So the launch of Ryzen was exciting because AMD was finally rejoining the high-end market on the CPU side of things and a lot of the benchmarks were very exciting. So once it was all finished up I had to get a proper AMD build together. The original plan was my wife's new PC might be running a Ryzen 7 CPU but ITX AM4 boards aren’t out yet so rather than wait I decided to build an AMD themed build right away. While Ryzen has gray and orange as its colors I decided to stick with the traditional black and red as AMD has used them both a lot in the past. So I started gathering parts and decided on a project name as well. This build is going to be called Carmine as it is a shade of red while also avoiding the traditional red themed names like Ruby. I’m still working on getting in components and planning out the build but I did want to at least get a post up with the base components we are going with, so check them out!
Title: Project Build: Carmine - Part 1
Written by: Wes
Pictures by: Wes
Build Sponsors/Supporters: Cooler Master – Asus - AMD
Amazon Affiliate link: HERE
Links to the rest of the project: Part 1 – Part 2 – Part 3
Case
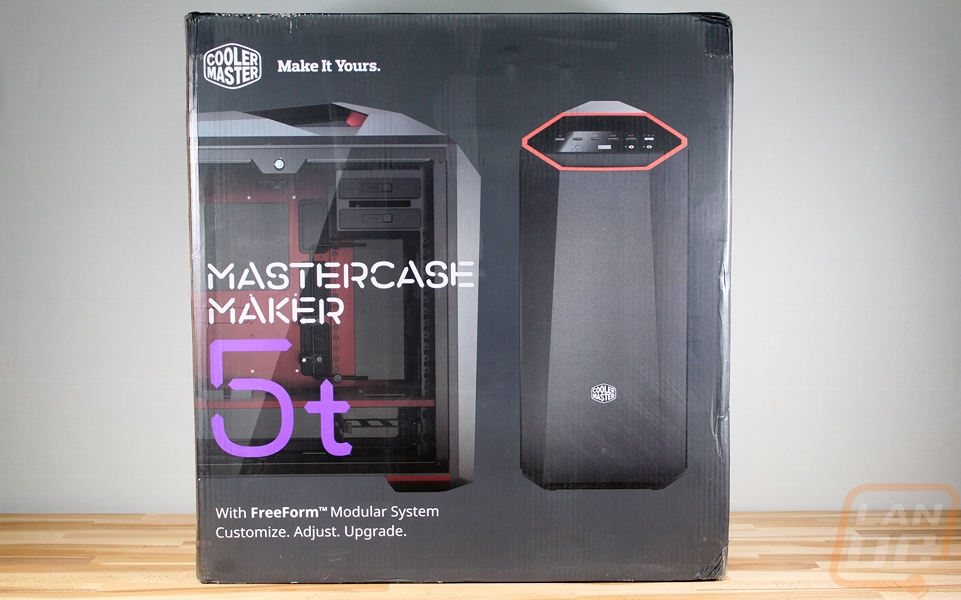
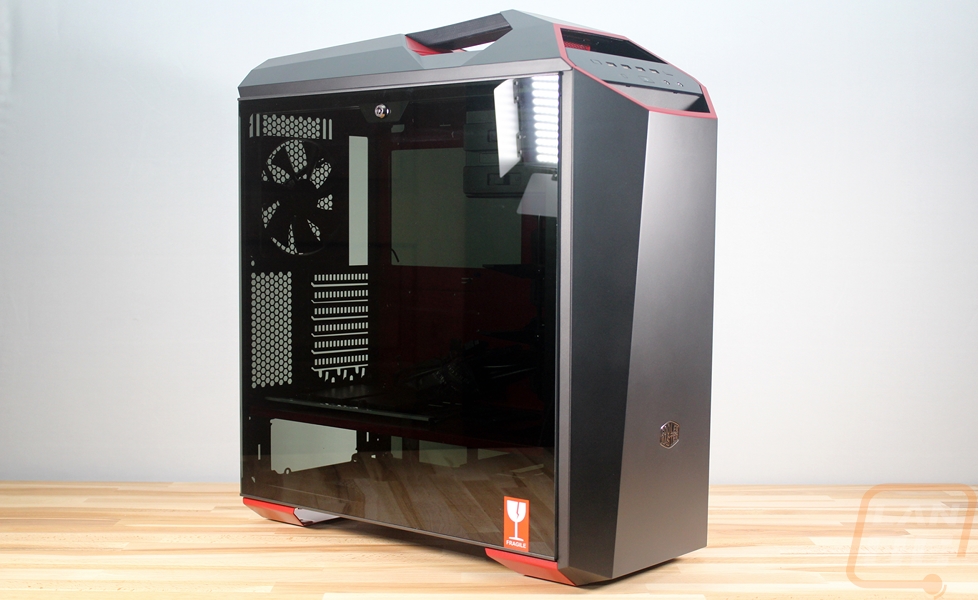
As always, picking out our case was important before figuring out the rest of the components. The plan with my wife's PC was small form factor so this time around I thought this build could be a little bigger. I had the exact case in mind right away as well, with a red theme I have been wanting to check out the Cooler Master Mastercase Maker 5t and it fits perfectly with its red interior, red trim, and red lighting. Cooler Master was kind enough to send one out for the build, so let's take a look at the case. But first here is a look at the box. I love that they went with a full-color box and have multiple angles of the case photographed on the front. The box also had specifications and just about every detail all on the outside as well for anyone shopping in a store.
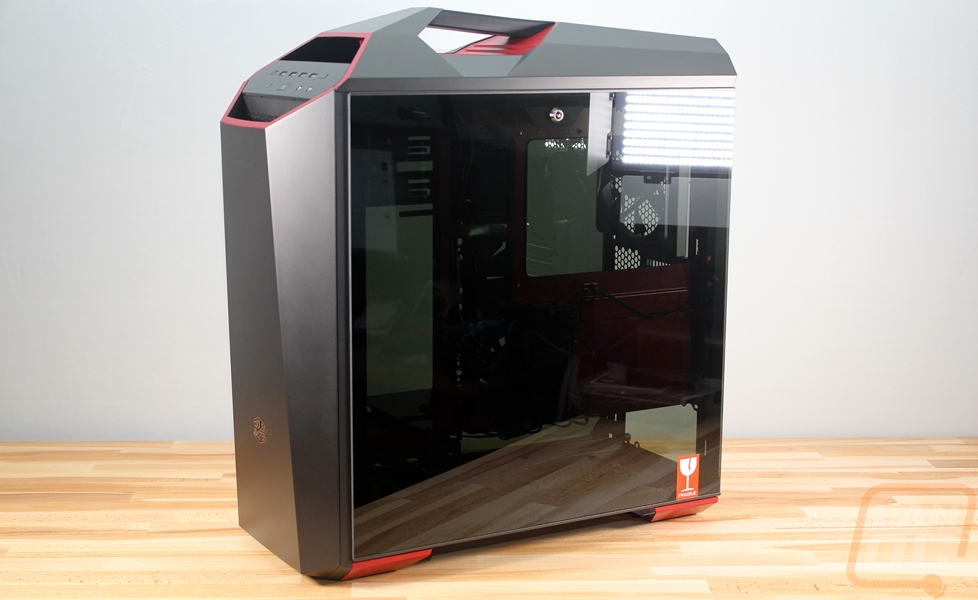
So even from the outside, you can start to get an idea of what this was a good pick for the red theme of Carmine. The 5t shares the same styling as the Mastercase Maker 5 only they trimmed this entire model out in red. This includes down at the feet, around the front I/O panel, and under the handle on the top of the case on the outside.
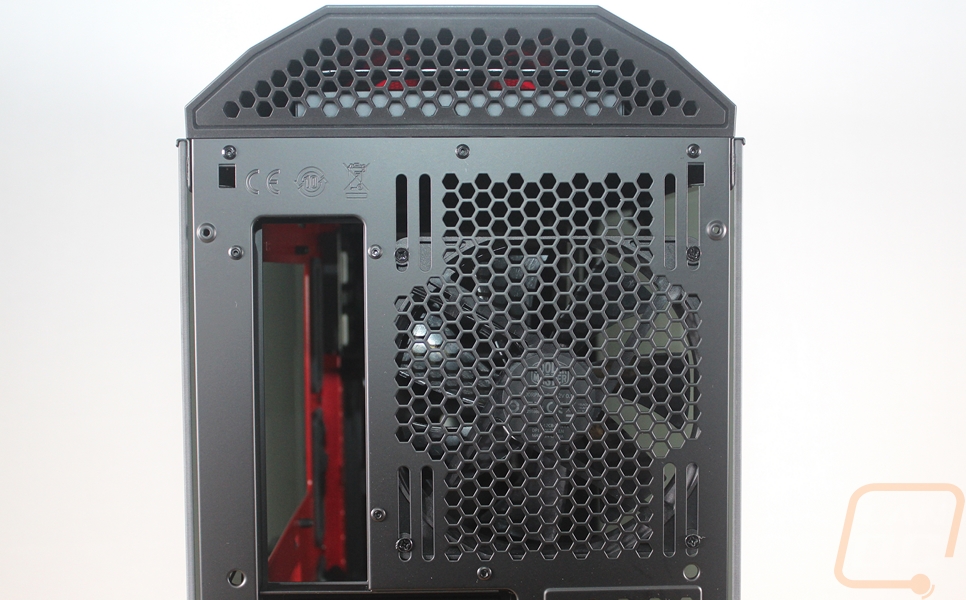
The handle on top is really nice to see, you rarely see handles on larger cases and while this is officially a Mid-Sized case, I would still consider it a big case. The top handle should help move it around in the office if nothing else. Up under the handle, there is some ventilation but the overall handle design does cut into the overall ventilation. They fixed this by integrating a removable panel behind the handle that can be popped off for more airflow if needed. This is really only an issue if you install fans or a water cooler in the top of the case.
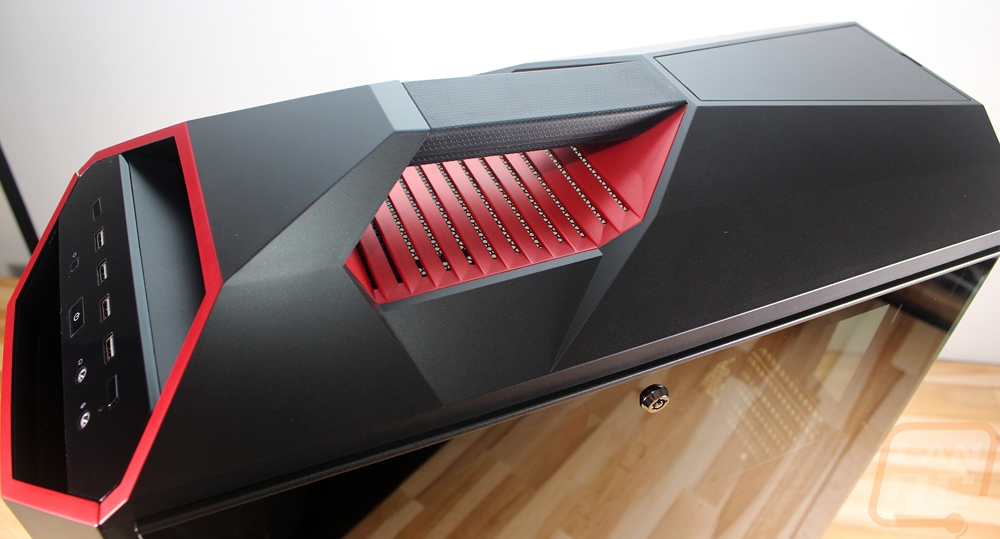
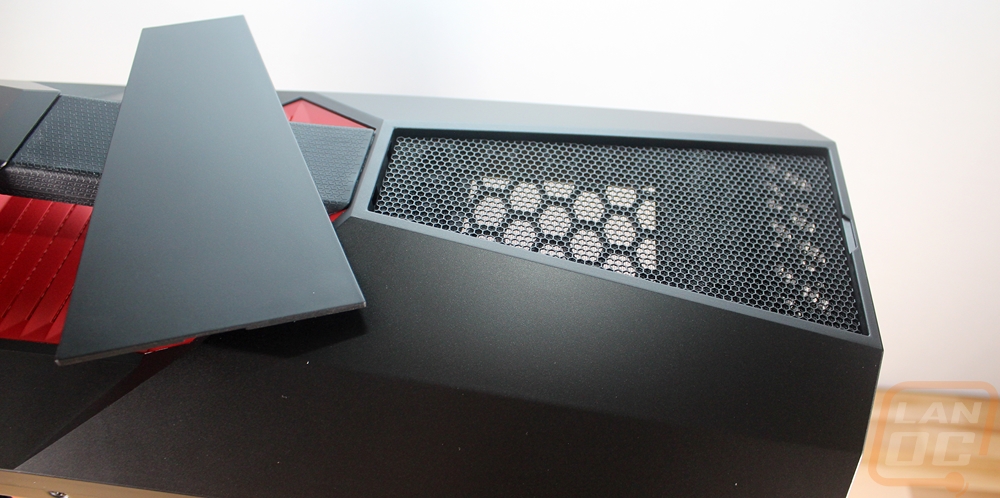
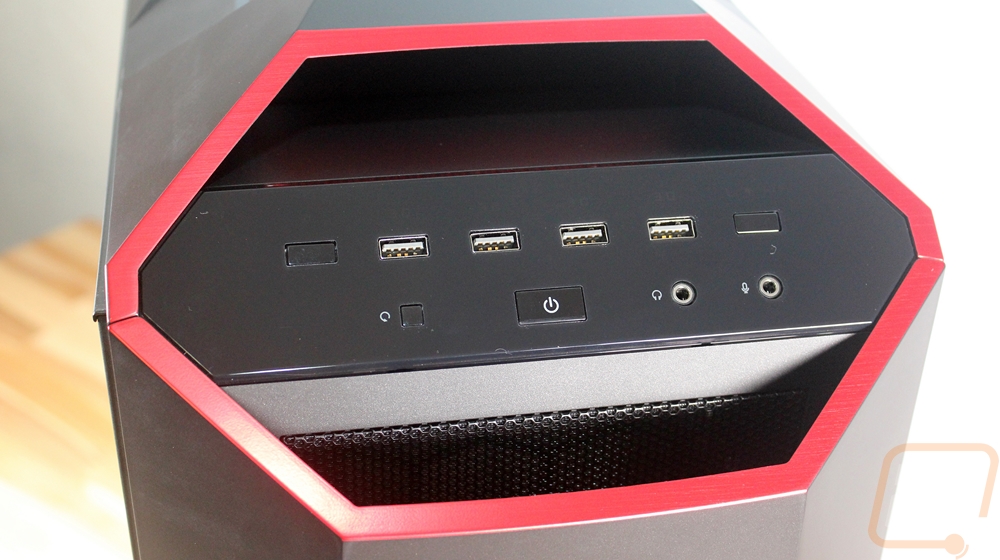
For the front I/O they went all out with four USB 3.0 ports along with the front panel audio and power and reset buttons. It is up in the top front corner, facing up and out. There are two buttons that don’t look labeled but have labels that light up when the case is powered on, they control the lighting and fans in the 5t.
The front of the 5t has a unique tilt forward action that you can do when you need additional airflow. This is also how you remove the front panel as well. You lift it up and it comes right off leaving access to the large fan filter across the front of the case. It can also be removed by pulling on the bottom to pull it out to clean. The flip down front panel is held in place with magnets and is great if you install a disc drive in the case as well as it will bump the panel open when your drive opens.
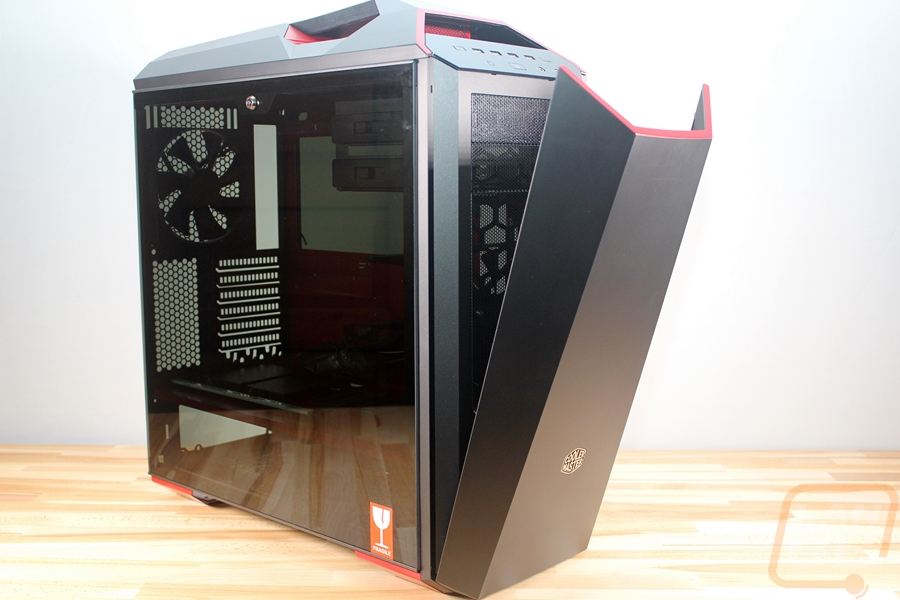

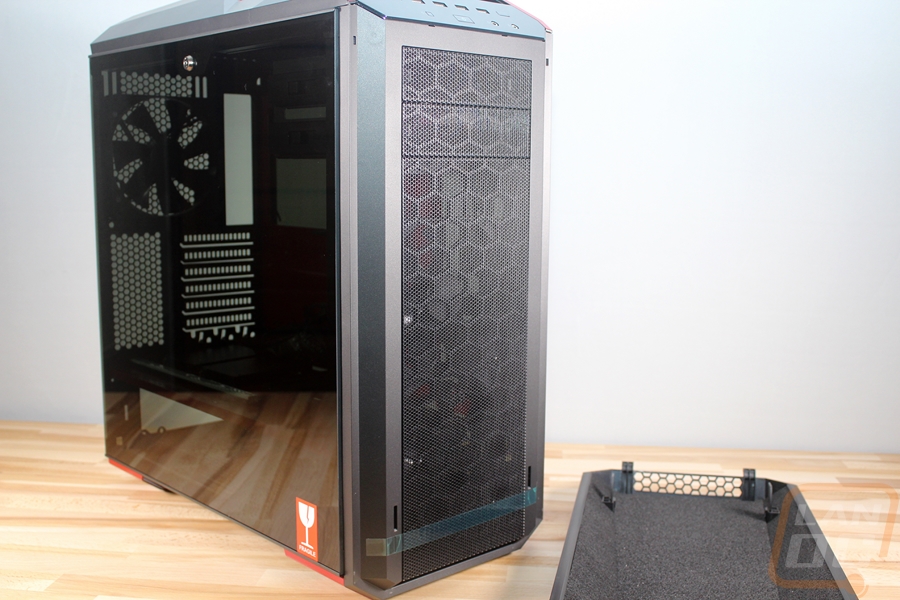
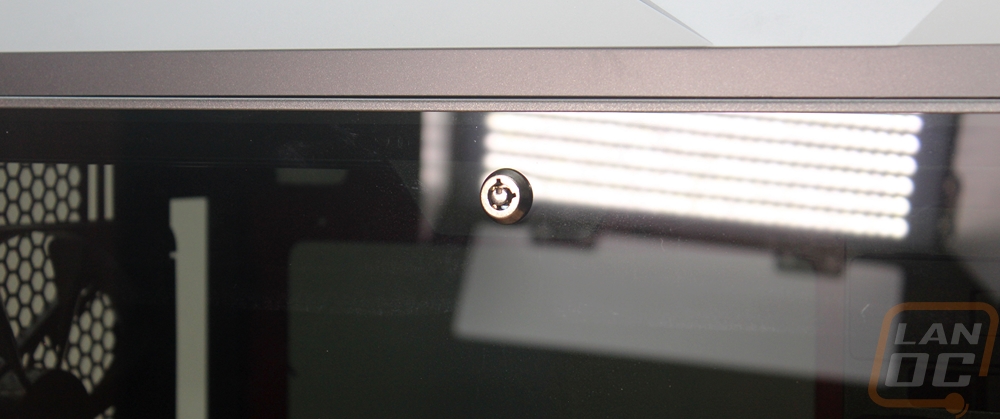
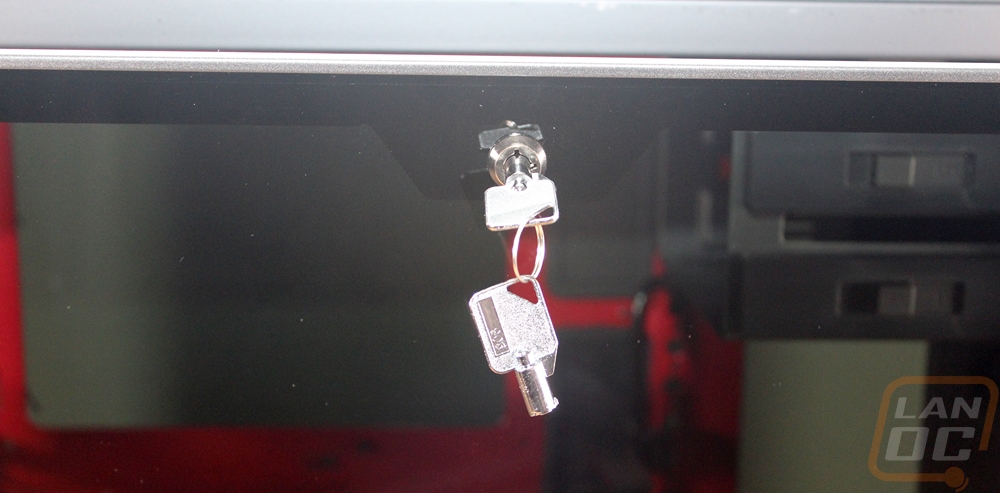
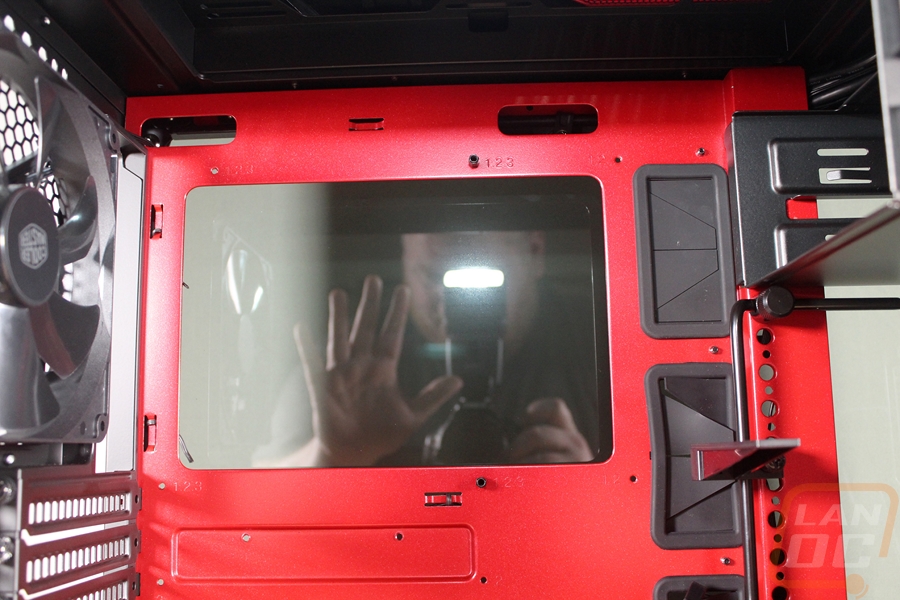
Cooler Master also has the best implementation of glass side panels in the 5t. Most companies just put four holes in the side panel and have you mount it using thumbscrews. They used a lock at the top to keep it latched. When you unlock the side panels the glass panel drops down but stays attached until you lift it up and take it off. This means you don’t have to worry about dropping it or having to get finger prints all over it when installing it. The only downside to this is where do you keep the keys.
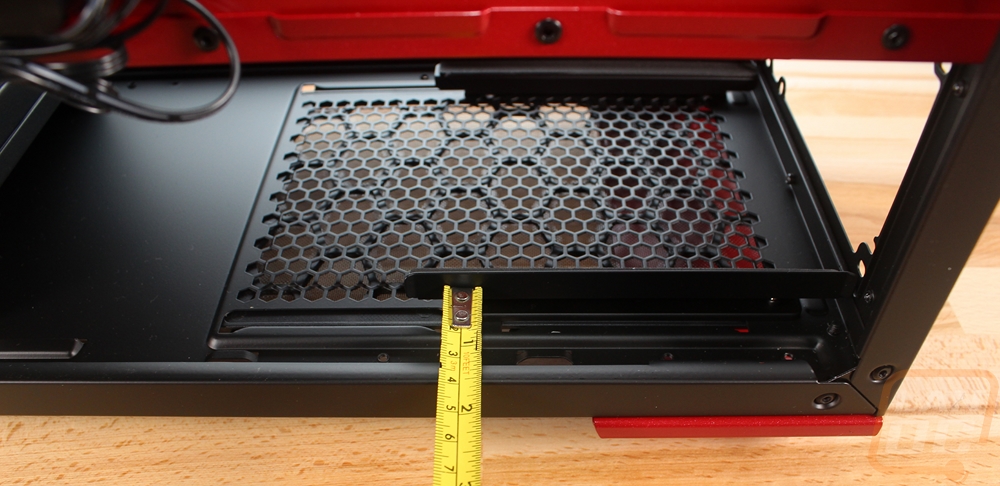
The bottom of the case has a pullout fan filter under the power supply and then the two red feet.
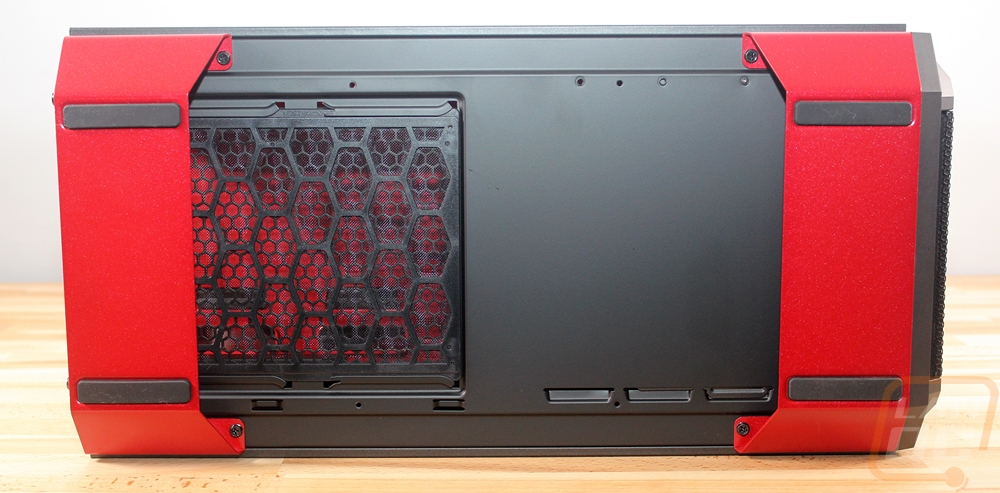
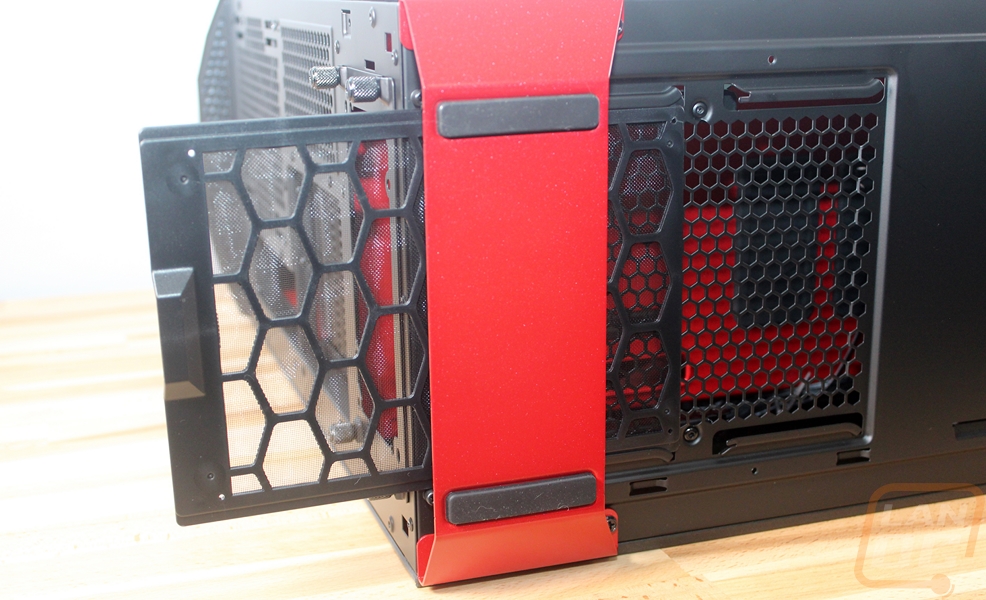
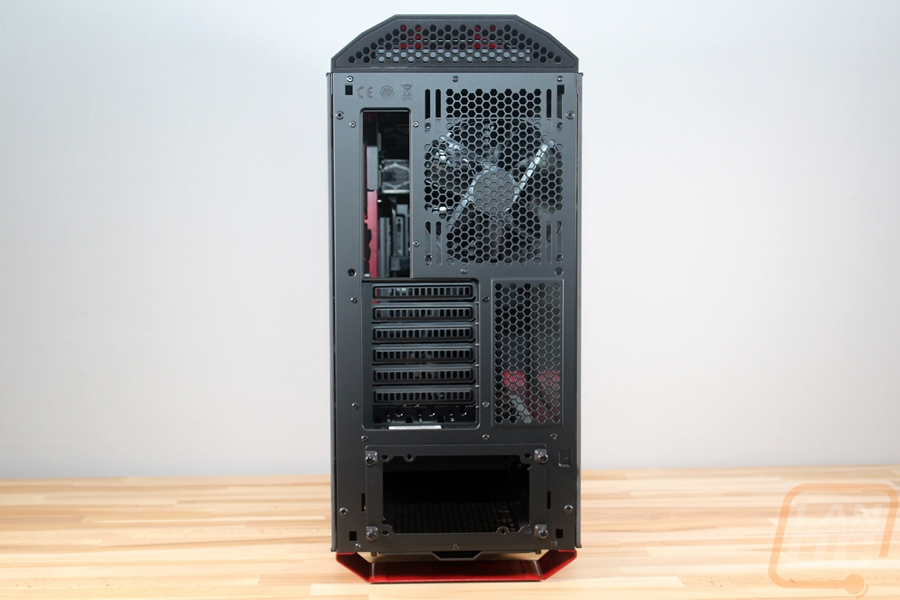
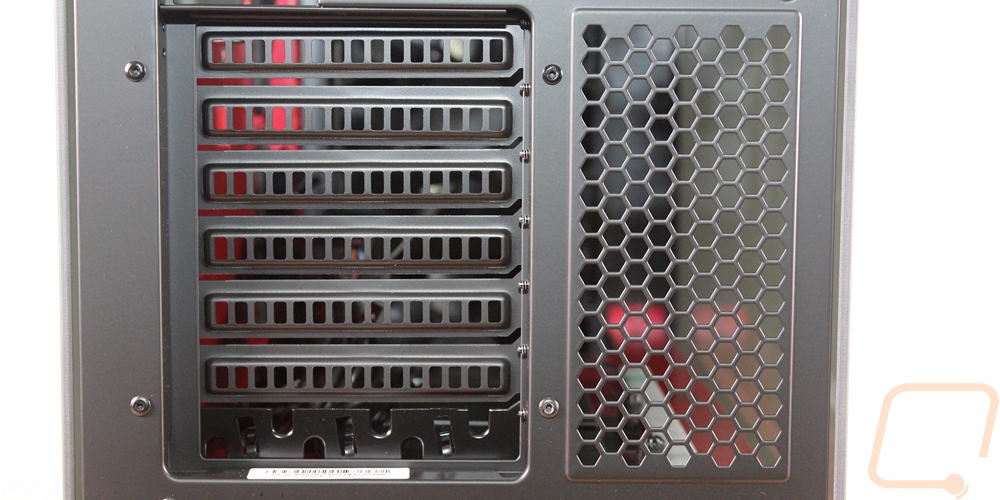
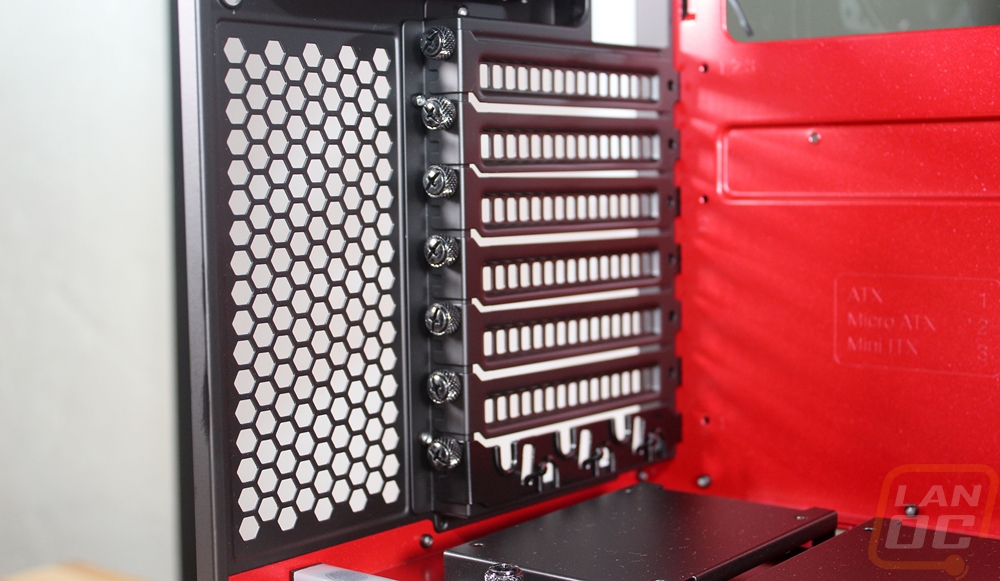
Then around to the back of the case, I was surprised at all of the ventilation. There is one exhaust fan but there are vents up in the top, above the PCI slots, and even in the PCI slot covers themselves. The exhaust fan also has an interesting design where it can be slid up or down about an inch and you can swap to a smaller 120mm fan as well if needed.
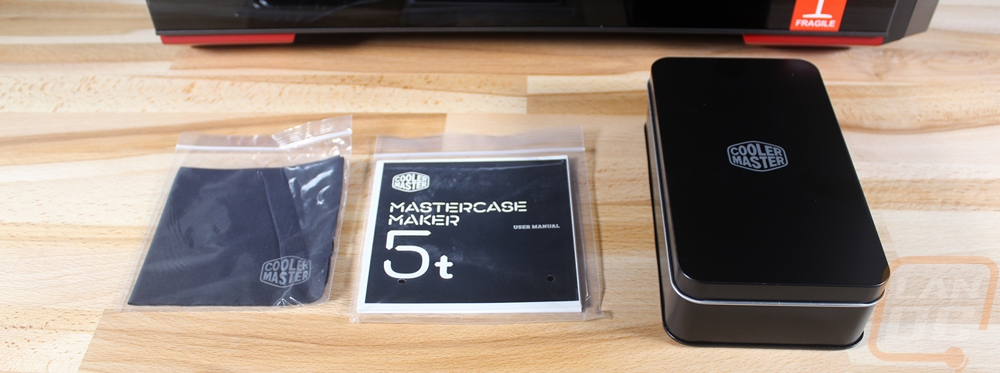
Rather than dump all of the accessories and screws into a bag, Cooler Master went out of their way to include this tin with a sorter inside to hold everything. It also has magnets inside so you can stick it right on to parts of the case if you want so you don’t misplace it.
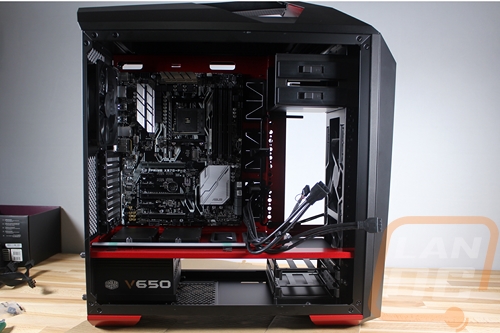
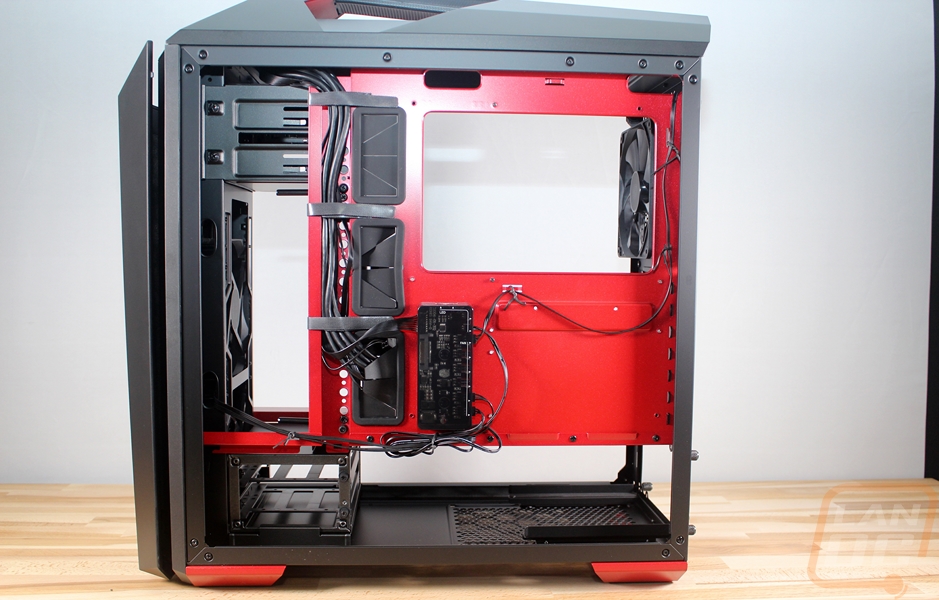
Inside the case, they went even crazier with the black and red theme. The entire motherboard tray and divider above the power supply section are both painted in a metallic red finish. The case itself has a lot of room and supports full size and extended ATX motherboards. The huge hole in the motherboard tray also means you should be able to get access to the back of the CPU on just about any board configuration as well.
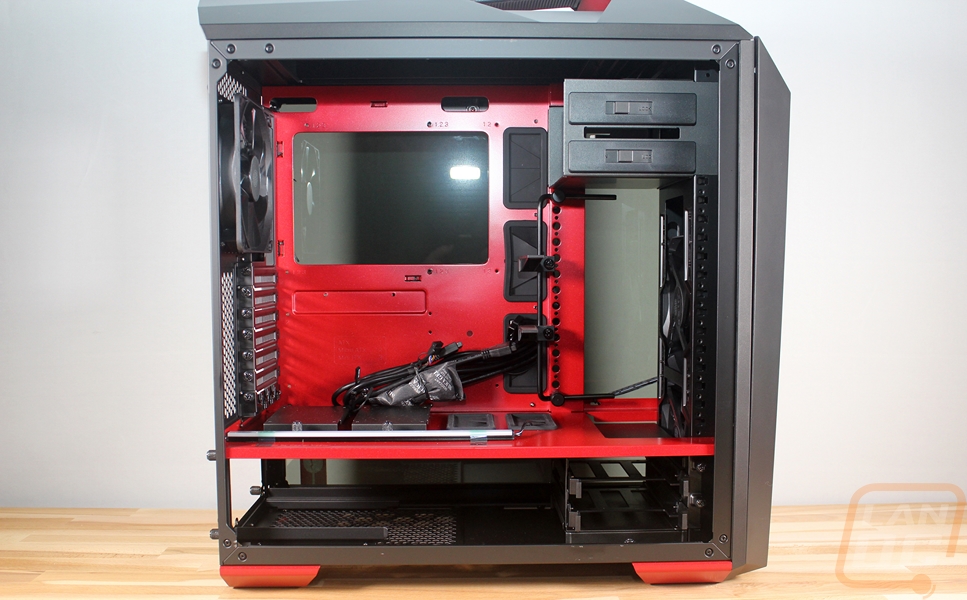
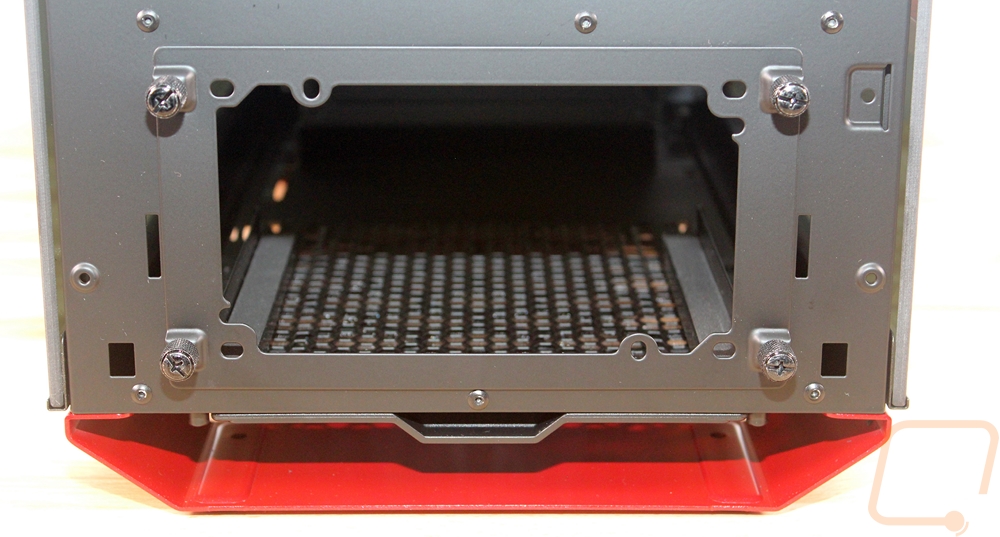
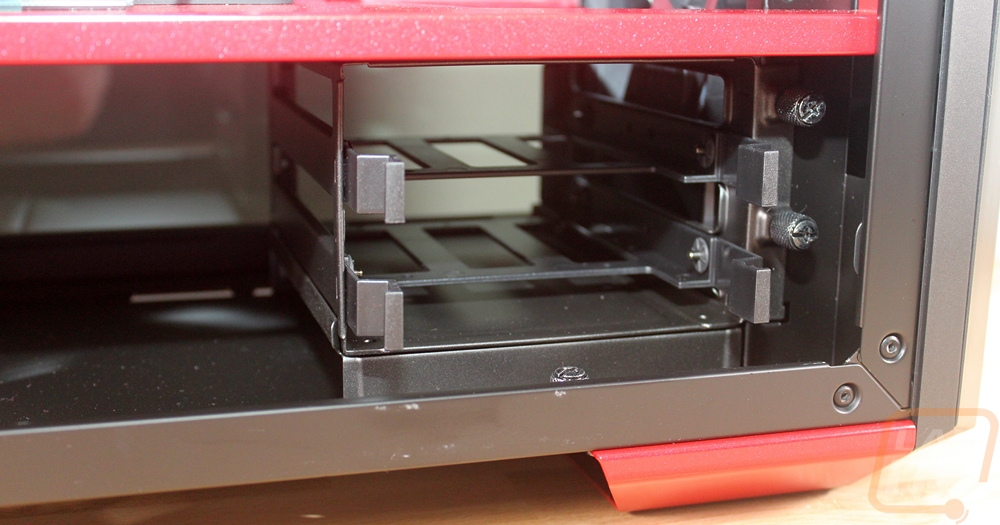
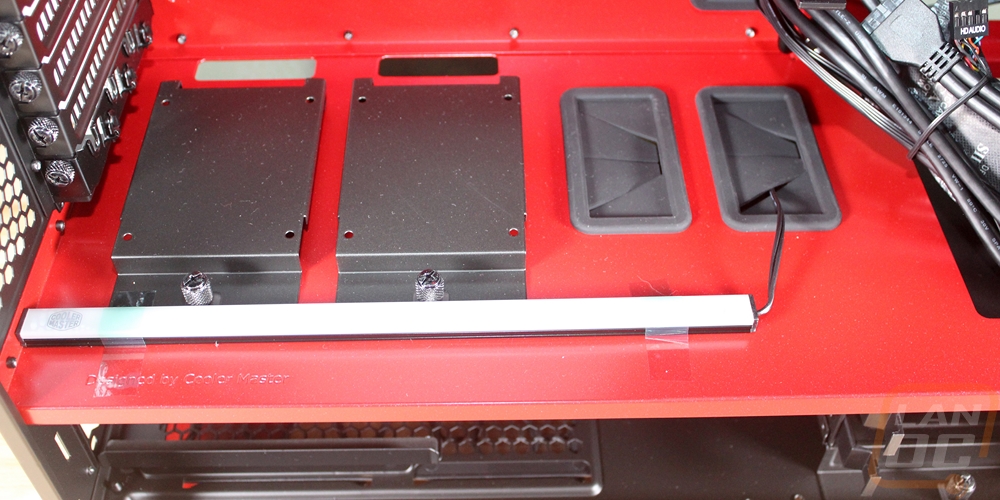
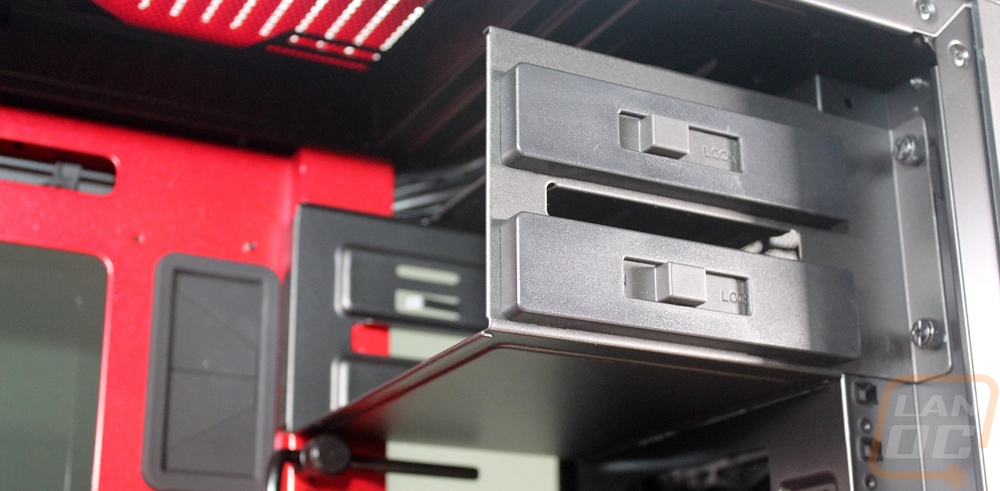
The bottom section that is split off from the rest of the case supports the power supply and helps you hide some of the wiring. You actually install the power supply by removing the four thumbscrews on the back panel and sliding it in from there. There is also a two hard drive cage down here in this section that can be removed. Both trays are toolless when using them with 3.5 inch hard drives but you can also install SSDs in them with screws.
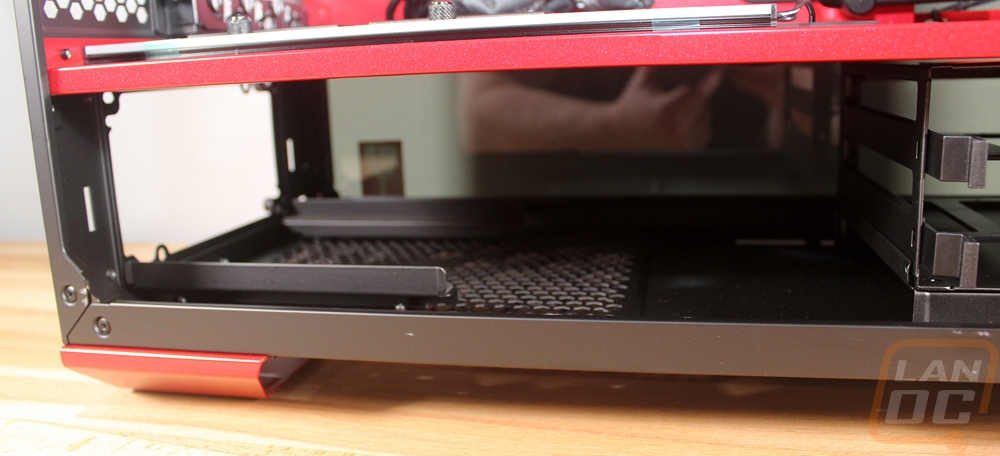
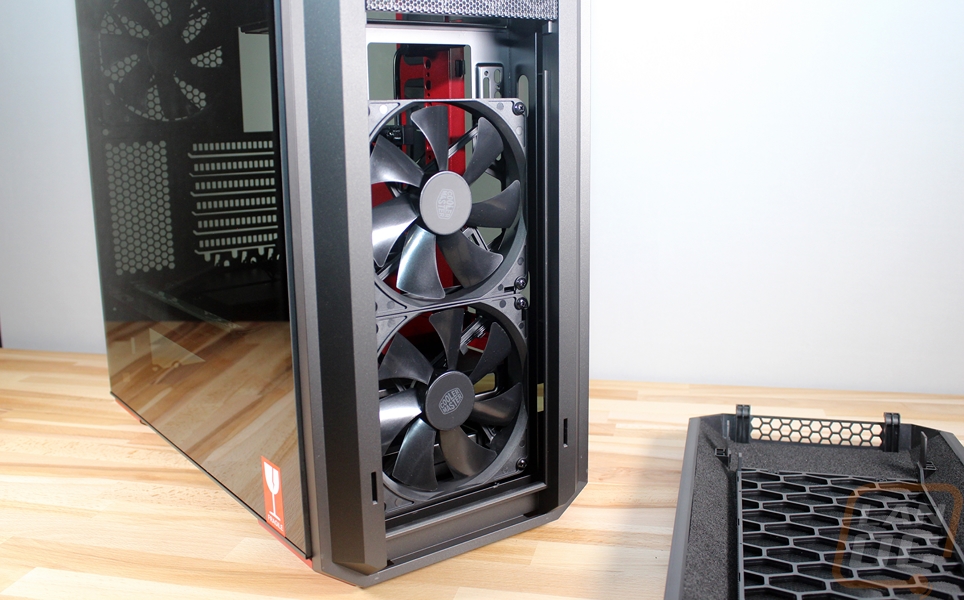
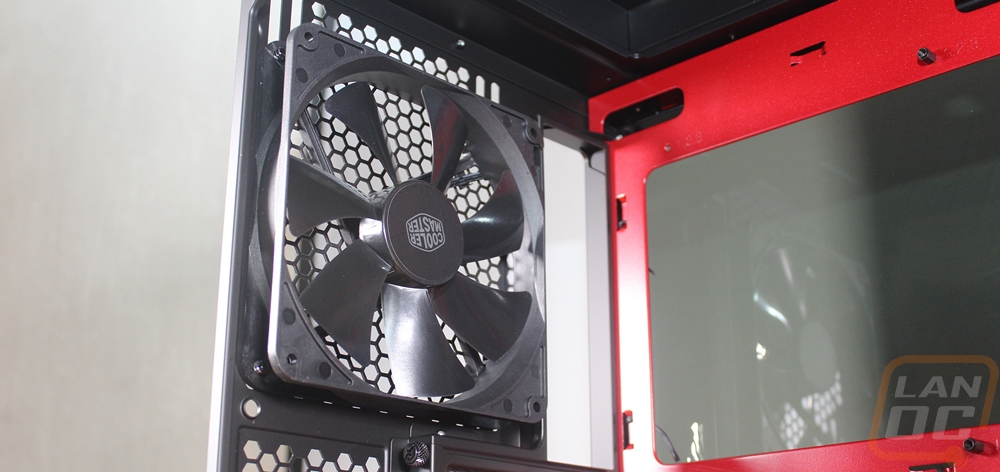
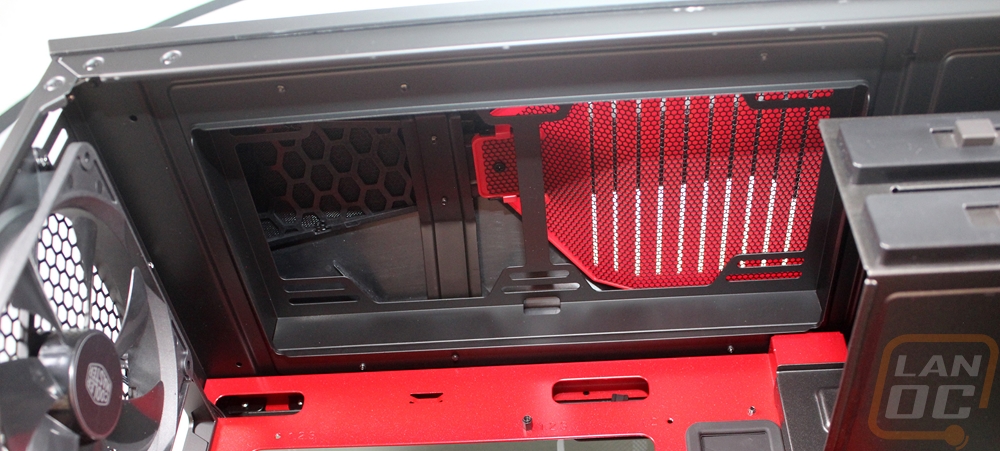
For airflow, the 5t comes with three 140mm fans. Two are on the front of the case for intake fans and the exhaust fan is on the rear of the case blowing out the back. This means there is some positive air pressure with the stock configuration to blow out the other vents in the back panel and up the top of the case as well. The mounts on the front fans are similar t the rear fan where they have slots to allow you to swap to 120mm fans or to just move the fans up. The front design is very modular. The stock configuration has one of the fans down in the bottom section, you can actually remove the hard drive cage and install a radiator there if you want.
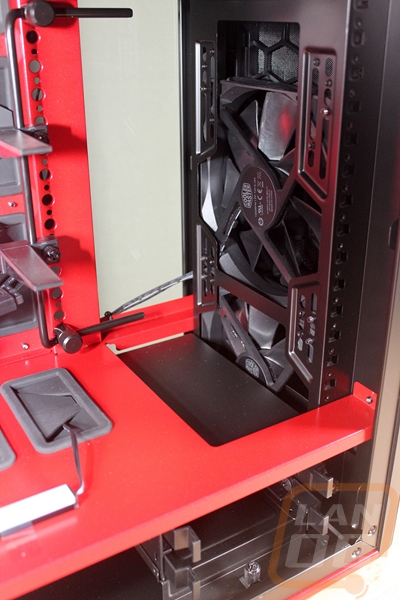
Beyond the bottom drive cage, there is also a dual 5.25 drive cage for a disc drive or fan controllers. You almost never see these on cases anymore. They are removable as well to open up more room for water cooling if you want. There are also two SSD trays sitting on the section divider. The 5t also came with its own LED lighting. The lighting panel is really interesting because it is actually defused where LED light kits normally have direct light. It is also magnetized so you can move it around in the case to whatever works best for your configuration. Also in the divider are two large grommeted holes for wire management.
Here is the view of the top where you can slip in another two 120mm/140mm fans.
They also included this cool adjustable video card support setup to help hold up those long video cards.
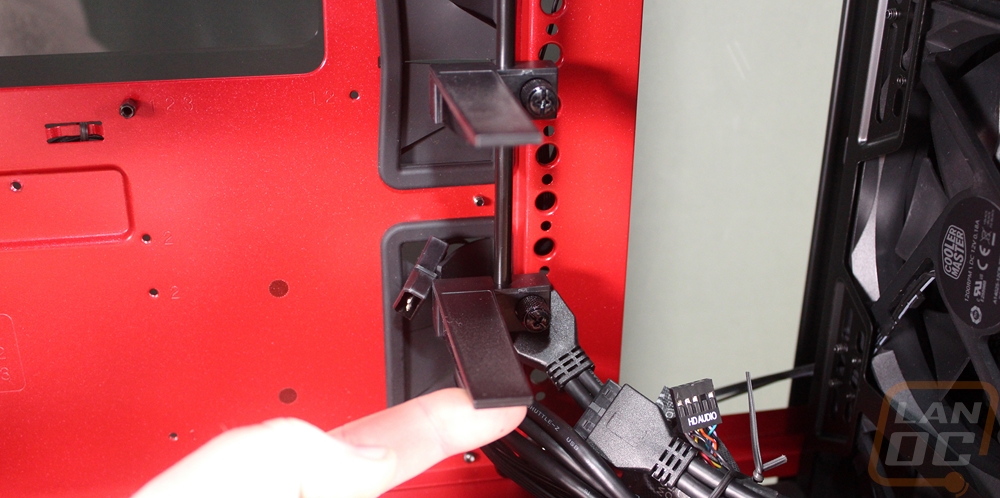
The back of the 5t has a lot of room for wire management. The tightest area is directly behind the motherboard tray where you get about ¾ of an inch of space then it opens up complexly when you get to the power supply area. There is even about an inch and ¼ next to the power supply. There is a track for wires that runs from the bottom to the top as well right in the middle. All of the front panel cables come pre-run in this area and Cooler Master included Velcro strips to hold the wires in place down the track.
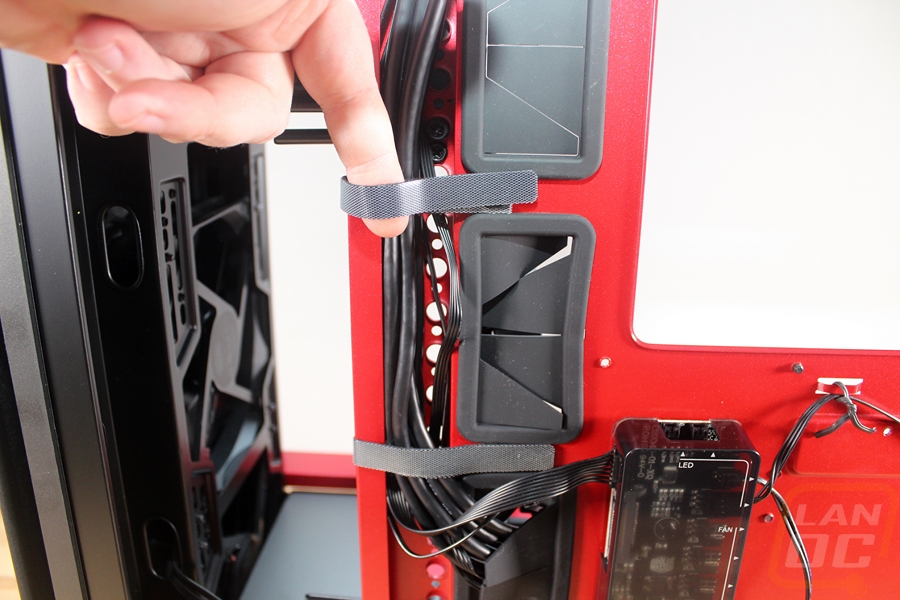

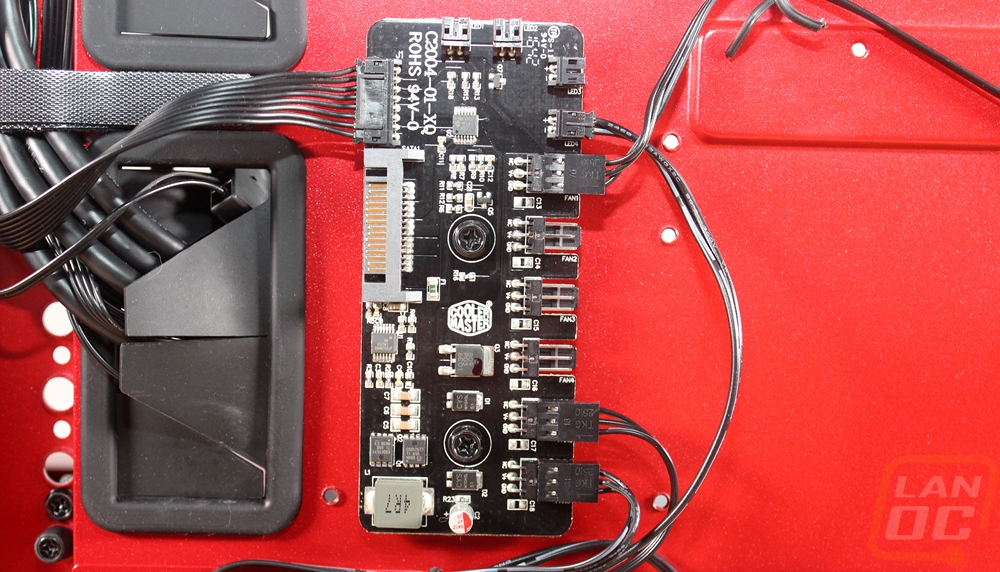
It all leads to a PCB on the back where the fans and LEDS are all controlled. The fans have dual speeds 12 and 7 vote modes and the lighting can be flipped between on, off, and breathing. The PCB lets you expand and add three fans and three lights on top of what comes with the case.

Power Supply
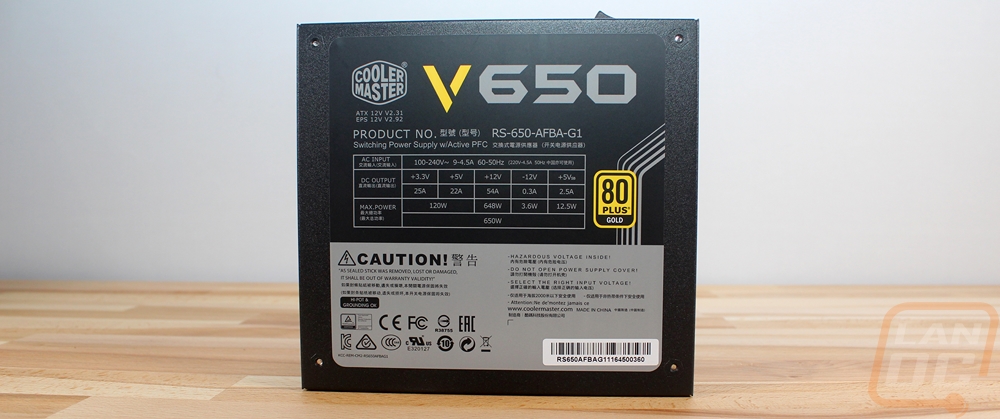
Along with the case, Cooler Master also sent over a power supply. They picked the model and wattage but it ended up being perfect for the build. At 650 watts it is enough to handle any single card setup and even some dual card configurations. Being a V series it also is completely modular so in the future, I can replace cables with custom cables if I want and I don’t have to worry about hiding any extra cables even though the Mastercase Make 5t does have more than enough room in the power supply compartment to hide them if needed. This is also an 80 plus gold rated power supply, the higher efficiently falls right in the sweet spot where you get good efficiency at a decent price where Titanium and Platinum rated power supplies are cool but are too expensive to recommend. If I were recommending a power supply for a build this is about where I would be looking though to be fair currently this model is only a good value if you get it with the Rebate that is currently on Newegg. Without that, it’s a little expensive compared to similar models from the competition.
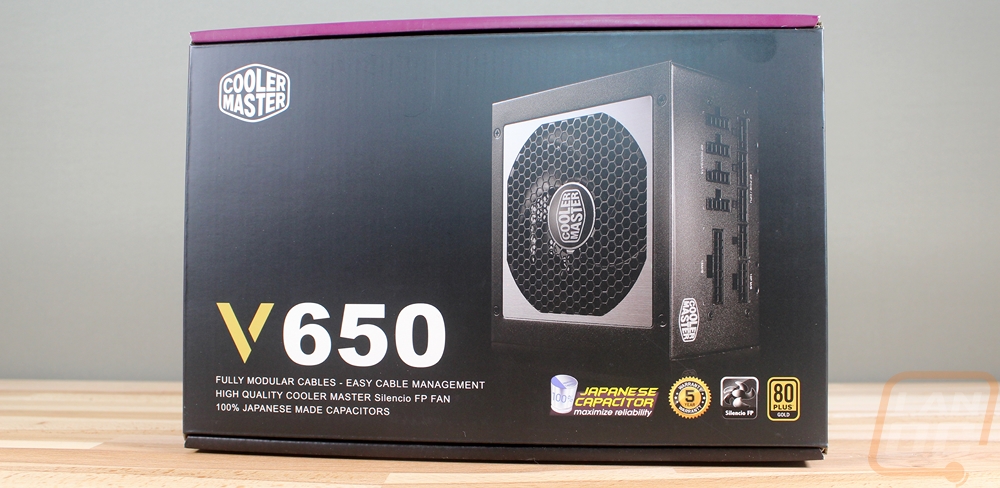
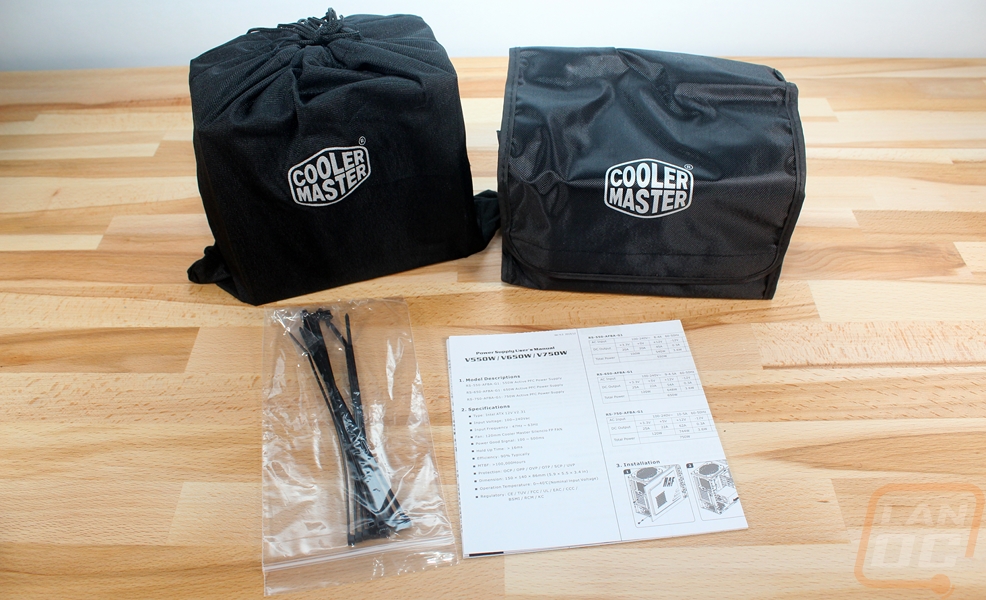
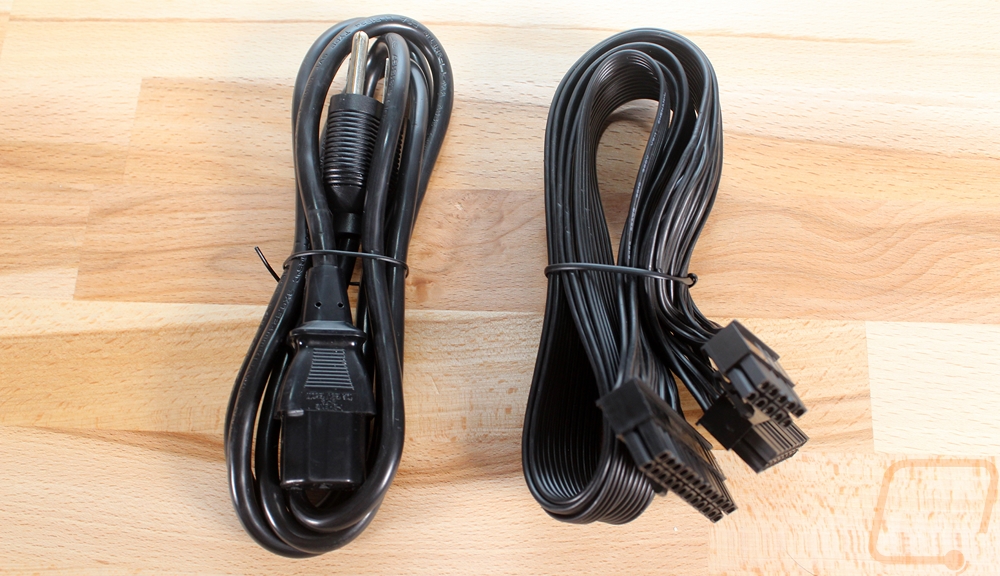
The power supply comes wrapped up in a felt bag and you get a solid Velcro closed bag for all of your extra cables. They also include screws and a few wire ties and the documentation.
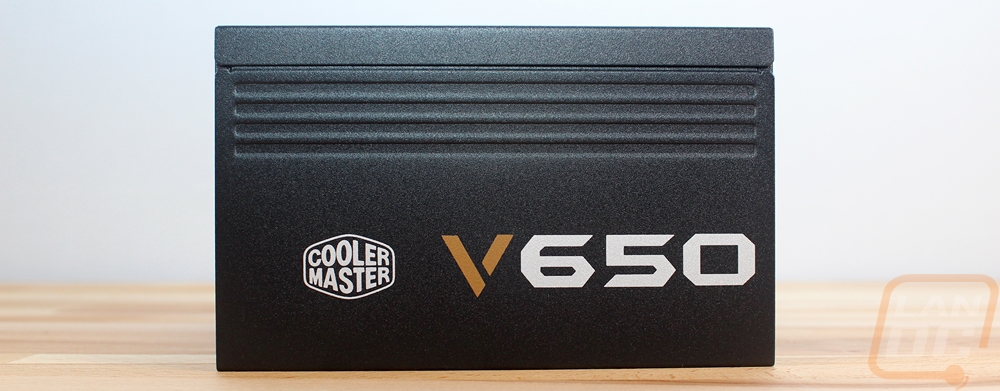
The V650 is a good looking power supply with its dark but simple caseing. They use gold for the V and white on the 650 but beyond that, the rest of the power supply is basically black. Around the fan, they use a lighter gray but in most builds, this should be facing down against a vent anyhow. I’m glad they don’t use a lot of bright colors that might clash with some builds other than the small amount of gold in the V’s.
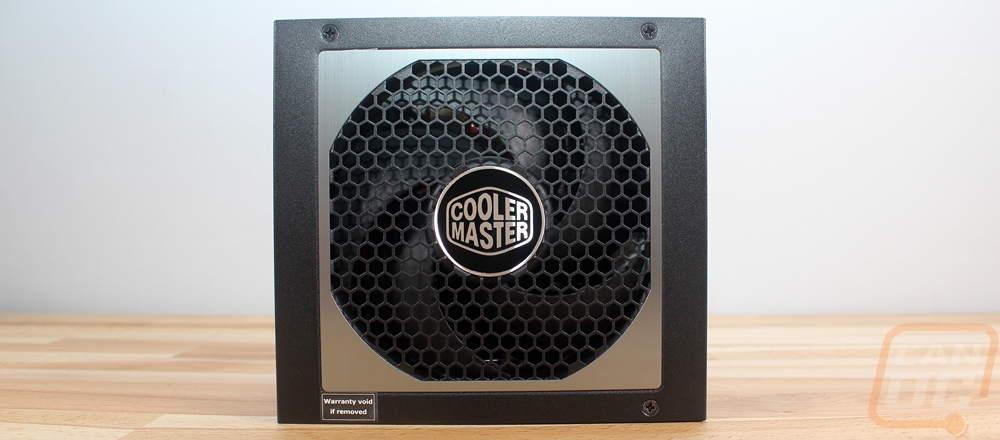
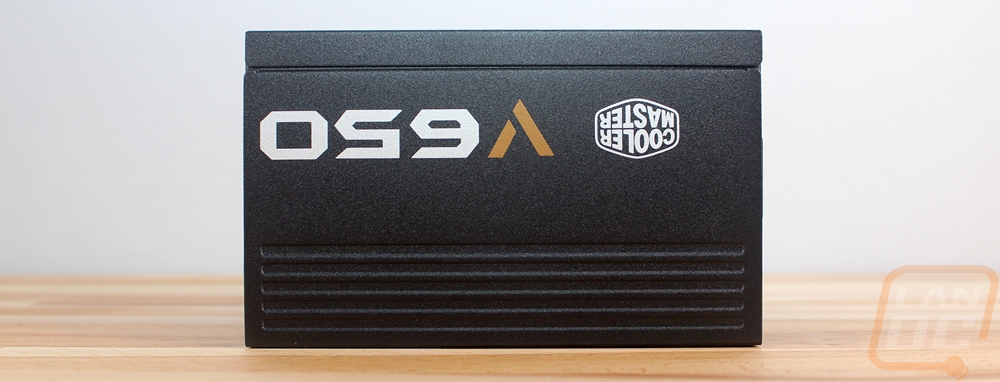
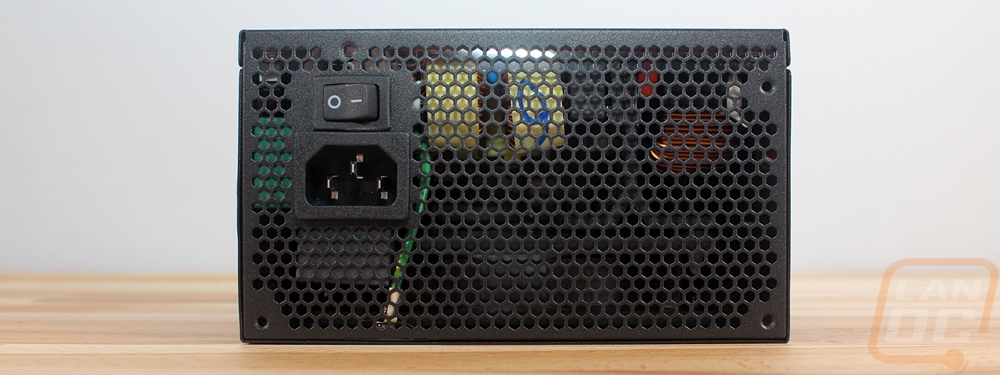
The inside connection area has a 24 pin split into two connections, four accessories (SATA or Molex) plugs, and four 8 pin connections for CPU or PCIe power. The connection types are the same that Cooler Master has been using on their power supplies for years now. The outside facing end has a standard power connection and with it an on and off switch, the rest is covered in exhaust venting for all of the air that the 120mm fan pulls in from the bottom.

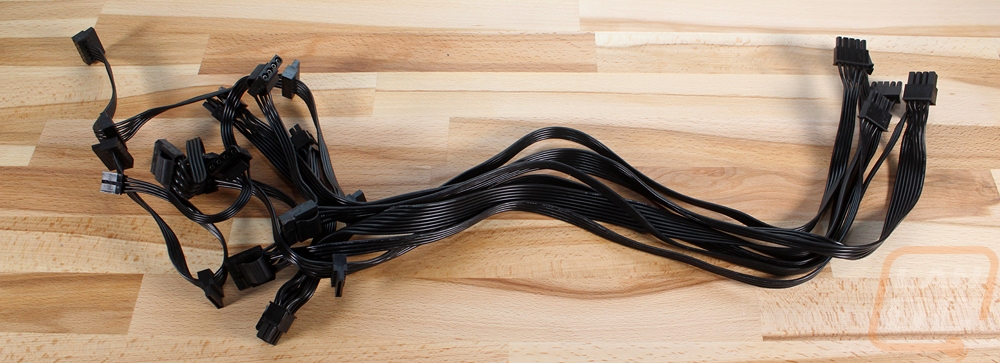
For cables, it comes with a nice selection of all black flexible cables. These are the thin cables that don’t require any sleeving and have no “ketchup and mustard” showing near the connections. It should go well without black and red theme of the build, though I wouldn’t be against adding sleeved red cables later.
Motherboard
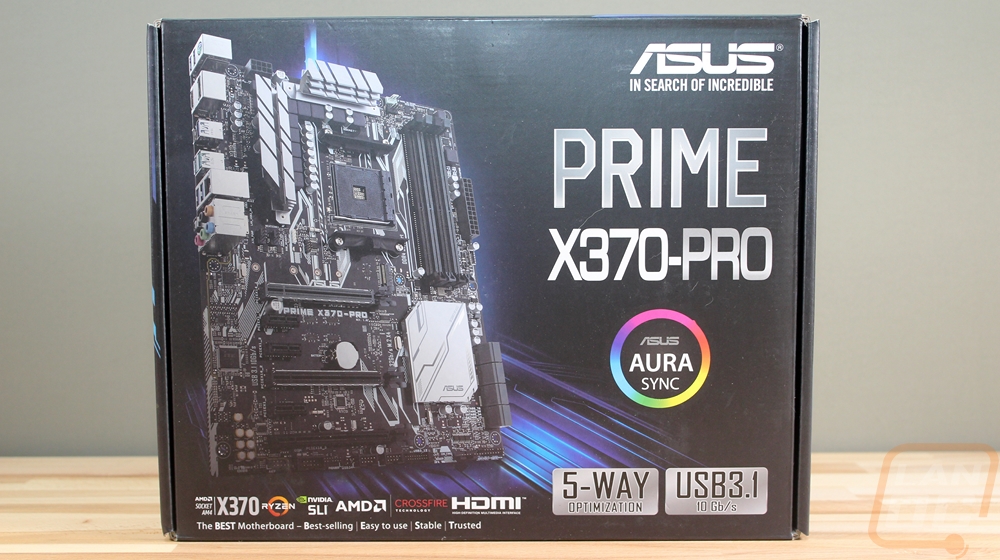
For the last component today I had to pick out a motherboard. So obviously, being an AMD build it needed to be a Ryzen board. I was originally going to use the MSI X370 Titanium that I covered at launch because I had it on hand. The bright silver theme wouldn’t really go with everything though. When talking with Asus about other upcoming projects this one came up and they offered to send over their Asus Prime X370 Pro. With neutral colors, it fit the build and it better fit what I would recommend for someone building a Ryzen PC right now. Plus Asus hardware and software has been great on our test bench so why mess with what works right?
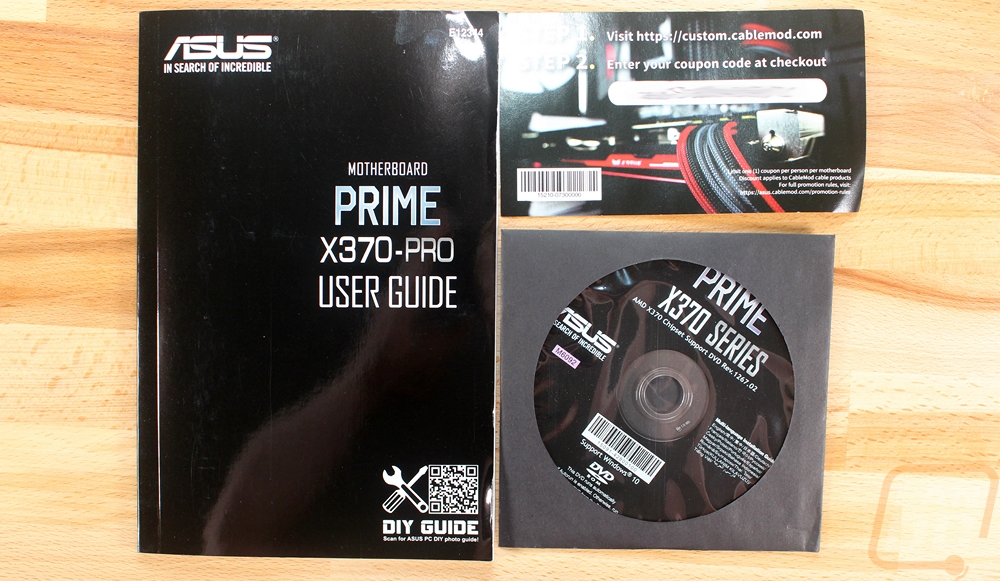
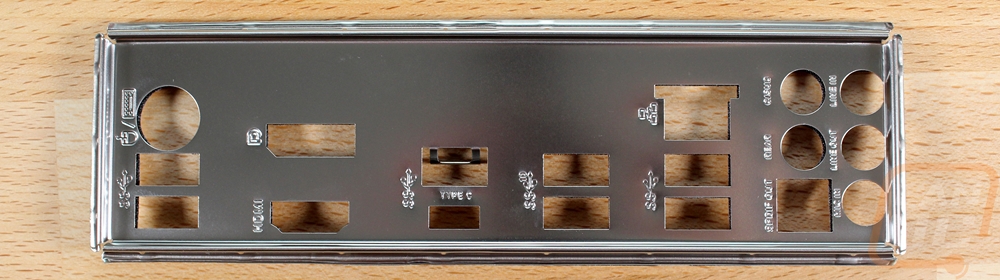
So the box for the board has a basic black background with a large photo of the board on the front. Being a prime board they kept things simple and avoided any of the red themes of the ROG boards. Inside the box, beyond the motherboard, you get a user guide for documentation, a coupon for a discount off of CableMod lighting, and a driver/software disc. The rear I/O cover is surprisingly basic, I was really hoping for a blacked out plate but they went with a darkened silver with small white labels. The back does have the foam rather than all of those metal springs so you don’t have to worry about getting those jammed in the USB and network ports.

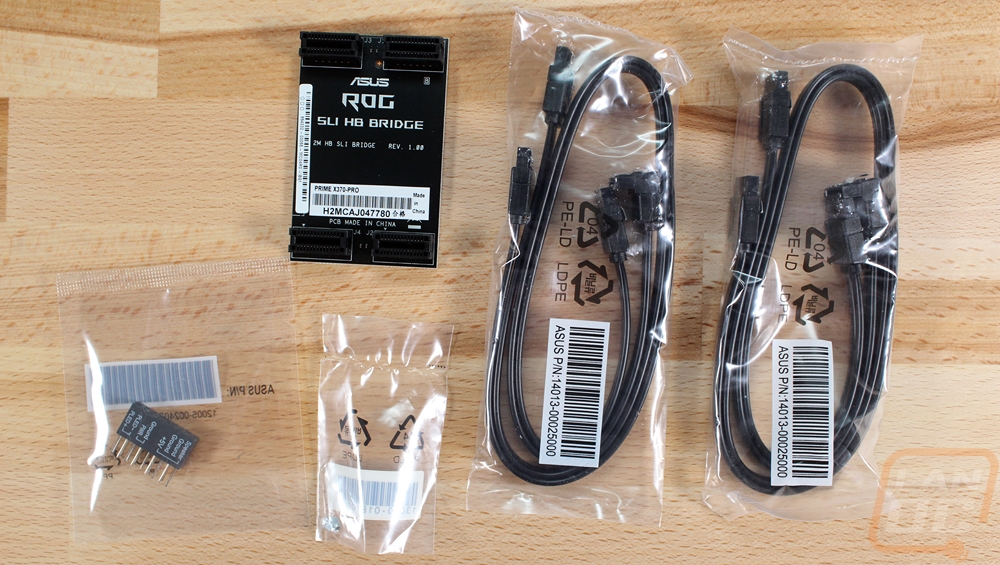
The board also comes with an HB SLI bridge with a solid black PCB for anyone who wants to run SLI on the Prime. You also get four black SATA cables, two with a right angled end. There is a Q connector for an easier front panel connection and then you get a couple small screws for Asus’s 3d printed designs. You can print a few different covers and attach them right to the board on the included mounting point with these screws.
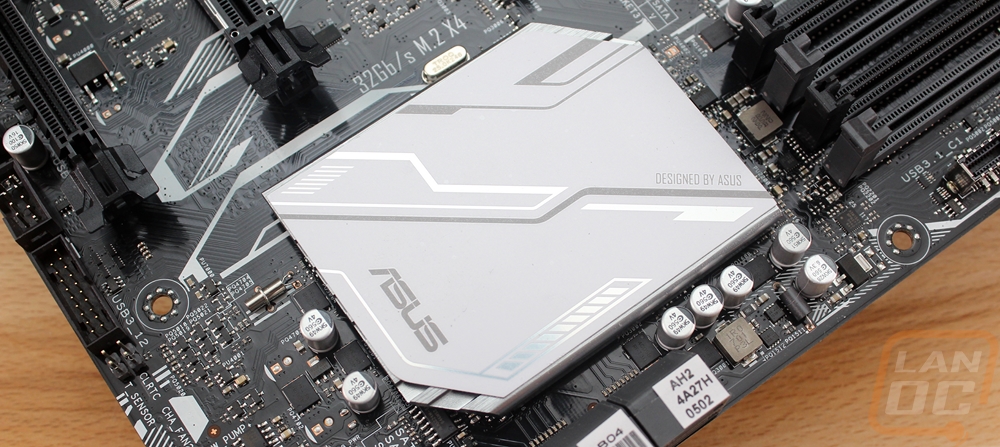
So like I mentioned before, the X370 Prime has a fitting name because the board sticks with the basics and gives us a color neutral theme but on a board with some of the features found on the higher-end “gaming” themed boards. The board itself is full ATX with a black PCB. It has black plastic for all of the ports and slots, then they use gray and white for the heatsinks. There isn’t anything too fancy so they dropped the rear I/O cover and focused on what people need. For cooling, there are two aluminum heatsinks around the CPU socket to handle the power circuitry. There aren’t any heatpipes connecting the two but they both have good surface area. The Chipset cooler is flat and doesn’t have much going on other than the white cover stuck to it with a few designs on the top and the Asus branding.
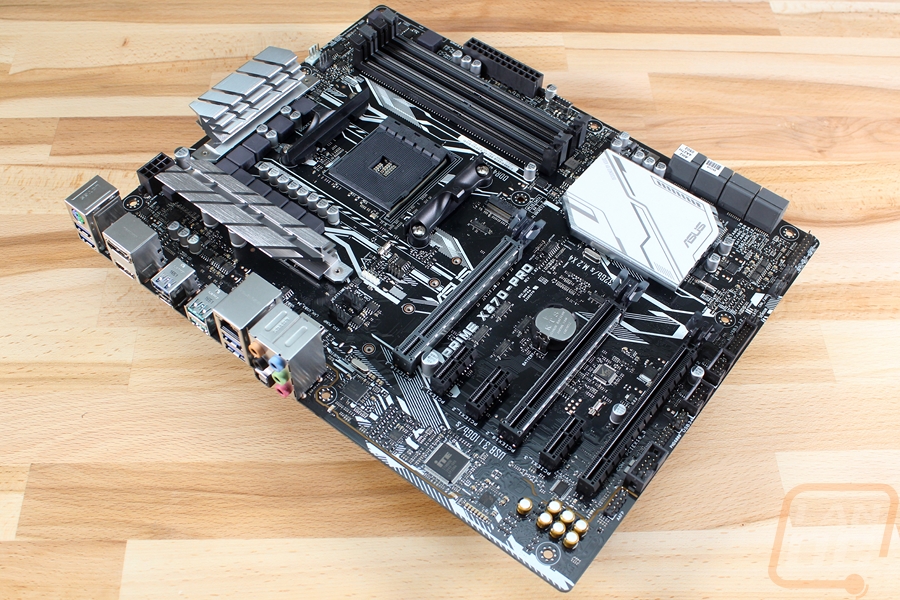

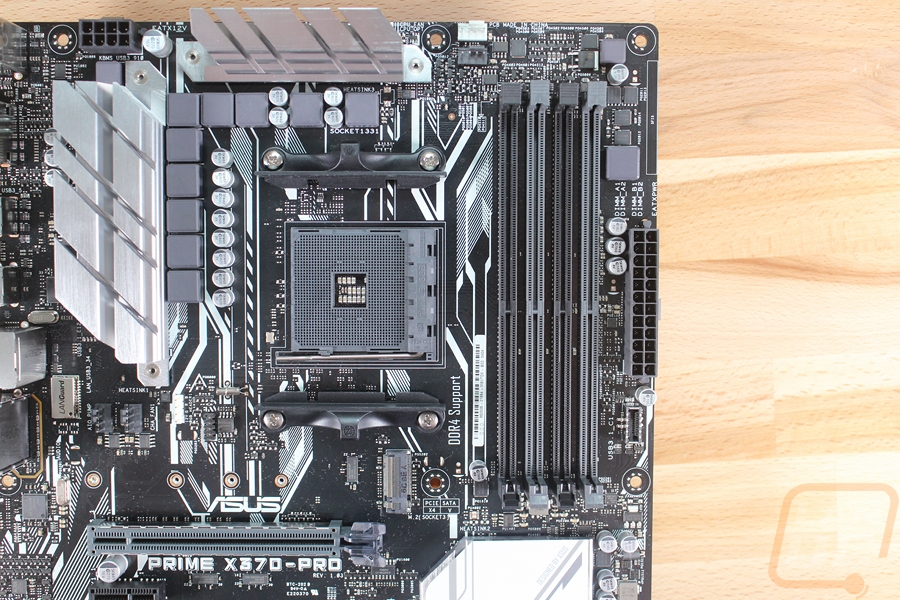
Starting up in the top left corner of the board, the Prime X370 Pro has an 8-pin CPU power connection tucked up above the power circuitry heatsinks. Below that same heatsink, they also slipped in two 4-pin case fan headers. There are two more 4-pin fan headers to the right of the top heatsink as well but those two are for CPU coolers with the main fan or pump header designated in white. All around the CPU socket, Asus did screen print white strips on the PCB, as someone who would prefer a darker or all blacked out board I’m not a big fan though.
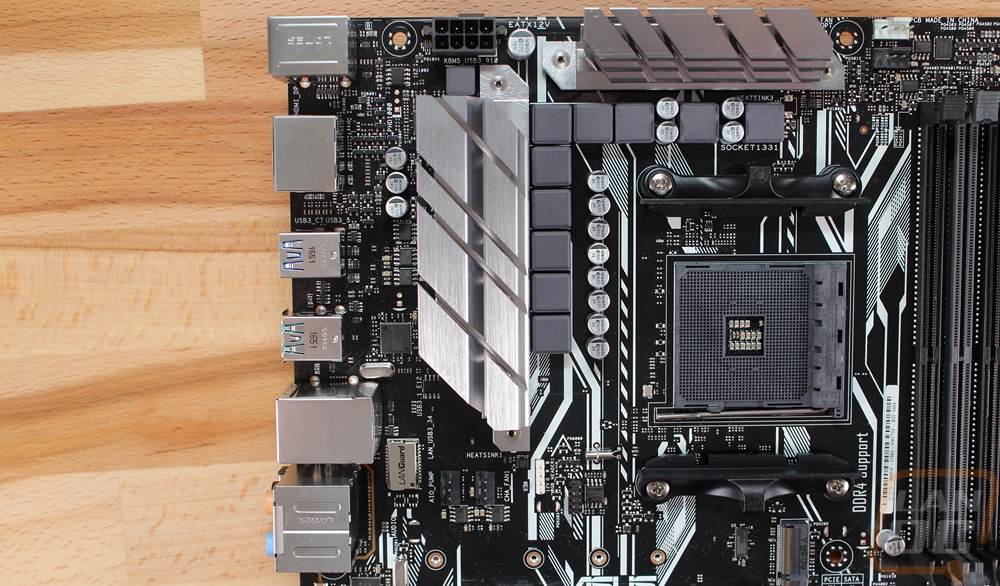
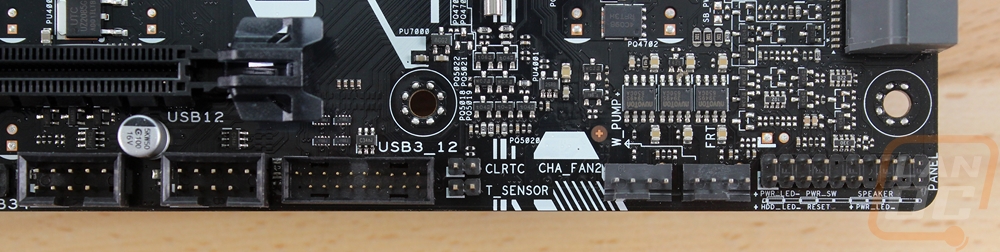
Over on the top right, the Prime has four DDR4 dims with a black and dark gray theme on every other DIMM. Next to them is the 24-pin motherboard power and below it a new USB 3.1 front panel connection. There aren’t any cases that use this new connection just yet, but I can’t wait to have even faster connections available on the front panel, especially with what looks to be an easier to use connection that the USB 3.0 internal connection.
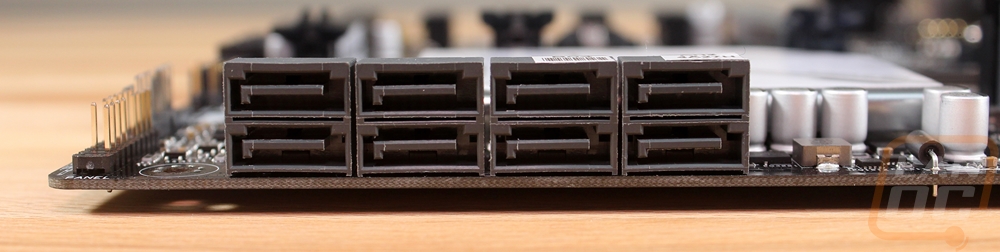
Moving to the bottom right section there isn’t anything until you get to the six SATA connections. They are all right angled for better wire management and you can run a whole bunch of drives should you need the storage. Down in the farther corner is the front panel I/O connection it isn’t color coded but Asus does provide their Q Connection helper. Then you have two more 4-pin PWM fan headers for a total of 6 so far. Then you have a front panel USB 3.0 header and two USB 2.0 headers.
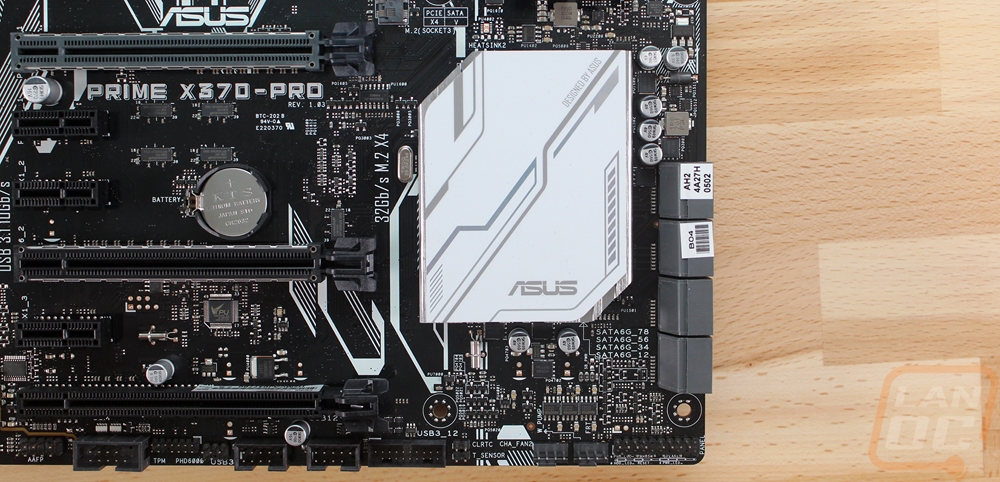
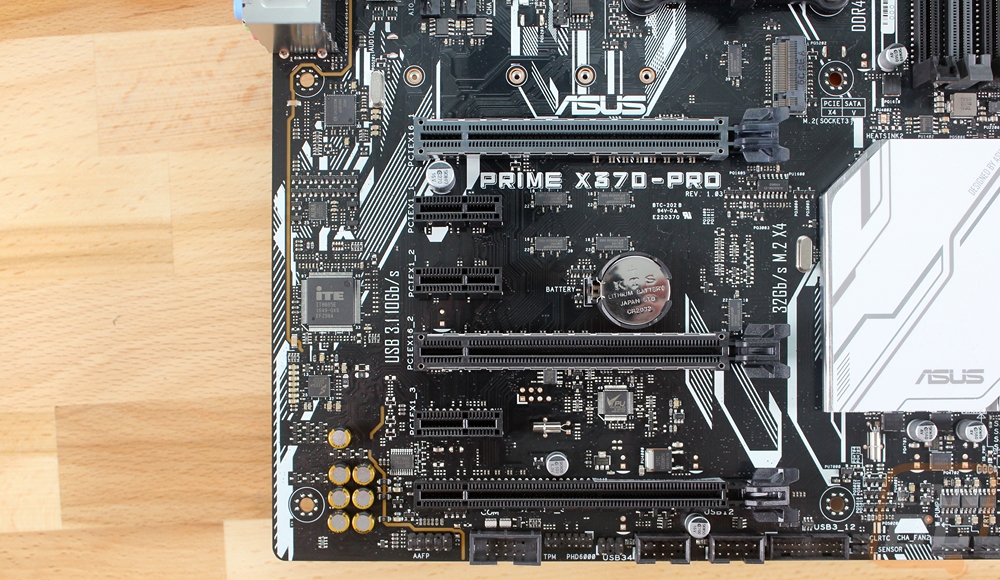
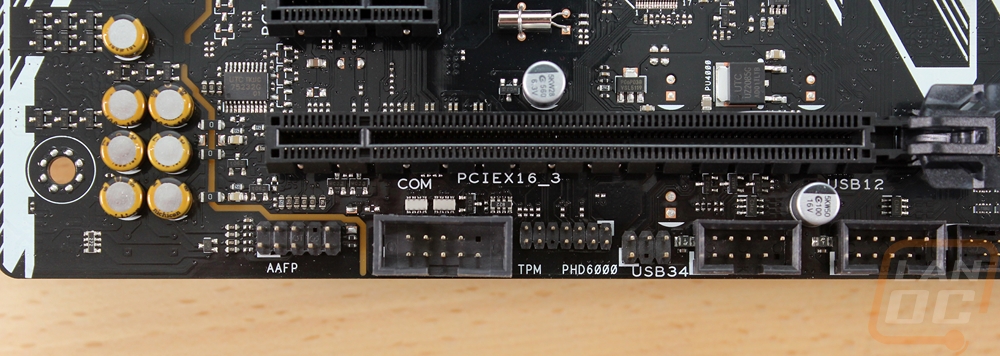
In the bottom left section, most of the space is taken up by the PCIe connections. The Prime X370-Pro has three x16 length slots and three x1 length slots. The top two x16 length slots run at x8 when working together as this board does support Crossfire and SLI or the top slot will take the full x16 in a single card configuration. The last one runs at x4 all of the time. Above the slots, there is a single M.2 socket with support for 2242/2260/2280/22110 length drives. It also runs at a PCIe x4 assuming you are using a Ryzen CPU not one of the upcoming Athlon APUs. Also in the corner, we can see the gold Japanese made caps that are part of the build in audio. Asus used a Realtek ALC 1220A 8 channel audio CODEC and slipped in things like impedance sense for the front and rear headphone and the split PC to protect from interference.
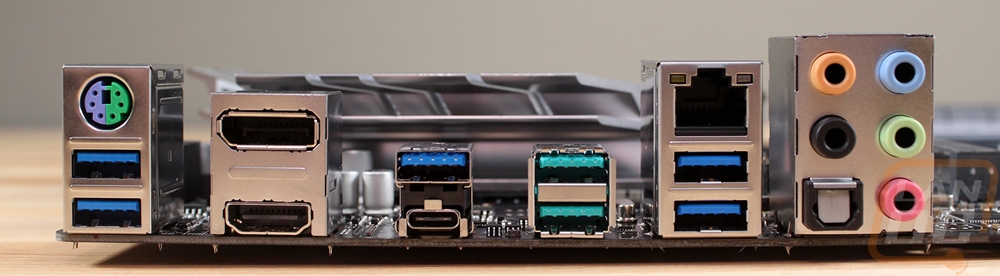
For the rear I/O the Prime has a mix of connections including DisplayPort and HDMI connections for future use with Ryzen CPUs with built-in GPUs. Over on the right is a standard 5 plus optical audio array. For USB you get 5 USB 3.0 ports, a Type-C 3.0, and two USB 3.1 ports. The Network port is for an Intel I211-AT NIC, I still love seeing Intel NICs even on Ryzen boards because they are great network cards. Then last but not least is the PS2 port up in the top left for older mice and keyboards. If I had my way the Prime could use a few more USB ports or at least a faster Type-c, but it does have enough for most people.
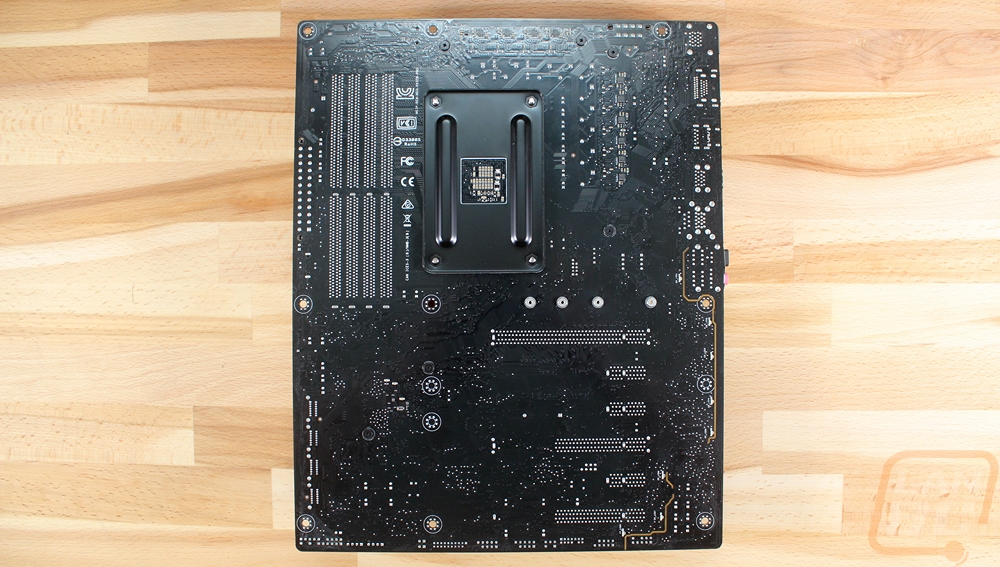
The back of the board doesn’t have too much going on. We can see the black PCB better and we can see the AM4 backplate. Beyond that, nothing to special back here.
So this is where our Ryzen build project Carmine stands currently. It will most likely be a week or two before we see any more updates. We have to lock down things like the SSD, RAM, and cooling as well as the CPU and Video Card that I’ve already got picked out. So keep an eye out for more updates soon!


