Taking everything apart
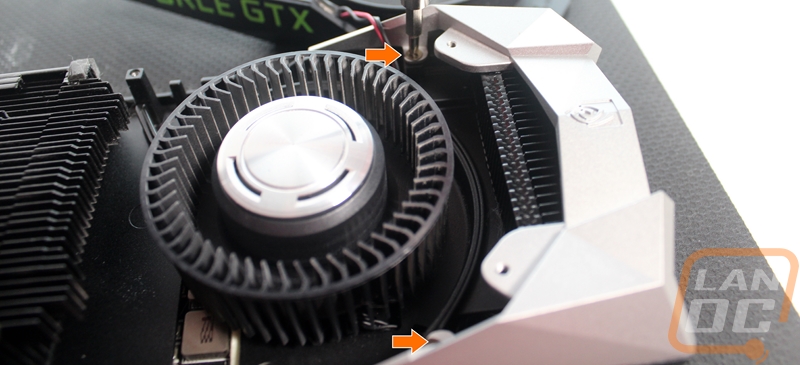
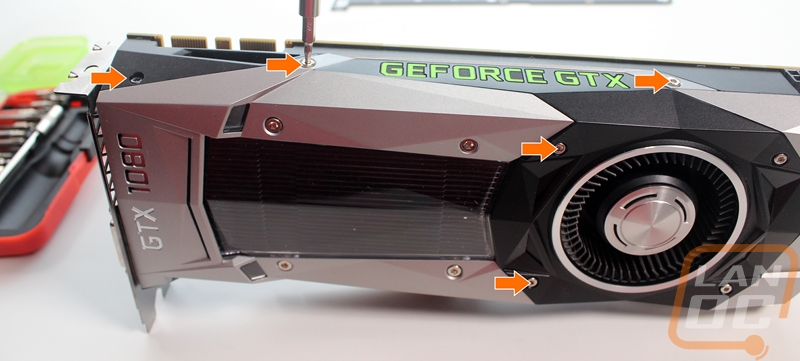
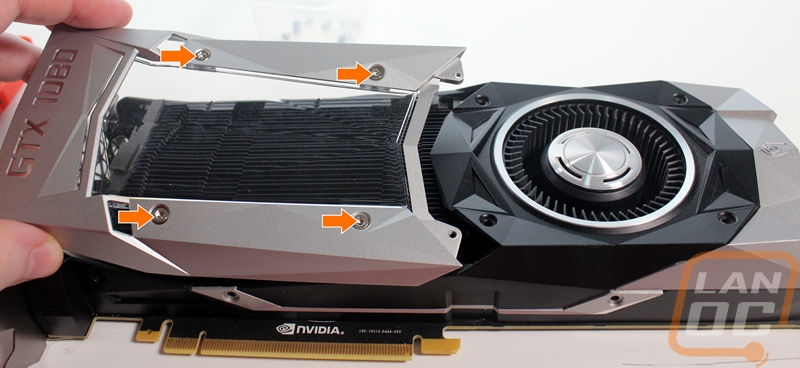
Once you have all of your tools ready and have a workspace to be able to pull your card apart for a day or two you can get started. The first thing we want to remove is the large plate that covers most of the card with the window in it. To make things easier I have put arrows showing each of the screws needed to be removed. While we are doing this we are also going to go ahead and remove the screws holding the top and bottom trim plates as well. So on the top of the card, you have three 2mm hex bolts to remove and on the bottom of the card, there are the same. Really only the two black bolts hold the main plate on though. Then from there, you have two more 2mm hex bolts to the left of the intake fan.
With the front plate out you can remove the four 2.5mm hex bolts that hold the front window in. Then we can sit the front plate aside until we get ready to paint.

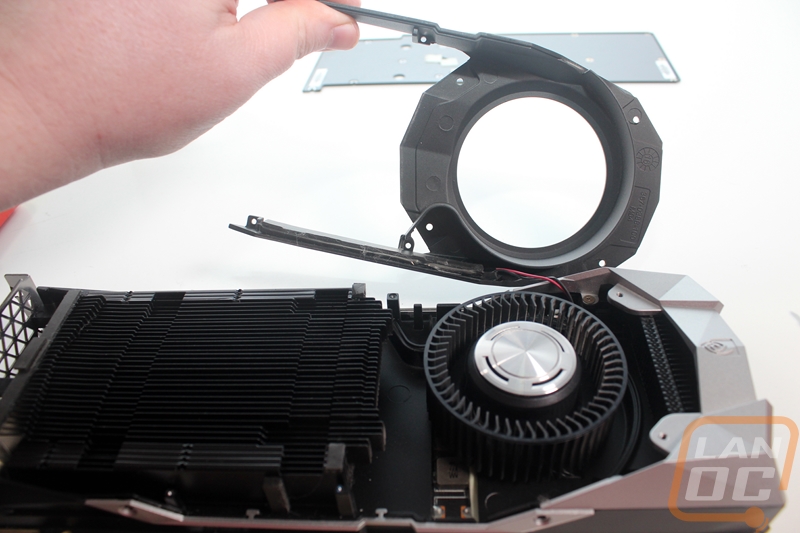
Next, the black shroud around the fan needs to come out. This is all that is left holding the top and bottom accent bars in and we have to get this out to start working on the last silver piece at the back. The black shroud has four tiny screws above and below the heatsink. There are also two more 2mm hex bolts up on top. Once removed the shroud comes loose but remember this has the Geforce GTX logo on the top that is backlit. You can unplug the cable or just set it just above the card and work around it. Unplugging might be easier but I kept mine plugged in on both cards and was just careful what I was doing.

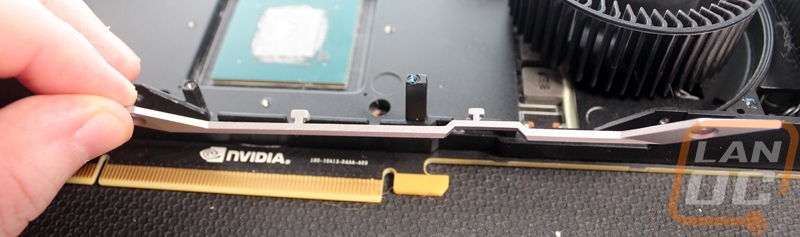
With the black shroud out the top and bottom accent bars that we already removed the bolts on should just lift up. Previous generations of Nvidia’s cards had glue here but these just have T-shaped clips that hold them in place. Be very careful with them, they bend and flex really easy and you can break them. One of my cards had these come out easily and the other I had to carefully pry up on them because they were sitting tightly in place.

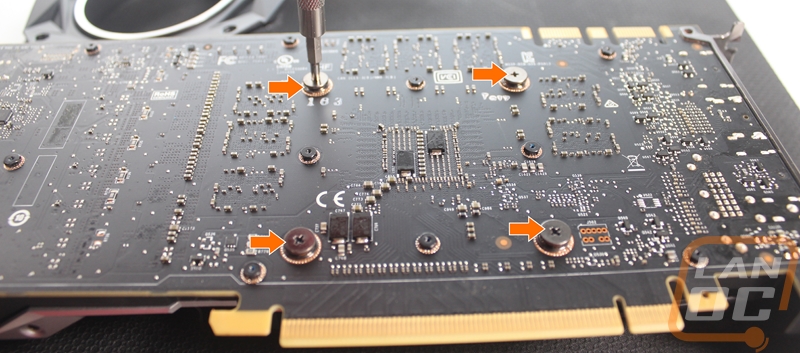
You would think that at this point we are in the home stretch right? We have three out of the four pieces that we are going to paint off. Sadly that last panel requires a few other things to come apart before we can get it off. To start off we will have to remove the heatsink. You can access these screws with the back panel on even though I don’t have it on in the photo below. So these four screws all have springs built in. When you remove them make sure you have your hand under the card because the heatsink may drop off depending on how old the thermal paste is.
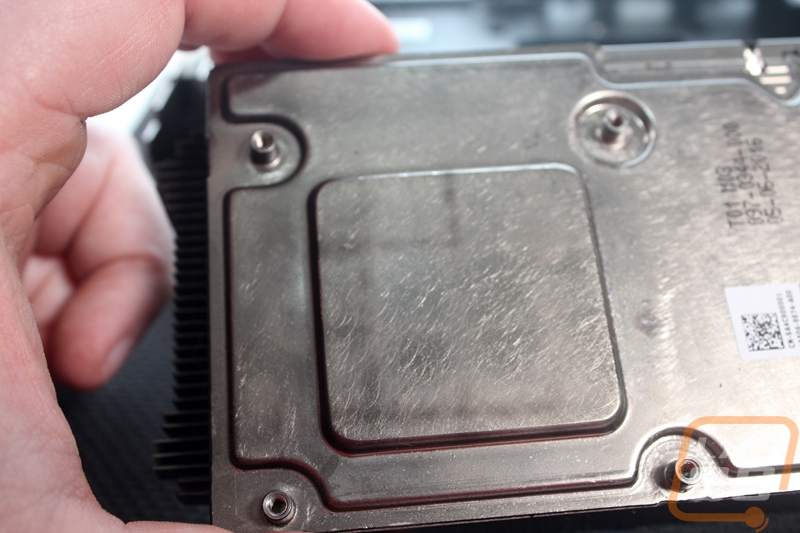
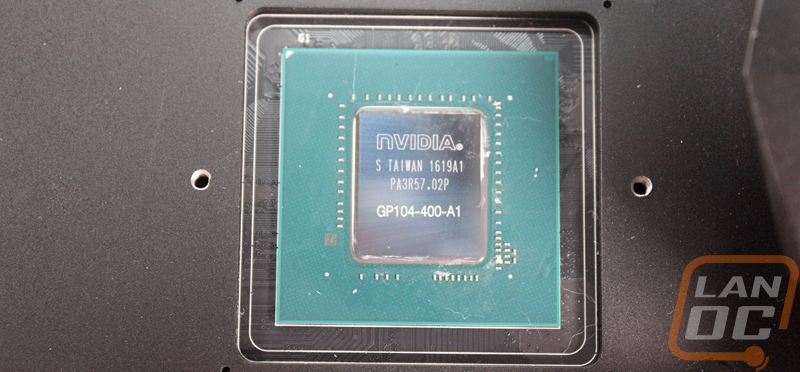
Before we make a mess, make sure to get a paper towel and clean both surfaces off. Use rubbing alcohol to get them perfect. Be careful around the edges on the GPU of course, you don’t want to knock any of those surface mounted bits off.
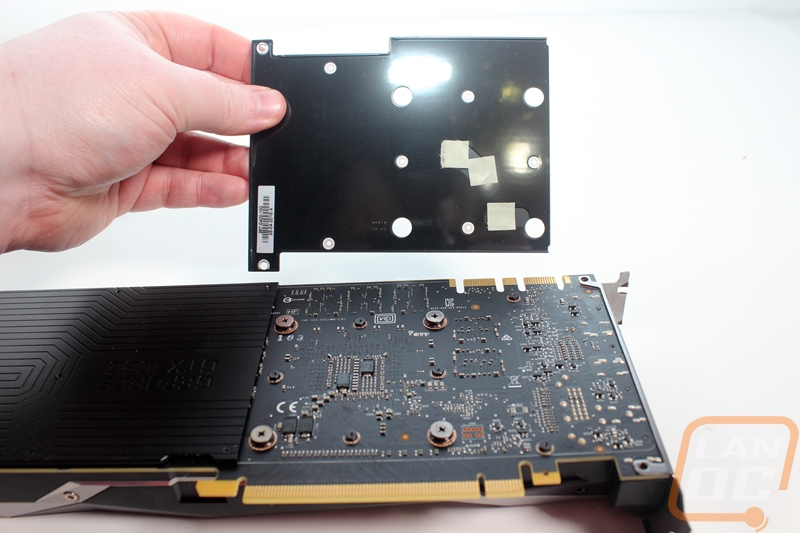
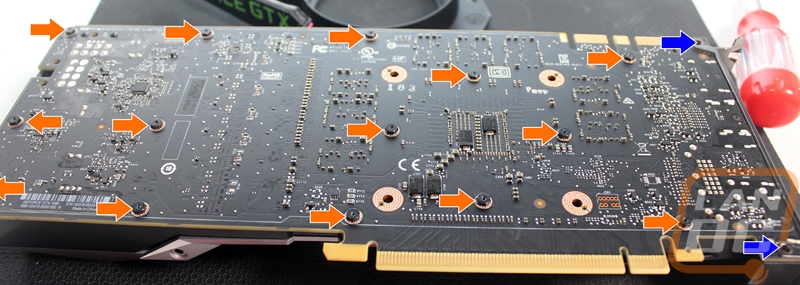
Next, we have to actually pull the base of the heatsink off the PCB but to do that you have to get the backplate off first. There are two halves to the backplate and it is held in place with 14 tiny Philips head screws. You need that PH0 sized screwdriver for this one and be careful not to lose any of them as they are really small. This is why we have the small container to keep all of the removed screws in.
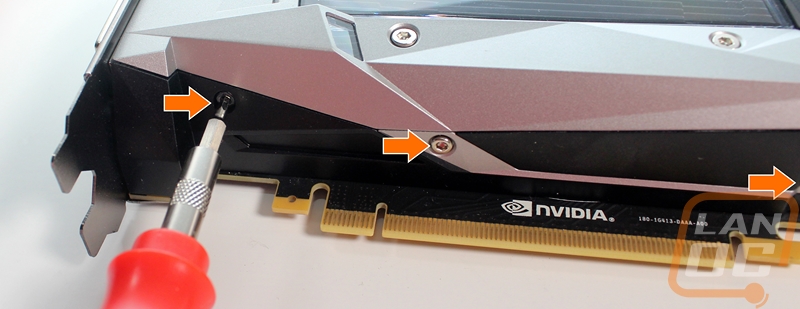
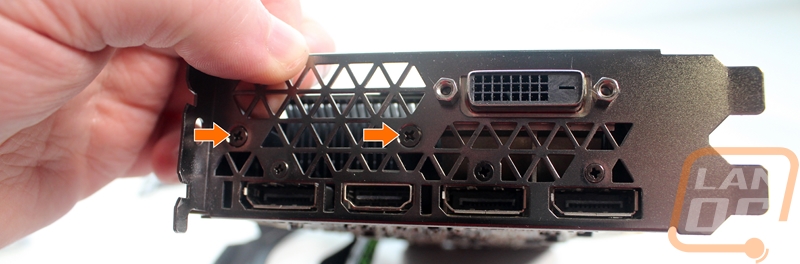
Next, we have two screws to remove on the PCI endplate. A lot of people will be tempted to just remove all of the screws here but you only have to remove the two that I have pointed out below.
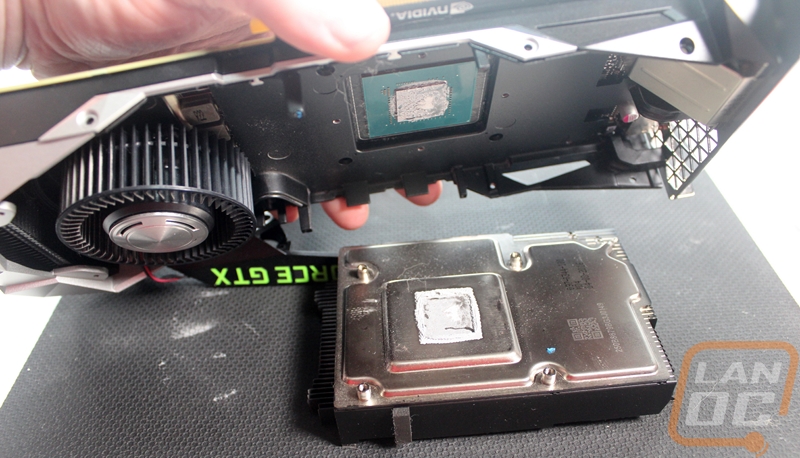
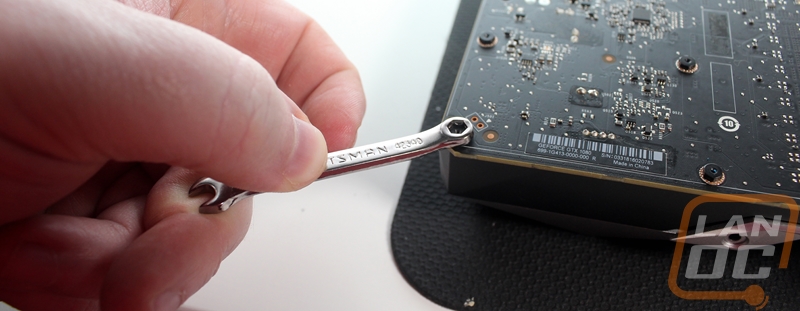
Now to pull the PCB off the heatsink you have to remove two screws over on the right then we have to deal with the 14 standoffs that the backplate screws screwed into. This is where that odd 4mm deep well socket comes in handy. As you can see I ended up using the 4mm wrench and I would highly recommend no one else do this. You can loosen the standoffs with it but you risk bumping all of the surface mounted diodes and other components on the back of the card. The standoffs aren’t tight at all so the deep well socket and your hand should get them off.
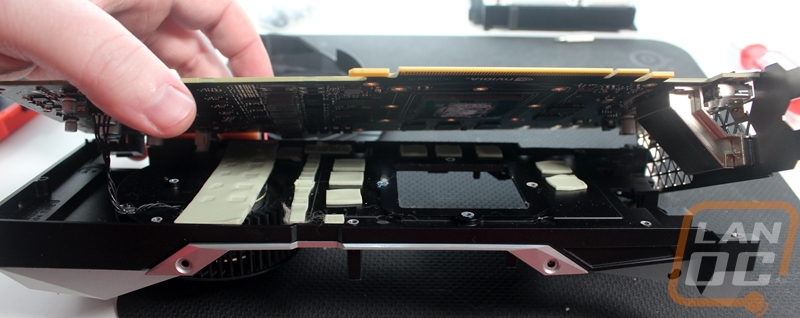
Once removed the PCB will lift off of the rest of the heatsink. There are thermal pads on the memory and other components so you might have to pull it apart a little bit to get it started.
Finally, we can get to that last piece. It is held in place with four screws. Two are up top next to the fan and are really visible. The other two, on the other hand, are hidden up under the card and under the PCB. When I pulled the PCB off I didn’t unplug the fan or the light so I kept it close to the heatsink still but moved it just to the side on the end. There is a screw in the same area of the 8 pin power connection and one on the bottom as well. Once you pull them off the panel will fall right off, be sure to grab the screws then put the PCB back in place to protect the thermal pads.