So yesterday I went through and spoke about each of the components I went with for Lunchbox 4 and why I went with them. Today's the day we dive into customizing the build to make it stand out a little including adding that all important carrying handle. Then after that, I benchmark the build and figure out how the new build compares to our last Lunchbox build. Does it fit our goal of always going smaller and faster? Do I have any regrets with the new build? Well I talk about that in the last section, so don’t forget to check that out as well.
Project Name: Lunchbox 4
Review Samples Provided by: Raijintek, Noctua, Silverstone, Gigabyte, Crucial, Intel, Corsair, NZXT, and Zotac
Written by: Wes
Pictures by: Wes
| Components Used | Live Pricing | |
| Case | Raijintek Metis | Live Pricing |
| Motherboard | Gigabyte Z170N-Gaming 5 | Live Pricing |
| CPU | Intel i7-6700K | Live Pricing |
| Video Card | Zotac GTX 1060 AMP! Edition | Live Pricing |
| RAM | Corsair Vengeance LPX 32GB (2x16B) | Live Pricing |
| Heatsink | Noctua NH-L9x65 | Live Pricing |
| Case Fan | NF-F12 industrialPPC-3000 PWM | Live Pricing |
| Power Supply | Silverstone SFX Series 600W SST-SX600-G | Live Pricing |
| Lighting | NZXT Hue+ | Live Pricing |
| Storage |
Crucial MX200 1TB SSD Crucial MX200 M.2 500GB SSD |
|
| Handle | MNPCTech Black Billet Grooved Handle | Live Pricing |
Customizing it all
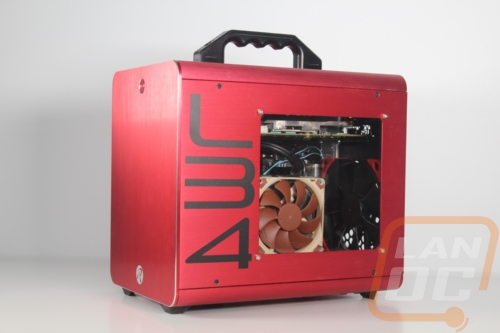
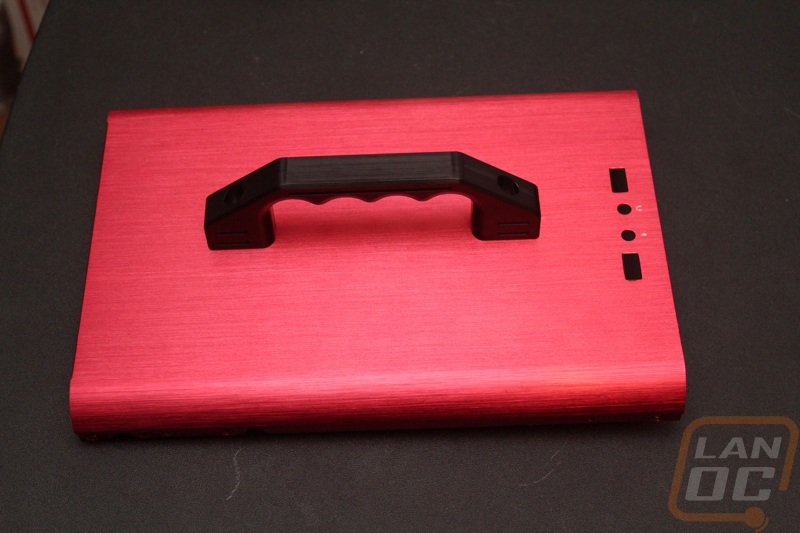
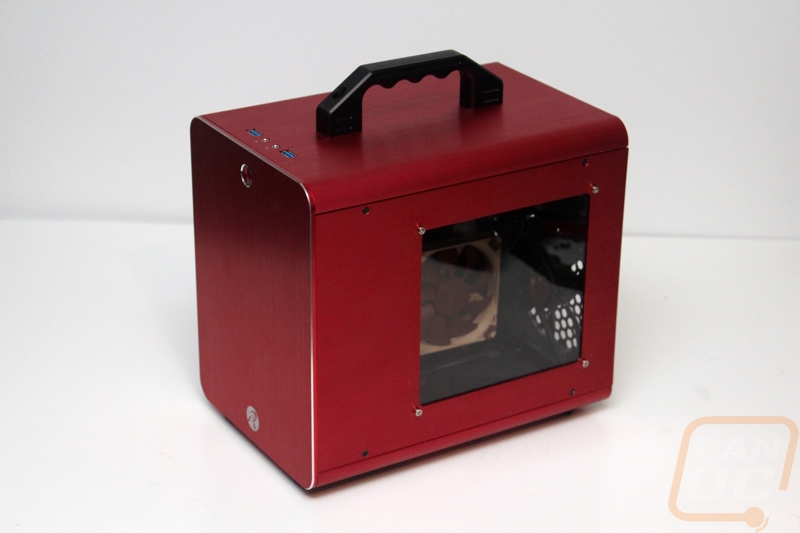
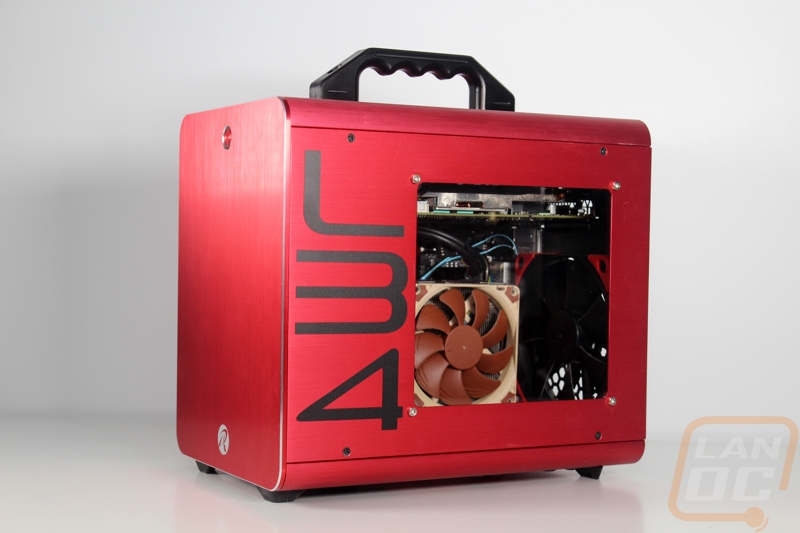
Well even with a stack of cool components for the build, I wasn’t about to toss it all together without at least making a few changes. The biggest thing I set out to do was to find a carrying handle for the Metis. After living with the handle on Lunchbox 2 and Lunchbox 3 I didn’t want to go without it this time around. I spent a lot of time trying to find something that would have the strength and support needed and that wouldn’t look out of place. In the end, I only found one option, the Billet Grooved Handle from MNPCTECH. They came in black or silver and you can only get them in a pair. Well matching the red on the case was never possible so I went with the black, we had already used a few black trim pieces inside of the case.
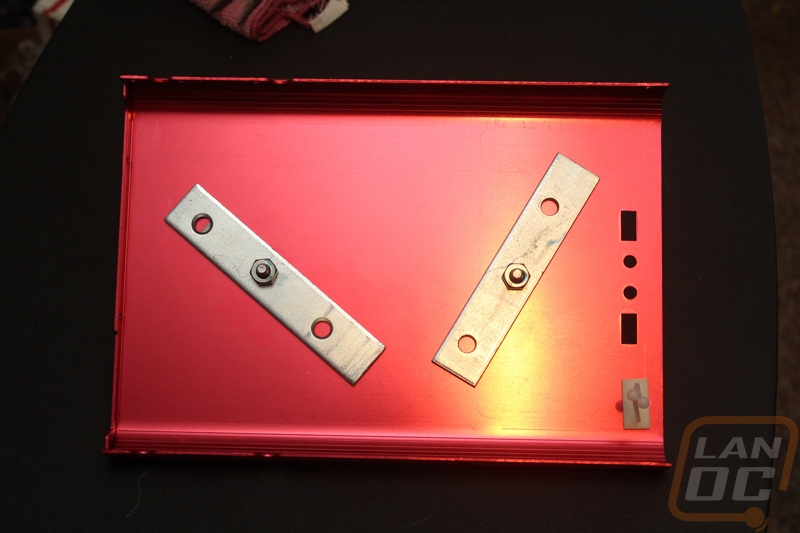
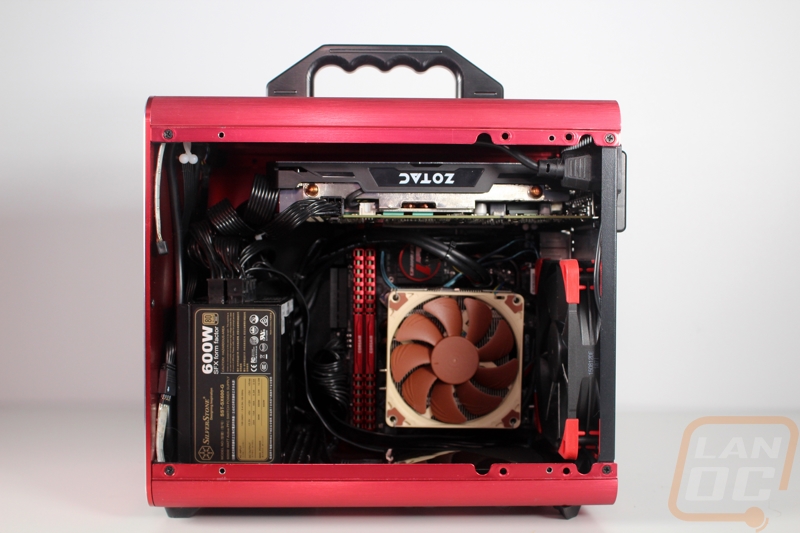
To install the handle I picked up a thick strip of steel and cut it in half then made sure it had holes in the middle of each piece. From there I measured out the location I wanted on the top of the panel and marked out my holes. I had to take the case halfway apart to remove the top panel for drilling but I didn’t want to get any metal shavings into the already installed components. I drilled out the holes, confirmed they were correct, then set out to mount the handle. MNPCTECH includes nice bolts so I used those along with the support straps I made to get everything bolted together. I used the support straps to distribute the load from the handle out, being an aluminum panel I didn’t want to end up bending it. I also pointed the straps in different directions to make sure the load was spread out as well. Last but not least I used Loctite to make sure the bolts would stay tight forever, I would hate to have the handle fall off in the future.
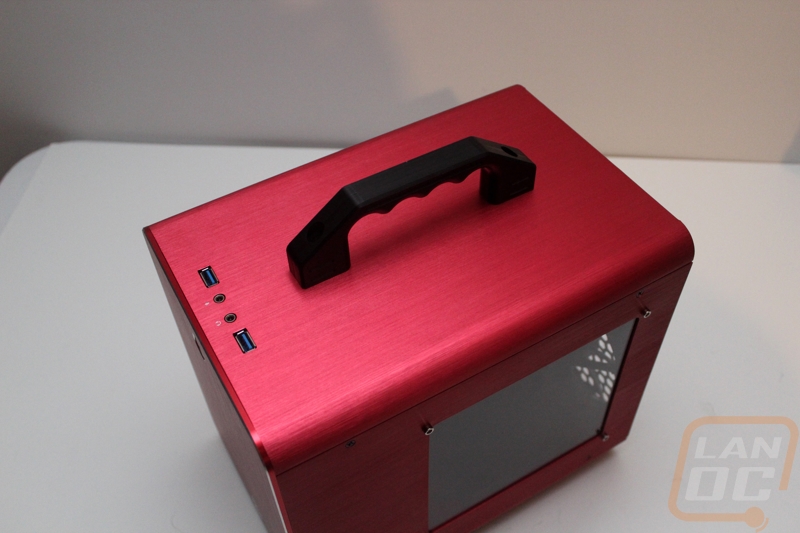
The handle turned out really good but I was a little concerned that the black handle on the otherwise red case would stand out too much.
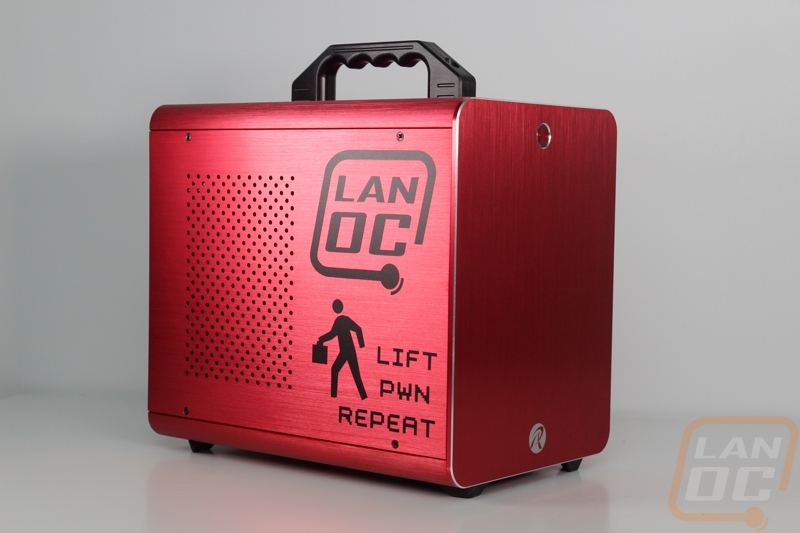
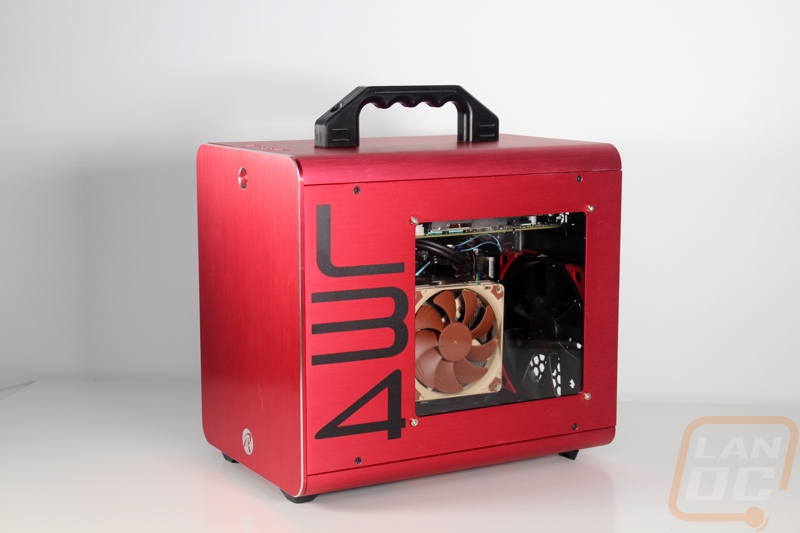
Well, I just happen to own a plotter so I put together a few sticker designs and cut them in a flat black to go on the case, the idea being to bring the black into the whole case. I made a lanOC logo as well as our exclusive Lift-Pwn-Repeat sticker that goes on all of our Lunchbox builds. Those two stickers, in my opinion, came out really good. I also wanted to add the Lunchbox 4 name to the case somehow like we have on the last few builds. I ended up making an LB4 sticker that represents the cases name for the other side of the case using the PlayStation font. Sadly, I can’t really say I’m happy with that one at all, in fact, I kind of hate it. I would love to invite whoever is interested to contact me with any other designs they might have. If I end up going with it I will also hook you up. Anyhow, for now here is what it looks like.
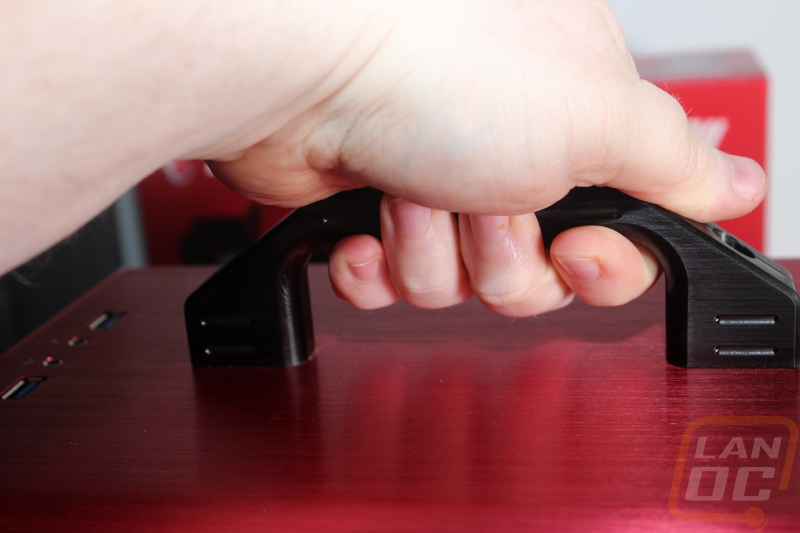
The CNCed handle though fits my hand perfectly, I’m extremely happy with it!
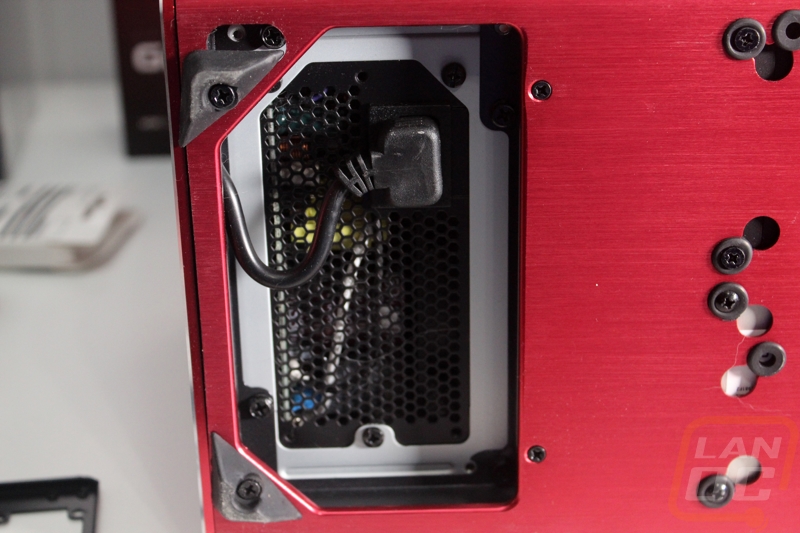
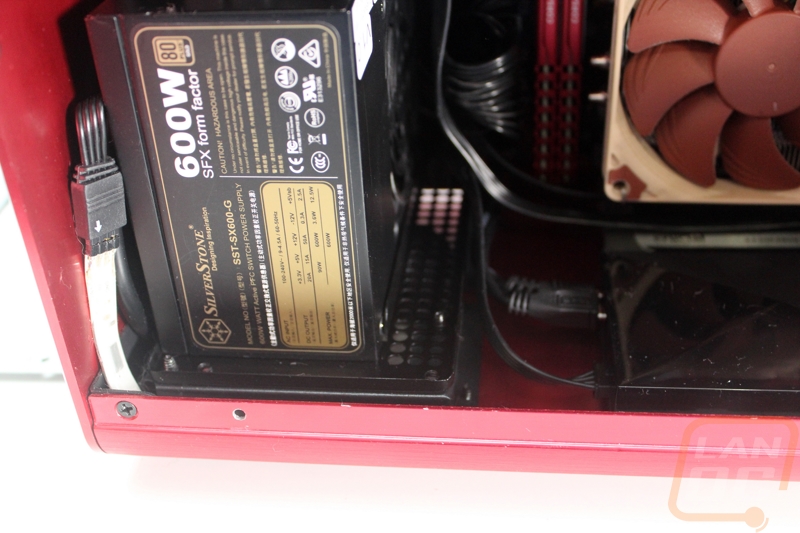
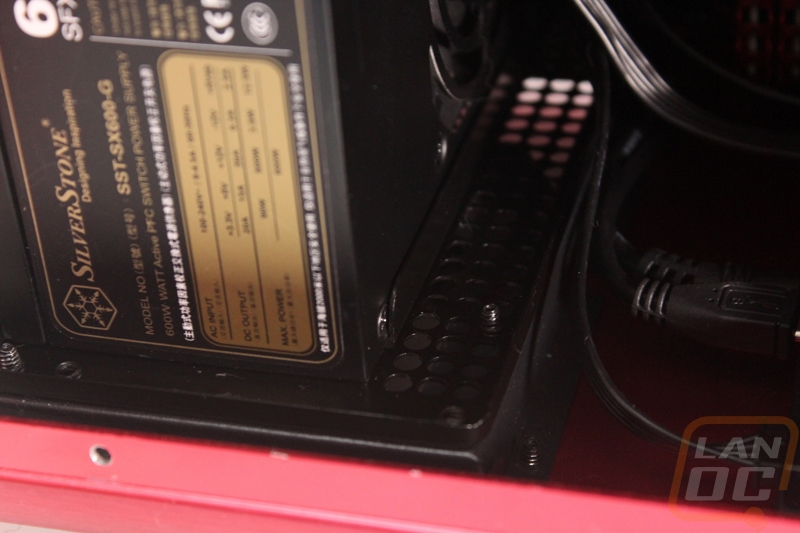
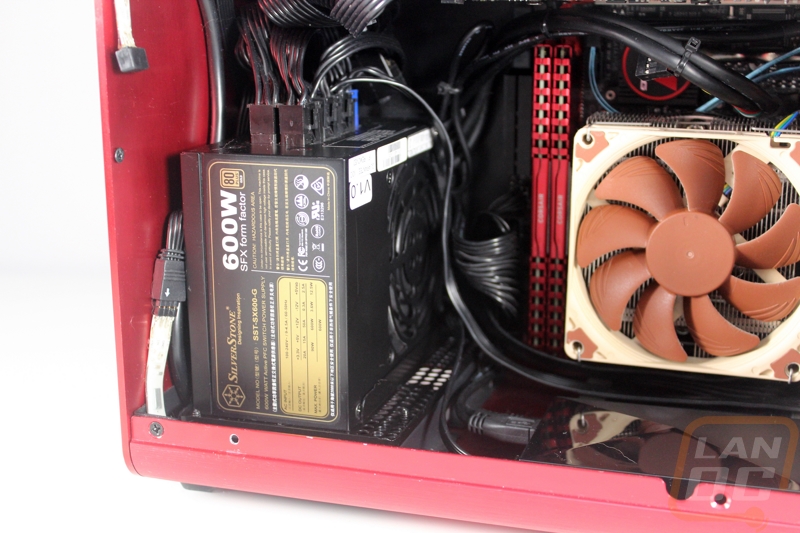
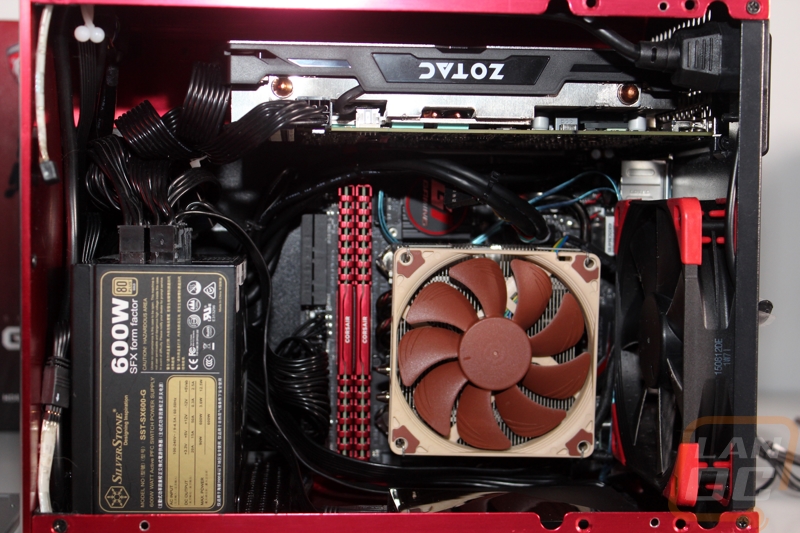
After the handle, I also had to clean up our power supply installation. Remember I went with an SFX power supply in a case designed for a full sized ATX power supply. Originally I used the adapter plate that Silverstone included and I had planned on removing it and painting it. Well, Silverstone actually makes and sells a nice powder coated adapter plate so I picked one up on Amazon for $7. I like the new adapter better because it actually offsets the power supply over a little to the left where the original mount put it in the center. This helped open up even more space in the case and pushed the power supply up closer to the front panel of the case. It also got rid of the gray eyesore of an adapter plate that comes with the power supply.
Last but not least I had to get some lighting. See with Lunchbox 3 one of the downsides was the enclosed case didn’t really draw any attention. So part of the reason I went with the Metis, on top of its bright color, was it having a side panel window. Well, I still needed to light everything inside up to make that work. I had both red and white lights here in the office and couldn’t pick between them but then decided to reach out to NZXT about their new Hue+ (new at the time lol). I use the original hue in our Fridge build and low having the option to go with any color we want. With the Hue+ they drop the front panel controls and use a control box hooked to USB to control everything with software. In fact, you can control individual LEDs, not just the overall color. This gives us all kinds of crazy lighting options including both the red and white that I was considering.
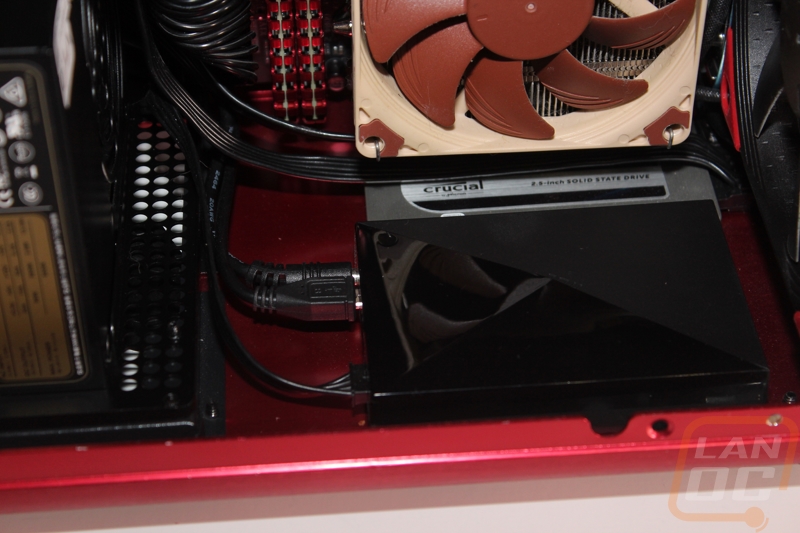
The control box for the lighting ended up having the footprint of a 2.5 inch SSD but is about twice as thick. I was just going to double sided sticky tape it in the case but I noticed that it had screw holes on the bottom to install in an SSD mount, so I installed it in our cases second SSD mount. With that, I had to move our 1TB SSD back to the second mount because it was thin enough to fit under the motherboard and the Hue+ was way too tall to fit. I’m not a big fan of the use of a micro USB connection on the controller, but man is the Hue+ cool to play with.
You obviously have full RGB control as well as a whole list of different modes that you can run. I focused on the red and white that I wanted to use on the build originally and I was able to put together a few cool effects. Here is a simple video showing what I’m talking about.
Performance
Typically for testing or our LAN rigs, I try to get out to as many events as possible with it. Well with the overheating issues I originally ran into it has currently only made it out to one event. That said I have still spent 6+ months using the PC in different capacities and fine tuning things. It’s been in the office hooked up to an amazing 34 inch curved ultrawide monitor and from time to time I have been gaming on it and the rest of the time I have been using it to run our two 3dprinters. That’s great and all, but before I finished up this article I had to know just what the system is capable of. To do that I went ahead and ran it through a list of benchmarks. With those, I want to invite you to open up a second window with our previous Lunchbox 3 coverage and we can compare the numbers between the two. Here is a link to the performance numbers for Lunchbox 3.
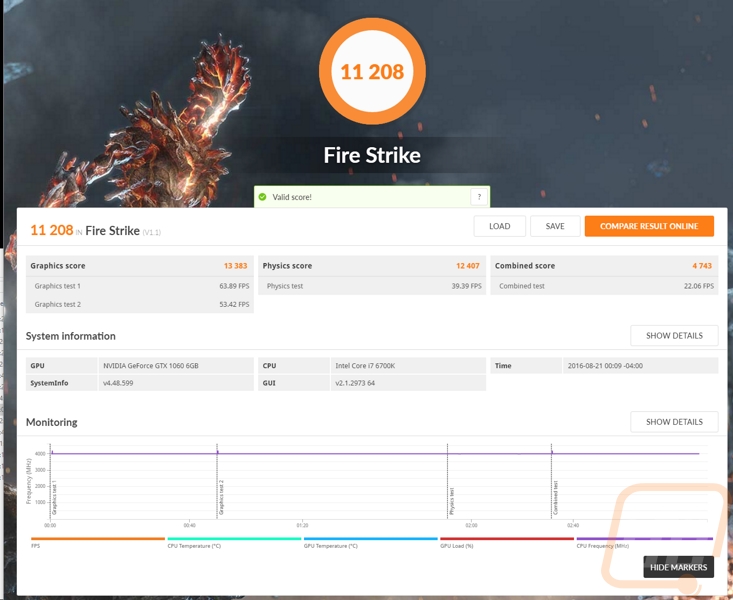
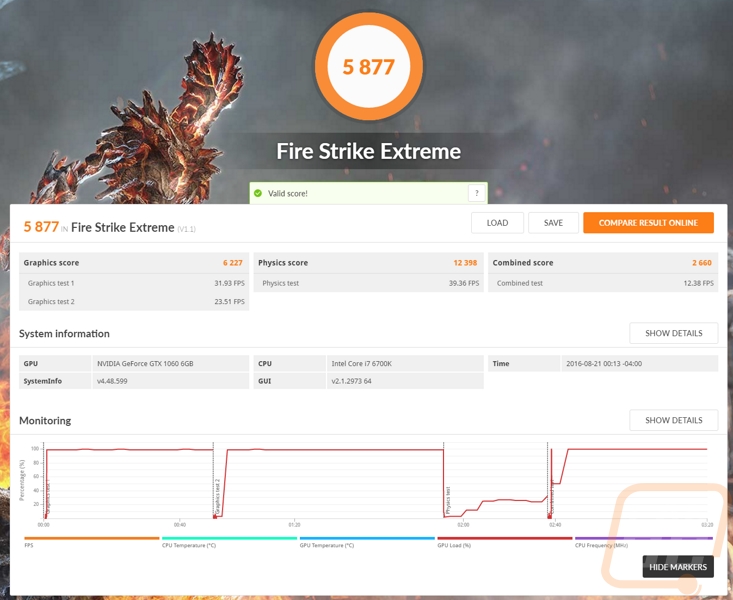
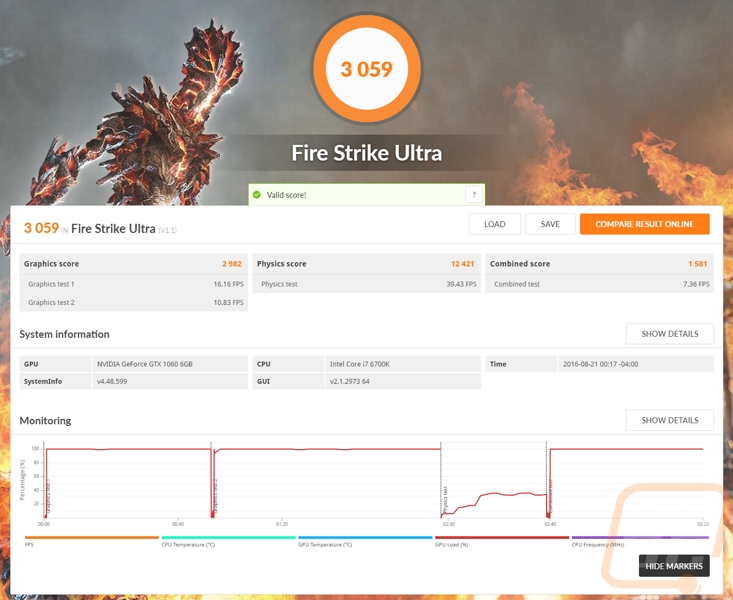
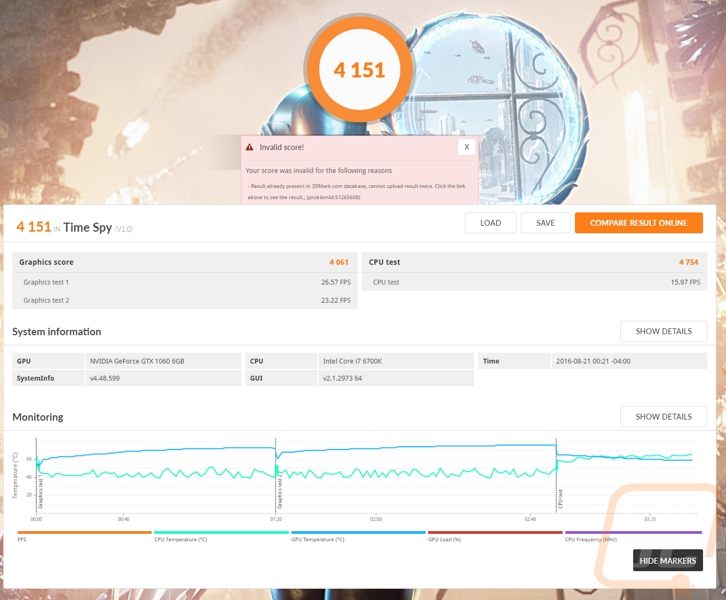
Because this is a build specifically for gaming I started off my testing in 3DMark. I tested Lunchbox 4 with all three resolutions of the Fire Strike benchmark as well as the new Time Spy benchmark. Of course when I made Lunchbox 3 the 4k Ultra benchmark didn’t exist nor did the DX12 Time Spy test so we can only compare the Performance and Extreme settings. That said The difference is clear. Lunchbox 4 doubled the score on both.
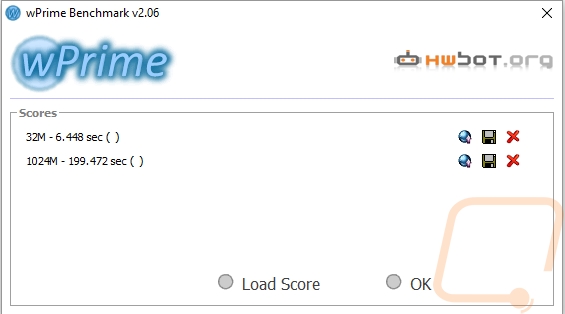
Next, I tested out the CPU with wPrime and the i6-6700k left the old i7-4770k in the dust. Seriously, though, who would have thought there would be that much of a difference, the 4770k is still a great CPU today.
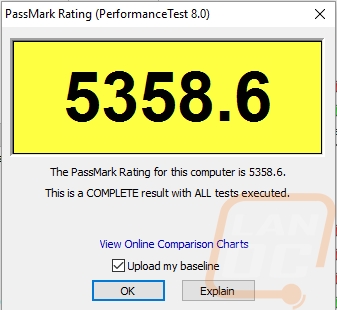
In the overall Passmark benchmark, there isn’t as big of a jump. A lot of the individual tests do show a nice jump in performance but the overall score only goes up about 300 points.
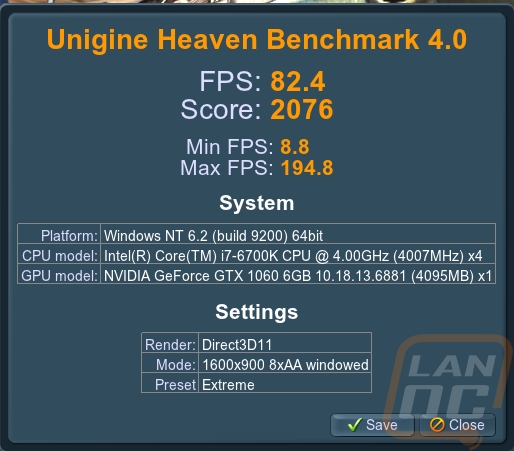
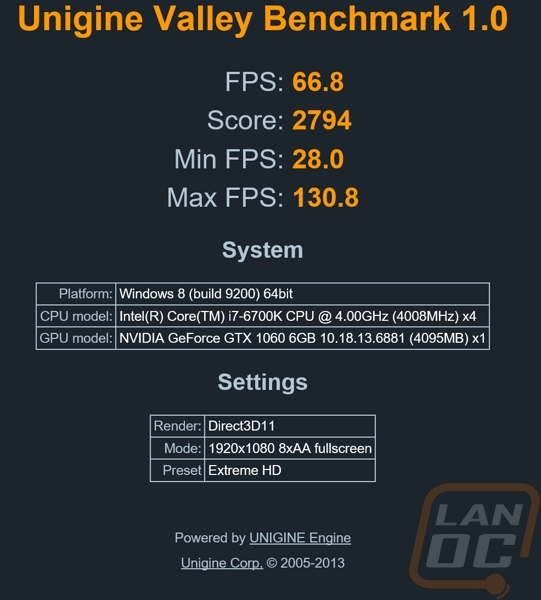
The Heaven benchmark that I used on Lunchbox 3 is really outdated now but I dug it out and ran it on Lunchbox 4. Here we doubled the average FPS. Just for easier comparison in the future and for anyone curious how their LAN rig compares I did also test using the Valley Benchmark, while we don’t have a number to compare with but at over 60 FPS I don’t think we can complain.
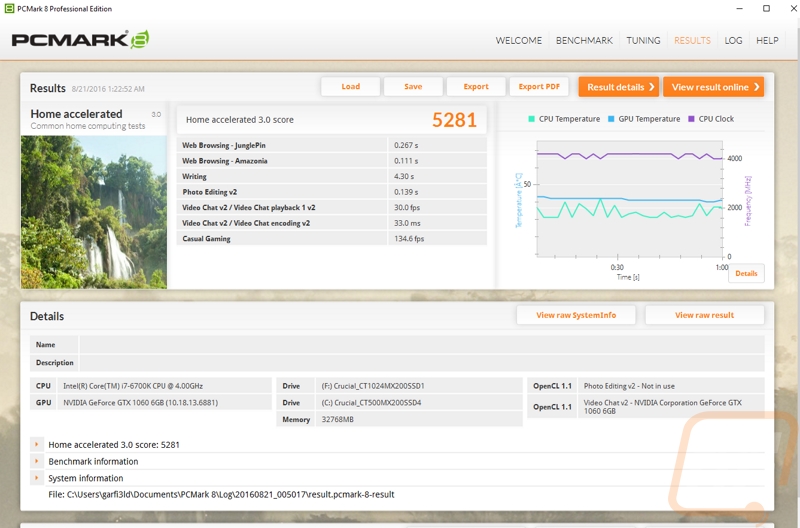
I also tested with PCMark 8 and at first glance I was a little concerned. The overall score actually dropped 200 points for the new build but when looking closer I noticed a few things. For starters, if you look at the individual results, each and every test was faster on Lunchbox 4. Second PCMark actually has given the Home Accelerated benchmark that we used numbers and we are now on the 3rd version. Back in January of this year, Futuremark released an update that changed the scoring and moved the Home Accelerated benchmark to version 2. From then to now the test has changed again as well. So our score can’t be compared, but we can compare the individual tests and we know how that turned out.
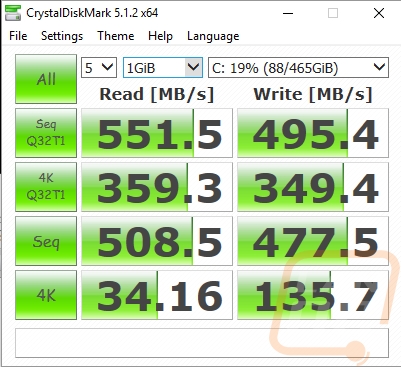
I also benchmarked our two SSDs as well. Both performed very similarly to each other. Both are also much faster than the SSD and Hard Drive in Lunchbox 3. I’m sure a few people are curious why I didn’t end up going with an NVMe drive in this build. Well, it would have been a perfect fit but honestly, we just didn’t have an extra NVMe drive available at the time. At the start of the year, there weren’t many NVMe drive options and the biggest one the Intel 750 Series drive that I tested last year would have taken up our only PCIe slot. That said I may upgrade the build to one later on or save that for Lunchbox 5 ;).
Crucial MX200 1TB SSD
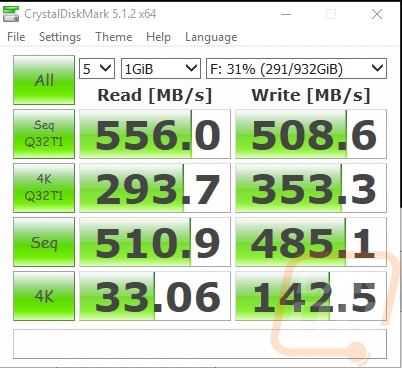
Crucial MX200 M.2 500GB SSD
The last bit of my testing was focused back on temperatures. Remember all of the issues I had with overheating with both our GPU and CPU. Well, I ran our normal test for testing a GPU, I looped Valley benchmark and documented the temperatures. Without changing the fan profile on our video card at all it ran solid at 76 degrees Celsius. While I wouldn’t consider that to be amazing, it was a huge improvement over the original numbers. More importantly, this was only two degrees warmer than the same card ran on a completely open test bench just last week when I reviewed it. That tells me that the case isn’t holding a bunch of hot air in one place causing our card to overheat. For the CPU I ran Prime95 and it ran solid at 59 degrees. Mind you that is while also forcing the GPU to run full bore, just to make sure that when they are running together things won’t heat up too much. If I ever feel like either is to warm I still have a lot of headroom on the fan profiles to crank things up, but for now, I will take the near silent operation and the decent temps over my ears bleeding but the PC running ice cold.
Final Thoughts
So now that after 8 months the Lunchbox 4 project build is finally done do I have any regrets or final thoughts about the build? Well to fully consider that I spent time looking back at Lunchbox 3 and my coverage of the build and there were a few things with 3 that I regretted, even right after I built it. The biggest thing, and I wrote about this in my coverage of the Lunchbox 3 build, was that I regretted the build not having a better overall color theme. Later on, when using it I was also surprised at how little people even noticed the tiny build, even though it was the PC I was most proud of. Well with Lunchbox 4 I can say that I did a MUCH better job in this department. Nearly everything is black or red and the build itself is a lot more eye-catching. That said the Noctua fan on the CPU cooler still needs to go, it stands out like a sore thumb. I also already regret not coming up with a better design for the graphics on the case itself, I hope a reader feels the same way and has a much better idea that I can implement.
This time around I think I spent a lot more time focusing on thermals. In any small case, heat is going to be an issue but I’m hoping with the changes I’ve made Lunchbox 4 won’t run into those issues. Our last build would sometimes require me to pull the side panel off at hot events to help keep things cool, with that 3000 RPM Noctua fan I think it should help prevent me from having to do that in the future.
As for actual performance in the gaming focused tests we actually ended up doubling the performance when compared to Lunchbox 3. Given how good of a PC that still is, I think that is a big accomplishment. While I typically just take my normal 1080p monitor to LANs, I may have to pack the higher resolution ultra wide when space in my car and on my table at LANs allows. The new build shouldn’t have trouble playing most games at the higher resolution, let alone at 1080p.
So do I have any other regrets? Well, I think beyond the few issues that I still plan on fixing there is only one thing I do regret with this build. While it fits perfectly into our tiny form factor, easy to carry, and powerful PC guidelines for a typical Lunchbox build. This is the first time I didn’t actually go smaller on the form factor. Because of that I’m left still wanting to change everything up completely. In fact, over the past few months, I have been eyeing a few different cases that have the potential to pack this same power into an even smaller form factor. Really the only thing stopping me is the fact I JUST finished building this PC. In the end, this is an amazing PC in an easy to carry form factor for LANs. The timing couldn’t be better either, the next LanOC LAN is only a few weeks away. I guess it will be seeing action soon!


