Now that you know a little more about all of the parts that are going into Lunchbox 3, today we are going to go over how well the installation went and then put it all to the test in a few benchmarks. This is where we can finally see how the part choices work out and talk about any regrets I might have with them. Of course I’m most excited to see how it all performs. Then this coming weekend I can finally put it to good use at a LAN.
See Part 1 Here - See Part 2 Here
Project Supported by: Lian Li, Asus, Kingston, Silverstone, Seagate, and Noctua
A special thank you to the companies above who helped make this project a reality!
Written by: Wes
Pictures by: Wes
Installation
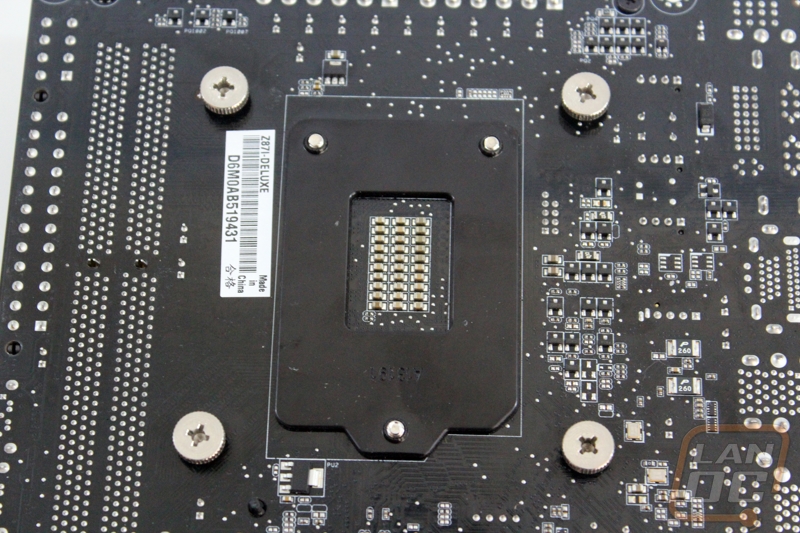
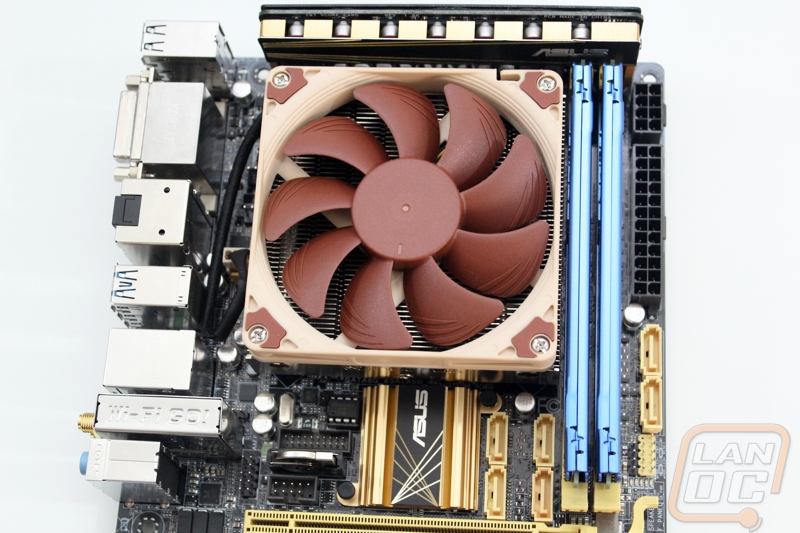
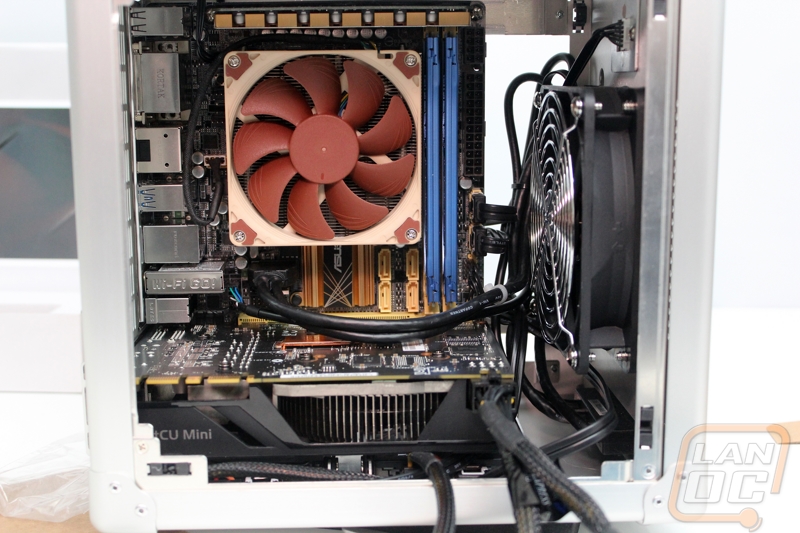
To start the installation off I needed to get the CPU and heatsink installed on our Asus motherboard as well as the ram. The CPU installed without any issues but I was curious how well the Noctua heatsink was going to install. Surprisingly this was the easiest installation I have ever done. After putting my thermal paste on the CPU, I dropped the heatsink into place and then flipped the motherboard over and screwed in the four screws provided. Once tightened down I just had to plug in the fan and it was all good to go. Installing the ram was easy as well. With that all set I was ready to dive into more complicated parts of the build.

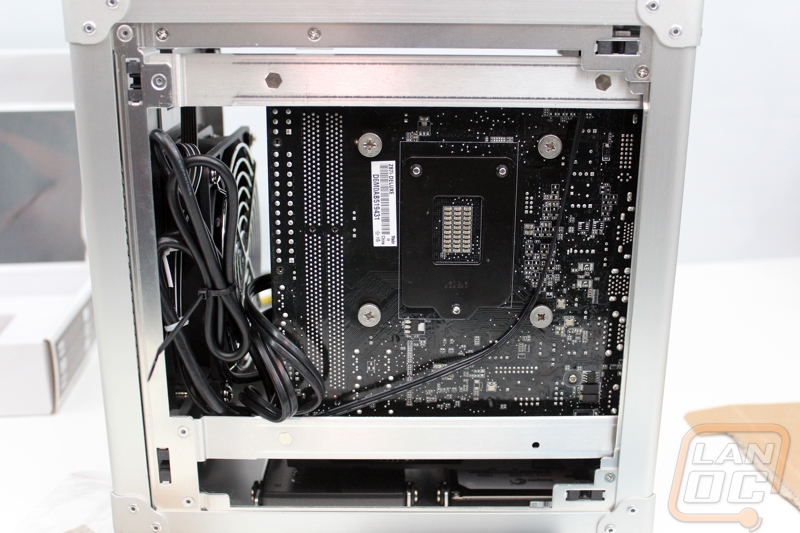
Next I installed the motherboard using its four screws and set out on installing my SSD and SSHD. Mounting them was simple, but as someone who plans ahead, I knew the wiring was going to be tight so I connected the power and SATA cables to the drives before dropping them in. I had hoped to be able to install the drives with the wiring facing back, but it was clear right away that wouldn’t work. If Lian Li moved the mounting tray over a little I think it would be possible though. To save wiring room in an already tight spot I actually removed one of the three SATA power plugs from my cable all together, giving me just enough cable to plug everything in without having to worry about the space later when the video card is installed.
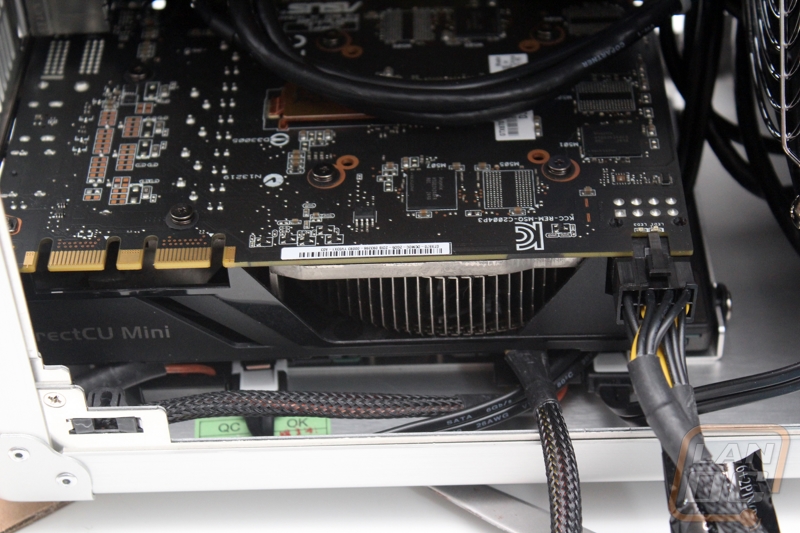
With the drives in started hooking up the front panel connections for the power button, USB 3.0, and audio. The USB 3.0, as always, was stiff and requires a little work to get it plugged without it wanting to come unplugged. The front panel connections were a complete pain due to the limited space. Asus did provide the extension cable for this exact reason, but I wanted to keep the wire length down so I decided to go it alone. Once I had all of those hooked up, I could finally slide in the Asus GTX 670 DirectCU Mini. This required a little work as it doesn’t fit well between the edge of the side panel and the fan. To keep things clean I went ahead and hooked up our modular power supply cables to this as well.

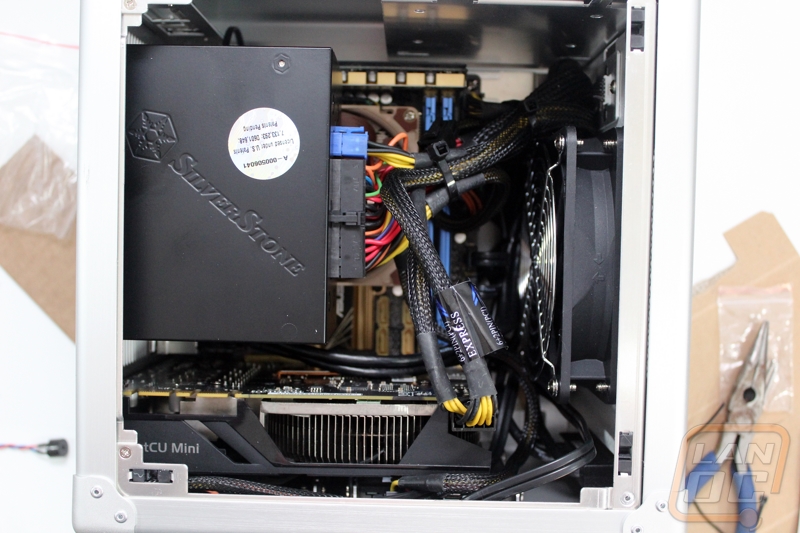
With the Power supply being the last thing I was sure to hook up our SATA cables and clean up all of my wiring so far. This is extremely important here because once the power supply is installed there just isn’t room to get in and clean anything else up. With my pre-planning though, installing the PSU went smoothly because I only had to clean up the power cables before locking it all down. As you can see below, with it all installed it is still very tight. Speaking of tight, the wiring on the back side of the motherboard was as tight as I had thought previously. I did run one small cable to hook up the front fan, but much more than that is going to be very tight.
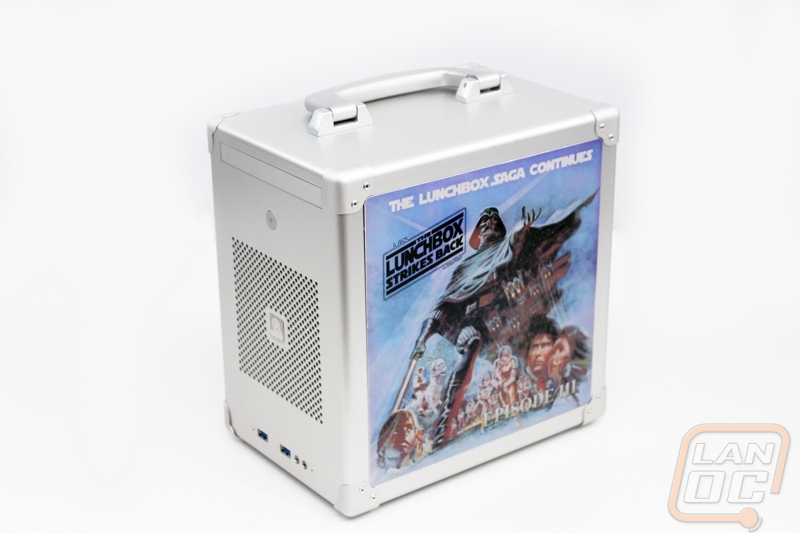
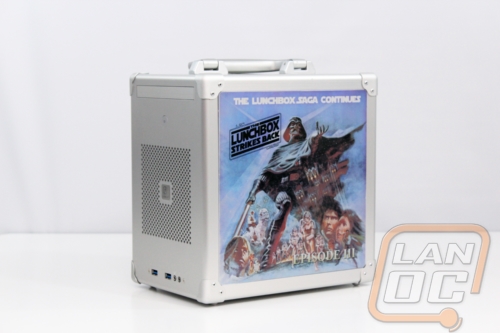
To add the final touch to the whole build I also put together a little artwork and ran it on the right side of the case. I plan on including a few things on the left side when I get a little more time to cut them out on the plotter as well. The idea behind the design was to make this look like an actual lunchbox, but the aspect ratio of normal lunchbox art wouldn’t fit well with the case. So I found the original artwork that they made the Star Wars lunchboxs with and made adjustments to make it fit the LAN theme a little more.

Performance
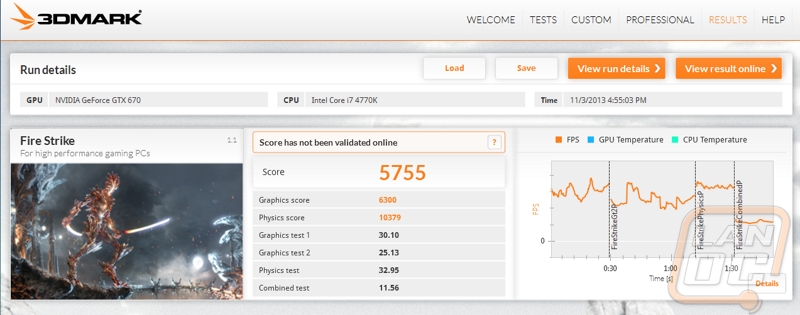
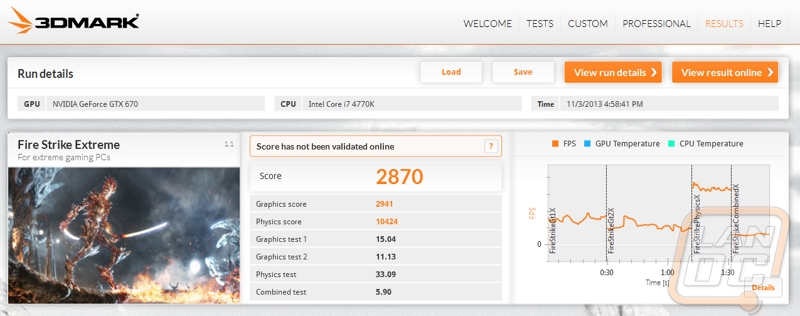
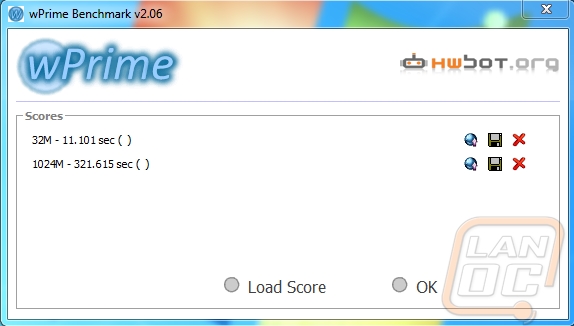
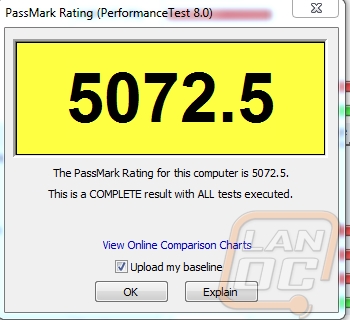
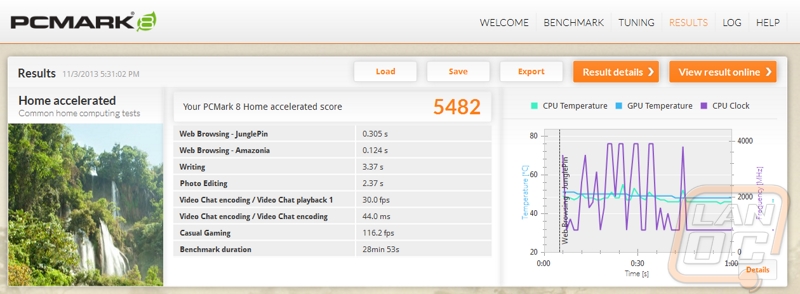
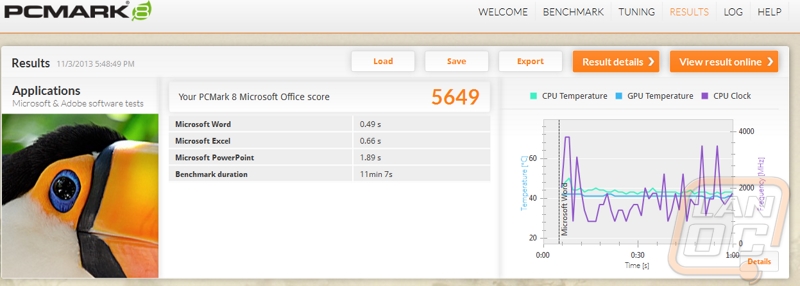
With everything together and up and running I ran the new build through a series of benchmarks to make sure it would run smoothly and I also wanted to publish a benchmark of what to expect from this build performance wise. This way if you would like you could run any of the same benchmarks and see how your build compares.
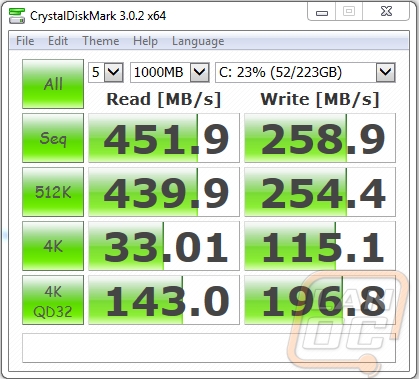
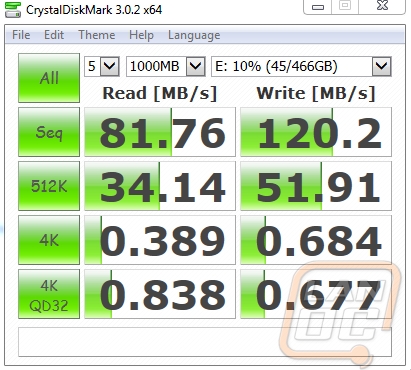
Kingston HyperX SSD Results
Seagate SSHD Results
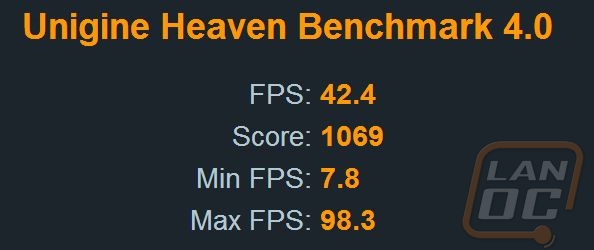
So I’m sure some of you are curious, how well did the build perform cooling wise? When running our benchmarks as well as while playing games I kept a close eye on all of the temperatures, in a small build like this heat can be a big challenge. Going into the build I was a little concerned with the possibility that I would struggle with CPU cooling performance, because of this I actually installed the power supply backwards so it would pull air in from the CPU and blow it out the back of the case. In testing the Noctua heatsink kept things cool. With Heaven benchmark running CPU temperatures stayed a consistent 41 to 42 degrees and motherboard temperatures were similar. For such a small heatsink and a compact build this was much better than I had expected.
My other concern however was the GPU though. While playing games I didn’t experience too much of an issue, but when I left Heaven Benchmark running for an extended period of time I saw GPU temperatures reach 100 degrees. After a little experimenting I noticed that this wasn’t an issue at all when I removed the side panel. I found that the TU-100’s main flaw is if you are running two drives on the bottom of the case there isn’t really room for it to pull in fresh air into your video card. I think a much better design would be to move the two drives to the top of the case and ditch the slim disc drive bay all together. This would open up a little room around the video card. Along with that a small vent on the bottom of the case, with slightly taller feat would allow the card to pull in cool air. In the end, I only experienced this with a benchmark looping, but I have every intention on pulling the side panel off at LANs just to be safe, and to show off the goods inside anyhow.
Beyond all of the benchmarks, I have been extremely happy with this build so far. Not only is it extremely snappy. But the overall experience is great with the software that Asus includes with their motherboard as well as the recently upgraded Geforce Experience that Nvidia provides with their cards. I have spoken many times before about Asus’s software, but living with it day to day is great. Being able to tune the fan profiles in a case like this was especially important to be able to stay on top of heat before it builds up. The Nvidia software “experience” was impressive because of the newly introduced ShadowPlay that runs like a DVR while you are playing, allowing you to press a button combination and save the last 5-10-or more minutes of your game play, all without slowing down your gaming experience at all. I don’t know how many times something awesome has happened in game and I wished that I was recording; a feature like this will never let that be an issue again.
I mentioned before that I would talk about any regrets with the build? Well obviously in a situation like this where we are partnering with various companies I can’t always get exactly what we are looking for. If I had to do it all over again I would have gone with the Asus Impact motherboard for its upgraded audio card and also for its black and red theme that would match our video card. To go with that I would rather have red or black ram. The mix of colors from gold, red, black, blue, silver, and whatever colors that Noctua uses gives Lunchbox 3 a little room for improvement. But then again you can’t see inside of it anyhow, and frankly in a build like this portability and performance are the top two worries and it has both of those and some!