In my first article about our project build Lunchbox 3, I covered everything that controls how fast the build is. Today I will be following up with all of the parts that support. That includes the power supply, case, and cooling components. These are all critical parts to your PC, but things like the CPU, motherboard, and video card generally get all of the attention. Today we will find out all about why space was such a concern when picking our previous components. Let’s dig in and see the rest of what Lunchbox 3 will consist of.
See Part 1 Here - See Part 3 Here
Project Supported by: Lian Li, Asus, Kingston, Silverstone, Seagate, and Noctua
A special thank you to the companies above who helped make this project a reality!
Written by: Wes
Pictures by: Wes
PSU
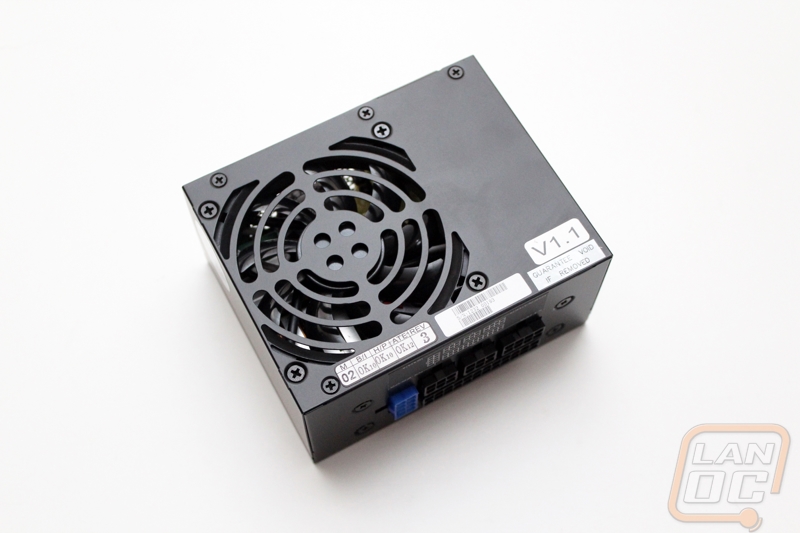
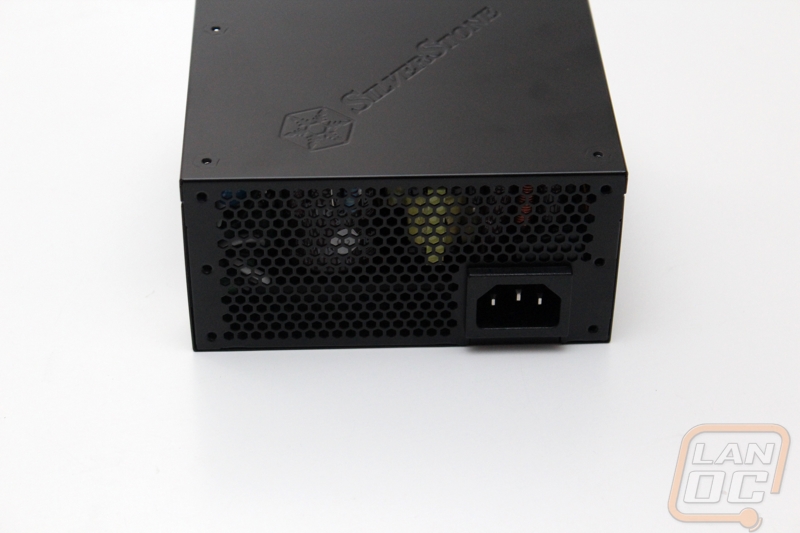
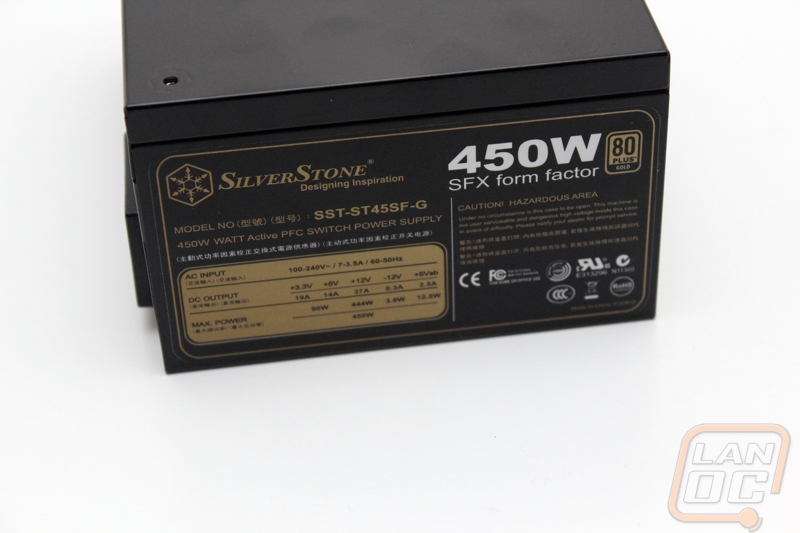
When it comes to picking a power supply for Lunchbox 3 my options were even more limited than on previous builds. When you can go with an ATF power supply, you can worry about details like colors, brand, ect. But with the case that I went with (that I will talk more about on the next page) I had to go with an SFX sized power supply, similar to what I used on Lunchbox 2. SFX Power Supply options come down to only a few options and only one has the power I need and is available in a modular design. That would be the Silverstone ST45SF-G with its 450 watts of power and black chassis. This is the same power supply I used in Lunchbox 2 and not only has it proven itself to be reliable, no one else has given Silverstone any competition in this market. They are still the only option.

Case
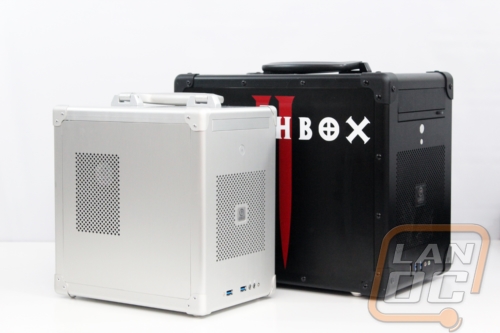
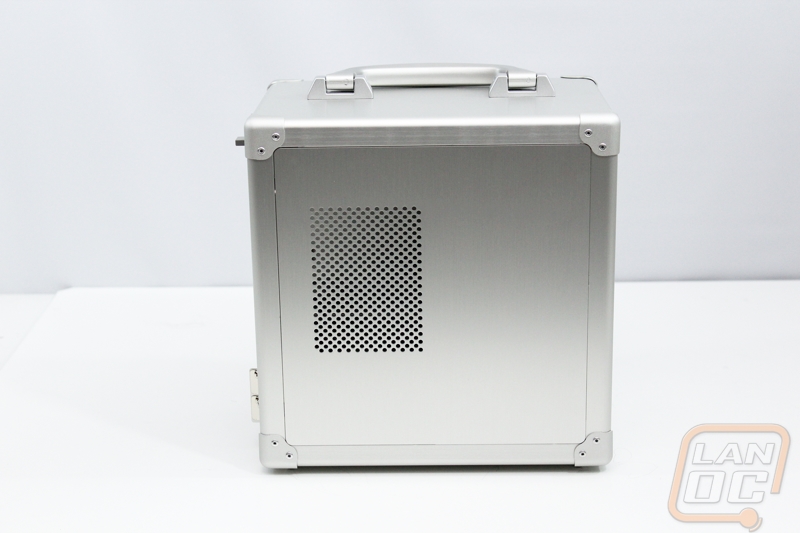
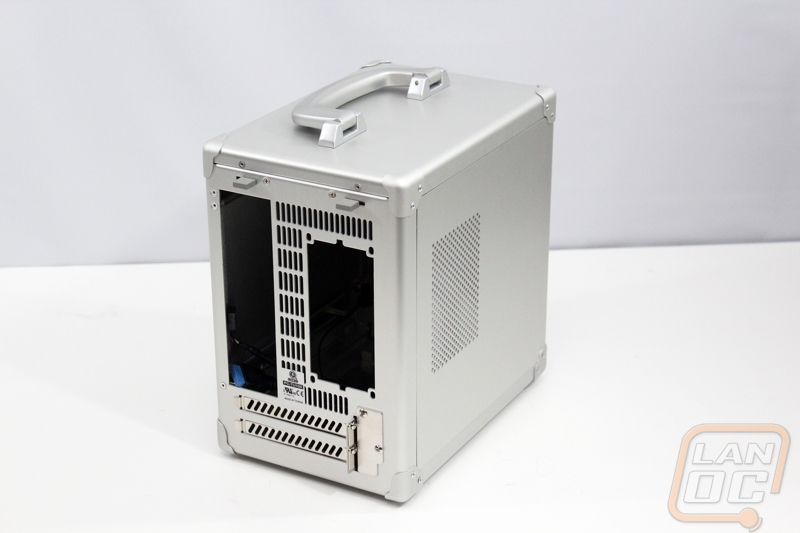
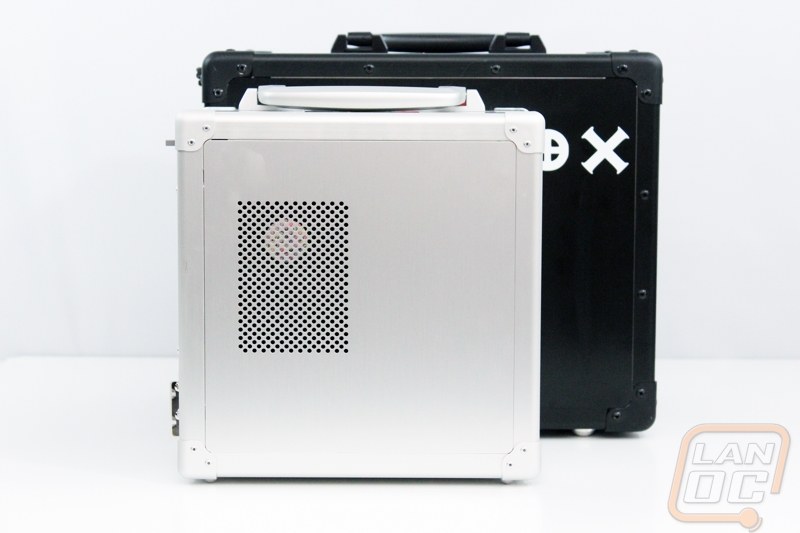
Beyond all of the go fast parts, the case for Lunchbox 3 was the most important decision. Everything else was designed to work around this specific case due to its size. As I mentioned before, our last build used the Lian Li TU-200, an all-aluminum case from Lian Li with a briefcase like handle on the top that made carrying it to and from events very easy. That case wasn’t flashy in any way, but its size and overall power got a lot of attention at various events that I brought it too as well as when I used it at LanOC events as a loaner PC for people who had PC problems. After carrying your heavy PC all the way to a LAN you can’t help but be a little jealous of the guy who can carry everything into the building in one trip without a cart or any help. When it came time to do Lunchbox 3, I really didn’t want to lose that ease of use. So when Lian Li introduced the TU-100, a smaller version of the TU-200, I knew right away that it was perfect for our next build.
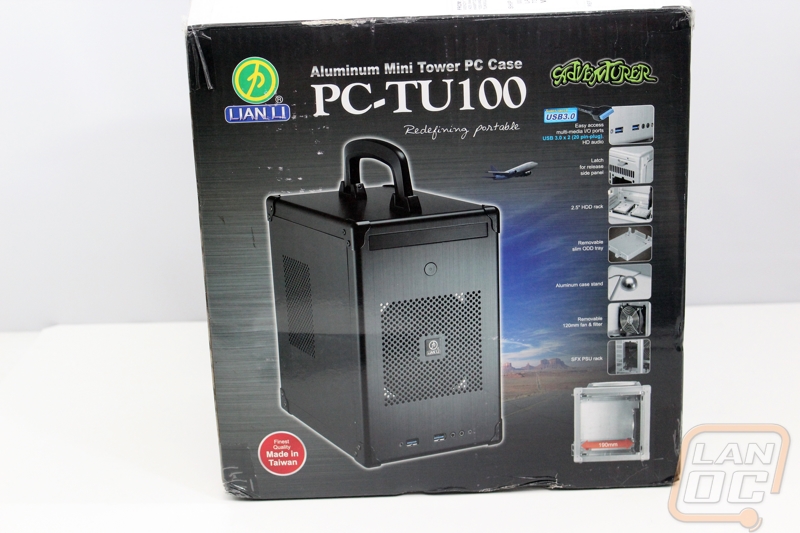
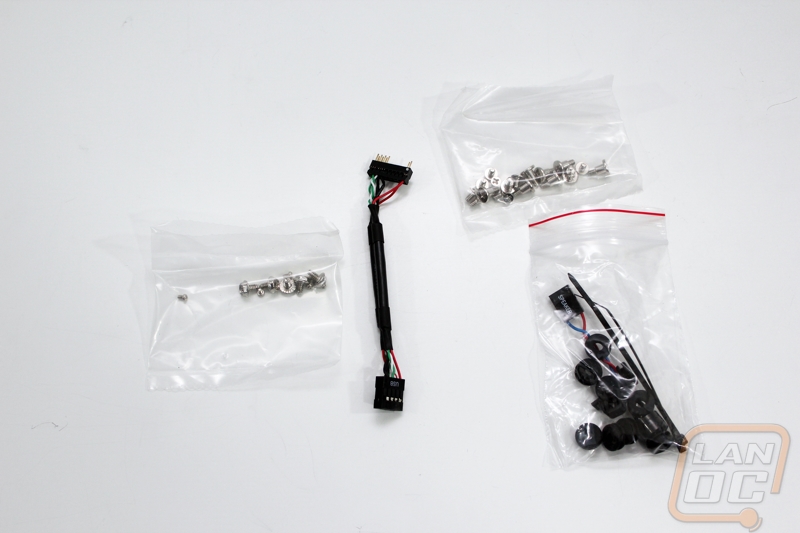
The TU-100 came in a box that was very similar to the TU-200, only smaller. The front of the box has a photo of the case itself, but along with that Lian Li included 8 other small photos along the side with each showing a different feature. It’s actually hard to believe that a case this small could have that many features in the first place really. On the side of the box they also included a full specification listing, something that I wish more manufactures would do.
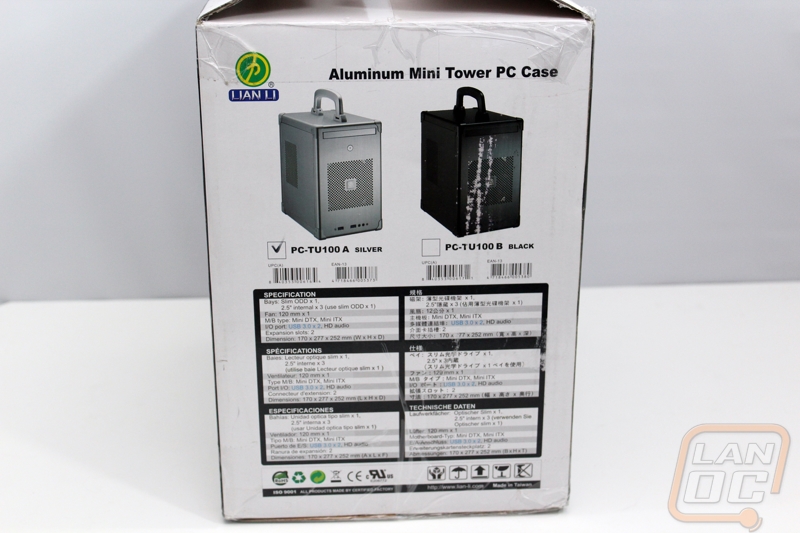
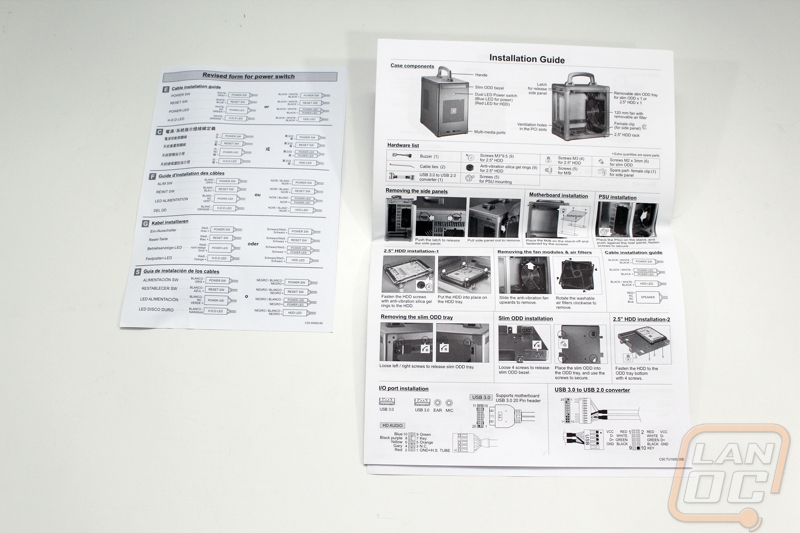
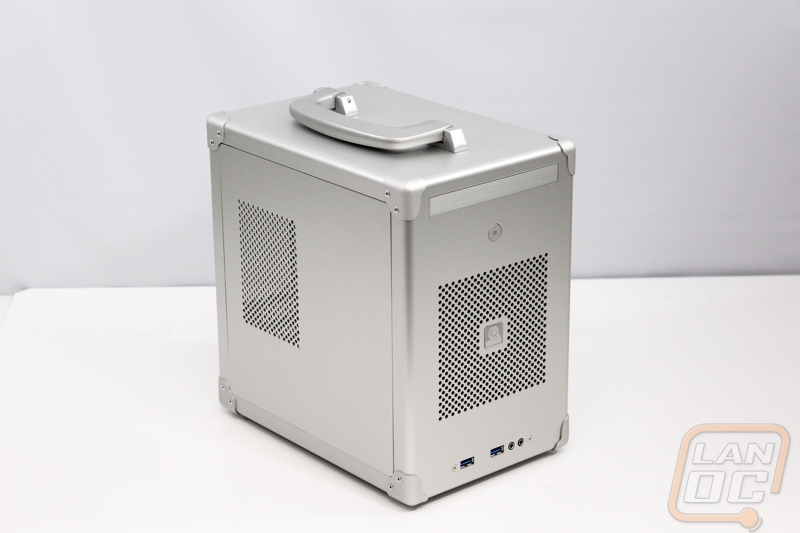
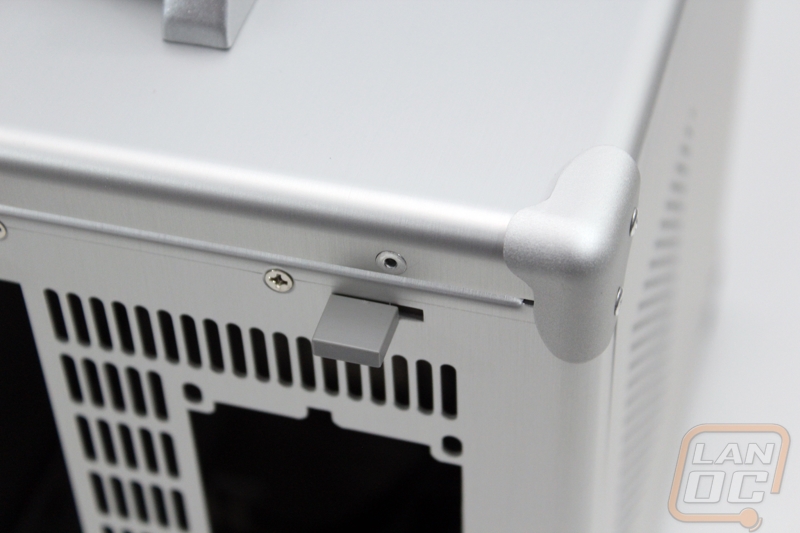
The TU-100 is available in both silver and black, just like its bigger brother. The overall exterior styling is a lot like the TU-200. Lian Li built the TU-100 with rounded edges but to improve its durability even more they doubled up on the corners with corner guards. This isn’t something you would see on most cases and is a clue that the entire case was designed specifically to be transported.
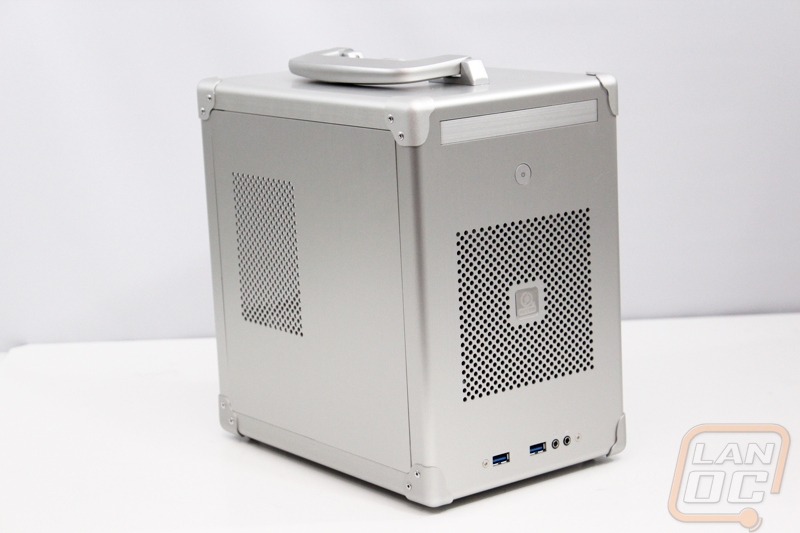
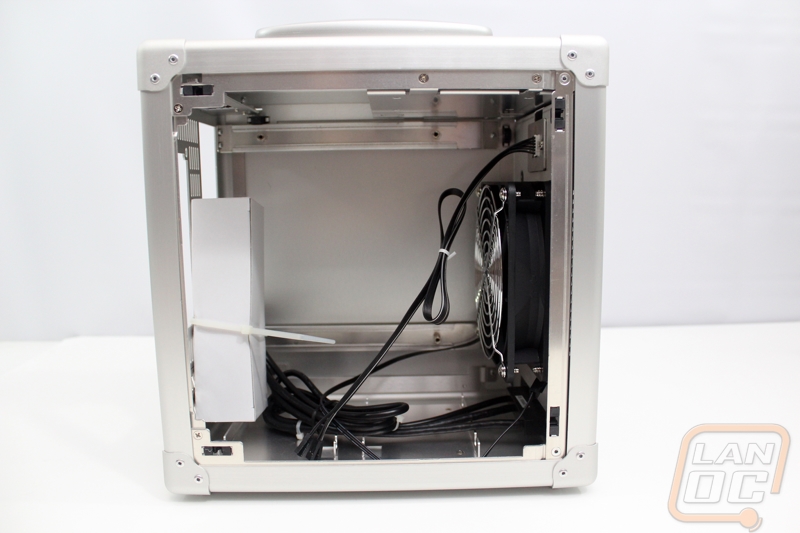
On the left side of the case, the side panel is flush mounted and has a large area of ventilation holes machined into it to help provide fresh air for your power supply intake fan.
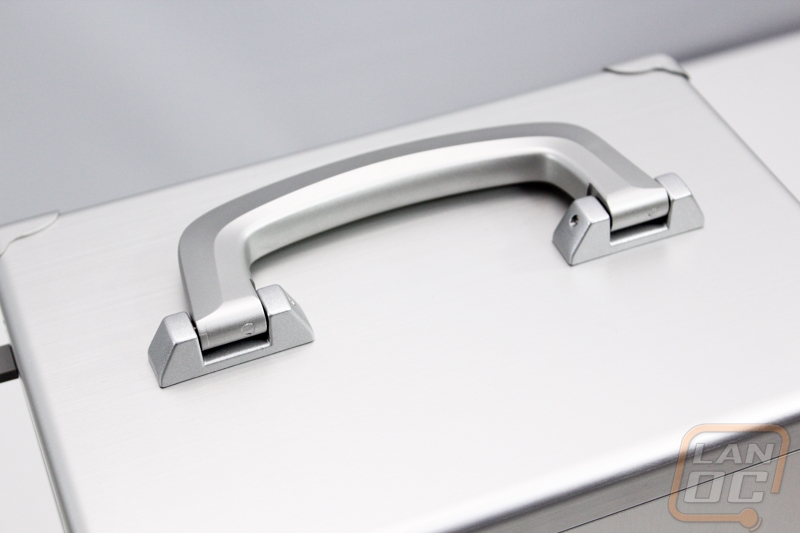
The top carrying handle has to be the TU-100’s most distinguishing features. The handle looks like it was taken off of someone’s briefcase, giving it a clean look. The handle is made of plastic, but has a solid feel. I doubt you could break it without doing a lot of damage to the rest of the case/components.
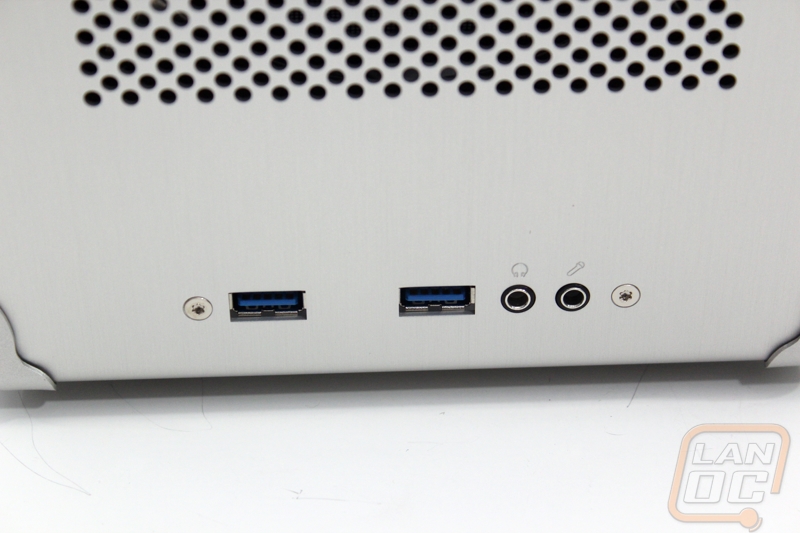
The front of the TU-100 is basically where everything is going on. You have ventilation for the cases 120mm front fan in the middle. Lian Li slipped in their logo in there as well without going to crazy with it. Up top you have a slim disc drive bay where you can still run a laptop style drive if you need one. To keep things simple they only went with a single power button with double LEDs. This is down from a power and reset button along with power and HDD LEDs. The LED lights bleu for power and turns purple when you have HDD activity. Lastly, down at the bottom you have two USB 3.0 ports as well as front microphone and headphone ports.
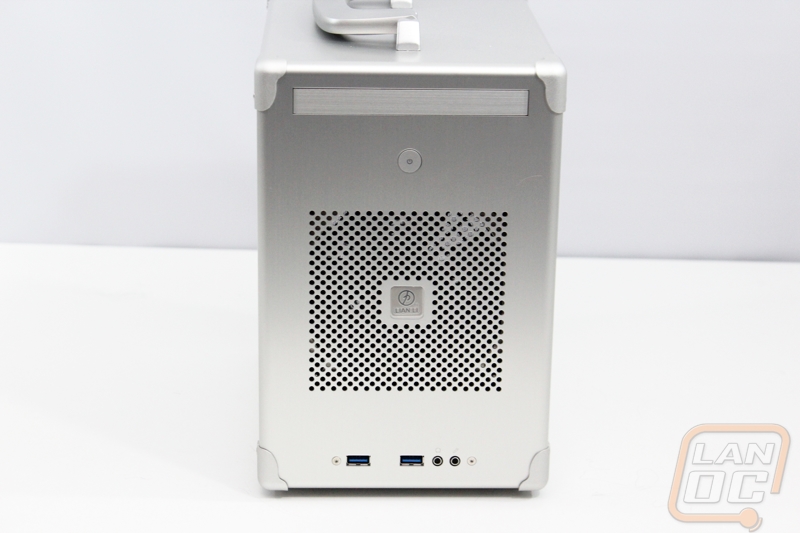
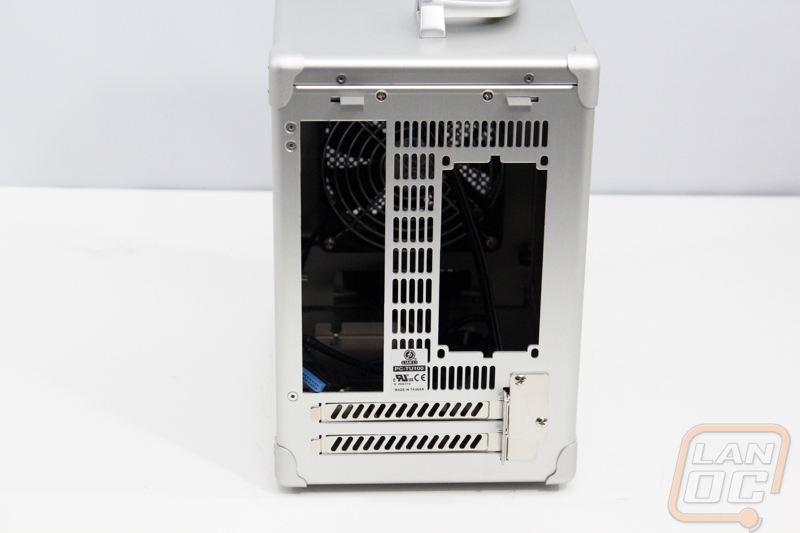
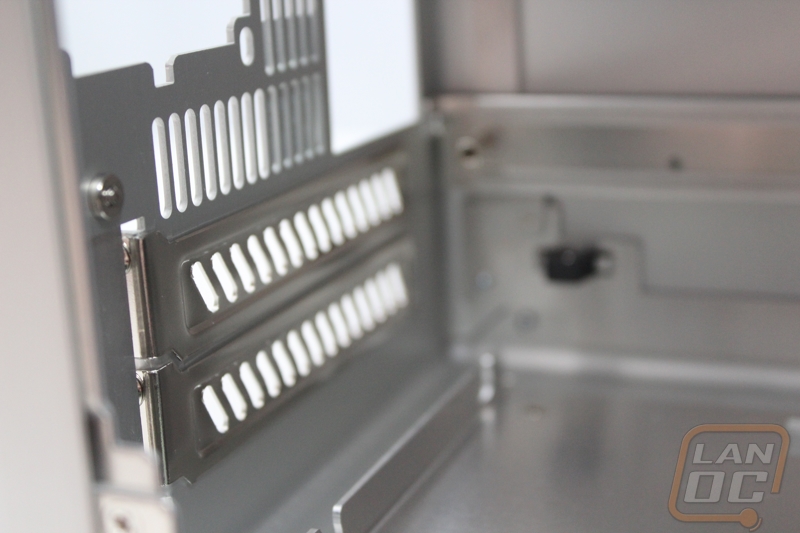
The back of the TU-100 has a lot going on. First you will notice that any area that isn’t taken up by the rear I/O panel, PSU mount, or PCI slots is vented to help improve the cases airflow. For PCI slots you get two, just enough to run a two slot wide video card. The PSU is mounted directly above the rear I/O panel and only supports a SFX sized power supplies. The way the power supply is mounted is the traditional way, this is different than the TU-200 that used a removable mount that allowed you to slide the power supply out for more access to your components. Up on the top of the back panel you will also find the release handles for the side panels. When you pull on them, they push the side panel out slightly to allow you to pull it off. There aren’t any thumbscrew locks this time around, nor do I think they were needed before. This helps give the case its slick flush mounted side panels without any handles or dents to make taking the door off easier like you see on a lot of other cases.
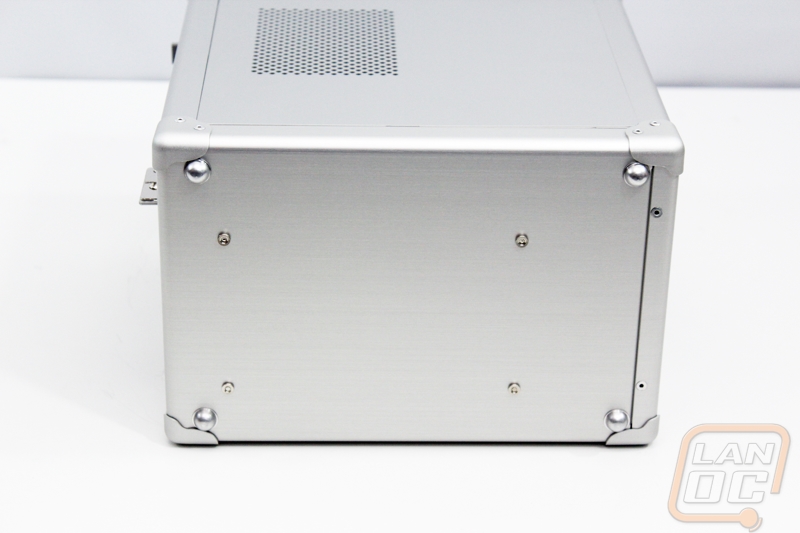
On the bottom Lian Li went with metal domes for feet. This has to be one of the only issues I have with the exterior of the case really. I would much rather have rubber feet that are going to grip on the plastic tables uses at a lot of LANs. It also doesn’t help that the metal on these “feet” also leaves grey marks on my photography area as well.
The interior of the TU-100 is compact to say the least. Because of that Lian Li had to get creative in order to be able to pack in room for multiple drives, cooling, and a disc drive.
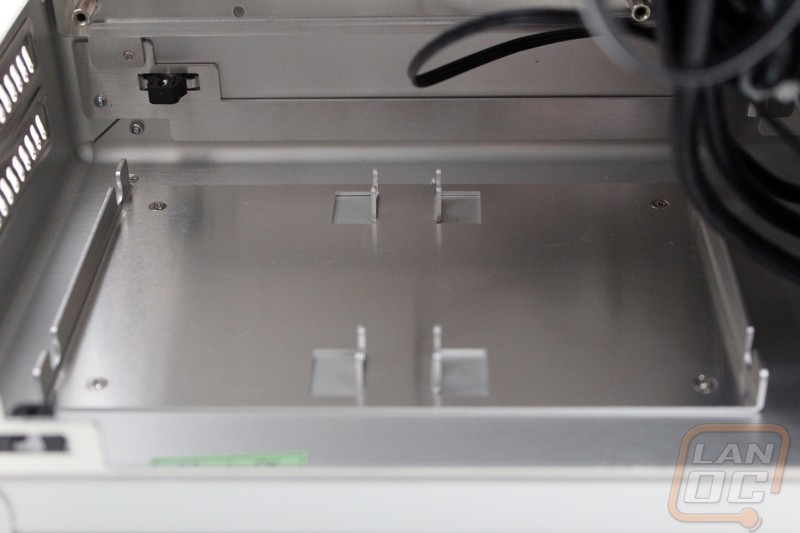
The two main drive bays are down on the bottom. You attach rubber mounts to your 2.5 inch SSD’s or hard drives and then you push them down to lock them into place. This also doubles as a way to keep vibrations down as well. This does mean the drives are tight up against the bottom of the case and you will have to work with your cabling to get the power connections plugged in, especially when it’s not the power plug on the end of the cable. You can actually mount a third drive up top inside of the slim disc drive bay if you choose to not use a DVD or blue ray drive as well.
I mentioned it before, but the TU-100 comes with two PCI slots to allow for double wide video cards, of course the card has to fit length wise as well. You can also see how tight the space is between the drives and the video card area. They didn’t waste any space in this case.
This case also uses the same rail system for motherboard mounting that I mentioned in our last Lian Li case. In this situation I like it a lot more, mostly because it doesn’t leave room for big open areas once you install the motherboard here. This also helps keep the weight down, something that is even more important when you are transporting this PC often. Back behind the motherboard you might as well not plan on being able to run cabling. There is very little space between the rails and the side panel. I suspect you would have better luck actually running cabling in between the motherboard and the rails due to the space that the risers give you, but you have to be very careful with this because the motherboard can easily rub or poke into cables and cause a short later on.
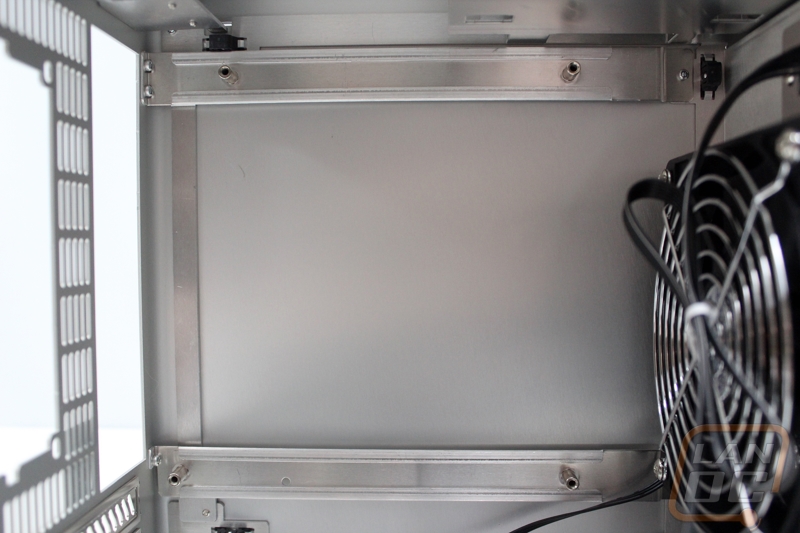
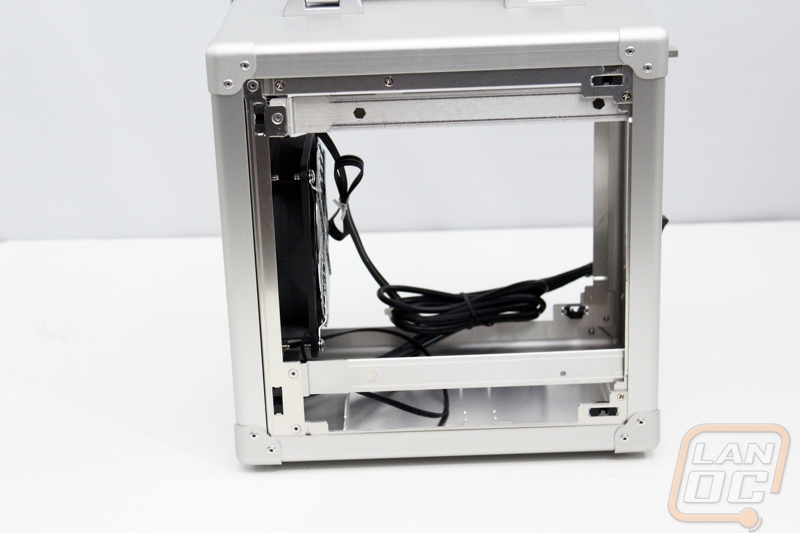
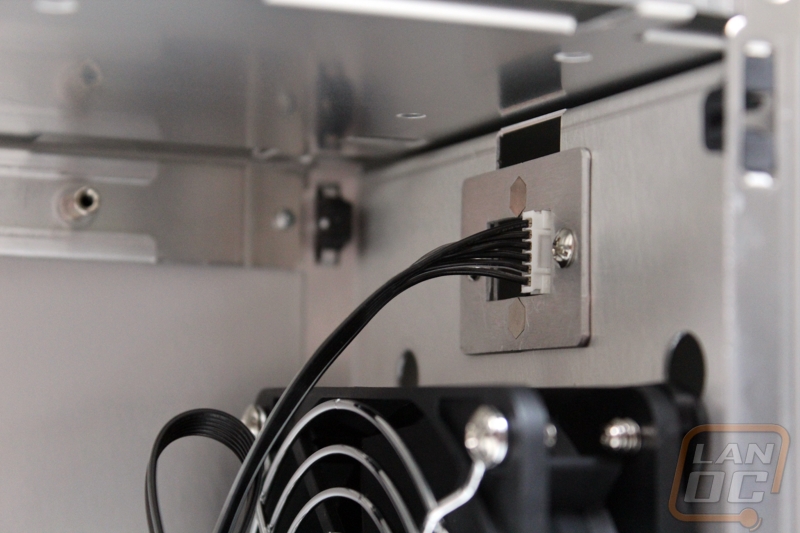
Here is a shot off where the front panel power and LEDs plug in. They slipped it in just above the 120mm fan. Also, it’s a nice touch to include a fan grill on the inside of the case for this situation. With this being such a tight case, there is a good chance if you didn’t have the grill you would end up with cables pushing in and hitting the fan.
When you put the TU-100 up next to our Mini-ITX motherboard you can finally get a better idea of its actual size. This is also a sneak peak at the artwork on the back side of the case as well!
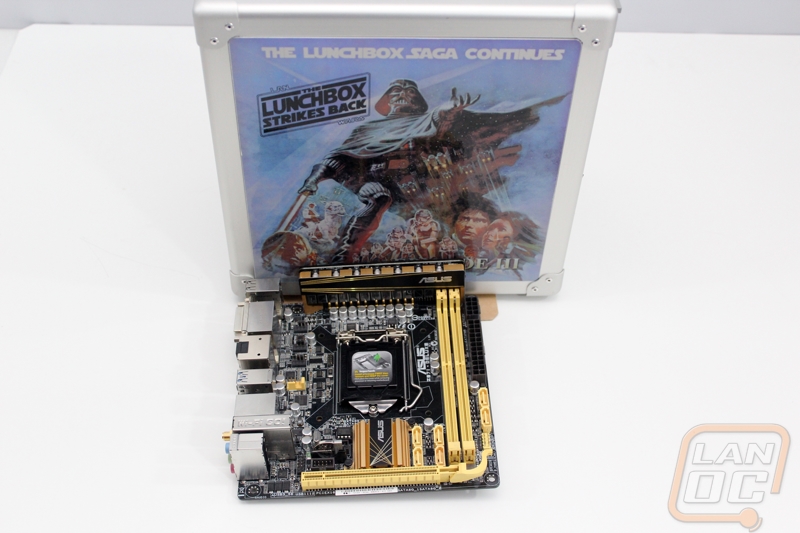
The interesting thing about the exterior of the TU-100 is at first glance you could easily mistake it as the TU-200. It isn’t really until you put them next to each other than you can really see the difference. The TU-100 is considerably smaller in every aspect, especially in front to back length. This is why it requires the use of a card like the Asus GTX 670 DirectCU Mini over a normal length card. You do still get the same styling and the same carrying handle that made the TU-200 a popular choice.
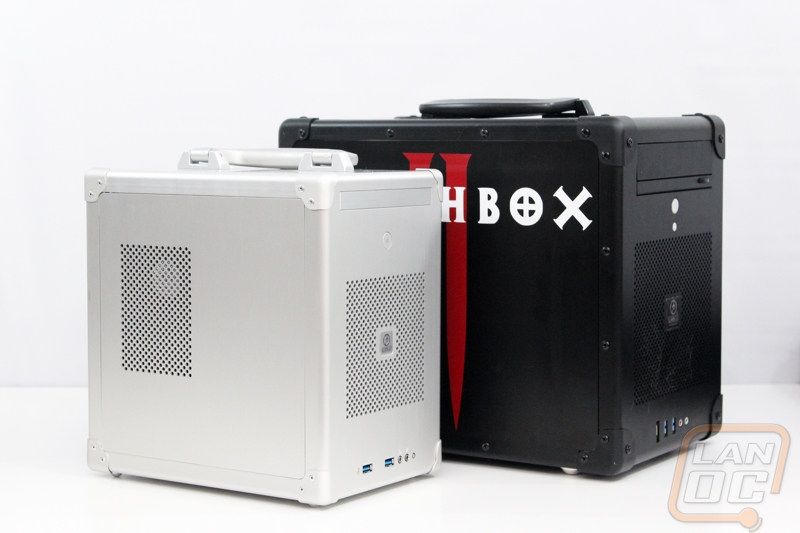
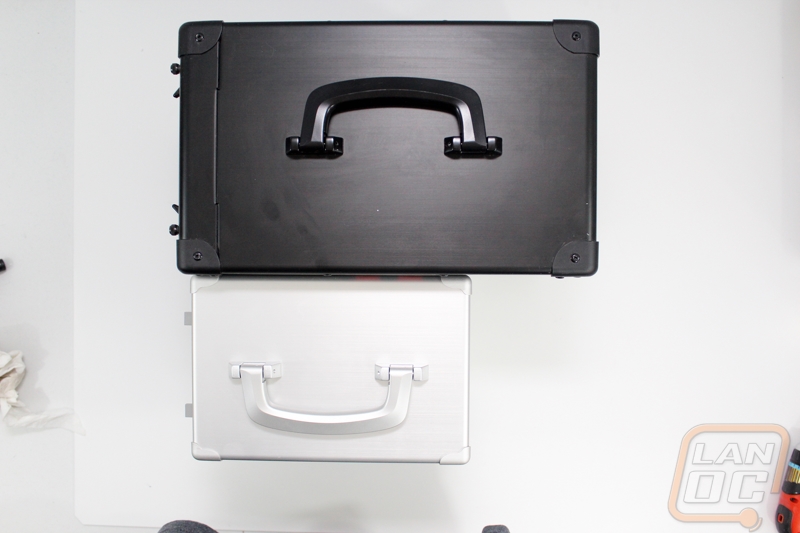
The size difference is especially noticeable when you look at the two cases from above.
Cooling
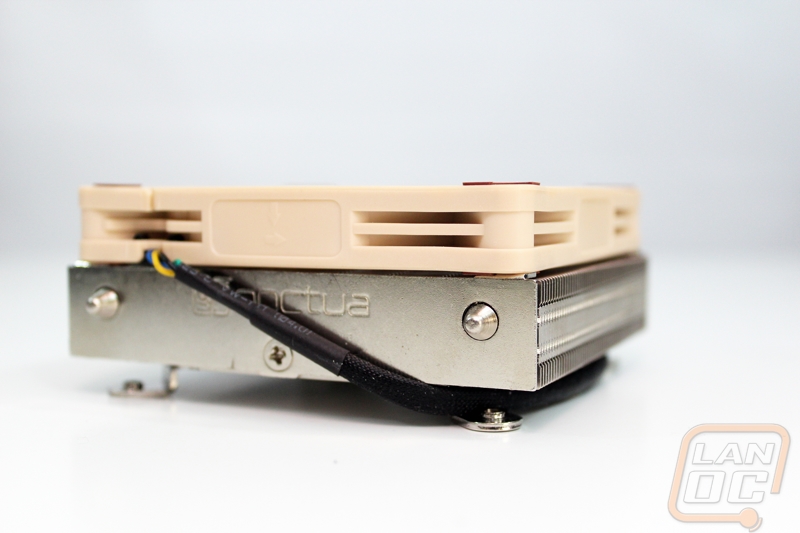
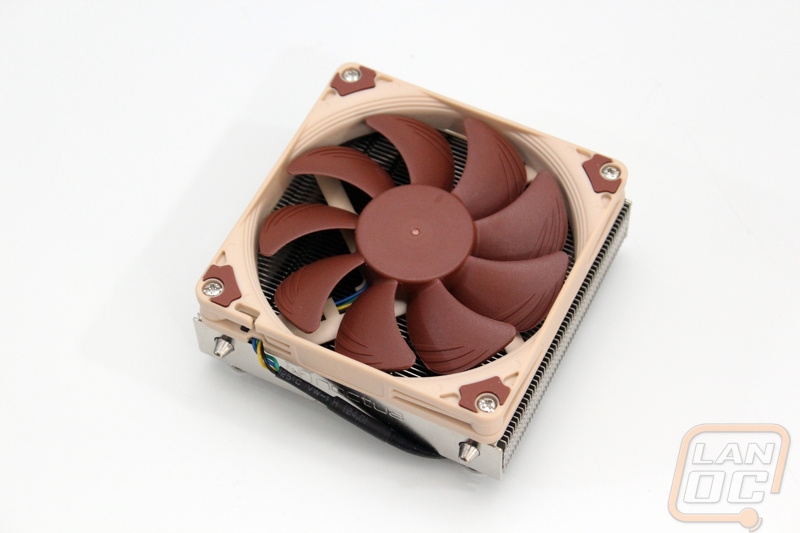
Keeping everything cool in your PC is always important but it is doubly important when you are working in a case as small as the TU-100. Last time I went with a heatsink from Thermalright and it performed perfectly. This time around I was hoping to save a little more space so I went with Noctua’s low profile heatsink, the NH-L9i. The I means this is the Intel model, Noctua also offers an AMD specific model. I could have made the Thermalright cooler fit, but the Noctua has a total height of 37mm’s including its fan leaving as much room as possible in the case itself for overall airflow. With everything being packed into such a small space, having room for air to move is very important. The NH-L9i is noticeably shorter than a stock cooler even and from the look of it there is actually has more heatsink surface area.
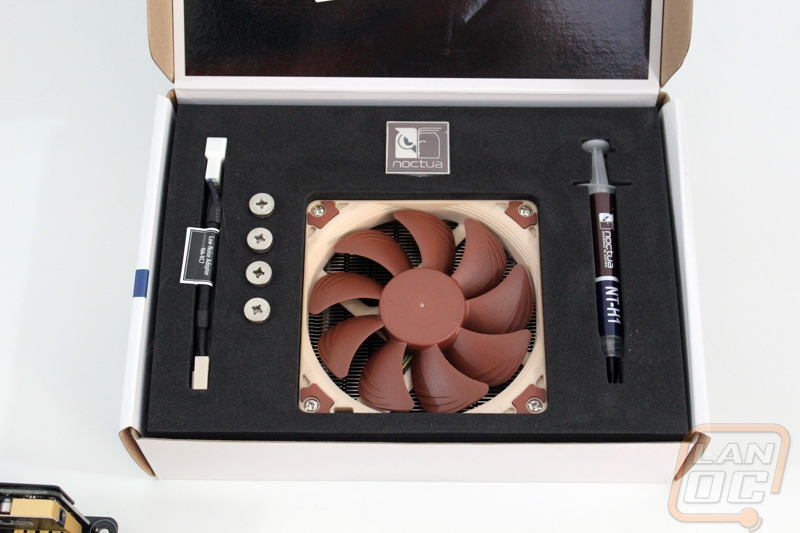
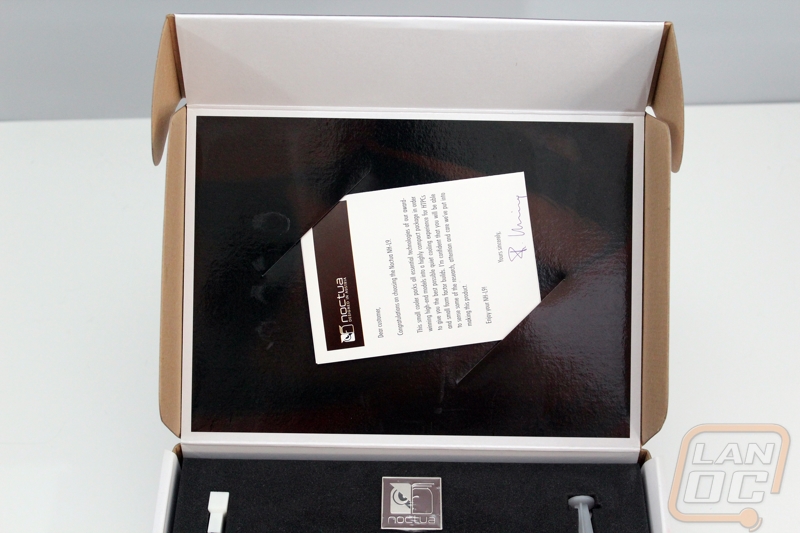
The NH-L9i came in a much smaller box than the normal Noctua heatsinks. When you open it all up everything is perfectly in order with each part having its place cut out in the foam. There are a surprisingly low number of parts all together actually, partly due to Noctua splitting up the models between Intel and AMD. You get a low speed fan adapter, metal painted Noctua case badge, four mounting screws a full tube of Noctua NT-H1 thermal paste, and the heatsink itself of course. The installation instructions are tucked up in the lid of the box as well.
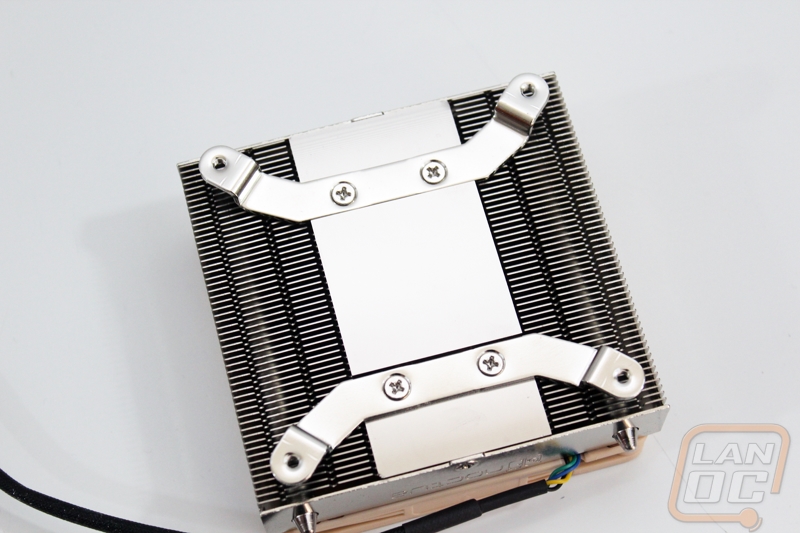
With the heatsink out I can finally see how amazingly low profile the design is. To go with the short heatsink Noctua used a new low profile fan design as well that fits the heatsink perfectly. Each corner of the fan has rubber pads to keep any vibration the fan might create from vibrating anything else in your PC. This is especially important with this design because if you flip the heatsink over they used an extremely simple mount design that isn’t going to absorb any vibration. I will talk a little more about the actual installation in our final article though.