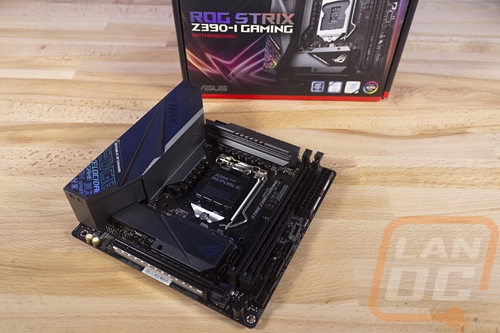
BIOS
To take a look at the UEFI on the Strix Z390-I I put together a basic video that goes through and opens up all of the options in the BIOS. I did this rather than just having a few pictures to allow everyone to see what options you have and to be able to pause at any point to get a closer look. You first boot into the EZ Mode, this is a single page where you have a lot of the normal information you might be looking for like all of the installed drives, memory, CPU, and BIOS revision. You can look at the fan profile and speeds as well as see a graph of CPU temps, voltage, and motherboard temps. You can turn on XMP and rapid storage here and the boot order is drag and drop. Basically everything the average user might need to get into without any of the more complicated options that you can cause problems or damage with.
The advanced mode dropped me right into the Ai Tweaker tab. This is where Asus has all of the overclocking focused options. Now all of the motherboards on the market have an overclocking focused page, but the number of options that Asus lets people get into, even on this ITX board, is on a different level. The My Favorites tab is just where you can right click and add any BIOS option to put often used things in one easy access location. Then the main tab is the normal home tab for most older BIOS where you can see the CPU model and BIOS revision as well as set system language. So 1/3 of the video is filled with the AI Tweaker options and another 1/3 is just on the Advanced tab. This is because both are filled with options. I think each take me as long to click and scroll through the options as it took for my last non-Asus motherboard video altogether. The Advance tab is basically where every other peripheral or chipset related option can be found.
The Monitor tab lists out the reading of every sensor on the motherboard. This includes temperatures and fan speeds of course. But also voltage readings. You can also get into the Qfan options down at the bottom to set up how fan speeds ramp up and to run the fan tuning that adjusts everything to your fans. The Boot tab is about what you expect. You can adjust boot settings like turning on the ROG logo at the start, set how the PC react to a power loss, and turn on newer windows boot features. You can also set your boot device or boot override to a specific device for a one time override.
The Tool tab is where you find all of the other tools. The main one here is the EZ Flash 3 utility where you can update your BIOS. You can download the update from a server here or what I prefer is to download it in windows to make sure I have what I want and then save it on an easy to find location and in the BIOS tool, you can read the file right from your installed hard drive, no flash drive needed. There is a hard drive secure erase tool and overclocking profiles can be found here as well. The Armoury Crate option is the new feature here. This is where you can turn this option on or off. The Armoury Crate (yes they used the British spelling) has been a little controversial. It bakes in a software notification from the BIOS to your windows install that will prompt to install (without internet) a few key drivers like your network driver to get you up and running. I gave it a try and I loved that I didn’t have to load my NIC driver on a flash drive from another PC. That said I also understand the security concerns some people have had with the idea of opening up a way to push software into your windows install. This option might be better placed somewhere more visible, but it is nice there is at least an option to turn it on and off.
