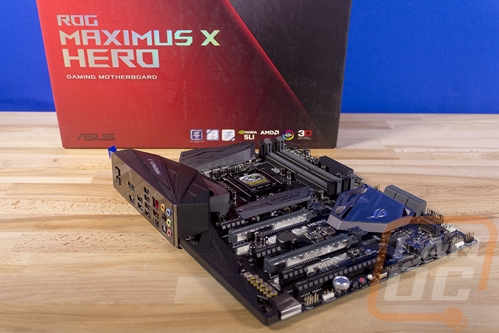
BIOS
So to take a look at the BIOS, rather than use photos I recorded a basic video. I just run through the UEFI and try to open up every option that way you can see all of the options available and trust me there are a lot. This video ended up being much longer than most of my past videos purely because of the options the Hero has available.
As usual, you have the ROG logo in the middle of the screen when booting up. When I landed in the UEFI I) was in the advanced mode on the extreme tuner page. For overclocking you couldn’t ask for a better landing page to keep things simple. That said I would still prefer that the first time in the UEFI that it should go to the EZMode just to keep people who don’t know what they are doing from getting into anything damaging. The EzMode is a single page that gives you a lot of information on the CPU and memory, fan speeds and things like that. Then you have the option to turn on XMP profiles and change the boot priority with a drag and drop setup. Those are the two main things most people will need to mess with.
Back in the Extreme Tweaker section, I was blown away at the options available. Obviously, this is an ROG board and you have all of the normal stuff, but digging into it you will also find lists of profiles already made up for you depending on the ram configuration all the way down to what chips and if it is single sided or dual sided. Of course, you can go in and manually set every option yourself if you prefer as well.
The Advanced page is basically the home for every other chipset, CPU, or peripheral option that isn’t overclocking specific and a few that are like Hyperthreading. That includes all of the SATA setting options for things like naming your SATA ports. You can also turn off all of the options that you aren’t using. The Monitor page lists out every sensor reading from fan speeds, temperatures, and voltages. Speaking of a few of those things, there is a hardware monitor on the right side of the screen for all of the pages that show clock speeds and voltages for the CPU and memory. Then the Boot page has your boot order options, boot options like turning the logo on or off, windows fast boot, and also options to override and force a one time boot to a specific device.
The Tool page is where you will find some of the most useful things though. Here you can access the EZ Flash 3 utility, this allows you to update the UEFI from the internet or even directly from a windows folder where you downloaded the file without a flash drive at all. There is Secure Erase to wipe old hard drives. And then the Overclocking Profile lets you name and save 8 different profiles to help when overclocking to flip between different profiles or to save an overclock you are working on.
Overall the UEFI for the Hero isn’t really changed when compared to other Asus ROG boards but that is because this setup works well and is easy to navigate. There aren’t issues with mice not feeling right and you can use your keyboard to do it old school as well. But the Hero does have a LOT of options available, especially for overclocking.
