If you aren’t into flashy builds or if you are building a PC to be used in an office environment it seems like it is getting harder and harder to find simple but feature filled motherboards. Thankfully a few of the manufacturers like MSI have Pro focused lines. This is especially important with X299, a platform that overall seems better focused on workstation builds. Well MSI just happened to send over the X299 SLI Plus from their Pro lineup and today I’m going to check it out and see what it has going on.
Product Name: MSI X299 SLI Plus
Review Sample Provided by: MSI
Written by: Wes Compton
Pictures by: Wes Compton
Amazon Affiliate Link: HERE
|
Specifications |
|
|
CPU Support |
Supports Intel® Core™ X-Series Processor Family for LGA2066 Socket |
|
Chipset |
Intel® X299 Chipset |
|
Memory |
• 8 x DDR4 memory slots, support up to 128GB • Quad channel memory architecture with the CPU that supports up to 4-channels DDR4** - X-series processor support DDR4 4133-2133 MHz • Dual channel memory architecture with the CPU that supports up to 2-channels DDR4** - X-series processor support DDR4 4500-2133 MHz • Supports Intel® Extreme Memory Profile (XMP) |
|
Slots |
4 x PCIe 3.0 x16 slots - Support x16/x16/x8 mode with the 44-lane CPU.* - Support x16/x8/x4 modes with the 28-lane CPU.* - Support x8/x8/x0, x8/x4/x4 modes with the 16-lane CPU.* • 2 x PCIe 3.0 x1 slots |
|
Multi-GPU |
Supports NVIDIA® SLI™ Technology • Supports AMD® CrossFire™ Technology |
|
Storage |
• Intel® X299 Chipset • 8 x SATA 6Gb/s ports* • 2 x M.2 slot (Key M) - Supports up to PCIe 3.0 x4 and SATA 6Gb/s - M2_1 slot supports 2242/ 2260 /2280 storage devices - M2_2 slot supports 2242/ 2260 /2280/ 22110 storage devices - Supports Intel® Optane™ Memory Ready for all M.2 slots • 1 x U.2 port *** - Supports PCIe 3.0 x4 NVMe storage • Supports Intel® Smart Response Technology for Intel Core™ processors |
|
RAID |
• Intel® X299 Chipset - Supports RAID 0, RAID1, RAID 5 and RAID 10 for SATA storage devices - Supports RAID 0 and RAID1 for M.2 PCIe storage devices* * M.2 PCIe RAID volume can be created with M.2/Optane Genie. Please refer to user manual for Creating a M.2 PCIe SSD RAID with M.2/Optane Genie. |
|
USB |
• ASMedia® ASM3142 Chipset - 3 x USB 3.1 Gen2 (SuperSpeed USB 10Gbps) ports (1 Type-A port and 1 Type-C port on the back panel, 1 Type-C port available through the internal USB connector) • ASMedia® ASM1074 Hub - 3 x USB 3.1 Gen1 (SuperSpeed USB) ports on the back panel • Intel® X299 Chipset - 5 x USB 3.1 Gen1 (SuperSpeed USB) ports (1 Type-A port on the back panel, 4 ports available through the internal USB connectors) - 8 x USB 2.0 (High-speed USB) ports (4 Type-A ports on the back panel, 4 ports available through the internal USB connectors) |
|
Audio |
• Realtek® ALC1220 Codec - 7.1-Channel High Definition Audio - Supports S/PDIF output |
|
LAN |
• 1 x Intel® I219-V Gigabit LAN controller • 1 x Intel® I211 Gigabit LAN controller |
|
Internal I/O Connectors |
- 1 x 24-pin ATX main power connector - 1 x 8-pin ATX 12V power connector - 8 x SATA 6Gb/s connectors - 2 x USB 2.0 connectors (supports additional 4 USB 2.0 ports) - 2 x USB 3.1 Gen1 connectors (supports additional 4 USB 3.1 Gen1 ports) - 1 x USB 3.1 Gen2 Type-C port - 1 x 4-pin CPU fan connector - 1 x 4-pin Water Pump connector - 4 x 4-pin system fan connectors - 2 x Front panel connectors - 1 x Front panel audio connector - 1 x RGB LED connector - 1 x TPM module connector - 1 x Virtual RAID on CPU connector - 1 x Thunderbolt add-on card connector |
|
Back Panel I/O Ports |
- 1 x Clear CMOS button - 1 x BIOS FLSAHBACK+ button - 1 x PS/2 keyboard/ mouse combo port - 1 x BIOS FLASHBACK+ port - 4 x USB 2.0 Type-A ports - 1 x BIOS FLASHBACK+ port - 4 x USB 3.1 Gen1 Type-A ports - 2 x LAN (RJ45) ports - 1 x USB 3.1 Gen2 Type-A port - 1 x USB 3.1 Gen2 Type-C port - 5 x OFC audio jacks - 1 x Optical S/PDIF OUT connector |
|
Dimension |
• 12 in. x 9.6 in. (30.5 cm x 24.3 cm) • ATX Form Factor |
|
Mounting |
9 mounting holes |
|
Rear I/O |
Clear CMOS Button Keyboard / Mouse USB 2.0 Dual Intel® LAN Golden Audio Connectors BIOS Flashback Button USB 2.0 / BIOS Flashback+ USB 3.1 Gen1 USB 3.1 Gen2 Type-A/C Optical S/PDIF-Out |
Packaging and Accessories
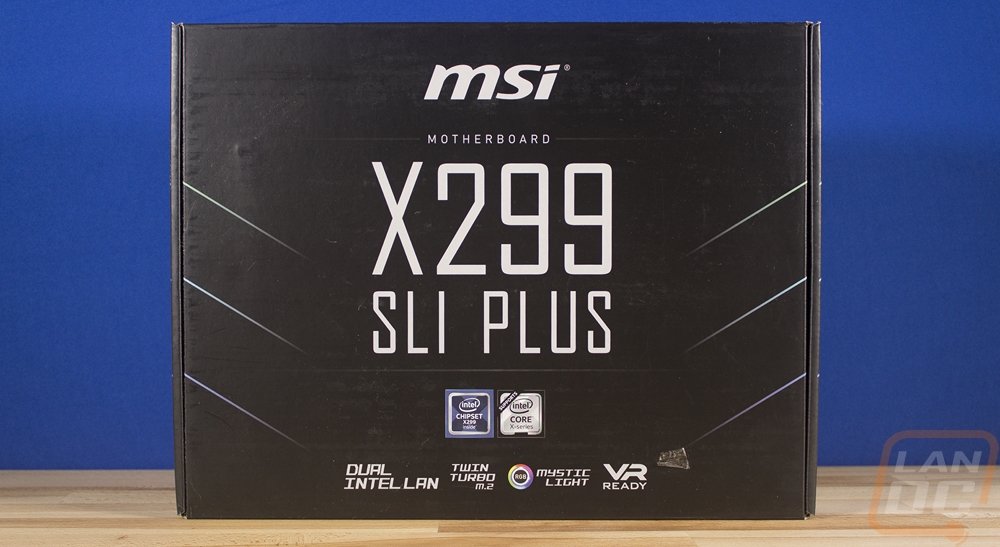
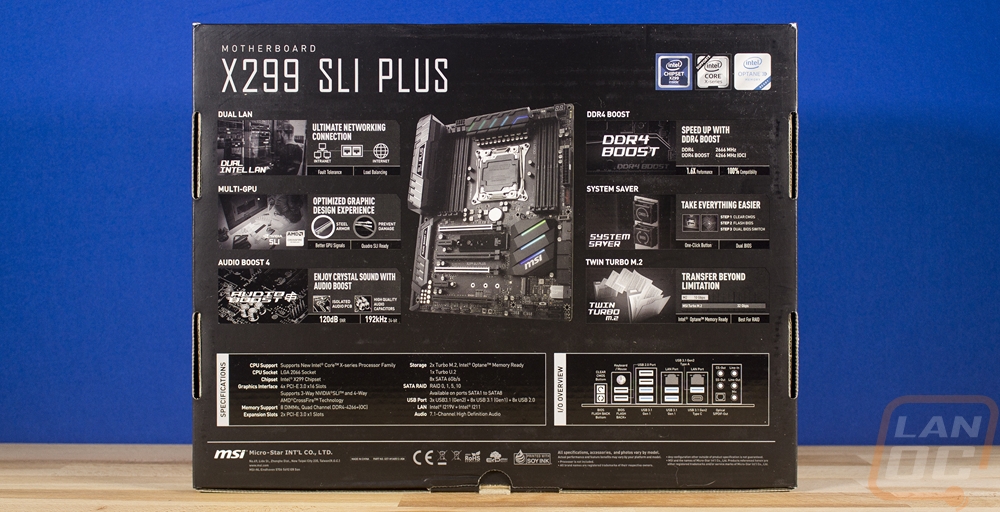
I love that MSI sticks with the same simple look on the packaging of their Pro focused boards like the X299 SLI Plus. You get a good idea right away what to expect. This one has the model name in huge letters in the center with MSI branding up above. There is a black background with small slashes on the sides as the main color, just like the board. Down on the bottom, they do have a few features highlighted as well as the two Intel logos for the X299 chipset and the CoreX CPUs. On the back, we actually have a real photo of the board. Around it they touch on those same highlights as were on the front but this time with a little more information. Then down on the bottom, there Is a short specification listing as well as a line drawing of the rear I/O to make sure you have the connections you need.
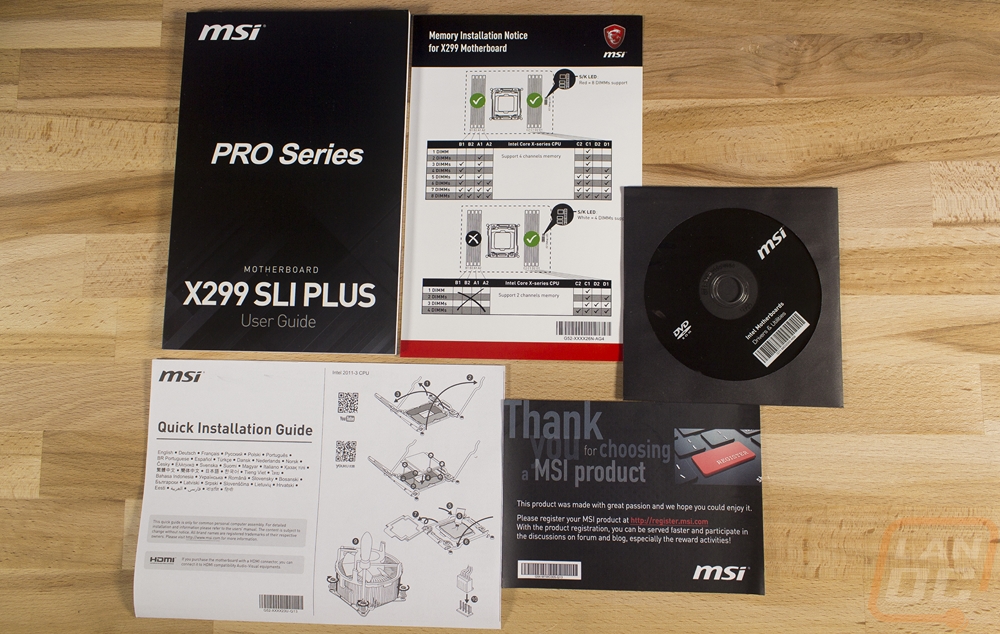
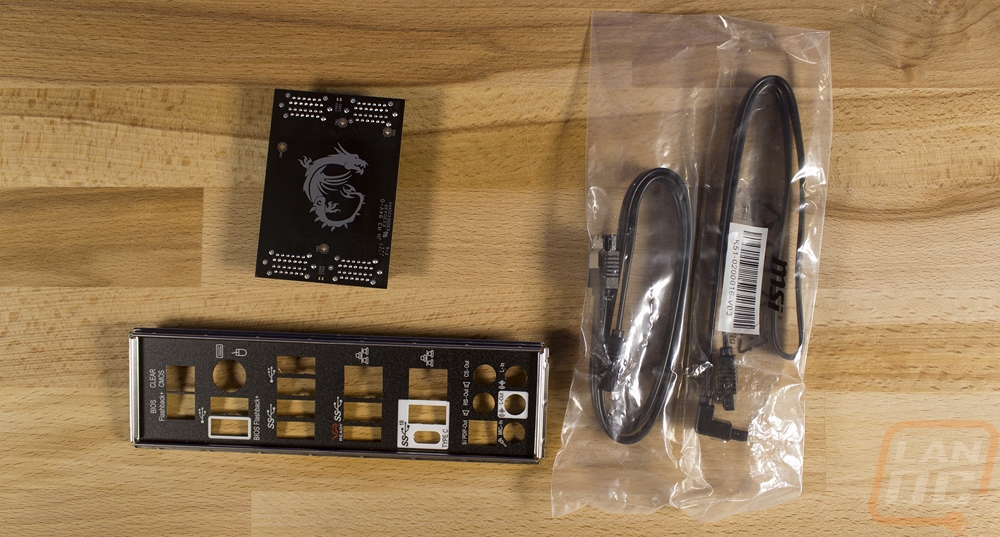
Inside the board, itself comes wrapped up in the standard static protective bag and sits on its own cardboard tray. There is a small stack of documentation with the board as well. You get a thick user guide, an installation guide, a warranty card, and they also have a paper that explains which ram slots work depending on your CPU. They also include a software/driver DVD although I always recommend downloading the latest versions when possible. Then for accessories, you get two black SATA cables, one with a right angled connector, a black PCB HB SLI bridge, and a blacked out rear I/O shield as well. The I/O shield has a few white touches around key connections and white labels for each as well.
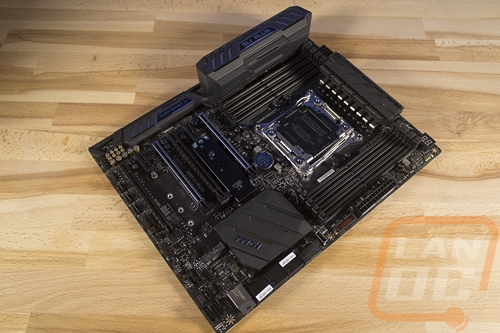
Board Layout and Pictures
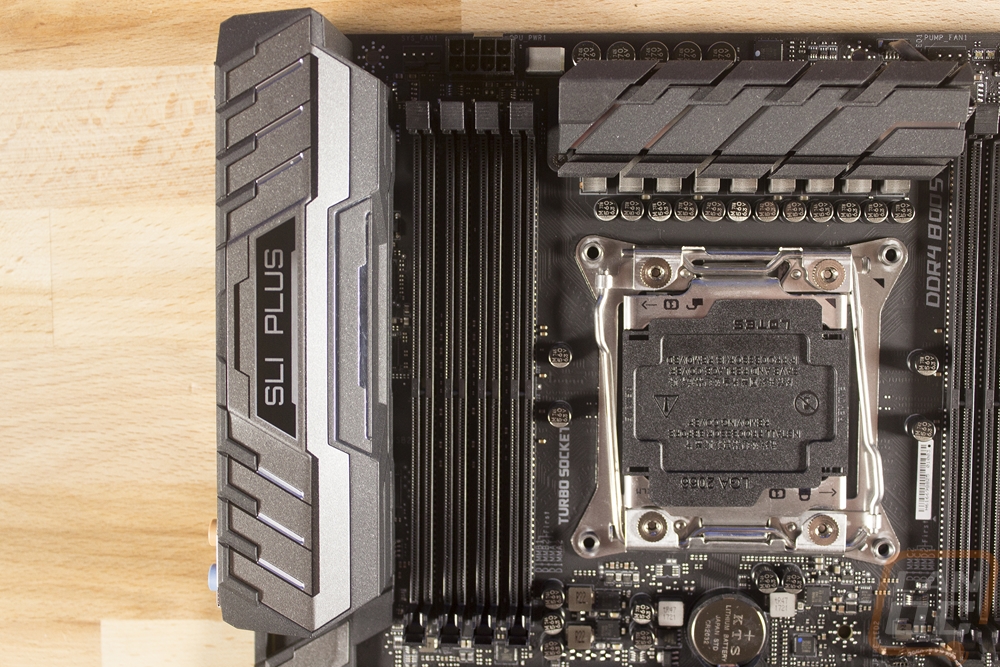
Well like I said, the overall look of this board is simple and clean. It has a flat black PCB, black heatsinks, all black plastic, and then dark gray shields over the rear I/O and audio bits. There are a few small RGB touches in the heatsinks but overall they did a great job of avoiding any of the flashy colors, over the top heatsink designs, and anything else that is going to make you embarrassed to of had in your PC when you are much older. It is a full ATX board and as you would expect given the name, it runs on the recently introduced X299 chipset, has an LGA2066 socket that runs the new Core X CPUs. I don’t want to dive too much into the complex varying features of the Core-X line of CPUs that gives you different PCI lanes depending on the CPU, but MSI did build this board to support the full quad channel memory and PCI lanes so expect features to drop a little if you run a mid or low-end CPU, but I will get into that later. The murdered out look of the all black board is only broken up by the silver on the CPU socket and the silver on the PCIe shields.
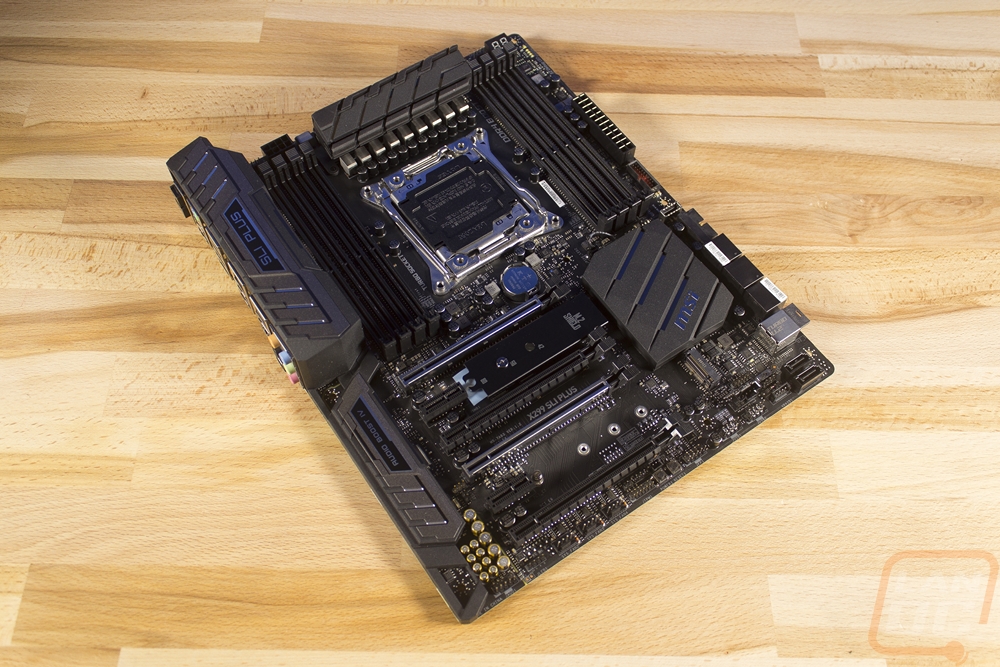
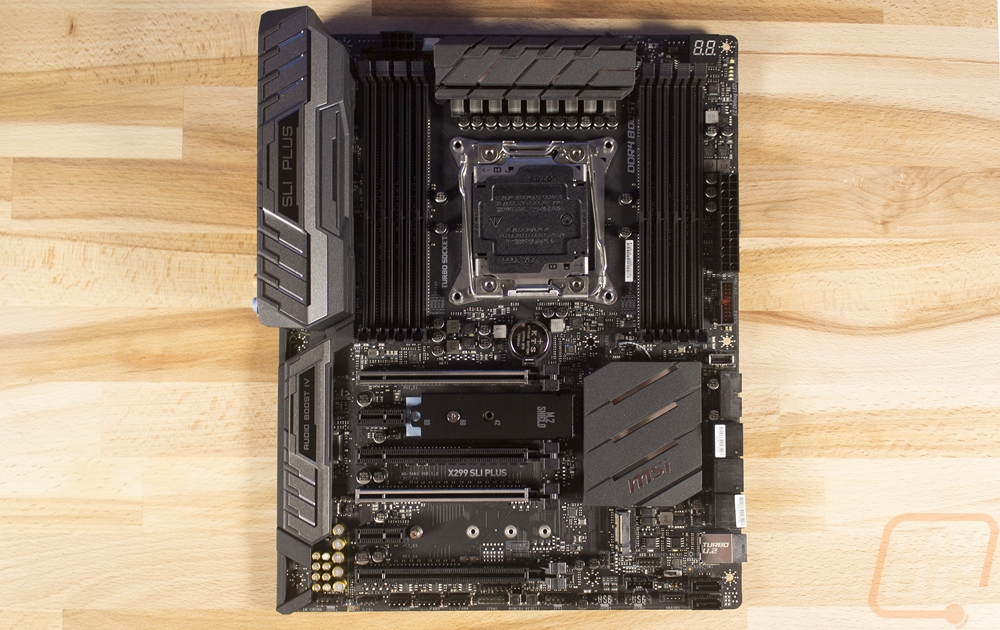
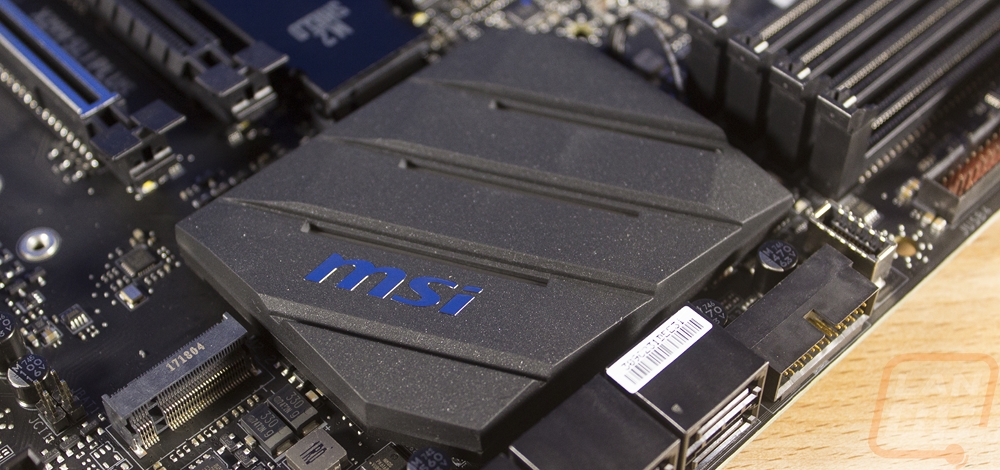
For cooling, there are two heatsinks. One is up above the CPU that is there to cool the PCH and VRM and the second is down in the bottom right to cool the chipset. Both have built in lighting, though each is just limited to a few thin strips. Both have a dark gray finish as well. The VRM heatsink has a few cuts in the underside for ventilation but this isn’t a huge heatsink as well. The SLI Plus isn’t really an overclocking focused board so the cooling should be fine. The chipset heatsink is low profile to help it clear the video cards and other than the slits that have the RGB lighting in them there isn’t much going on really. It has the MSI logo and that’s it.

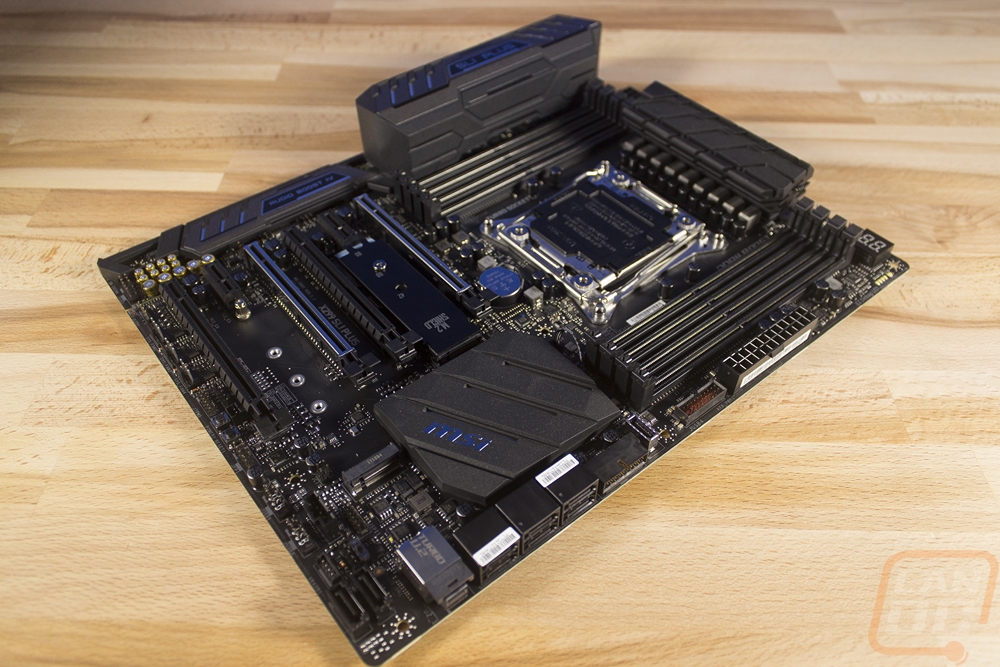
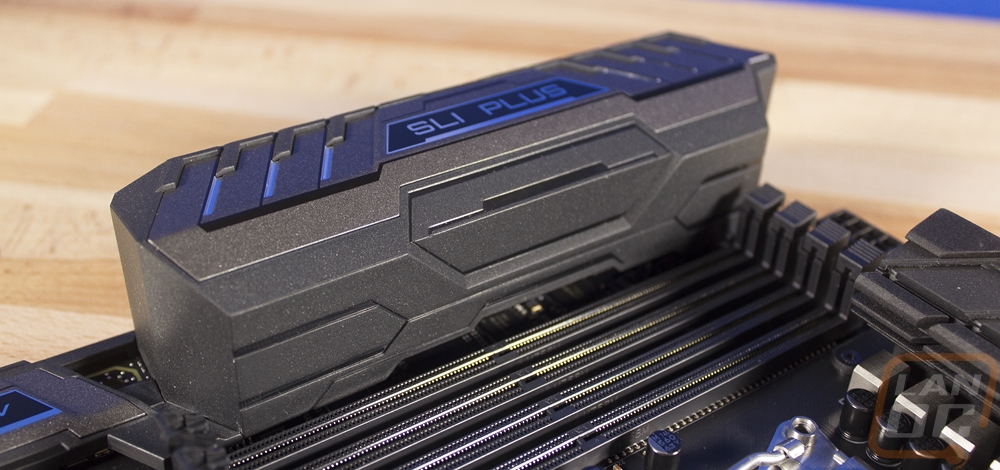
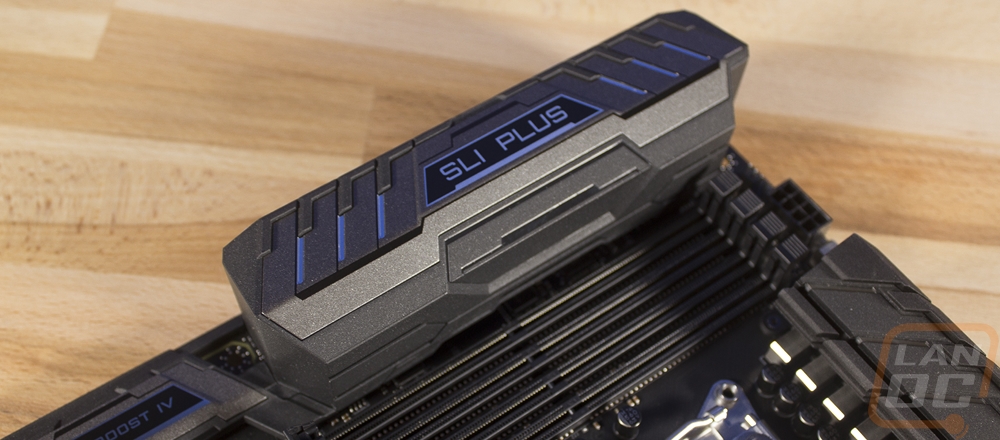
It might be one of the simplest editions but I really love that the SLI Plus has the rear I/O shield. This is mostly a fluff item that doesn’t affect performance at all but boy do they look good. Covering up the reflective metal of the rear I/O makes a huge difference in how clean a PC looks, especially when it’s an all blacked out board like this one. MSI did style it a little with the same angled slash marks, only these don’t have the lighting like the heatsinks. Then the SLI Plus name is up on top.
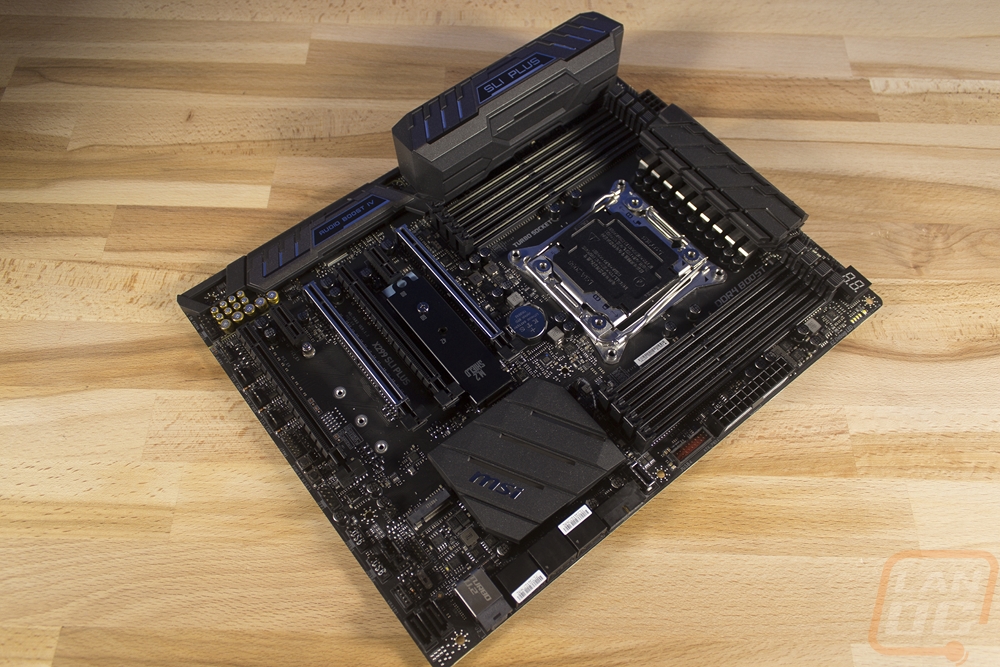
Okay to dive more into the details let's work our way around the board and see what it has starting in the top left corner. This section is mostly dominated by the rear O/O, the CPU socket, the VRM, and half of the eight DDR4 DIMMs but there are a few things going on. Just above the left DIMMs is the 8-pin CPU power. Then next to it is a 4 pin PWM fan header for a system fan. There is also another 4-pin PWM header way over on the top right of the picture as well that is for a water pump if you are running water cooling. Next to it there is a small hookup for the lighting built into the VRM heatsink.
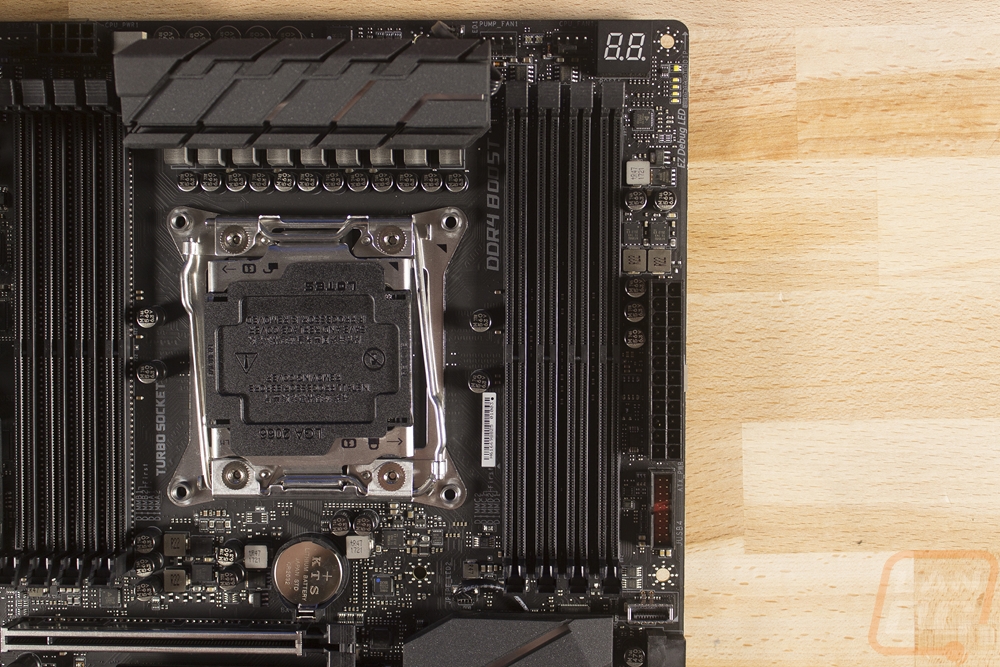
In the top right corner, you have the other half of the DDR4 DIMMs. These are the four slots that will work with the low-end CPUs with just dual channel memory. Above them, next to that pump header is also a CPU fan header, it is 4-pins and PWM as well. Then there are a couple of debugging tools in the corner. The LED readout is there and then just below the screw hole, there are a few small LED indicators that will show you what part of the board is hanging up. Moving down the side there is the 24-pin motherboard power and then there are two USB 3.1 headers. One is the traditional type that does USB 3.1 Gen 1 speeds and the second is the new style that supports Gen 2 speeds.
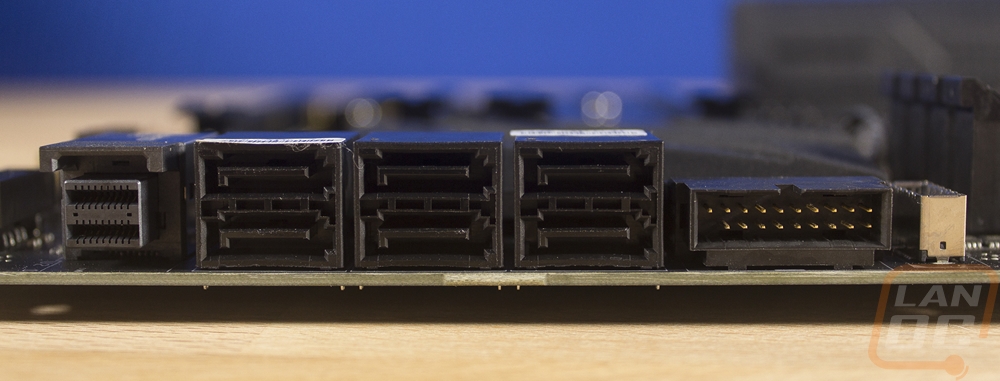
Working our way down to the bottom right corner, everything on the right side is at a right angle for wire management. That includes another USB 3.1 header. I love this because most boards that end up with a new style USB 3.1 header don’t end up having two of the old style and there are a few cases that have four USB connections on the front panels and need that second plug. For SATA there are 6 connections, you can’t run a huge NAS off this board but you should have enough hookups for most builds. Then over on the left, the funny looking connection is the new U.2 connection. This is basically an external M.2 connection and I just recently saw that Kingston is finally joining this market with a drive along side of Intel’s U.2 drive. Down on the bottom edge, there are two more SATA headers facing up as well as two USB 2.0 headers. The front panel connection is over on the left. They also slipped in two small power and reset buttons for those who are testing their setup before installing it into a case. Over by the SATA ports, there is a small BIOS switch along with the controversial VRAID key connection.
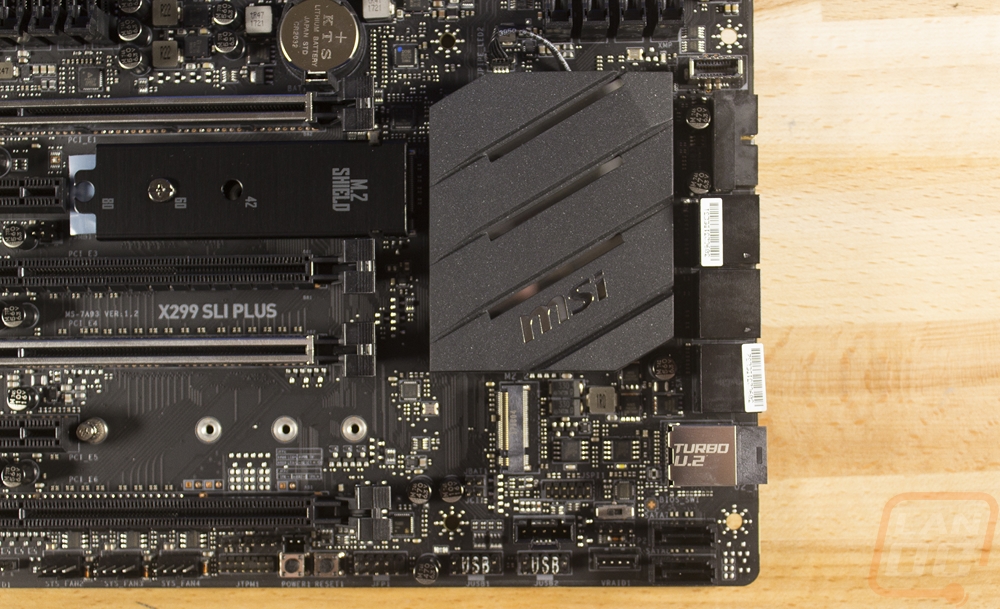
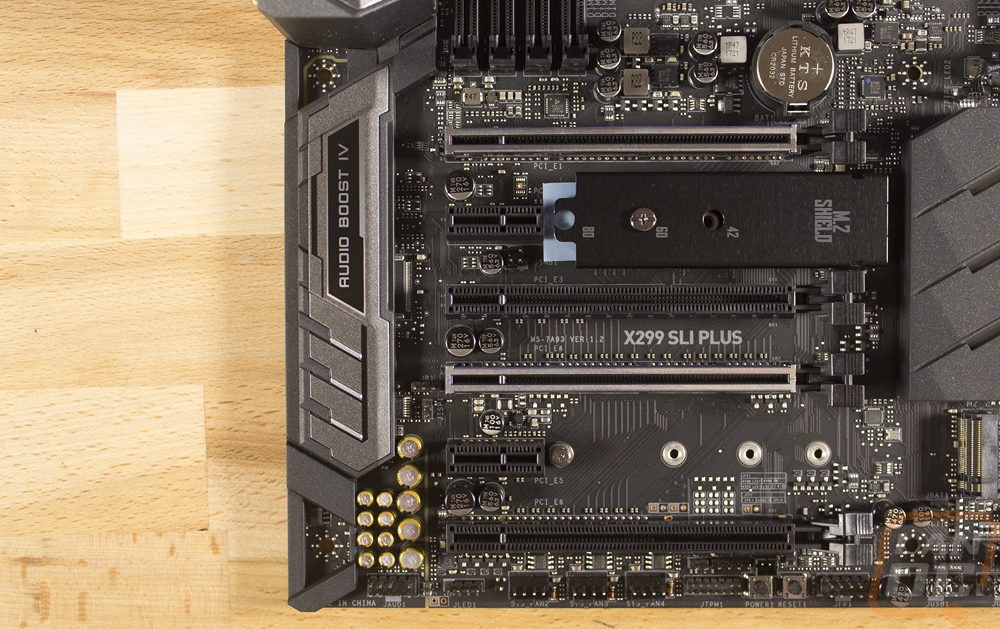
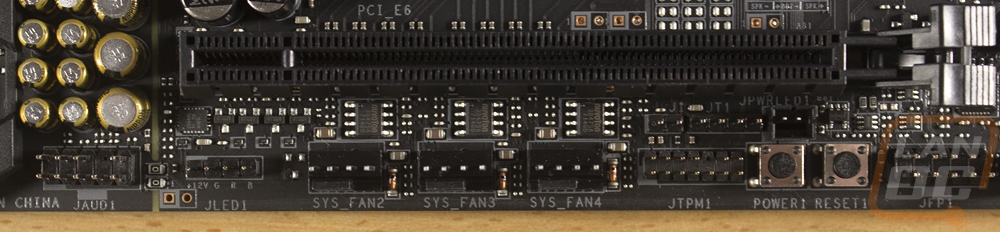
Over in the bottom left area, there is a lot going on. There are of course all of the PCIe slots. Two of which have metal shields to strengthen the slots. You get four x16 length slots and two x1 slots. If you are running a 44 lane CPU the x16 slots will get you an x16/x16/x8 configuration, a 28 lane CPU will get you x16/x8/x4, and a 16 lane CPU will get you x8/x8/x0 if you run two cards and x8/x4/x4 if you run three. Notice none of these have all four slots listed though so you will still have to choose. On each of the x1 slots, they are short enough to fit M.2 drives to the right. The top one gives you a shield plate over it and the second slot is longer, both support x4 speeds, SATA drives, and Optane. Down along the bottom edge, there are three more 4-pin PWM fan headers and an RGB header. There is also a TPM header along for those who need a Trusted Platform Module connection. Then on the far left is the front panel audio connection, just past the break in the PCB for the audio circuitry isolation.
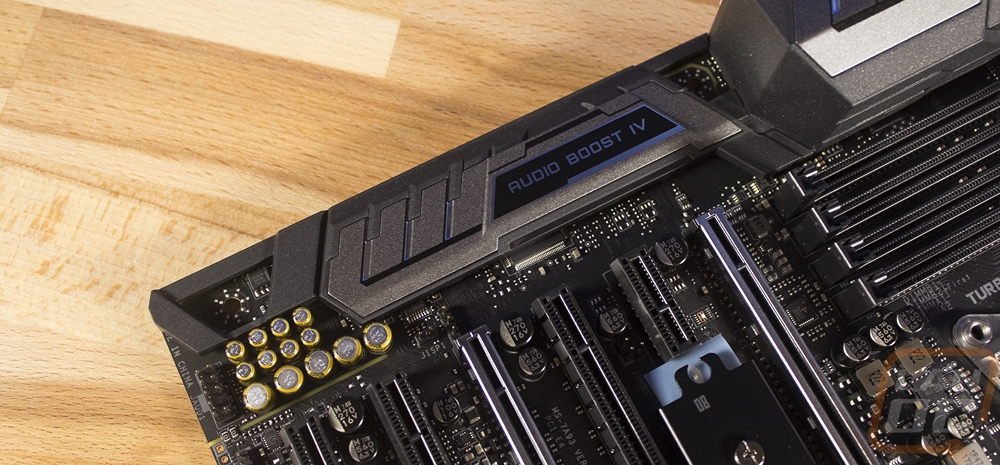
So the far left side of the board below the rear I/O is mostly dedicated to the audio chipset. They covered part of it with a plastic shield that links with the I/O shield, it has the Audio Boost IV branding on it. They went with a Realtek ALC1220 Codec and you can see the golden Chemi-Con 85c rated capacitors. The circuitry is isolated and according to MSI they also split the channels to their own layers of the PCB as well to try to avoid any cross talk. The built in DAC has a 120dB SNR and is 32 bit. There is also a built in headphone amp that auto-detects impedance as well.
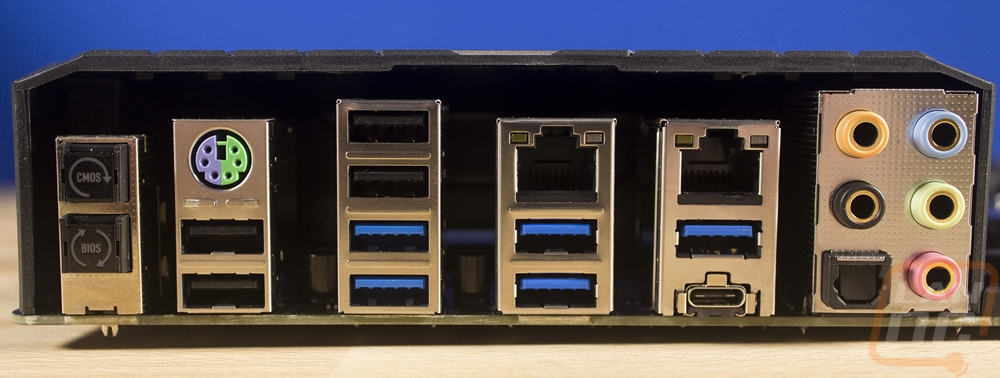
The on the rear I/O you sure wouldn’t be able to tell this isn’t an expensive flashy board. MSI slipped in the clear CMOS and BIOS flash buttons for easy access, something I only seem to find on higher end boards anymore. They did still include a PS2 port for those using older keyboards, this could also be good for workstation use as well. There are a whole bunch of USB ports. You get four USB 2.0 ports. There are then four USB 3.1 Gen 1 ports on the left and then on the right, there is a USB 3.1 Gen 2 Type-A and a Type-C port. Those two ports are going to be faster, the Type-A port has the same blue color but is labeled on the rear I/O shield. There are two NICs, both are Intel one is an I219-V and the other is an I211, both running at Gigabit speeds. Then on the far right, there is a standard 5+optical for the audio connections.
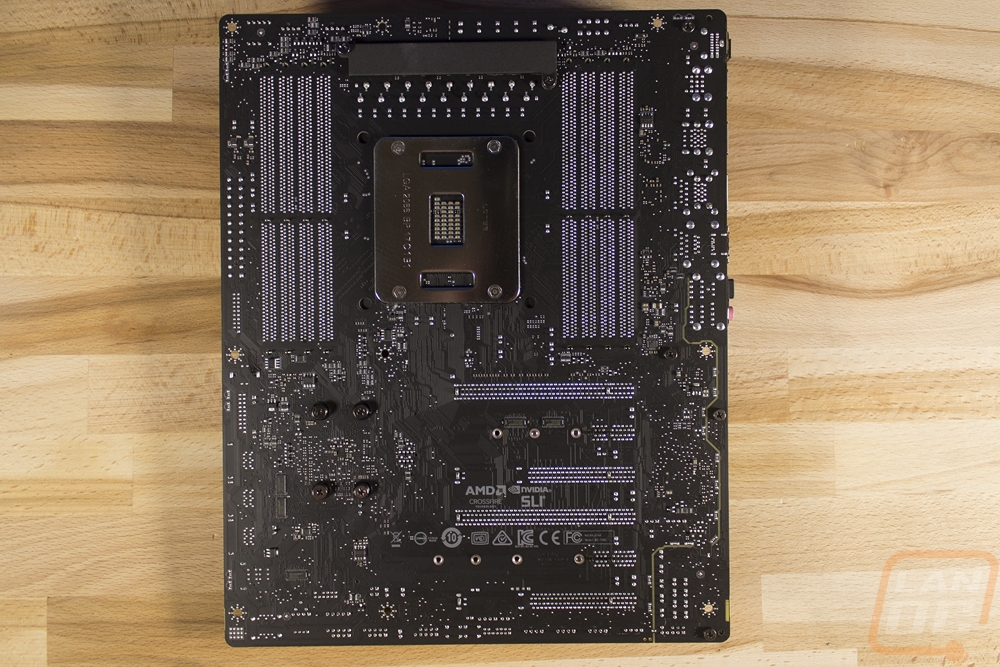
With the X299 SLI Plus flipped over we can really see that great looking flat black PCB finish. Beyond that, you can see that the chipset heatsink is attached with screws and the power heatsink has a backplate and is also attached by screws.
BIOS
For the BIOS I did a quick walkthrough video that shows me going through each menu. This way we don’t have 30 pictures while still missing some of the details of the BIOS. Overall I was surprisingly happy with the BIOS for the X299 SLI Plus. The mouse movement was smooth and it booted us right into the easy mode first. Two things a lot of BIOS don’t seem to manage somehow. You get all of the important settings right in the easy mode for things like arranging your boot drives, basic OC Genie overclocking and XMP. Moving into the advanced menus it doesn’t seem like they missed any options. So while this isn’t an overclocking focused board, you do have the ability to do it. The black/gray and white look matches the board well and while it did make me feel like I was in an old black in white movie I would rather have this than bright colors when going through the menus. You also get features like savable overclocking profiles and the ability to update your BIOS as well.
Test Rig and Procedures
|
Intel Z270 Test System |
||
|
CPU |
Intel Core i9-7900X |
|
|
Cooling |
Noctua NH-U12S for cooling Noctua NT-H1 Thermal Paste |
|
|
Memory |
Kingston HyperX FURY DDR4 16GB Kit 2666MHz |
|
|
Storage |
Kingston HyperX 240GB SSD |
|
|
Video Card |
Nvidia GTX 1080 Ti |
|
|
Power Supply |
Thermaltake 850w |
|
|
Case |
Microcool Banchetto 101 Test bench |
|
|
OS |
Windows 10 Pro 64-bit |
|
|
Motherboard Testing |
|
|
Passmark Performance Test 9.0 |
Overall PCMark score |
|
PCMark 10 |
PCMark 10 standard test, not the quick or extended versions |
|
3DMark |
We run the 2013 Fire Strike test on the performance setting |
|
In Game Tests |
|
|
Deus Ex: Mankind Divided |
In game benchmark, ultra setting, 1080p |
|
Tom Clancy’s Ghost Recon: Wildlands |
1080p, built-in benchmark run at the high setting |
|
Subsystem Testing |
|
|
Passmark |
Passmark Advanced network test |
Performance
For performance testing, I’ve been saying it for years but the head to head numbers on most benchmarks don’t really help much when comparing board to board. Most of those are dependent on the GPU, CPU, RAM, and even day to day driver updates. I’m mostly just looking for large issues when testing. For example, when I first tested the SLI Plus I noticed all of my numbers were low and it ended up being chipset driver issue, I retested and the numbers are in line across the board. Really the only numbers that can sometimes differ are the network tests because some boards don’t use the same NICs. In this case, MSI went with two solid Intel NICs so the performance was great and had no issues. Overall the SLI Plus performs well as expected, especially when paired with a GTX 1080 Ti and the i9-7900k.
|
3DMark |
||||
|
Motherboard |
Overall Score |
Graphics Score |
Physics Score |
|
|
Asus Prime X299 Deluxe |
19867 |
23755 |
24113 |
|
|
Gigabyte X299 Aorus Gaming 3 |
20474 |
23567 |
26871 |
|
|
MSI X299 SLI Plus |
19153 |
23712 |
25345 |
|
|
PCMark 10 Score |
||||
|
|
Overall Score |
Essentials |
Productivity |
Content Creation |
|
Asus Prime X299 Deluxe |
6475 |
9145 |
8486 |
9496 |
|
Gigabyte X299 Aorus Gaming 3 |
6402 |
9193 |
7932 |
9764 |
|
MSI X299 SLI Plus |
6304 |
9355 |
7834 |
9277 |
|
Passmark PerformanceTest 9.0 Overall Score |
||||
|
Asus Prime X299 Deluxe |
5924.0 |
|||
|
Gigabyte X299 Aorus Gaming 3 |
6042.2 |
|||
|
MSI X299 SLI Plus |
5816.2 |
|||
|
Tom Clancy’s Ghost Recon: Wildlands Average FPS |
||||
|
Asus Prime X299 Deluxe |
113.64 |
|||
|
Gigabyte X299 Aorus Gaming 3 |
115.88 |
|||
|
MSI X299 SLI Plus |
113.58 |
|||
|
Deus Ex: Mankind Divided Average FPS |
||||
|
Asus Prime X299 Deluxe |
94.3 |
|||
|
Gigabyte X299 Aorus Gaming 3 |
96.9 |
|||
|
MSI X299 SLI Plus |
98.7 |
|||
|
Average Network Speed |
||||
|
Asus Prime X299 Deluxe - Intel I219V NIC |
918.2 |
|||
|
Asus Prime X299 Deluxe - Intel I211-AT |
942.0 |
|||
|
Asus Prime X299 Deluxe - Wireless AC |
211.8 |
|||
|
Gigabyte X299 Aorus Gaming 3 |
936.6 |
|||
|
MSI X299 SLI Plus |
927.1 |
|||
Overall and Final Verdict
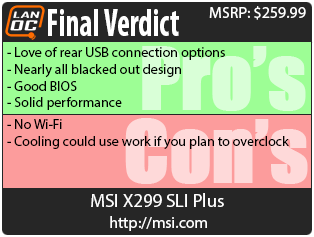
So the X299 SLI Plus ends up being in a weird spot. It isn’t really a budget board, you are still getting nearly all of the same features as the high-end X299 boards without all of the flashy fluff. It has a ton of USB connection options, both on the rear I/O and inside with 5 different USB headers. I really like the blacked out look as well as the inclusion of a rear I/O shield. This is from what I can tell the cleanest looking X299 board on the market. You even get a good BIOS and solid performance in all of our tests. For cons I didn’t really have any glaring issues when I first went through the board's features, I just would love to see WiFi be included. As a workstation board, I can see it being needed and I would gladly give up one of the two Intel NICs for it. I also think the VRM cooling might be pushing it if you plan on overclocking or running the upcoming high-end CPUs.
The reason the SLI Plus feels like it is in a weird place is because on any other platform this would be a high-end board. But with X299 it actually is a low to mid range board, with MSI just having one option below it. It is still a little too expensive for anyone looking at Kaby Lake X, not that I would even recommend looking at that. But it does end up being the low key value if you want a clean looking build on the X299 platform.
Pricing has the SLI Plus at $259.99 for the MSRP but it looks like X299 boards including this one are already getting some discounts less than a month after the launch. You can get this board for $229.99 on Amazon and for even less on Newegg when you include the mail in rebate. If you are planning a crazy off the wall build with the soon to be released $1000+ CPUs that Intel is bringing out to match ThreadRipper I don’t think this is the board. Paired with the 7800X or the 7820X though this might make for a powerful but clean looking build.

Live Pricing: HERE


