It’s crazy to look back at the original Crosshair and see just how much things have changed. Hell, the original was running on a Nvidia nForce 590 chipset, how many people even remember that Nvidia had their own chipsets! Anyhow, even all the way back to the original Asus has always packed the Crosshair boards full of features and from what I’ve seen of the new Crosshair VI Hero it looks like they have done the same thing again. This is one of the two boards that came with our initial review setup for the new Ryzen processors. So today I’m going to check out the new Crosshair VI Hero and see what it is all about and find out if it is a good option to consider for those of you excited to build a new high-end AMD build.
Product Name: Asus Crosshair VI Hero
Review Sample Provided by: Asus
Written by: Wes
Pictures by: Wes
Amazon Link: HERE
|
Specifications |
|
|
CPU |
AMD AM4 Socket for AMD Ryzen™/7th Generation A-series/Athlon™ Processors Supports AM4 Socket 14 nm CPU Supports CPU up to 8 cores |
|
Chipset |
AMD X370 |
|
Memory |
AMD Ryzen™ Processors 4 x DIMM, Max. 64GB, DDR4 3200(O.C.)/2933(O.C.)/2666/2400/2133 MHz Non-ECC, Un-buffered Memory * AMD 7th Generation A-series/Athlon™ Processors 4 x DIMM, Max. 64GB, DDR4 2400/2133 MHz Non-ECC, Un-buffered Memory * Dual Channel Memory Architecture |
|
Multi-GPU Support |
Supports NVIDIA® 2-Way SLI™ Technology Supports AMD CrossFireX™ Technology |
|
Expansion Slots |
AMD Ryzen™ Processors |
|
Storage |
AMD Ryzen™ Processors: |
|
LAN |
Intel® I211-AT, 1 x Gigabit LAN Controller(s) Anti-surge LANGuard ROG GameFirst IV |
|
Audio |
ROG SupremeFX 8-Channel High Definition Audio CODEC S1220 |
|
USB Ports |
AMD Ryzen™/7th Generation A-series/Athlon™ Processors : |
|
ROG Exclusive Features |
ROG RAMCache II |
|
Special Features |
ASUS Dual Intelligent Processors 5-Way Optimization by Dual Intelligent Processors 5: |
|
Back I/O Ports |
1 x LAN (RJ45) port(s) 1 x USB 3.1 (black)Type-C 1 x USB 3.1 (red)Type-A 8 x USB 3.0 (blue) 4 x USB 2.0 (one port can be switched to USB BIOS Flashback) 1 x Optical S/PDIF out 1 x Clear CMOS button(s) 1 x USB BIOS Flashback Button(s) 5 x Gold-plated audio jacks 1 x M.2 Wi-Fi Slot |
|
Internal I/O Ports |
2 x RGB Header(s) 1 x USB 3.0 connector(s) support(s) additional 2 USB 3.0 port(s) 1 x USB 2.0 connector(s) support(s) additional 2 USB 2.0 port(s) 1 x M.2 Socket 3 with M key, type 2242/2260/2280/22110 storage devices support (SATA & PCIE 3.0 x 4 mode) 1 x TPM header 8 x SATA 6Gb/s connector(s) 1 x CPU Fan connector(s) 1 x CPU OPT Fan connector(s) 3 x Chassis Fan connector(s) 1 x W_PUMP+ connector 1 x AIO_PUMP connector 1 x 24-pin EATX Power connector(s) 1 x Front panel audio connector(s) (AAFP) 1 x Thermal sensor connector(s) 1 x Reset button(s) 1 x LN2 Mode switch(es) 1 x ROG extension (ROG_EXT) header(s) 1 x Safe Boot button 1 x ReTry button 1 x Slow Mode jumper(s) 1 x System panel connector 2 x 3D Mount screw port(s) 1 x W_IN header 1 x W_OUT header 1 x W_FLOW header 1 x Start button 1 x USB 3.1 front panel connector |
|
Accessories |
User's manual ASUS Q-Shield 4 x SATA 6Gb/s cable(s) 1 x M.2 Screw Package 1 x Supporting DVD 1 x SLI HB BRIDGE(2-WAY-M) 1 x ROG big sticker 1 x Q-Connector 0 x 10-in-1 ROG cable label 1 x Extension Cable for RGB strips (80 cm) 1 x 3D printing mount package 1 x ROG coasters |
|
BIOS |
128 Mb Flash ROM, UEFI AMI BIOS, PnP, WfM2.0, SM BIOS 3.0, ACPI 5.0, Multi-language BIOS, ASUS EZ Flash 3, CrashFree BIOS 3, F11 EZ Tuning Wizard, F6 Qfan Control, F3 My Favorites, Last Modified log, F12 PrintScreen and ASUS DRAM SPD (Serial Presence Detect) memory information |
|
Manageability |
WfM 2.0, WOL by PME, PXE |
|
Support Disc |
Drivers AURA ROG GameFirst IV*3 ROG RAMDisk ROG RAMCache II ROG CPU-Z ROG Mem TweakIt ROG Keybot II Sonic Studio III Sonic Radar III Overwolf CloneDrive Kaspersky® Anti-Virus DAEMON Tools Software Winzip ASUS WebStorage ASUS Utilities |
|
Operating System |
Windows® 10 64-bit |
|
Form Factor |
ATX Form Factor 12 inch x 9.6 inch ( cm x cm ) |
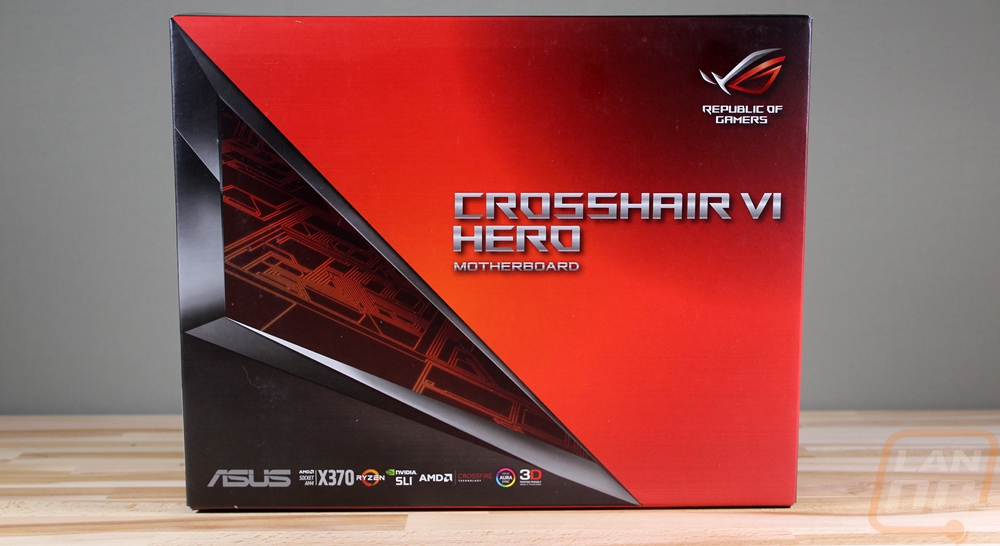
Packaging
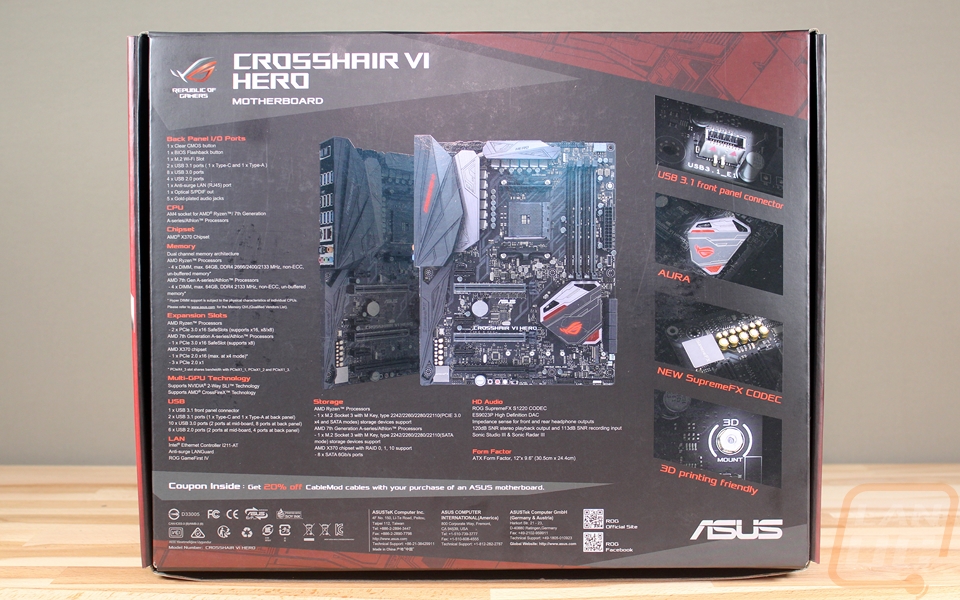
The first Crosshair was the first ROG motherboard from Asus so it's no surprise the packaging for the Crosshair VI Hero has the standard black and red theme. Up in the top right is the ROG logo with the branding just under it. They do use a few logos to list board features down along the bottom long with things like confirming SLI support. On the back of the box, we actually get a full photo of the board, as well as four, zoomed in photos of specific board features. They also basically have a specification/feature breakdown over the rest of the back of the box. No marketing fluff at all, just a list of everything the board has and it is a lot.
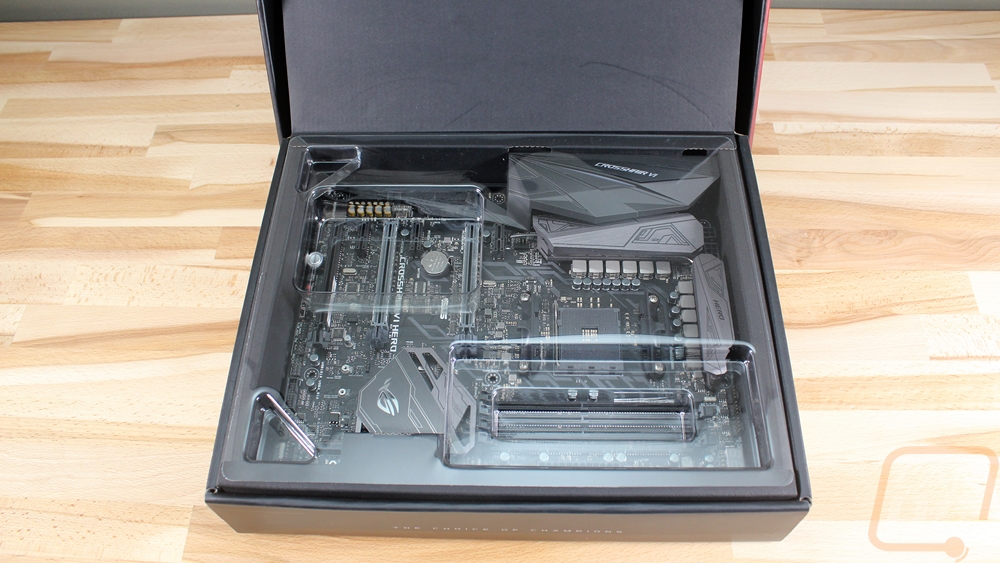
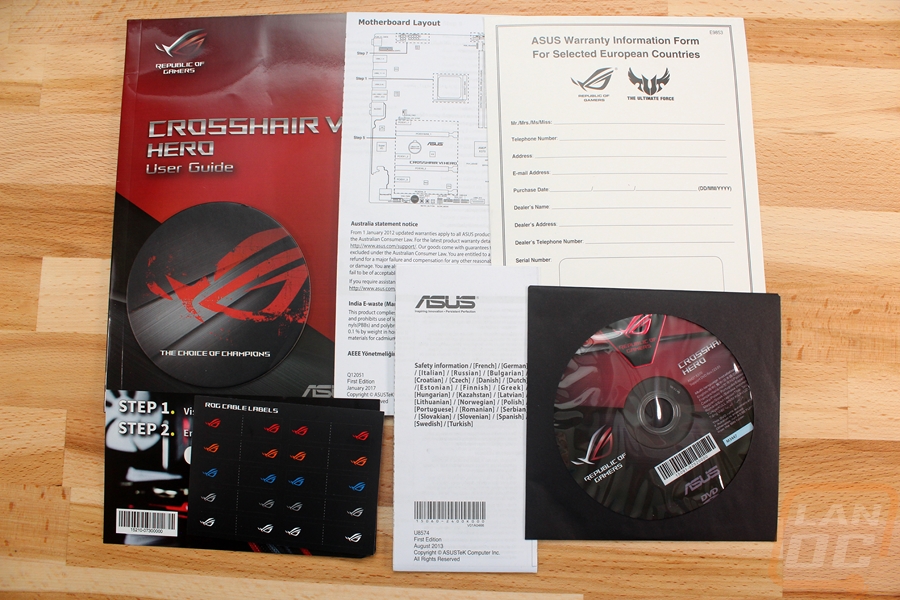
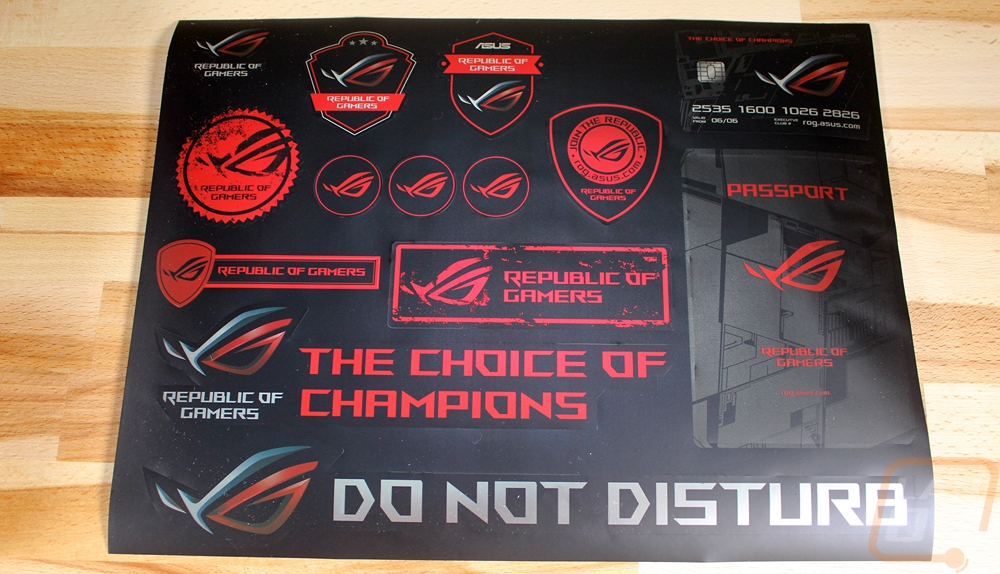
The box opens up a little differently but once opened the board greets you right on top. It sits in a cardboard tray with a static protective bag. You can then pull the tray up and out and below it and find all of the documentation. Unlike the cheap boards, boards like the Crosshair come with a whole stack of things. There is a thick user guide, a separate motherboard layout paper, and a safety information document. Then you get a driver/software DVD and cool black ROG cable labels. They even include a ROG coaster. Then for stickers, you get a huge sticker sheet with a variety of stickers. They also slipped in a coupon code from CableMod to get a deal on a set of CableMod RGB lights that are compatible with Asus Aura lighting.
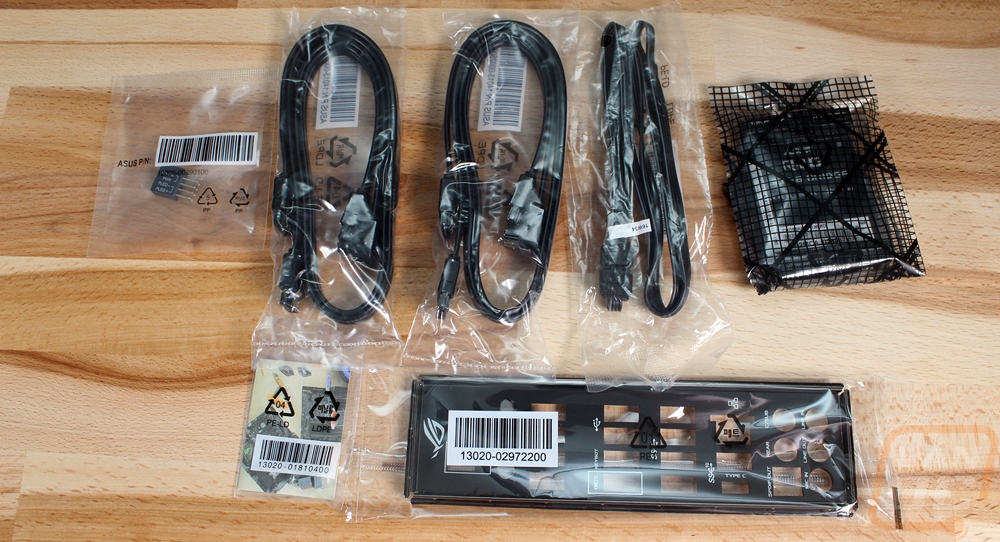
There is another piece of cardboard up under all of the documentation and then you get to the accessories. You get an all blacked out rear I/O panel and connection helpers for your front panel connections. There is an SLI bridge with a black PCB. Then for cables, you get four black SATA cables and a pair of the RGB lighting adapter cables to hook your case lighting up.
Board Layout and Photos
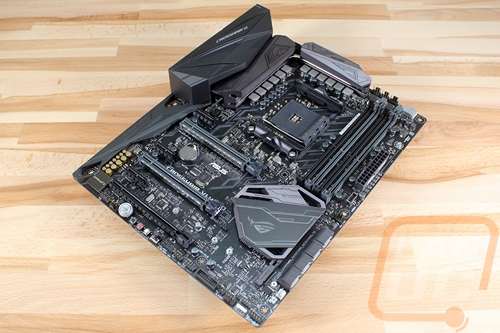
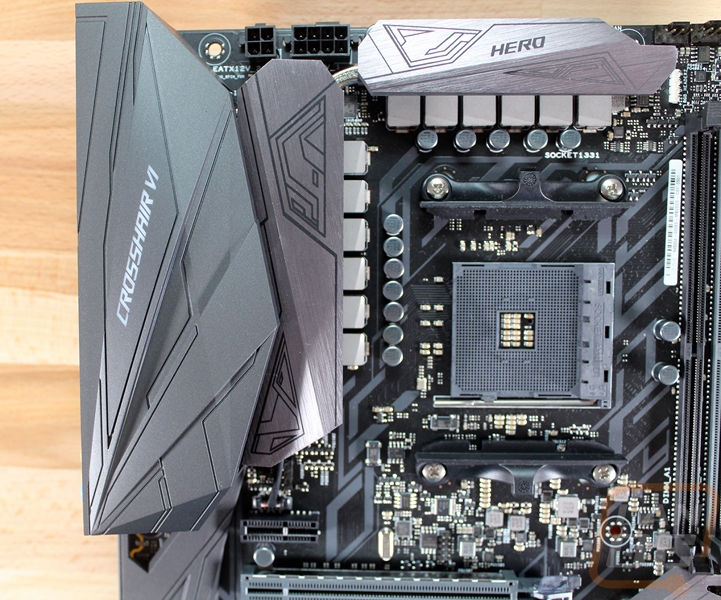
The Crosshair VI Hero is where we finally see a lot of the angular styling and features of the last few generations of Asus Intel boards finally reach an AMD chipset. The board itself really doesn’t look much different than a Z170 or Z270 board or even some of the later X99’s, but you have to remember that with AM3+ Asus is still literally selling the older anodized blue themed boards. They look good, but they haven’t had that look with the rest of their boards in 5 years, all the way back to Z77. They did have the 970 Pro Gaming/Aura, but beyond that, it’s a sea of blue or ROG boards. So the color neutral black PCB with dark and darker gray for the I/O cover, heatsinks, and ram is really nice to see.
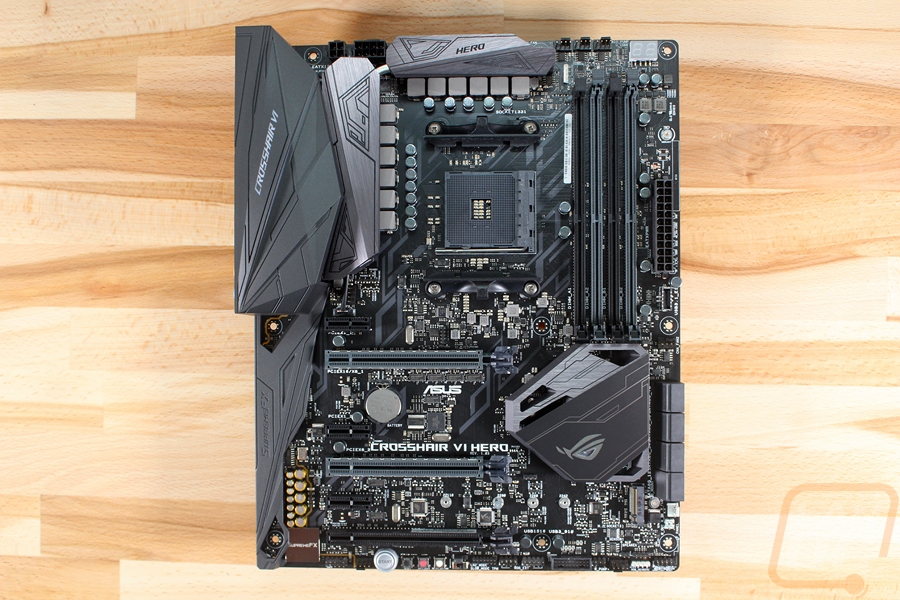
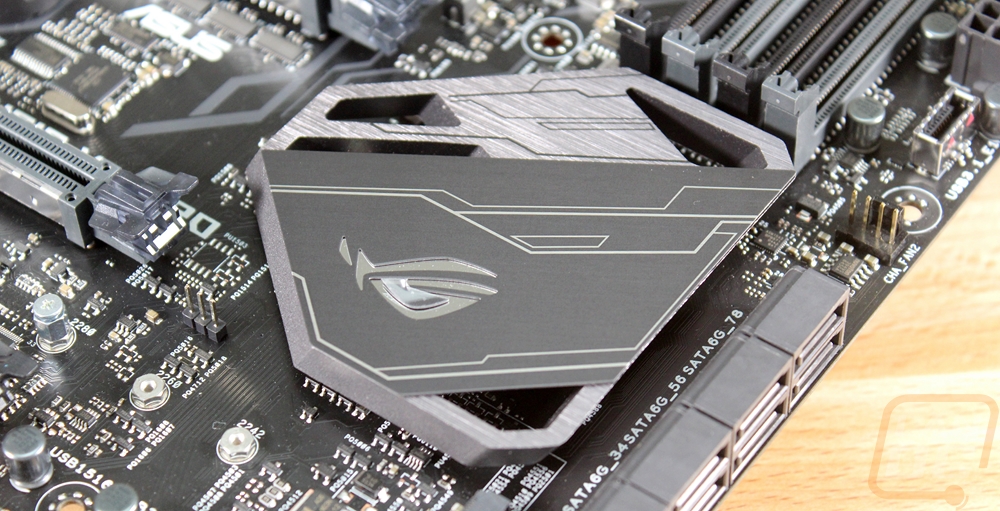
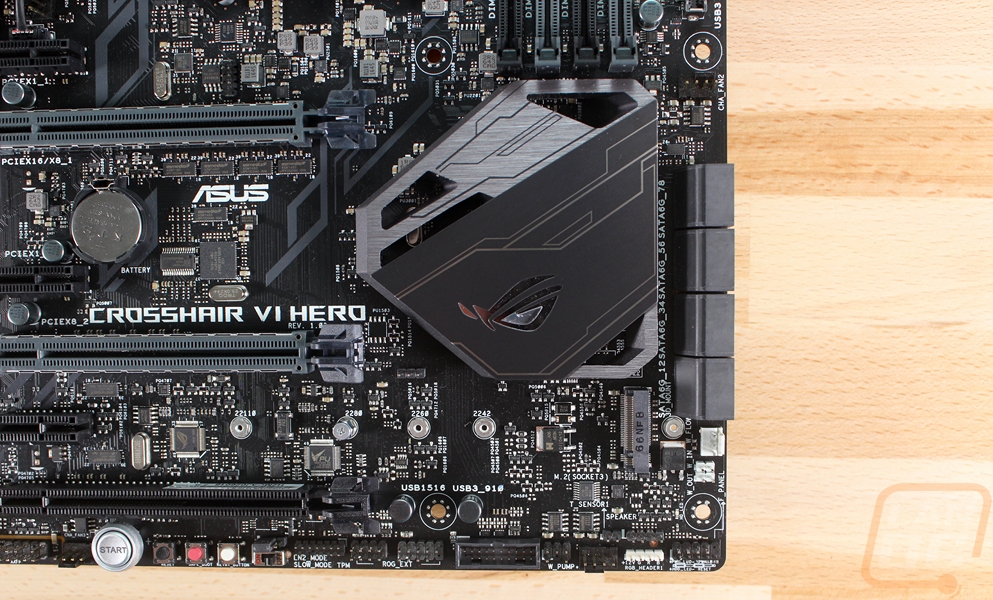
For cooling the Crosshair has three heatsinks. There is a thin mostly decorative heatsink to the right of the PCI slots for the chipset. I say it is mostly decorative because there aren’t really any attempts to add surface area or anything, not that it is really needed. It mostly floats and is backlit with RGB lighting that glows around the heatsink and through the ROG logo on the top. There are then two main heatsinks to the left and above the CPU. They are both in the lighter of the two dark grays with angular drawings un top including the Hero branding. There is also a heatpipe between the two to help spread the heat around. They both pull the heat away from the boards VRM phases. You can also see how the rear I/O cover also integrates with the left heatsink in the photo below.
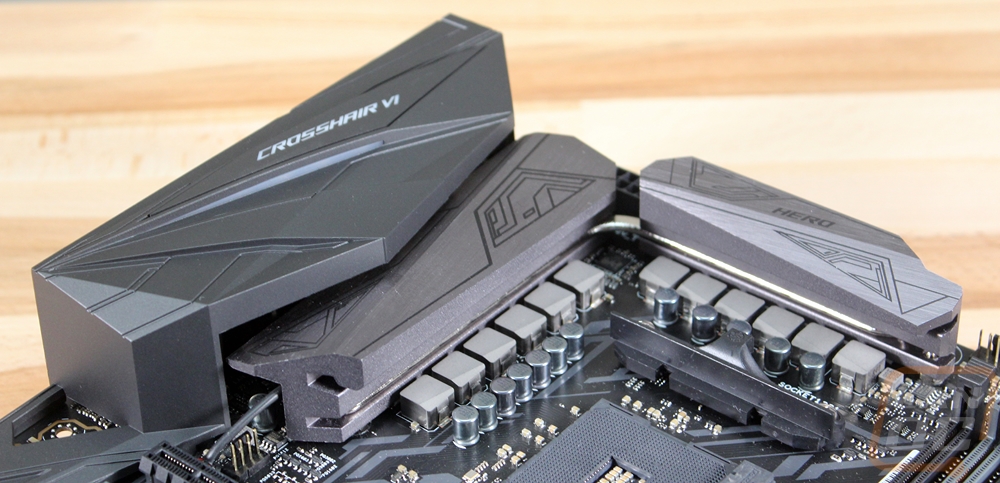
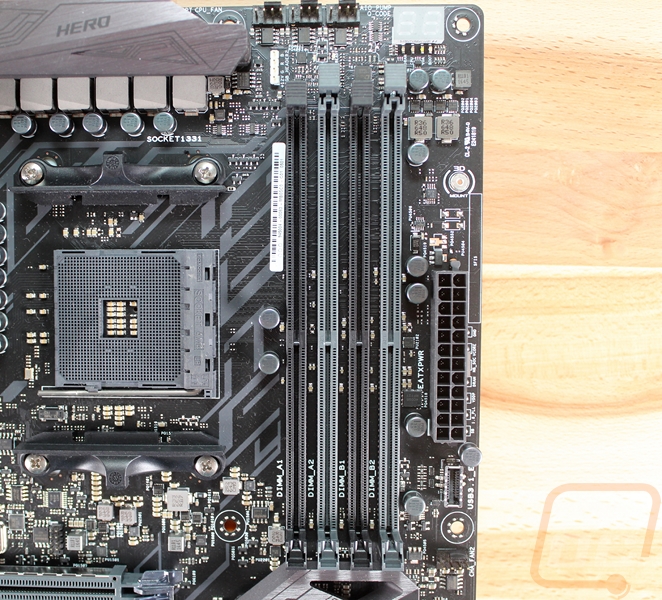
The top left portion of the board is mostly dominated by the two heatsinks and the large plastic cover over the rear I/O panel. Asus did slip the CPU power connections up in the top left, though. They have a standard 8-pin along with a 4-pin for additional power. We also have the CPU socket itself taking up a lot of space in this area. The new AM4 socket is similar to the AM3 in that it has an open area in the middle that could be used later with an AM4+ configuration to add more pins. The pins are also a little closer together, but the socket itself looks about the same as it always has. AMD still uses the clip design, but the new AM4 socket does have a new hole layout. Asus, however, did something unique and designed the board with both the old and new holes. They have done this in the last when sockets first changed as well. It basically means if you upgrade you don’t have to find an AM4 bracket for your cooler, not that most companies aren’t giving them away.
In the top right, we start to have more going on. There are the four DDR4 DIMMs to start. Above them are three fan headers that are all tied to the CPU socket so you can control your fans and a PWM pump altogether. There is also a tiny white 4 pin connection under them for Aura RGB lighting in the top portion of your case. In the top right corner is the LED status readout and down farther is the 24 pin motherboard power. Asus has a few 3D mounting locations including one above the 24 pin, you can 3D print designs that they have made or your own designs for covers to change the look of your board. Down below the 24-pin the board also has a new style USB 3.1 header and another 4-pin PWM fan header. The new USB 3.1 headers are great to see because those are going to be the future of front panel connections. They are faster and take up less space, not to mention they should be easier to keep plugged in.
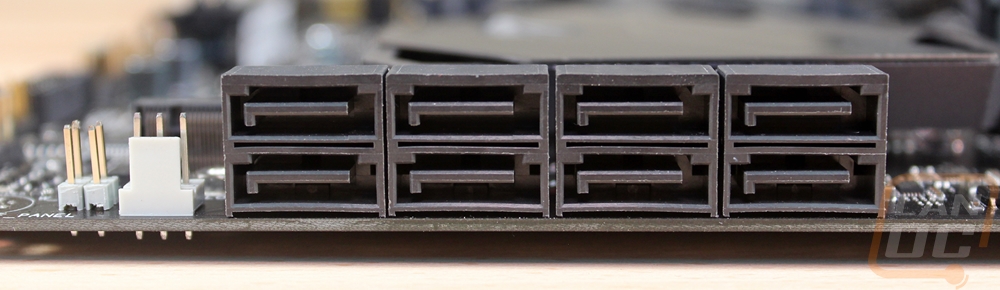
Moving down to the bottom right portion of the Crosshair VI Hero we have 8 right-angled SATA connections. Up under the chipset heatsink is a full-length M.2 socket with PCI x4 or SATA compatibility. Just under the SATA ports is an interesting out and in flow connection where you can hook up a flow meter to your water cooling and feed the information right into the motherboard so Asus’s software can keep track of it as well. Along the bottom edge, there is a second white RGB header. In the corner are the front panel connections. There is another PWM fan header and one USB 3.0 header before getting to the ROG Extension header for overclockers who use the ROG OC Panel.
Moving across the bottom edge over on to the left. There is another 4-pin PWN header next to the large backlit power button. There are also smaller buttons for reset, Safe Boot, and a retry button. Safe boot is for overclocking when you have trouble you can boot to a safe non-overclocked setting with this button. The retry button is something I wouldn’t mind having in real life, but in this case, it is also an overclocking button to force a hard reboot. Next to the TPM header, they also slipped an LN2 Mode switch aka a slow mode switch to help boot at a lower clock speed to avoid cold bugs when overclocking with LN2. There is a front panel audio connection and if you look closely you can see that this and the full audio card is all on its own PCB with a backlit gap between them. For the onboard audio, Asus went with the SupremeFX S1220 CODEC, Nichicon caps, and a Sabre Hi-Fi ES9023P for a DAC.
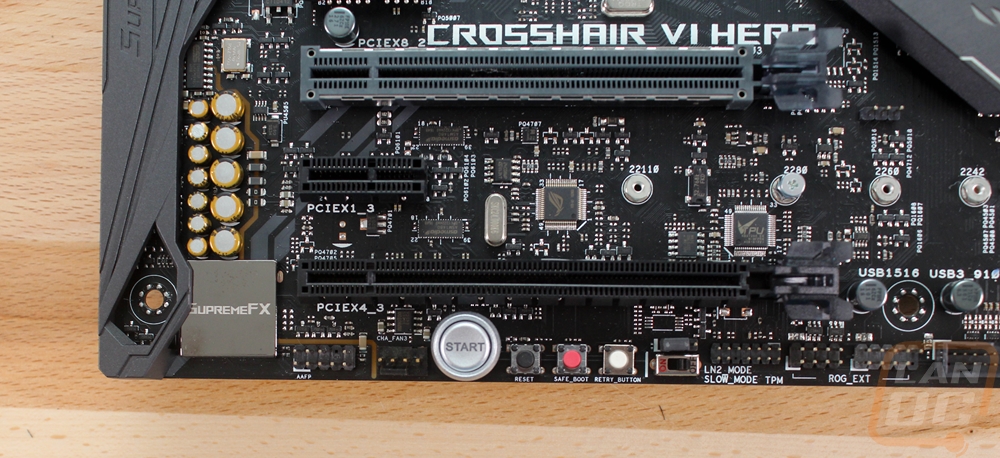
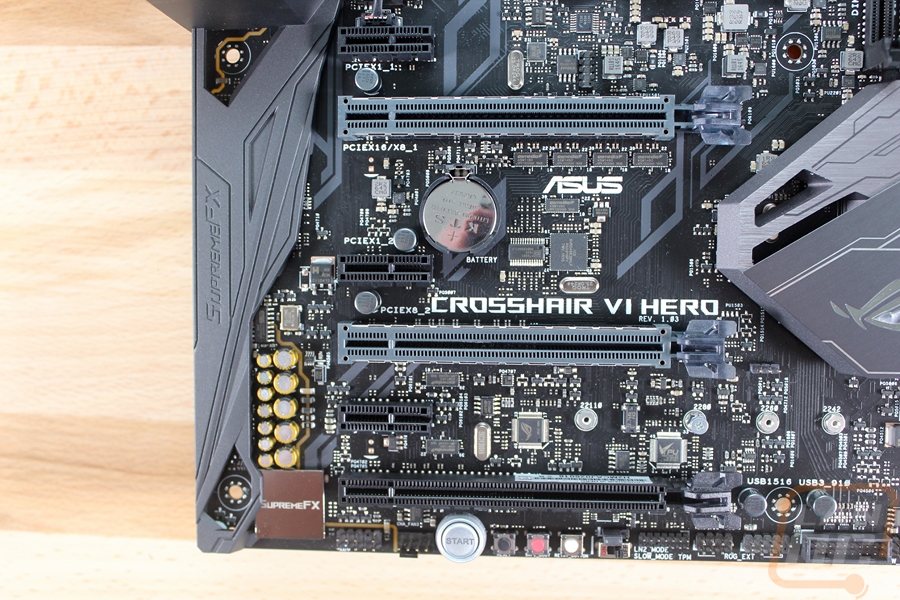
For PCI connections the Crosshair VI Hero has three X16 length slots and three x1 slots. Interestingly though all three of the x1 slots have an open design on the right. I haven’t seen this before but from what I understand the open design allows longer PCI x4 and maybe x16 devices to be plugged in and just run at x1 speeds. This is more appropriate for the original idea behind the x1/x4/x16 design where the slots would be flexible. The three x16 slots break down with the top two gray slots being PCIe 3.0 and being able to share x16 so if you run one card in the top slot you get x16 and if you run two cards with the built-in Crossfire and SLI support they both run at x8. The bottom slot and the x1 slots are all PCIe 2.0 and the bottom sx16 length slot only runs at x4.
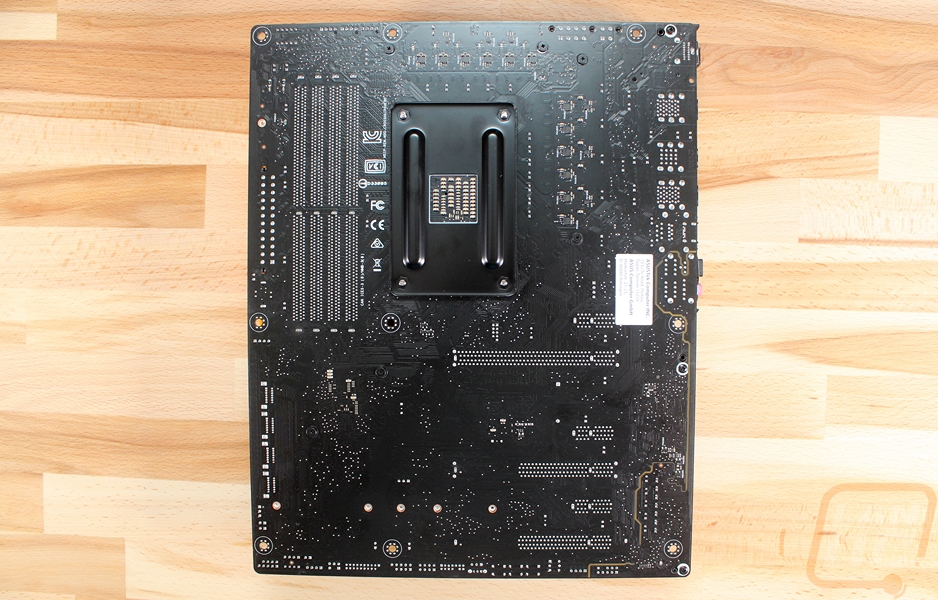
The back view of the board gives us a better look at the all black PCB. The included CPU backplate is actually an AM3 by default for better cooler compatibility. The back view also gives us a better view of the phases where there are 6 and 6 for a total of 12.
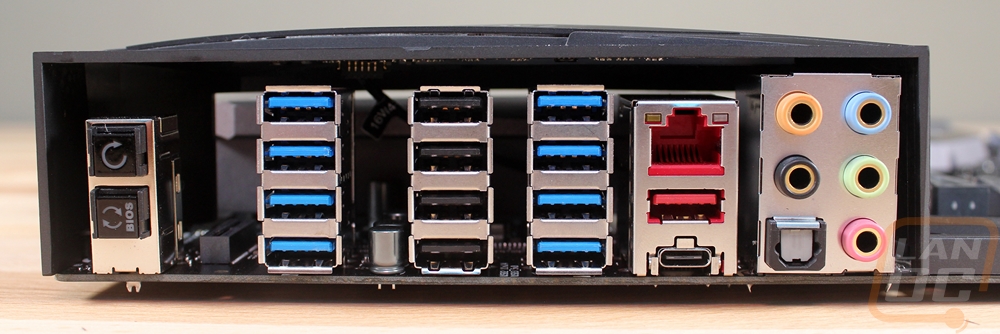
I think the rear I/O of the Crosshair VI Hero ended up being the best part of the board for me. Over on the right, you have the standard 5+optical audio connections but Asus did use gold plating inside of each plug for the best connection. Over on the far left is a Clear CMOS button and a BIOS flashback button. Surprisingly there isn’t Wi-Fi on the board, but there is a spot for it with an M.2 E-Key connection to add one to the rear I/O later next to the two buttons. Then They went with the Intel I211-AT for the Ethernet connection and they included Asus’s Anti-surge LanGuard to protect the connection from a power surge through the network. It’s the USB connections on this board that really set it apart, though. The red port below the NIC is a 10 Gb/s USB 3.1 Type A and the smaller connection below it is a new Type-C USB 3.1 as well. There are then an impressive 8 USB 3.0 and 4 USB 2.0 headers. All of the 3.0 and 2.0 ports run on the X370 chipset and the two 3.1 ports run on an ASMedia controller. I haven’t seen this many USB connections on a board in years and I can’t be happier about it.
UEFI
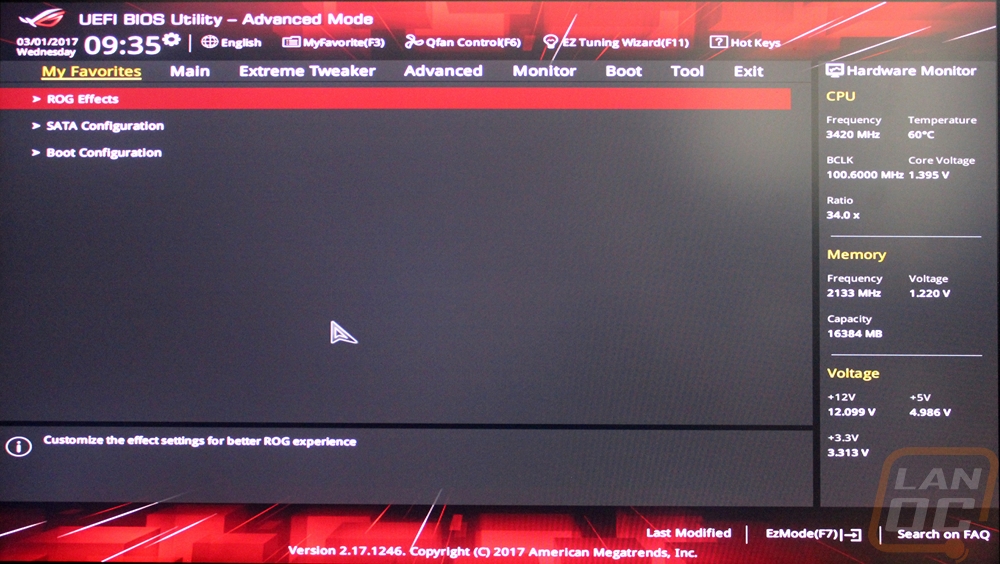
So booting up into the UEFI on the Crosshair you land first on your favorites page. By default, there are a few things already here, but you can add any feature that you like to adjust often right onto this page. From there I flipped over to the main tab. The main tab has your revision numbers and a few basic things about your build like the CPU, CPU speeds, Memory capacity, and memory speeds as well. The only option you have here is to change the language.

The extreme tweaker tab is the overclocking page. Here you have every option that is related to overclocking your memory or CPU all in one place. Up top, it shows the target clock speeds of the settings you have set and on the right, you have a hardware monitor with the current speeds, voltages, and temps.

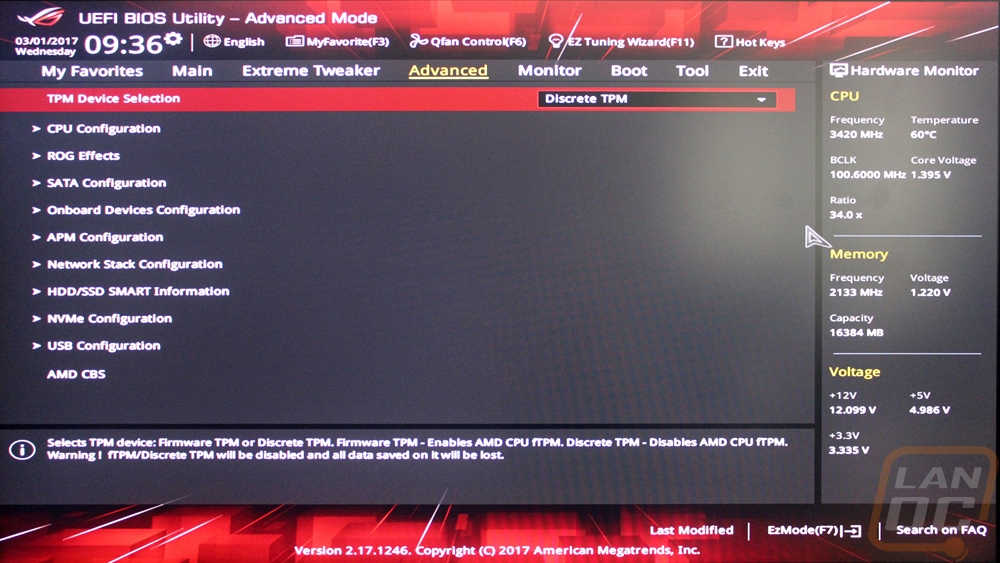
The Advanced tab is basically where you are going to find all of your other BIOS options for things. They have everything broken up into different subsystems with a whole list of options on each when you open them up.
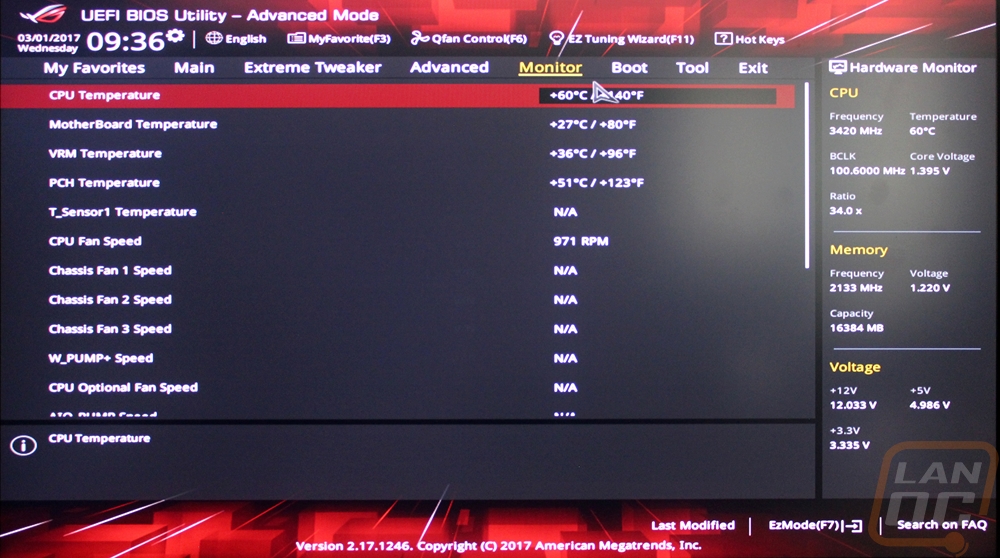
The Monitor tab takes what is over on the right and shows you, even more, details on all of the temperature and speed readouts on the Crosshair.
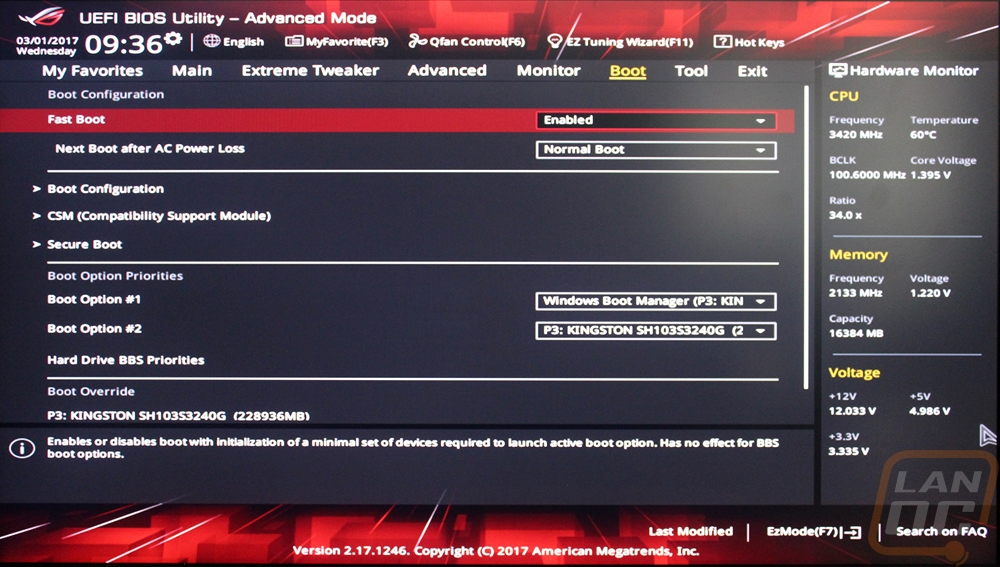
Boot is well your booting options, duh! Nothing special here. You can set your boot order, configure how power loss is handled, and also override boot settings and force boot to a specific drive if needed.
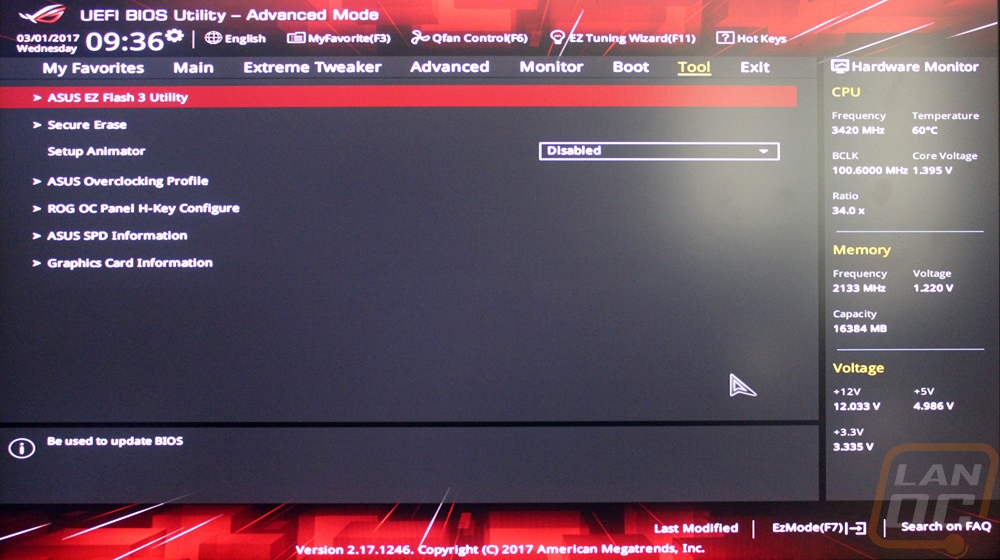
The Tool page is where Asus has slipped in all of their other tools. You can get to your overclocking profiles here, check out your GPU information, and even flash the BIOS from here.
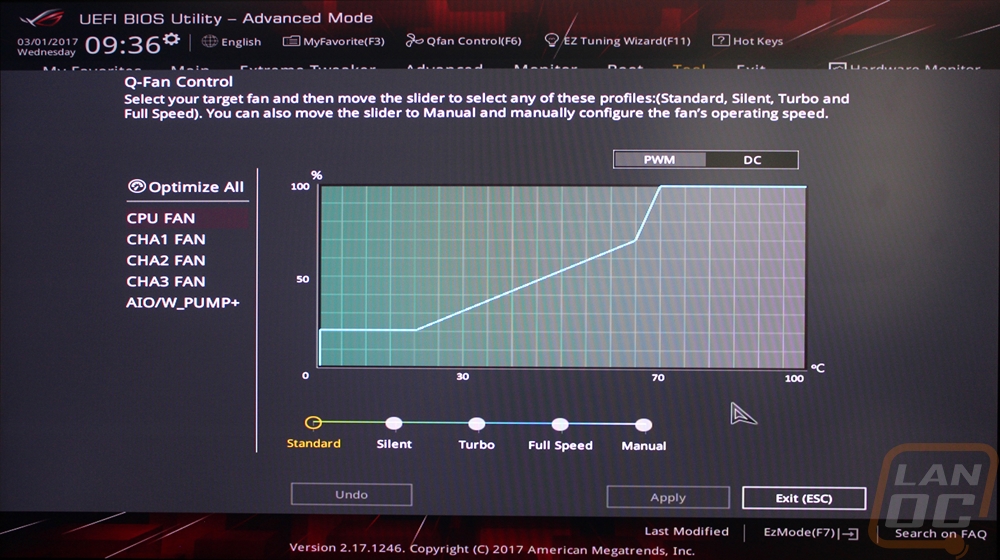
Up along the top of the UEFI, there are a few other options including the QFan page. Here you can get into similar settings to the AISuite for fan settings and change the fan profiles of each of your hooked up fans.
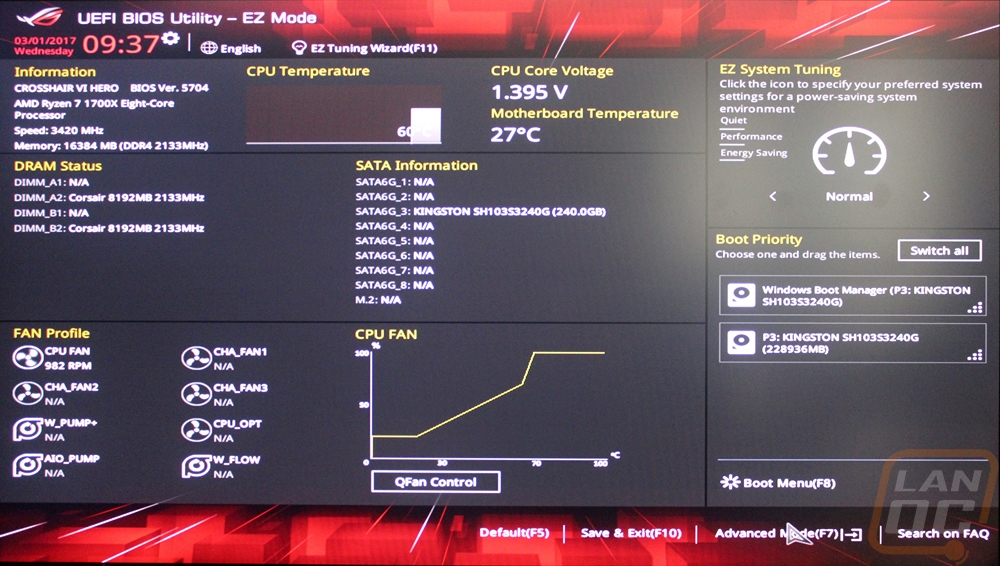
There is also an EZ Mode, I suspect that our board was tested ahead of time because normally Asus does a good job booting right into the EZ Mode first to keep inexperienced users out of the dangerous stuff. That said the EZ Mode page is simple. You can get to QFan control, see all of your installed hard drives and ram. You can also see all of the fans hooked up. There is the EZ Tuning for quick overclocking and then a drag and drop boot priority area where you can drag hard drives into the order you want them to boot from.
Test Rig and Procedures
|
Intel Z270 Test System |
||
|
CPU |
AMD Ryzen R7 1800X |
|
|
Cooling |
Noctua NH-U12S for cooling Noctua NT-H1 Thermal Paste |
|
|
Memory |
Corsair Vengeance LPX DDR4 2x8 16GB 3000MHz |
|
|
Storage |
Kingston HyperX 240GB SSD |
|
|
Video Card |
AMD RX480 |
|
|
Power Supply |
Thermaltake 850w |
|
|
Case |
Microcool Banchetto 101 Test bench |
|
|
OS |
Windows 10 Pro 64-bit |
|
|
Motherboard Testing |
|
|
Passmark Performance Test 9.0 |
Overall PCMark score |
|
PCMark 8 |
We use the Home Accelerated benchmark and track the overall score |
|
3DMark |
We run the 2013 Fire Strike test on the performance setting |
|
In Game Tests |
|
|
Deus Ex: Mankind Divided |
In game benchmark, ultra setting, 1080p |
|
Hitman 2016 |
Fullscreen with V-Sync turned off Detail, Texture Quality, Shadow Maps, and Shadow Resolution all set to their highest settings. Tested at 1080p in DX12 |
|
Subsystem Testing |
|
|
Passmark |
Passmark Advanced network test |
Performance
So, for the most part, performance testing is just about testing to make sure there aren’t any glaring differences, the performance differences you will see in motherboards can be found in things like network cards and other add-ons as well as in overclocking. So for performance testing, I did run through a list of benchmarks with the Crosshair VI Hero and I have left our previous AM4 results in here, they don’t directly compare. Especially the AB350 that wouldn’t let me set the same memory clock speed as the others.
That said the Crosshair did perform well in all of our tests when paired up with the RX480 and the R7 1800X. This included overall benchmarks like PCMark and Passmarks Performance Test 9 and 3DMark. In game performance was also in line with what I saw on the other boards as well. To test out the Intel I211-AT I used the advanced network test in Passmark’s Performance Test. The average transfer speed was great, coming in just slightly ahead of the MSI with the same NIC and the AB350 with its Realtek NIC was way behind the others showing a quality NIC can give you more consistent performance.
|
3DMark |
|||
|
Motherboard |
Overall Score |
Graphics Score |
Physics Score |
|
Gigabyte AB350 Gaming 3 |
11125 |
12608 |
19034 |
|
MSI X370 XPower Gaming Titanium |
11034 |
12515 |
18469 |
|
Asus Crosshair VI Hero |
11055 |
12548 |
18508 |
|
PCMark 8 Home Accelerated Score |
|||
|
Gigabyte AB350 Gaming 3 |
4350 |
||
|
MSI X370 XPower Gaming Titanium |
4309 |
||
|
Asus Crosshair VI Hero |
4342 |
||
|
Passmark PerformanceTest 9.0 Overall Score |
|||
|
Gigabyte AB350 Gaming 3 |
5037.3 |
||
|
MSI X370 XPower Gaming Titanium |
5049.7 |
||
|
Asus Crosshair VI Hero |
4872.7 |
||
|
Deus Ex: Mankind Divided Average FPS |
|||
|
Gigabyte AB350 Gaming 3 |
44.2 |
||
|
MSI X370 XPower Gaming Titanium |
44.0 |
||
|
Asus Crosshair VI Hero |
43.8 |
||
|
Hitman 2016 Average FPS |
|||
|
Gigabyte AB350 Gaming 3 |
82.41 |
||
|
MSI X370 XPower Gaming Titanium |
79.32 |
||
|
Asus Crosshair VI Hero |
79.09 |
||
|
Average Network Speed |
|||
|
Gigabyte AB350 Gaming 3 |
700.1 |
||
|
MSI X370 XPower Gaming Titanium |
916.8 |
||
|
Asus Crosshair VI Hero |
926.5 |
||
Overall and Final Verdict
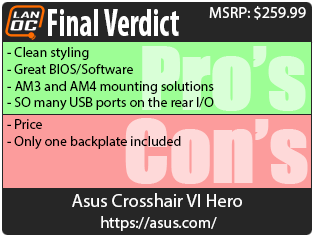
I mentioned it in the opening section but it is worth revisiting again. For a lot of people, the Crosshair boards have a little history. Not only were they the first ROG board ever made, but for some people, they are the first AMD boards people used. Because of that, I had high expectations when taking a look at the Asus Crosshair VI Hero and I saved it for last out of the three boards I had at launch. The Crosshair VI Hero ended up being drastically different than what I’ve seen in the past for AMD boards but that is a good thing. To start off they finally got this board in line with the styling they have been using on the Intel boards for a few years now. This means angular shapes but a color neutral black on gray on gray look that doesn’t lock you into one color like previous ROG boards. They leave their RGB lighting to set the color theme with the backlit Crosshair logo, the lighting around the chipset heatsink, and the two RGB headers on the board for case lighting. In the end, you don’t have a flashy look like the MSI I took a look at, but the Crosshair VI Hero does look good, simple and clean.
They then paired the board with Asus’s standard software suite that includes AISuite and their UEFI. Like always this was the only UEFI that I didn’t have trouble with my mice working correctly in it and it is packed full of features. Especially for overclockers who will be looking to push the limits of the 1800X soon. The AISuite 3 software hasn’t changed at all so I didn’t cover it but it is still as easy to use as always, especially with the Asus Aura controls also being part of their software now.
Asus really went crazy packing features into the board and frankly, I don’t have enough space here to go over them all but I really like the wide selection of connection options including a new USB 3.1 header that should start to become popular with new cases soon. They are also the only company to go with an optional AM3/AM4 mounting setup that lets you run newer or older mounting for your cooler. The only downside was the board I had only came with one backplate and you will need both if you want to use any type of cooling unless your new heatsink comes with one. But by far my favorite part of the board was the number of USB ports on the rear I/O. You end up with 14 ports and as someone who runs two USB hubs just to have the connection options I need this is a welcome change. You do give up onboard video connection options for them, but I don’t think many people will be buying this expensive of a board and then going with onboard later on when it's introduced.
That then leads me to the only real complaint I had about the board. This one is going to cost you to pick up. It is still a lot less than the MSI, so keep that in mind but AMD fans aren’t really used to having these higher end board options available. That said I think the board is completely worth it for the price. While I would go with the MSI for its crazy silver looks, the Crosshair VI Hero is the board I would be recommending for stability, support, and features. It's also the board I went with to test our AM4 CPUs now and in the future (until I get one in with onboard video lol). In other words, I think this might be the go to board unless you want an all silver build. Asus managed to fit a lot of overclocker features in the Crosshair VI Hero while still giving the everyday user everything they need now and in the future as well.

Live Pricing: HERE


