Board Layout and Pictures
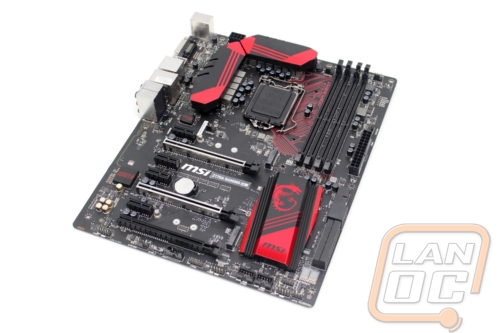
For MSI’s gaming products they have been moving to more and more red in their red and black color scheme. These new boards show that even more. They are still running a black PCB but the heatsinks have gone from having red as a trim to more of a red with a black trim. They also highlighted some of the traces going from the DDR4 slots to the CPU in red as well as something a little different. The brighter red that they are now using is a nice change as well because for a while it was a little too Asus’s red and black color scheme. Its great to be able to look at the Z170A Gaming M5 and see right away that MSI is constantly evolving, not sticking with what worked for them last generation.
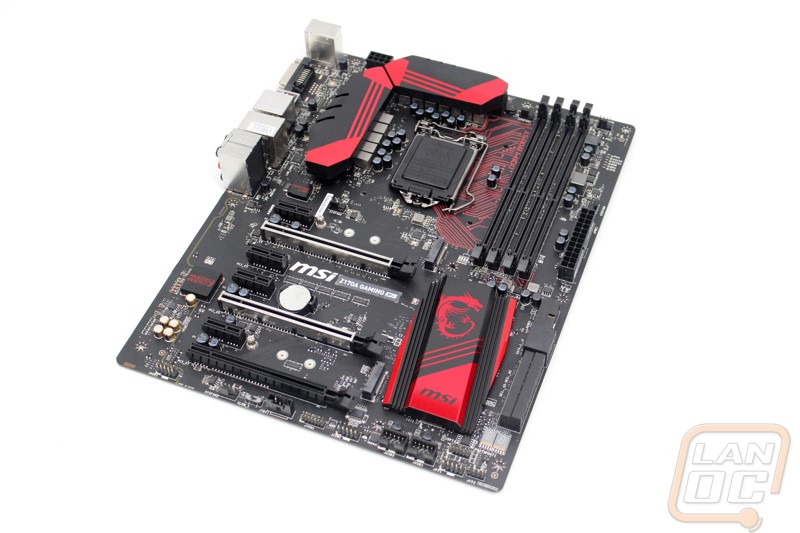
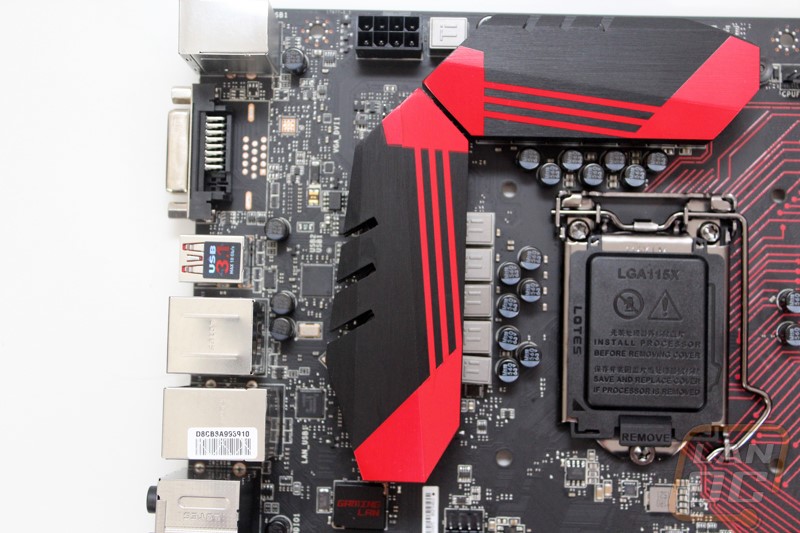
There are three heatsinks on the Gaming M5, two of those are up around the CPU socket. Much like the packaging MSI has evolved and cleaned things up from their past designs. In the past their heatsinks were designed around having a dragon design showing from the side profile, the new heatsinks are simpler and a lot cleaner although they do look a lot more like the heatsinks that Asus has been using on some of their ROG boards. The two heatsinks up here help keep all of the chokes and power circuitry cool. Surprisingly they didn’t use a heatpipe to connect the bottom heatsink to the others though. Speaking of the bottom heatsink, it keeps the chipset running cool. The design is low profile like always to keep it under long video cards. They did slip in their dragon logo here on a flat area in the middle, on both sides of the logo they have very short fins to help add to the cooling power, given that it can’t send any of the extra heat up to the larger heatsinks that extra cooling power is important.
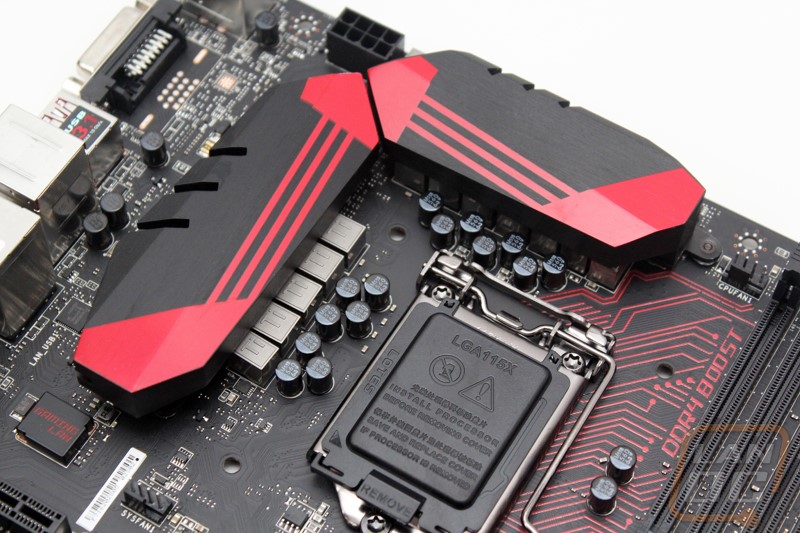
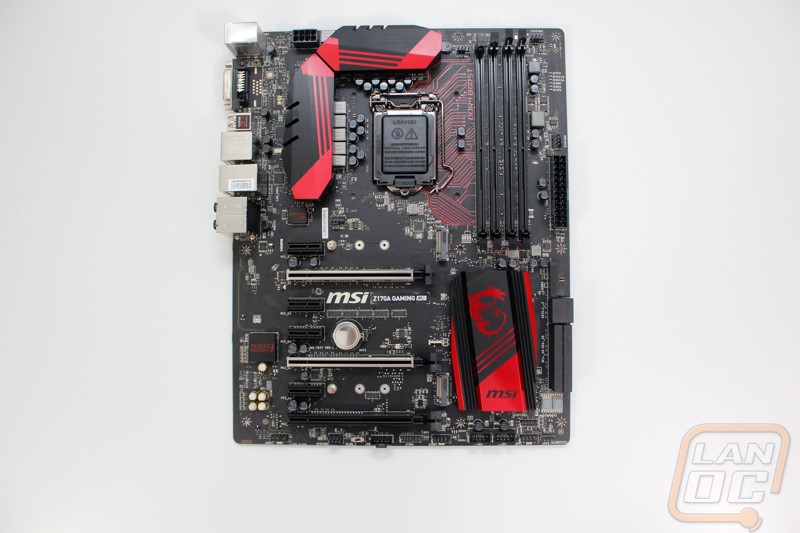
To get started I started up in the top left corner of the board behind the rear I/O panel. Here we have a better look at the red and black heatsink and of the red traces going over to the ram slots. There isn’t much going on in this area otherwise. We have the 8-pin CPU power up along the top edge and a four pin PWM fan header down to the bottom left of the CPU socket.
Over on the right side we can see that the red painted traces are labeled with a DDR4 boost logo. DDR4 Boost is MSI’s way of saying they ran the traces as short as possible and that they completely isolated it as well. Then of course we have the four black DDR4 DIMM slots for the new ram. They packed in three more 4-pin PWM headers into this area. Two are for the CPU fans and the last one is just a standard case fan header. Along the right edge they did slip in a stack of indicator LEDs to let you know where you have a problem if you can’t boot. Then down in the bottom right corner we have the 24-pin motherboard power connection.

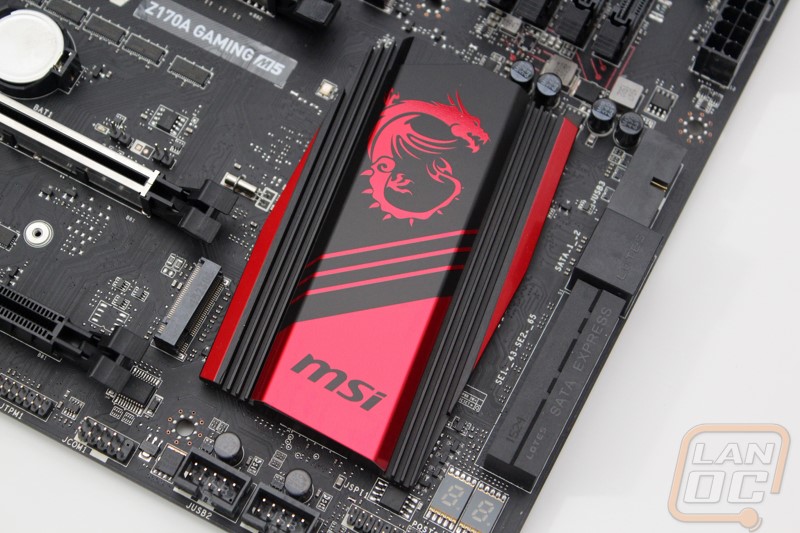
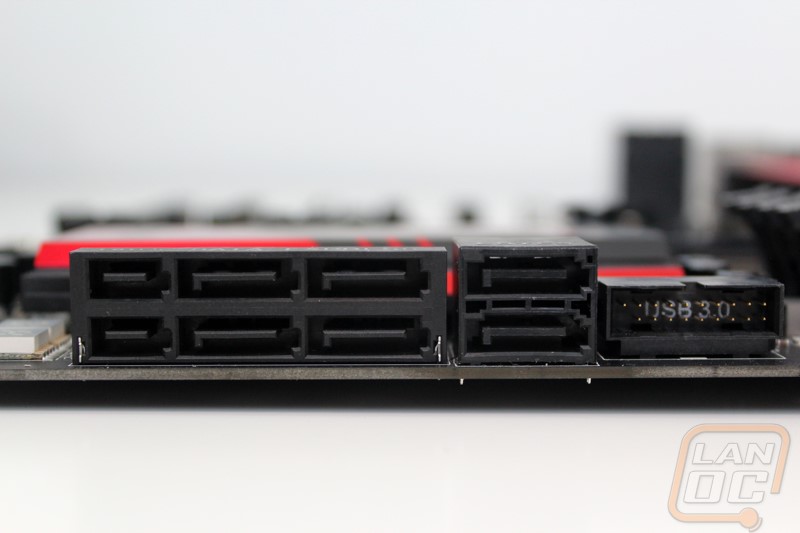
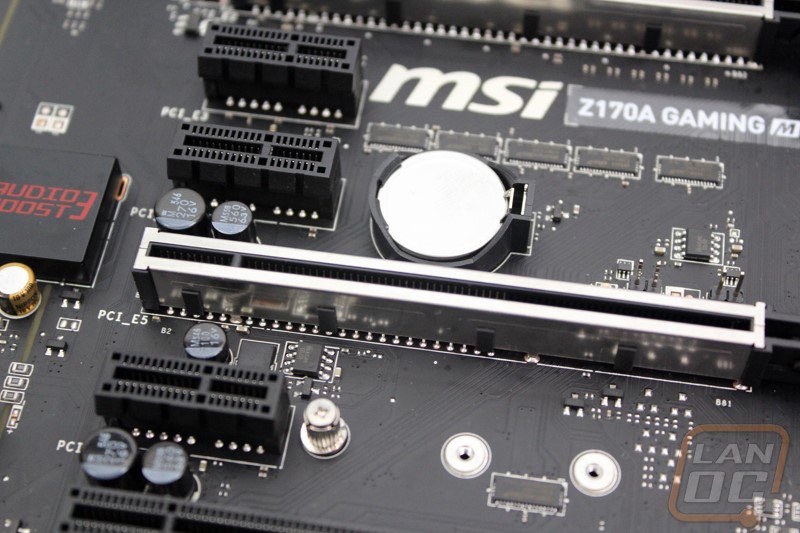
Moving down to the bottom right corner we have a lot more going on. For starters, tucked up in between the PCI slots and above the top PCI slot we have two M.2 slots that support all different lengths for your SSDs and other M.2 devices. Along the right edge MSI has put a right angled USB 3.1 header next to the SATA headers. Speaking of SATA, you get two SATA Express connections as well as two additional SATA plugs, this can also be six standard SATA 3 connections as well if you don’t need SATA Express. All of the SATA connections are right angled as well for the best possible wire management. Below the SATA Express connections they did slip in an LED readout for status codes as well as your CPU temp when your PC is booted. Down along the bottom edge we have the front panel connections right in the corner. Next to that are two internal USB 2.0 headers for hooking up devises or when you are using an older case without USB 3.0/3.1 connections.

Moving along the bttom edge we have a few communication headers and a nice switch to boot in slow mode when you are overclocking to hopefully help you get the highest possible overclock. The last 4-pin PWM fan header makes for a total of 5 on the board. The front panel audio connection is also along the bottom edge. It is just over the resin gap in the board to help show that the full audio circuitry is split from the rest of the motherboard to help prevent feedback. The audio card on the Gaming M5 has a short list of features to note. For starters you get gold connections on the rear I/O. Next the audio processor is covered in metal under the Audio Boost 3 logo. They also slipped in two dedicated headphone amps, one for the rear and the other for the front panel. For caps they went with Chemi-Con capacitors.
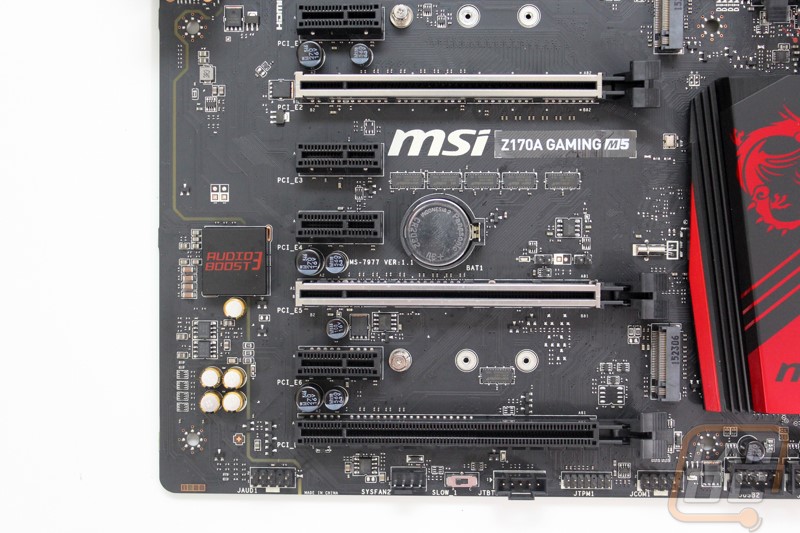
For PCI slots MSI included a crazy number of PCIE X1 slots in order to make room for the two M.2 connections. You get a total of four and then three full length slots. Due to the 16 CPU lane limitation of Z170 and of Skylake they can’t just let them all run x16 though. You can get one x16 slot, x8/x8, x8/x8/x4 or x8/ x8/x1. The two main slots have something interesting going on though, MSI covered them with a metal cover. They say this makes the slots stronger and also helps block any potential interference. I’m not really sure how much help they really are but the way I look at it is they can’t hurt!
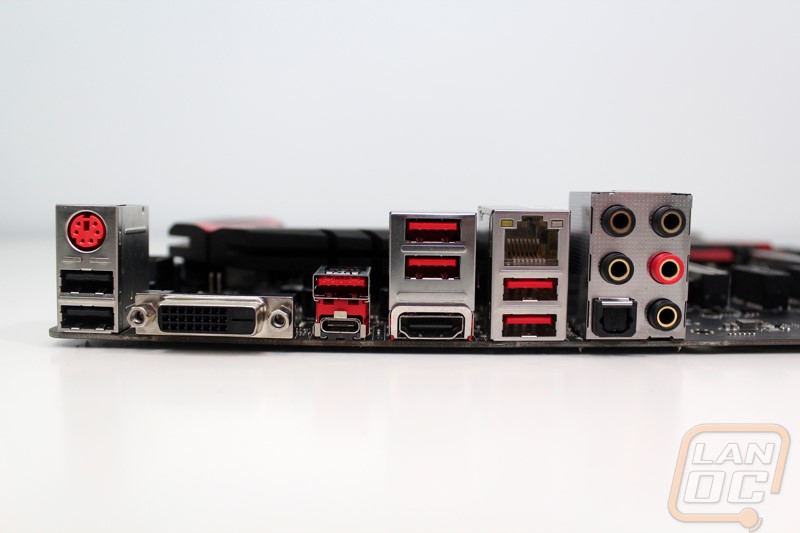
So the rear I/O panel on the Z170A Gaming M5 looks a little thin in features but when we get a good look at it MSI actually packed in a lot more than I expected. For starters it has the two standard USB 2.0 ports over on the left with a PS2 port for keyboards that support NKRO only over PS2. For display connections we have a DVI port and an HDMI. To go with that it also has a full audio setup with an optical out. MSI blacked out most of the audio connections but the single red one is the port that runs through the amp so keep that in mind when hooking everything up. Then for network you get a Killer NIC. The NIC is paired up with two USB 3.1 ports. There are a total of five standard USB 3.1 ports. The best part of the I/O to me is the inclusion of the single small USB 3.1 Type C port. This is the new plug that can be plugged in in both directions, I can’t wait for this to become even more popular.
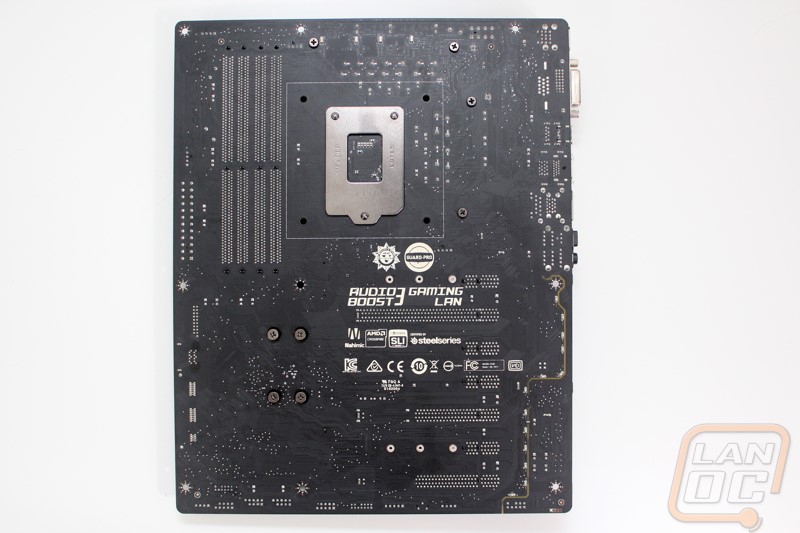
With the board flipped over backwards we can get a much better look at the flat black finish that MSI has been using on their motherboards. The finish looks great and doesn’t have any of the copper blead through that some other black PCBs have. Also on the bottom MSI has put all of the required logos. They have been doing this the last few chipsets and I also really dig it, it helps keep the top of the board clean looking while still having what they need. The one that stood out to me here though was the inclusion of the SteelSeries logo, I’m not sure what SteelSeries could be certifying other than maybe that their USB devices work.