So what is now years ago Adam and I were at a press event for Gigabyte at CES. At that event I spent some time playing against a pro gamer and we also had the chance to see them introduce their new games series of motherboards. At the end of that speech they slipped in a quick sneak peak of a new line of overclocking motherboards with an orange theme that they called OC Orange. Now I think everyone knows just how much I love orange and OC orange to me is LanOC orange, a color that we have used on the website from nearly the start. At that time Adam wrote that he imagined that I wouldn’t be able to sleep until I got my hands on one of the boards. Well it has been a long few years, but today is finally the day. Gigabyte sent over their new X99-SOC Champion flagship overclocking board and today I’m going to dig into it and see what it is all about. Oddly enough now that I can sleep, I want nothing more than to stay up and see what sets the board apart from the competition.
Product Name: Gigabyte X99-SOC Champion
Review Sample Provided by: Gigabyte
Written by: Wes
Pictures by: Wes
Amazon Link: HERE
|
Specifications |
|
|
CPU |
Support for Intel® Core™ i7 processors in the LGA2011-3 package L3 cache varies with CPU |
|
Chipset |
Intel® X99 Express Chipset |
|
Memory |
4 x DDR4 DIMM sockets supporting up to 32 GB of system memory * Due to a Windows 32-bit operating system limitation, when more than 4 GB of physical memory is installed, the actual memory size displayed will be less than the size of the physical memory installed. 4 channel memory architecture Support for DDR4 3400(O.C.)* / 3333(O.C.) / 3200(O.C.) / 3000(O.C.) / 2800(O.C.) / 2666(O.C.) / 2400(O.C.) / 2133 MHz memory modules Support for non-ECC memory modules Support for Extreme Memory Profile (XMP) memory modules Support for RDIMM 1Rx8 memory modules (operates in non-ECC mode) |
|
Audio |
Realtek® ALC1150 codec High Definition Audio 2/4/5.1/7.1-channel Support for S/PDIF Out |
|
LAN |
Intel® GbE LAN chip (10/100/1000 Mbit) |
|
Expansion Slots |
2 x PCI Express x16 slots, running at x16 (PCIE_1,PCIE_2) * For optimum performance, if only one PCI Express graphics card is to be installed, be sure to install it in the PCIE_1 slot; if you are installing two PCI Express graphics cards, it is recommended that you install them in the PCIE_1 and PCIE_2 slots. 2 x PCI Express x16 slots, running at x8 (PCIE_3,PCIE_4) * The PCIE_4 slot shares bandwidth with the PCIE_1 slot. When the PCIE_4 slot is populated, the PCIE_1 slot will operate at up to x8 mode. * When an i7-5820K CPU is installed, the PCIE_2 slot operates at up to x8 mode and the PCIE_3 operates at up to x4 mode. (All PCI Express x16 slots conform to PCI Express 3.0 standard.) 3 x PCI Express x1 slots (All PCI Express x1 slots conform to PCI Express 2.0 standard.) |
|
Multi-Graphics Technology |
Support for 4-Way/3-Way/2-Way AMD CrossFire™/NVIDIA® SLI™ technology |
|
Storage Interface |
Chipset: 1 x M.2 PCIe connector (Socket 3, M key, type 2242/2260/2280 PCIe x4x2/x1 SSD support) * Support for M.2 PCIe SSDs only. 1 x SATA Express connector 6 x SATA 6Gb/s connectors (SATA3 0~5) Support for RAID 0, RAID 1, RAID 5, and RAID 10 * Only AHCI mode is supported when an M.2 PCIe SSD or a SATA Express device is installed. (M2_20G and SATA Express connectors can only be used one at a time. The SATA Express connector becomes unavailable when an M.2 SSD is installed, but the SATA3 4/5 connectors are still functional.) 4 x SATA 6Gb/s connectors (sSATA3 0~3), supporting IDE and AHCI modes only (An operating system installed on the SATA3 0~5 ports cannot be used on the sSATA 0~3 ports.) |
|
USB |
Chipset: 2 x USB 3.0/2.0 ports available through the internal USB header 8 x USB 2.0/1.1 ports (4 ports on the back panel, 4 ports available through the internal USB headers) Chipset + Renesas® uPD720210 USB 3.0 Hub: 4 x USB 3.0/2.0 ports on the back panel |
|
Internal I/O Connectors |
1 x 24-pin ATX main power connector 1 x 8-pin ATX 12V power connector 1 x 4-pin ATX 12V power connector 1 x OC PEG Power Connector 1 x SATA Express connector 10 x SATA 6Gb/s connectors 1 x M.2 Socket 3 connector 1 x CPU fan header 1 x water cooling fan header (CPU_OPT) 3 x system fan headers 1 x Thunderbolt™ add-in card connector 1 x OC Panel connector (for future expansion) 1 x front panel header 1 x front panel audio header 1 x S/PDIF Out header 1 x USB 3.0/2.0 header 2 x USB 2.0/1.1 headers 1 x serial port header 1 x Clear CMOS jumper 1 x power button 1 x reset button 1 x Clear CMOS button 1 x CPU mode switch 1 x OC Trigger switch 1 x DualBIOS switch 1 x BIOS switch Voltage Measurement Points |
|
Back Panel Connectors |
1 x PS/2 keyboard port 1 x PS/2 mouse port 4 x USB 2.0/1.1 ports 4 x USB 3.0/2.0 ports 1 x RJ-45 port 1 x optical S/PDIF Out connector 5 x audio jacks (Center/Subwoofer Speaker Out, Rear Speaker Out, Line In, Line Out, Mic In) |
|
I/O Controller |
iTE I/O Controller Chip |
|
H/W Monitoring |
System voltage detection CPU/System/Chipset temperature detection CPU/CPU OPT/System fan speed detection CPU/System/Chipset overheating warning CPU/CPU OPT/System fan fail warning CPU/CPU OPT/System fan speed control |
|
BIOS |
2 x 128 Mbit flash Use of licensed AMI UEFI BIOS Support for DualBIOS™ PnP 1.0a, DMI 2.7, WfM 2.0, SM BIOS 2.7, ACPI 5.0 |
|
Unique Features |
Support for APP Center * Available applications in APP Center may differ by motherboard model. Supported functions of each application may also differ depending on motherboard specifications. @BIOS Ambient LED EasyTune EZ Setup Fast Boot Cloud Station ON/OFF Charge Smart TimeLock Smart Recovery 2 System Information Viewer USB Blocker V-Tuner Support for Q-Flash Support for Smart Switch Support for Xpress Install |
|
Bundle Software |
Norton® Internet Security (OEM version) Intel® Smart Response Technology cFosSpeed |
|
Operating System |
Support for Windows 8.1/8/7 |
|
Form Factor |
E-ATX Form Factor; 30.5cm x 26.4cm |
Packaging and Accessories
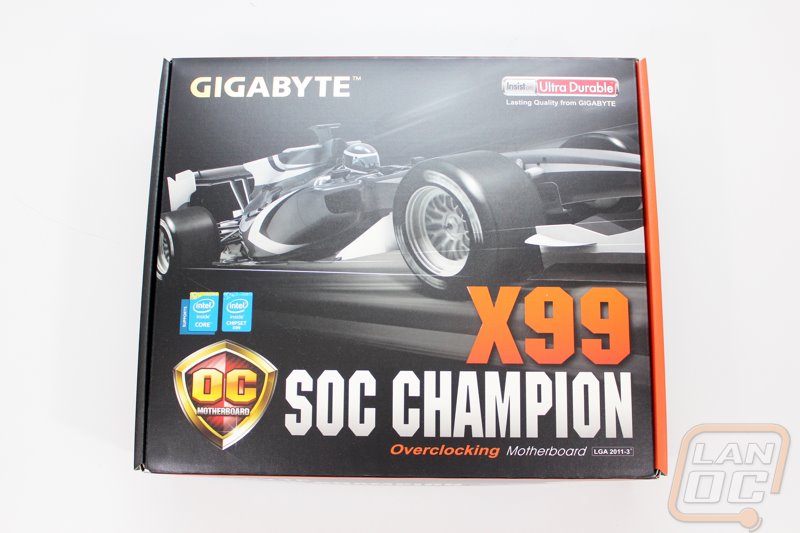
Right from the start you can spot the X99 SOC Champion’s packaging when next to other Gigabyte products. Being an overclock board they use the same orange that is used on the trim on the packaging as well to highlight part of the name as well as the side of the packaging. The front of the box has the X99 SOC Champion branding in huge letters along with a Overclock logo. The two intel logos are smaller as well as the Gigabyte branding as well. Then in the background there is a formula 1 car to highlight that this is their fastest board.
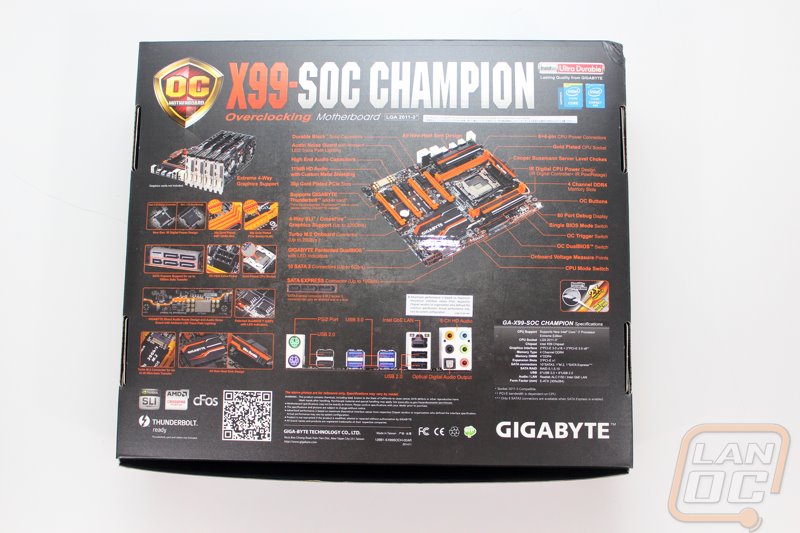
Around on the back Gigabyte has a few photos of the mothboard including one with a ton of lines coming out of it with highlights of each of the boards features. Over on the left they have featured a few of those features with closer photos of each. They also slipped in a photo of the board with four video cards on it as well to show off its quad SLI and Crossfire support. Beyond all of that there is a small specification listing as well as a photo of the rear I/O panel with labels to show all of the connections you will get with the X99 SOC Champion.
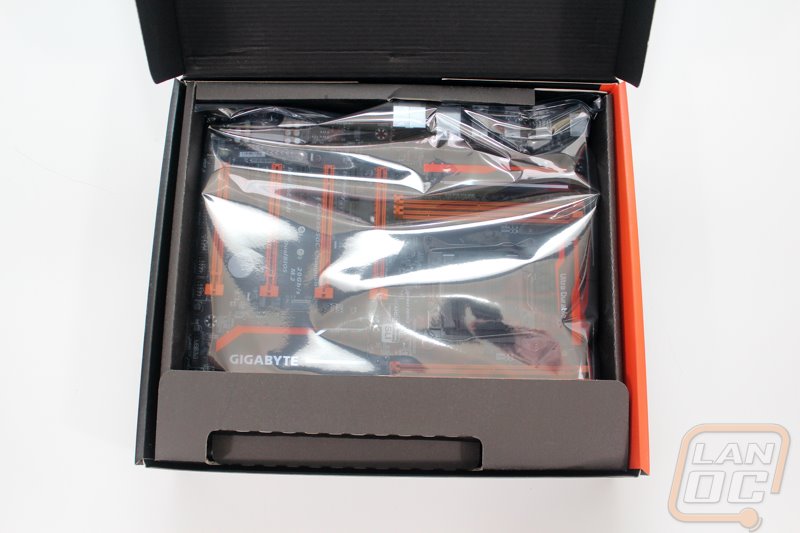
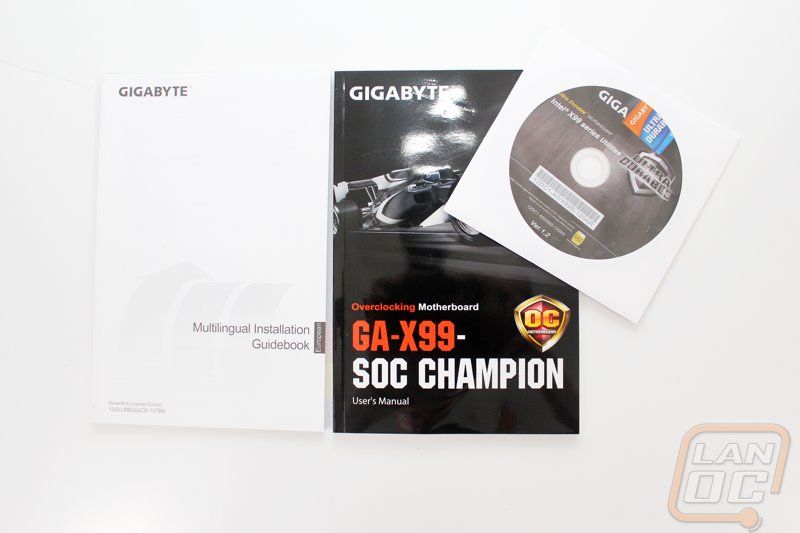
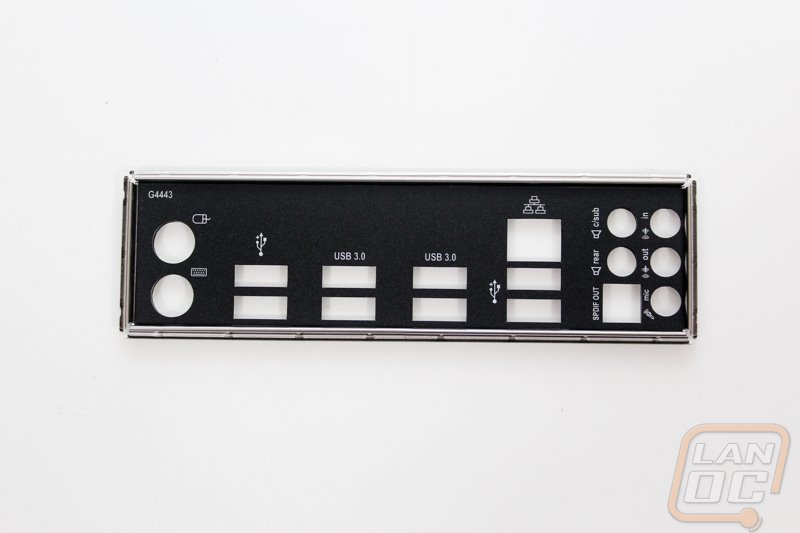
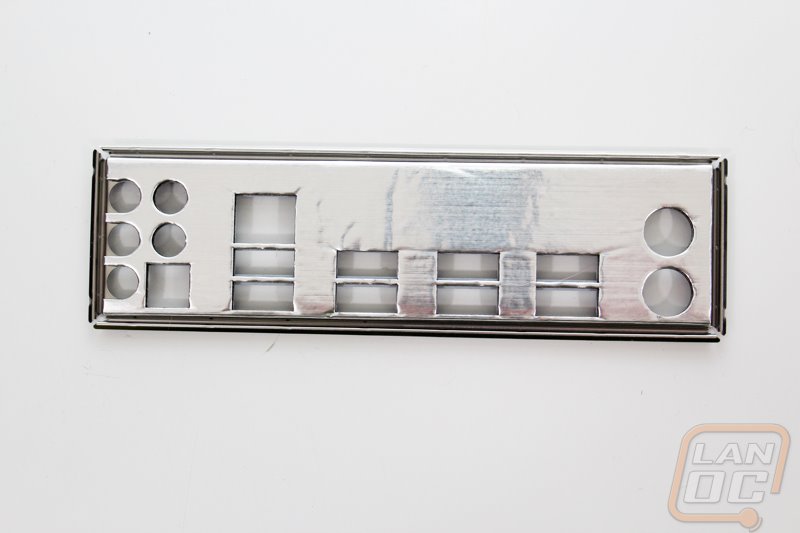
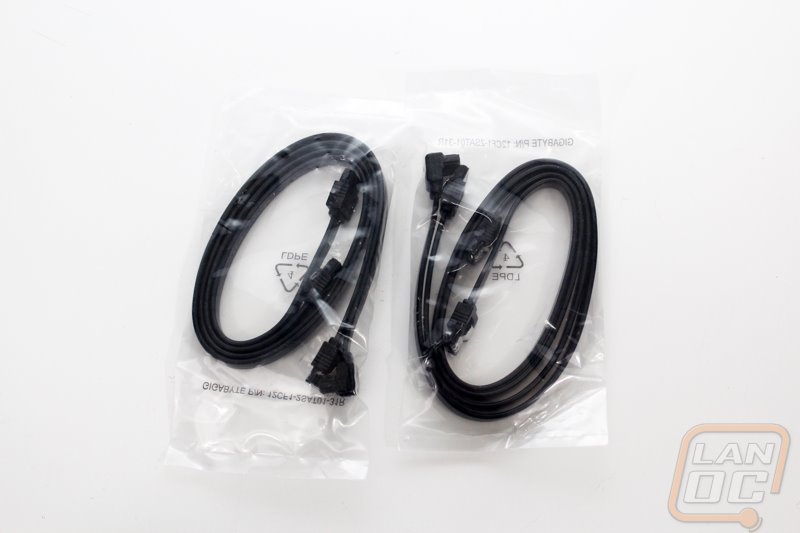
Inside the box the motherboard is wrapped up in a static protective bag and then it sits in a cardboard tray that can be pulled out. Up under that tray are all of the accessories and all of the included documentation. For documentation you get a thick users manual as well as a multilingual installation guidebook. You also get a dvd with the drivers and software as well. For accessories you get a blacked out rear I/O panel with easy to read white lettering. Being a premium board the I/O cover doesn’t use the small springs that sometimes get caught in I/O plugs, instead they use a foam backing that still keeps things tight. For SATA cables you get four all black cables with two of the cables having a single right angle connector on them should you need that option.
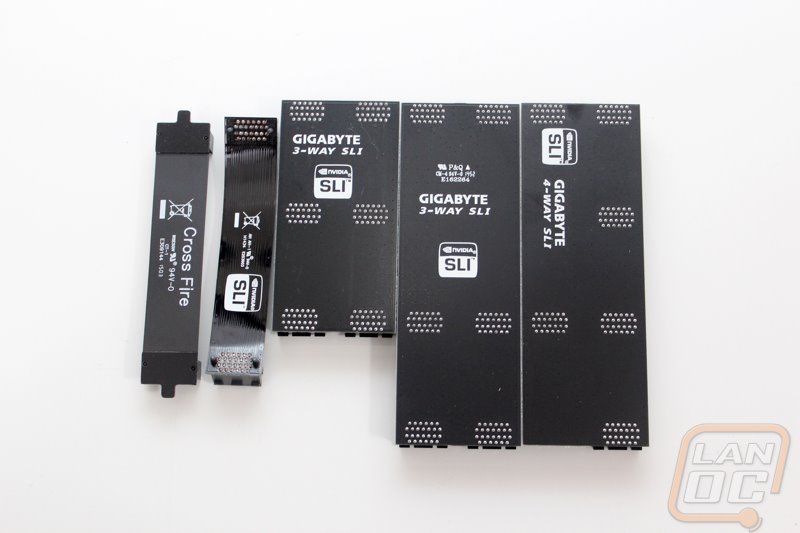
Really the coolest thing that comes with the X99 SOC champion to me is the collection of SLI and Crossfire bridges. You get two different three way SLI bridges depending on the card configuration you want to run, those and the quad SLI bridge are all three solid PCB bridges. You also get a single flexable SLI bridge for dual SLI configurations. What really stood out was the inclusion of a crossfire bridge though, normally those come with the cards themselves. All five of the included bridges are all blacked out. We see this more with SLI bridges because they come with the motherboards, but it is awesome to finally see a nice blacked out Crossfire bridge. It’s a shame that the 290 and 290X don’t use them anymore!
Board Layout and Pictures
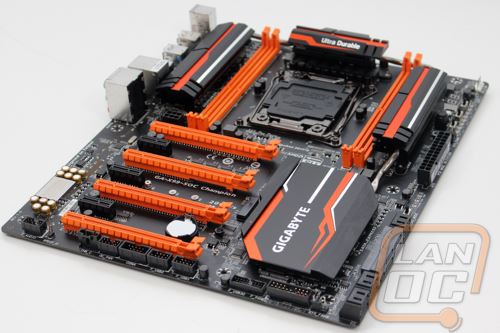
If you have seen any of Gigabytes previous overclock motherboards you should know what to expect with the X99 SOC Champion. Alongside of all of the overclock specific features, Gigabyte highlights their overclocks boards with their orange and black theme. MSI does something similar with their yellow M-Power boards. Asus is a little harder to figure out because their overclocking and gaming boards all fall under the ROG brand with its red and black theme. This makes picking the board that works for you a little easier because if you plan on overclocking you go orange and for Gigabyte you go with the G1 line for gaming.
The X99 SOC Champion is one of a few different overclock boards for Intel’s X99 chipset, this board stands out though because they have refined the overclocking features now that they have had more time with the chipset. The Champion when compared to the Force also drops a few features. You loose some of the OC buttons, fewer RAM slots, and a few less connection options both on the board and on the rear I/O.
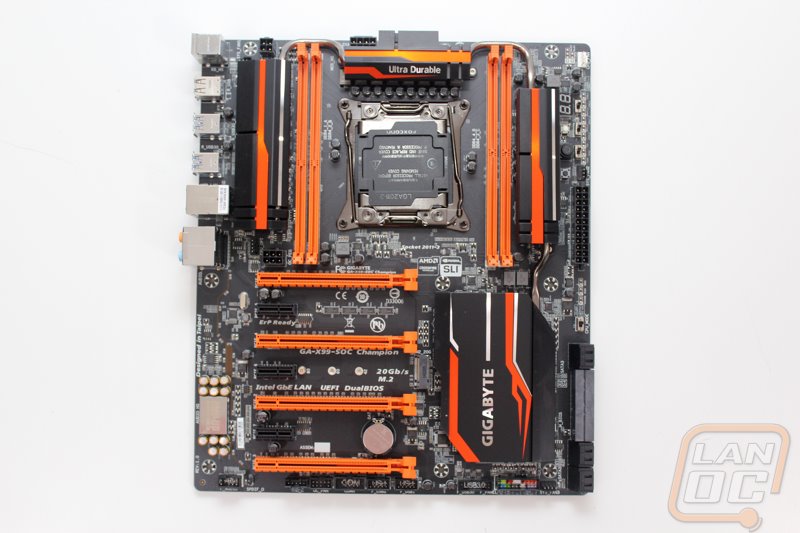
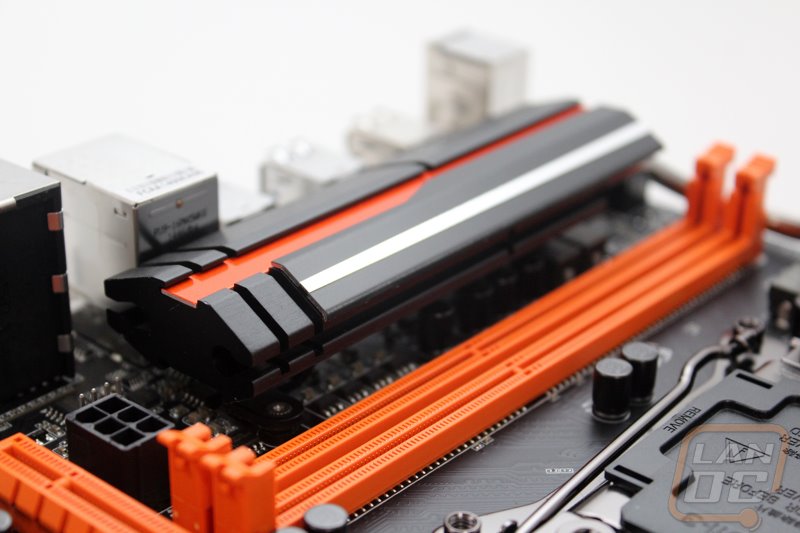
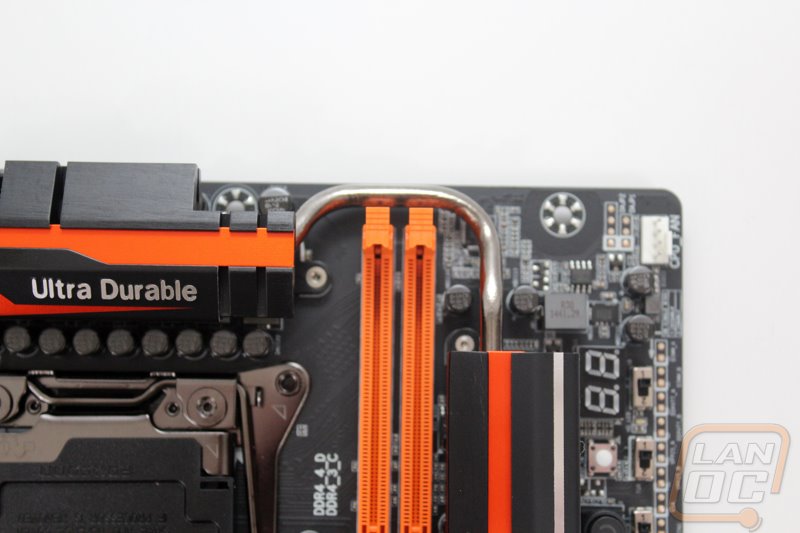
Being an overclocking board Gigabyte went all out on the cooling for the SOC Champion. They didn’t use any fans or water cooling options opting to keep things simple with passive cooling. To do that they did use an impressive four large heatsinks that are all combined with heatpipes to spread the heat all around. For the chipset cooler the large low profile heatsink is considerably larger than what you see on most other boards, taking up all of the space from the ram to front panel connections. I love how the heatpipes for the heatsinks on both the left and right of the ram slots are carefully wrapped around out of the way.
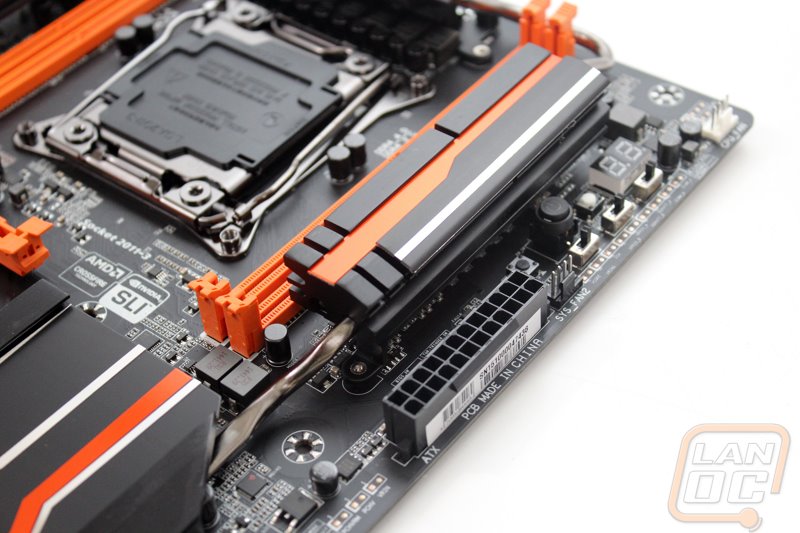
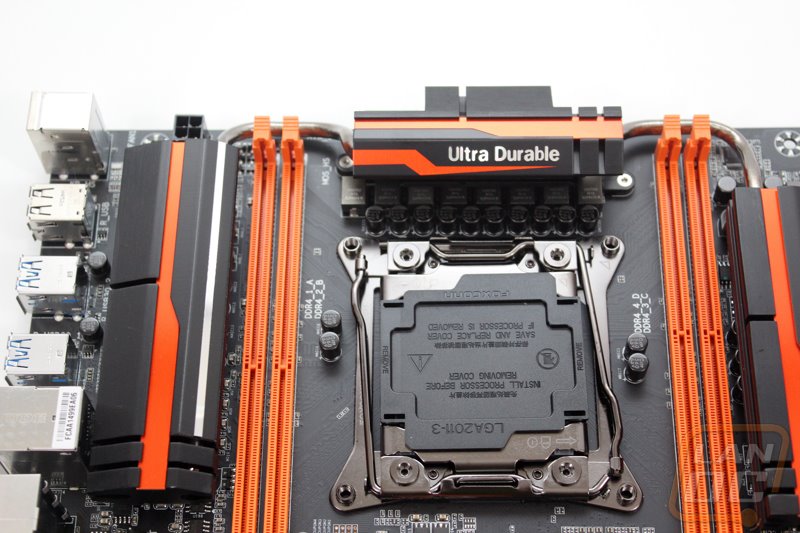

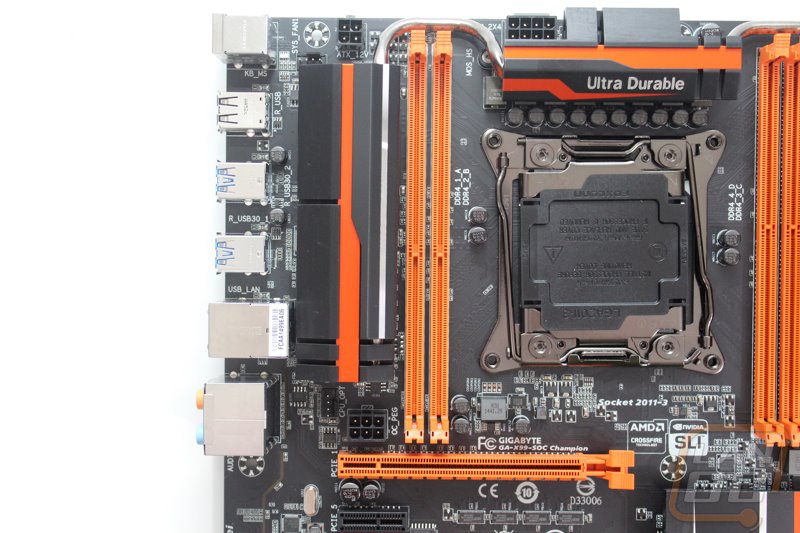
Starting up in the top left corner we have two DDR4 DIMMs with a large heatsink packed between the DIMMs and the back of the rear I/O. Just above that heatsink we have a 4-pin CPU power along with a second CPU power 8-pin above the heatsink just above the CPU. The heatsink is notched to fit just around the 8-pin. There is a 6-pin PCI power plug just above the top PCIe x16 slot, this plug helps feed additional power for when you are running quad-SLI and Crossfire configurations. For fan connections we have a four pin near the 6-pin and a another 4-pin PWM fan header up at the top next to the 4-pin CPU power.
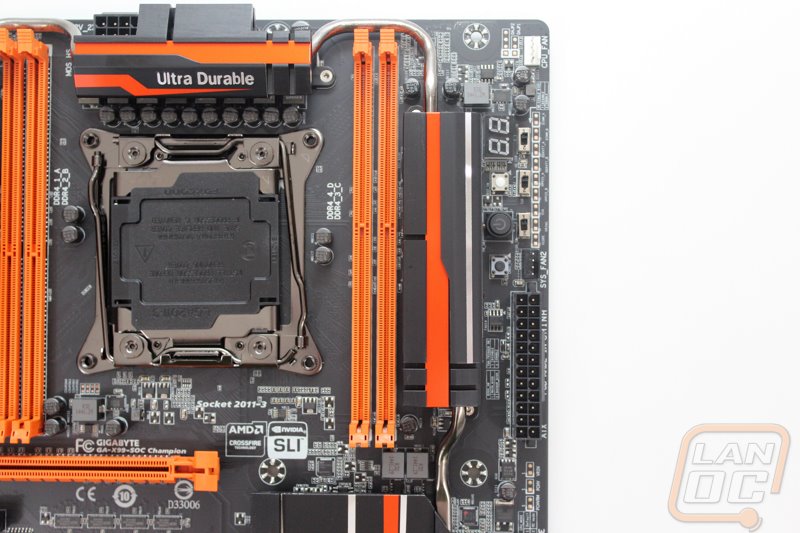
Over on the top right side we have two more DDR4 DIMMs giving us a total of four, half of what most standard X99 boards have but in line with an overclocked focused board would have (like the Classified that I previously reviewed). Over on this side we have another power connection, the 24-pin motherboard power connection. Just above that we have most of the overclocking specific features of the SOC Champion. Unlike the SOC Force we just have a single large power button where the Force had reset and buttons to adjust your Bclk speed. Anyhow we still have a few other things going on here. For starters we have the CPU fan header (4-pin) and a system fan header. We have onboard voltage measuring points along the edge. Then we have three switches, one is the OC DualBIOS Switch, the next is the OC Trigger, then the last is the Single BIOS Mode Switch.
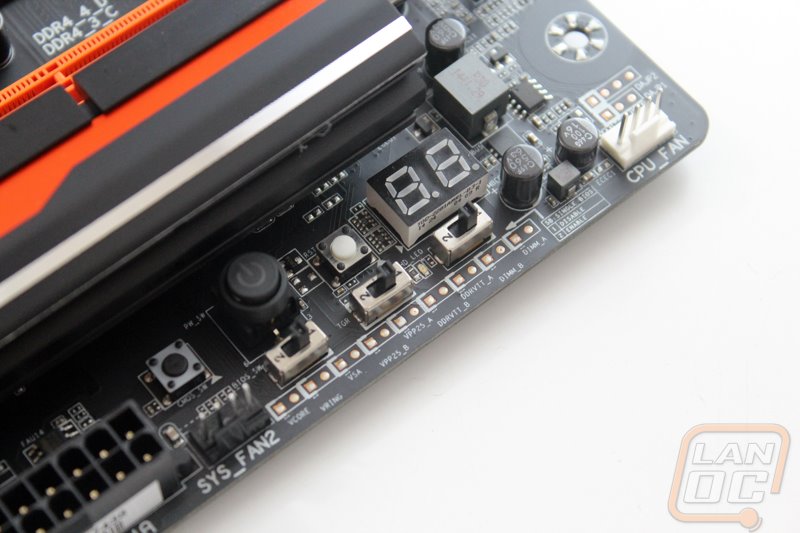
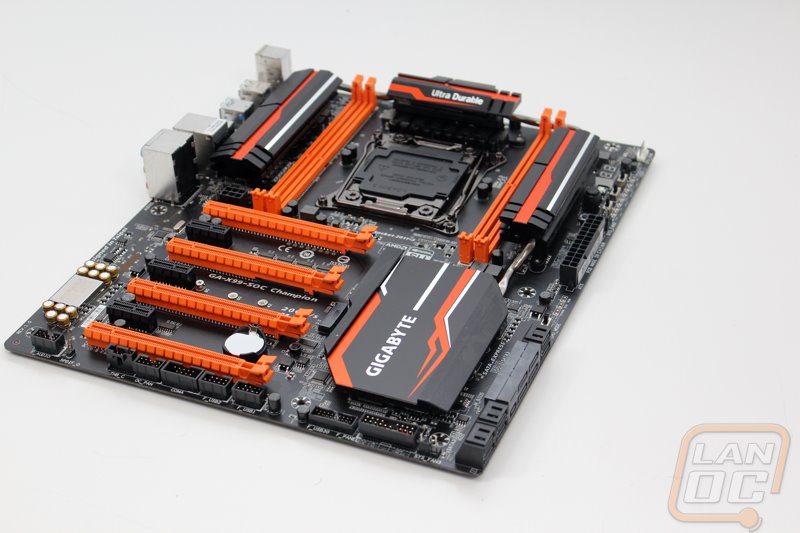
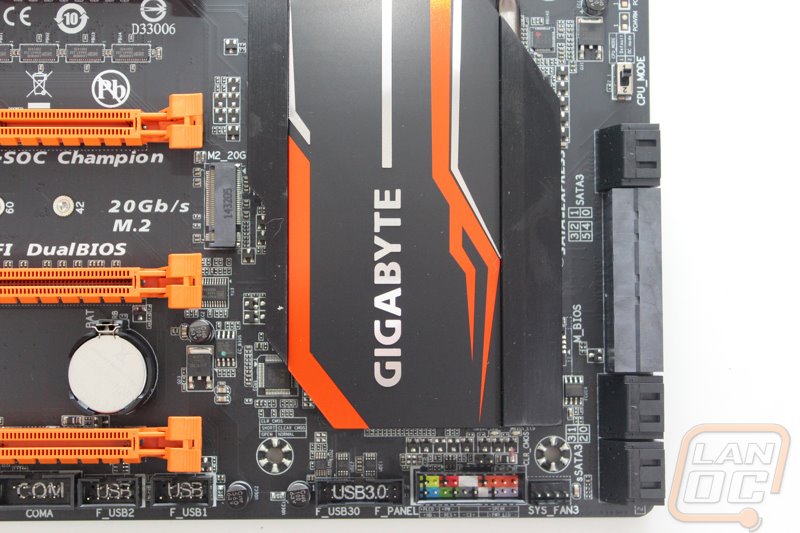
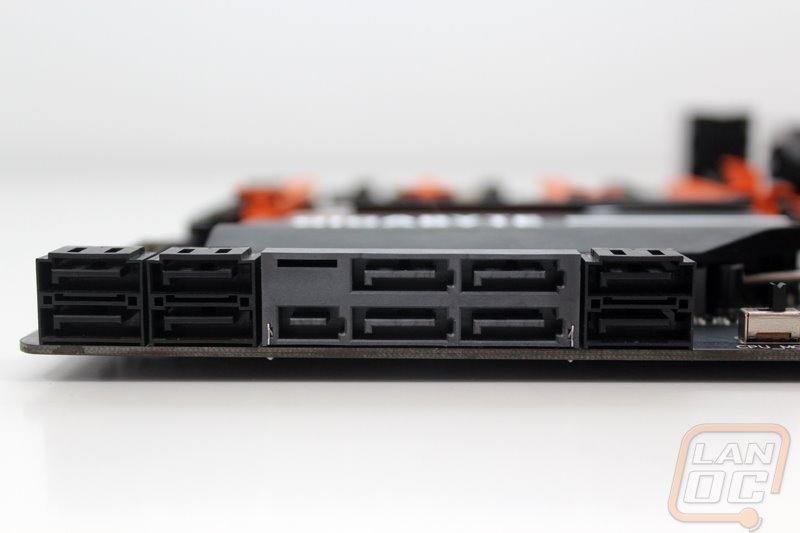
Moving down the right side of the board, next we have the CPU Mode switch that switched from default to Overclocking mode. Just below that we have all of our SATA connections. We get a total of six standard SATA 3 ports along with two SATA Express connectors that consist of two normal SATA plugs and a small half connection that adds up to a faster 10 Gb/s interface. Down along the bottom edge we have our fifth and final 4-pin fan header. Also down along the bottom are two USB 2.0 headers and a USB 3.0 header as well. Then of course we have the front panel connections. I love that Gigabyte makes hooking up the front panel connections simple with color coding inside of the plug itself but they also include labels printed on the PCB just below.
On over to the bottom left edge we have the front panel audio plug all the way over on the left corner. Beyond that you have a THB_C plug and a plug for Gigabyte’s Overclock Panel.
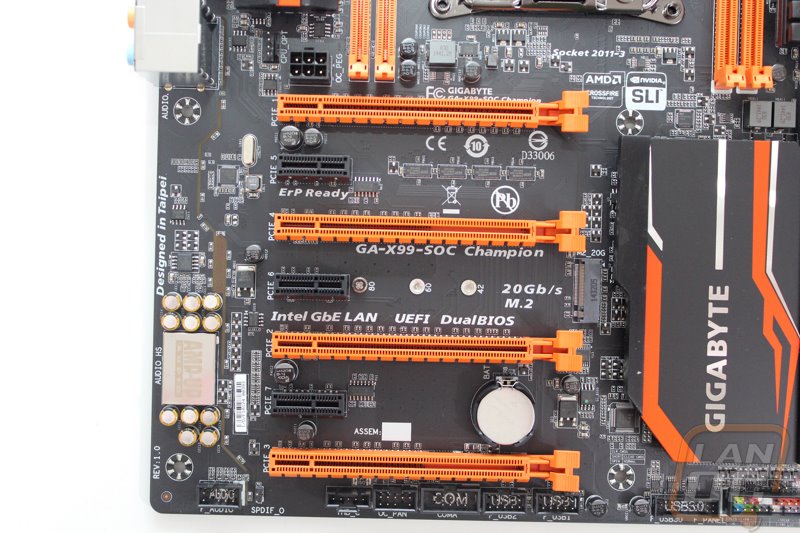
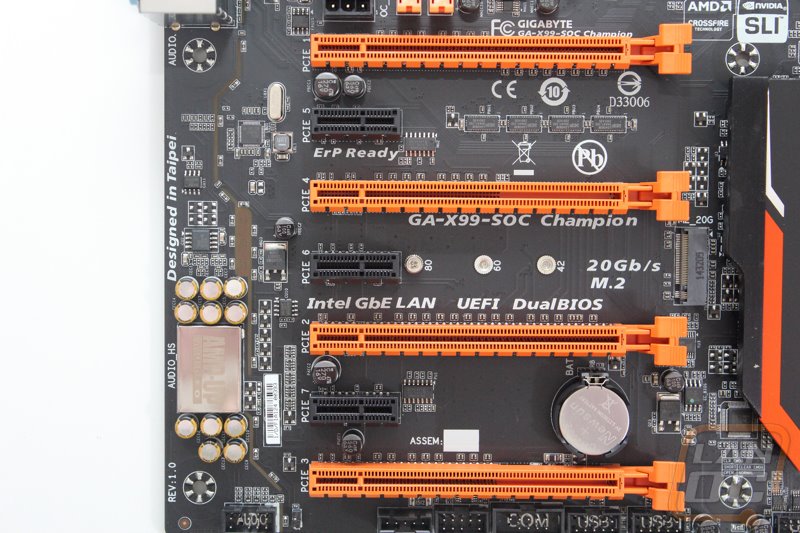
As I have mentioned before the X99 SOC Champion has full support for Quad SLI/Crossfire. Gigabyte was careful to space each out to get a full two slots for each to make room for their coolers. If you run watercooling or don’t end up running four cards you do have a few other options. In between each x16 slot you do get a single PCIe x1 slot. The CPU lane breakdown for the PCIe x16 slots is the following. If you are running two cards you will get x16 for both cards, when running 3 or 4 cards the 3rd and 4th slots share bandwidth with the 2nd and 1st slots respectively. That means a quad card setup will get x8 to each card, but if you run tri SLI you could get x8 to two and x16 to one. Also keep in mind if you are running the i7-5820K you get fewer CPU slots so the forth slot drops down to x4.
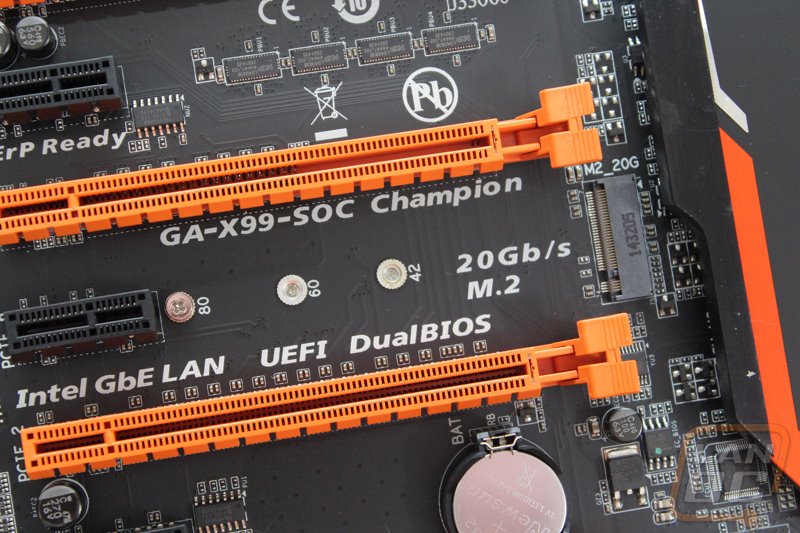
Right in the middle of the PCIe slots they did also slip in an M.2 connector. You have mounting options for three different lengths and Gigabyte made it simpler by labeling each mount. They are calling this a Turbo M.2 slot although an easier way to look at it is a x4 M.2 meaning it has four CPU lanes. This means full support for the new SSDs with up to 20 Gb/s bandwidth.
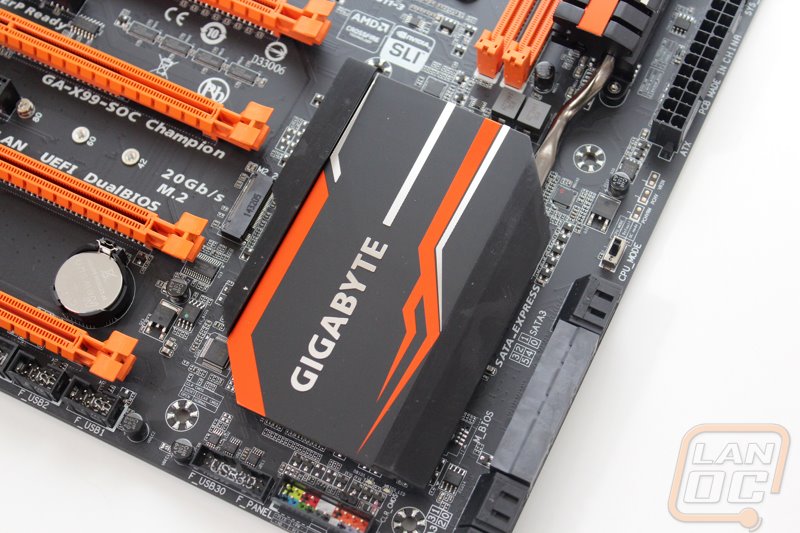
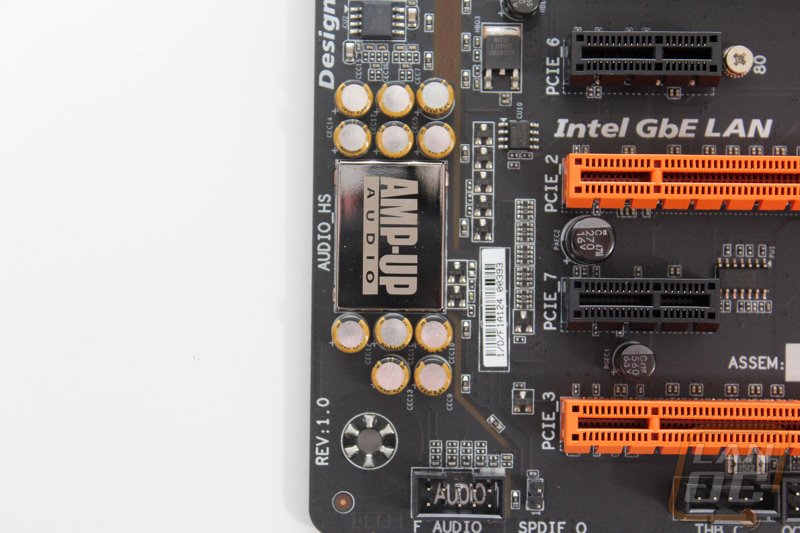
Also tucked in over next to the PCIe slots is the SOC Champion’s audio card. Gigabyte uses a Realtek ALC1150 audio card with a small metal shield over it with the AMP-UP Audio logo on top of it to prevent interference. The entire audio section is also on its own split PCB and to show that they use a backlit strip to show the gap between the audio PCB and the rest of the motherboard. They also keep the left and right channels split up on different PCB layers to help prevent crosstalk. The ALC1150 provides ten DAC channels that give you a 7.1 through the rear audio panel as well as 2 channels for the front panel connection. You also get a built in rear audio amp, oddly enough I’m not seeing a front headphone amp, something a lot of the most recent boards seem to come with.
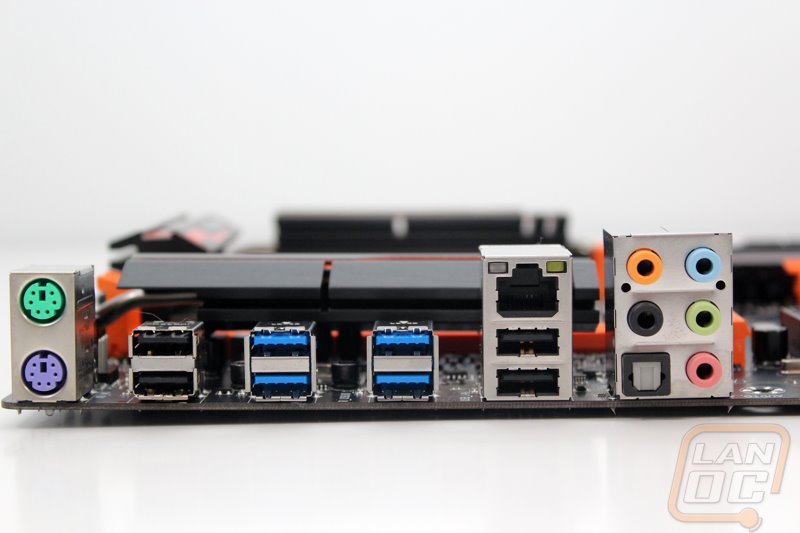
Much like the EVGA X99 board that I tested at launch. The X99 SOC Champion doesn’t have to much on its rear I/O panel. With an overclocking focus we get just enough to get the job done. So over on the left we have two PS2 ports, one for a mouse and a second for a keyboard. I know that a lot of people want PS/2 ports for their old Model M keyboards, but I can’t for the life of me understand the need for a mouse PS/2 port, almost no one is using them. That said it is very possible that the PS/2 mice are less likely to be an issue in extreme overclocking. Beyond that you get four USB 2.0 ports and four USB 3.0 ports. There is also a single Gigabyte Ethernet port and then a 5 port audio panel with an optical connection as well. The EVGA board did have an easy access Clear CMOS button and I wouldn’t have minded getting that on this board as well, but overall you get enough to use this as a main PC if you would like but not the crazy number of USB ports that you see on some of the other boards.
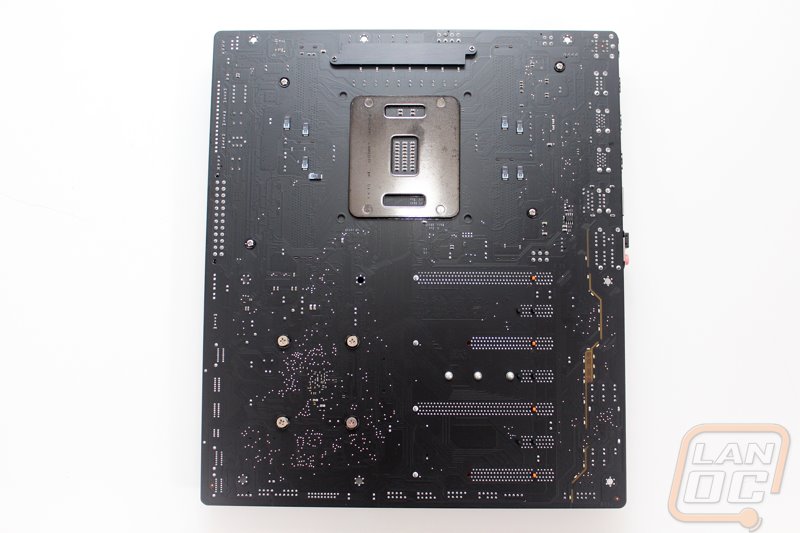
When we take a look at the back of the X99 SOC Champion we see a few things going on. For starters we have the standard X99 CPU backplate for the two spring holddown. This board also has a second backplate on the back though, the second one is for the heatsink just above the CPU socket. Beyond that here on the bottom we can see the separated audio PCB better and we can also see that Gigabyte went with a slick flat black PCB color.
UEFI and Software
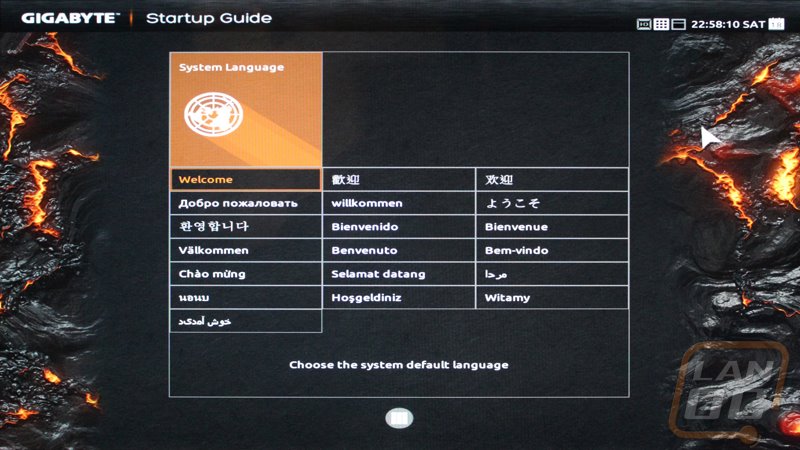
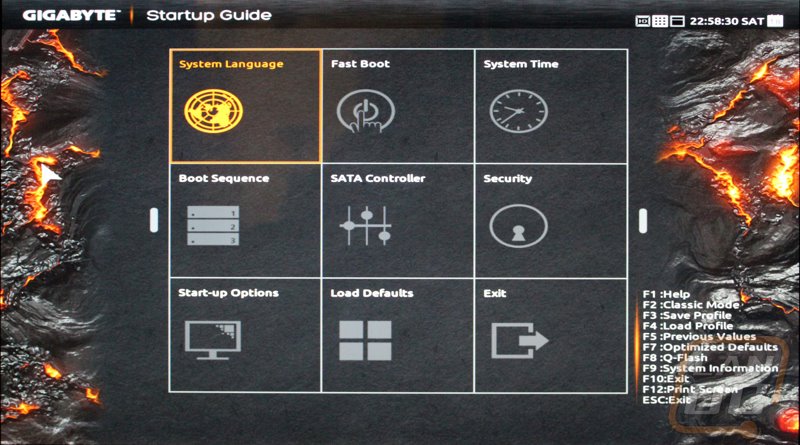
Once I had our testbench up and running I jumped into the UEFI of the X99 SOC Champion to see what Gigabyte has been up to on the BIOS side of things. When I got into the UEFI right after the CMOS was cleared I was surprised to see that they have a quick and easy startup page that lets you first select the language that you prefer and then from there you get a page with quick access to the basic things needed to get everything setup. That includes the system time, boot and SATA options, as well as security and start up options.
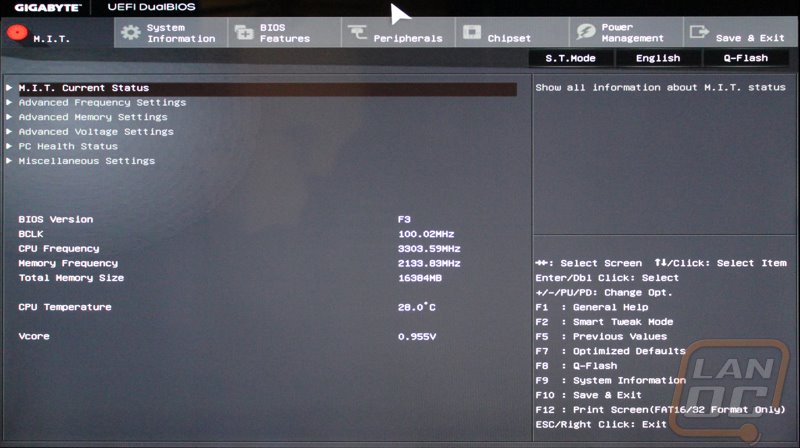
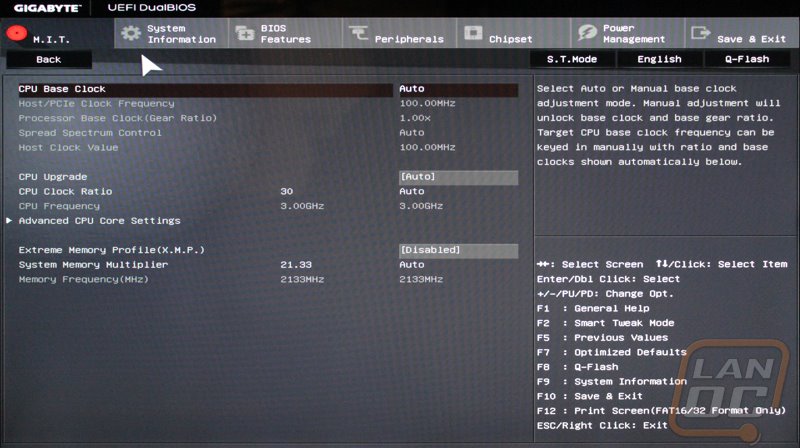
Once you get through the startup guide you can get into the classic UEFI mode if you would like. Here we have a much more normal layout. Being the Overclocking board the landing page takes us right to CPU frequency, memory settings, and voltage settings pages. There isn’t anything to surprising here, you can use your mouse to browse or go old school with your keyboard. When you mouse over or navigate to an option the area over on the right side does show a description of what the option does to hopefully help and prevent any damage.
From there we can get into the BIOS features tab up top but frankly this would be better labeled as the boot options page. Here we can select the boot priority, turn on and off boot features and set the hard drive priority.

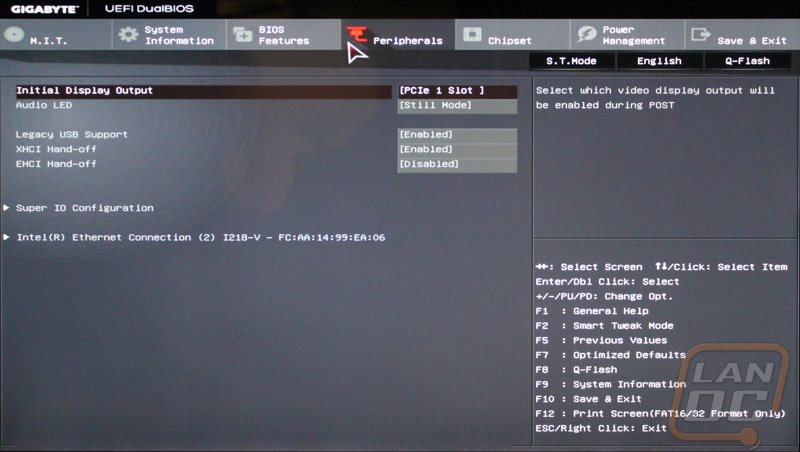
The peripherals tab lets us set the audio LED lighting, select what PCIe slot should have display output priority, and get into things like the Ethernet connection settings.
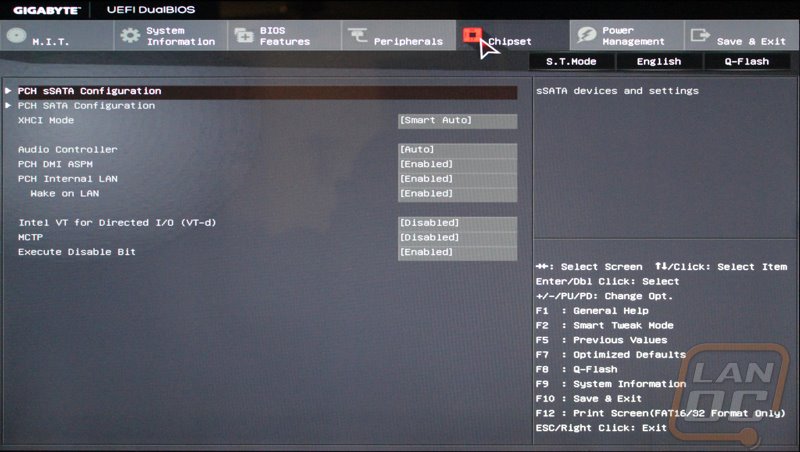
The chipset tab digs a little deeper with options for the sSATA and SATA configurations as well as audio controller and LAN features, basically most of what is built into the chipset.
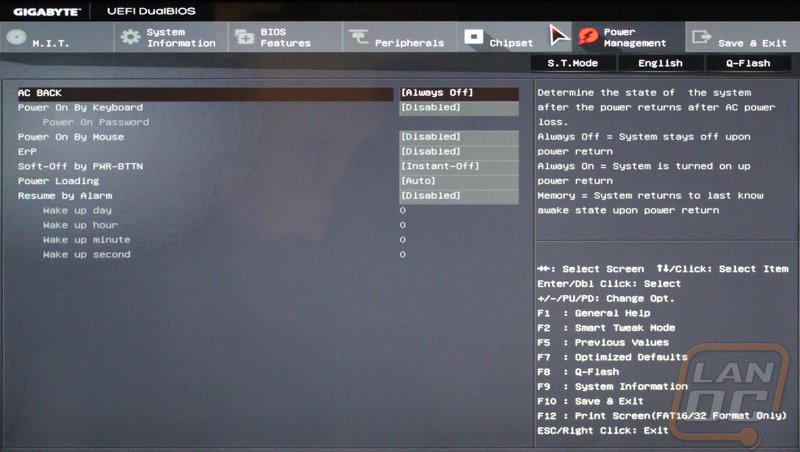
The last tab before getting to the save and exit option is the Power Management tab. Here we can set how we would like the computer to handle power loss and things like powering on from mouse movement or over the NIC. Standard stuff really.
Next I booted back into windows and installed a few of the different software utilities that Gigabyte has on their website. Specifically I installed the APP Center, Ambient LED controls, and Easy Tune. They did have a few cloud options but I was just trying to dig into the meat of everything, the stuff that most people are looking for. I was a little surprised actually to find out that once you install everything that the APP Center actually brings everything together into one program. This is something that Asus has been doing for years and MSI has recently jumped on board as well. I think the only way they could improve on this would be to just give a single download option and bundle everything together. I know I would prefer to not have a few of the things installed, but if those things are just options in one single program that I install its not a big deal.

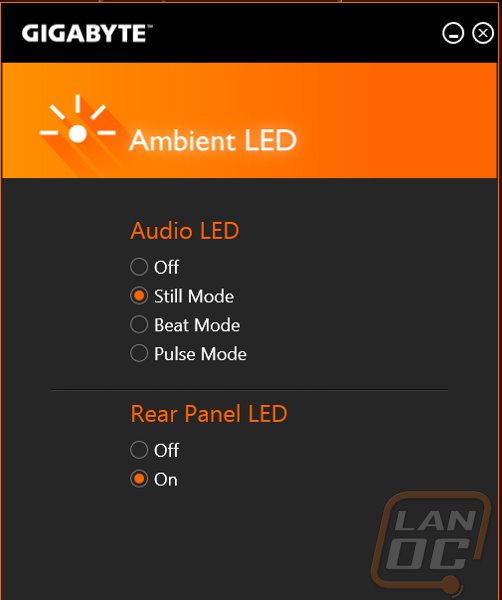
The first app I took a look at was the lighting control. For starters I was very happy to see that the software uses the same orange theme as the motherboard. Beyond that the APP Center and the programs all have a nice windows 8 theme that is clean, simple, and to the point. It looked good when running it on Windows 7 but I bet it would feel even more at home on any of my Windows 8 PCs. The lighting controls were simple, you can turn them off, set them on all of the time, have them pulse, or light up to the beat of any music playing through the sound card. There is also an option to turn the rear panel LED on or off. I’m not sure if this is a carryover from the SOC Force, but I didn’t see a rear panel LED at all.
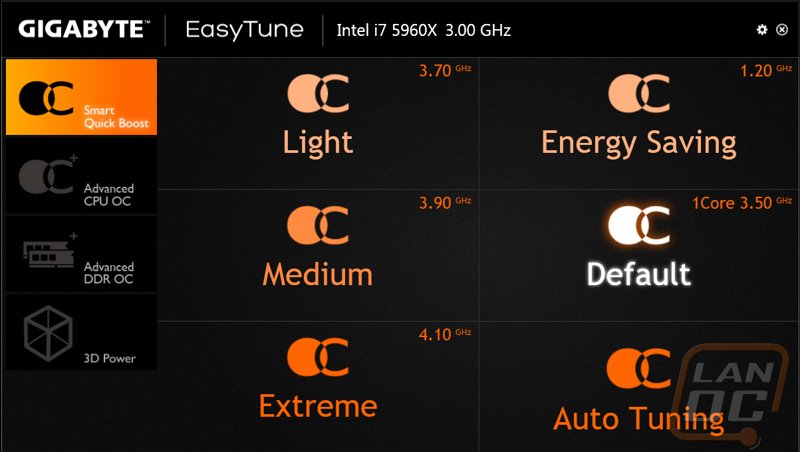
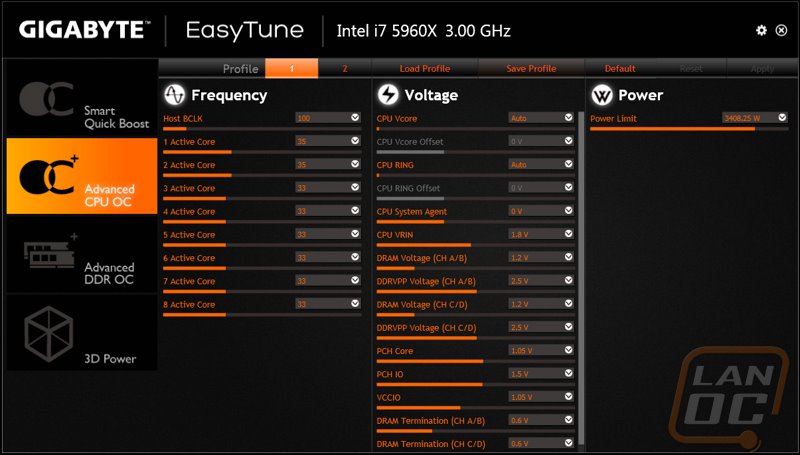
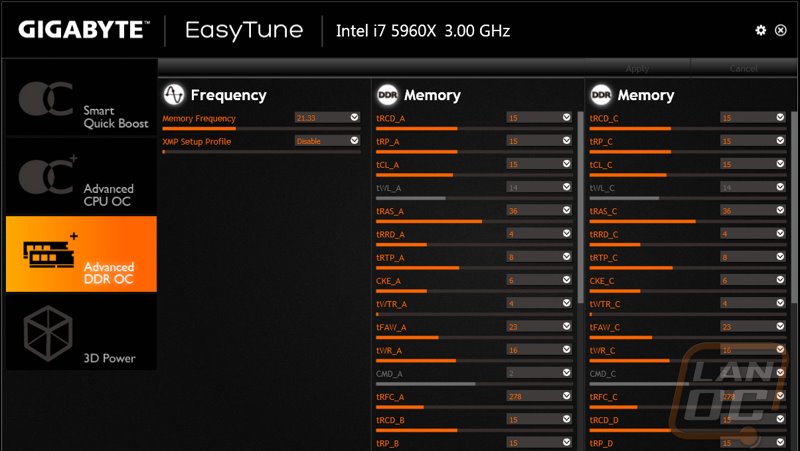
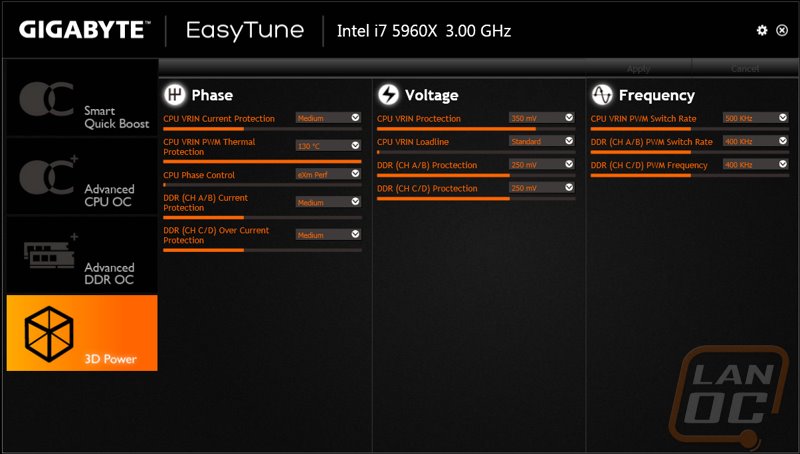
The other app that I installed was the EasyTune program. Now I remember a LONG time ago just how weird this program was so just opening it all up now is so refreshing. Just like I mentioned before, the software looks great and matches the SOC Orange theme. Most importantly they keep things simple. When you open up the program you can select from a few default overclocks or the option to do an auto tune. I will get into that more later in the overclocking section, but I love that the software gets right to the point, keeping things simple for people who don’t know how to overclock. Digging into the program more you can find tabs along the side to change basically every single overclocking related option in the UEFI and here you can slide a bar and see the results right after clicking apply. The same goes for memory options as well as all of the voltage and power options. In fact I see things in here that I don’t remember seeing in the UEFI, especially when it comes to controlling the Phase settings.
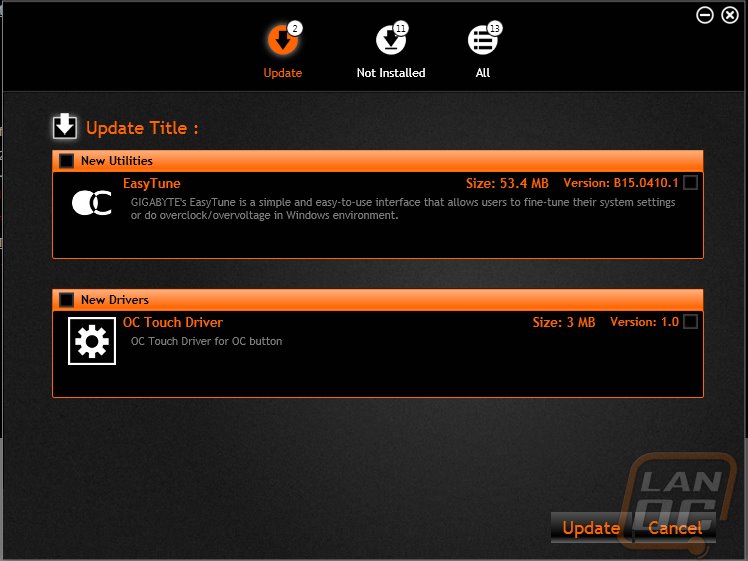
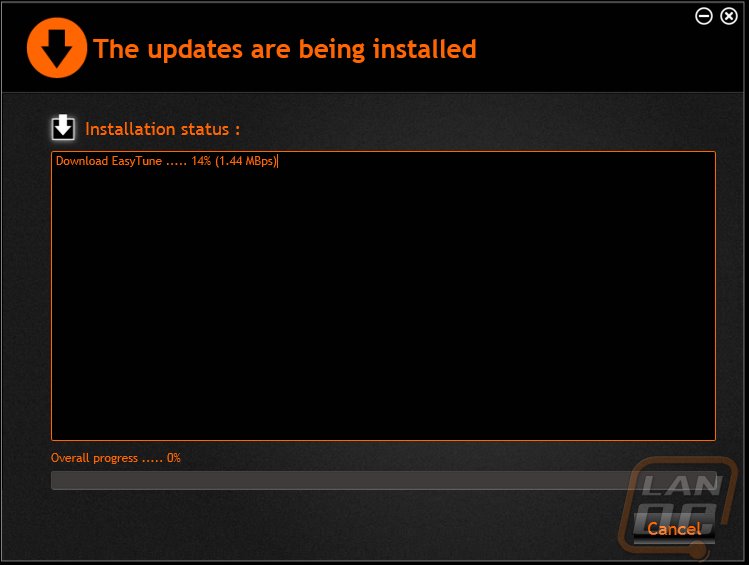
Beyond being easy to use and looking good. The App center also checks for updates and lets you know when there is an update available. Equally important is the option up top to see what you don’t have installed. Here you can one click install any of the Gigabyte options that you didn’t install at the start or perhaps that they didn’t have out yet at the time. Once you click an update it will give you a status page that shows you what it is doing and how far along it is as well as the status bar down at the bottom that shows you how far you are into it all overall.
Test Rig and Procedures
Our Test Rig
|
Intel LGA1150 Test System |
||
|
CPU |
Intel i7-5960X CPU |
|
|
Cooling |
Noctua NH-U12S for cooling Noctua NT-H1 Thermal Paste |
|
|
Memory |
Corsair Vengeance LPX 2666MHz DDR4 4x4GB |
|
|
Storage |
OCZ Vector 150 120GB SSD Western Digital Velociraptor 600GB HDD (for steam) |
|
|
Video Card |
Nvidia GTX 780 |
|
|
Power Supply |
Thermaltake Grand 850W PSU |
|
|
Case |
Dimastech Test Bench |
|
|
OS |
Windows 7 Pro 64-bit |
|
Our Testing Procedures
|
Motherboard Testing |
|
|
Passmark Performance Test 8.0 |
Overall PCMark score |
|
PCMark 8 |
We use the Home Accelerated benchmark and track the overall score |
|
3DMark |
We run the 2013 Fire Strike test on the performance setting |
|
In Game Tests |
|
|
Bioshock Infinite |
Using the Adrenaline Action Benchmark Tool, we run Bioshock Infinite on the “Xtreme” quality setting. |
|
Tomb Raider |
Using the Adrenaline Action Benchmark Tool, we run Tomb Raider on the “Xtreme” quality setting. |
|
Hitman: Absolution |
Using the Adrenaline Action Benchmark Tool, we run Hitman: Absolution on the “Xtreme” quality setting. |
|
Sleeping Dogs |
Using the Adrenaline Action Benchmark Tool, we run Sleeping Dogs on the “Xtreme” quality setting. |
|
Subsystem Testing |
|
|
Crystal Disk Mark |
We use this benchmark for USB 3.0 and SATA speed tests. Testing is done with Crystal Disc Mark with a Corsair Force GT 60 Gb. USB 3.0 testing is hooked up through a Thermaltake BlackX with USB 3.0 support |
|
Passmark |
Passmark Advanced network test |
Performance
Once I spent a little time getting to know the X99 SOC Champion I did have to run it through our standard performance testing. This includes a variety of benchmarks both CPU and Gaming related to see how well everything runs. As a whole, these results don’t typically show any major differences between motherboards as long as things are running well, but they do help pinpoint any potential issues. In this case the SOC Champion ran through 3DMark without any issues with results on par with the other X99 boards. The same goes with PCMark 8, matching the numbers of the MSI MPower. In Passmark the MPower was slightly ahead but close enough to be considered a margin of error in the benchmark. Then when I got into actual in game testing the SOC Champion was spot on with the competition. All in all the board performed well and gives us a great idea of what to expect if you pair it up with a 5960X and a GTX 780 like our testbench.
|
3DMark |
||||
|
Motherboard |
Overall Score |
Graphics Score |
Physics Score |
|
|
Asus X99 Deluxe |
8959 |
9738 |
16185 |
|
|
EVGA X99 Classified |
8963 |
9753 |
16075 |
|
|
MSI X99S MPower |
8992 |
9801 |
16009 |
|
|
Gigabyte X99 SOC Chamption |
8956 |
9728 |
16196 |
|
|
PCMark 8 Home Accelerated Score |
||||
|
Asus X99 Deluxe |
4183 |
|||
|
EVGA X99 Classified |
4272 |
|||
|
MSI X99S MPower |
4697 |
|||
|
Gigabyte X99 SOC Chamption |
4659 |
|||
|
Passmark Overall Score |
||||
|
Asus X99 Deluxe |
4975.9 |
|||
|
EVGA X99 Classified |
4981.2 |
|||
|
MSI X99S MPower |
5016.1 |
|||
|
Gigabyte X99 SOC Chamption |
4981.8 |
|||
|
Bioshock Infinite Average FPS |
||||
|
Asus X99 Deluxe |
100.48 |
|||
|
EVGA X99 Classified |
98.23 |
|||
|
MSI X99S MPower |
106.25 |
|||
|
Gigabyte X99 SOC Chamption |
106.08 |
|||
|
Tomb Raider Average FPS |
||||
|
Asus X99 Deluxe |
56.7 |
|||
|
EVGA X99 Classified |
56.9 |
|||
|
MSI X99S MPower |
57.2 |
|||
|
Gigabyte X99 SOC Chamption |
57.5 |
|||
|
Hitman: Absolution Average FPS |
||||
|
Asus X99 Deluxe |
46.6 |
|||
|
EVGA X99 Classified |
46.7 |
|||
|
MSI X99S MPower |
46.7 |
|||
|
Gigabyte X99 SOC Chamption |
44.7 |
|||
|
Sleeping Dogs Average FPS |
||||
|
Asus X99 Deluxe |
61.5 |
|||
|
EVGA X99 Classified |
62.0 |
|||
|
MSI X99S MPower |
61.3 |
|||
|
Gigabyte X99 SOC Chamption |
61.2 |
|||
USB 3.0 and SATA 3
For USB 3.0 and SATA 3 testing I take the same Corsair Force GT SSD and benchmark all of the boards using Crystaldiskmark. I run the same test with the SSD hooked up directly to the board via SATA and then again through USB 3.0. Below are the results. As we can see there are no surprises on the SATA testing, all four boards utilize the same Intel SATA controller built into the chipset. The same goes for with USB 3.0 with the exception of Asus using their own special drivers to pull those impressive Turbo numbers.
|
SATA3 |
Read Speed |
|
Asus X99 Deluxe |
448.3 |
|
EVGA X99 Classified |
456.6 |
|
MSI X99S MPower |
458.3 |
|
Gigabyte X99 SOC Chamption |
450.5 |
|
USB 3.0 |
Read Speed |
|
Asus X99 Deluxe |
245.1 |
|
Asus X99 Deluxe w/turbo |
405.3 |
|
EVGA X99 Classified |
237.8 |
|
MSI X99S MPower |
241.9 |
|
Gigabyte X99 SOC Chamption |
245.3 |
Network
The X99 SOC Champion uses the standard Intel NIC from the X99 chipset. That said in my testing I did run into a few issues. Given that normally the built in NIC in the X99 is rock solid, our sample may have had issues. The main issue I had was slow performance when using out Trendnet switch. I have seen this in the past with some low end Realtek NICs, swapping our office switch from the Trendnet to a Dell improved the numbers but as you can see below the performance was still not up to the standard set by the other X99 boards.
|
Motherboard |
Average Network Speed |
|
Asus X99 Deluxe |
887.0 |
|
Asus X99 Deluxe w/turbo |
907.6 |
|
EVGA X99 Classified |
818.5 |
|
MSI X99S MPower |
912.5 |
|
Gigabyte X99 SOC Chamption |
786.4 |
Overclock
With this being part of the Super Overclock line the overclocking testing was what I was most excited to get into. For my testing I ran through the EasyTune overclocking to see what kind of results I would get and compared them next to similar software overclocks from the other X99 boards. Then after that I went in and saw what I could do manually on our test bench. Keep in mind the test bench is still running on air and I wouldn’t consider myself to be anything close to a top level overclocker. That said, it is a level playing field from board to board.
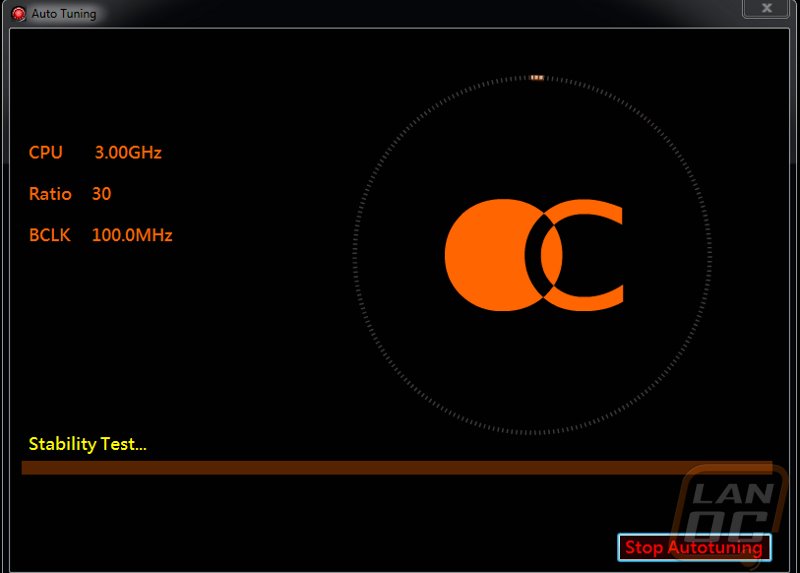
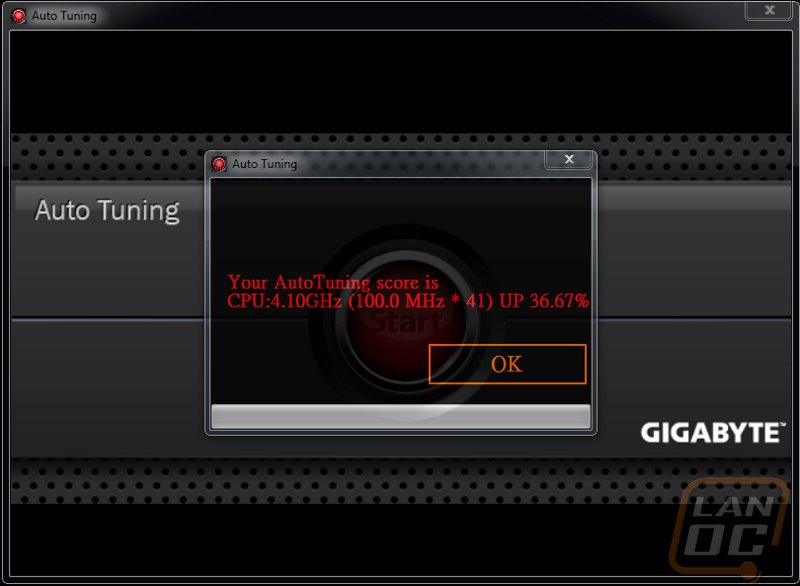
So jumping into the testing I ran the auto tuning, to get started I had to click on the creepy red light. Once started the tuning software shows the CPU clock speed, ratio and Bclk that it is currently running. You can watch it go through and do a stability test on each overclock. After about 15 minutes It finished up and I had a 36.67% improvement over the stock clock speed (4.1 GHz). This was an improvement over the MSI board but still lower than the Asus board tested. The MSI didn’t do any testing at all but in this case I was surprised that the software wasn’t able to get a little higher by doing a similar overclock and test like what Asus does.

After finishing that testing I did jump into it manually to see what the SOC Champion was capable of. Not surprisingly I ran into the exact same wall that I have hit previously on other X99 boards with a still very impressive 4.85 limited by our CPU and most likely also by our air cooling. With someone with more skills and a lot of LN2 I’m sure the SOC Champion is much more capable, especially considering the features I saw and went over earlier. On top of that this board is designed to support crazy fast RAM as well with a listed support of 3400MHz.
|
Motherboard |
Overclock reached via software |
Overclock reached manually |
|
Asus X99 Deluxe |
4.7 |
4.85 |
|
EVGA X99 Classified |
N/A |
4.85 |
|
MSI X99S MPower |
3.7 |
4.85 |
|
Gigabyte X99 SOC Chamption |
4.1 |
4.85 |
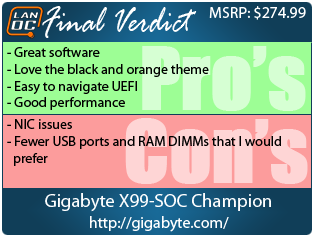
Overall and Final Verdict
So now that I have spent time with the X99 SOC Champion we can sit down and talk a little about what sets it apart from the others as well as what issues it has. To start things off, I absolutely love the black and orange theme that this board has going on. Not only is it eye catching, but I feel that orange is really coming into the mainstream as far as PC highlight colors, in the past you would have to paint everything if you wanted any orange and you couldn’t even get lighting but now orange LEDs are easier to come by and we have cases, video cards, motherboards, and ram all in orange. The flat black finish is also sharp as well.
Beyond the aesthetics I was really happy to see Gigabyte go all out on the software and UEFI on the SOC Champion. My past experiences with Gigabyte boards have always had issues on the software side of things, It is great to see that they have invested a lot of time and money into competing there as well. Good software is hard to find and Gigabytes App Center and other programs are right up at the top with Asus’s software. Their UEFI is easy to get setup but still allows enthusiast to dig in and get into the old school settings as well once you get into the classic bios.
Performance in most of our testing was right on par with the competition. This includes getting into overclocking. I would have liked to of seen the auto software overclock to give a slightly higher stable clock speed, but it was still worlds above the MSI’s result and the EVGA board didn’t even have the feature at all. The support for 3400Mhz RAM and all of the other overclocking features put this right at the top of the charts for overclocking. Currently all of the other X99 boards on the market only officially support 3300MHz or less. Gigabyte made sure to go out of the way to work with Corsair to pair the board with a 3400MHz kit that pushes the limits of the board and also matches the colors. I tried to get my hands on a set to test it as well but didn’t have any luck.
The only performance issue I ran into was with our NIC and I suspect this is more of a defect in our sample than a representation of the board, especially considering the other three boards tested use the same NIC. Beyond that my only other nitpick with the board was the lack of a few extra USB ports and only having four DDR4 DIMMs, I would prefer to see eight. That said overclocking boards don’t really need ether of those.
While I don’t have it listed down in my Pros and Cons I also want to highlight the price of the X99 SOC Champion. It might not be the cheapest board, but when we compare it to the similarly featured X99 Classified board from EVGA the price really stands out. With the EVGA board I complained that it was priced up with the boards with tones of USB ports and other features, I feel like Gigabyte really hit the nail on the head. It isn’t priced as a budget board because it is a high end motherboard, but without some of the consumer features that aren’t needed in an overclocking board the price is able to stay a little lower.

Amazon Link: HERE


