Board Layout and Pictures
Just like with previous MPower boards the X99S model comes in with an extremely clean design, an all-black PCB, and yellow trim. Being an X99 board there is a lot less empty space this time around due to the eight DDR4 slots. Even so aesthetically speaking I still think the MPower is one if not the best looking board on the market. You have to be okay with yellow though or if you are feeling wild you could repaint the yellow trim to match your PC. Of course we are here to look at more than aesthetics though right? Let’s take a closer look at what makes the X99S MPower tick.
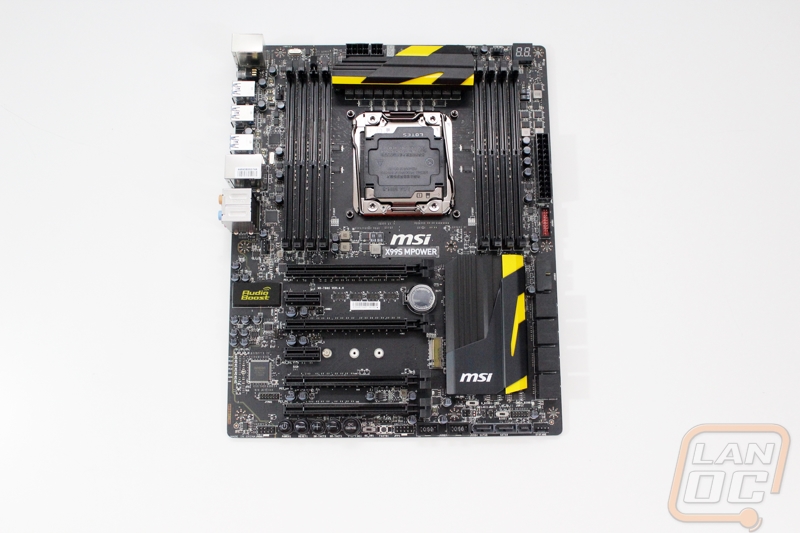
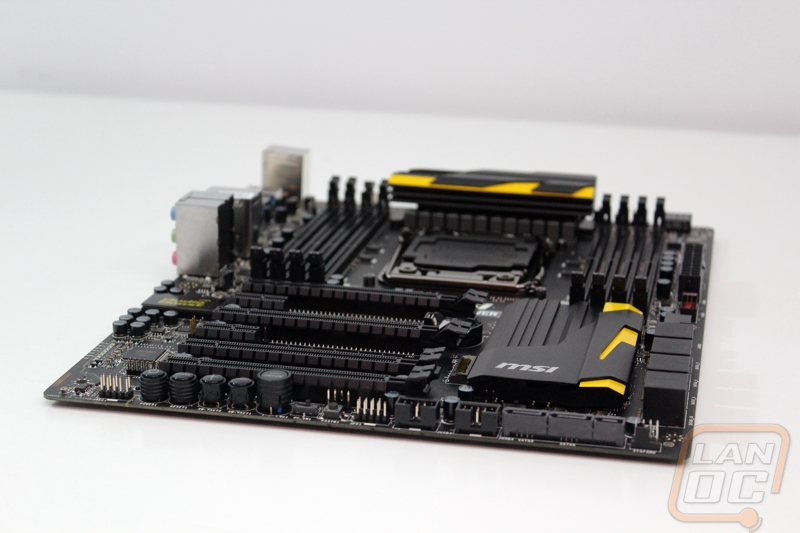
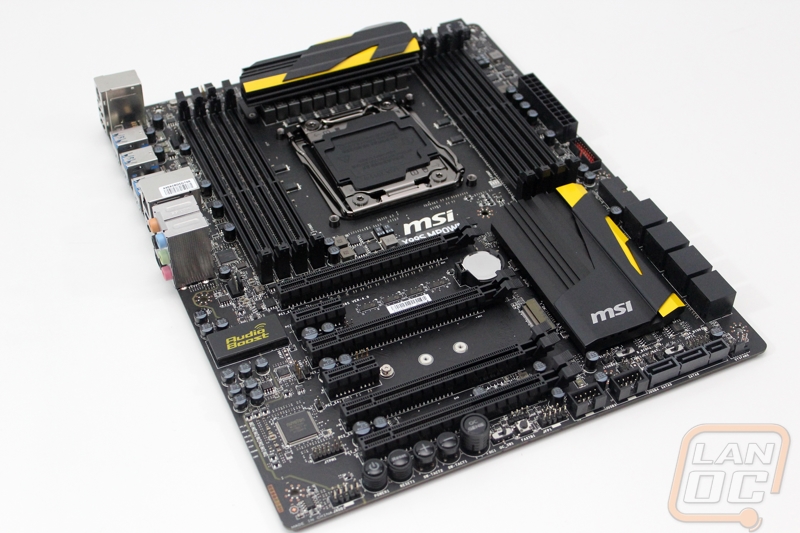
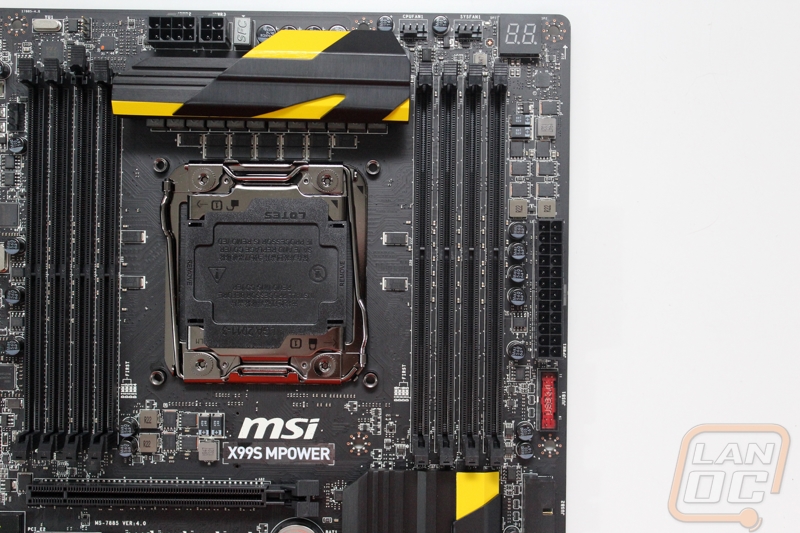
Starting up in the top left corner behind the rear I/O panel we have the first of two sets of four DDR4 DIMMs. Between the I/O panel and the ram are two four pin PWM fan headers, one is down near the PCI slots and the other is up near the top as a second CPU fan header. Also up on the top edge are the CPU power connections. MSI went with an 8 Pin and a 4 pin for power. Some other overclocking boards will sometimes have two 8 pins, but this is still more power than a standard 8 pin.
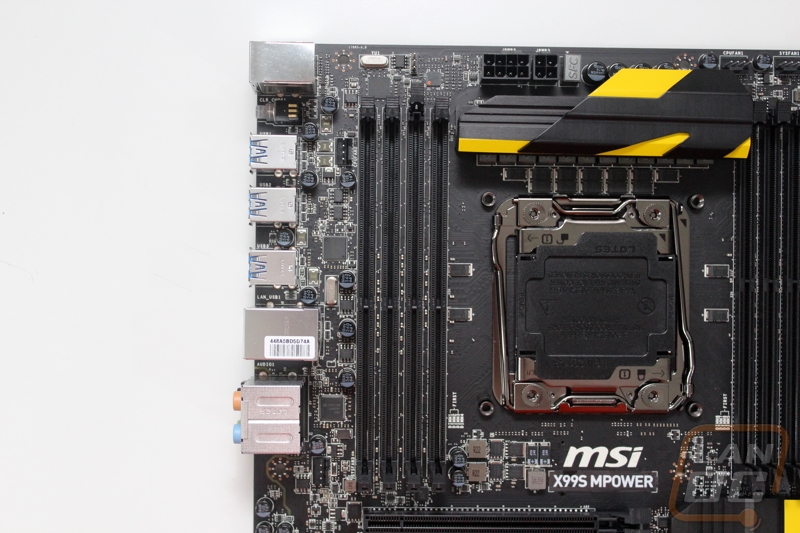
On the top right corner we have the second set of four DDR4 DIMMS, giving us a total of eight. We have two more four pin PWM fan headers up on the top edge, the one on the left is for the CPU fan and the right is another system fan. It is interesting MSI split up the CPU fan headers with one here and the other on the left side of the board. Up in the top corner MSI put the LED diagnostic readout, this is also a little different, they are normally in the bottom right corner. Along the right side you have a USB 3.0 port and the 24 pin motherboard power connection.
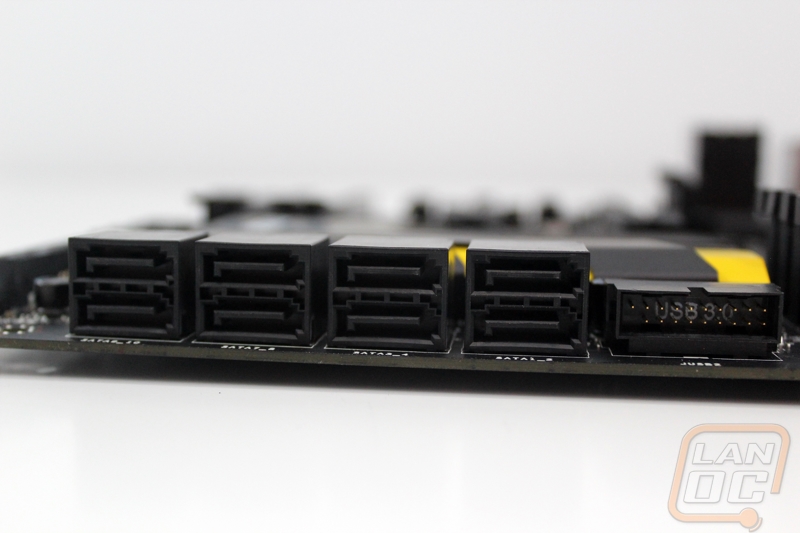
Moving down to the bottom right corner of the MPower we have a total of 8 right angled SATA connection. MSI also slipped in a second USB 3.0 connection, this time with a right angled connection. I love that they included two and also that they give a right angle option, when wiring USB 3.0 it can be a bit of a pain. Down on the bottom edge there are also two USB 2.0 headers. MSI included another four pin PWM fan header in the corner for a total of five so far. The SATA connection on the bottom edge is actually a SATA express connection, it’s nice to see that they included this, the EVGA board didn’t have one. Above the SATA express connection is the BIOS switch that switches between the Multi-BIOS II. The Slow_1 switch enables a slower boot to help with extreme overclocking as well.
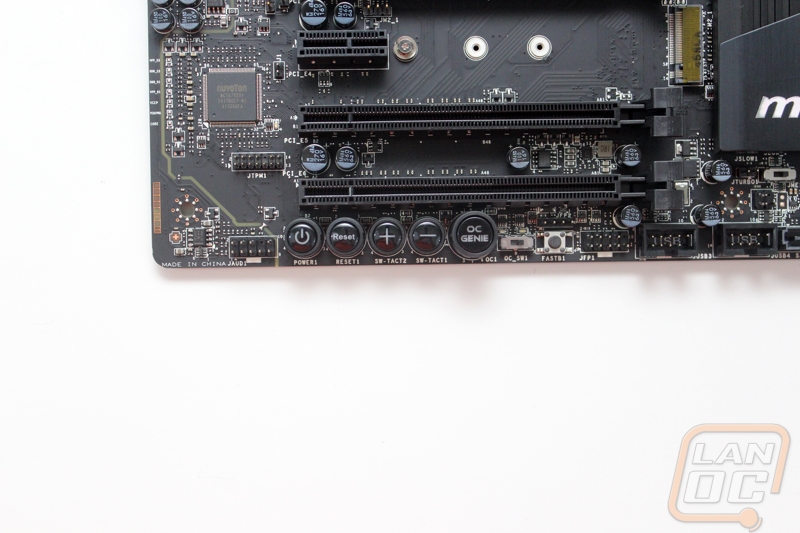
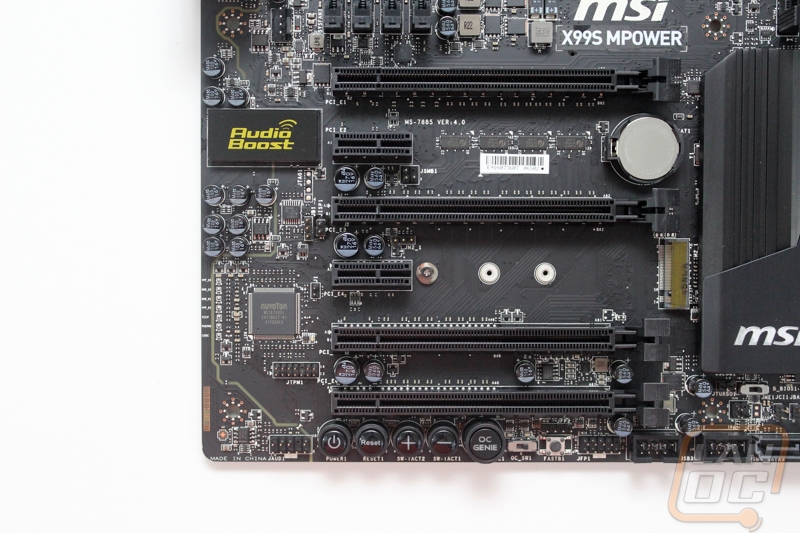
Also down along the bottom edge are five different buttons. MSI gives you the fairly standard power and reset buttons. You also get an OC Genie button for an auto overclock and + and – buttons to manually lower or increase the overclock. The fastB1 button will boot you directly into the BIOS. The OC_sw1 switch next to it gives you a small FSB overclock. All the way on the left we also have the front panel audio connection.
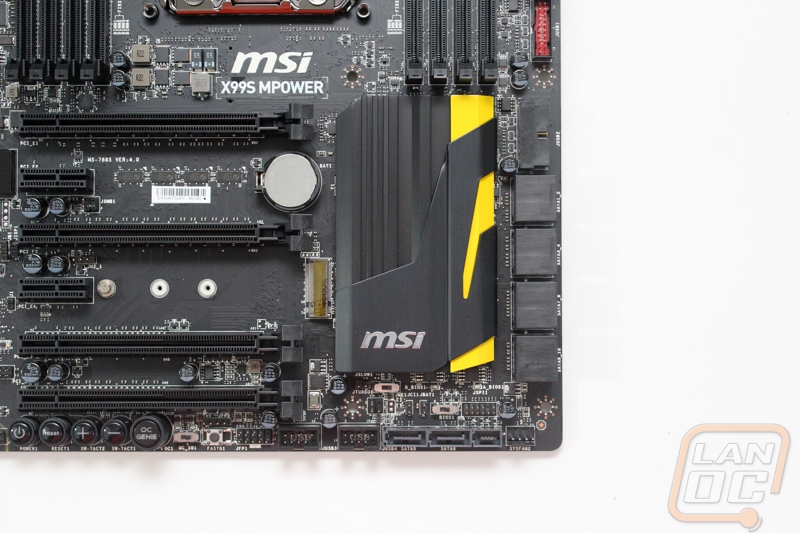
Just to the left of the PCIe slots MSI slipped in the audio card. Like the past few generations, they did separate the PCB of the audio card. To show this they put a gap and have LED lighting on the back side of the motherboard. When powered up you will see a yellow strip between the PCBs. This combined with the metal shield help keep interference to a minimum, this is one of the reasons people go with a full audio card over onboard audio. They use Nippon caps and also built in a 600 ohm headphone amplifier.

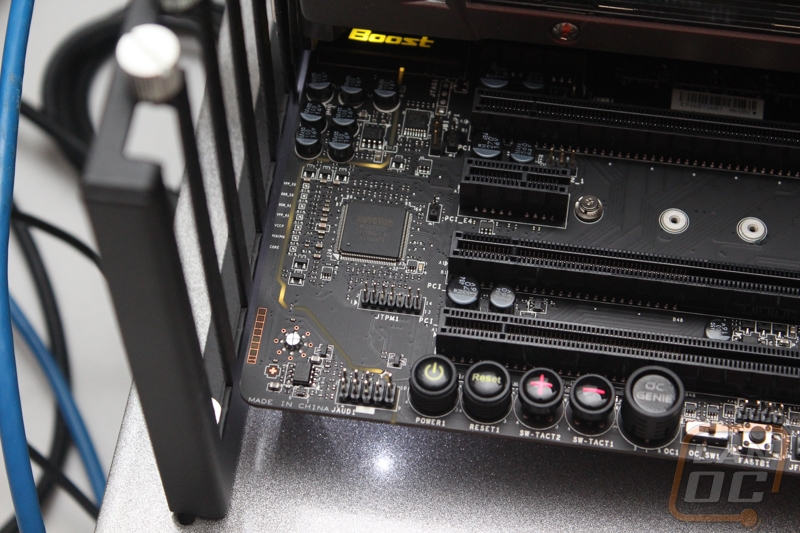
For PCI slots the X99S MPower does have a nice selection as expected being an X99 board. You get four PCIe 3.0 x16 slots and two PCIe 2.0 x1 slots. Depending on what CPU you end up running you will have 40 or 28 lanes to work with, so the breakdown is below. MSI was also careful to space each slot out to fully support quad SLI with dual slot cards. MSI also slipped in a M.2 x4 connection in between two of the PCIe X16 slots.
40 lanes (16,0,0,0)(16,16,0,0)(16,16,0,8)
28 lanes(16,0,0,0)(16,8,0,0)(8,8,8,0)
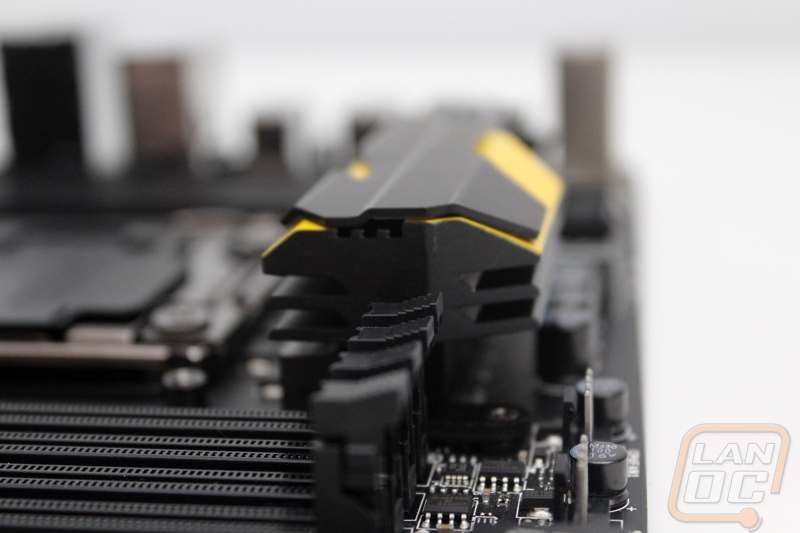
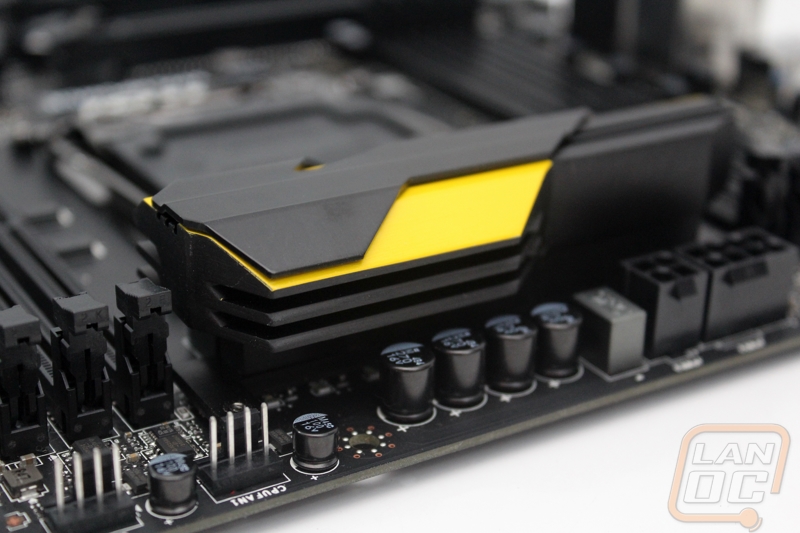
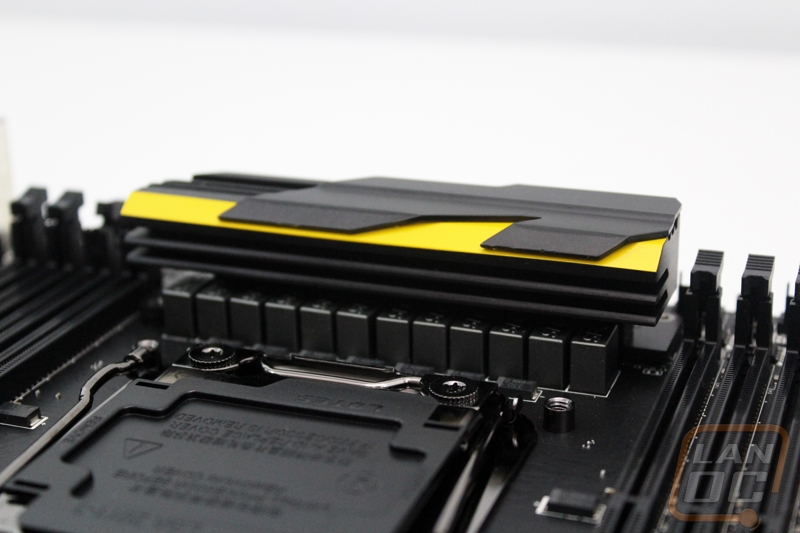
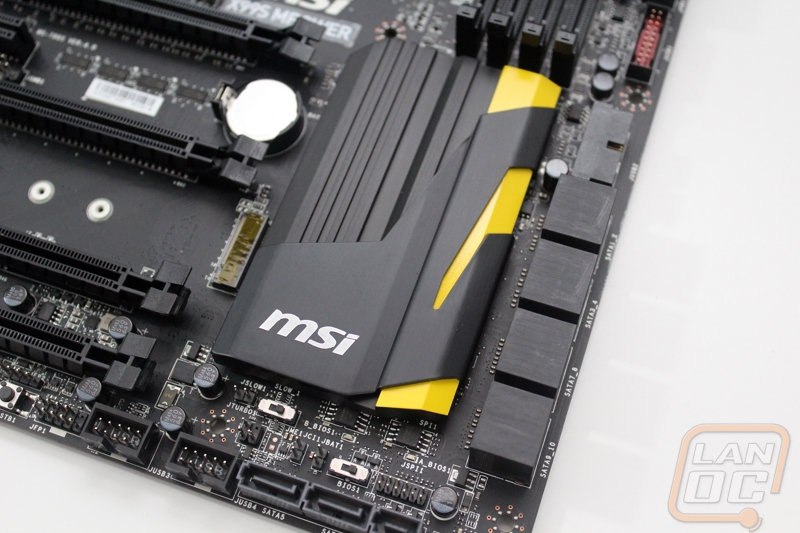
The cooling design of the X99S MPower has the same black and yellow theme that previous MPower boards have had but they went with a different heatsink design this time around. The last time I took a look at an MPower board it had an extremely clean looking heatsink that had very few fins that had me a little concerned with its ability to cool higher temps. This time around they were a little more liberal with the shape, giving the power capacitor heatsink a little more surface area. The chipset heatsink matches the same design as well with a black cover over a yellow strip on the right side.
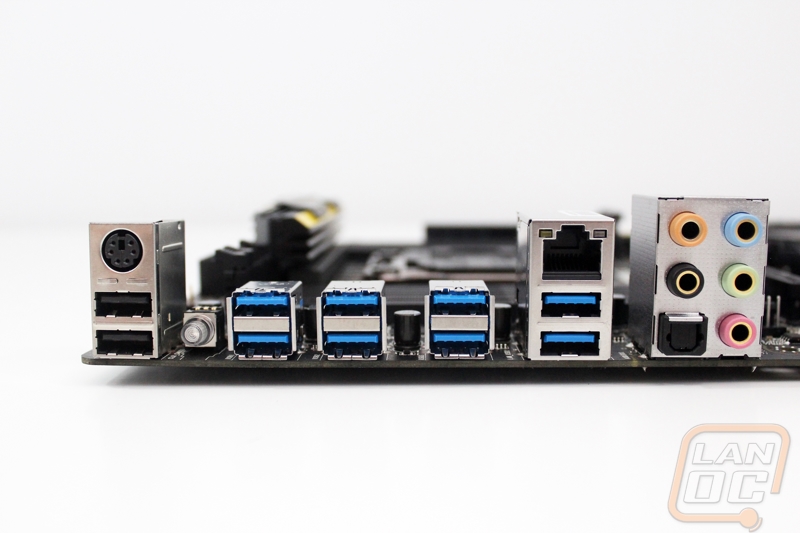
Most of the rear I/O panel on the X99S MPower is actually filled with USB 3.0 connections. You get a total of 8. There are also two USB 2.0 ports as well as a legacy PS2 port for those who want to run an older keyboard like a Model M. Beyond that things are fairly simple on the rear I/O. You get a port audio header with an optical connection. There is a single Ethernet connection that uses an Intel controller. I’ve been a little hard on MSI in the past because they have gone with Killer NICs on boards like this, I’m really glad to see they used an Intel NIC this time around. Lastly on the rear I/O the button just to the left of the USB 3.0 ports actually glows blue when the board is powered on. Pushing it clears the CMOS. Being an overclocking focused board it’s great to see that they made clearing the CMOS so easy.
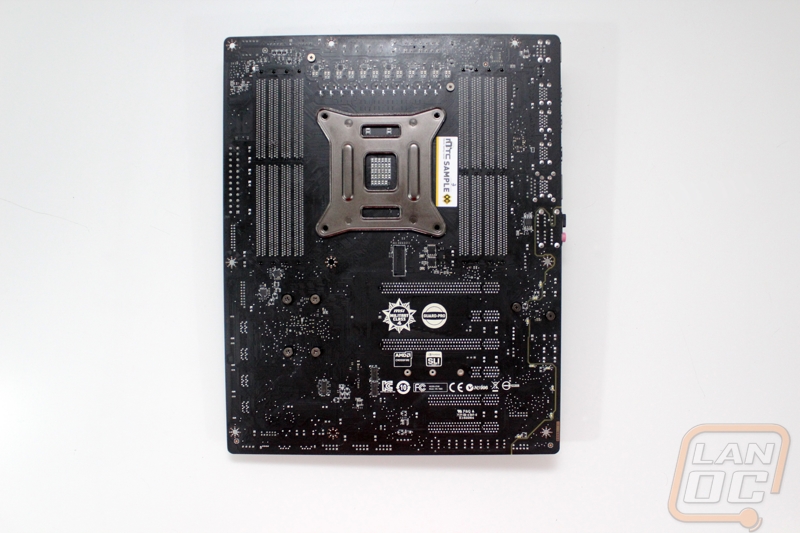
On the back side of the X99S MPower we get better look at the flat black PCB. We can also find a lot of the certification logos that are required to be on the board. MSI started hiding them on the back of some of their boards to make for more room and a cleaner look on the top of the PCB. I love it!