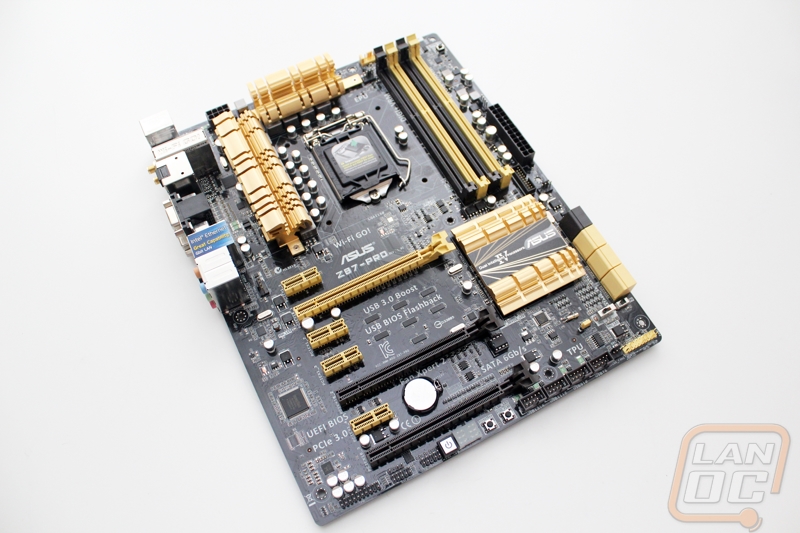
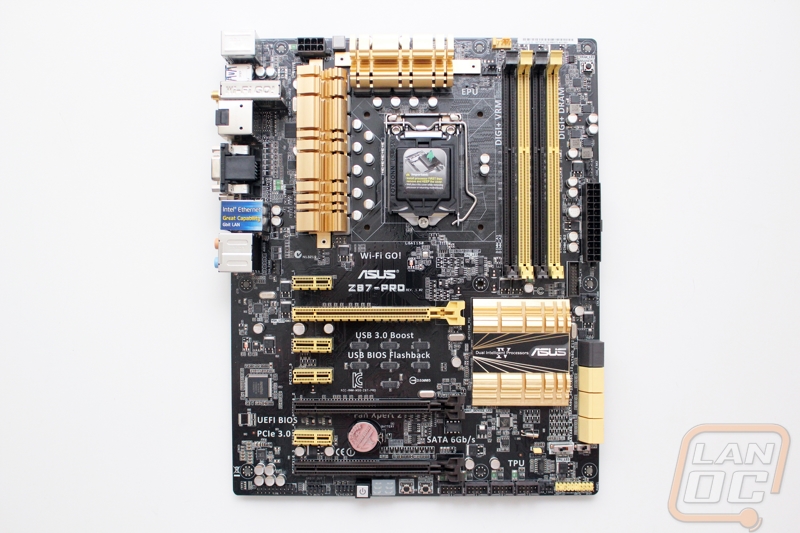
Z87 Pro Layout and Pictures
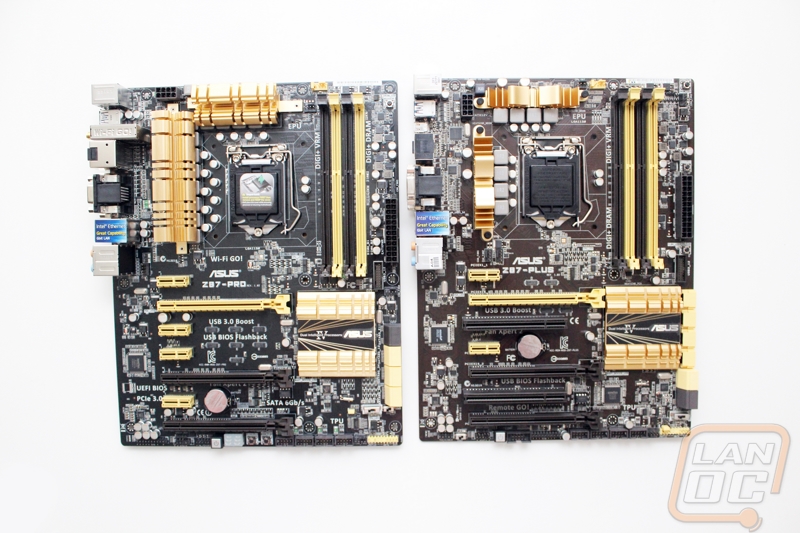
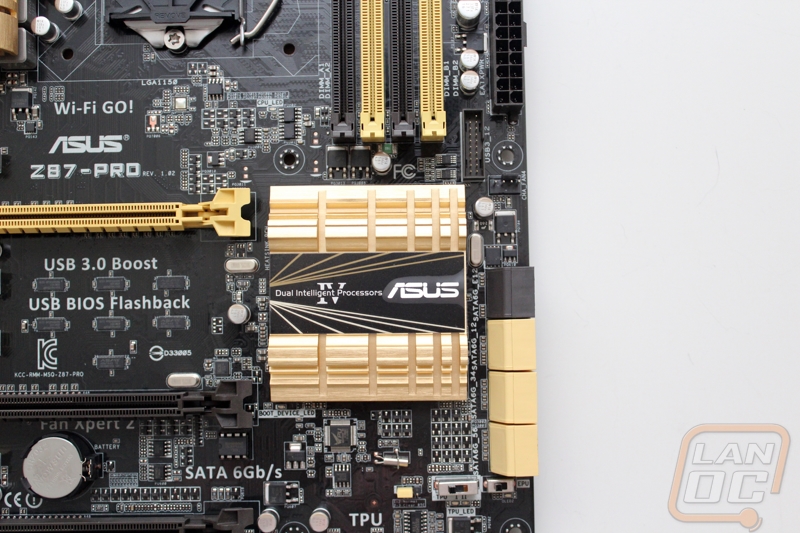
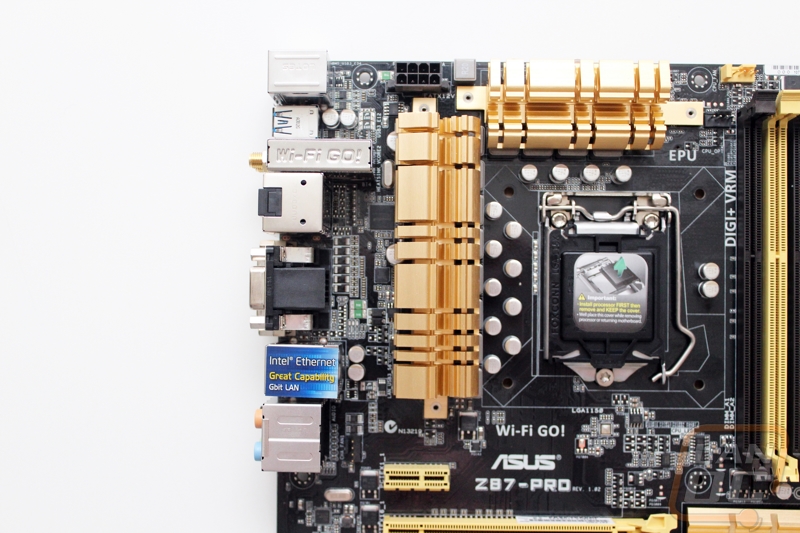
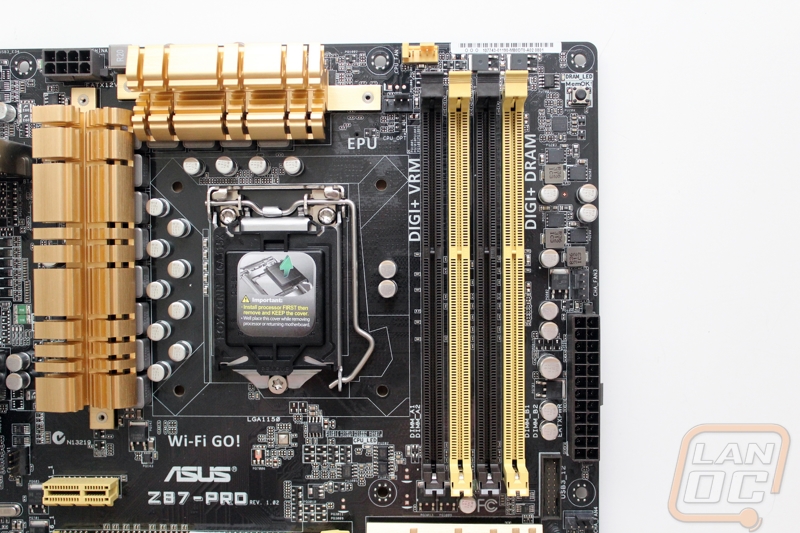
Now we can finally see why Asus was going with a gold theme on the packaging before. When Asus was previewing their new Z87 boards, they talked about the new golden standard in motherboards. They switched their blue theming on their mainstream boards to a gold color. I have a feeling that this is going to upset some people as it is a big change, but others are going to like it. The chipset cooler down in the bottom right next to the PCIe slots is the same flat design that was on the Plus and other than color it is the same as what we saw on a few of the Z77 boards as well. For power on the Z87-Pro we have 12 phase CPU and 2 phase DRAM Digi+ power control. To keep it all cool there are two fairly large heatsinks on the left side and top of the CPU socket.
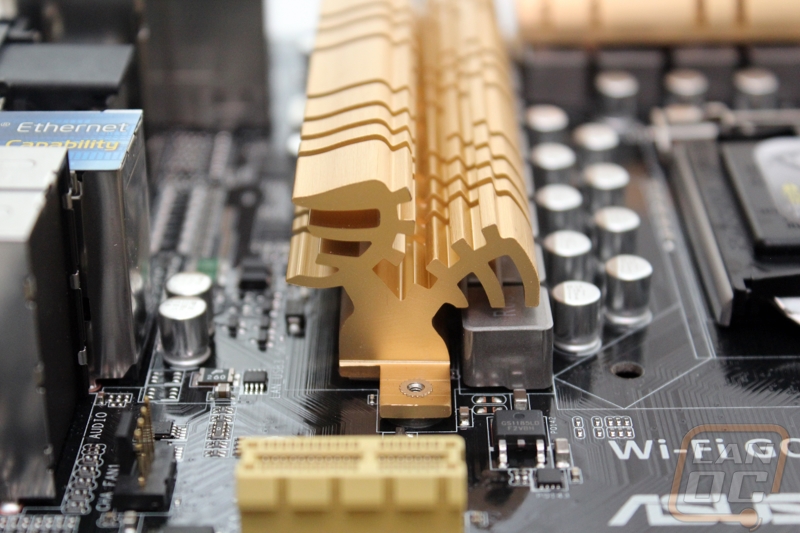
Just like with the components you can see, Asus also went with the best when selecting their voltage regulation components. For capacitors they went with 5K Caps that will provide a healthy power output. To give an example as to where these fall, The MSI GD-65's military class capacitors are rated for an output power of 330 watts while the Plus's 5K caps have an output power of 561 watts, that is a major difference if you ask me!
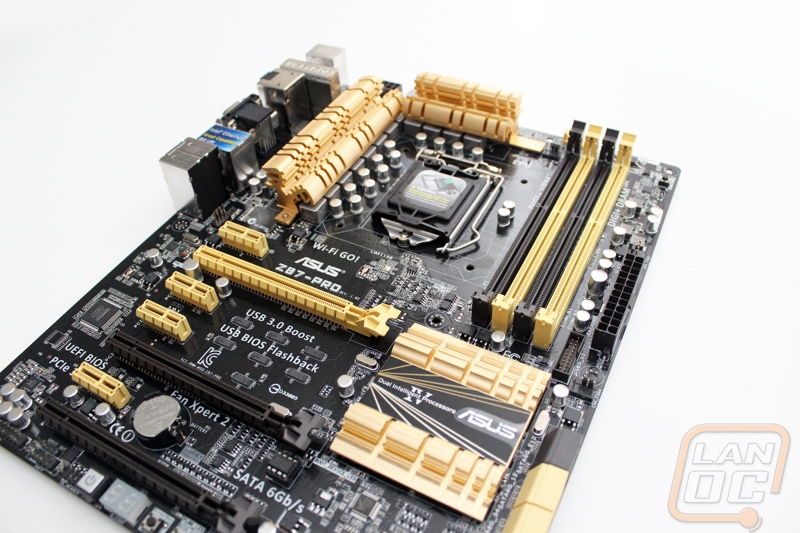
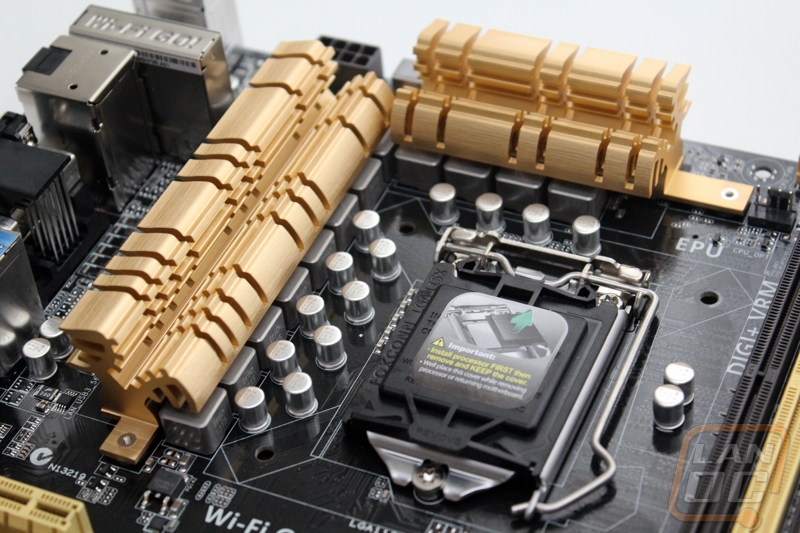
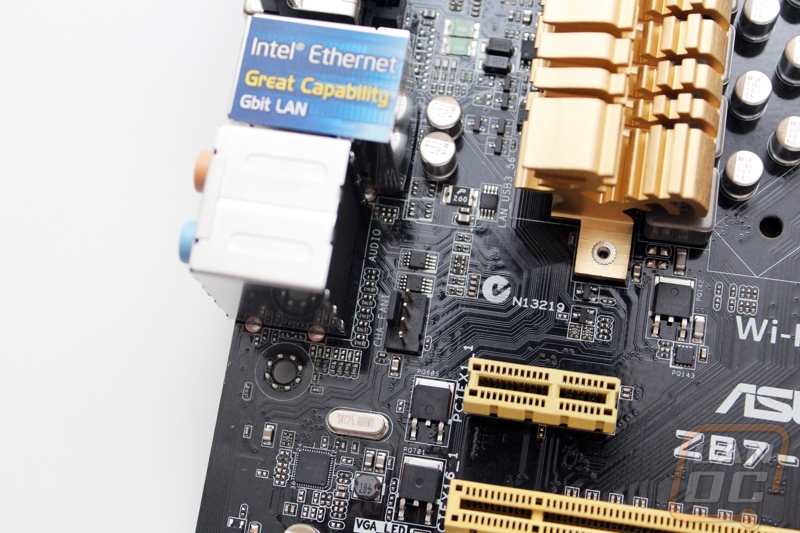
Starting up in the top left corner we have our 8 pin CPU power connection. Unlike the Plus this one is up near the edge of the board due to the larger heatsink design. You can see what Asus is most proud of on the rear I/O here as well. The Wi-Fi GO! and Intel Ethernet are both labeled for you to be able to see them easily all of the time, even when installed in your PC (assuming you have a window or the side panel off). The Wifi go is interesting to see because they have built the entire dual band wifi module with Bluetooth 4.0 into the rear I/O rather than putting the wireless down in a PCI slot near the heat your GPU creates.
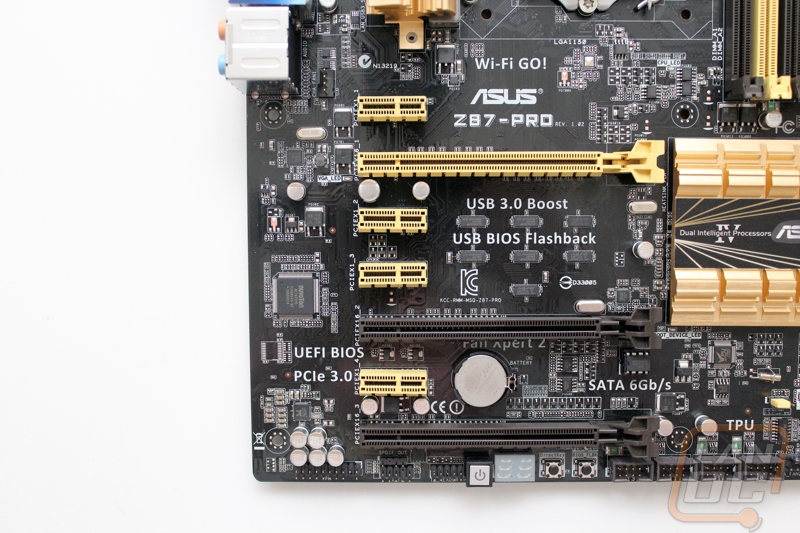
It’s hard to look in the top right corner and overlook the yellow DDR3 DIIMM slots. The Z87-Pro has four DIMM slots for your dual channel memory and each slot only needs the single clip on the top. With the Z87 boards Asus also introduced DRAM Overcurrent Protection, if you look very close you can actually see it just at the bottom of the DIMM slots, it is bright green. Think of this as a surge protector for your RAM to help protect it in case something goes wrong. Just above the ram are two four pin PWM fan headers specifically for the CPU fan and a second CPU fan, these also support 3 pin control of your fan via UEFI and AiSuite II if you don't have a PWM device to use. In the top right corner we have the MemOK button, a button that helps you deal with memory incompatibility’s by adjusting the ram settings until they work. This also can double as a clear CMOS button in a way, when pressed it resets your frequency and voltages but not other settings like your fan speed and boot configuration. There is also the DRAM LED, these LED’s are all over the motherboard and they light up as that part of the motherboard is initializing during boot. There are actually four total LEDs (CPU, DRAM, GRAPHICS, BOOT) this is important because if there is an issue during boot you can see the area that is causing your problem. Down lower we have a 24 pin power connection and then just below it an internal USB 3.0 header. There is another four pin PWM fan header just below the USB 3.0 header as well.
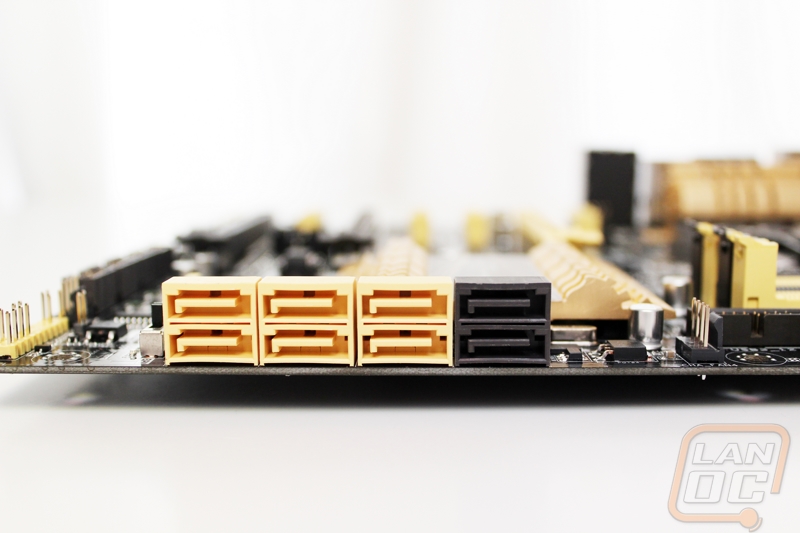
Here are the SATA ports for the Z87-Pro, they are all SATA 3 but only the six yellow connections are run through the Z87 chipset. That means you won’t get the Intel specific features like Smart Response, Rapid Start, and Smart Connect Technology. The two black SATA 6 connections are run on the ASMedia 1061 chipset.
The bottom right corner has a long yellow header that covers all of our front panel connections. There are labels along the bottom to make hooking everything up easier. Next to the front panel header is another four pin PWM fan connection, this is number five and they seem to just keep coming as we go around the board. Next we have four USB 2.0 internal headers lined up next to each other. Just below the SATA ports are the TPU and EPU switches. The TPU will give both your CPU and GPU an auto overclock up to 4.25GHz, from past experience you will get a better overclock by using the AI Suite III software for the overclock, but you can’t get much easier than a switch to turn the overclock on and off if needed. Asus has even made it a two set switch to give you even more control. Setting one only adjust CPU ratio and setting two adjust ratio and core clock speeds. The EPU is similar in a way but actually will adjust the voltage used down to save energy whenever possible. Obviously you wouldn’t want to run the two at the same time. Next to the TPU switch is the clear CMOS jumper, the yellow jumper helps it stand out to make it easier to find.
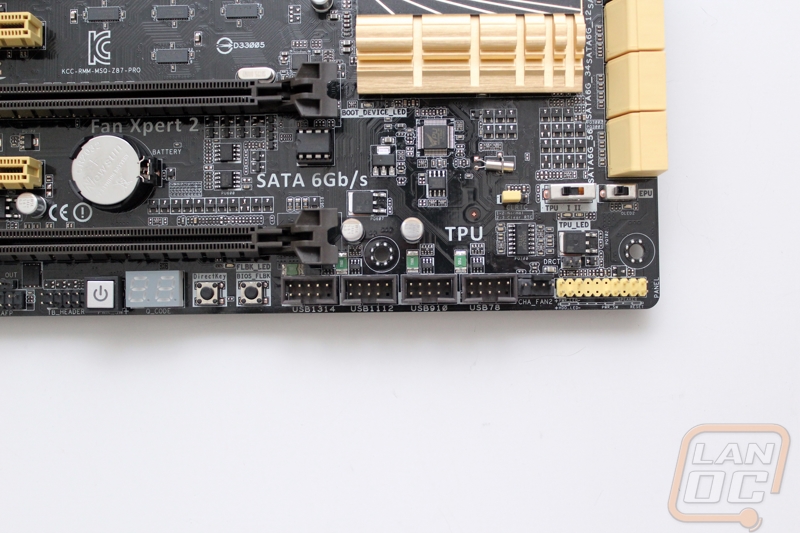
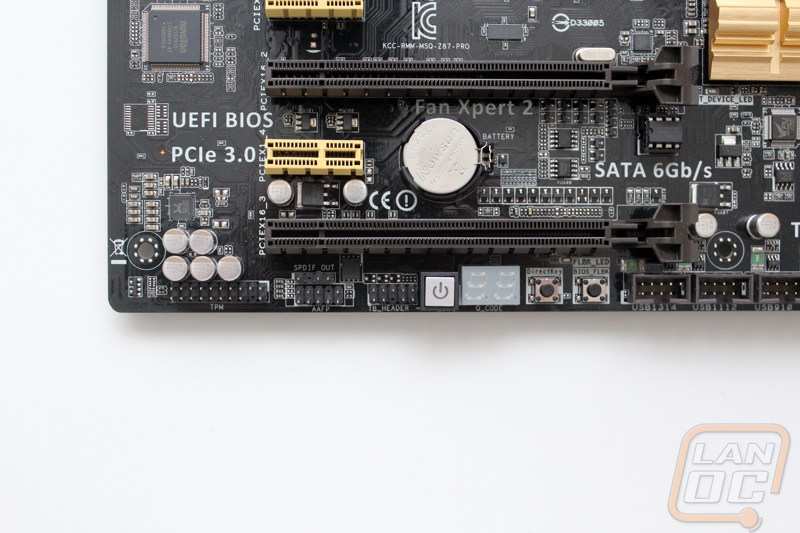
Down in the bottom left corner we can see part of the Realtek 1150 8-ch HD onboard audio. Just under it there is a plug for the TPM aka the Trusted Platform Module header. Next to it is the AAFP or audio front panel connection as well as a SPDIF output header. The next header is the thunderbolt header, this is in case you need a Thunderbolt connection later on and you add something like the ThunderboltEX, not only does it plug into the PCIe slot but it also needs to plug into this plug to work properly. Next we have the backlit power button and diagnostic LED; I think both of those speak for themselves. The two small buttons next to the diagnostic LED are the DirectKey and BIOS flashback buttons. The DirectKey is a button that takes you directly into the UEFI when you boot, with boot times improving this is becoming more important, as long as I remember this button is here I’m sure I will be putting it to good use. You can also actually hook up your cases reset button directly to DirecktKey and have the ability to run it with your PC built, or you can also select the option in the UEFI. The BIOS Flash Back button is even more interesting, when combined with a USB drive with the proper bios on it plugged into the proper USB port you can press this button and update or flash back your bios. It’s especially interesting because not only does this not require any interaction from you after pressing the button, but it doesn’t even need a CPU in the motherboard.
The Z87-Pro’s PCI slots consist of five PCI Express x1 slots and three PCI Express x16 slots. Like other Z87 boards there aren’t enough PCI lanes into the CPU to handle three x16 slots so the slots break down like this. When you are only using the top slot it runs at a full x16 speed, when you are using the top two, they both run at x8 each, and the last slot is always a x4 slot with a x16 form factor. The PCIe x1 slots do a good job of creating space around the top PCIe x16 slot so you will be able to run up to a three slot wide video card if you would like without it overhanging the second PCIe x16 slot. Also in this photo is the final four pin PWM fan header making for a total of six from around the whole board.
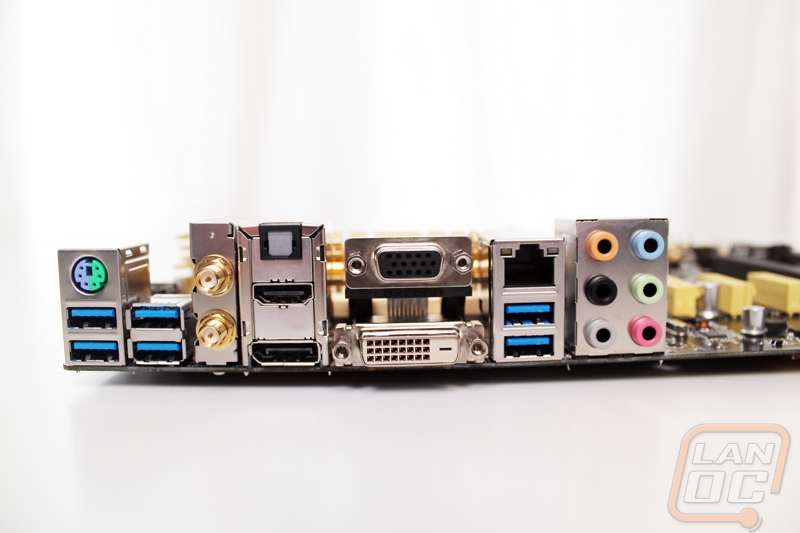
Around on the rear I/O panel we have a whole collection of connections. The first thing I noticed was that every single USB connection is USB 3.0, you have a total of six. On top of that you also have a legacy PS2 connection for mouse or keyboard use, a lot of keyboard enthusiasts will be happy to see this one. Next to the USB ports on the left side of the I/O panel the Z87 Pro has its two antenna connections. After that for on board video Asus has literally put one of everything, there is a VGA, DVI, DisplayPort, and HDMI port. As with almost every other Asus motherboard made in the past few years the Z87 Pro has an Intel Gigabit NIC. Lastly there are all of the standard audio hookups.
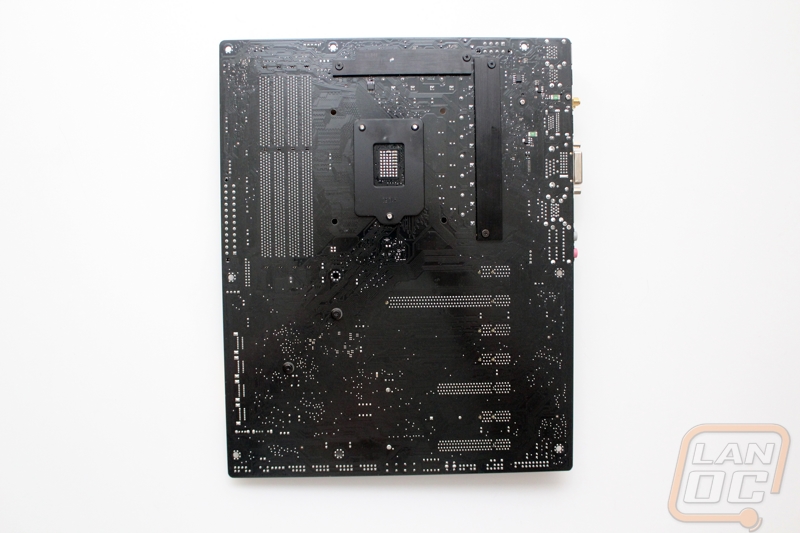
On the flip side you can get a better view of the all black PCB, even where there are traces near the surface you don’t see copper showing through that sometimes gives motherboards that off black coloring. Asus even went as far as to black out the bottom of the LGA1150 socket back plate to match everything in an area of the board that people will only see once or twice. There are also two back plates for the Z87 Pro’s heatsinks as well, just like the CPU socket backplate, they are also all black.
We spoke before about the level of cooling the Z87 Pro has but when you put it up next to the Z87 Plus it is even more noticeable.