At the start of this year we helped introduce Sandy Bridge along with coverage on 5 different LGA1155 motherboards. One of those boards was MSI’s P67A-GD65, one of their 16 different P67 motherboards that are currently available. We found the UEFI BIOS, easy overclocking support, and low price point to be great and gave it both our Top Honors and Editors Choice awards. Today we are going to take a look at their P67A-GD80, the GD65’s bigger brother. With a similar feature set I have high hopes.
Product Name: MSI P67A-GD80
Review Sample Provided by: MSI
Review by: Wes
Pictures by: Wes
Specifications (From MSI’s Website)
|
CPU |
Supports Intel® Sandy Bridge processors in LGA1155 package. |
|
Chipset |
• Intel® P67 (B3) Chipset |
|
Main Memory |
• Supports four unbuffered DIMM of 1.5 Volt DDR3 1066/1333/1600*/2133*(OC) DRAM, 32GB Max |
|
Slots |
• 3 PCI Express gen2 x16 slots |
|
On-Board SATA |
• SATAII controller integrated in Intel® P67 (B3) chipset |
|
USB 3.0 |
• 1 USB 3.0 internal connectors by NEC® D720200 |
|
Audio |
• Chipset integrated by Realtek® ALC892 |
|
LAN |
Supports two PCI Express LAN 10/100/1000 Fast Ethernet by Realtek 8111E. |
|
IEEE1394 / FireWire |
- VIA® VT6308P chipset |
|
Internal I/O Connectors |
- ATX 24-Pin power connector |
|
Back Panel I/O Ports |
- 1 x PS/2 Mouse/Keyboard port |
|
BIOS |
The mainboard BIOS provides "Plug & Play" BIOS which detects the peripheral devices and expansion cards of the board automatically.
|
|
Dimension |
30.5cm(L) x 24.4cm(W) ATX Form Factor |
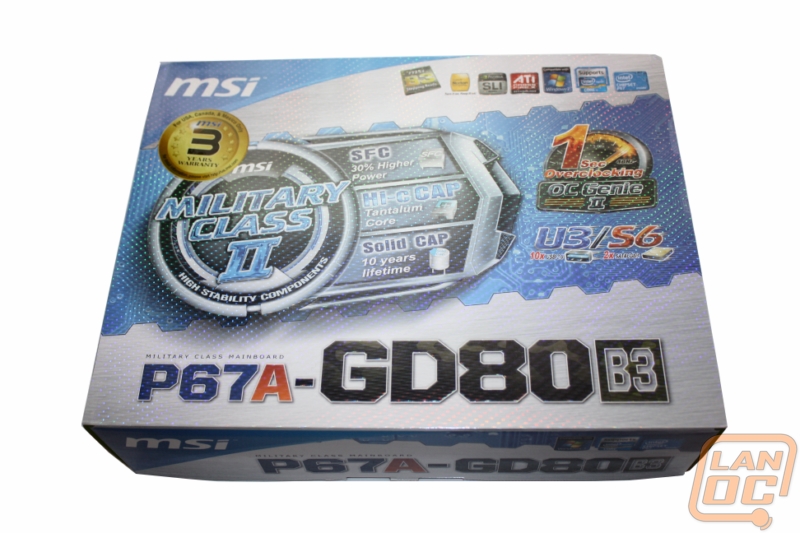
Packaging
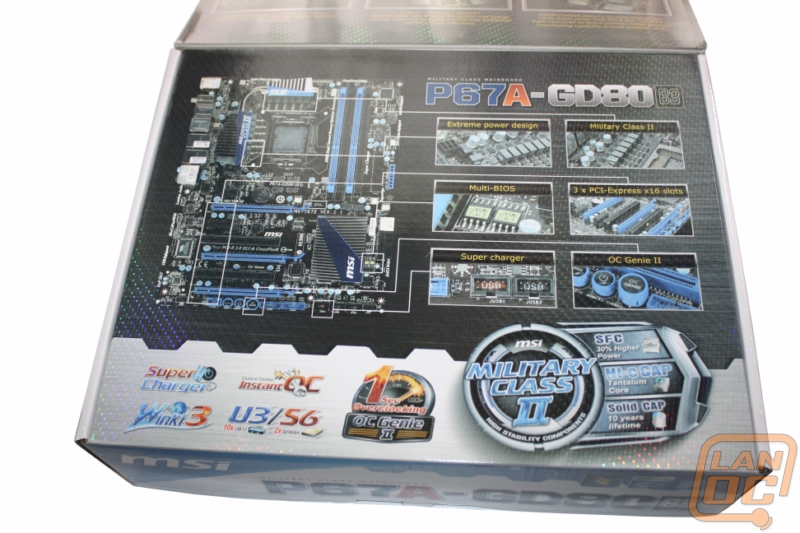
The packaging for the GD80 is similar to the GD65 that we tested previously and just about any other MSI motherboard on the market. They have their Military Class II logo on the front above the product name showing off their Hi-c caps and their OC Genie II. Up top you have all the required logos from AMD (LOL it’s really an ATI logo, what’s up with that?), Nvidia, and Intel. Around back they have broken down the GD80’s features into five different categories. The first three are the largest going more in depth to the OC Genie 2, Military Class 2, and a breakdown on the 3 PCI Express x16 slots. The last two include a small overview of the rear I/O panel and then one titled rick features that includes everything else not covered by the others.
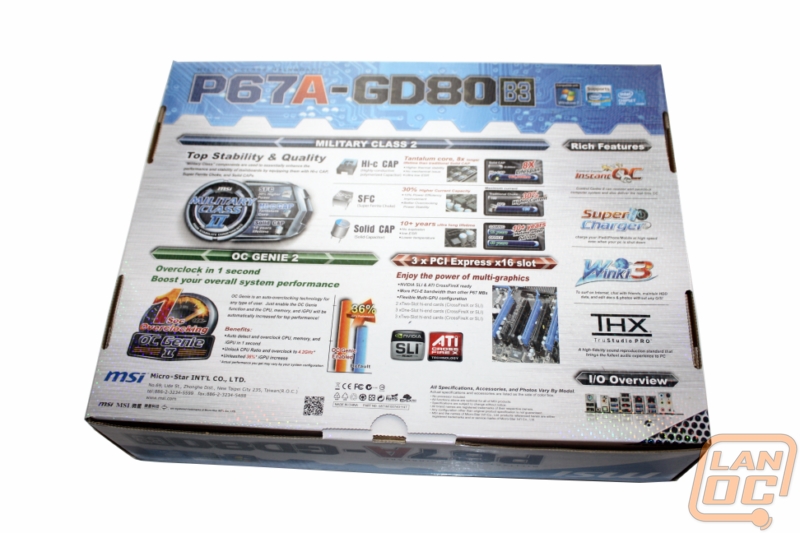
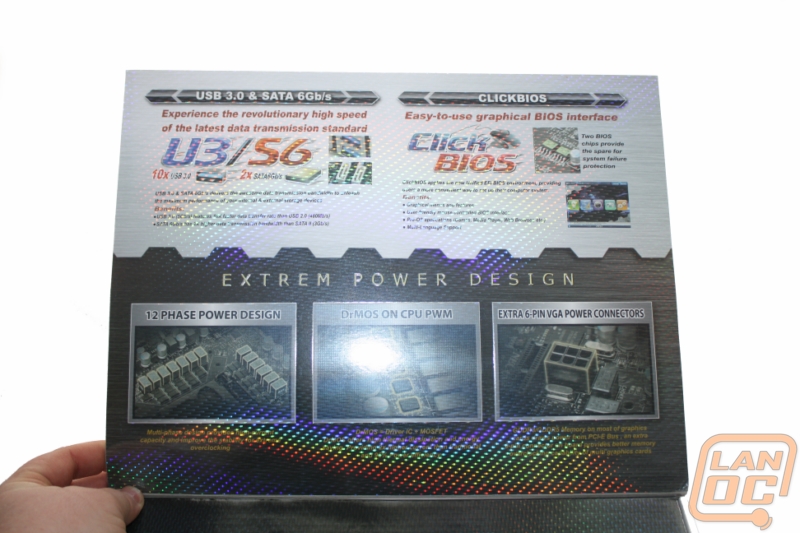
A little different than what we normally see MSI slipped in a little more room for information with a lift up front panel. Under it you have a large overhead photo of the GD80. Next to it you have photos of key features with lines leading to their locations on the board itself. On the flip side it’s broken down into three sections covering the 10 USB 3.0 and two SATA 6 connections, the Click BIOS, and their extreme power design.
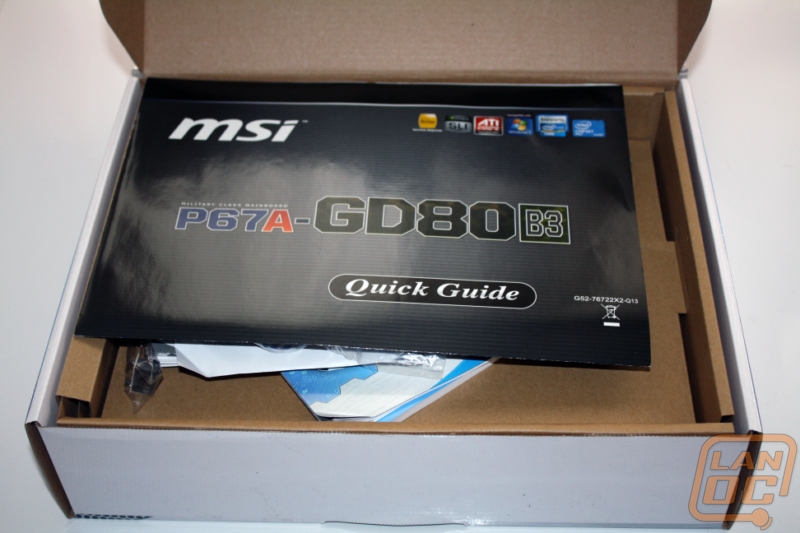
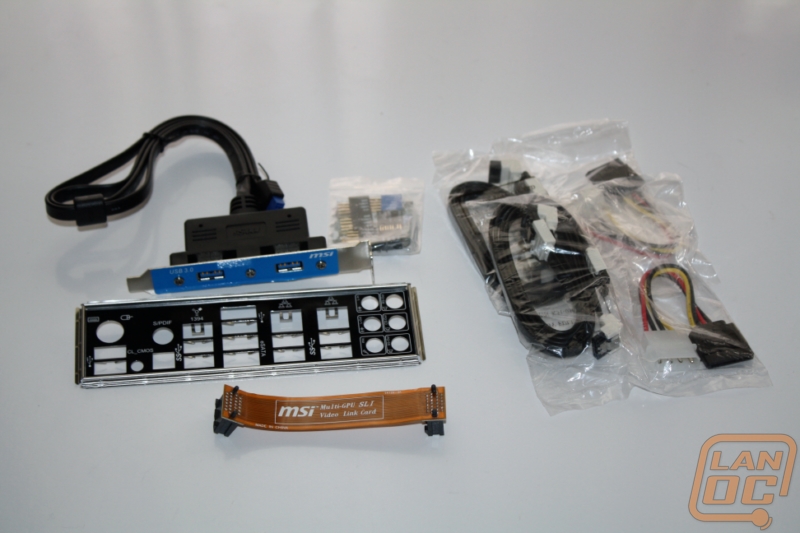
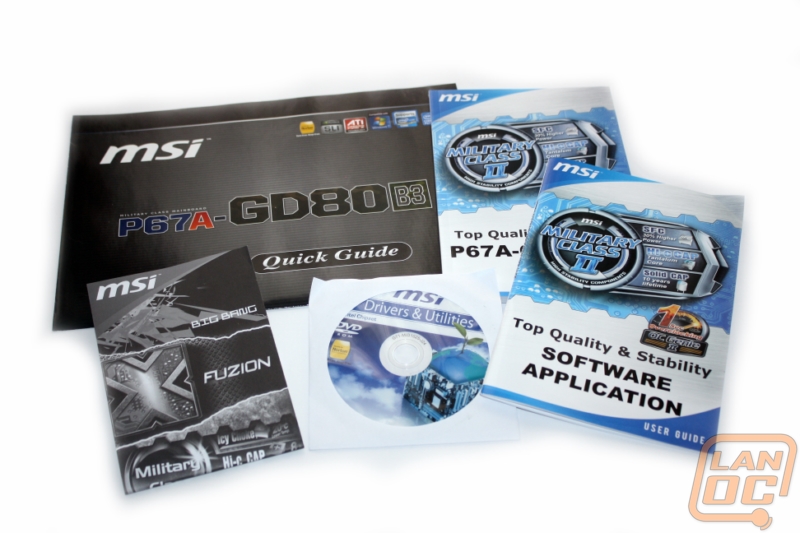
Inside when you open everything up you are greeted first by the documentation along with all of the accessories right up top. For accessories you have the rear I/O Panel, a flexible SLI bridge, two Molex to SATA power adapters, header helpers, four SATA 6 cables, and a USB 3.0 PCI adapter to give you a few extra connections on the rear of your PC. The GD80 comes with a surprising amount of documentation including a quick guide, hardware and software user guides, an MSI ad, and a DVD with all of the software on it.
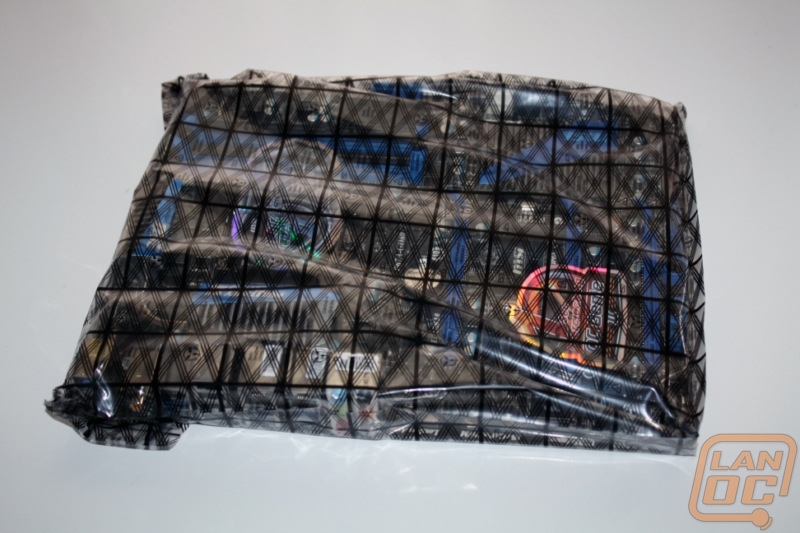
Under everything else the GD80 itself is wrapped up nicely in a static free bag to keep it safe.
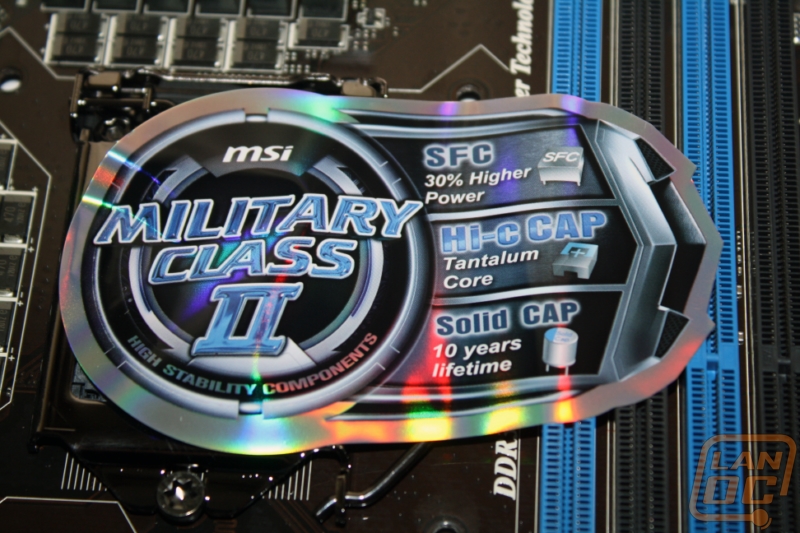
Even after you open everything up you will still find stickers with the Military Class II and OC Genie 2 logos. They really make sure you don’t forget about those features!

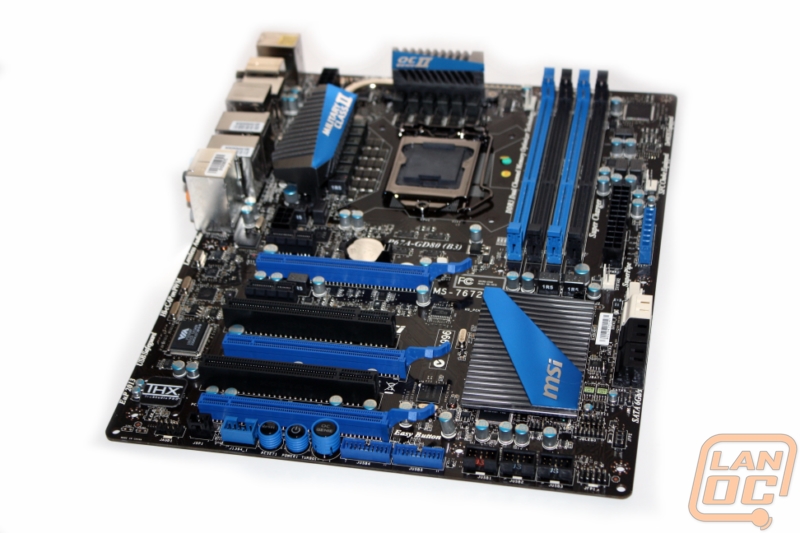
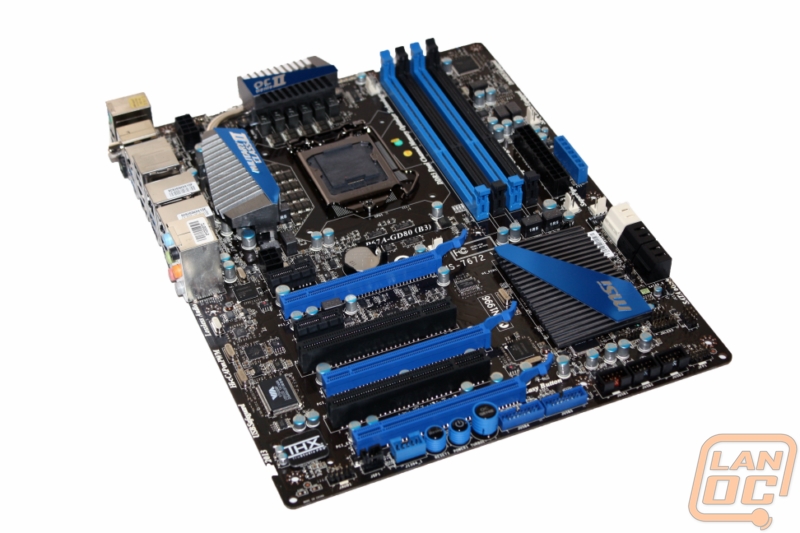
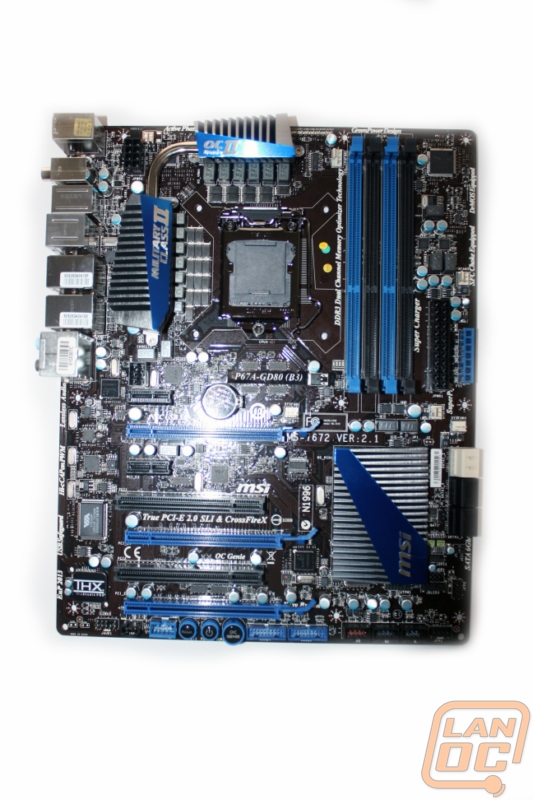
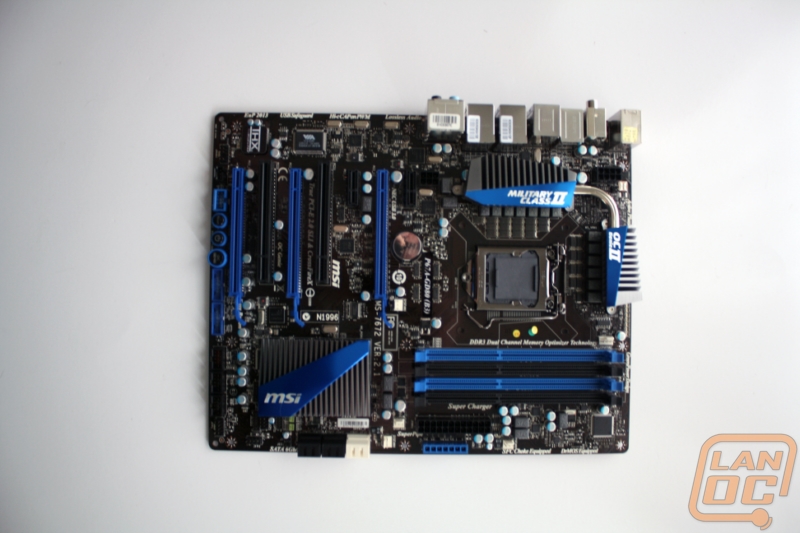
Board Layout
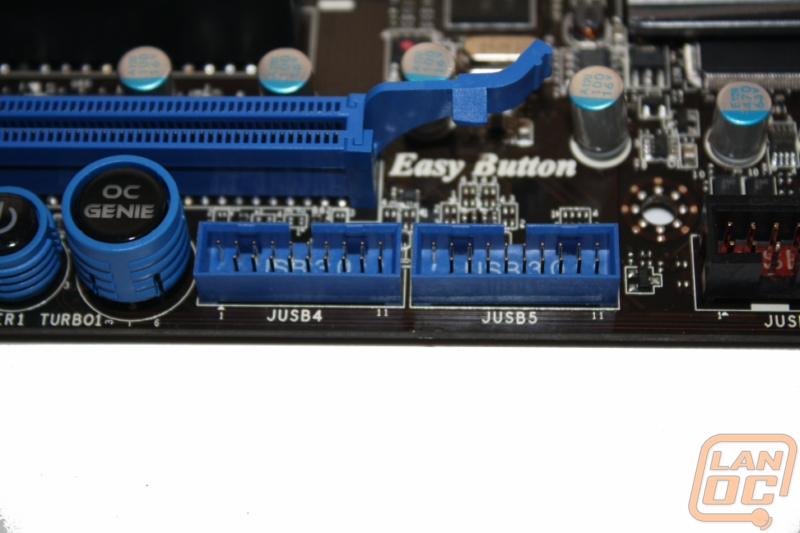
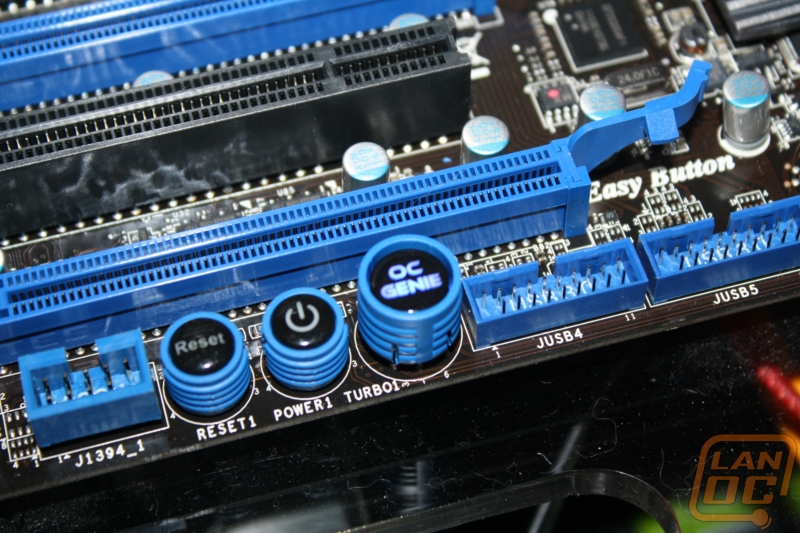
Down on the bottom of the GD90 you have a firewire connection along with power and reset buttons. Next too those buttons you have an even larger button for MSI’s OC Genie.
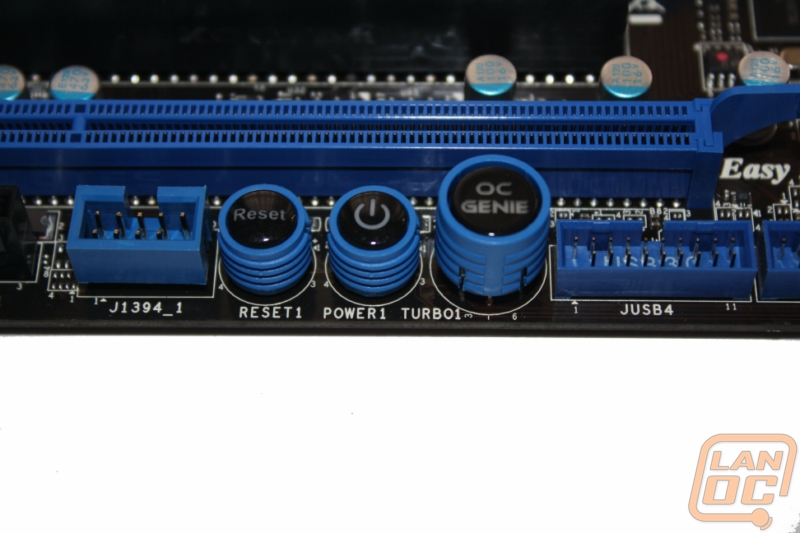
Next to the OC Genie button they have also included two internal USB 3.0 connections.
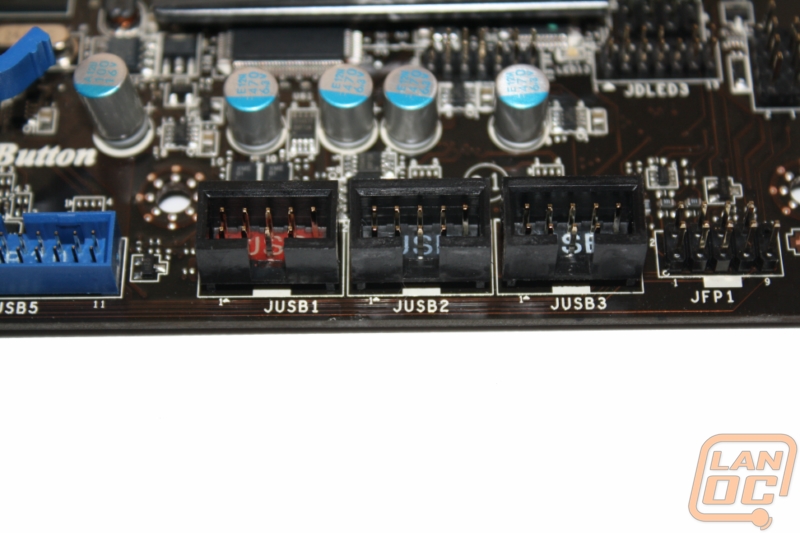
For USB 2.0 you get three internal headers. The red labeled header on the left is a “super charger” port that can help charge your ipod or iphone quicker.
The front panel audio header is in the bottom left corner of the motherboard, an easy location to wire up without having a wiring mess strung overtop of your motherboard like some motherboards.
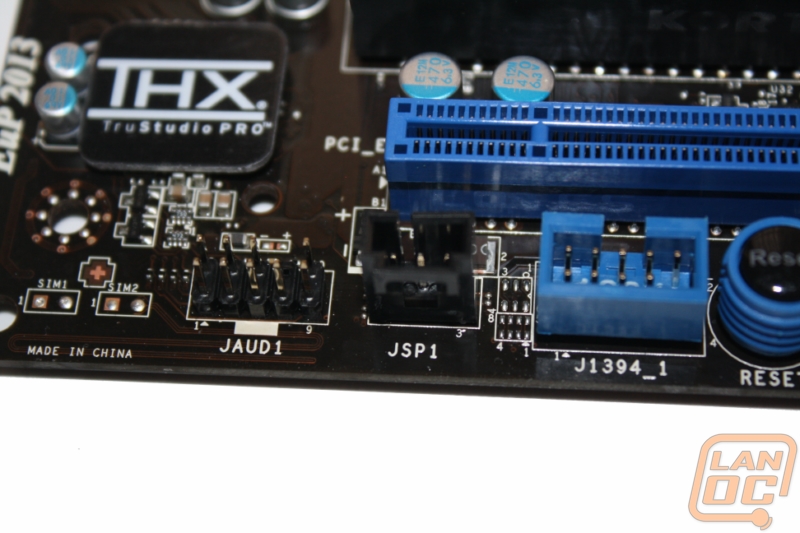
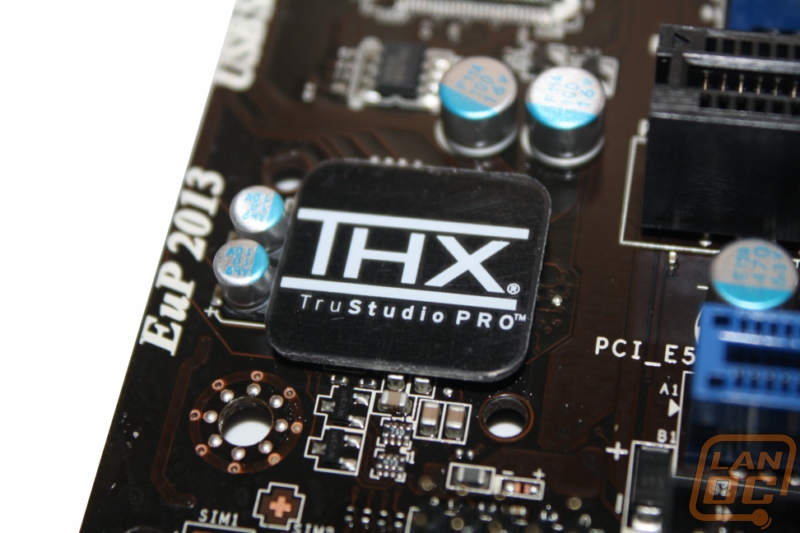
The onboard Realtek® ALC892 chipset is covered up by a small THX TruStudio PRO emblem. It’s located between the PCI slot covers and the last PCI Express slot, putting it close to the audio header in the bottom left corner.
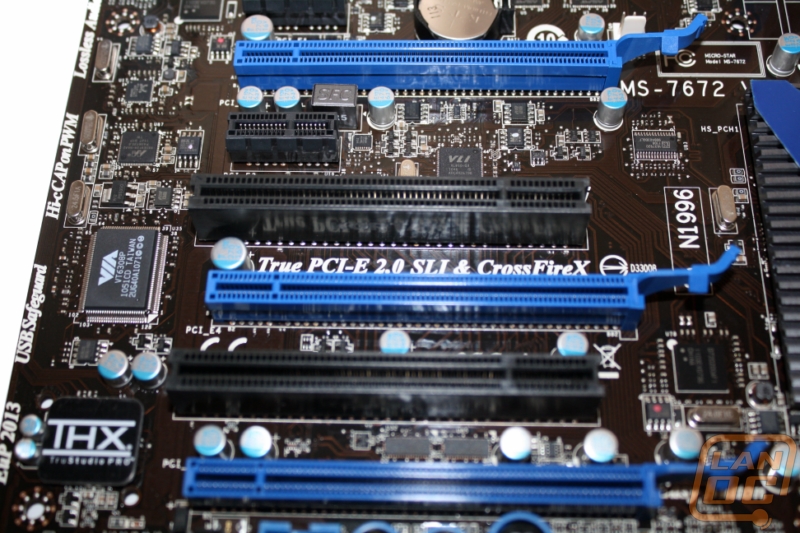
The PCI slot situation on the GD80 is a little tricky. At first glance you have two PCI Express x1 lots, Two legacy PCI slots, and three PCI Express x16 slots. To Start, even though the board has two PCI Express x1 slots per the specifications you can only use one or the other, if you try to use them both it will default back to the top slot. The PCI Express x16 slots are equally interesting. When running just the top slot you get x16, when running the top two you are limited to x8 on each. Where it gets really tricky, if you use the last spot you (PCI_E5) you will see x4 on it but due to a limitation with the chipset you will lose 2 eSATA ports, 2 onboard front USB 3.0 connectors, 2 PCI slots and 1 USB 3.0 rear IO port (the top USB 3.0 port at the side of audio jacks). In the end it almost seems pointless to have the third x16 slot if this is the case, as with the second x1 slot.
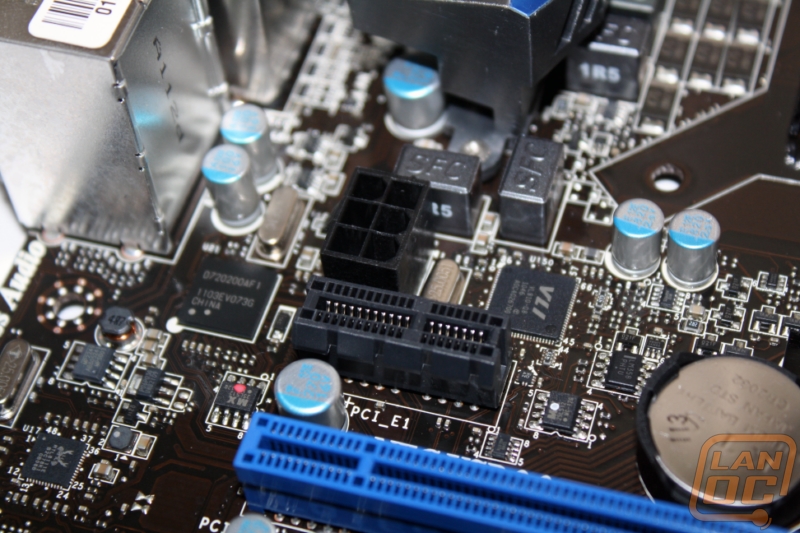
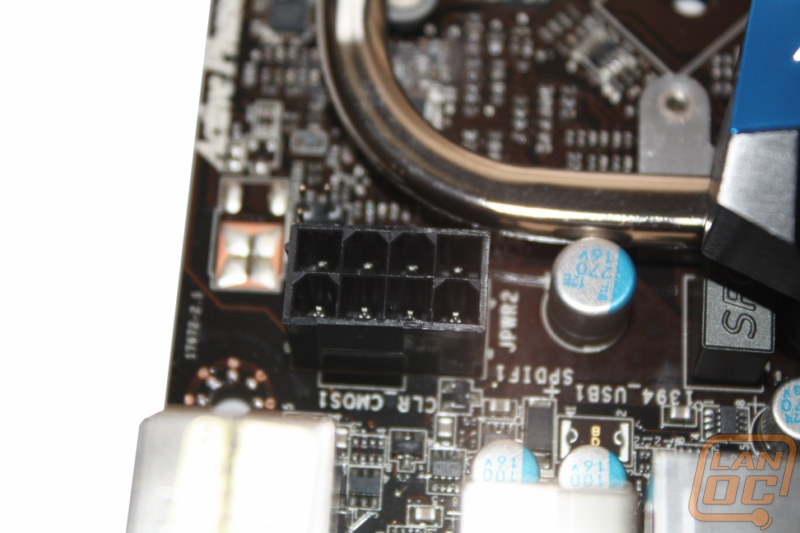
Oddly enough to give you extra juice for overclocking your video cards MSI pulls power from a 6pin connector just above the PCI slots. The use of an extra connector like this isn’t unheard of, but using a 6pin is an odd choice. If you are planning on running SLI on this board you will need to make sure you have enough 6/8 pin power connections for your cards and also an extra for the motherboard. I would have rather seen a Molex or a second 8pin CPU power be used as they are more common. Having said that our 850watt power supply had the extra connections needed, most high wattage PSU’s should suffice.
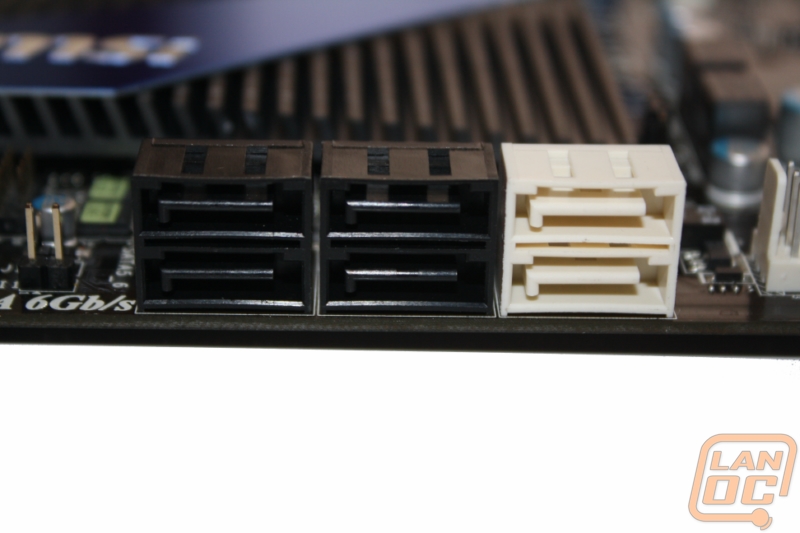
A total of 6 SATA connections internally with two being SATA 6 should hold off most people. If you are looking for more than six you are going to be stuck using an add on card. I would personally like to see at least 8 on a mid to high end motherboard. I don’t use that many anymore, but before moving all of my storage off to servers I would use 8 to 9 SATA connections between two disc drives and multiple hard drives. I would rather lose one of the two eSATA connections and have more internally if that was the case.
For anyone looking to keep a close eye on all of your voltages MSI provides a nice place to check them one by one with a multi-meter. They even include nice leads in the accessory pack to make it even easier.

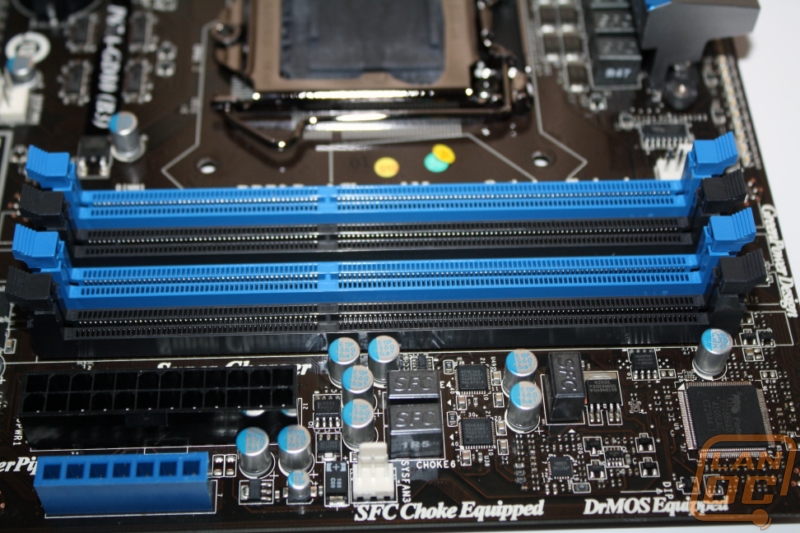
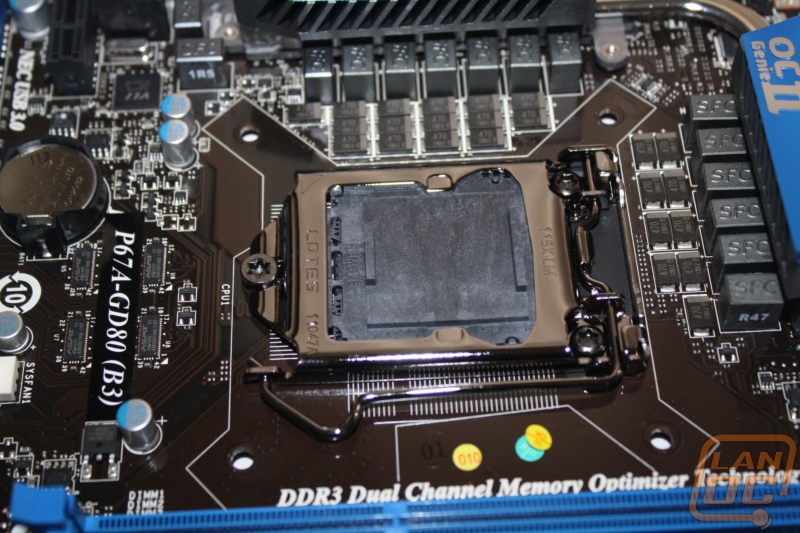
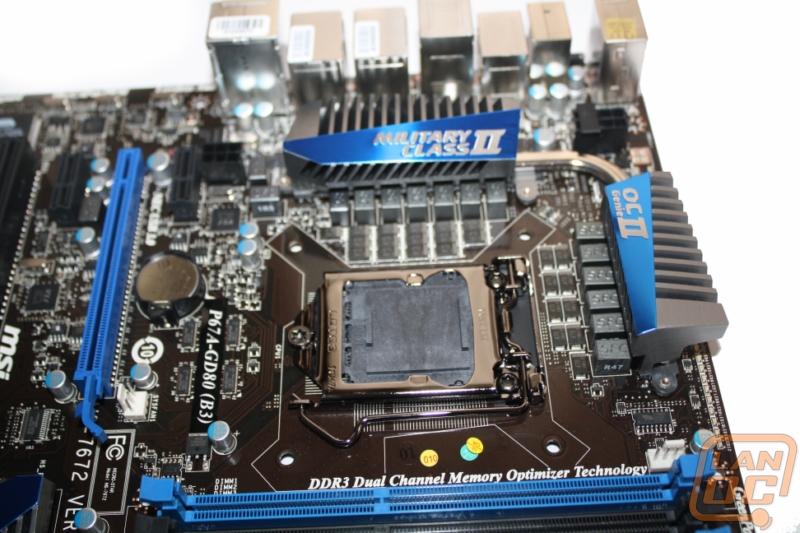
Next to the 24 pin power connection you have four DDR3 slots in blue and black.
The GD80 uses a Lotes made CPU hold down
Just behind the rear I/O panel and tucked up next to the heatpipes is a single 8pin CPU power
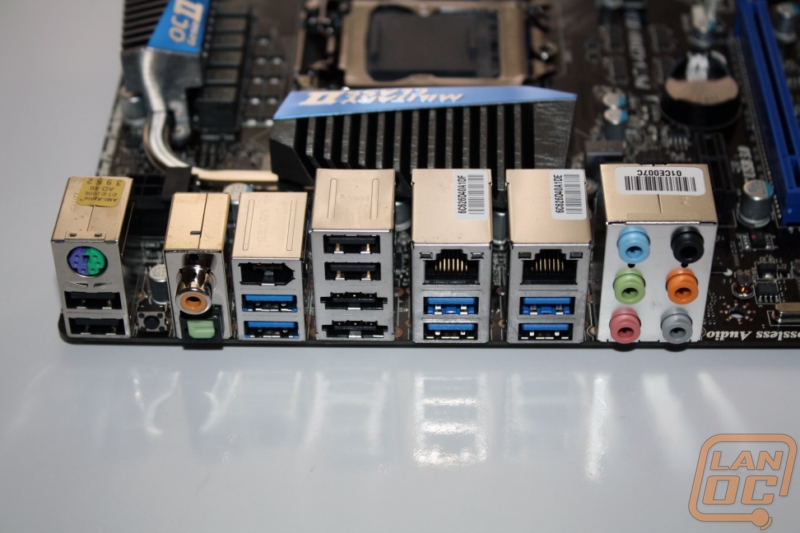
The rear I/O panel is PACKED with features. You have six USB 3.0 posts, six USB 2.0 ports two do double duty as eSATA ports, two 10/100/1000 ethernet ports, a firewire port, digital and optical audio ports, a ps2 port, and a six port audio panel! Try to stay all of that 10 times really fast.
BIOS
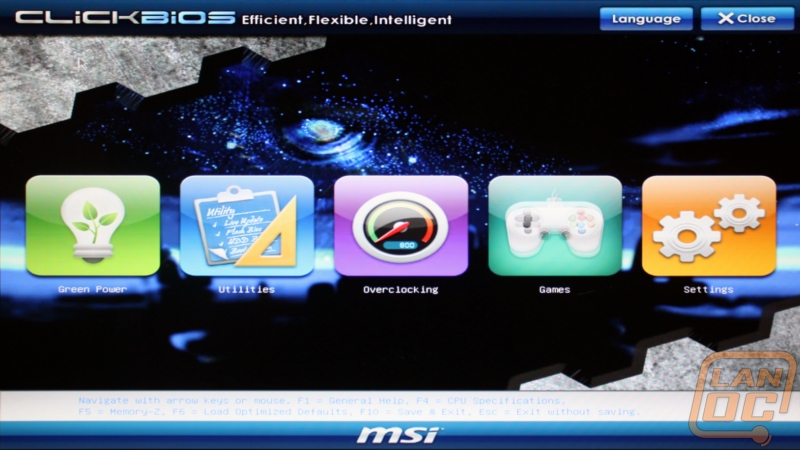
Just like with the GD65 one of the best parts about the GD80 is the easy to use UEFI BIOS. MSI calls it click BIOS but that is just a marketing term for UEFI with a mouse interface. Booting up into the bios will have you greeted with five colorful icons, each with their own purpose.
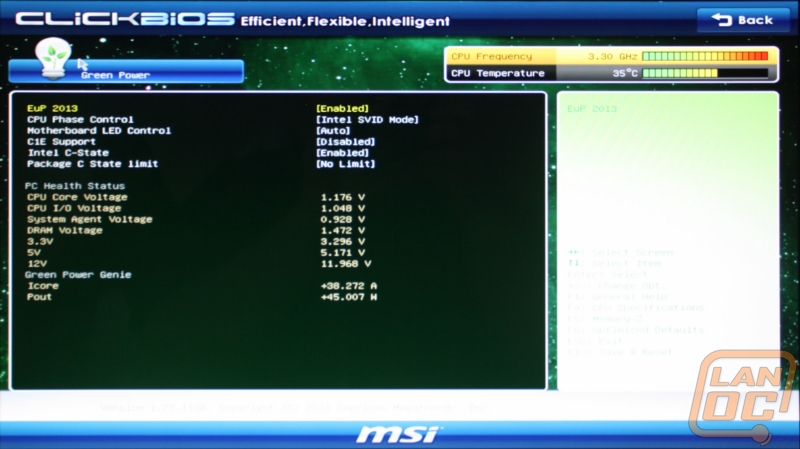
Under the green power option you can check your PC health status, or in other words the voltage on different areas of the board. This is also where you can control your CPU Phase control and other power efficiency settings
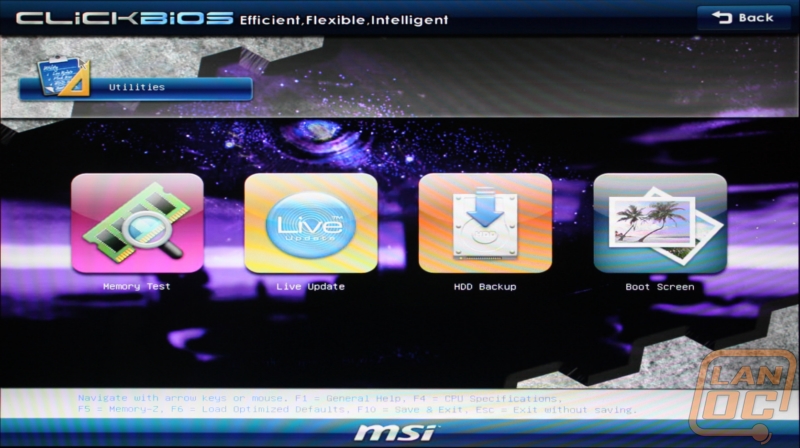
Under the utility’s option you can run a memory test, run live update to updated the GD80, back up your hard drive, and set a new image for the boot screen.
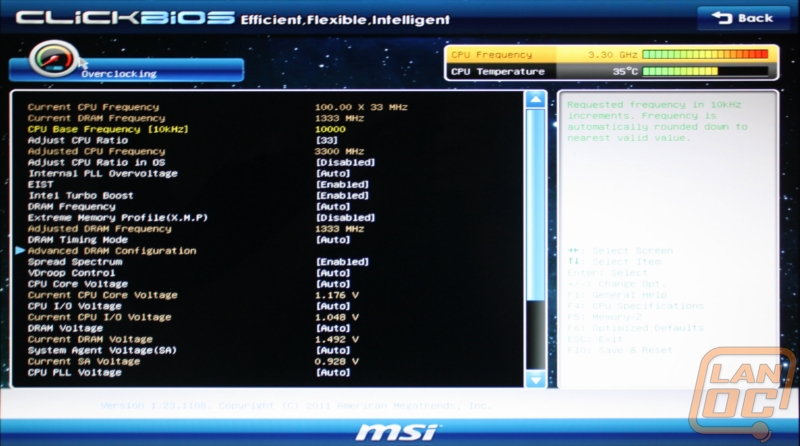
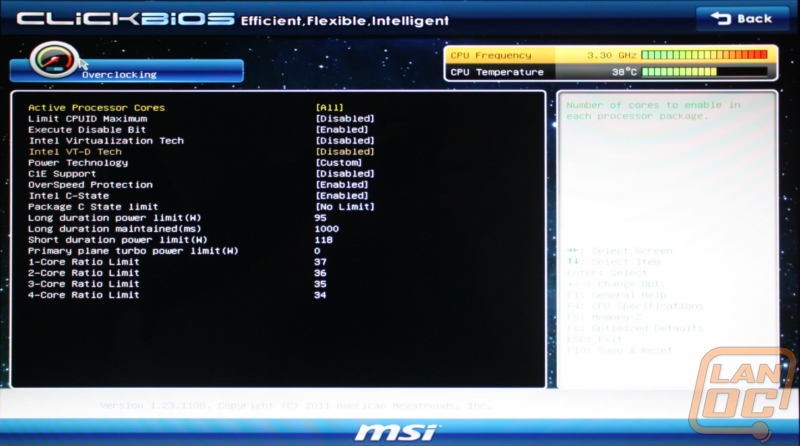
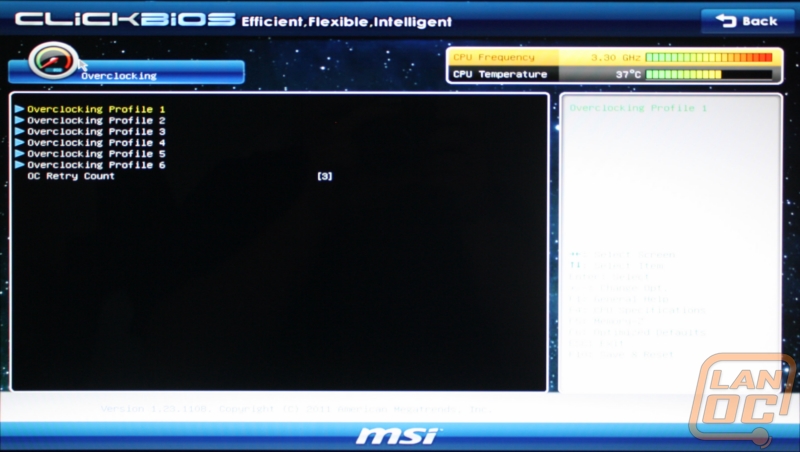
The overclocking is where you are most likely to spend your time at. Once you have made it in this far most of the options are laid out like you would expect a non-GUI BIOS to have them. The overclocking tab has everything you need to tweak and squeeze every ounce of performance out of your Sandy Bridge CPU. In our case the voltage, CPU ratio, and Bclock are all easy to get to. We shouldn’t have much trouble overclocking later in the review.
You can back up to six different sets of BIOS settings with the ClickBIOS. This helps when working on an experimental overclock or if you have different settings for different times of the year (hot and cool weather).
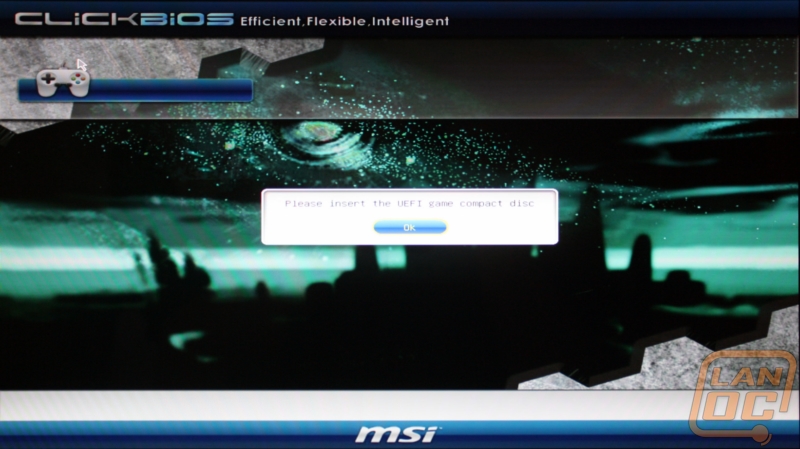
The games option in the bios brings you to a screen looking for a UEFI game compact disc although I can’t seem to find one available online. Wouldn’t it be cool if you could skip the OS all together and boot right into the game that you would like to play?
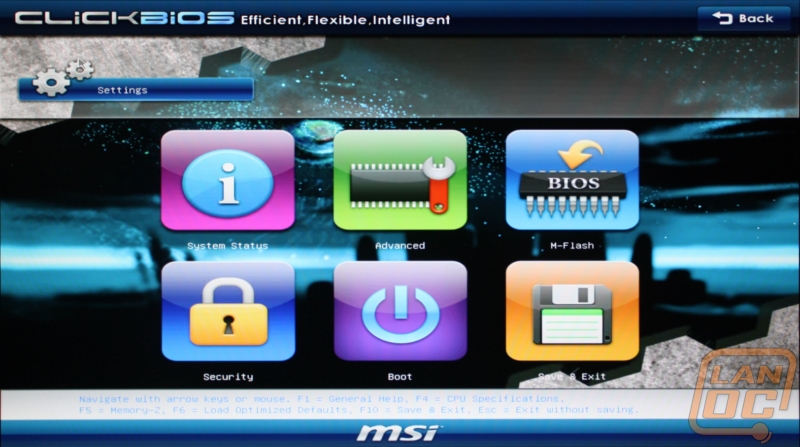
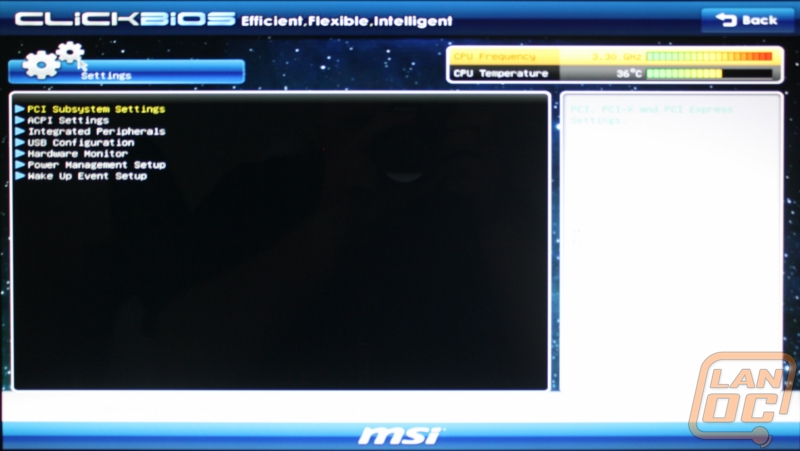
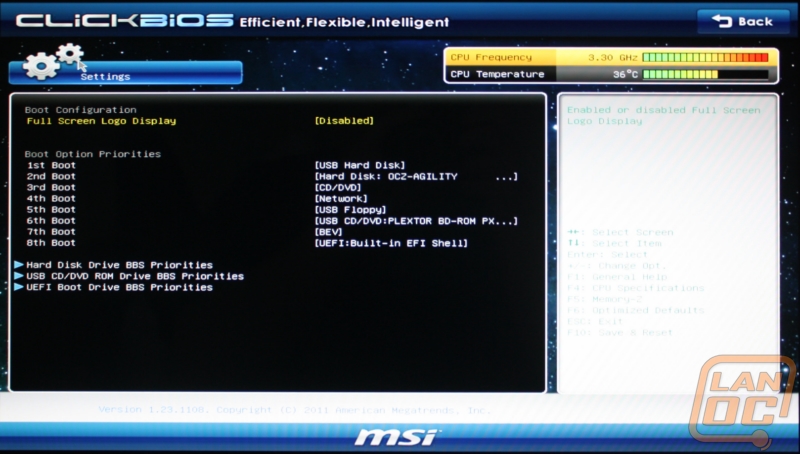
Last but not least you have the settings icon. This is the only icon that leads to more icons. Here you can reflash your BIOS, set your security settings, boot drive options and order, and check your system status.
Cooling
Keeping the board cool both thermally and aesthetically is left too three heatsinks and a heatpipe connecting the two. When you take it all in from a distance there is no question that this is an MSI motherboard. There cooling is functional but completely different than what we see from every other vender.
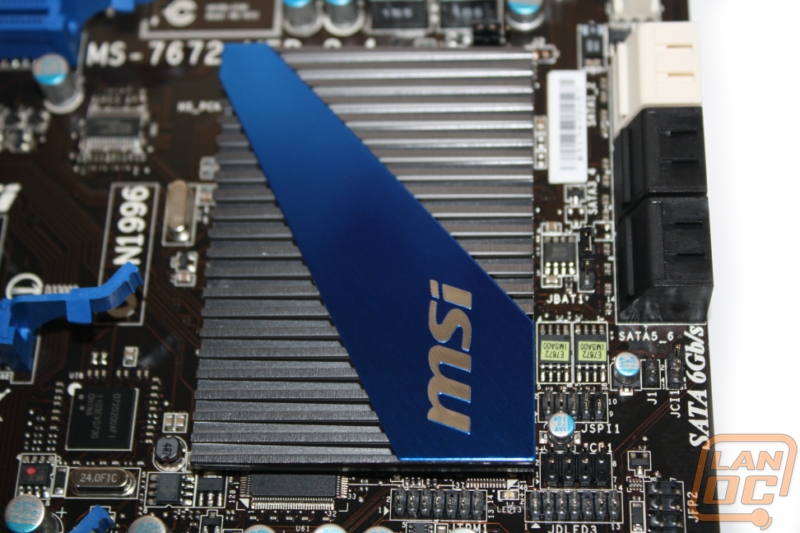
Down on the Southbridge MSI had to keep things low profile to be able to fit extra-long video cards above it. This heatsink has small fins cut into it in a grey color then to give it that MSI styling they added a angular blue strip with MSI cut into it. It’s all that is needed to keep things cool and it fits in perfectly with the rest of the motherboard.
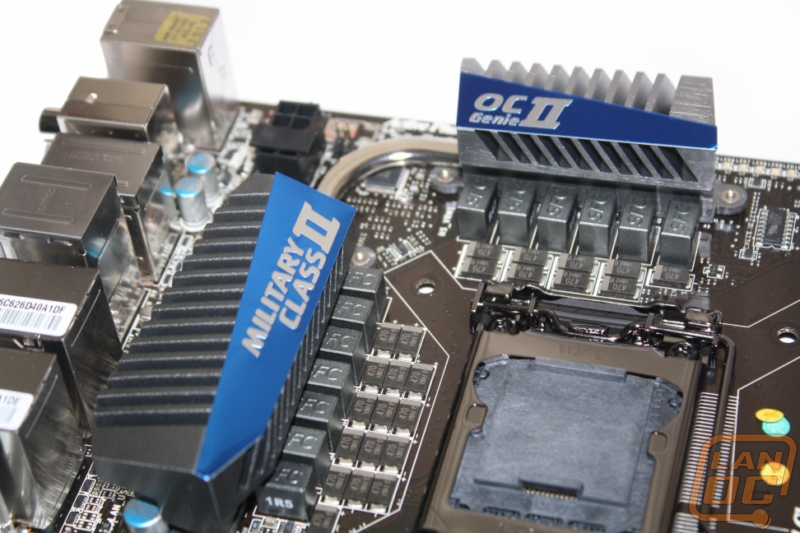
Up top around the CPU is where the magic happens and there is no way a low profile heatsink is going to do the job up here. MSI used the same Blue angular design on both of the connected heatsinks but this time around the heatsink fins are much more than just a short millimeter or two. Both of the heatsinks are machined with angles to go with the MSI styling. It almost reminds me of the now aged F1-17 stealth fighter jet with all of the angles. (Bad joke warning!) MSI you’re not getting off our radar that easily!
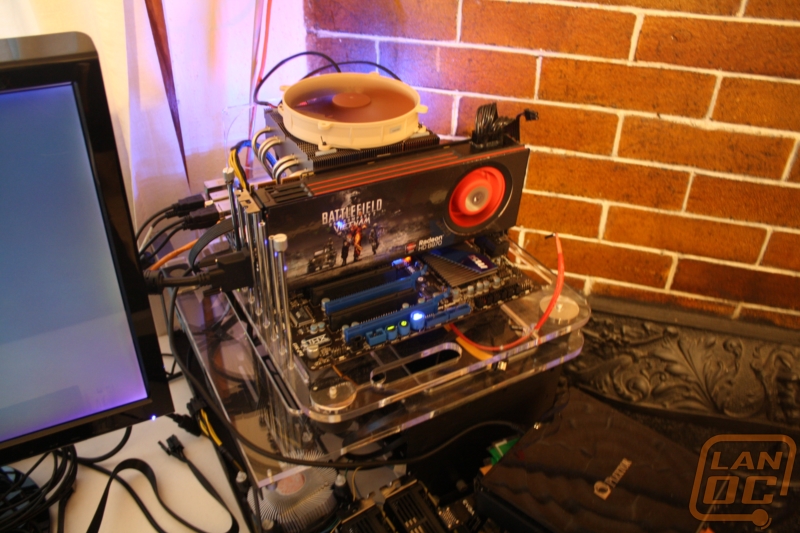
Our Test Rig
Intel Sandy Bridge i5-2500K CPU
Crucial Ballistix Tracer Ram 1600Mhz 2x2Gb
OCZ Agility 2 60Gb SSD
Noctua NH-C14 heatsink
Cooler Master 850Watt PSU
Sapphire HD6970 BF:BC2 Edition for AMD testing
Two Nvidia GTX580’s for SLI testing
Microcool Banchetto 101 Test bench
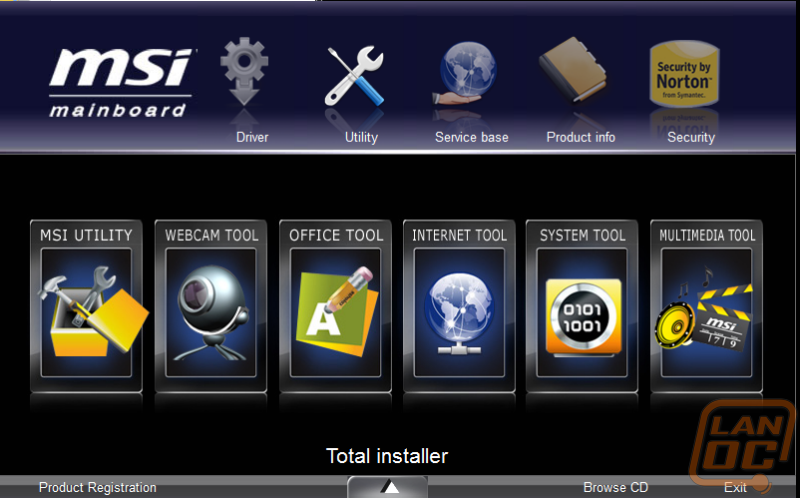
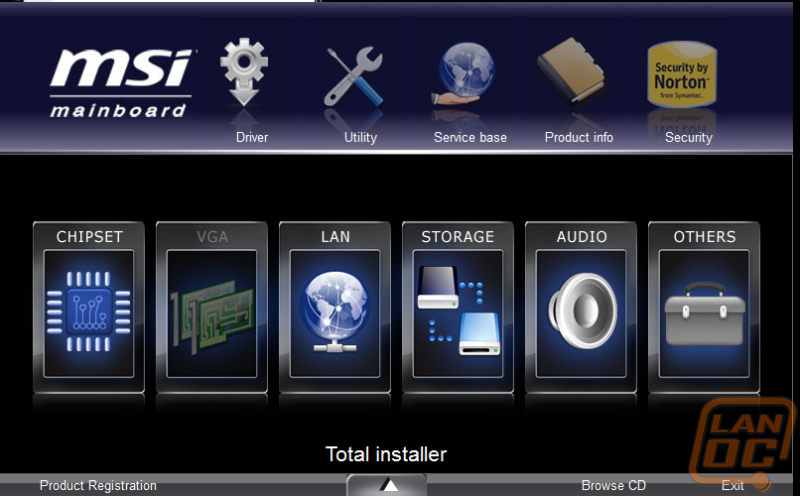
Software
Having just played in the BIOS when I went to install the drivers and software for the GD80 I couldn’t help but notice the similarity’s in the installer and the ClickBIOS. I spent most of my time in the MSI utility folder installing all of the included utilities but it’s great to see they included a whole selection of software! It’s a little weird that MSI has broken everything up into different utilities; it seems it would be easier to package it in one easy to use program. Let’s take a quick look at easy piece of software.
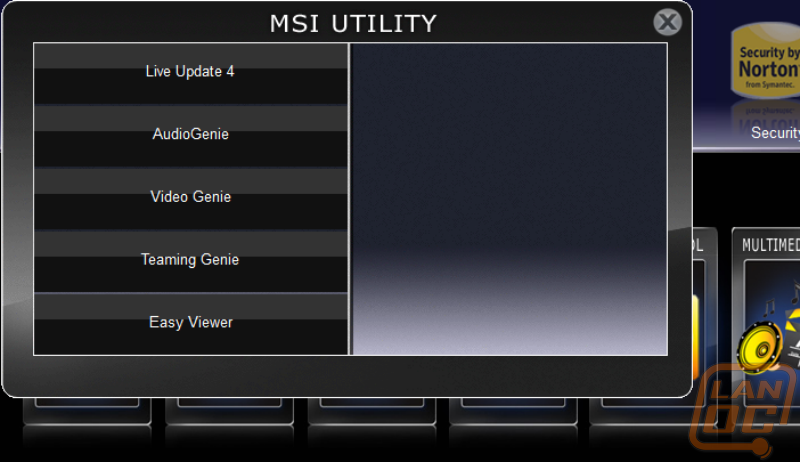
Live Update 4

A quick and easy way to check for updates to both your current software and your BIOS. If you need an update Live Update will download the installer for you. It’s not going to install it for you but it’s a nice step and very helpful.
Audio Genie
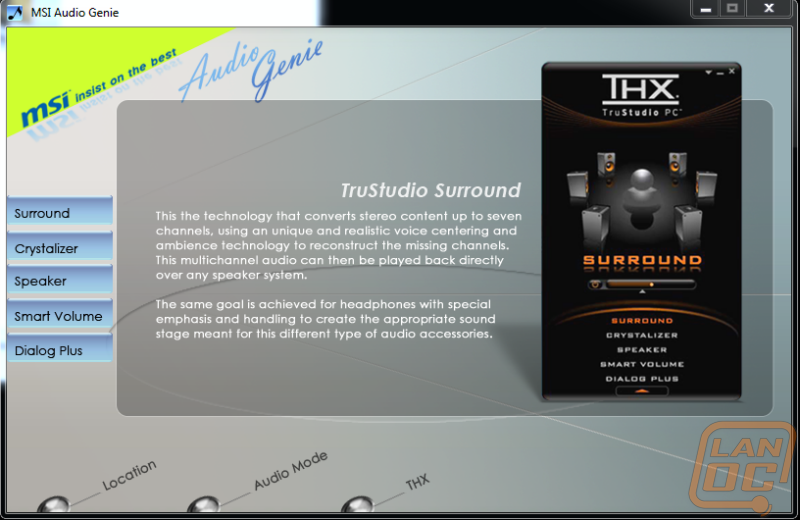
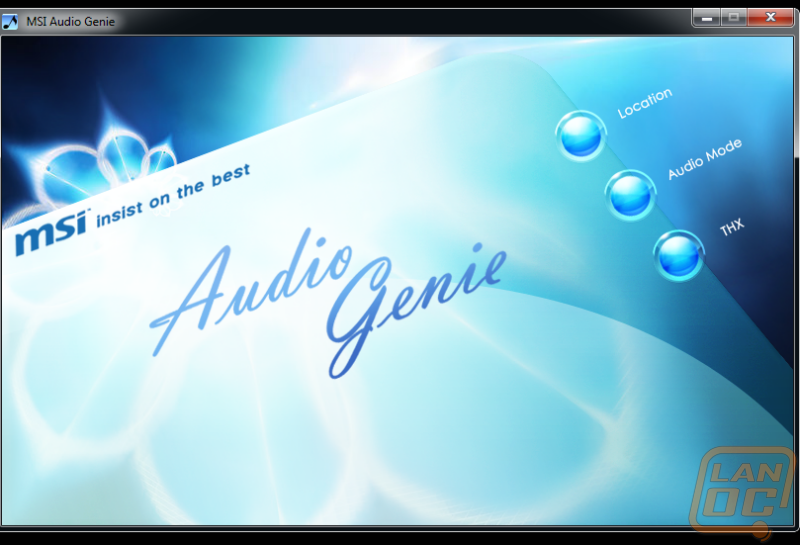
This piece of software mostly runs in your task bar giving you the option to switch between a couple different audio modes. The options are general and extremely limited. Its simple software like this that makes me wish they would pack it all together.
Teaming Genie
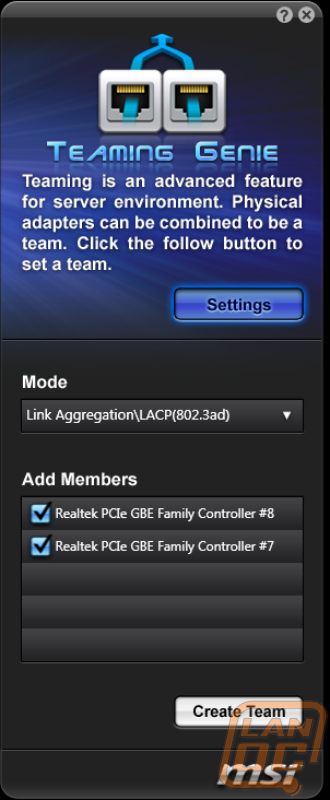
Just an on and option to turn on MSI’s Ethernet teaming. Doing that can double the speed of your Ethernet. I don’t see this being very helpful when running full gig, but at 100 I can see this giving a welcomed improvement.
Easy Viewer
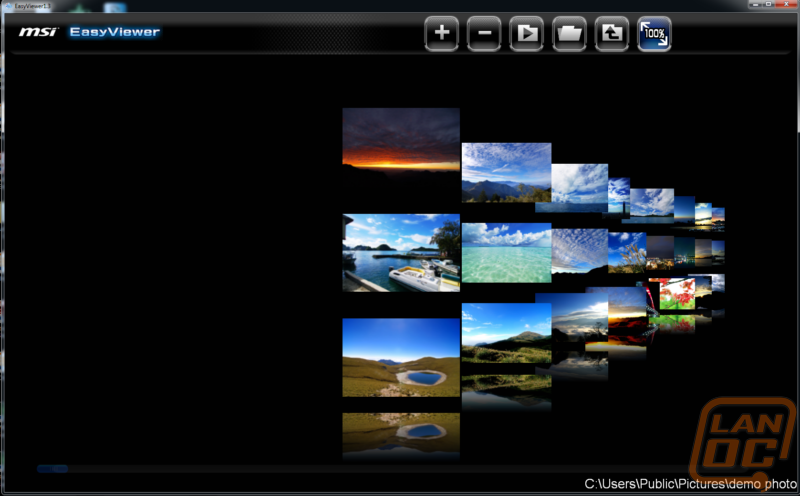
This program replaces windows photo viewer for anyone who installs it. It’s great for pulling up a full folder of photos and scrolling through them, but maybe I am getting old but I don’t feel like this is needed. The old way works well for me lol, I am starting to sound like my grandpa.
Our Testing Procedures
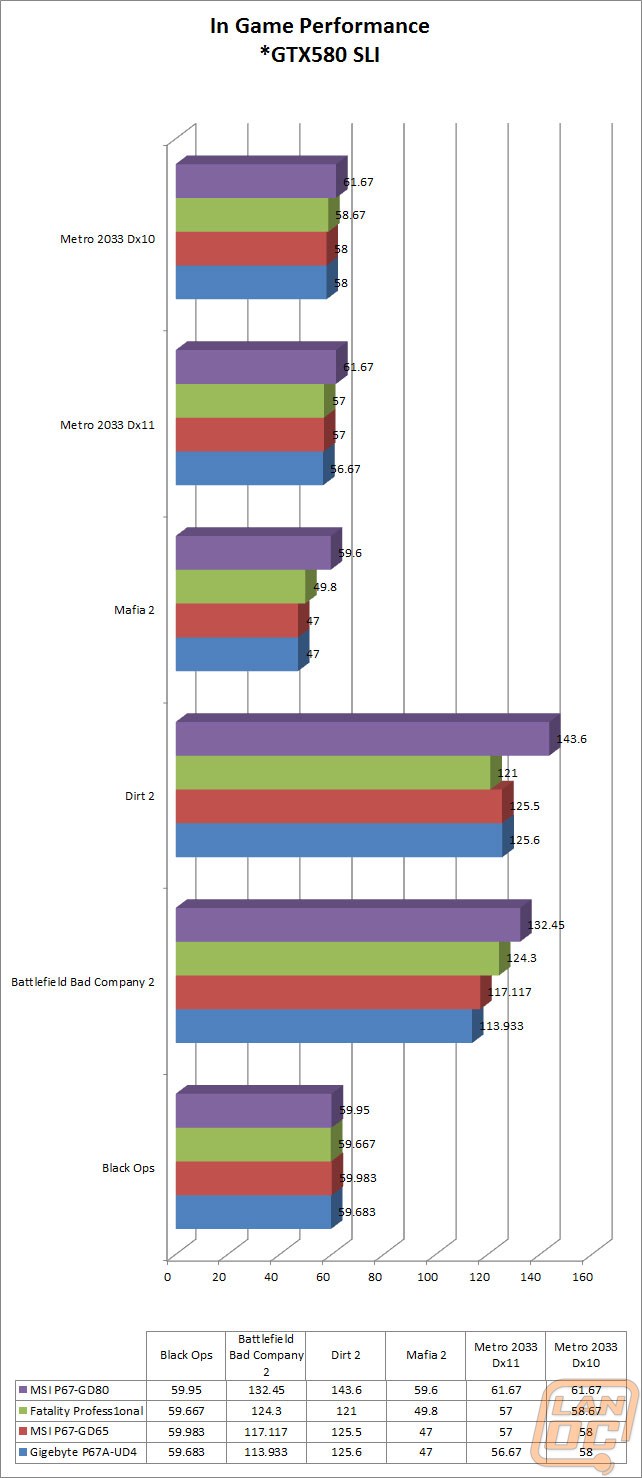
All of our in game performance testing was run at 1920x1080, you can see the exact settings below. Here are the details for each of our tests.
Call Of Duty Black Ops (1920x1080 – high settings, first scene starting after the cut scene, recorded using fraps)
Battlefield Bad Company 2 (1920x1080 – high settings, first scene starting after the cut scene, recorded using fraps)
Dirt 2 (1920x1080 – 4x MSAA – high settings, in-game benchmark)
Metro 2033 DX11 test (built-in benchmark, 1920 x 1080; DirectX: DirectX 11; Quality: Very High; Antialiasing: MSAA 4X; Texture filtering: AF 4X; Advanced PhysX: Enabled; Tessellation: Enabled; DOF: Disabled)
Metro 2033 DX10 test (built-in benchmark, 1920 x 1080; DirectX: DirectX 10; Quality: Very High; Antialiasing: MSAA 4X; Texture filtering: AF 4X; Advanced PhysX: Enabled; Tessellation: Enabled; DOF: Disabled)
Mafia 2 (built-in benchmark, 1920x1080, PhysX on, high settings)
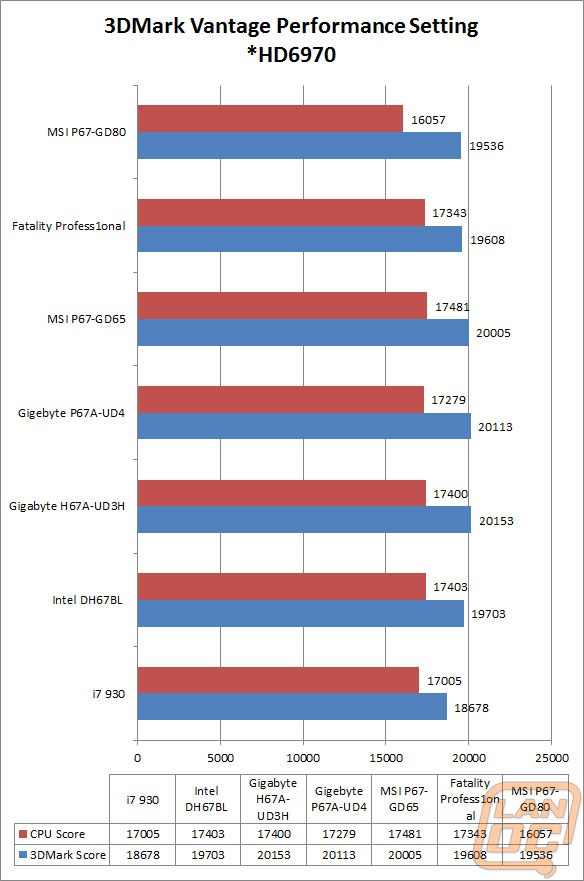
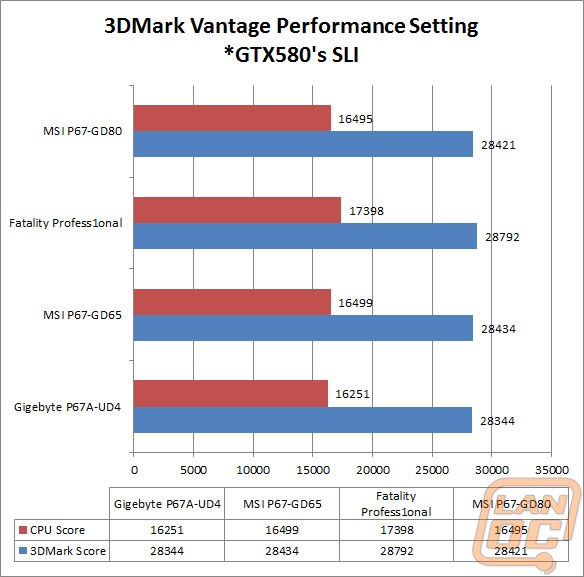
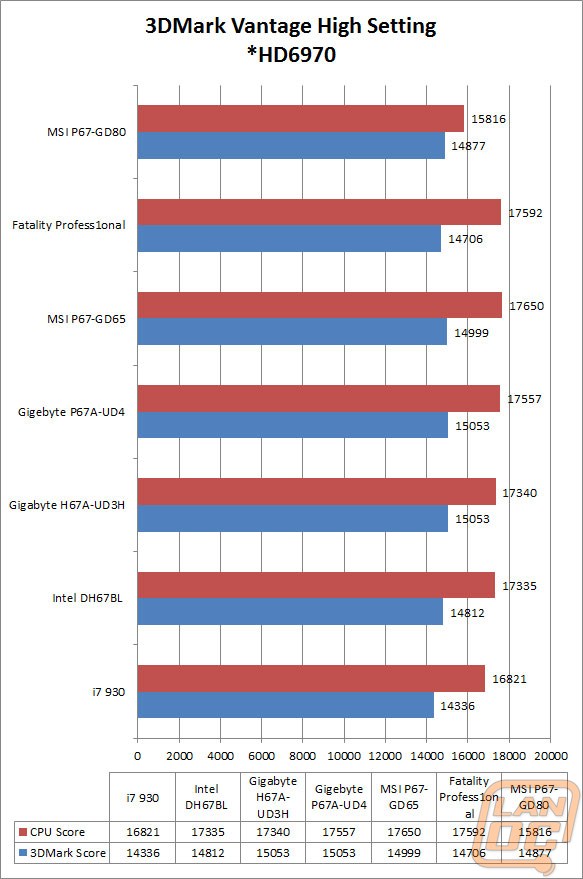
Synthetic Benchmarks For motherboards our synthetic benchmarks are limited to 3DMark Vantage, 3DMark Vantage 2011, and PC Mark Vantage. 3DMark Vantage is run with PPU turned off with results from both the performance and high settings. In 3DMark Vantage 2011 we run both performance and extreme benchmarks. PC Mark Vantage is set to its default setting. PCMark 7 is run with every option selected to give the widest selection of test results, some can’t be replicated without using a Pro version of the software.
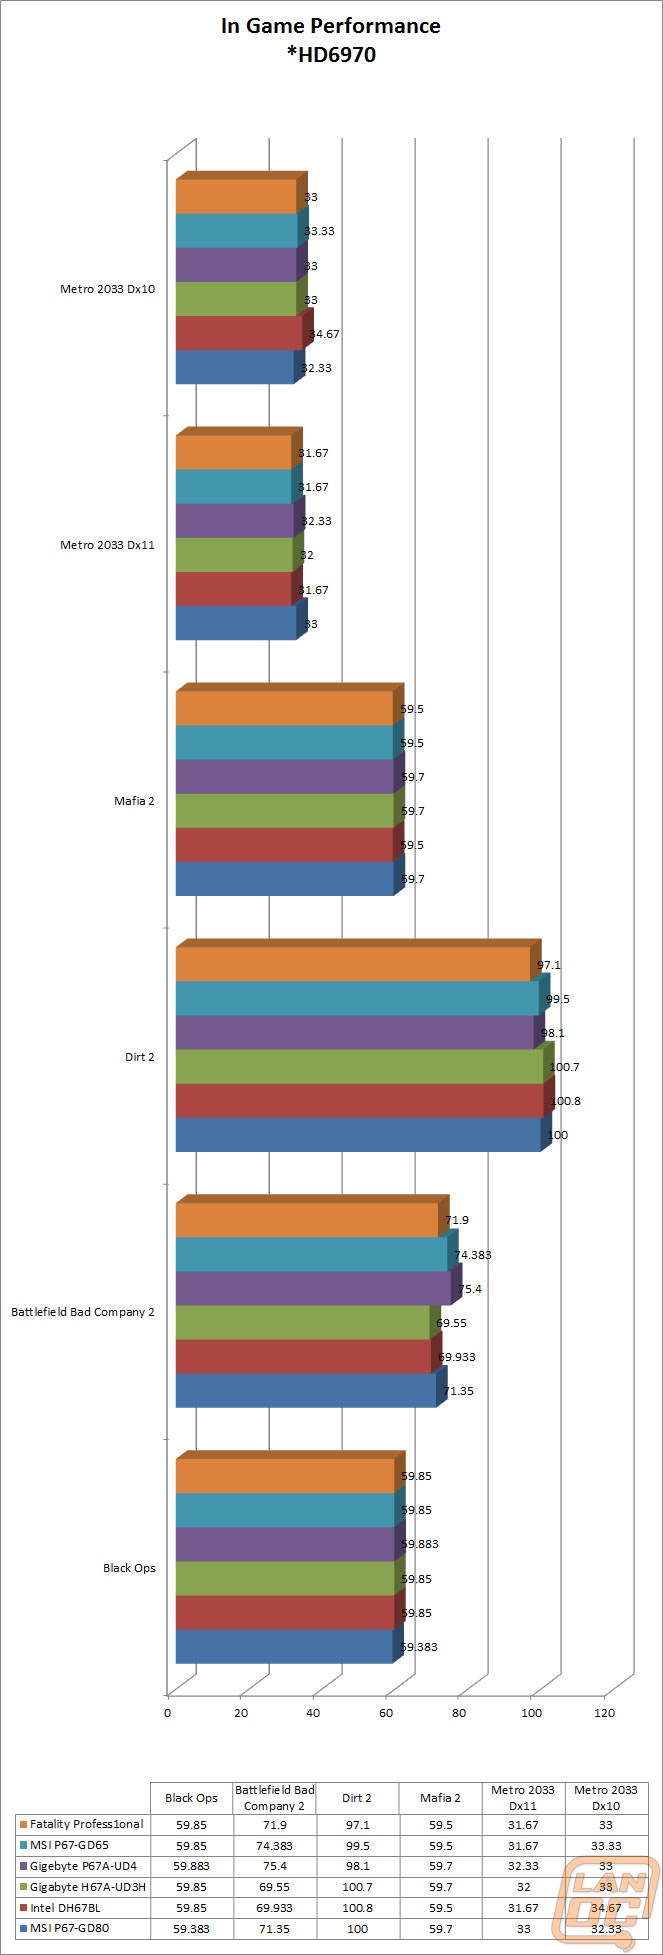
In Game performance numbers
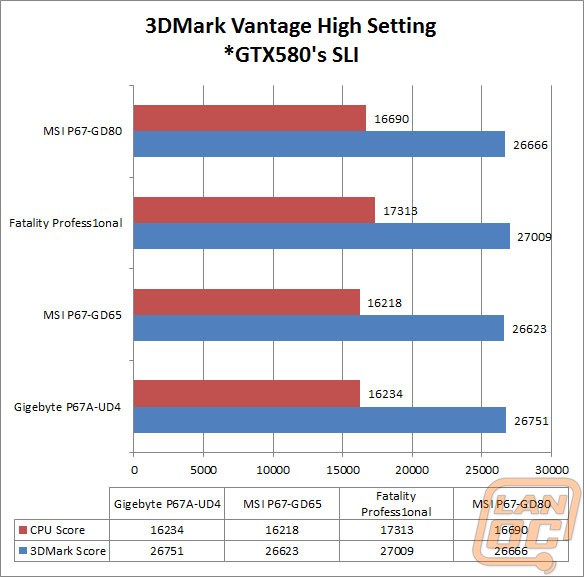
3DMark Vantage

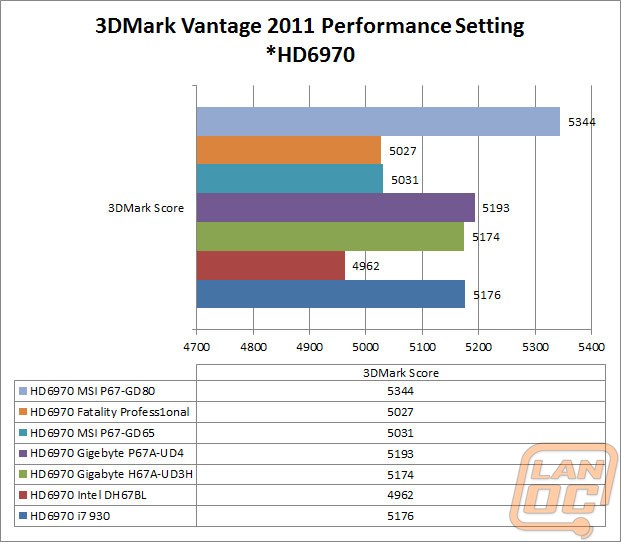
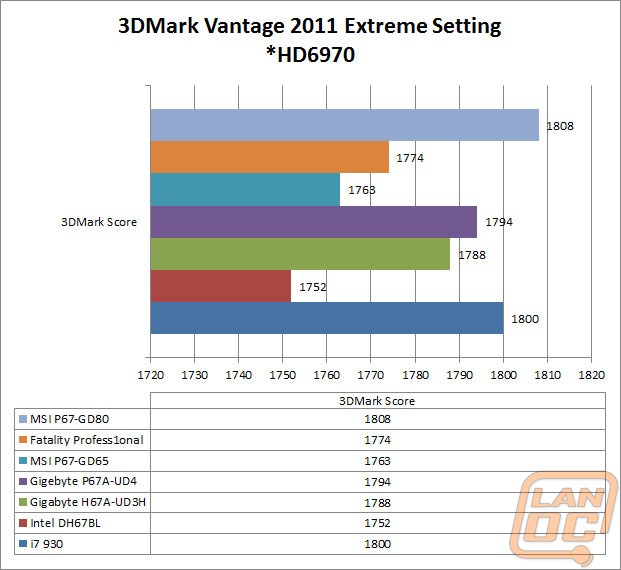
3DMark 11

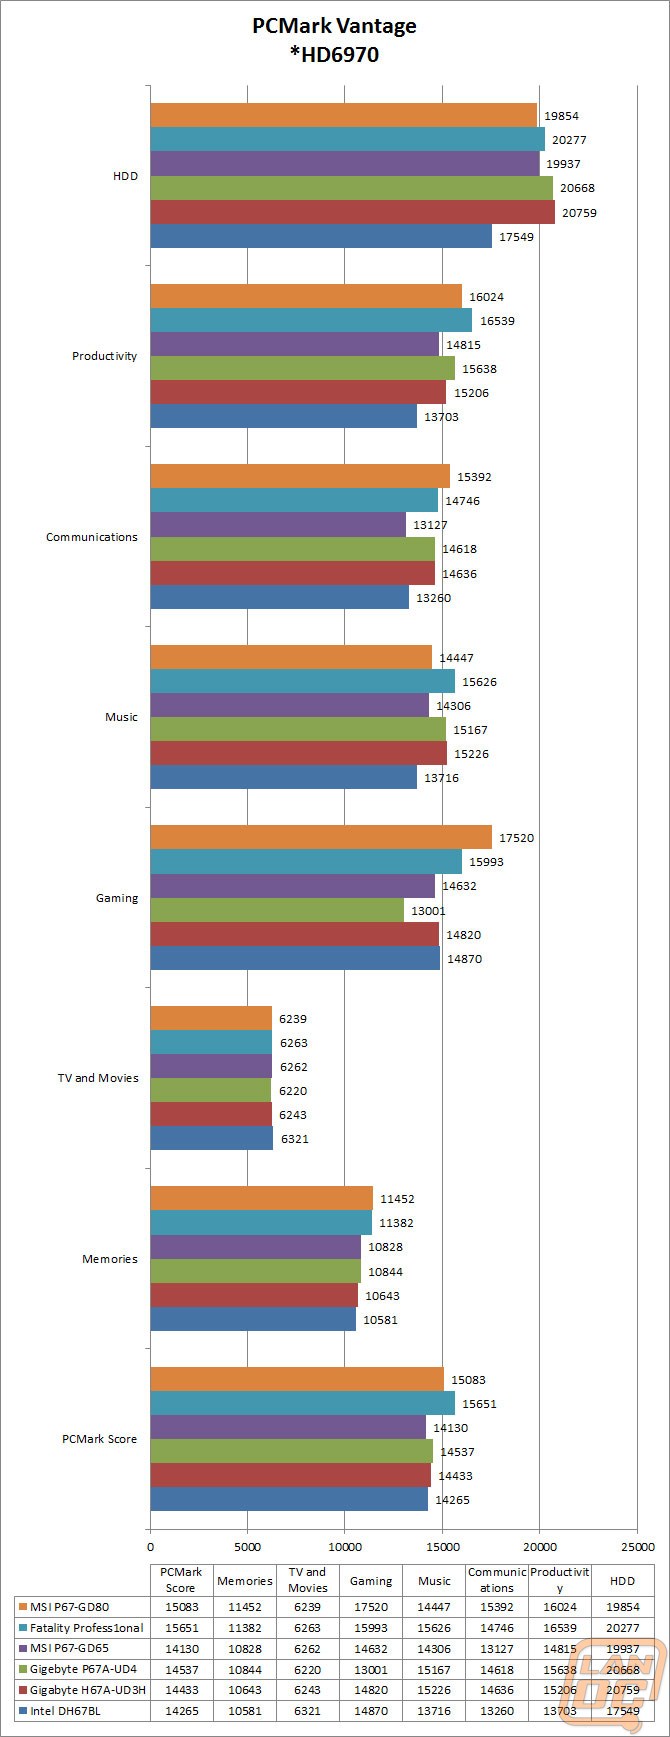
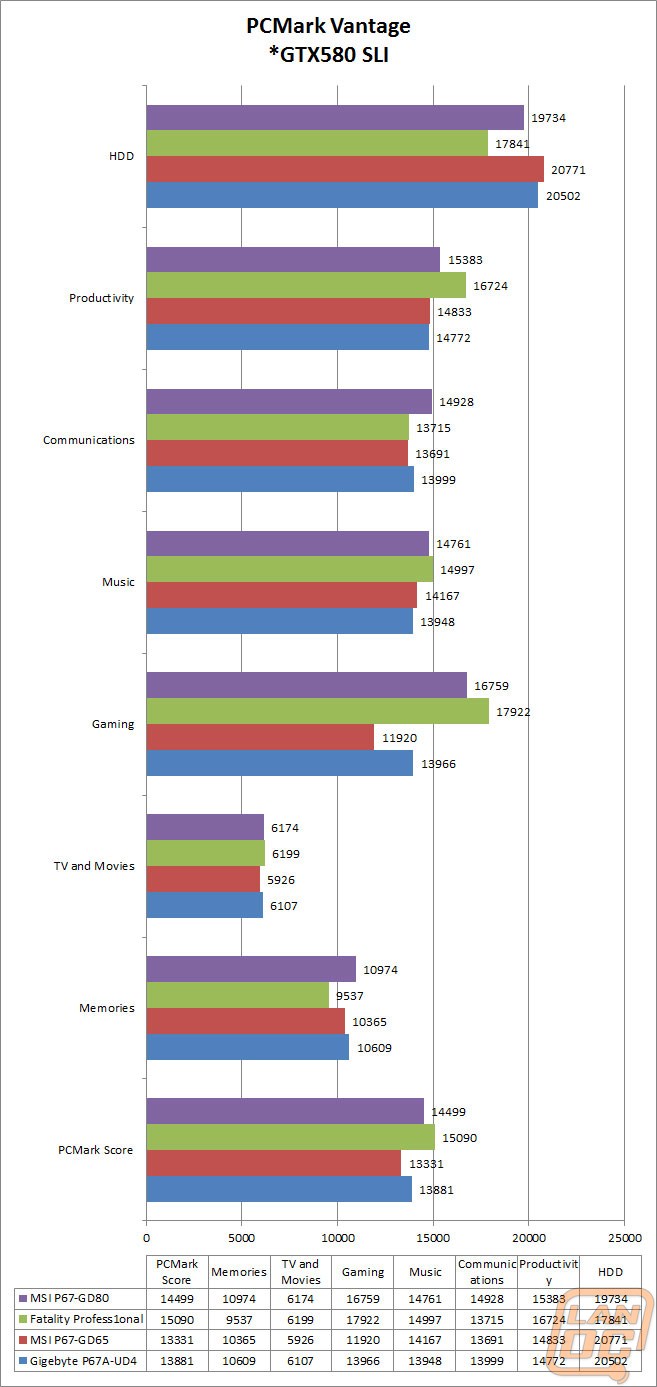
PCMark Vantage

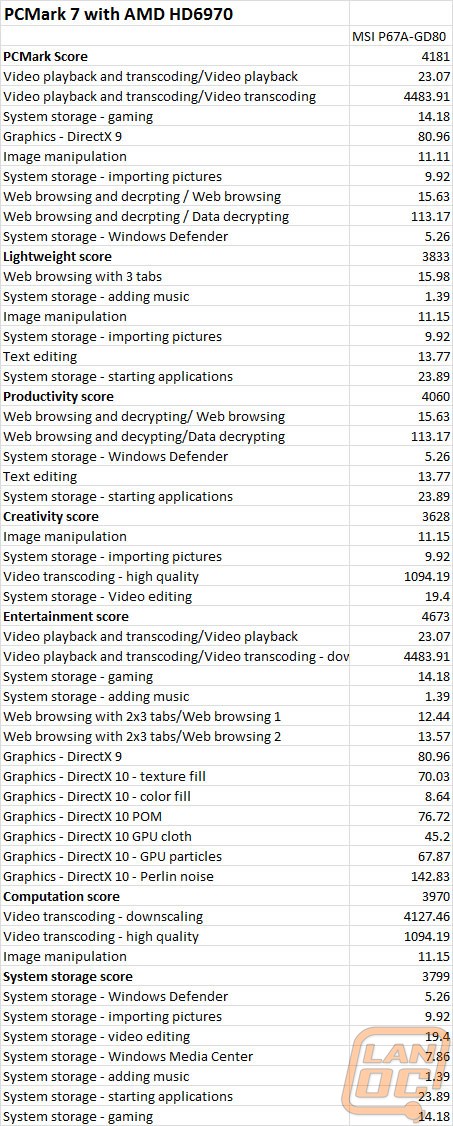
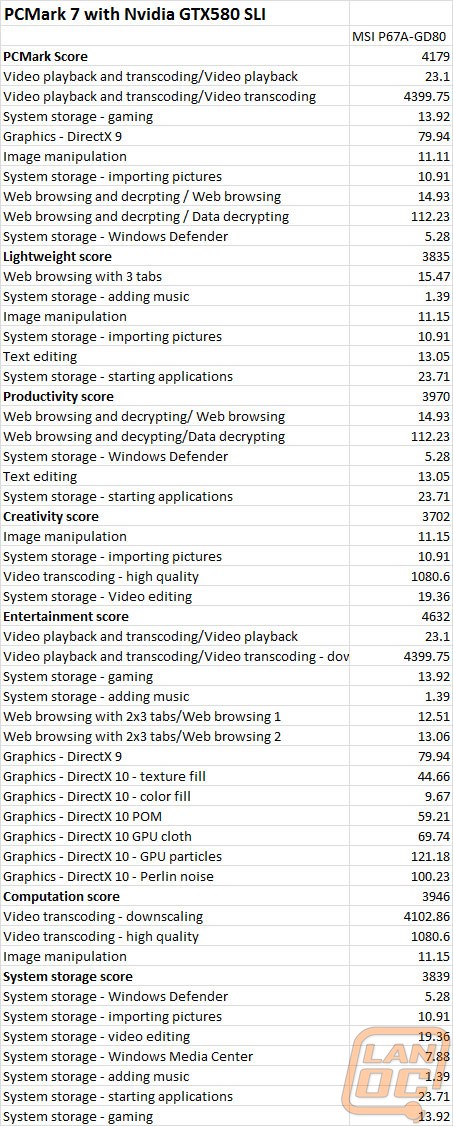
PCMark 7
Performance
As you can see the P67A-GD80 holds its own against every other P67 motherboard we have tested in the past. In multiple cases it out performs them considerably. Although this is the first time we have used PCMark 7 in a review I can’t wait to see how the GD80 performs against future reviews. All in all the limit of x8 on each of the PCI Express x16 ports wasn’t an issue when testing with our two GTX580’s in SLI. I wouldn’t recommend running a third card, at x4 there is a good chance you will see performance issues there. That third slot could still be used for a lower end card for PhysX or an audio or network card if you are looking for an upgrade in the future.
Overclocking
I took two different approaches with overclocking on the P67A-GD80, using the one step OC Genie and then going in myself and manually doing the overclock. Our i5 2500k is a known good overclocker that has seen 5.1+ on air multiple times so I know its fully capable of overclocking well.
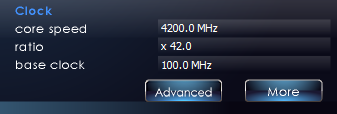
Running MSI’s OC Genie is as simple as pushing the button on the motherboard on and then rebooting your pc. With the button on, the motherboard tests and picks the best overclock its confident in. In our case I ran through this amazingly simple process and came out with 4200MHz (42 multi, 100bclock). I was hoping for a little more, I have seen this CPU run 4.6 on the stock cooler. With our Noctua heatsink running there is no doubt that it can do more. BUT, this is a great overclock. Even if it didn’t push the limits of the CPU a Sandy Bridge CPU running at 4.2 is a great improvement for literally no work. For someone who knows nothing about overclocking this is added value and the speed is low enough that even with stock cooling you wouldn’t have any problems.
Jumping back into the ClickBIOS you will remember that MSI gave us everything needed to push our CPU all the way to the bleeding edge. Bumping up to a x50 multiplier crashed us but stepping down to x49 everything booted smoothly and tested fine. Going back in to edge a little more I turned the bclock up but wasn’t able to get past 4950Mhz without having stability issues. In the end the GD80 overclocked great, but it wasn’t able to match what we have seen before with this CPU.
Overall
The P67A-GD80 is an odd situation. It’s obvious that MSI has packed the GD80 full of features, to the point where you can’t use them all at once. That means it’s a great motherboard, unless you need to use your eSATA ports while using the third PCI Express x16 slot. Because of that I would only recommend this board if you had no plans for using that third. When compared to the P67A-GD65 that we reviewed at launch the GD80 has more USB 3.0 connections and a second ethernet port, for the lower price I would recommend going with the GD65 unless the dual LAN with teaming is a requirement. That’s not to say this isn’t a great board, you will just have to consider what you’re looking for in a board before you select one of the MANY boards that MSI has to offer on the P67 platform.