Performance
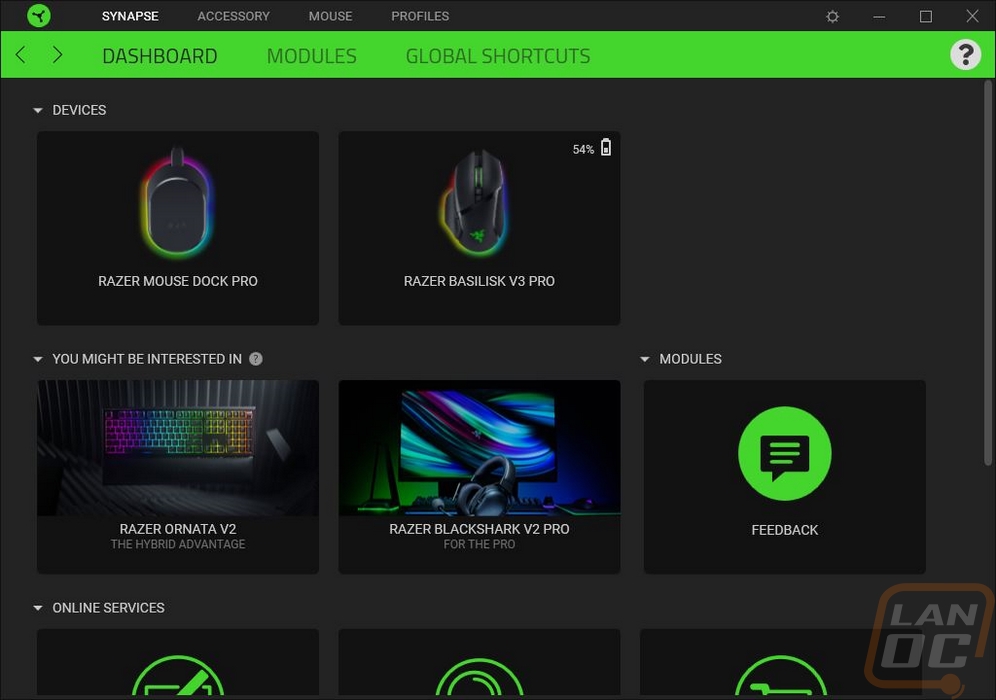
To start my testing I did want to check out the software that the Razer Basilisk V3 Pro will be working with. If you have seen any of my last few Razer reviews not too much has changed here so you can skip ahead. Razer has a few different programs but the one you will need is Razer Synapse. Just having your mouse plugged in will normally prompt a download, if not you can get it from their website. Once installed Synapse will ask you to log in but you do have the option to skip that. Logging in will sync your settings into the cloud which can be nice if you have multiple PCs. With a new mouse like this, you may also need to have Synapse check for updates as well to get on the latest version after the mouse is plugged in but once up to date, this is what you will see. The dashboard shows you all of the Razer devices that you are currently running which in this case I have the Basilisk V3 Pro and the Mouse Dock Pro as well which I’m using with the Basilisk V3 Pro.
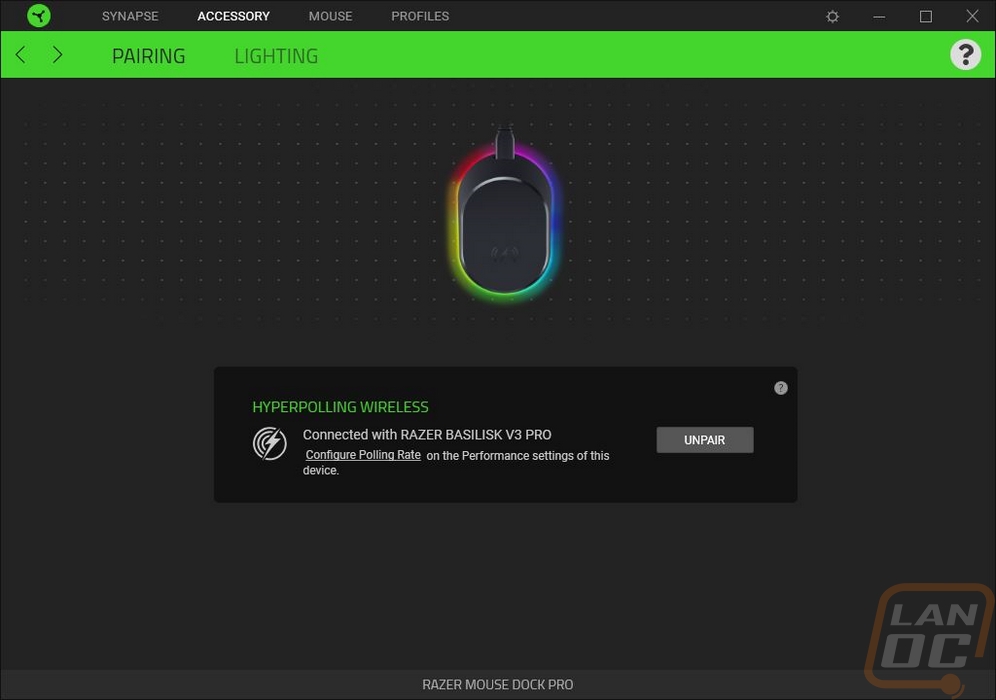
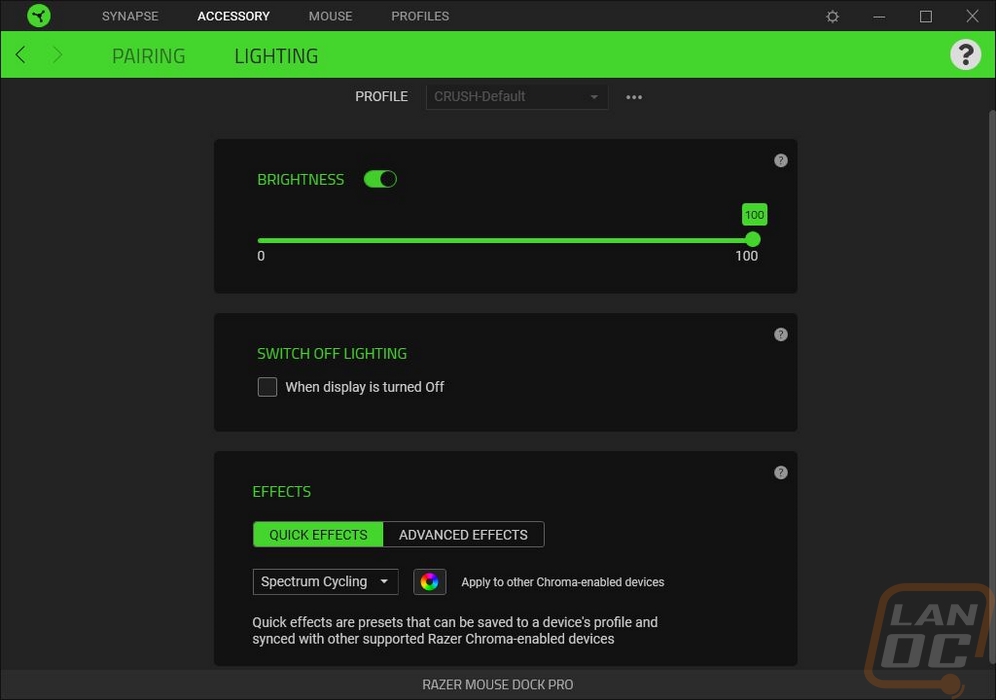
If you are using the Mouse Dock Pro you will need to pair it with your device which is the first of two pages that the Mouse Dock Pro has in Synapse. The second page is the lighting page which lets you pick your brightness level, decide if the lighting should turn off when your monitors turn off, and pick from the drop-down quick effect list or create your own under advanced.
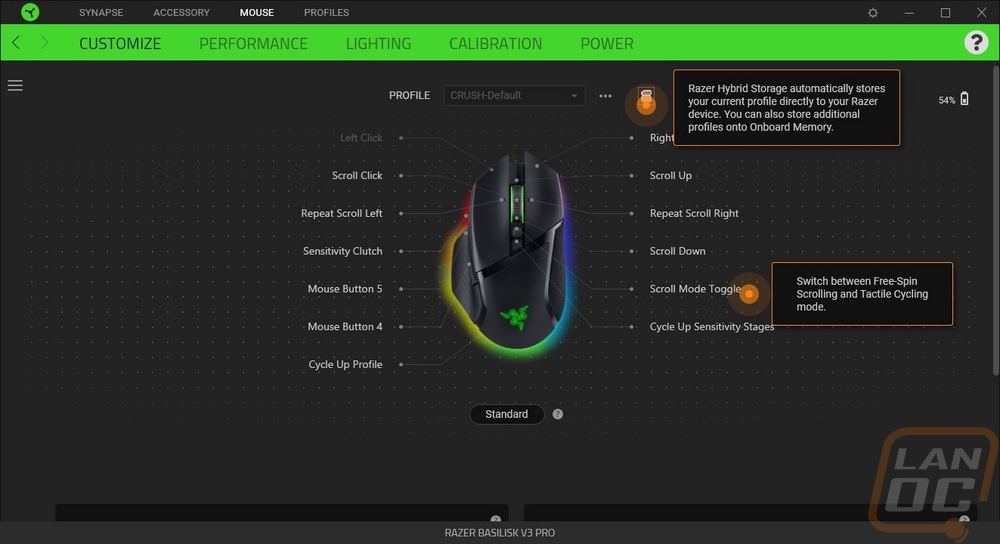
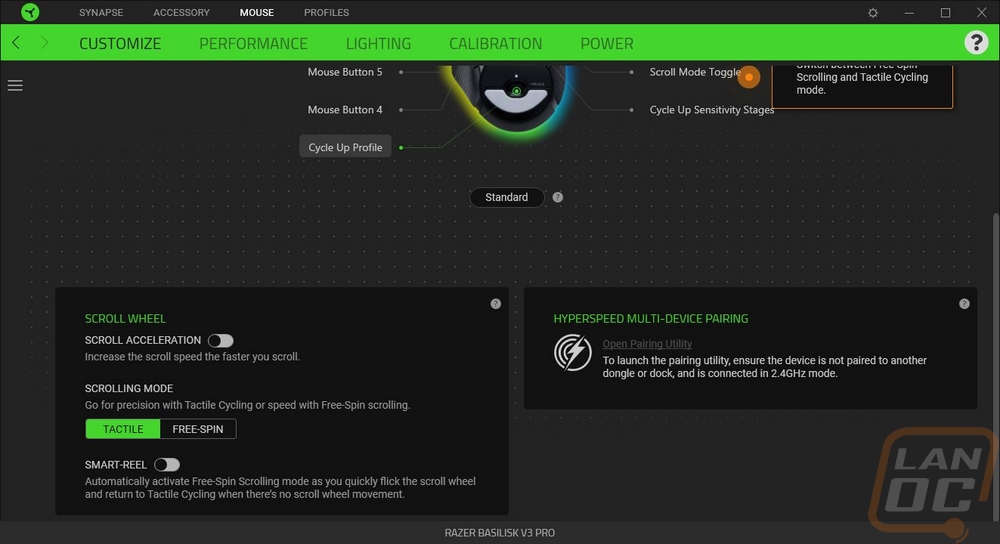
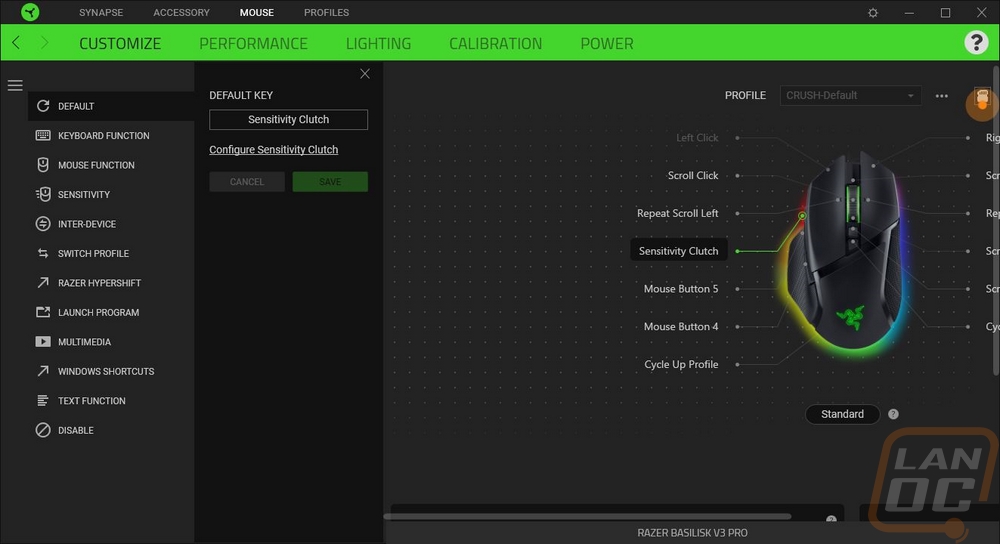
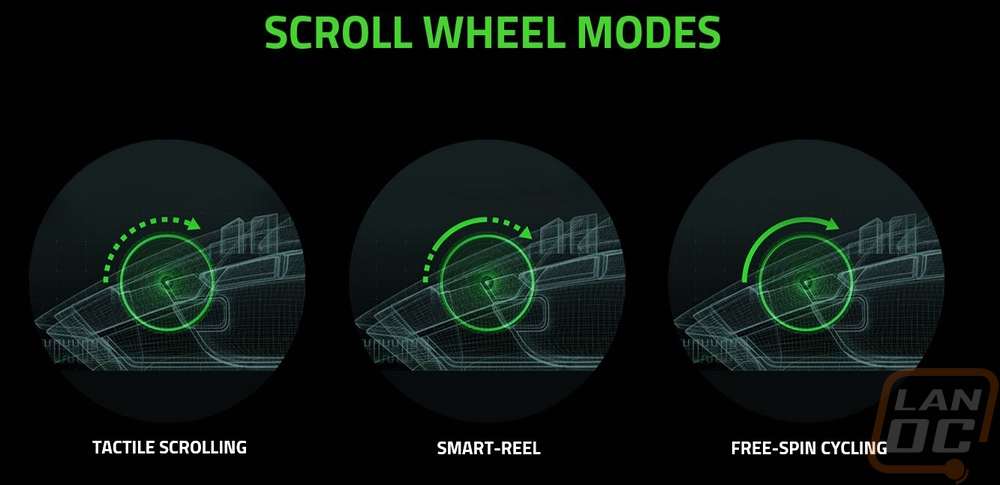
The landing page when you open up the Basilisk V3 Pro has a picture of the Basilisk V3 Pro in the center and around it is a crazy number of options with lines to their locations. Each of the buttons including the side and bottom scroll buttons is programable and you can also program it to scroll up and down as well. Down at the bottom where it says standard you can also switch to Hypershift mode which assuming you have a Hypershift button set you can program a second layer of functions that use the Hypershift button like a function or shift key on a keyboard. Scrolling down there are a few options hidden below everything. This is where you can change scroll wheel settings to turn on acceleration or smart reel which will automatically turn on free spin if you scroll a lot. You can also set tactile or free spin scroll modes here if you don’t have that button programmed. Clicking on any of the buttons around the Basilisk V3 Pro will open up a list of functions you can program it to do on the left side which covers everything from keyboard keys, opening software, opening media files, and many more things.
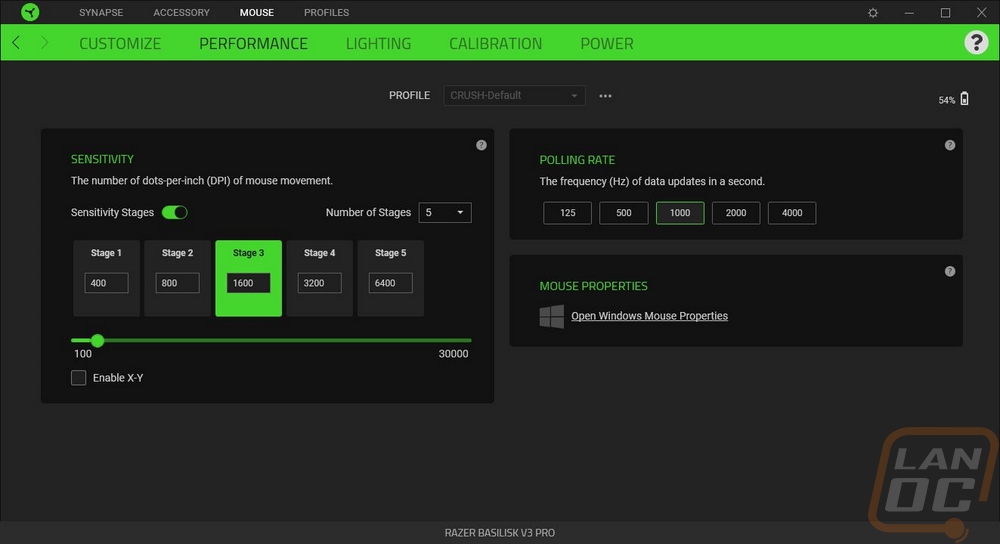
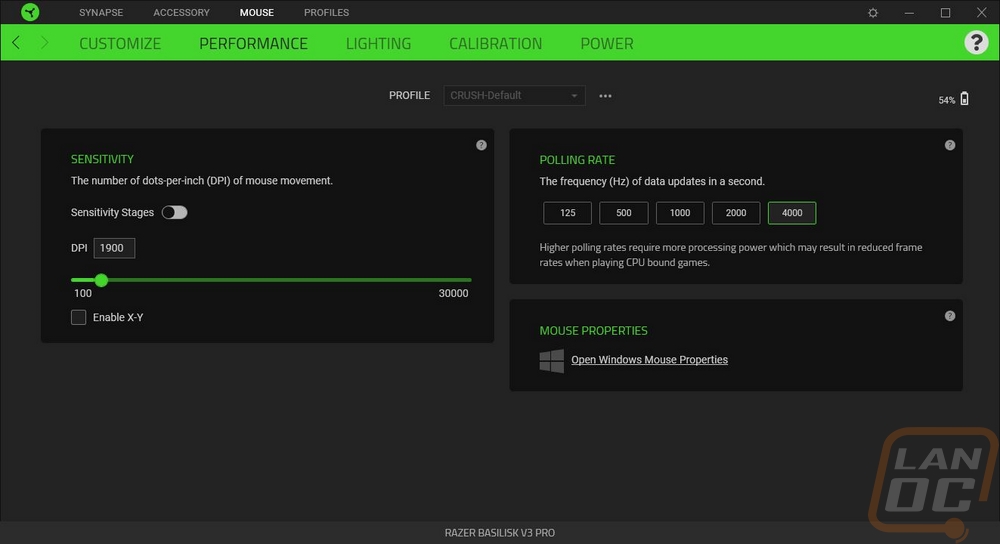
The next tab is the performance tab which just has two important functions. You can set your DPI here or if you want you can set up multiple DPI stages which you can flip through. If you want to get crazy you can even set the DPI to be X and Y specific. Then on the right, you can set your polling rate. By default with the included dongle the Basilisk V3 Pro can run up to 1000 Hz but when using the Mouse Dock Pro or the Hyperpolling adapter you can increase that up to 4000 Hz. You also get a link that opens up the windows mouse properties as well if you need to make any changes there.
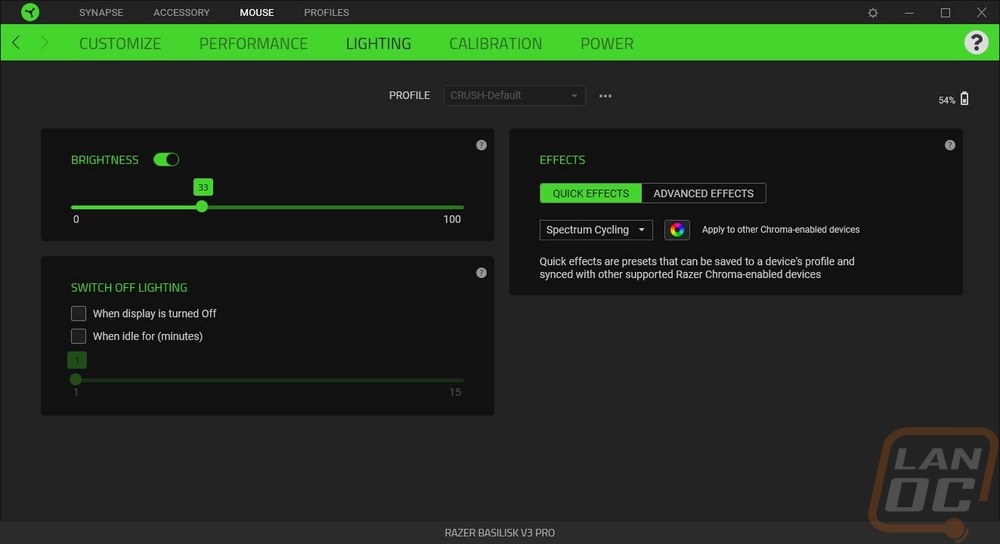
The next page is the lighting page which given the amount of lighting on the Basilisk V3 Pro will come in handy. By default the Basilisk V3 Pro comes with the lighting set to 33% which I have to assume is to help with battery life. Below that you can set how the mouse handles idle time or when your monitors turn off. By default, the Basilisk V3 Pro keeps the lighting on but you can change that and for the idle time you can set it between 1 and 15 minutes for idle time. Then on the right, you have the effects section where you can use quick effects using the drop-down menu. The RGB icon will quick set that same effect to all of your chroma-enabled devices. The advanced effects tab lets you know to install the chroma studio module which will give you access to full control of creating your own lighting effects.
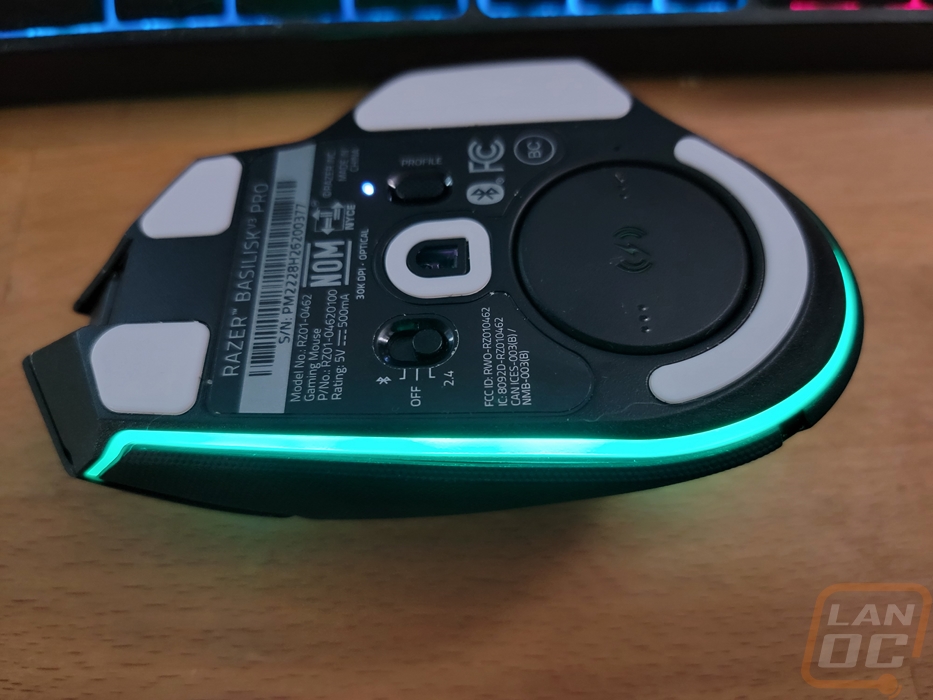
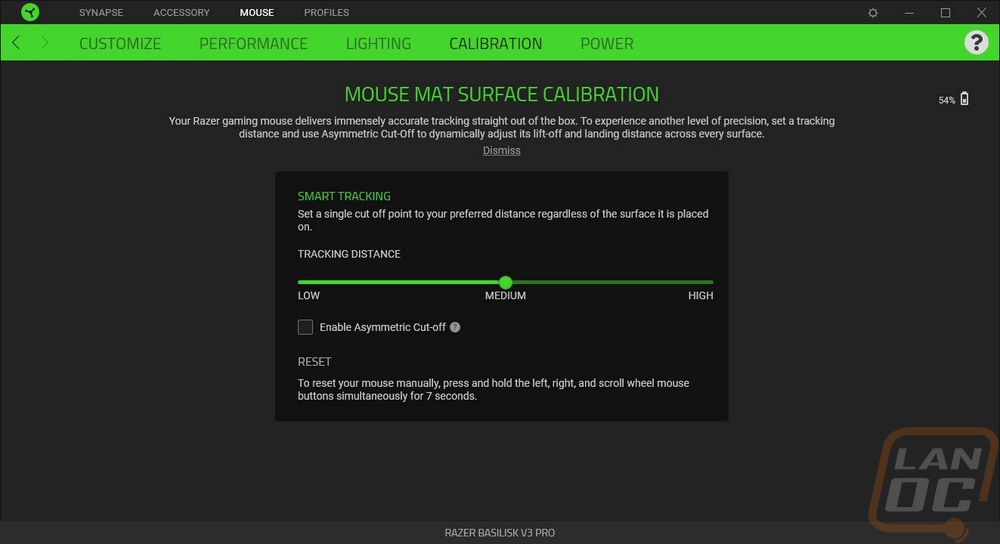
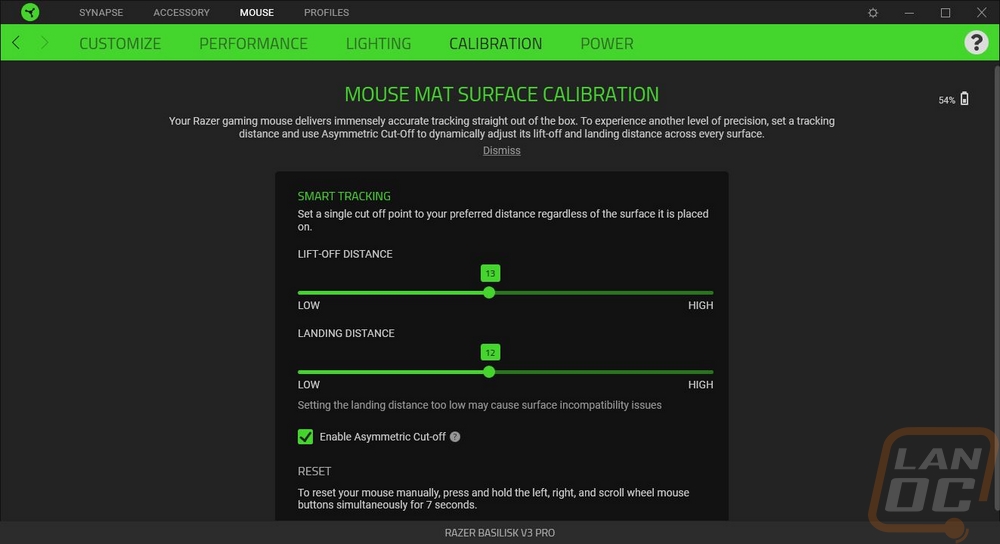
The calibration page is where you can adjust the lift-off distance. The default setting is smart tracking which just gives you basic low, medium, or high settings that you can adjust between. Turning on asymmetric cut-off lets you change lift-off and landing distances on their own.
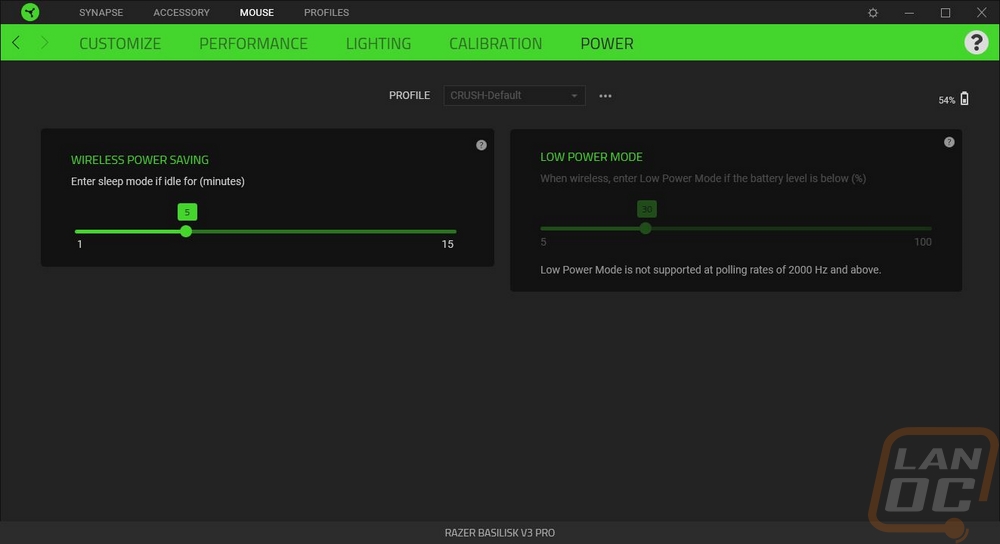
The last page for the Basilisk V3 Pro in Synapse is the power page. This is where you can set the sleep mode idle time and if you are running 1000Hz or less you can also change when the low power mode turns on but with the Hyperpolling module or the Mouse Dock Pro at 4000Hz, this option is turned off.
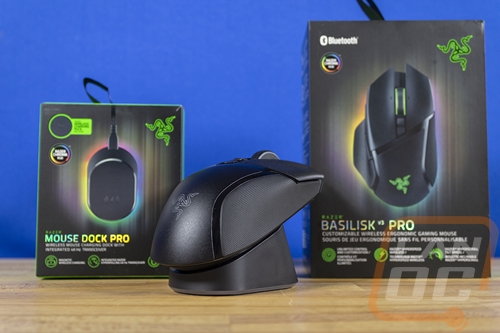
I’ve only had the Basilisk V3 Pro in the office for just under a week in total which is less time than I would like for testing but with today's launch, it cut the testing time down. But I have been using the Basilisk V3 Pro and the Mouse Dock Pro as my main mouse for those 5 days for gaming, work, and normal PC use so I have put some miles on the mouse. My initial impressions were with the overall shape, this is the first Basilisk I have tested and immediately you can see the similarities between it and the Logitech G502 which I use from time to time on a PC downstairs. It has the same aggressive styling, weight, and length only with a Razer touch on top of that. I’m not typically a big fan of mice with rubber grips but I did have a few notes about the grips on the Basilisk V3 Pro. For starters as I mentioned earlier when talking about its shape, both the left and right sides have a shape that overhangs which helps with lifting. Between the wing that sits under your thumb and the big overhang I don’t think the grip was needed on the left side, optional grip tape like provided with the Deathadder V3 Pro and Viper V2 Pro might have been a better option. But with the rubber grip and the wing, I noticed that I can grip and control the Basilisk V3 Pro with only my thumb, nothing touching the rest of the mouse which is impressive.
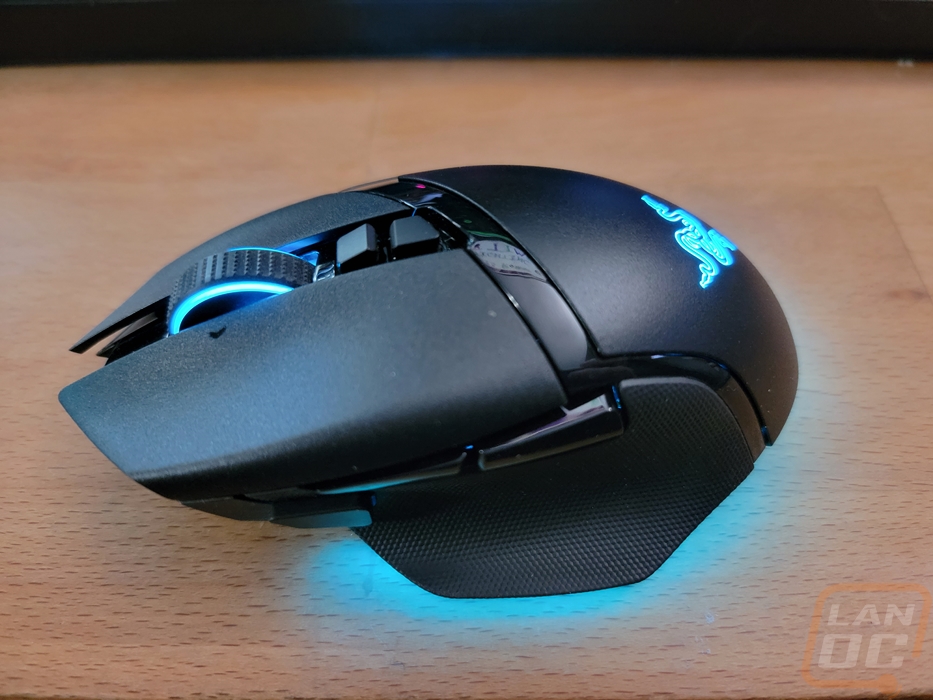
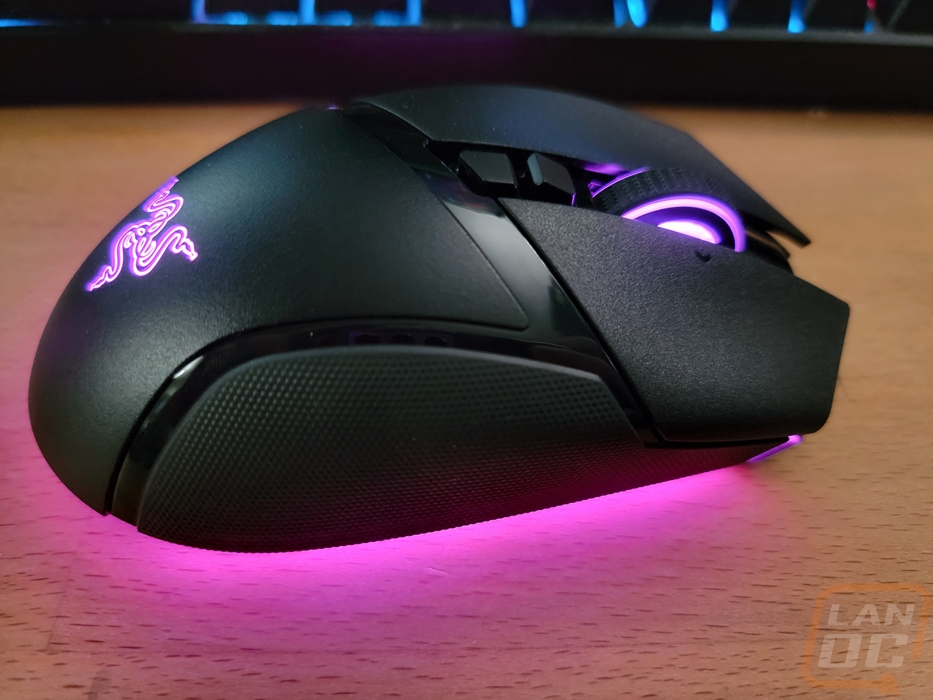
They only have buttons on the left side of the Basilisk V3 Pro which is a little surprising considering how many they were packaging into the mouse. The two normal side buttons on the left were easy to reach and the glossy finish helped them blend in a little when not in use. The third button at the front did still feel weird, just like how it looks with it sticking out randomly and having a different finish. It is reachable and usable but it almost feels like it could have been a four-way toggle which might be nice. The 114 gram weight as tested of the Basilisk V3 Pro was noticeable, it's good that this is focused on the G502 market which likes that weight. I wouldn’t want to give up ALL of the features of the Basilisk V3 Pro, but a medium ground which keeps things like the underglows and charging dock support but drops the rubber grip and the top lighting might help get the weight down under 100 grams which would make a big difference.
There weren’t any big surprised with the Focus Pro 30k sensor which is based on the PAW3950. Like on the new Deathadder and Viper it performed well as far as tracking goes with just one exception which may be an issue with our mouse specifically or a software issue. But it worked perfectly but sometimes when I come back to my PC the DPI setting hasn’t changed at all but it moved slowly. I normally run my DPI around 1800 and to get the performance back up to that same level I had to crank it up to 5450 DPI. I thought maybe my windows mouse sensitivity somehow changed but when this happens the Logitech Superlight which is also hooked up doesn’t have the same issue at all. Rebooting would sometimes fix the issue or switching back to the original dongle would do the job as well.
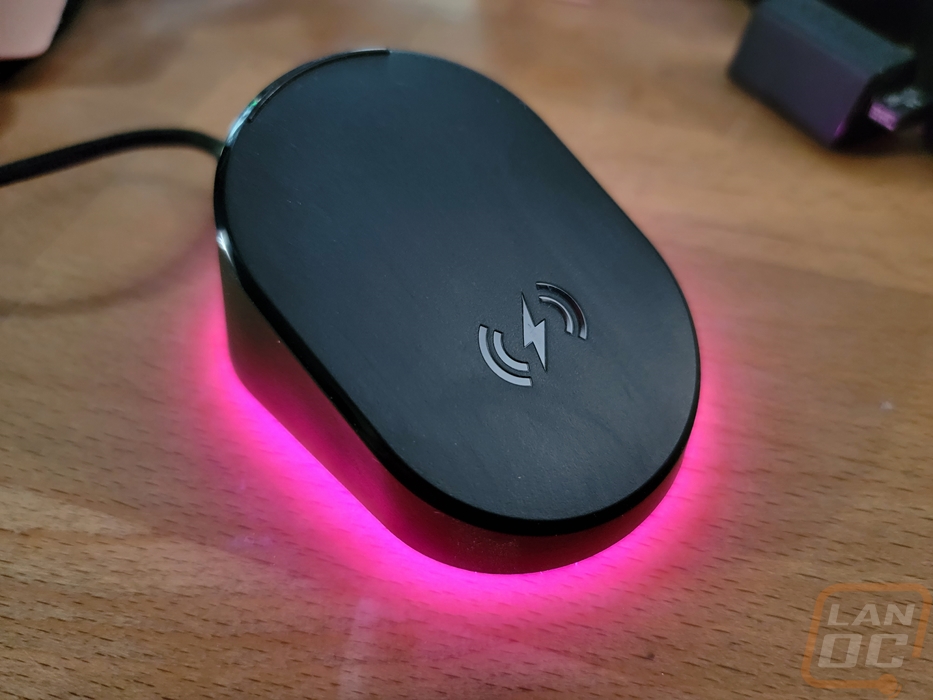
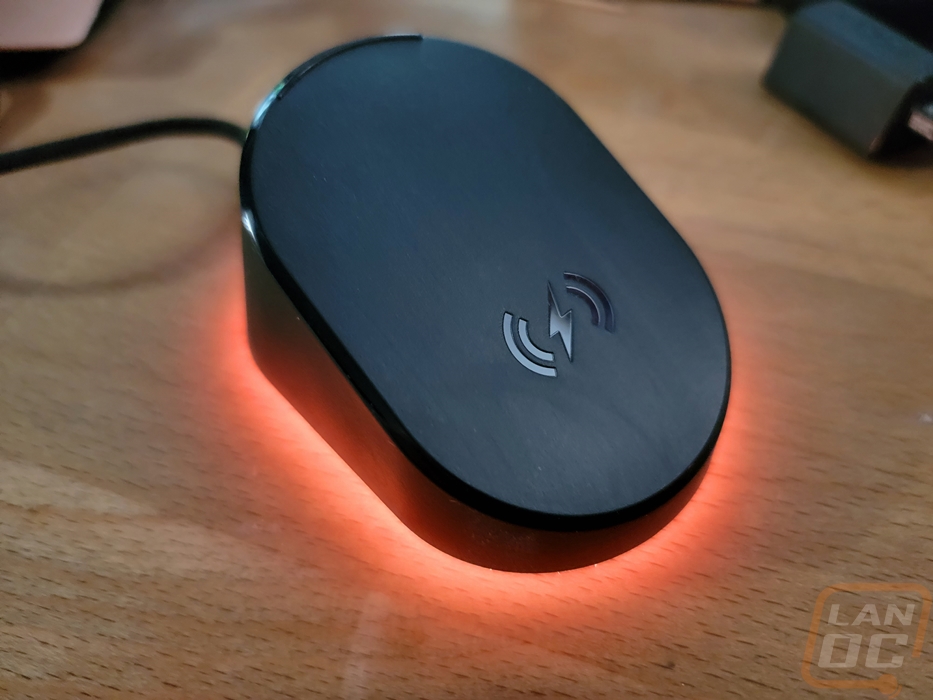
Speaking of the Mouse Dock Pro, one of the big issues I have had with the Viper V2 Pro and the Deathadder V3 Pro is not having a wireless charging option or at least a dock and that is a big feature that the Basilisk V3 Pro has when combined with the Mouse Dock Pro. The puck design that is similar to what Logitech is using adds Qi charging and the Mouse Dock Pro charges the Basilisk V3 Pro and holds it in place with a magnet compared to the old harder to use dock design with pins. The puck design also has the potential to work with other devices in the future, I hope Razer brings out a hard pad option because while I love the PowerPlay from Logitech, there is a lot of room for improvement. As it sits though with the dock I was finally able to stay on top of keeping the Basilisk V3 Pro charged. The dock magnet works well but I have to say that the grip on the bottom of the dock that keeps it from sliding around is even more impressive and is what makes the design work so smoothly. The dock also adds Hyperpolling as well which allows you to get up to 4000 Hz polling rate on wireless. This helped even more with smoothness but it did come with an unexpected issue unrelated to Razer at all. Because of how fast it would refresh things when running at 4000 Hz I had issues with Windows window snap which is when you move a window to the sides or top and it will change the window size to half of the screen. When dragging windows from monitor to monitor with the high polling rate it would always hang up at the sides and try to snap the window even if I moved quickly. I have this issue at 1000 Hz sometimes and anything lower than that I don’t have the issue at all. It was so bad that I would have to pick between snap which I use often and the higher polling rate, I don’t think I could keep them both together.
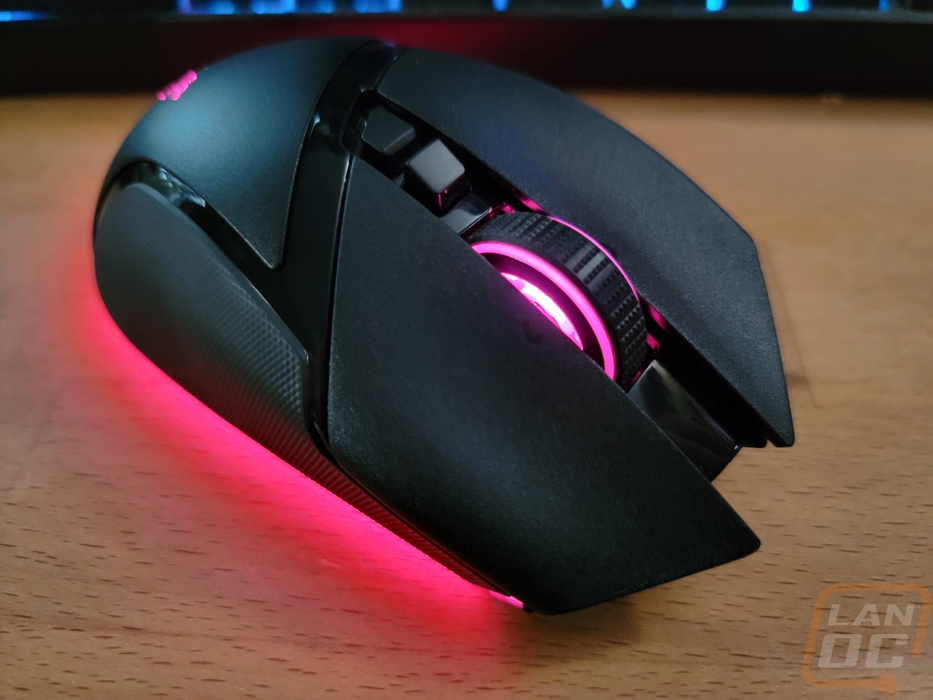
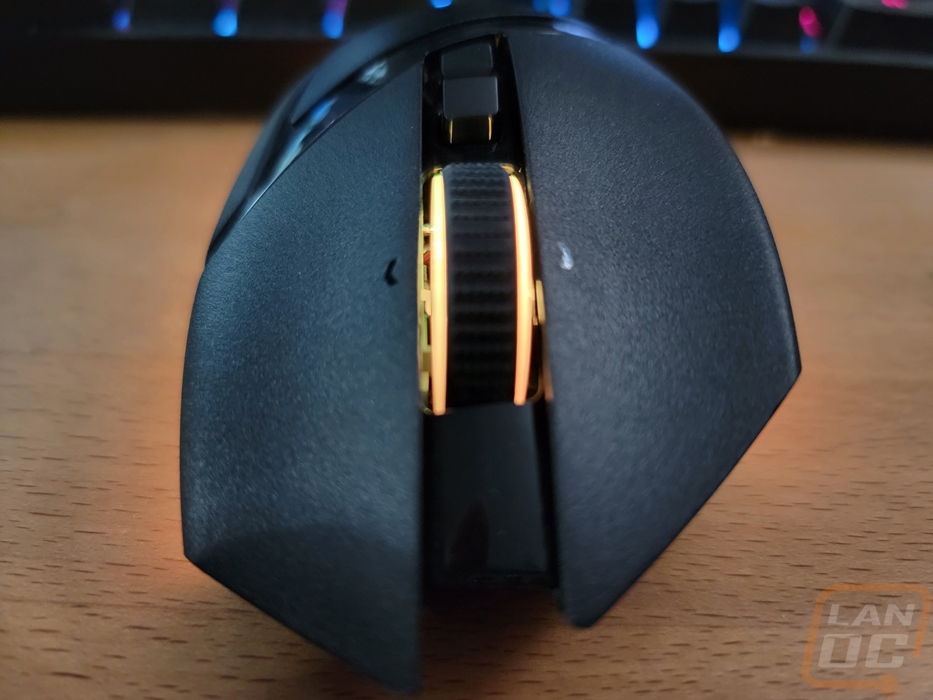
The gen 3 optical switches on the Basilisk V3 Pro were the same switches used on the new Deathadder and Viper and like with those I love the solid click that they offer and I had no performance issues with them. They have an advertised like of 90 million clicks and if that holds true they should be perfect. The other big change coming to the Basilisk V3 Pro was with the scroll wheel design. Visually it looks the same as the Viper and Deathadder other than it now has lighting built in like past Razer mice. But it has added side clicking and they also have an electronic swap between a tactile scroll and free scrolling. The scroll still has a nice tactile feel if that is what you prefer but when doing a lot of scrolling you can save yourself some trouble by turning it off and letting the weight of the scroll wheel do the work a little bit. They also have an auto switch mode called smart reel which I wish had an adjustment slider. I love the idea of it but sometimes my normal scrolling was fast enough to kick it into free spin mode which can get annoying. The side-to-side buttons took a little getting used to. I’ve used them in the past and always loved them but they have become so rare that I haven’t seen them in years. They do give you more customizable button locations without adding a big array of buttons like the Naga.
As far as wireless performance and battery life. Wireless has reached a point now that I don’t notice any difference between it and wired except for when wired you can sometimes feel the cord hanging up on things. The soft flexible cord included with the Basilisk V3 Pro and the dock isn’t too bad though. As far as battery life goes, this is the main area where the truncated testing time hurts. I ran the battery down initially by not charging it and once charged over that week I have needed to put it on the dock to keep things charged up. But I have been running the lighting at 100% which doesn’t come that way stock and I have had 4000 Hz polling turned on. The Basilisk V3 Pro lists its battery life at 100 hours when using Bluetooth and 90 hours when running at a 1000 Hz polling rate but there is a note with those that both would be with the lighting completely turned off. They don’t list a 4000 Hz battery life but I can say that the Deathadder which also had a 90-hour battery life dropped down to 24 hours or less when Hyperpolling and adding lighting on top of that (especially cranked to 100%) is only going to lower that. So thankfully you have the Mouse Dock Pro which lets you charge things back up and gets you the 4000 Hz polling rate. You will want to charge daily if doing that or every few days to a week depending on your use if you aren’t at 4k with the lighting cranked.
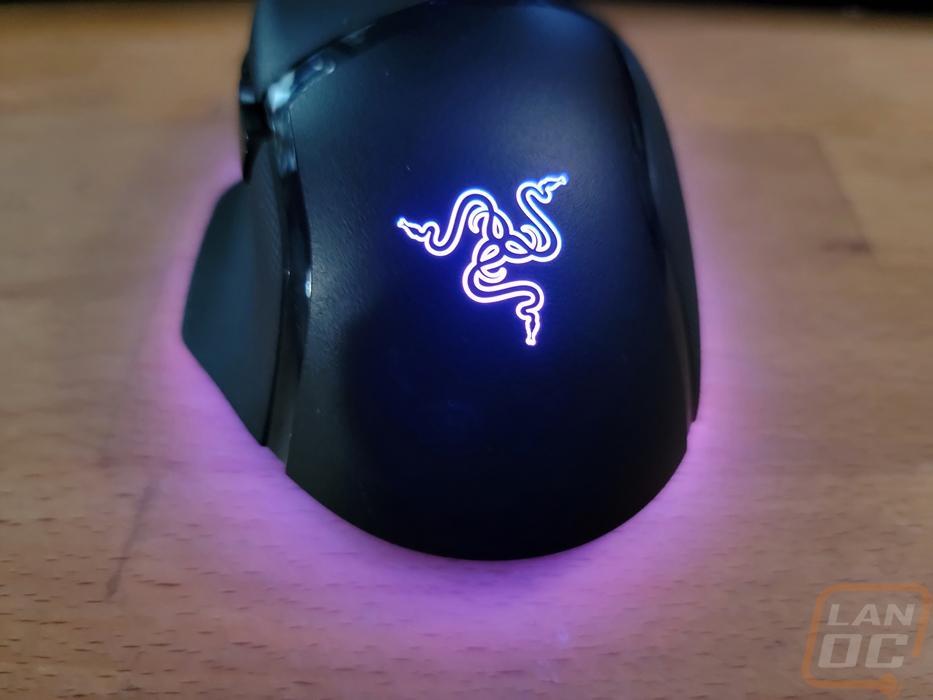
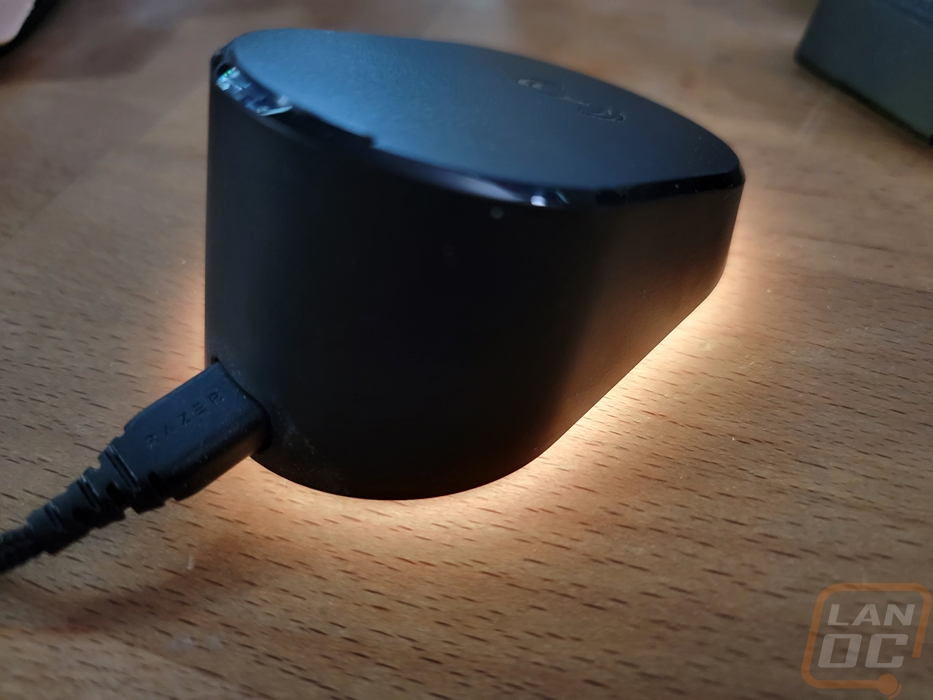
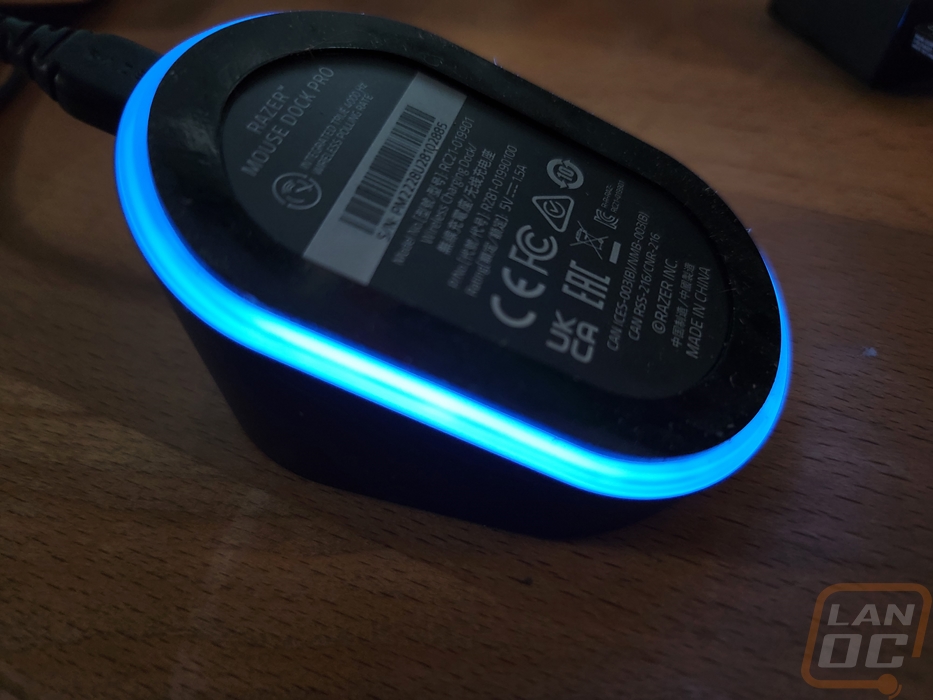
Before finishing up my testing I did want to check out the lighting on both the Basilisk V3 Pro and the Mouse Dock Pro. Like I mentioned when looking at the software, the Basilisk V3 Pro comes with its lighting set at 33% which honestly was more than bright enough. The pictures below were taken with the lighting set to 100% and taken on my desk in the middle of the day with sunlight coming in the window next to me. I have never seen the amount of glow that both the Basilisk V3 Pro and the Mouse Dock Pro had with their underglows during the day, normally it would need to be a little darker to be able to photograph it like this. I don’t care much about the logo being backlit, especially with it under your palm, and the same with the scroll wheel. But the underglows and the lighting on the Mouse Dock Pro looks great. This lighting helped me notice when the Basilisk V3 Pro battery life was getting low the first time, specifically the Mouse Dock pro turning its lighting to red and doing random strobes caught my eye quickly to let me know there was an issue.