I picked up my first Razer mouse in a CompUSA back in 2005 and it was the newly introduced at the time Diamondback Plasma which looked crazy and was the first time I had given any thought to the performance of my mouse. While I did like it the shape didn’t fit my hand at all so I later picked up the newly launched Deathadder which was larger and fit my hand perfectly. In fact, I liked it so much that later on, I picked up two more for $25 each on sale. I eventually would upgrade when Razer offered better sensors and over the years I have switched back and forth between the Deathadder and the Sensei shape but I always come back to the Deathadder from time to time. Well 16 years after the original Deathadder launch Razer is now introducing their new Deathadder V3 and I’ve got the wireless Deathadder V3 Pro here in the office to check out today so let’s see what's new!
Product Name: Razer Deathadder V3 Pro
Review Sample Provided by: Razer
Written by: Wes Compton
Amazon Affiliate Link: HERE
|
Specifications |
|
|
Form Factor |
Right-hand Ergonomic |
|
Weight |
63g (Black) 64g (White Edition) |
|
Dimensions |
Length: 128.0 mm / 5.00 in Width: 68.0 mm / 2.67 in Height: 44.0 mm/ 1.73 in |
|
Sensor |
Focus Pro 30K Optical |
|
Sensitivity/Resolution |
100-30,000 DPI |
|
Max Acceleration |
70G |
|
Max Speed |
750 IPS |
|
Resolution Accuracy |
99.8% |
|
Switches |
Optical Gen-3 |
|
Switch Click Lifecycle |
90M clicks |
|
Tilt Scroll Wheel |
No |
|
Polling Rate |
1000 (upgradeable to 4000 Hz) |
|
Battery Life with Hyperspeed Dongle |
Up to 90 hours (constant motion at 1000 Hz) |
|
Battery Life with Hyperpolling Wireless Dongle (Sold Separately) |
Up to 24 hours (constant motion at 4000 Hz) |
|
Programmable Buttons |
5 |
|
Total Buttons |
6 (including DPI button) |
|
RGB Lighting |
No |
|
Connectivity |
Razer HyperSpeed Wireless Wired – Speedflex Charging Cable USB Type C |
|
Cable |
Speedflex Charging Cable USB Type C |
|
Onboard Memory |
Yes |
|
On-Board memory Profiles |
1 |
|
Mouse Feet |
100% PTFE |
|
Dock Compatibility |
No |
|
Other Features |
Enhanced AI functions Tracks on glass Upgradeable to true 4000Hz wireless polling rate |
|
Box Contents |
•Razer DeathAdder V3 Pro •Wireless USB dongle + USB dongle adapter •USB Type A to USB Type C Speedflex cable •Razer Mouse Grip Tape •Important Product Information Guide |
|
Warranty |
2-Years |
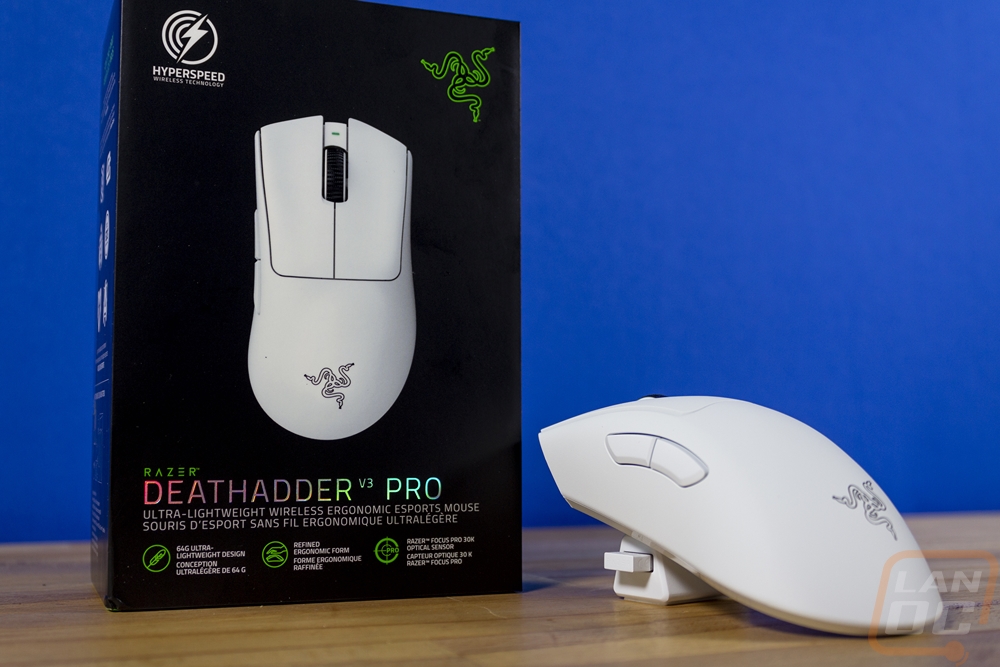
Packaging
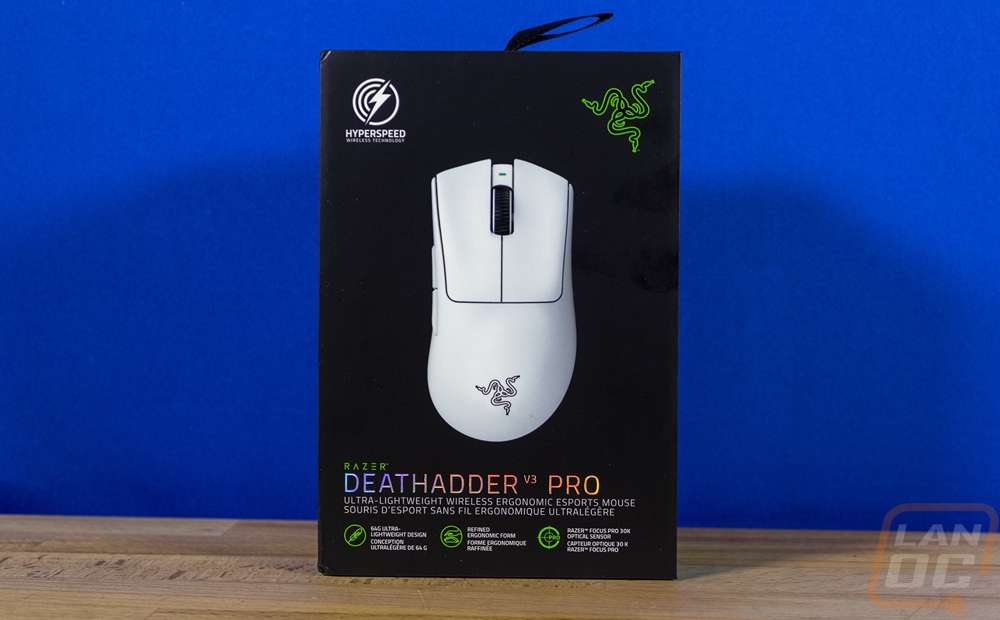
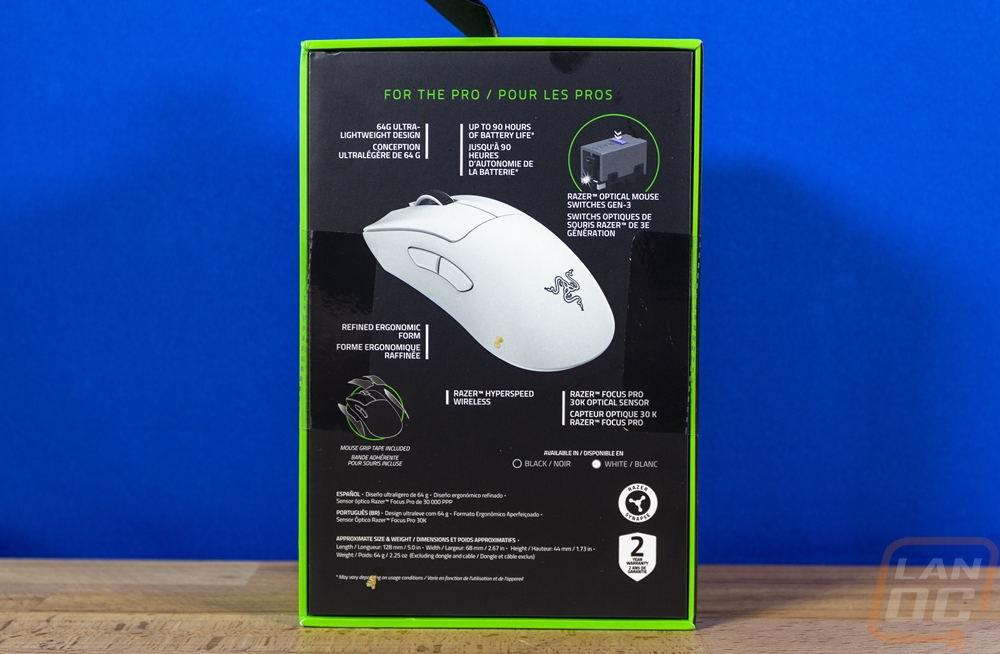
The Deathadder V3 Pro, even in the white version that Razer sent over, sticks with the same look that Razer has had for their packaging for 12+ years. It has a black background which has the Razer triple head logo in the top right corner. They have a large picture of the mouse in the middle which with it being white stands out. Then down at the bottom, the Deathadder V3 Pro branding is in a reflective finish with a tiny Razer logo in green with it. Below that it has a short description that lets you know that this is a wireless mouse and that lightweight is the focus and its esports focus with it being one of their pro branded mice. They highlight three more features with icons at the bottom and one large one up in the top left for the Hyperspeed wireless. Around on the back, you can see some of the bright green used as an accent, and then the back has another angle of the Deathadder V3 Pro pictured in the middle. They touch on more features with lines kind of showing where they are and pictures of the gen 3 switches and a drawing of the included grip tape as well. You can see that they show that this is available in white or black and they also show the 2-year warranty back here with a badge for that as well.
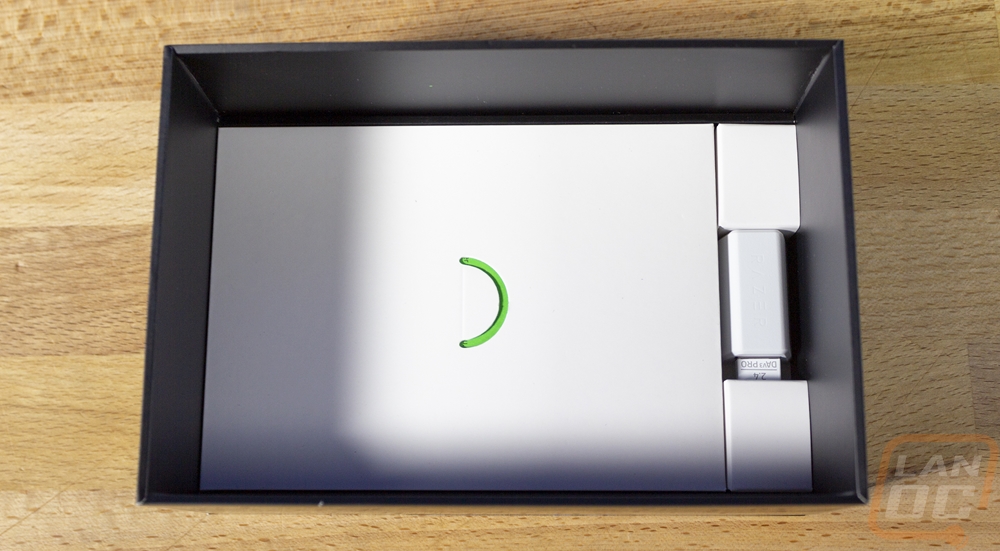
Once you cut the tape seals you can pull the top of the box off which is a harder more compact cardboard for both halves and the top just has one piece of foam that holds the mouse in place and the bottom has a tray with the Deathadder V3 Pro shape in it to keep it from moving around. So when you open the box up the mouse is right there in your face. Up under the mouse tray, there is a spot to hold the included wireless dongle and adapter and a box with the documentation in it with a small tab to help you pull it out in the center.
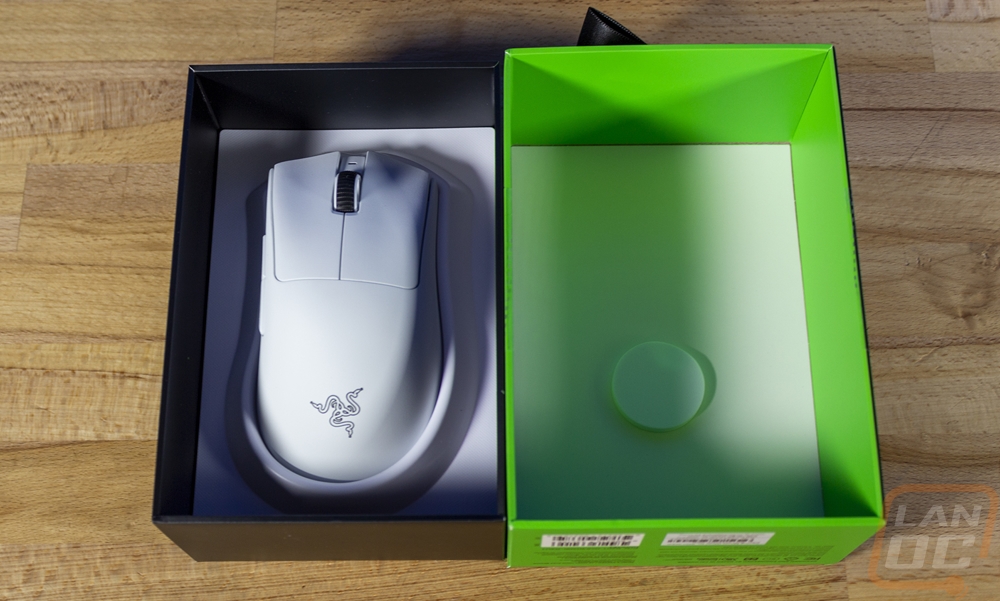
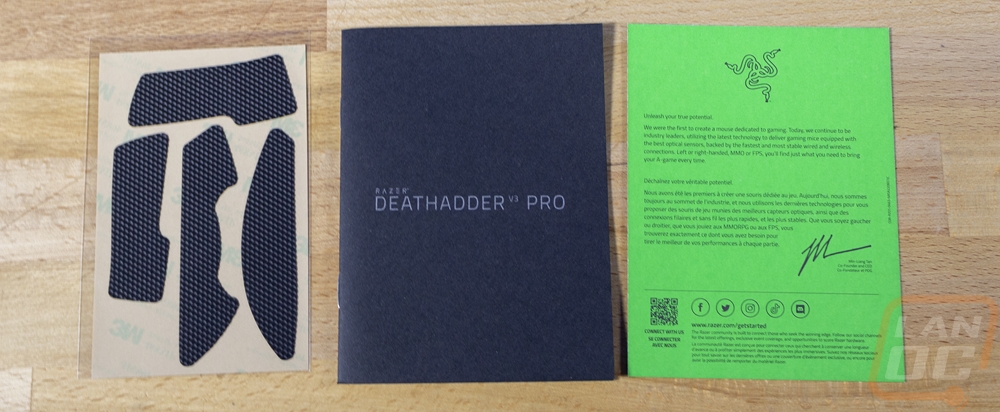
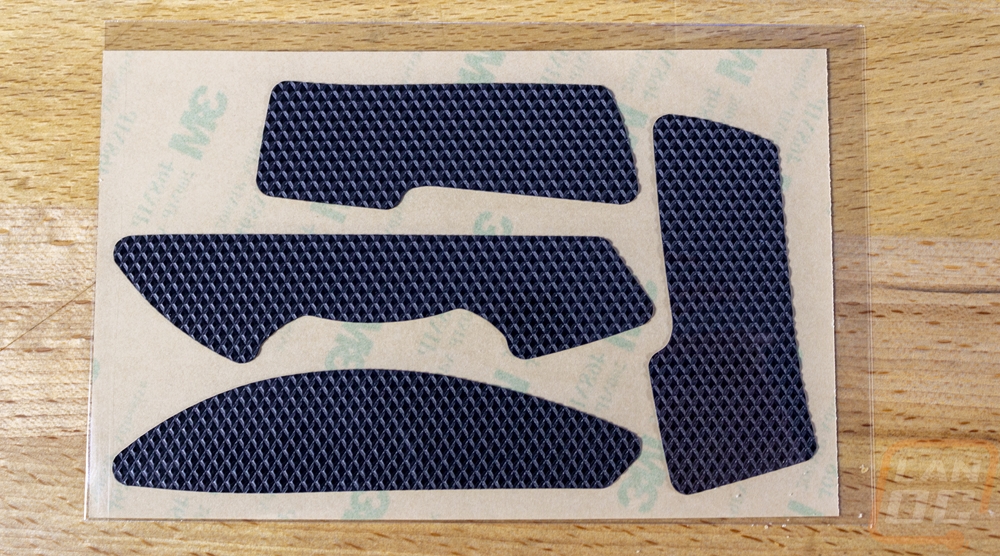
The Deathadder V3 Pro comes with the same green card Razer has always included which has a welcome message from their CEO and his signature and you get a small black user guide book as well. Along with the documentation in that box, they also had the cable wrapped up which came with matching white caps on both ends which was a nice touch. You also get a card with a full set of grip tape. If you haven’t used grip tape before, this is a way to add more traction to your mouse with stickers and normally this would run you another $10 or more to pick up a set cut to fit your mouse so it’s a nice addition that Razer included a set with the Deathadder V3 Pro.
Photos and Features
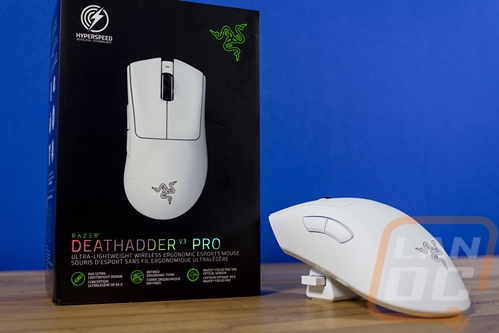
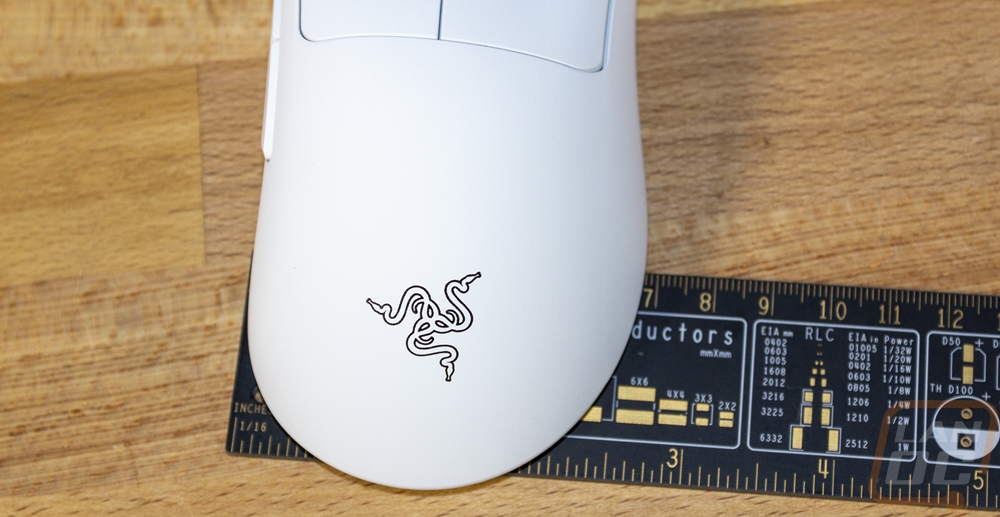
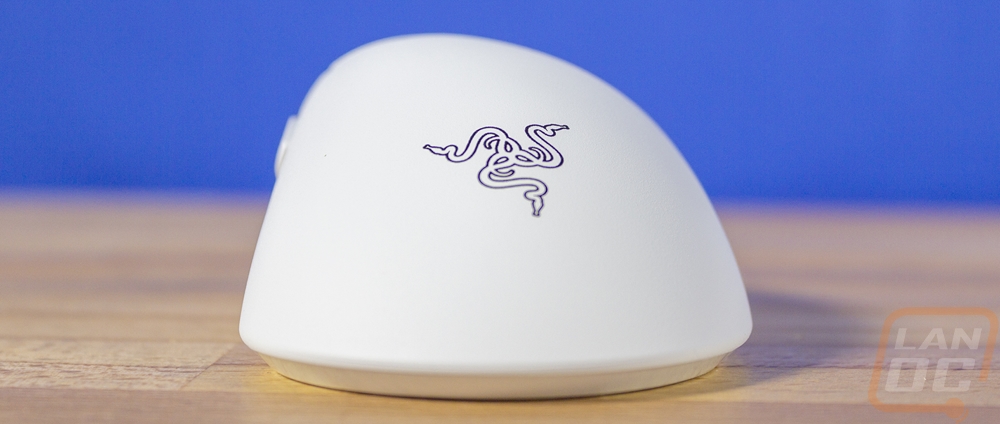
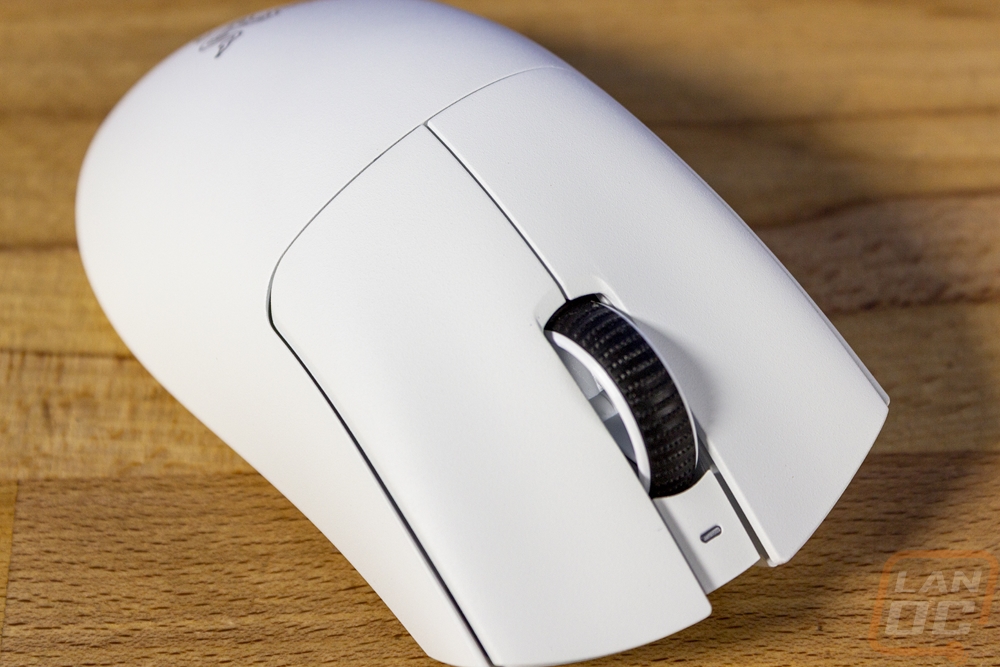
The new Deathadder V3 Pro has the Deathadder look which you can see right away but I was surprised to see that the new design does depart from some of the design that has been around forever making the V2 Pro the last Deathadder true to the original shape which is something to keep in mind if you aren’t a fan of the changes. But for me, as I mentioned earlier I switch between the Deathadder and the Sensei symmetrical shapes so the changes in the shape may be an improvement for me but we will see. The Deathadder V3 Pro is available in black or white and we have the white version for testing. With a big focus on the weight, the V3 Pro doesn’t have any RGB lighting so the Razer logo in the palm area is now painted on which for the white version it is in black and looks great. This is a right-handed ergonomic design so lefties are out and it also means that the design, like Deathadder’s have always been, is completely different from side to side to get that ergonomic shape. Our white model does have a painted finish but I couldn’t tell at all even when looking into the gaps to the inside which is also white and the finish has the same texture that the black Viper V2 Pro that I recently reviewed has as well.
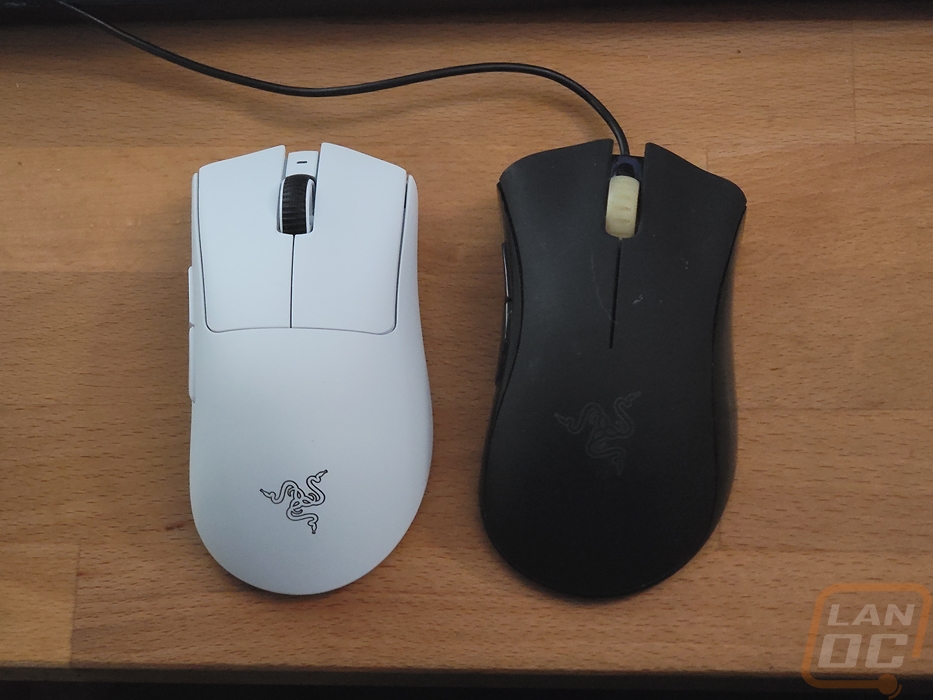
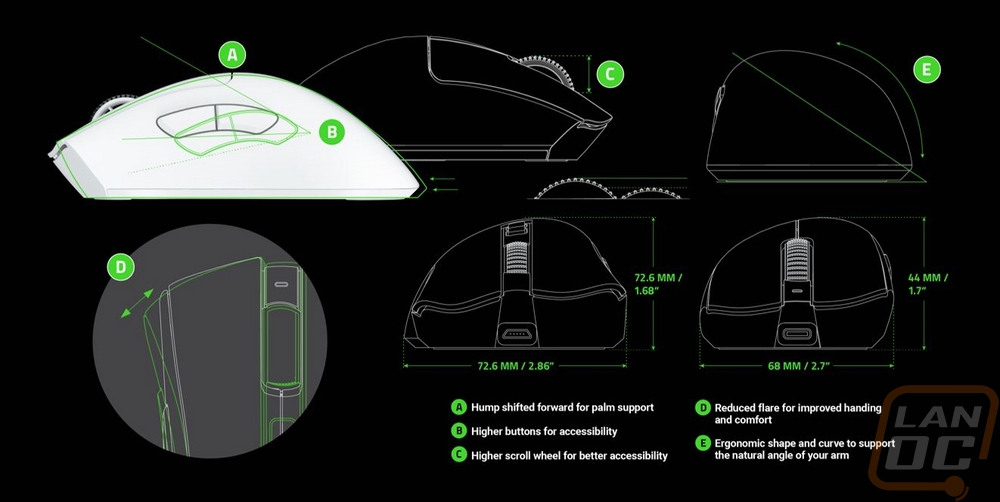
Razer did put together a presentation on the new design and that included a line drawing of the new shape which does a better job than most pictures to show the shape and some of the changes. They have green lines and white lines, the green lines are the old design and the white lines show the new shape. You can see that one of the biggest changes was to cut off what I would call the wings at the left and right front corners of the triggers which was a big design feature on the original Deathadder and most of Razers mice back then. They say that this helps with comfort and handling but I would bet it also helps cut out some weight. The side profile of the V3 Pro also has the hump in the middle shifted forward slightly which they did to try to get better palm support and the tail end is cut shorter but they used that distance to extend the triggers out slightly. They have also moved the side buttons which I will talk about in just a minute. The Deathadder V3 Pro is 68 mm wide whereas the old design was 72.6 mm and the new shape is 1.4 mm taller at 44 mm to 42.6 mm before. I also included a picture of our original Deathadder which we can see the shape changes and also how much the scroll wheel has changed over the years. Interestingly enough this Deathadder was one of only a few old mice that didn’t get that rubberized finish that later in life turns sticky and gummy so it has held up well unlike a lot of my other older mice.
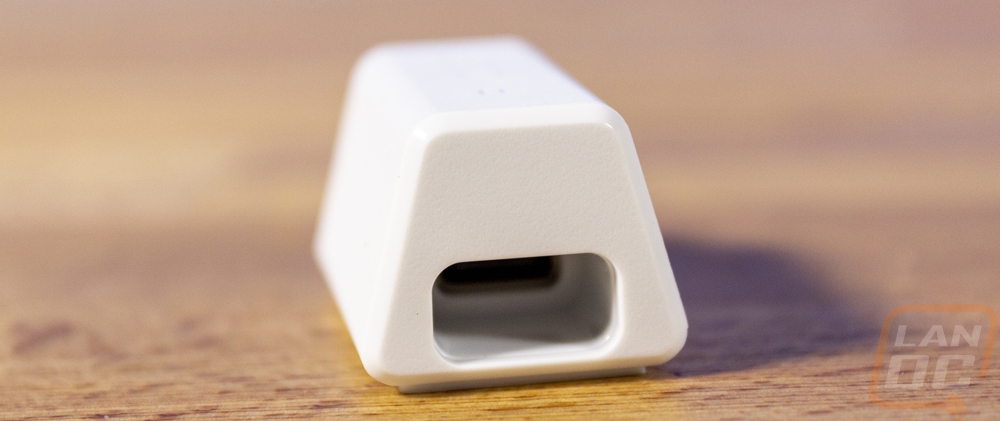
The front view of the Deathadder V3 Pro shows the angled shape but also gives us a look at the Type-C connection on the front where you can charge the V3 Pro or run it as fully wired with the included cable. The back view does a good job of showing the slight overhang on the left side but the rounded shape on the right that makes the shape harder to grip for lifting.

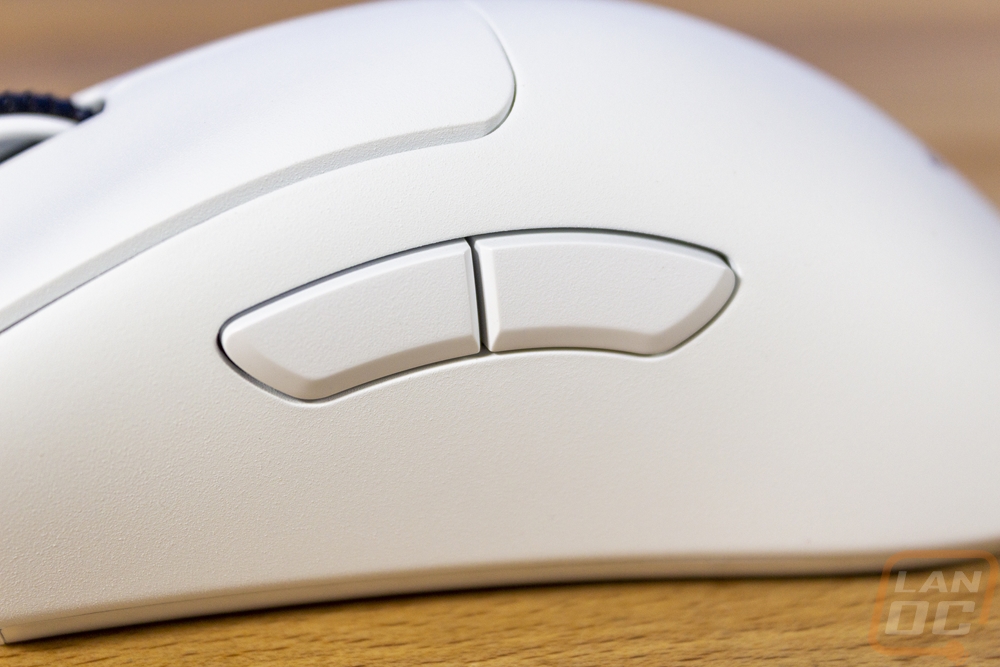
Being an ergonomic right-handed design the Deathadder V3 Pro doesn’t have any buttons on the right side of the mouse. You also see how much lower the right side is compared to the left. The one thing about this design that I don’t like but has always been a part of the Deathadder design is that the right side of the mouse doesn’t have any lip or shape to help grip the mouse for someone like me who picks their mouse up often. The left side of the mouse with the side buttons does have a little bit of an overhang which is accented even more with the buttons sticking out. The buttons both land right where my thumb is but they have changed from the old Deathadder design. The old shape the side buttons curved down more but these are a lot more like the buttons on the Viper shape only thicker.

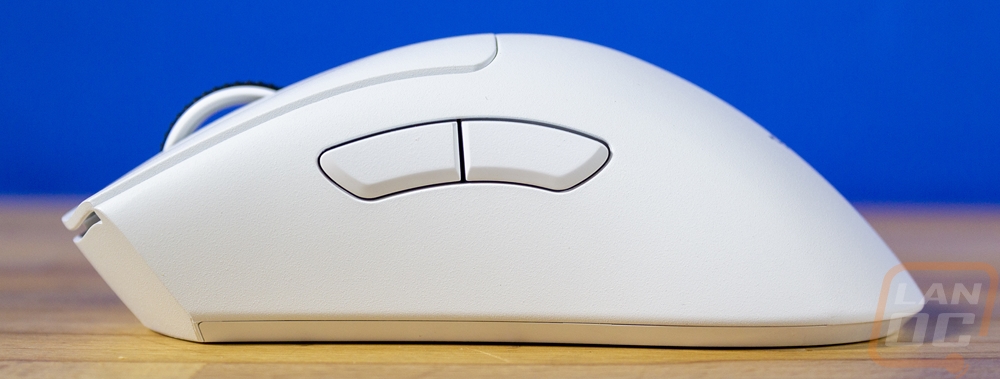
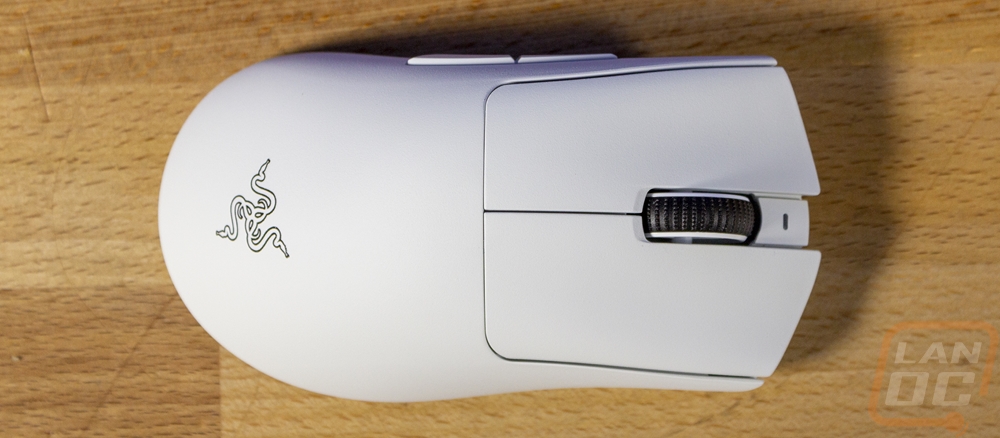
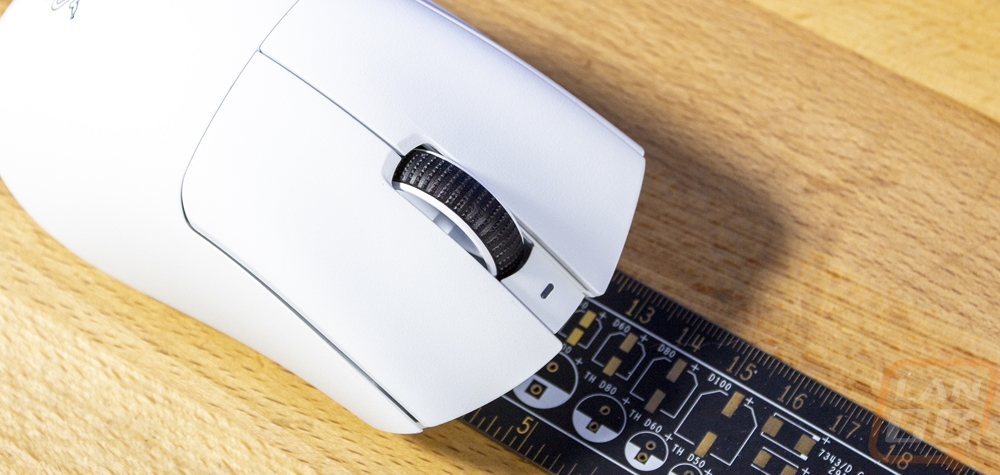
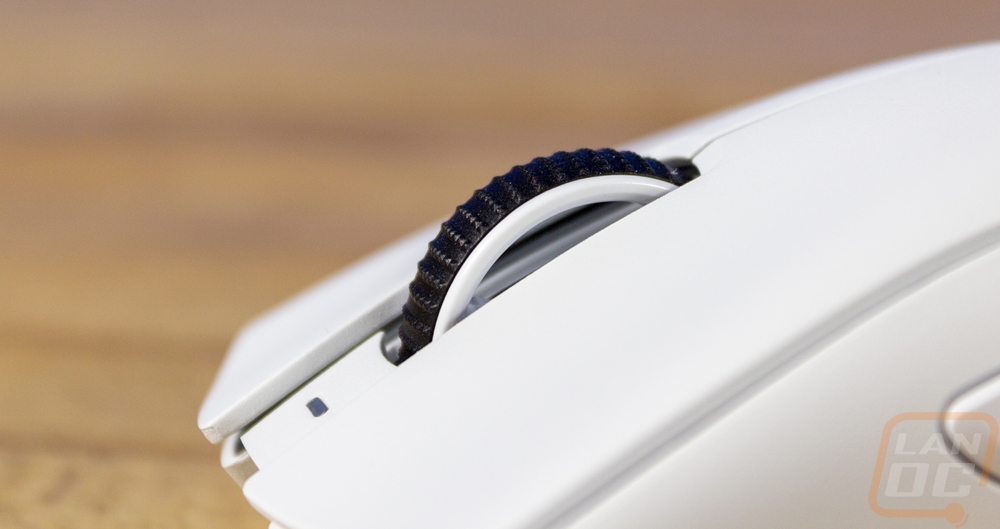
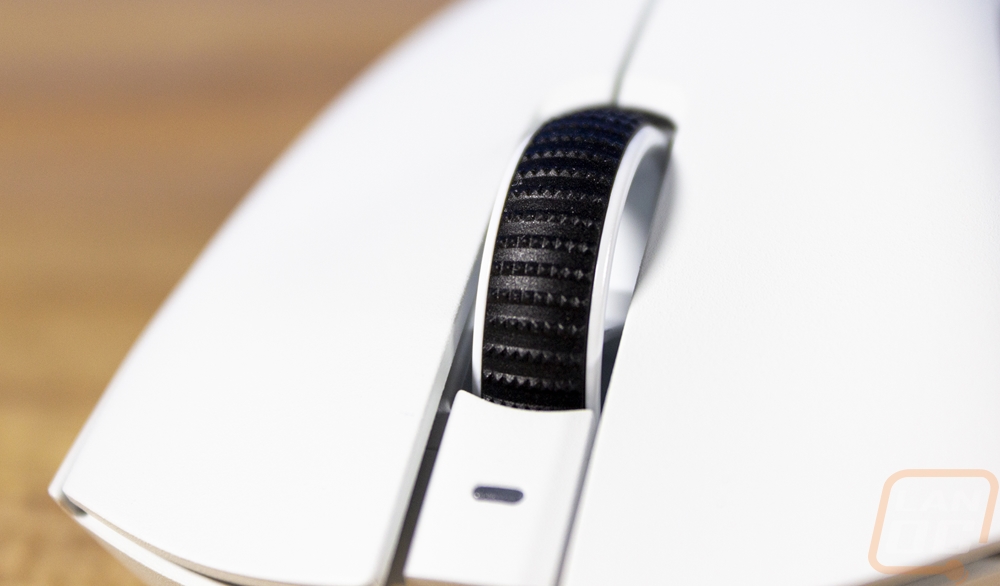
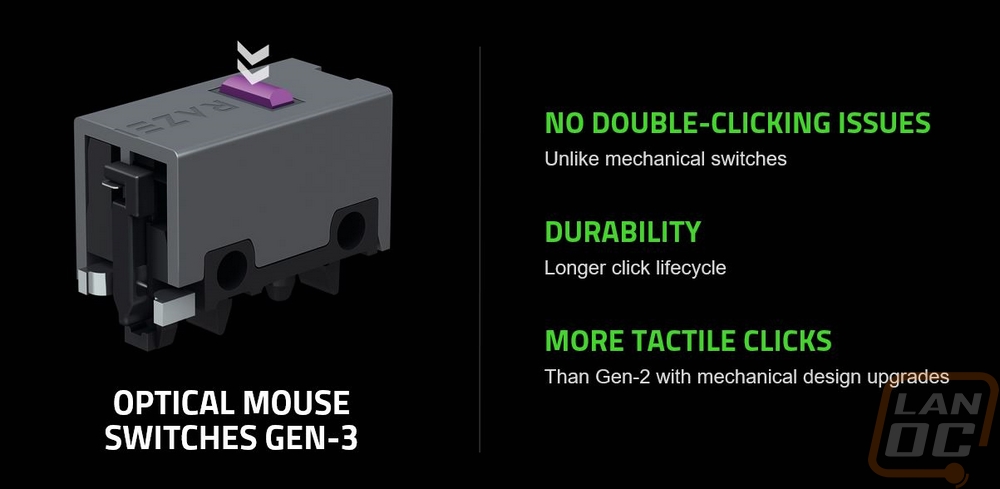
The scroll wheel on the Deathadder V3 Pro matches the white finish with its white wheel but does stand out slightly with the black rubber grip going around it. The grip has lines of raised dots to give more traction. The scroll wheel doesn’t do side-to-side clicking but does still have the button when you push down on it that can be programmed in Razers software. You can also see the status LED in front of the scroll wheel here which is the only LED on the entire Deathadder V3 Pro. This will let you know the battery status and when you turn the mouse on. Around the scroll wheel, you then have the two triggers. Unlike the original Deathadder, these aren’t part of the entire shell they are split up near the top of the mouse to free up their movement. Under them Razer has the same Razer branded optical gen 3 switches that the Viper V2 Pro had. These are rated at 90 million clicks which is 20 million more than the gen 2 switches used in the Deathadder V2 Pro which also offers better latency than legacy switches and now are more tactile than the gen 2 switch as well.
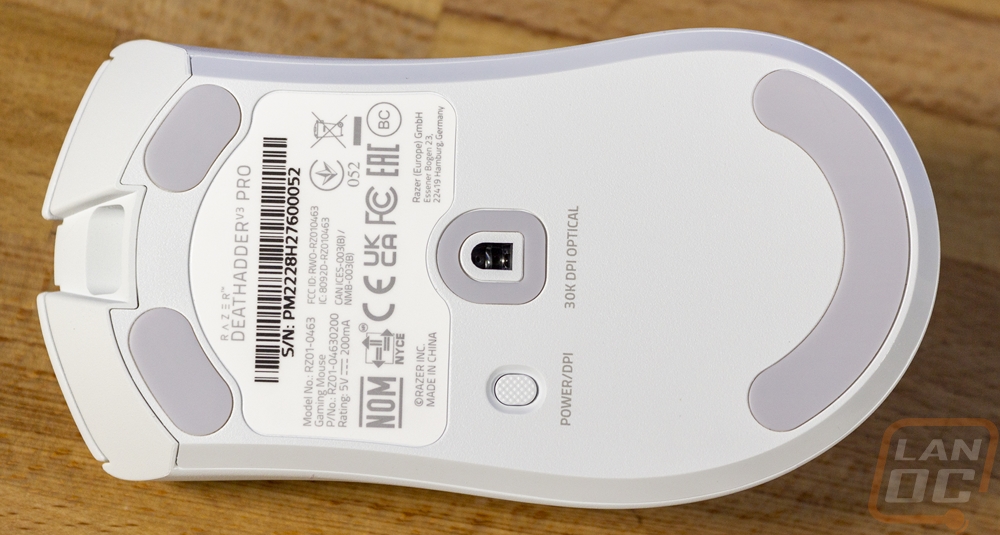
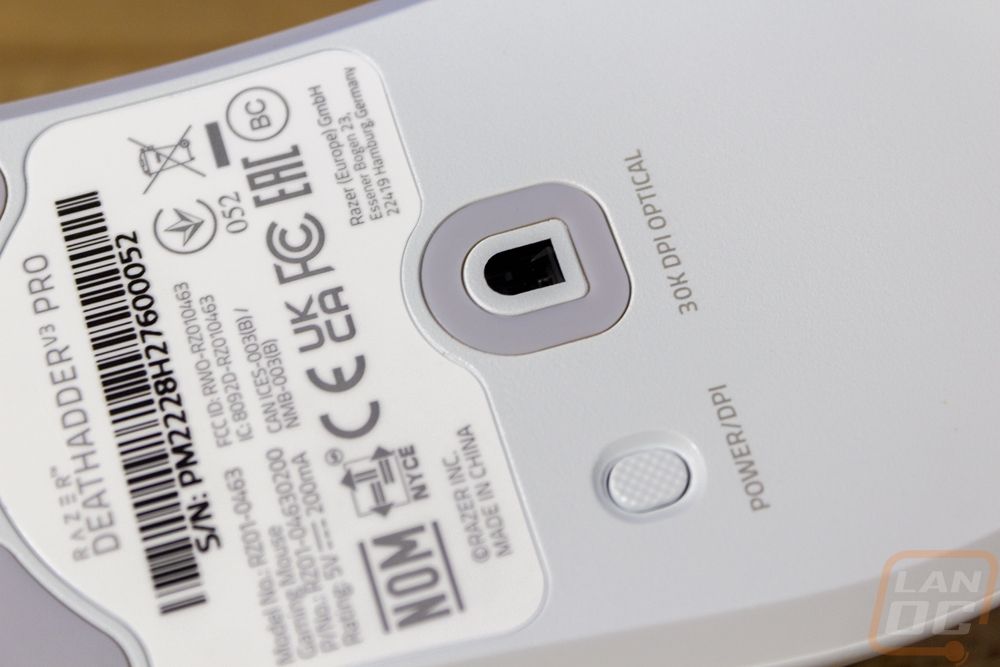
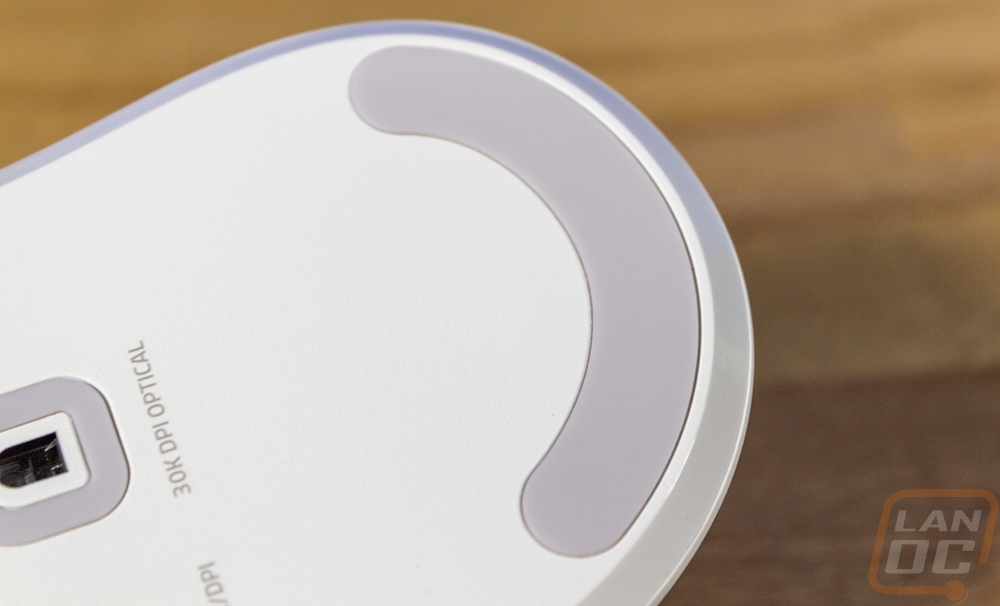
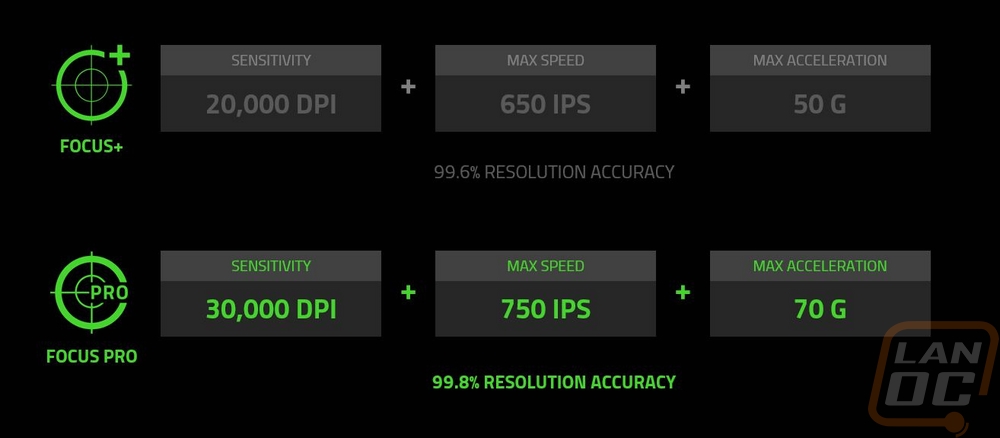
The bottom of the Deathadder V3 Pro has that same white finish on it. It has three 100% PTFE gliders with two smaller gliders under the triggers and one smile-shaped glider at the back. This was a similar layout and shape to the Viper V2 Pro. There is also a D-shaped glider around the sensor in the middle to keep that area from rubbing and to keep the distance consistent for better tracking. There is a white sticker that has your serial number printed on it as well as all of the model and manufacturing information and the normal required certification logos as well. The Deathadder V3 Pro like the Viper V2 Pro has just one button on the bottom. This doubles as the power button and also for changing the DPI on the fly. Pressing and holding it will turn the mouse on or off and quick presses will flip through all of the DPI levels that you have programmed. In the center then you have the Focus Pro sensor which has a 30,000 DPI and an impressive 750 IPS and 70G of acceleration. This is the same sensor as the Viper V2 Pro that I liked and seems to be based on the PAW3950.
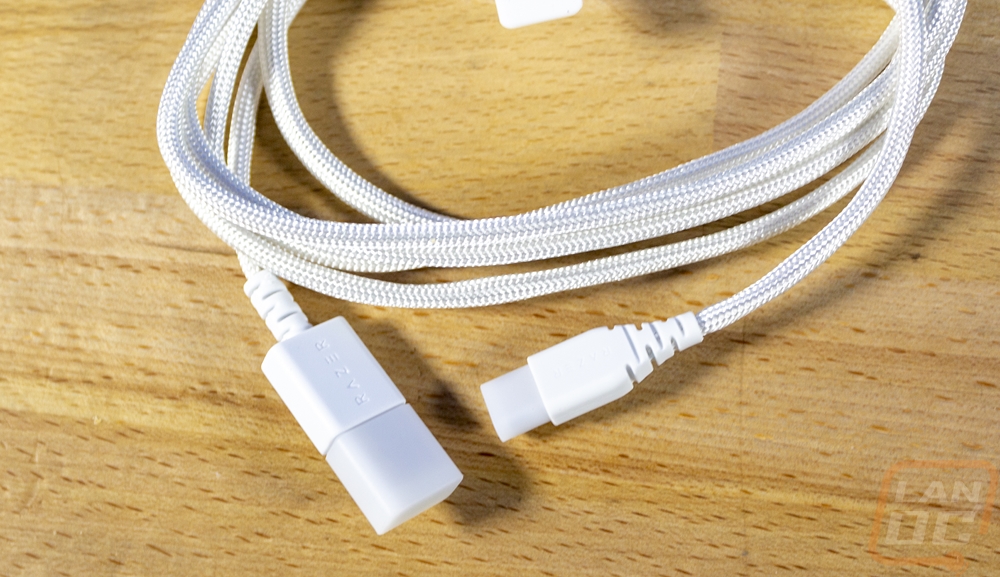
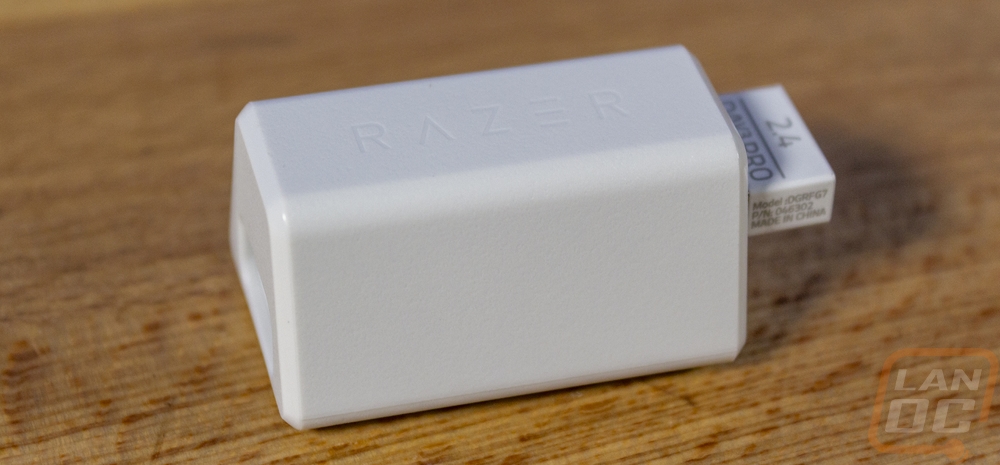
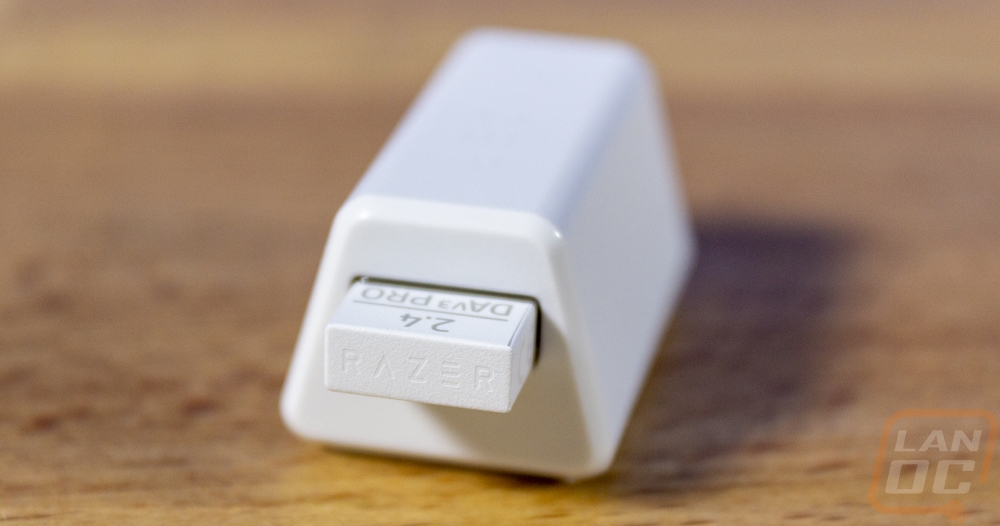
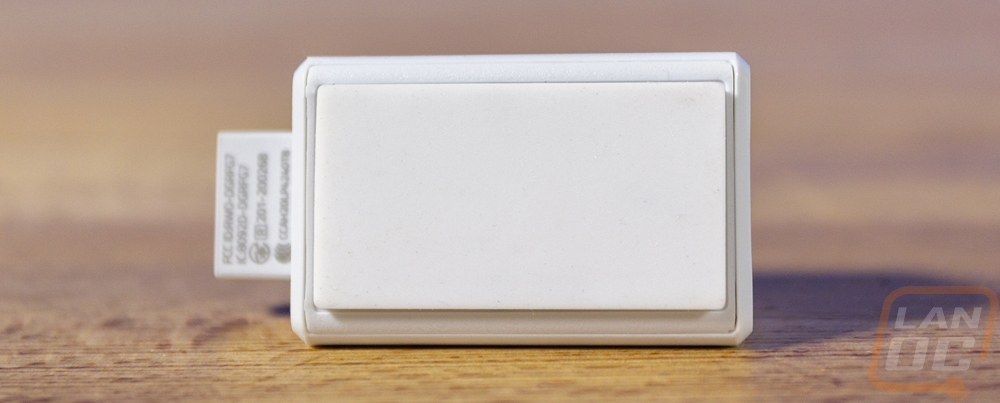
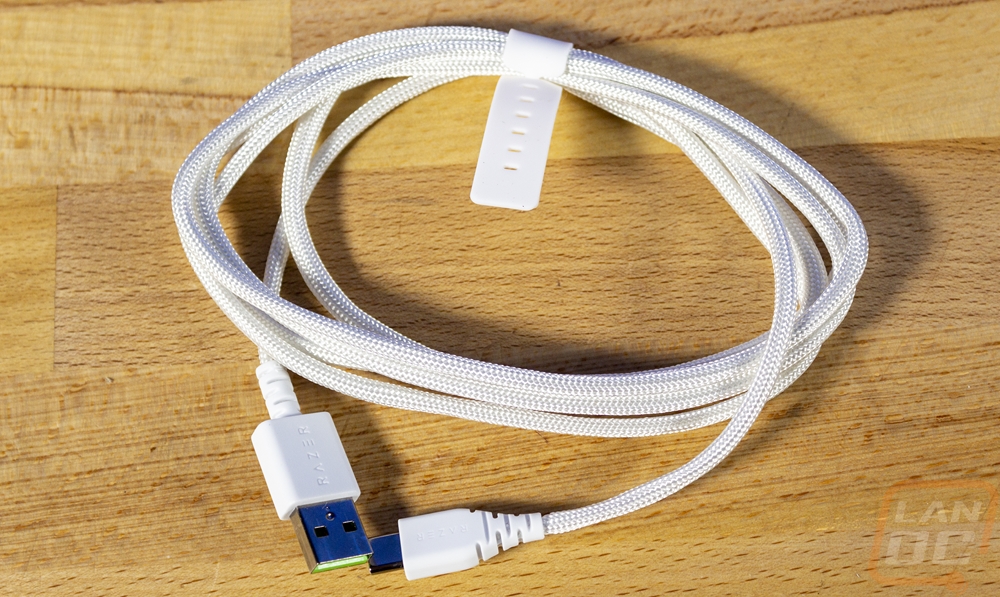
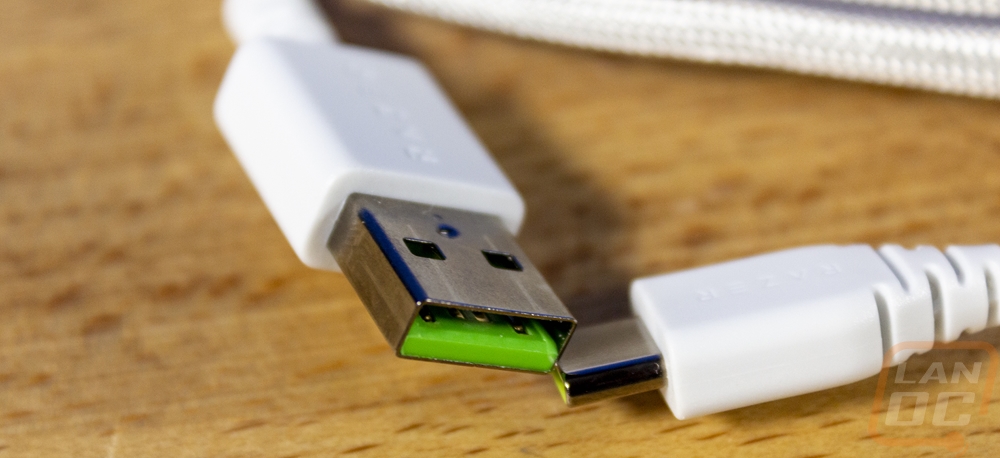
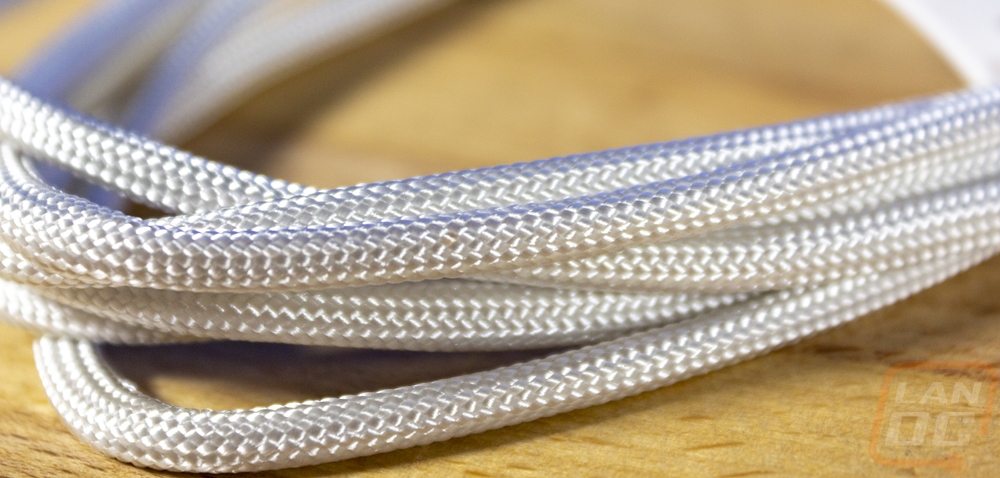
We can’t forget the wireless dongle included with the Deathadder V3 Pro as well as the cord. The Deathadder V3 Pro has a Type-C connection at the mouse for charging or a wired connection so the cord included with it has a Type-C connection on one end and a typical Type-A on the other end. Both plugs have the Razer branding on them and green inside of the connections so they will be easy to spot if you are trying to figure out which cord is which at the back of your PC. The cord is bright white to match the white model and has a surprisingly soft sleeving and is very flexible which should be nice when charging to keep from having the cord pull or push the mouse. The dongle included is also bright white and is the same as I saw on the Viper V2 Pro with its A-frame shape. It has a Type-C input on one end to match the cord and charging plug on the mouse but the other end of the adapter has a Type-A connection which comes with the wireless dongle plugged in. If you want you can remove it and plug it directly into your PC but I would recommend using the cord and keeping it as close to your mouse as possible for the best possible connection. The Deathadder V3 Pro uses 2.4 GHz wireless and what they call Hyperspeed wireless which gets you 1000 Hz polling. I also like that the dongle does have an abbreviated version of the Deathadder V3 Pro name on it so if you have more than one Razer device you won’t get the dongles confused. That said Razer does support using one dongle with more than one device which can be helpful as well. The adapter also has a rubber grip on the bottom to help keep it from moving around.

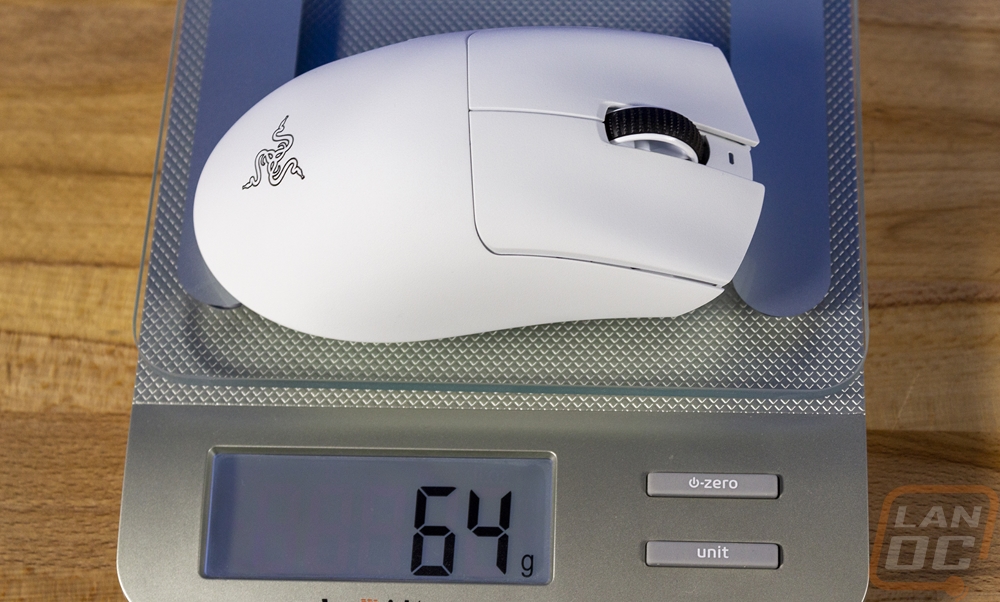
Given the size of the Deathadder, in the past weight has never been a big focus but it's clear across the entire Razer lineup that they are working on improving that, especially with pro-focused models like the Deathadder V3 Pro. One thing that I found especially interesting though is the two different weights listed in the specifications. So the Deathadder V3 Pro in black is listed at 63 grams and the white version that we have is 64 grams. The extra 1 gram in weight for the white model is to account for the paint needed to get that bright white finish which surprised me because the finish doesn’t look like paint at all. The 64-gram weight fits perfectly with what I saw on our scale and considering the Deathadder V3 Pro is a wireless mouse 64 grams is impressive being a larger mouse. Even the Viper V2 Pro that I recently reviewed was just 59 grams and it is noticeably smaller in height.
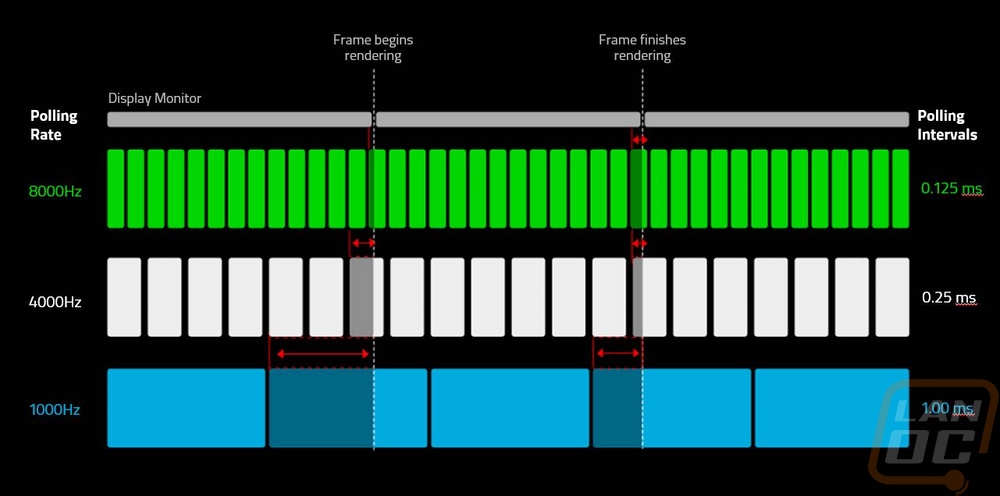
Another feature that I wanted to highlight even though it doesn’t come with the Deathadder V3 Pro is the Hyperpolling wireless dongle that works with it. This is 29.99 and you can only get it directly from Razer. It replaces the wireless dongle that comes with the Deathadder V3 Pro and bumps the polling rate up from 1000Hz up to 4000 Hz which can when help increase the responsiveness of your mouse movements. Like with a high refresh monitor, even small amounts of time make a difference in reaction time and with this, you can get more mouse movements and have fewer frames on your display between mouse updates. Razer does up to 8000Hz on their wired options and in their presentation, they did show a comparison of how the three different polling rates could affect things compared to your displays frame rendering.

Performance
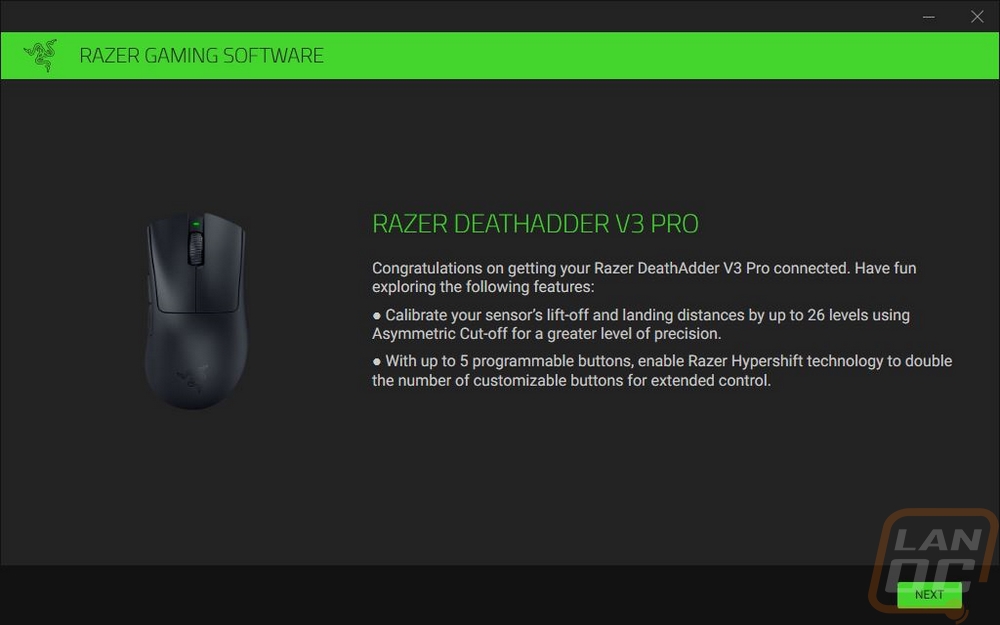
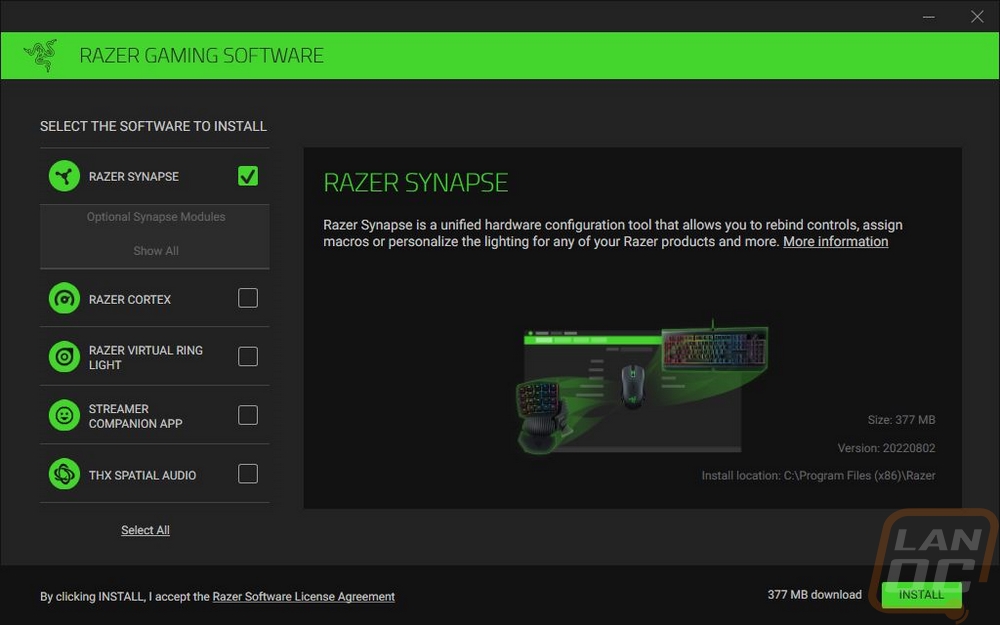
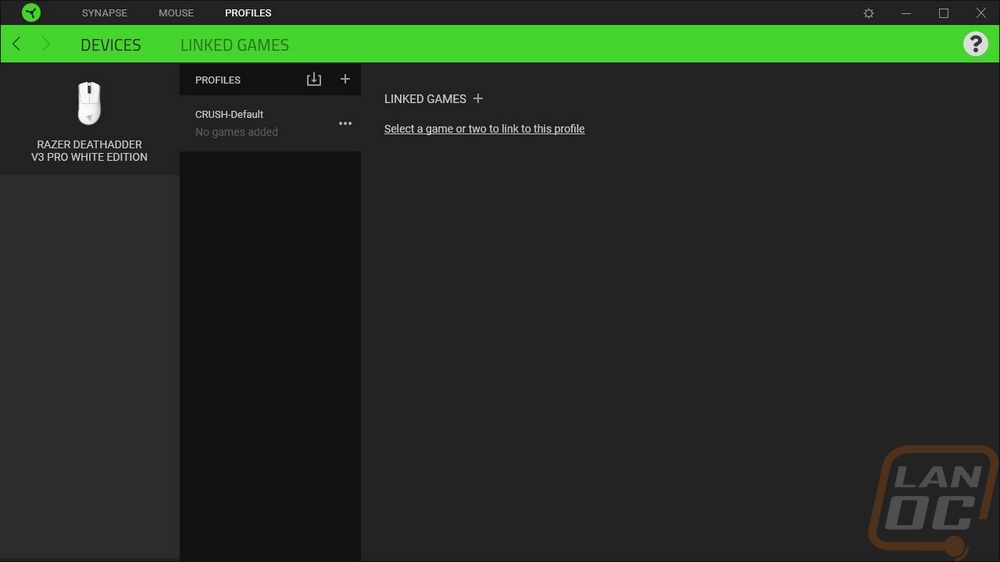
To start off my testing I did need to get the Deathadder V3 Pro installed and with that setup its software to get things confirmed. Just plugging the mouse in I received a prompt asking if I wanted to install Razers software. This congratulated me on the new mouse and let me pick from their software list which software to install. I went with just the basic Razer Synapse and I didn’t need any of the modules but if you plan on recording macros you will need that or if you want to tie your lighting in with other things there are different modules for each.
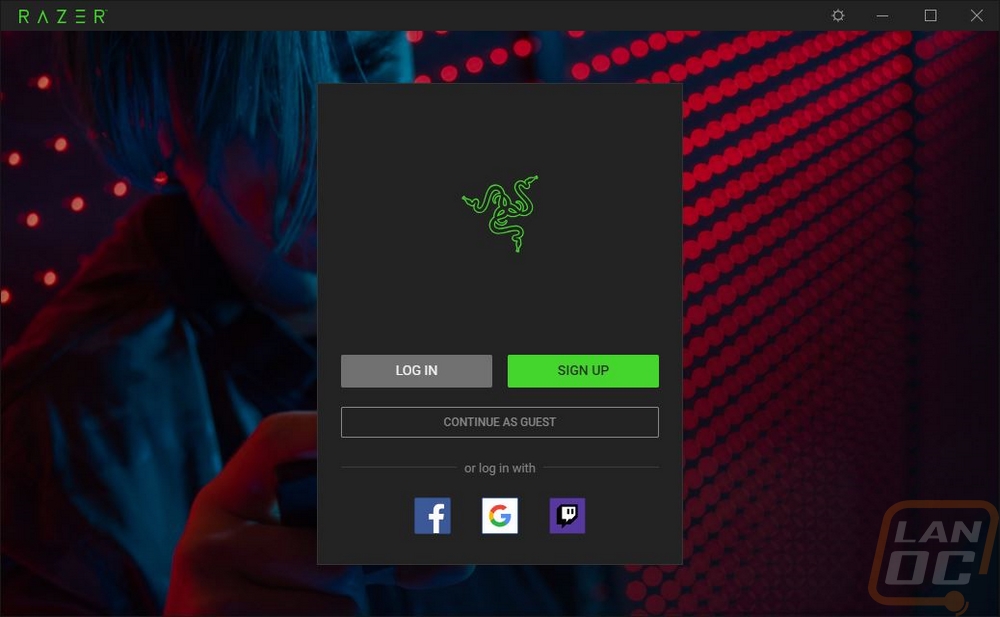
Once the software is installed you will get a popup asking you to sign up or log in to Synapse software which you can do with Facebook, Google, or Twitch as well. You also have the option to continue as a guest if you don’t want to create an account. I have an account but for these pictures, I was logged in as a guest. Once logged in as a guest you do get another popup reminding you that if you sign in you can back up your settings and access those settings from any PC. I should also point out that after this I did have to have Synapse check for updates because the brand new Deathadder V3 Pro didn’t show up the first time.

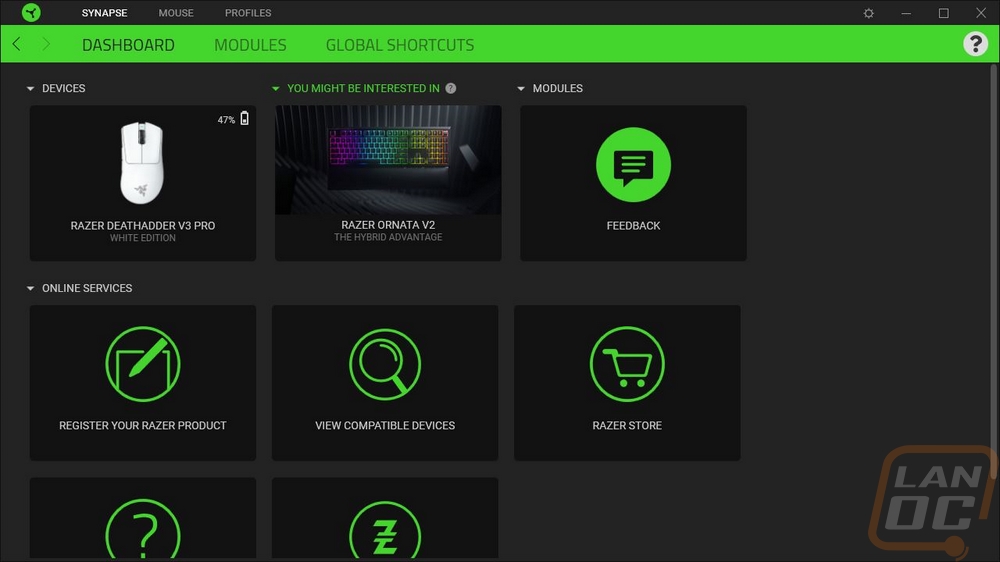
The main landing page for Razer Synapse has links up top for the main dashboard, your module page, and global shortcuts. The dashboard page will show all of the installed Razer devices and has links to things like the Razer store. I was surprised that the software recognized that we had the white version and gives us photos of the white model.
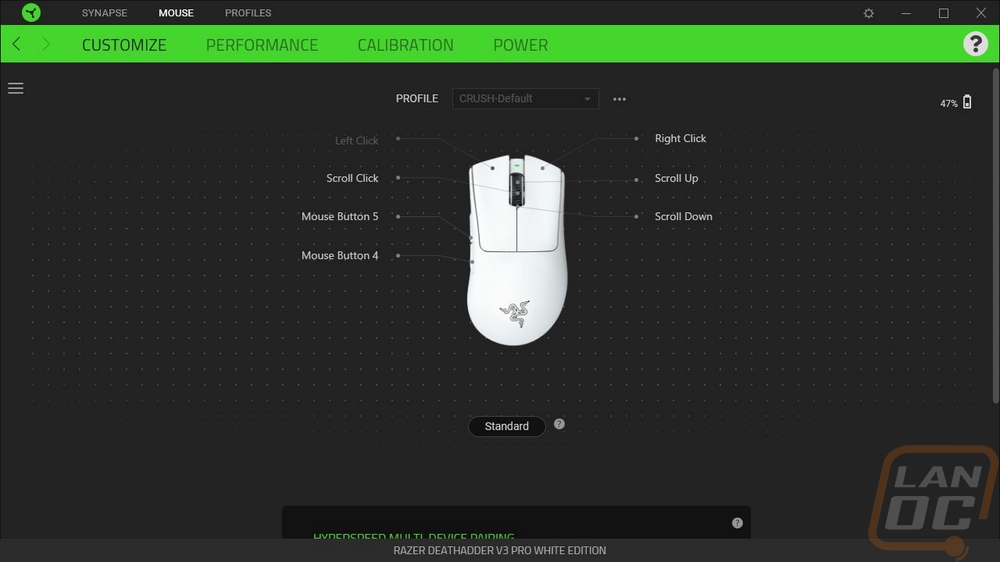
Clicking on the Deathadder V3 Pro you get the customize page which is where you program the buttons on the Deathadder V3 Pro. This page also had a picture of the mouse in the center which was white to match our mouse. It then has lines drawn to each of the programable buttons. Up top, you can pick from the profile, and down at the bottom, you can switch between standard mode and Hypershift mode which is like a function layer or your shift key that if you program a button to do it you can hold it and press other buttons to get more buttons to reprogram. Clicking on any of the buttons will give you a list on the left of all of the options you can program. You can do things like keyboard keys, launching programs, opening multimedia, windows shortcuts, changing mouse sensitivity, and anything else you might be able to think of and that is even before you include macros that you can record.

The next page is the performance page. This is where you can adjust your sensitivity settings. The Deathadder V3 Pro comes with five stages which you can set up what each stage runs at and use the bottom DPI button to switch between them. You can change the number of stages or for people like me who don’t like having more than one DPI you can turn it off and run just one. You can also change the polling rate here which with the default dongle maxes out at 1000 Hz and they also include a link to the windows mouse properties as well.

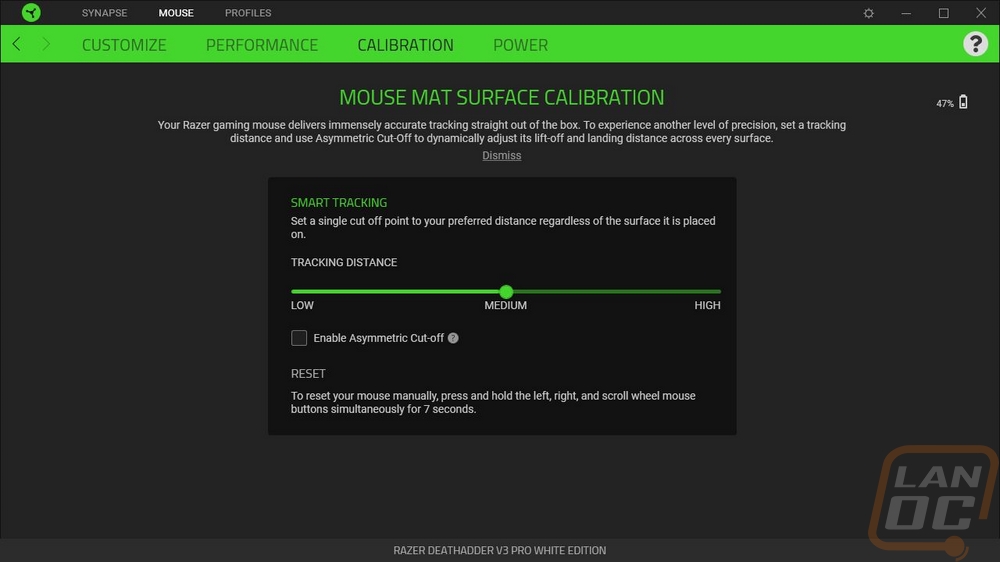
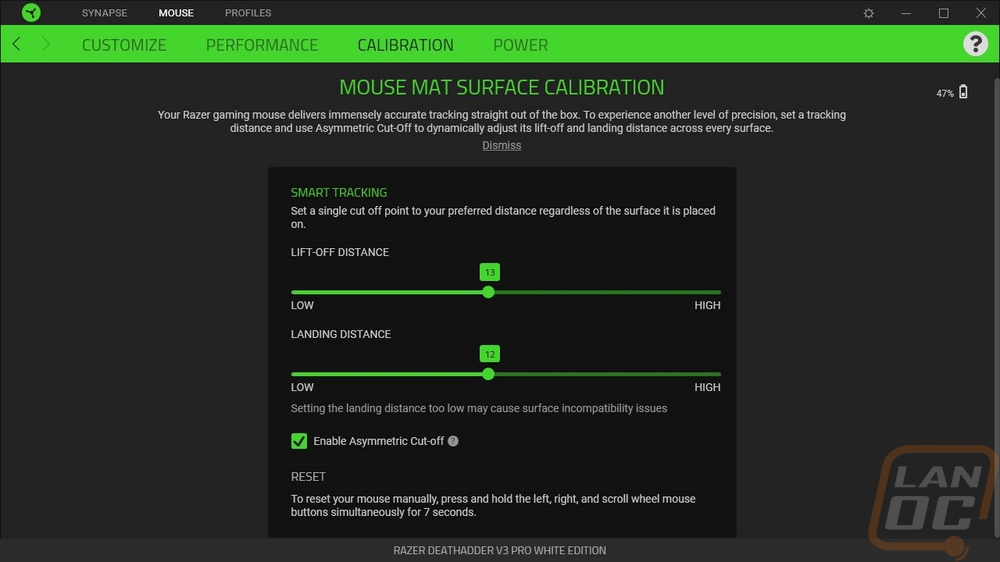
The calibration page is about calibrating your mouse surface but this is setting up your lift-off distance. They give you a simple slider that you can adjust or you can turn on asymmetric cut off which lets you adjust the lift-off distance and the landing distance at different rates.
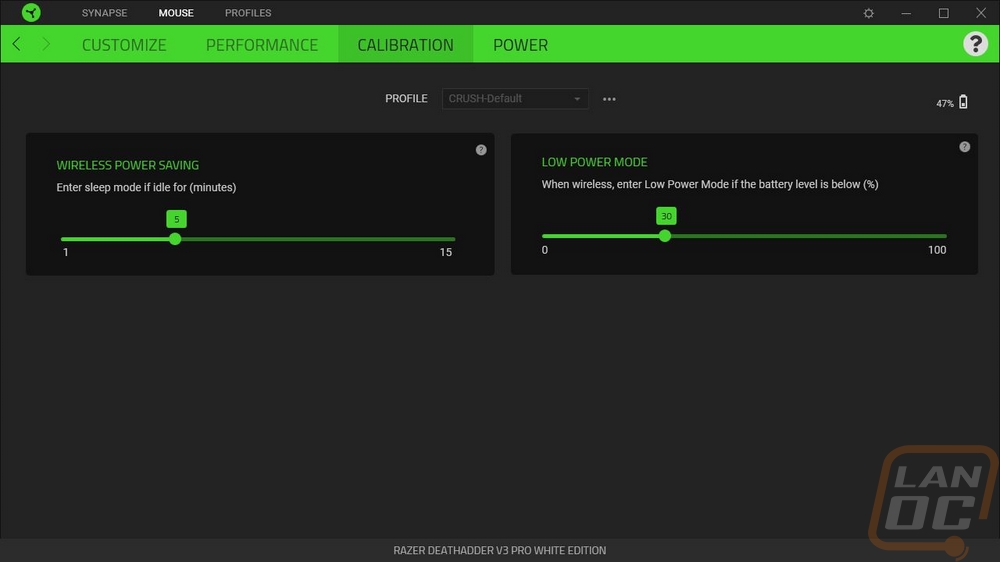
The power tab has your battery settings and there are just two settings for the Deathadder V3 Pro. You can change the idle time before it will go into wireless power saving mode which by default is set at 5 minutes. Then you have the low power mode start percentage which is defaulted at 30%.
You can create more than one profile or set profiles up to be app specific for games in which you maybe want custom button profiles.
For the rest of my testing, I switched from my normal Logitech Superlight to the Deathadder V3 Pro as my main mouse. Because of the launch and the timing of when our V3 Pro came in, I only have had a week of testing but during that time I have been using it for gaming and everyday use trying to put some miles on it. The biggest thing I have noticed is that in most ways it feels just like the Razer Viper V2 Pro that I reviewed last month. That isn’t a huge surprise given how much the two mice share but I think it’s the first time that a Deathadder has felt like anything else for me. In the past Deathadders have been big heavy mice with a unique shape like nothing else and while the Deathadder V3 Pro does share a lot of the same shape the small changes were enough to make a big difference. In some ways that isn’t a bad thing, the 63/64 gram weight is amazing and with this being a larger mouse it almost feels like it is even lighter than that. The slightly raised and moved peak fits my hand a little bit better but the moved side buttons where I like them just don’t feel like a Deathadder anymore not to mention having less flare on the triggers visually.
The Deathadder V3 Pro doesn’t have any of the lighting that Razer used to have back in the day and I’m perfectly fine with that and they have also avoided the rubbery grips or grips altogether really. I do however think that the black model which doesn’t have paint may have a slightly better texture assuming it has the same heavy texture that the Viper V2 Pro has which I liked. You can feel it on the white Deathadder V3 Pro but it just has slightly less grip. Combine that with the ergonomic shape that the Deathadder has always had and as someone who lifts their mouse often when gaming I may need to use grip tape which was something I didn’t need with the Viper V2 Pro. Thankfully Razer includes a full set.
The wireless performance like with the Viper V2 Pro was flawless, I didn’t have any issues with it, and even with just the stock receiver and not the HyperPolling receiver that is optional that bumps you up from 1000Hz to 4000Hz the Deathadder V3 Pro does well. With just a week of use battery life is a little hard to tell but the Deathadder V3 Pro is rated to 90 hours of battery life of constant 1000 Hz motion so I haven’t killed the battery yet after giving it its first charge a few days in. When charging you do have the extremely soft and flexible charging cable which for the white model is also a matching bright white so even when forced to go wired you are hardly going to feel it. But I do still wish there was a wireless charging option like Logitech and a few others. I’m just really bad about remembering to charge especially if I don’t have a charging dock like Razer has used in the past. The Deathadder V3 Pro like the Viper V2 pro does have a standard Type-C connection so you could if needed use a phone charger to charge it as well, but if you are using it while doing this the included soft cable would be a love nicer.
The Deathadder V3 pro has the same Gen 3 optical switches as the Viper V2 Pro which means it has the same loud satisfying clicks when you press them and a crazy 90 million click rating which should hopefully mean no issues for years. The scroll wheel grips well and works as you would expect it to and I don’t hear the slight rattle like our Viper V2 Pro had. I also found the side buttons to be easy to reach even though I do miss the more curved shape of the older Deathadder designs and those have a good click as well. Then for the PAW3950-based Focus Pro sensor like with the Viper V2 pro, it has been great, with no noticeable flaws or issues, and the 750 IPS picks up on quick movements great.
Overall and Final Verdict
Coming from the Razer Viper V2 Pro that I reviewed a little over a month ago it is really easy to see a lot of the similarities between it and the Deathadder V3 Pro that I’m checking out today. They share a majority of the same features and given how much I loved the Viper V2 Pro that isn’t a bad thing. Razer has put together a winning combination of great and seemingly reliable optical switches and a good sensor along with a focus on keeping things lightweight. The larger Deathadder V3 Pro design is impressively lightweight, especially for a wireless mouse. Wireless performance is great and they have the 4000 Hz HyperPolling option launching with it as well on the Razer website. Then we have the soft and flexible charging cord and simple software as well. The only real difference between the Deathadder V3 pro and the Viper V2 Pro is in the shape and I love that you can now just pick the shape and not have to miss out on features because of it.
Now the V3 Pro does lose some of the unique shape that the Deathadder mice have always had bringing what was a unique mouse closer to being just like everything else on the market. I know some hardcore Deathadder fans are going to consider the Deathadder V2 Pro to be the last true Deathadder design. But the new shape does work well on its own. Like with the Viper I do wish that there was a wireless charging option available or at least an optional dock for people like me who are bad about remembering to charge my wireless devices. I like that it is available in both black and white and visually I love the bright white but do think the black has just a touch more grip which for me is needed with the ergonomic shape here.
The Deathadder V3 Pro has an MSRP of $149.99 which is the same as the Viper V2 Pro which I still think is a little high. That is a lot of money to throw down for a mouse and with some of the competition in the lightweight wireless mouse market selling for less, it hurts the pocketbook a little. For those who aren’t scared off by the pricing, it is a good buy, and if the price is an issue I’m sure it won't be long before there are cheaper wired options or as Razer has been known to do refurbished models may be an option in the future.


Live Pricing: HERE


