
A 58-gram wireless mouse that doesn’t to that weight with the top and bottom of the mouse riddled with holes and isn’t a “mini” size? That is what Razer's new Viper v2 Pro is promising which is a big change from the 74 grams of the original wireless Viper Ultimate. It’s been interesting seeing Razer listening to the mouse enthusiast community where in the past they would dictate what people would want. The Viper lineup as a whole has been a great example of that and with this latest version, I’m curious to see what else they have changed so today I’m going to take a closer look at the Viper V2 Pro and then put it to the test. Let’s dive in!
Product Name: Razer Viper V2 Pro
Review Sample Provided by: Razer
Written by: Wes Compton
Amazon Affiliate Link: HERE
|
Specifications |
|
|
Form Factor |
Right-handed Symmetrical |
|
Connectivity |
Razer™ HyperSpeed Wireless Wired – Speedflex Cable |
|
Battery Life |
Up to 80 hours (constant motion at 1000Hz) |
|
RGB Lighting |
None |
|
Sensor |
|
|
Max Sensitivity (DPI) |
30000 |
|
Max Speed (IPS) |
750 |
|
Max Acceleration (g) |
70 |
|
Programmable Buttons |
5 |
|
Switch Type |
Optical Mouse Switches Gen-3 |
|
Switch Lifecycle |
90-million Clicks |
|
On-Board Memory Profiles |
1 |
|
Mouse Feet |
100% PTFE |
|
Cable |
Razer™ Speedflex Cable USB Type-C |
|
Tilt Scroll Wheel |
None |
|
Sizes |
Length: 126.7 mm / 4.99" Grip Width: 57.6 mm / 2.27" Height: 37.8 mm / 1.49" |
|
Weight |
58g |
|
Dock Compatibility |
None |
|
Box Contents |
Razer Viper V2 Pro Wireless USB dongle + USB dongle adapter Type-A to Type-C Speedflex cable Razer Mouse Grip Tape Important Product Information Guide |
|
Warranty |
2 years |
Packaging
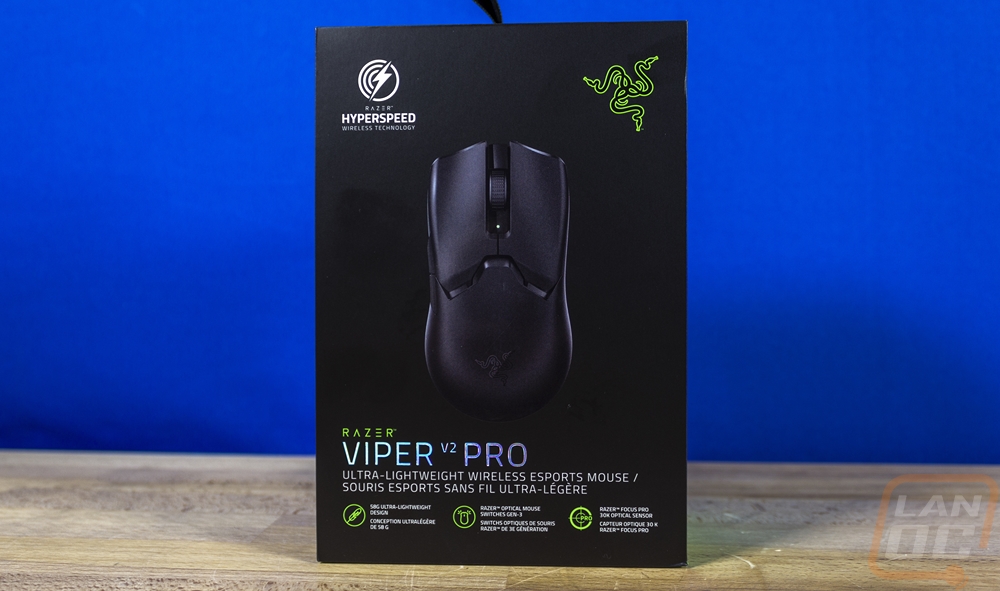
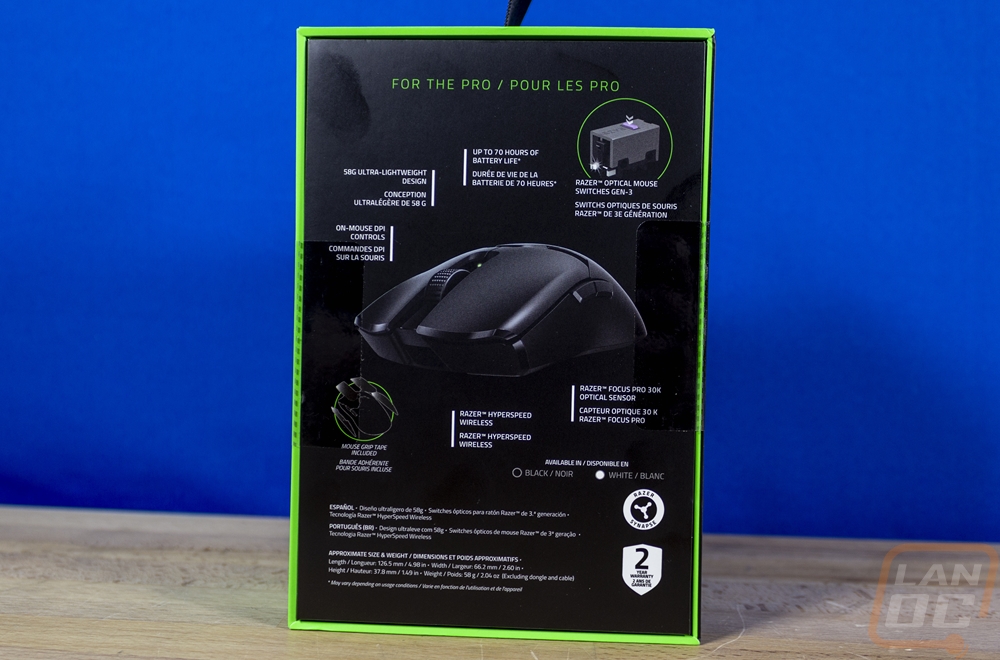
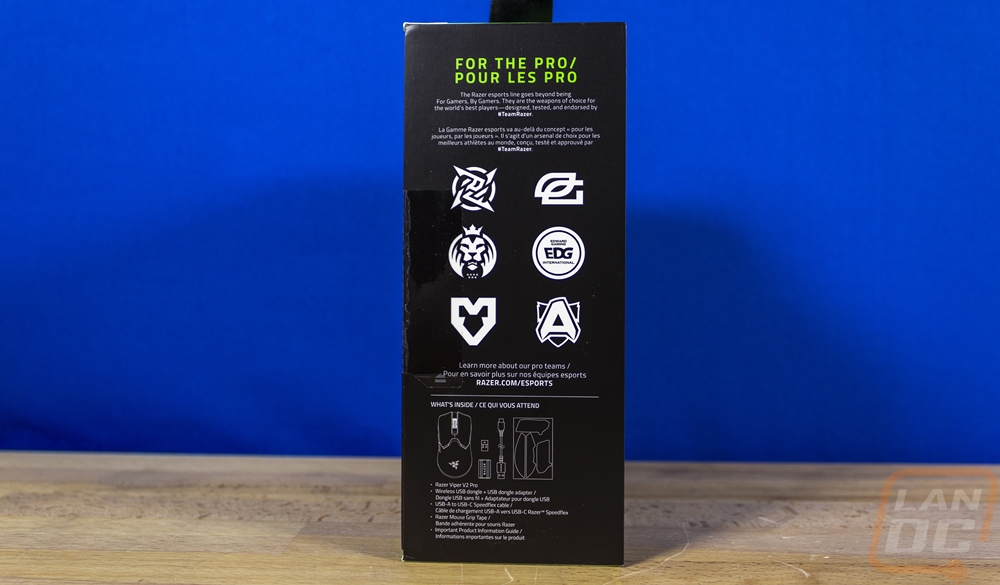
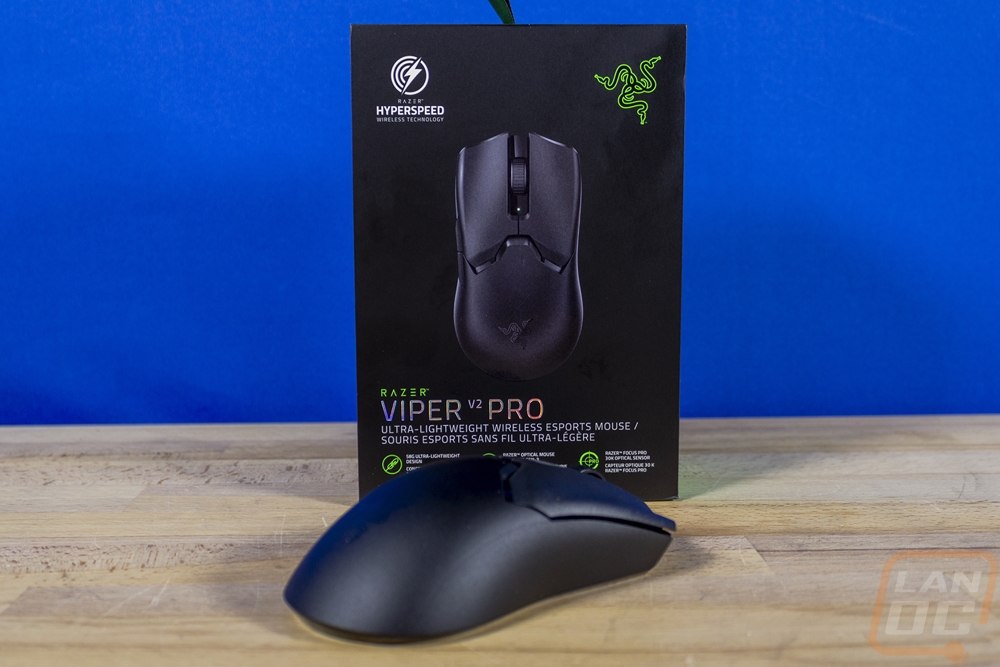
The box for the Razer Viper V2 Pro sticks exactly with the same look that Razer has done their packaging for 16 years, going back to the launch of the Krait. That is of course a fully blacked-out box with a picture of the mouse in the center. The Razer logo in the top right corner and above the model name are both in that signature Razer green. The Viper V2 Pro model name has a reflective finish and is the biggest font. Then below that, they have a short description and three of its features highlighted with a logo and description. The back of the box has a bright green outline then black. There is another picture of the Viper V2 Pro in the middle and around it they have more of the features listed. They also note the 2-year warranty down in the bottom corner with a logo. There is a line drawing on the side of the box along with a list of everything inside of the box.
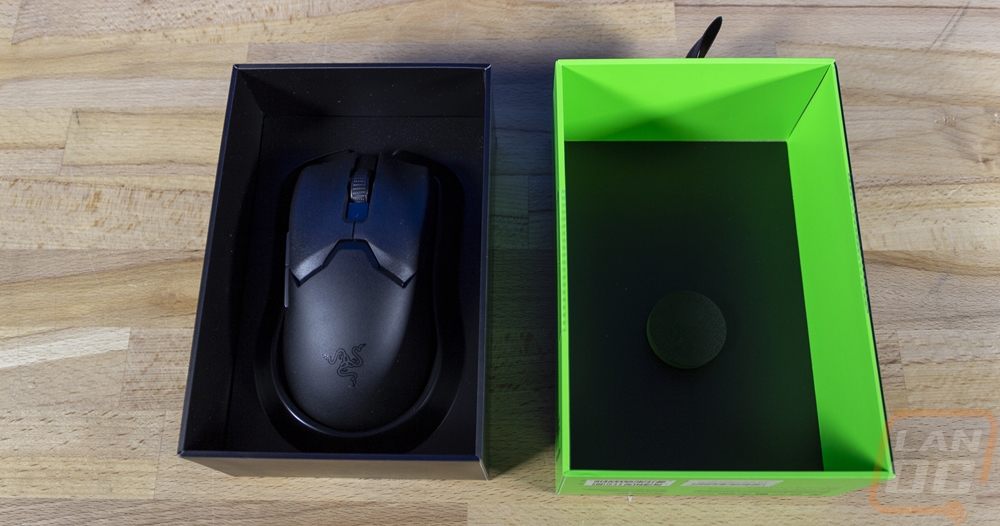
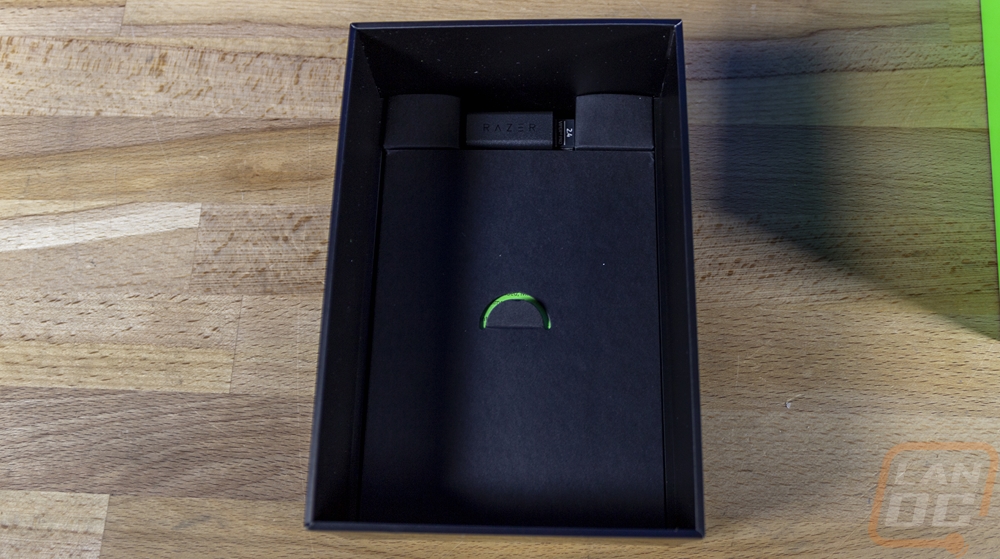
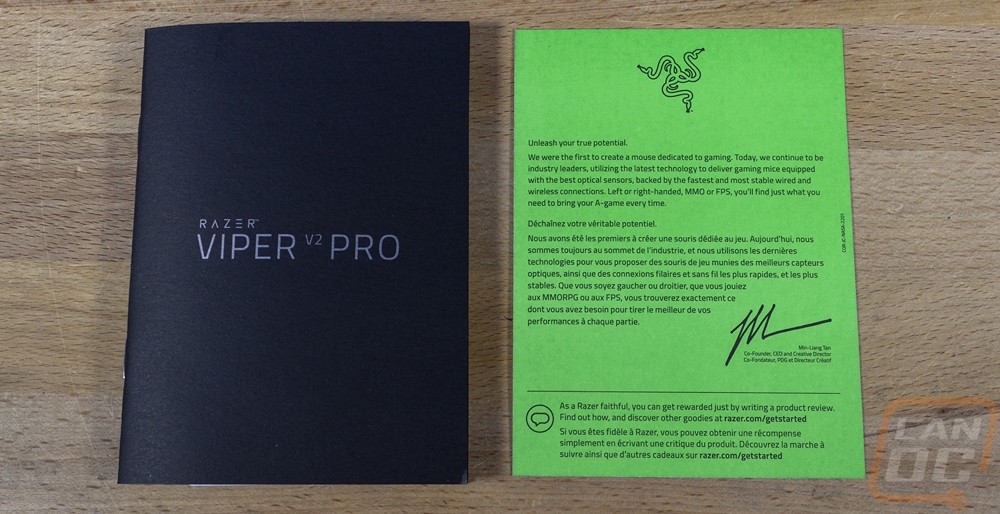
The front of the box pulls off and right up on top the Viper V2 Pro sits in its plastic tray and the lid has a small foam pad to keep the mouse from moving around. Up under the tray, there is an envelope with a pull tab and above that, the wireless dongle and its adapter are together and in their own compartment. The envelope has the charging cable, the mouse grips, and the documentation. For the documentation, you get the bright green card with the welcome from the Razer CEO and a user guide booklet.
Photos and Features
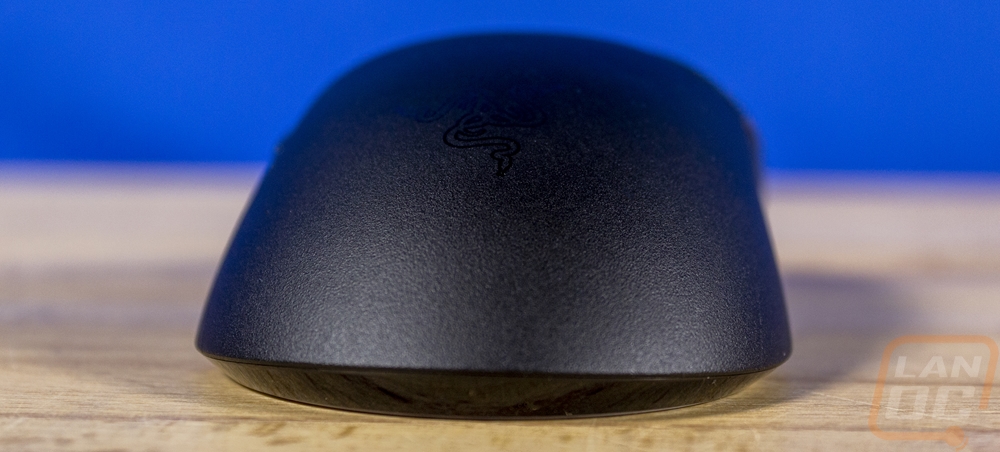
If you haven’t had the chance to check out any of the Razer Viper mice in the past, I would consider the Viper shape to be in line with the FK shape or the SteelSeries Sensei which is good because that is my preferred mouse shape. It is far from a knockoff of those shapes but I will get into those differences in just a minute. The Viper V2 Pro is blacked out with a fine texture across the entire mouse and doesn’t have any crazy RGB lighting. In fact, it has the Razer tri-head logo on the back in a gloss black which reminds me a lot of their special edition signature black version of the Deathadder.
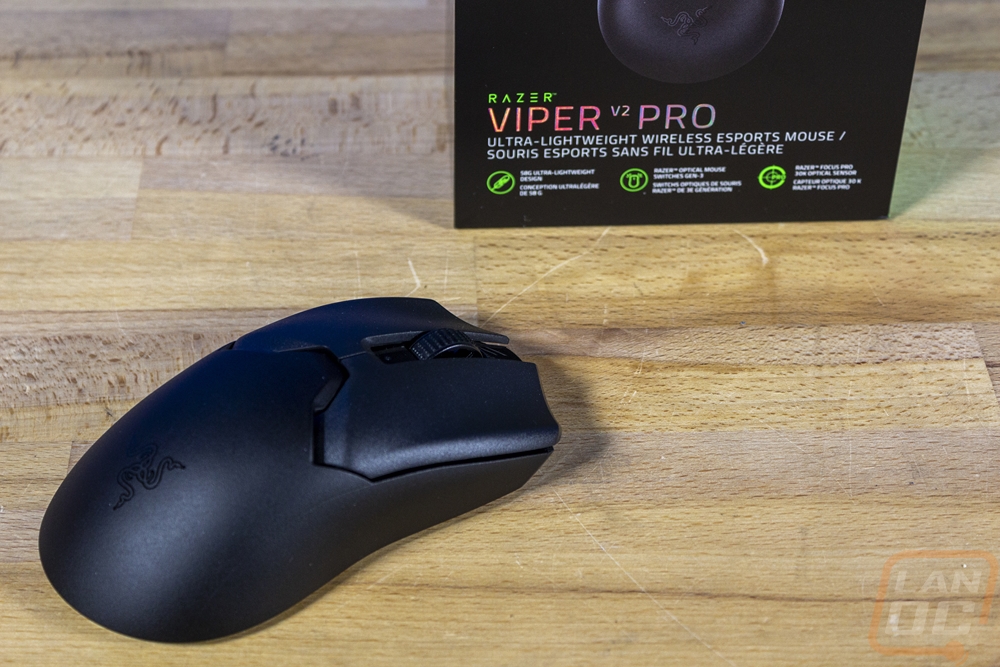
The Viper V2 Pro is 126.7mm long and has a width of 57.6mm and is in the 67mm range near the back. Then for height, it is 37.8mm tall. The Viper design sits lower than the Sensei designs and had less of a hump that keeps the height short. Razer has it listed as a Right-handed Symmetrical mouse which means that it is symmetrical like an ambidextrous mouse but it doesn’t have the side buttons on both sides, so for some lefties that may still be okay.

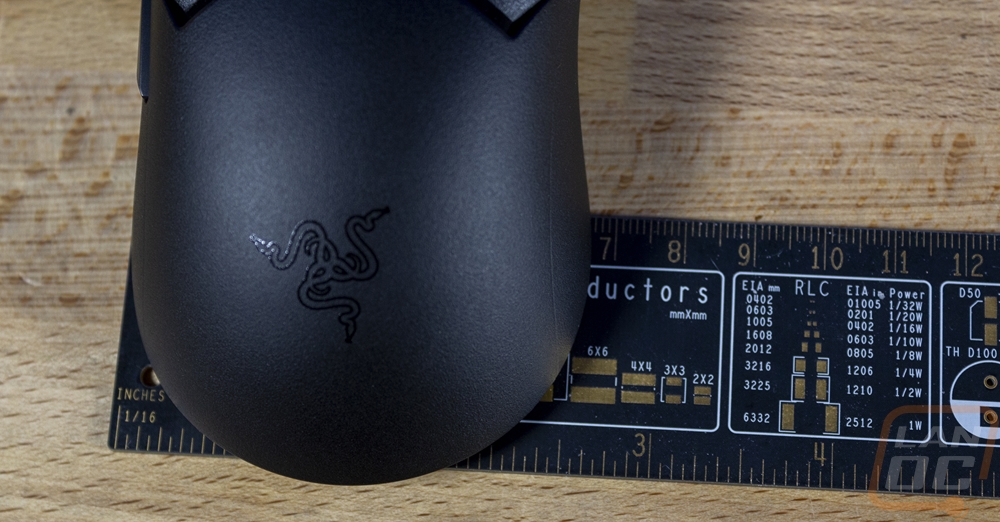

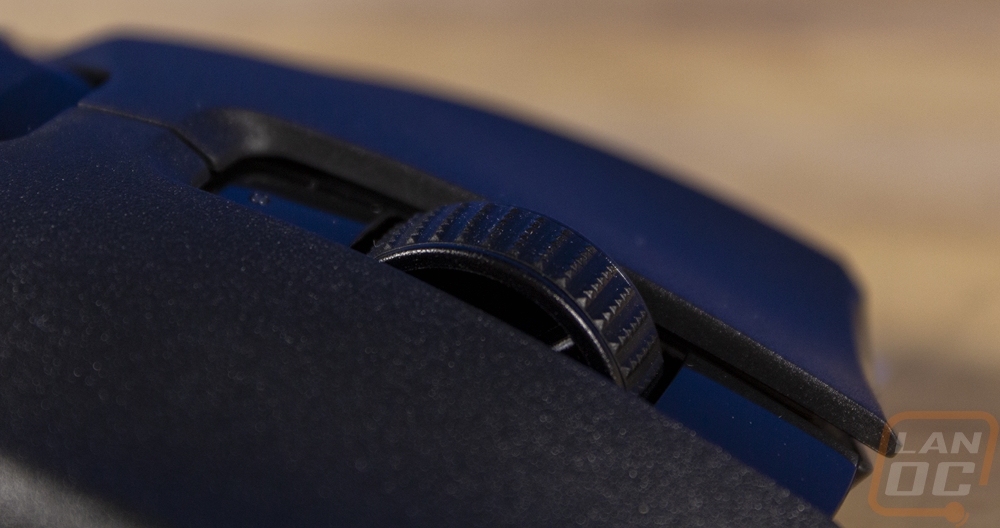
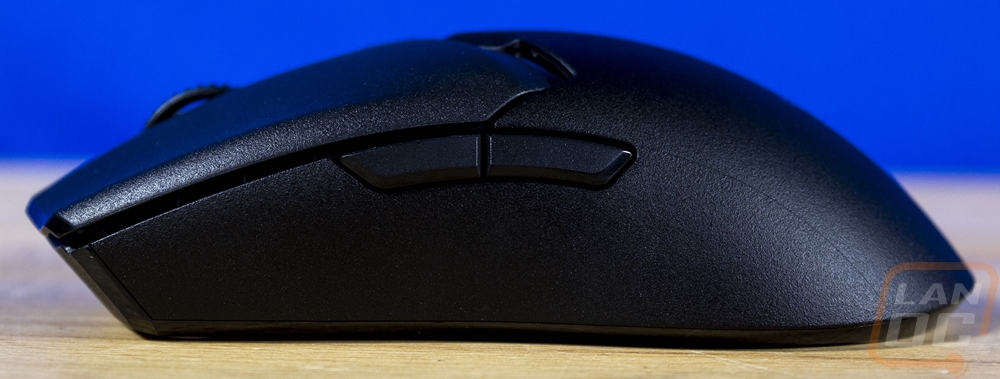
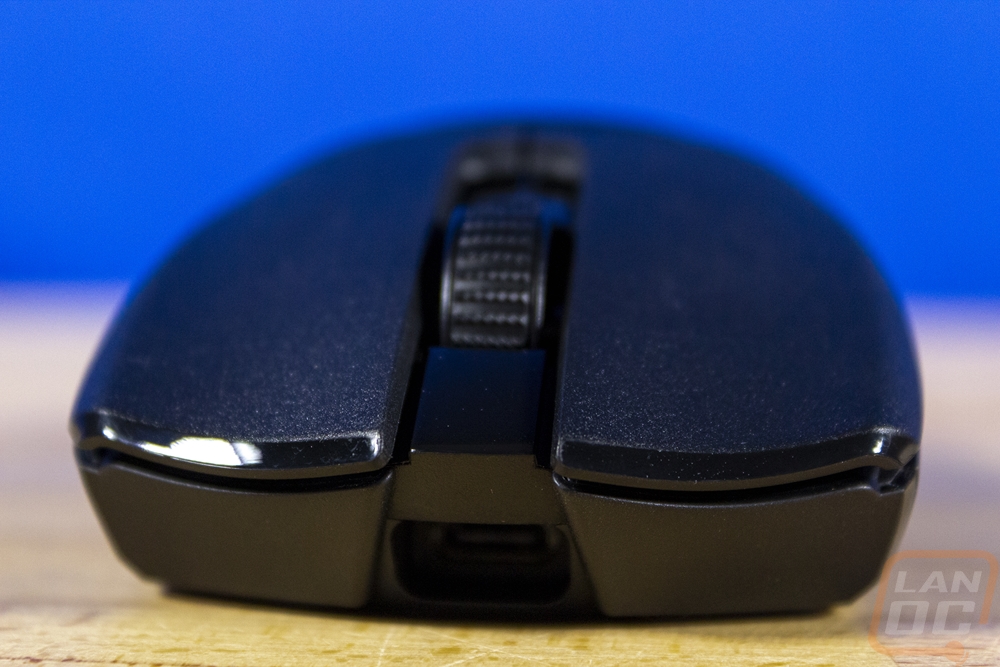
Where the Viper shape stands out compared with the Sensei and FK shapes is that its triggers have an old-school Razer shape which flares out towards the front and has slight wings on those flairs that hold your trigger fingers centered on the triggers. A shape that Razer used all the way back to their original mouse the Boomslang. Ironically the original Razer Viper from back in 2004 was one of the few Razer mice that didn’t have that flare. The Viper V2 Pro’s triggers also have a slight angle on them where they meet up with the rest of the housing then a wide area around the scroll wheel. The school wheel area is the only area that doesn’t have that same textured finish, it's glossy on that patch. Be2hind the scroll wheel there is one single LED on the entire mouse which is a white pinhole LED that lets you know when the Viper V2 Pro is powered up and can let you know when the battery is running low as well. The scroll wheel is simple and doesn’t have tilt clicking but does have a center click. For the grip, the rubber ring has small raised dots every few millimeters. For the triggers, both are Razer’s gen 3 optical switches which are rated for 90 million clicks.
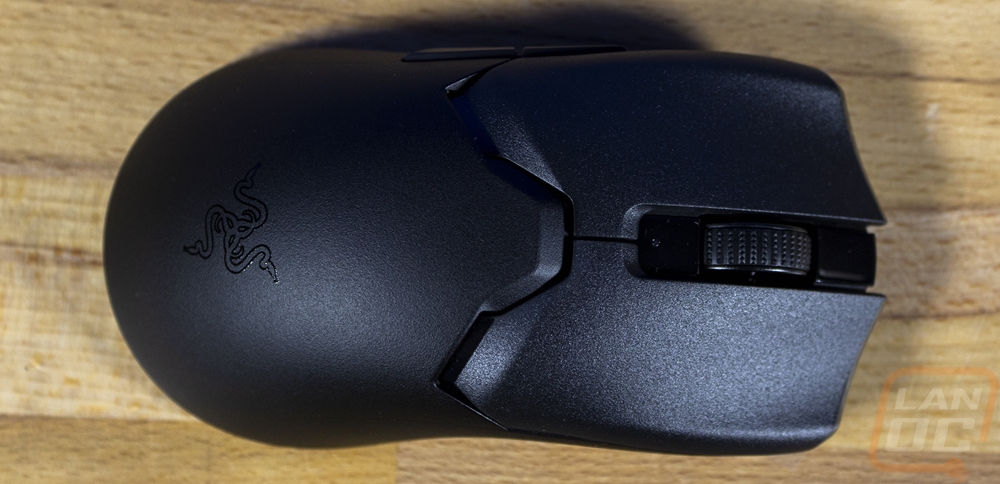
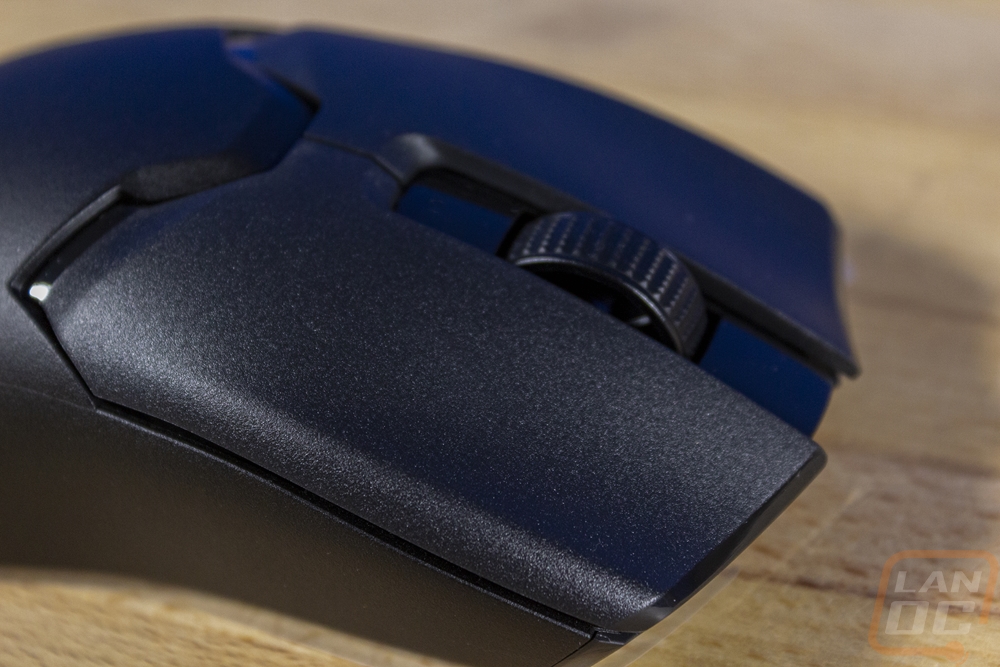
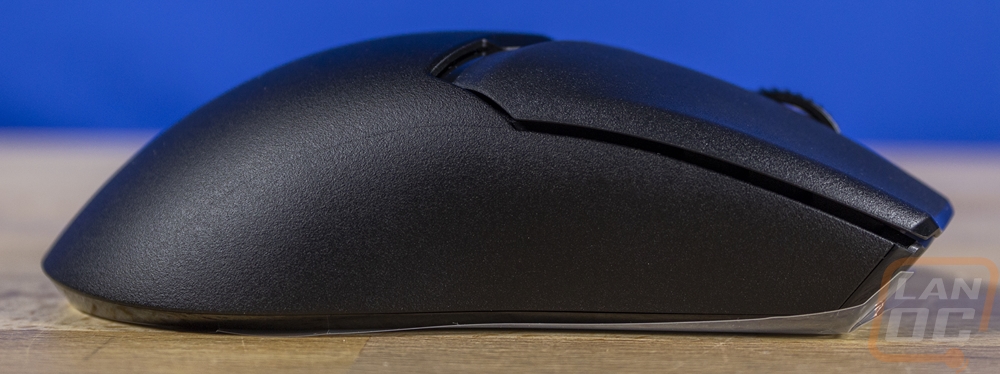
The side profile of the Viper V2 Pro shows the overall arch which is surprisingly consistent given the dips behind the triggers. The textured plastic finish carries on down the sides and it does have that FK/Sensei coke bottle shape that hangs over to give you a little grip ledge. The left side of the mouse has two side buttons which sit right at the peak of that side arch where your thumb will be at making them easy to reach. Past Vipers had the right side buttons as well but for the V2 Pro, those were dropped to cut weight.
The front view shows the symmetrical shape of the Viper V2 Pro and it also does a great job of showing the cupped shape of the triggers. The ends of the triggers do have a sliver of that glossy finish. Then in the front right in the center, the charging USB port which uses Type-C is recessed back into that hole. This shape gives the connection a little extra support from side to side movement but doesn’t look to be limited to a specific cable shape like some mice have so other Type-C connections as long as they are small should still fit.
The back view could be a clone of the other FK/Sensei designs and you can see a little bit of that wide butt where it flairs out down at the bottoms.
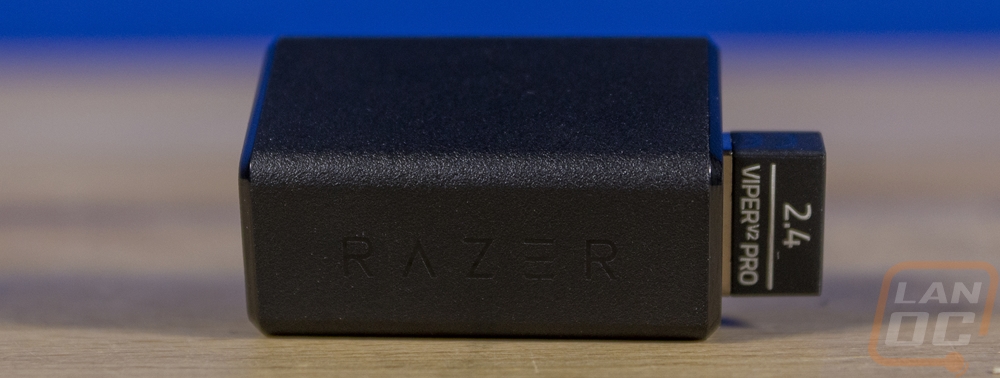
The bottom of the Viper V2 Pro has a smile-shaped PTFE glider on the bottom and two ¾-inch-long gliders up under the triggers. Then in the center around the sensor, there is a ring around that as well to keep the distance consistent. Having PTFE gliders is a nice touch as this is often an upgrade in the enthusiast community but I am surprised that extras weren’t included like a few other mice have done because it does wear faster. The label between the sensor and the trigger gliders has all of the normal certification logos, the serial number, and the Viper V2 Pro model information. Being a wireless mouse the Viper V2 Pro does have a power button down here which I’m surprised isn’t a switch but the button design most likely saved a little weight. You have to press and hold this to turn the Viper V2 Pro on and short presses will flip through the DPI modes if you have them set up. Last up in the center the sensor is what they are calling the Focus Pro 30K Optical Sensor which is based on the PAW3950 with a 30k max DPI, IPS of 750, and a max acceleration of 70.

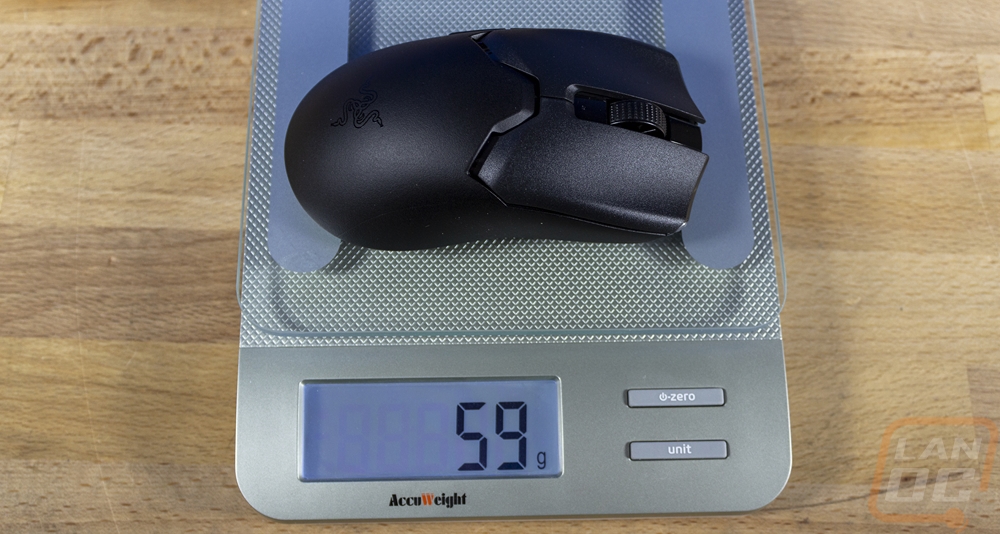
The biggest feature of the Viper V2 Pro interestingly enough is the lack of something, weight. So the original Viper Ultimate came in at 74 grams which in itself was impressive for a wireless mouse, especially one without a design filled with holes. That competed with the Logitech G Pro Wireless which was 80 grams. Logitech followed that up with their Superlight which was 63 grams and now the Viper V2 Pro is down to 58 grams according to Razers specifications and 59 on our scale. On the Razer website, they even broke down the weight each feature helped with. The side buttons being removed helped with 2.9 grams and 2.7 grams with the RGB lighting removed. The built-in grips being removed was the biggest change at 3.2 grams and they also lightened up the trigger covers for .6 of a gram.
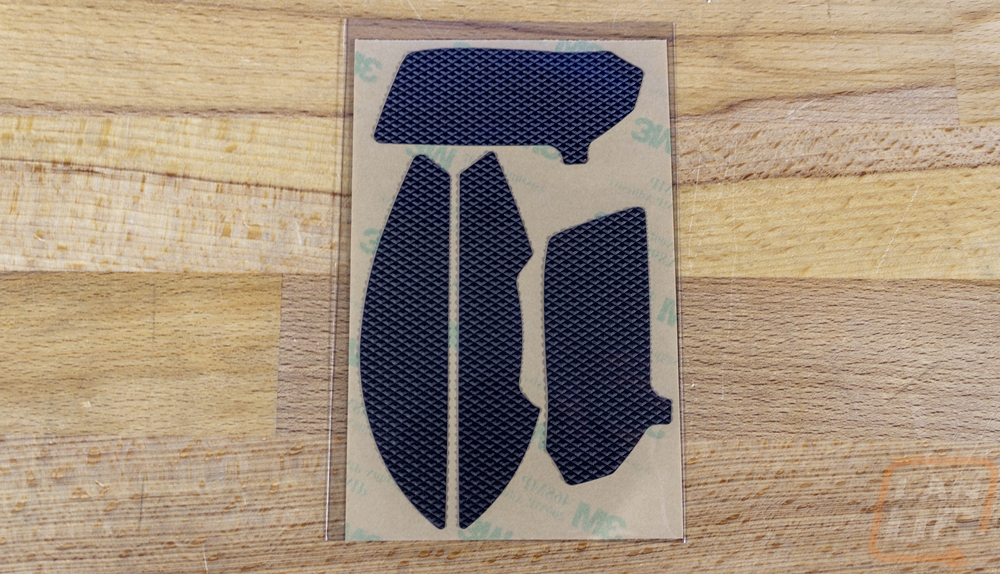
With the grip being removed Razer did bundle in grip tape already precut for the Viper V2 Pro. This is a great example of a feature that is big in the enthusiast community that Razer is clearly paying close attention to. Razer sells grip tape for the original Viper models in addition to the grip that was built into the sides. Going with optional tape is nice because for some like me I would prefer to have a nice cleanable surface that I’m not worried about breaking down over time than a built-in grip or if you want the grip you know you can replace them in the future. I’ve got a few mice that I wish I could do that with the original grippy finish or side grips. Getting this with the mouse also means you won’t have to buy it in the future which precut grips normally run between $7-$20 with most around $10.
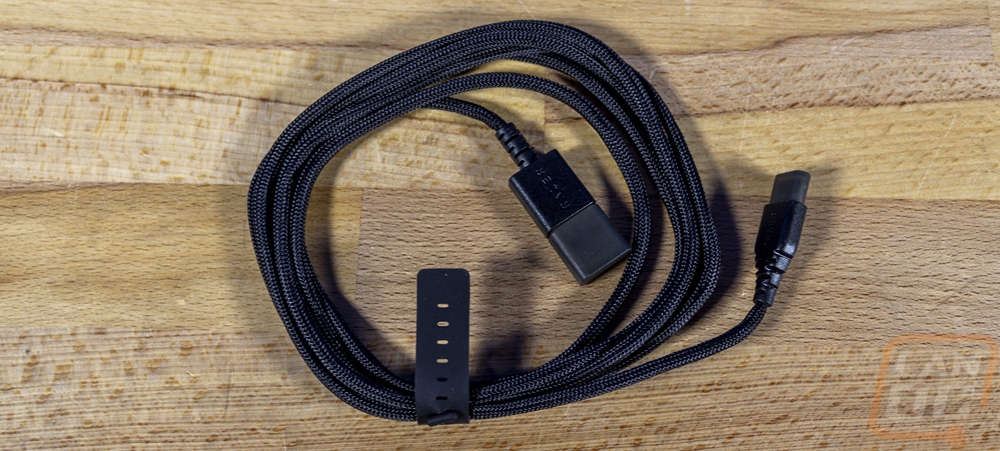
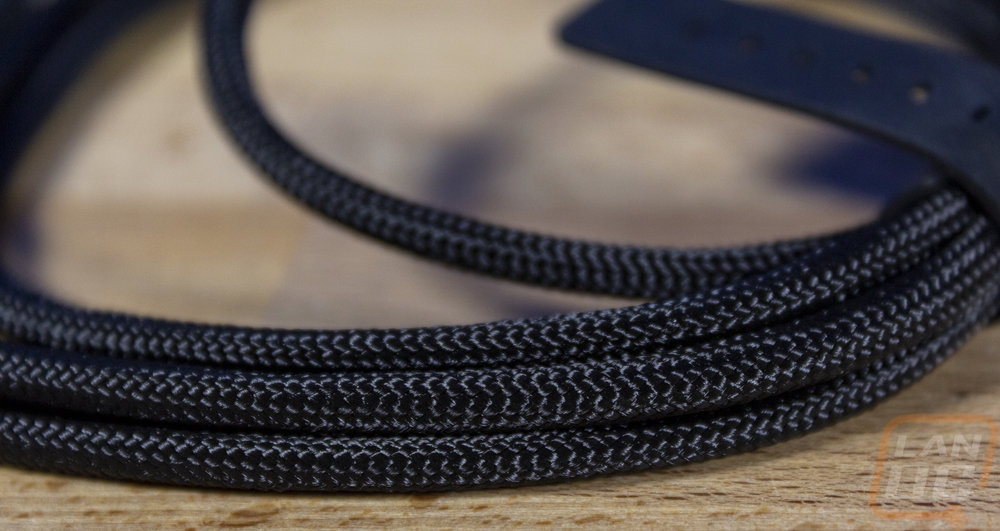
While the Viper V2 Pro is wireless you will need to charge it from time to time. Razer includes a nice USB Type-A to Type-C cable for this which has a soft black sleeving on it. The soft sleeving will be nice if you need to charge the Viper V2 Pro while you are still using it. This can also be used with the included dongle adapter to put your dongle closer to the mouse up on your desk.
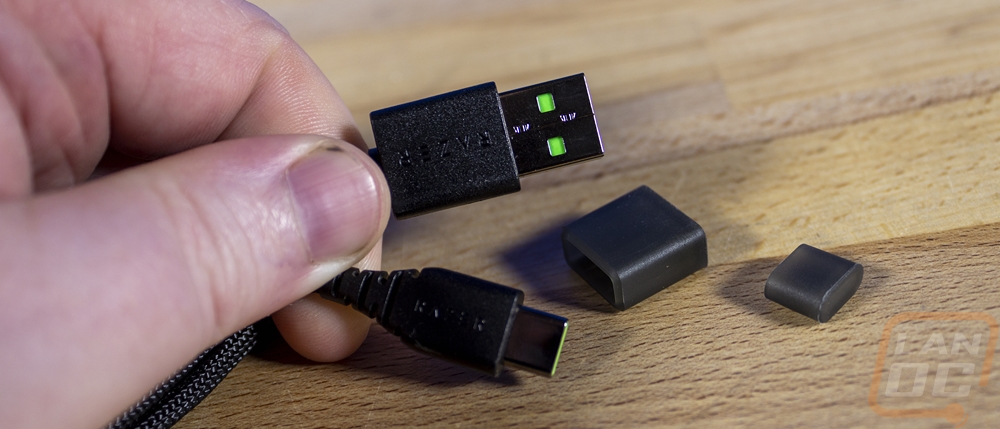
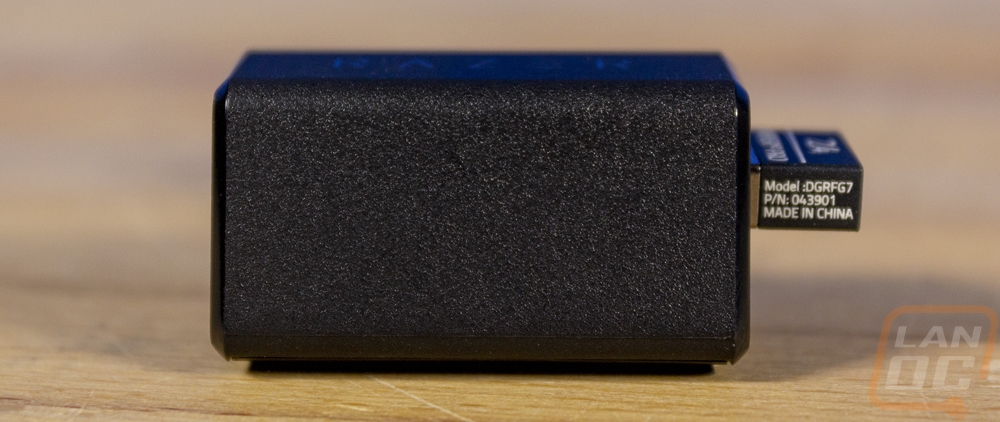
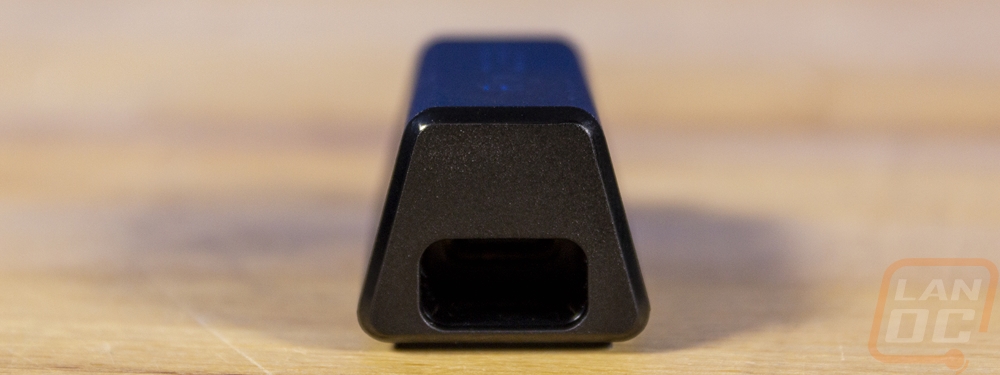
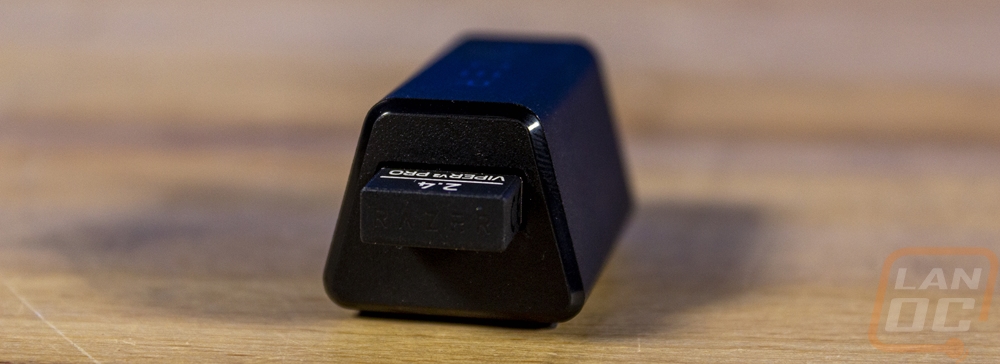
Speaking of the dongle and adapter here is what they look like. The adapter has an A-frame shape with the USB Type-C connection on one end to go with the charging cable and a Type-A plug on the other to plug the dongle into. It has a large rubber grip across the entire bottom as well. It isn’t too heavy but with the wider bottom, it does at least try to stay upright and with the grip down. I was surprised with the dongle, most even the smallest dongles have a little bit of chunkiness to the plastic end that can make them tight when you have it plugged in a USB port with a port next to it. This one is the same width as the metal connection all the way out. They have the Viper V2 Pro branding on top as well as the 2.4 GHz frequency, the Razer logo slightly embossed into the end, and on the underside, it has the normal FCC certification numbers.

Performance
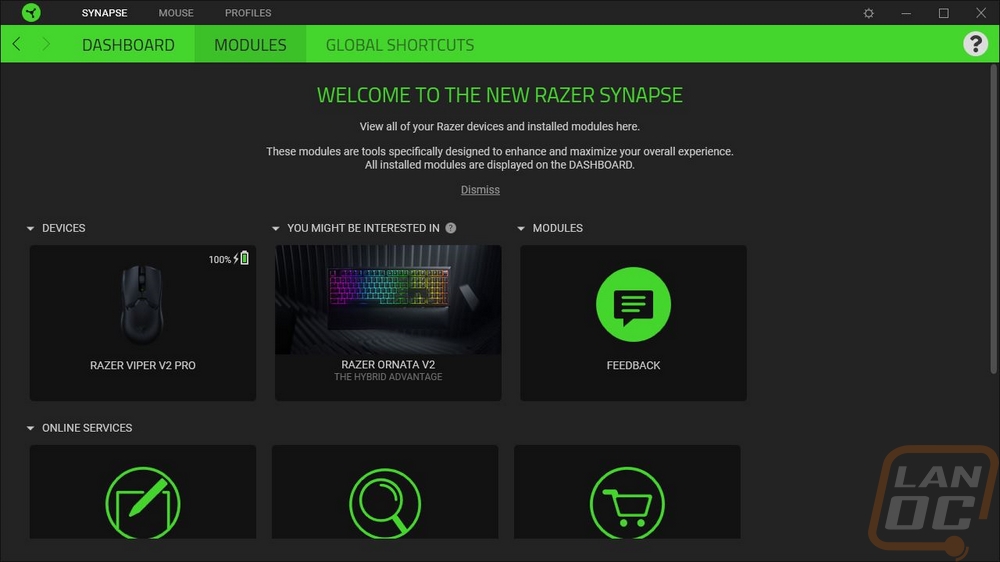
To start the performance testing out I wanted to check out the software side of things. Razer is still using their Synapse software which ties together all of their products so finding and downloading the software is easy. Once installed Synapse picked the Viper V2 Pro up right away and it will show it and any other Razer hardware you are running on the main page with a picture of the device.
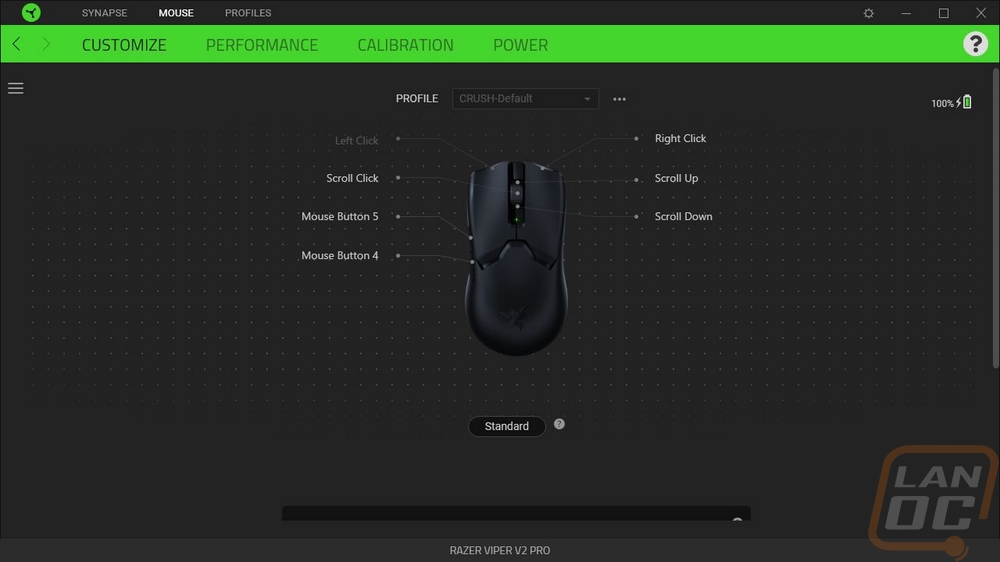
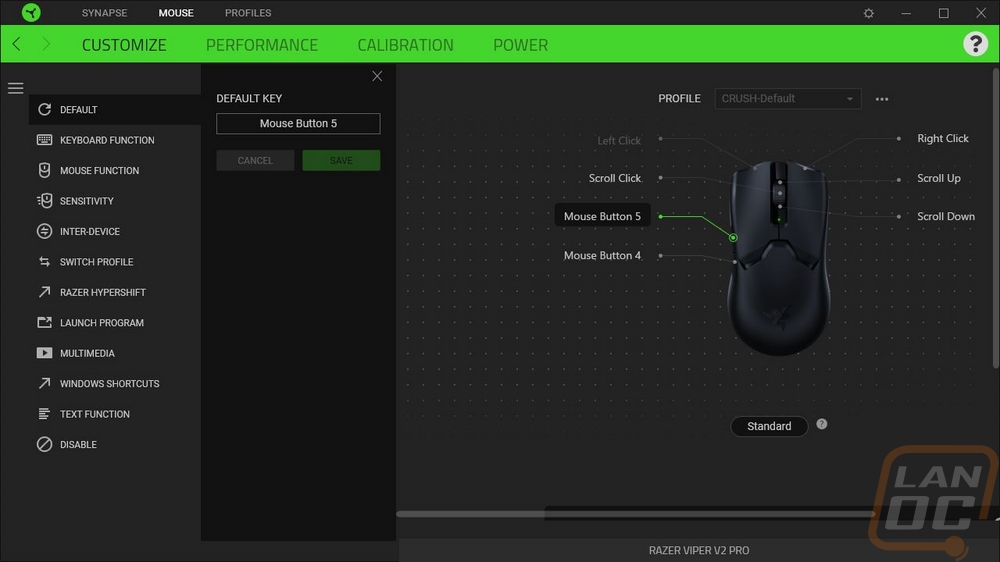
Once you click on the Viper V2 Pro you start off on the “Customize” page which has a picture of the mouse in the center with all of the buttons with lines drawn to them and it shows what each button does. You can click on any of the buttons and a menu will pop out from the left showing all of the options that you can program to it which include any keyboard key, mouse function, launching programs, shortcuts, text, and music or video files. You can also have any of them change your DPI settings or can function as the Hypershift button. Hypershift is similar to a function layer or your shift key on your keyboard, holding it will change all of the buttons to a second layer of functions which is a great way to double up on the number of button functions if you need them.
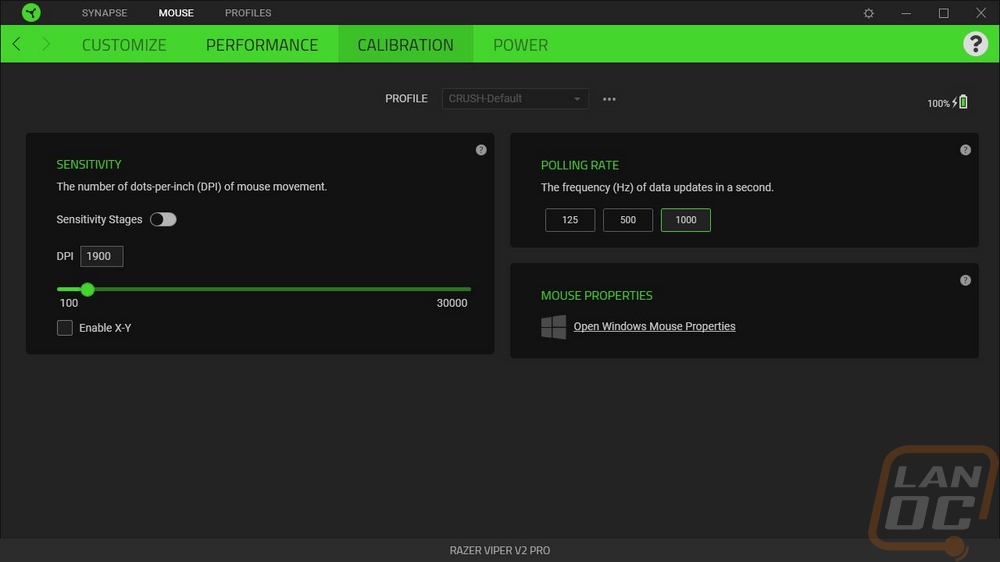
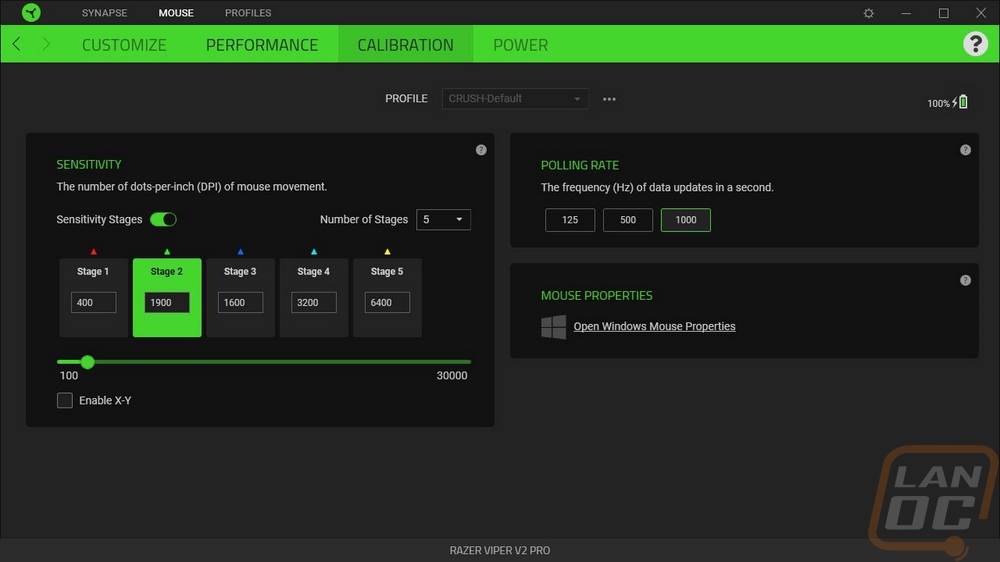
The next tab is the performance section. This is where you can get into your DPI settings which by default allow you to program 5 different DPIs to flip through using the button on the bottom of the Viper V2 Pro. Razer has also made it easier for people like me who just want one DPI with the option to turn the sensitivity stages completely off. You can pick between three different polling rates up to 1000 Hz. They also include a link to open up the windows mouse properties as well if you need to readjust the sensitivity setting in there as well.
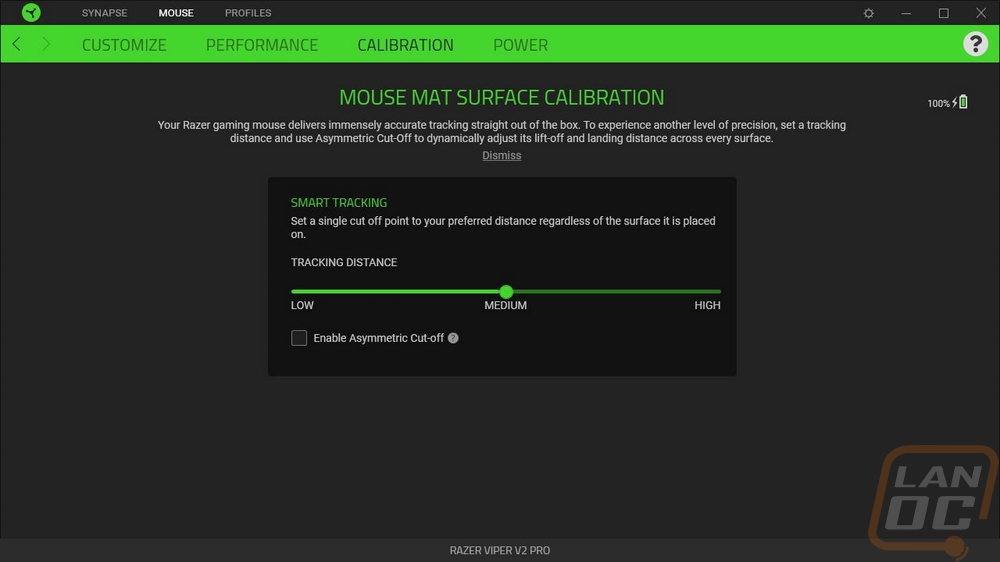
The Calibration tab is exactly that, just the option to calibrate to your mouse pad. Specifically, this adjusts liftoff distance which can change depending on the surface.
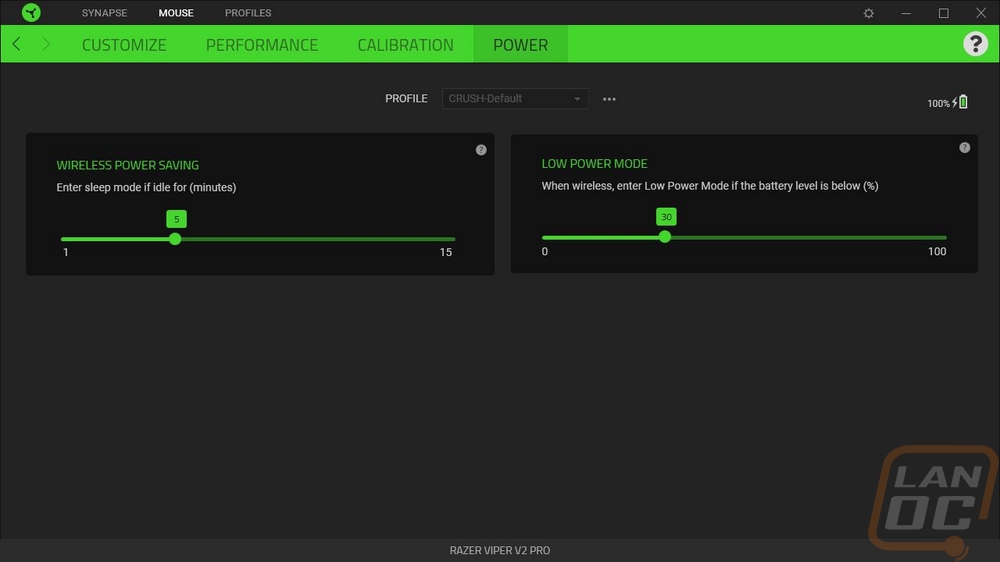
The Power tab is the last tab and this is specific to the Viper V2 Pro being a wireless mouse. You can adjust the idle time needed for sleep mode which by default is set to 5 minutes. The other option is the low power mode which is where you set the battery level to drop into low power mode. Low power mode lowers sensor tracking speed and acceleration to get you a little more battery life. Speaking of battery life, all of the Viper V2 Pro settings tabs do have the battery indicator up in the top right corner as well.
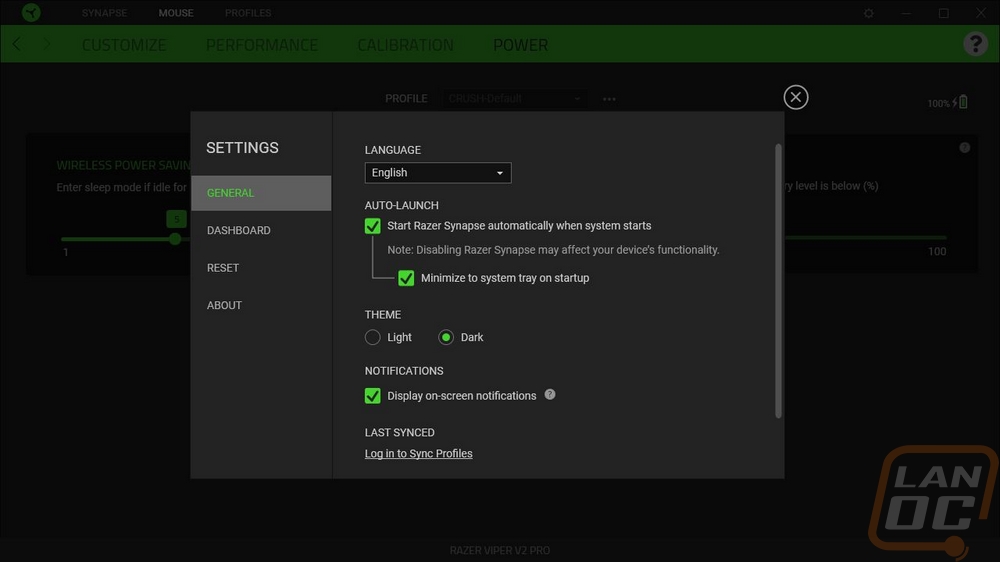
The Synapse settings page lets you select from light or dark modes which is nice. You can pick if you want the software to boot at startup and turn off on-screen notifications if you want.
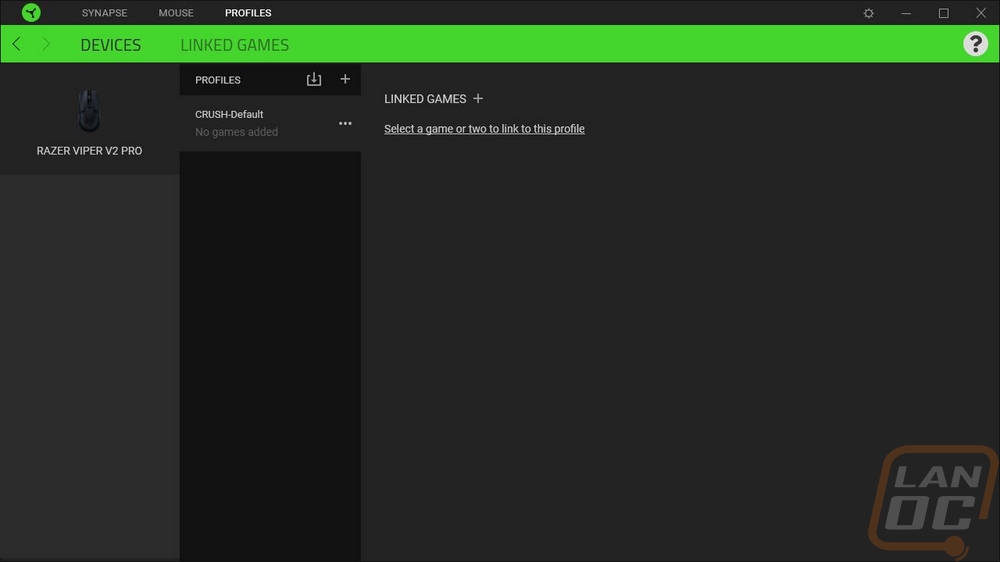
Synapse also has the option to link games and run different profiles depending on the game. This could be very useful if you like a different DPI depending on the game, specifically, sometimes you might want that for a shooting game compared to an RTS. It also helps if you have macros or anything game-specific setup for your keybinds as well.
For the rest of my testing, I have been using the Viper V2 Pro as my main mouse to get a feel for things and I’m coming from the Logitech Superlight which is the direct competition to the Viper V2 Pro. My initial impressions when switching between the two were three main areas. The shape of the Viper V2 Pro is very similar when it comes to my grip but you can tell that the Viper has a lower profile. The other big difference is in the texture of the two mice. Both have a plastic exterior finish without any other grips (without installing the included grips for the Viper) but the Logitech has a much smoother finish. My Superlight has going on a year and a half of use so where I hold it the finish is glossy, but even in the untouched areas the texture on the Superlight is minimal at best whereas the Viper V2 Pro has a heavy texture. The last huge noticeable difference was in the weight which surprised me. The Superlight isn’t a heavy mouse at 63 grams and the Viper V2 Pro is only 5 grams less so I was expecting them to feel similar. The extra texture along with the coke bottle shape on the sides of the Viper V2 Pro helped make it easy to grip and pick up when needed even without taking advantage of the included grips. I didn’t have any issues with the shape long-term and it didn’t take too long to adjust to the lower profile as well.
Part of the lightweight feel of the Viper V2 Pro is, of course, the PTFE glides which are fresh compared to the Logitech stock glides which are a little thin to start with and have a year of heavy use. The Viper’s glides do a good job of keeping the sensor at the needed height without any dragging and the liftoff distance of the Focus Pro 30K Optical Sensor was right on point with the Logitech even without calibration. The 30k DPI for the new PAW3950-based sensor wasn’t needed at all but so far in my use, the tracking has been perfect and without any flaws, angle snapping, or other issues.
The quick refresh rate and the 750 IPS help with quick reactions as does the HyperSpeed wireless which runs at 2.4 GHz and has no latency or issues. I do run using the charging cable and the dongle up on my desk because in my experience this eliminates the possibility of interference issues. Not to mention it keeps the charging cable up close to where you will need it. The only wireless downside for me personally compared to the Superlight is that wireless charging isn’t a possibility and frankly as much as I love wireless devices I am the worst at remembering to charge them. Thankfully you can use the Viper V2 pro when it is charging and the extra soft charging cable came in handy with that. I didn’t feel a difference between it and wireless. Razer has this model rated at 80 hours of continuous use when running at 1000 Hz which means you won’t need to charge it very often at least. In my testing so far I had to charge it part of the way in because it only came half charged and I’m still running on that charge right now two weeks in but it will depend very much on how much you are using the mouse and you can save battery power by running at a lower frequency as well.
The side buttons in my testing were right where I needed them while also doing a good job of not being right where I would grip and pick the mouse up so I haven’t had any miss clicks so far. The triggers are solid as well and because I have been comparing things between the Viper V2 Pro and the G Pro Superlight, the triggers and the side buttons both have very distinct sounds and feel compared to the Logitech. The triggers on the Viper are louder with an even more defined click and the sound is a touch higher pitched. Funny enough for the side buttons the Viper's side buttons have a deeper sound than the Superlights which have a more traditional mouse button click for its side buttons. The scroll wheel button on the Viper is just like the side buttons as well and the scroll action for the wheel is good but does have a tiny bit of rattle when you scroll it quickly. The rubber grip on the wheel with the dots grips well even with my greasy hands.
Overall and Final Verdict
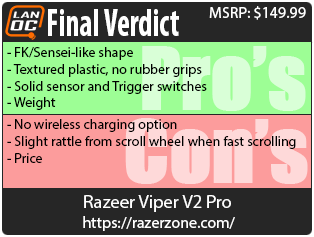
The reintroduction of the Viper lineup was a big move for Razer, especially with them going back to their roots and focusing on the enthusiast communities with their interest in simpler lightweight mice. From there they have been making smaller changes and continuing to innovate as they go and the Viper V2 Pro is the columniation of that. Making a lightweight wireless mouse itself is hard, especially when you aren’t just putting holes all over the design. There is a reason you only see a few companies going in that direction. Even the original Viper and the original G Pro Wireless were impressive at the time, batteries are heavy. But like with a race car, the Viper V2 Pro has had small changes that add up where it is now just 58 grams. Frankly, I don’t know how much more they can even do without big sacrifices. But the lightweight and the symmetrical shape is similar in some ways to the Sensei and the FK which has been a popular shape over the years.
Razer has dropped the grips on the side of the Viper and instead given an optional full grip tape set with the V2 Pro. The rubber and coating-less design also should hold up better long term, preinstalled rubber grips sometimes break down and get sticky or greasy. I’m also digging the texture that they gave the finish which helps a little with grip even without any additional grips. To go with all of that the new sensor performs well and I like the loud/solid click that the two optical trigger switches give. Being wireless battery life is always a concern but as it sits the V2 Pro is rated to reach around 80 hours of constant use and more importantly the charging cable has the same soft sleeving and flexible cable that you would expect from a wired mouse so even when charging you get a near wireless experience. The charging design uses a standard Type-C connection and most Type-C cables should work so using your phone charging cable can get the job done in a pinch as well but if I were using the mouse while charging I would stick with the included cable. Razers software was easy to use, didn’t require me to log in, and covered everything you might need to adjust. Frankly, without any lighting on the Viper V2 Pro, I don’t know how often you would even need to make changes after your initial setup. It might be a small bonus, but the Viper V2 Pro is available in a white model as well as the standard black which is nice. I would love to see even more options like the pink G Pro Wireless Superlight and the customization that SteelSeries is offering as well.
The number of complaints or areas that I would like to see improved are few and far between really. Because of the way I use my wireless devices and I always forget to charge them, I do wish the Viper V2 Pro had an easier charging option like the charging stand of the Viper Ultimate, or even better would be a wireless charging option like the Superlight has. I also did experience a tiny bit of rattle from the scroll wheel when I was fast scrolling, but not enough to be a big concern. Beyond that my only other issue was with the price but that one is complicated. The Viper V2 Pro has an MSRP of $149.99 and that is right in line with the competition with the Logitech Superlight though with that being out longer you can now find the black and white models in the $132/$136 range. My issue is broader and it was something I brought up with the Superlight as well. While it is lighter weight, it does get harder to justify that high of a price for any mouse, especially when you are losing features as well. Losing them did help with the weight, which is what makes it such a complicated issue. But In the end, I really like the Viper V2 Pro and would recommend it. But if price was a concern at all you can still save $30 by going with the 74-gram Viper Ultimate with its charging stand and buttons on both sides or a renewed version without the stand for $57.99. Or you can go with a wired Viper for $49.87 new or $35.98 renewed. The point is, the Viper is great and for some of those prices how could you not give it a try really!

Live Pricing: HERE


