Photos and Features
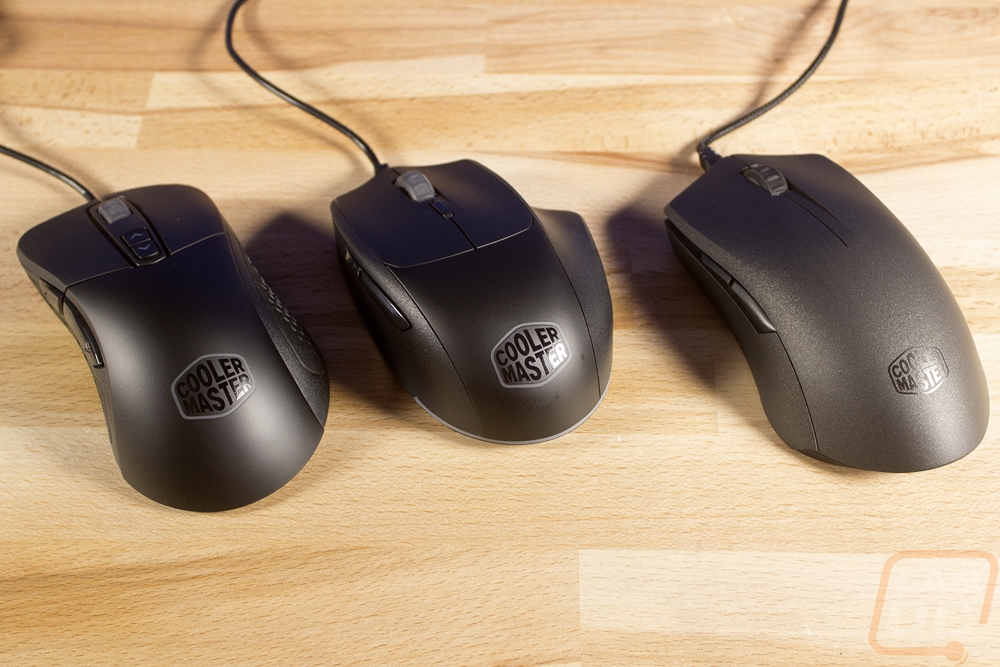
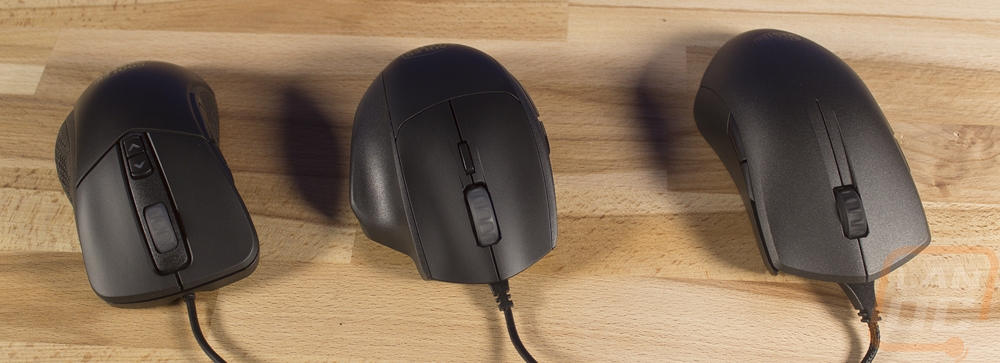
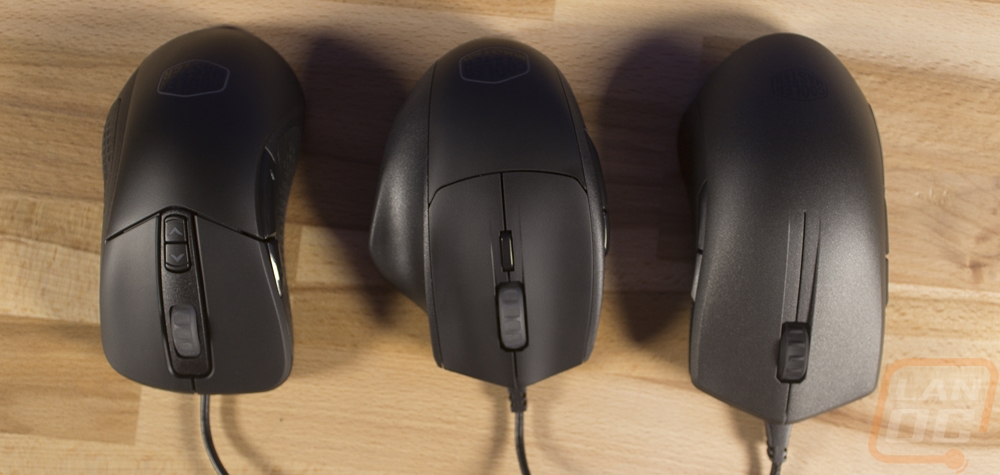
So with all three mice out and together, we can see a few things going on immediately. For starters, the whole dark gray and the lighter gray thing is going on here again. The MM520 and MM530 are both black where the Pro L has a gray finish. The Cooler Master logos on the new mice are also larger as well as are partially backlit. Most importantly though is with all three together we get a much better idea of their shapes. The MM520 is a continuation of the now very old Cooler Master Spawn mouse as well as the Xornet. The MM530 is a refreshed Cooler Master Alcor. Then the Pro L is the only one of the three that isn’t a refreshed version of an old Cooler Master design, instead it is actually a mix between the Deathadder and the Sensei but I will get into that more when we look at the design closer.
MM520
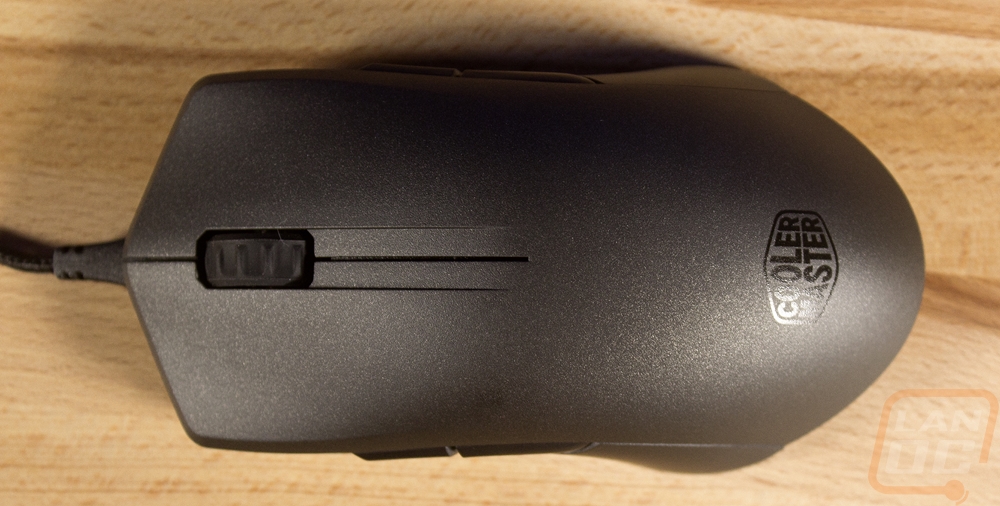
So the MM520 is the shortest of the three mice and it is also the most ergonomic of the three. This is because of the wing coming off the right side that supports your ring finger completely. With this top down view, we can get a really good look at the new plastic finish. The top of the mouse is slightly smoother and the right wing and the rest of the mouse has a little more of a coarse texture.
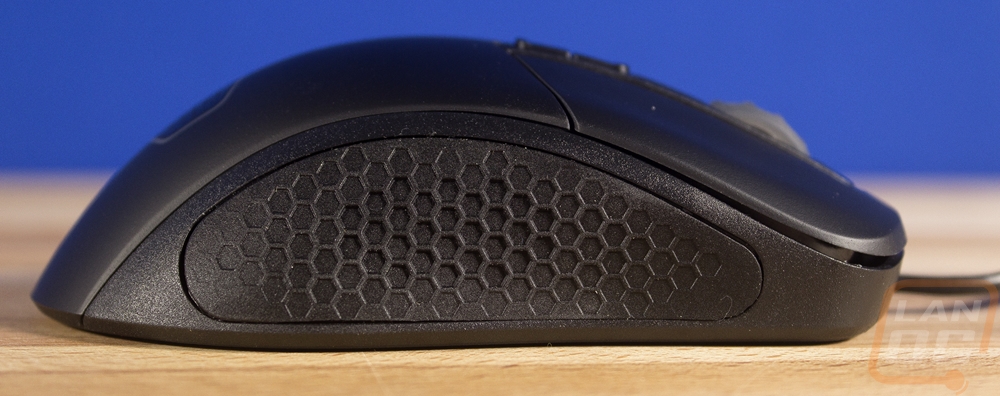
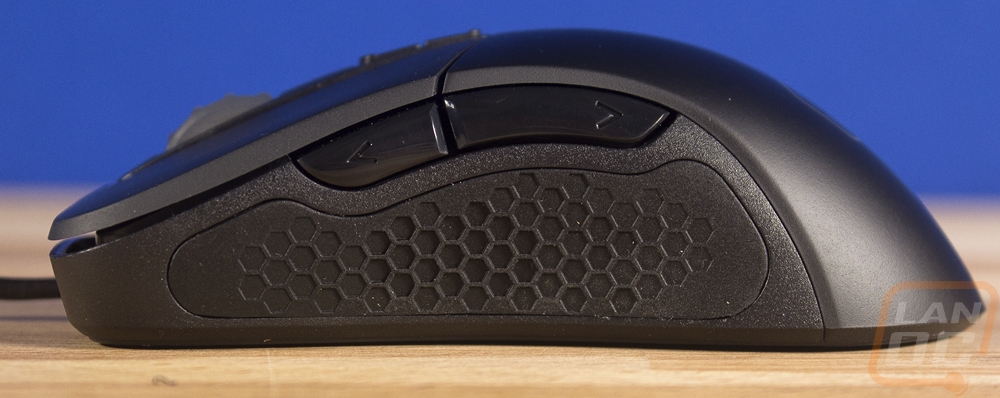
The left and right sides of the MM520 are completely different. So on the left side, you have a plastic finish with a deep scoop up under the two relatively large side buttons. On the right side the ring finger wing takes up most of the space and then there is a very small rubber grip for your ring finger. The grip has a honeycomb design that gets deeper as you get closer to the middle of the grip.
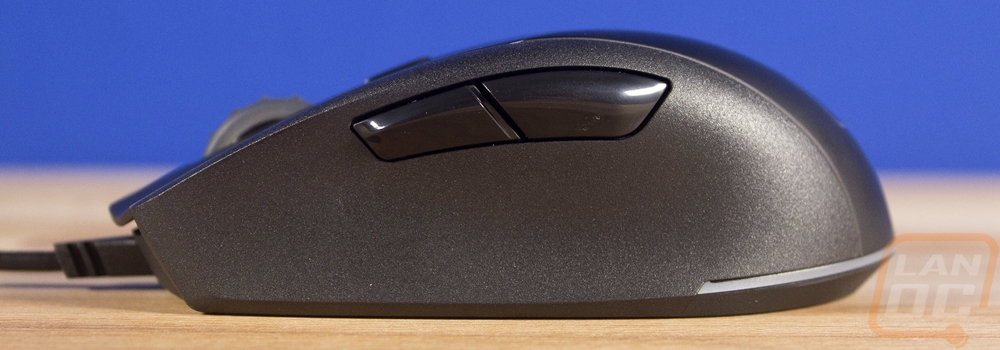
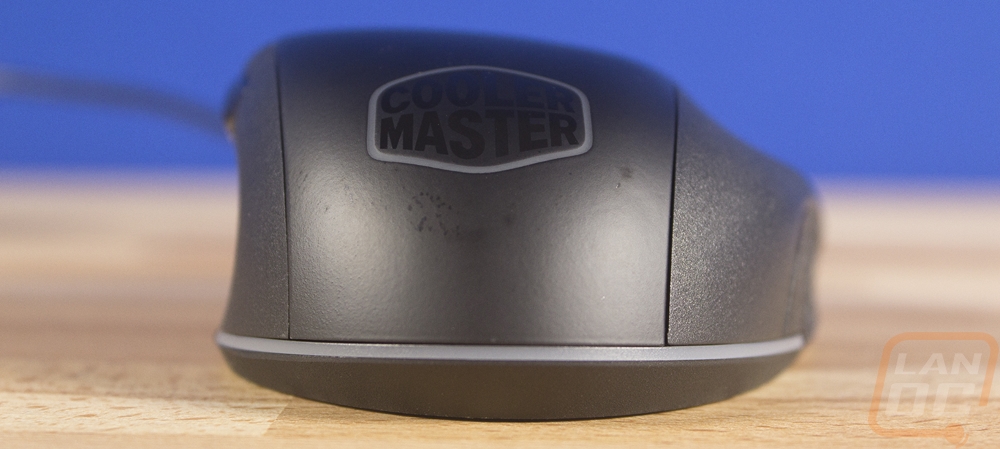
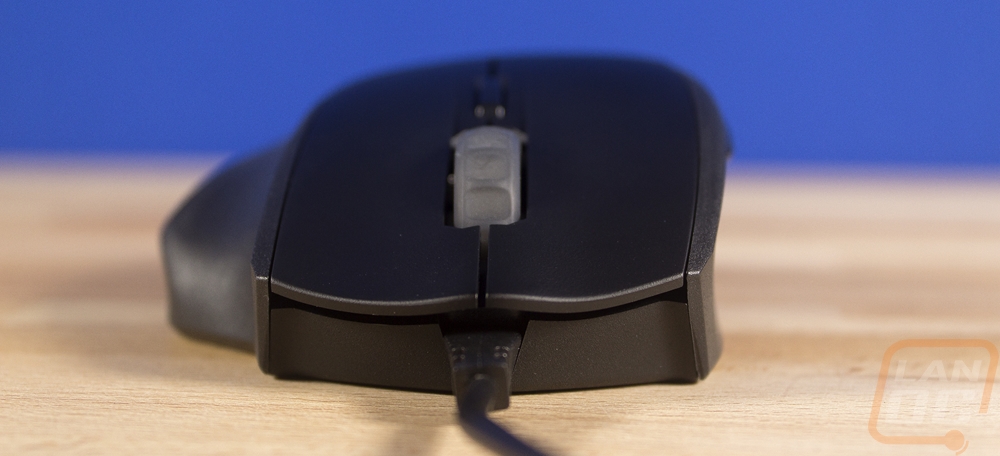
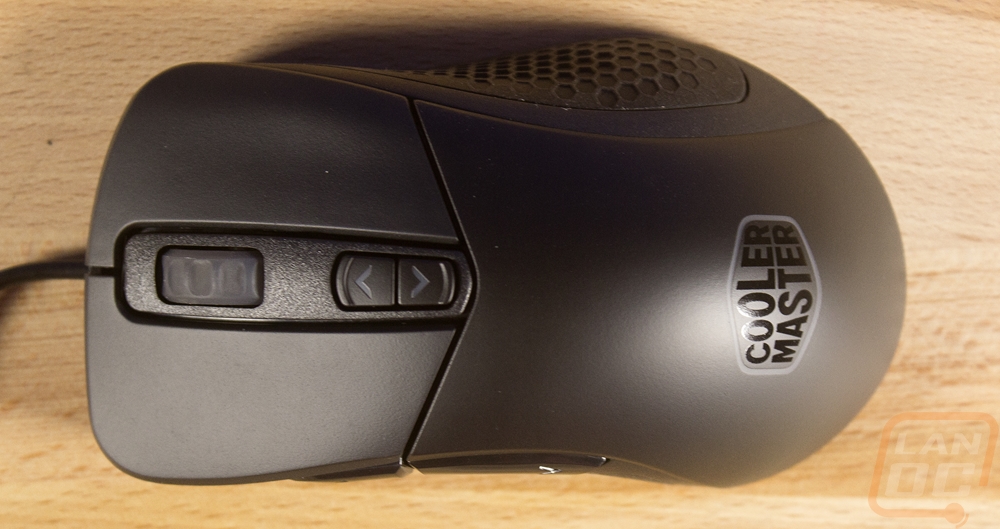
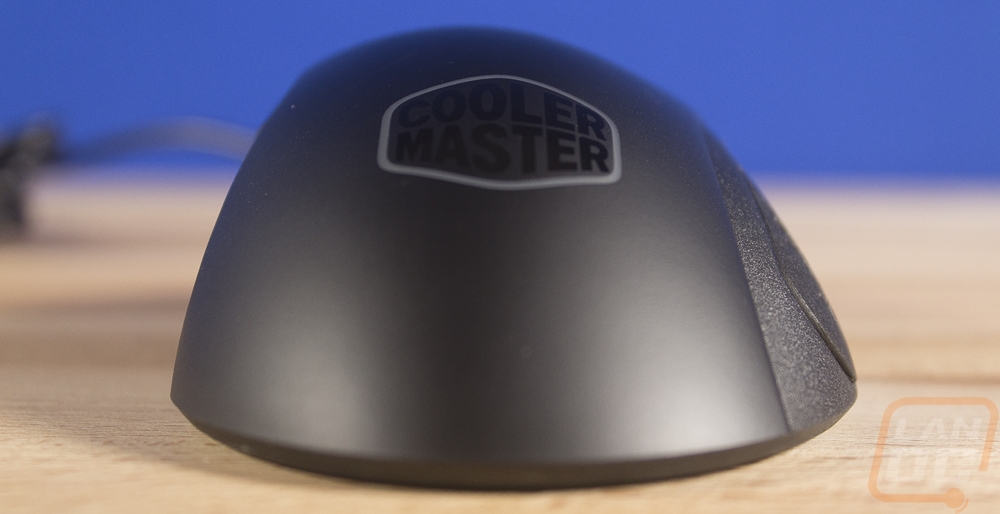
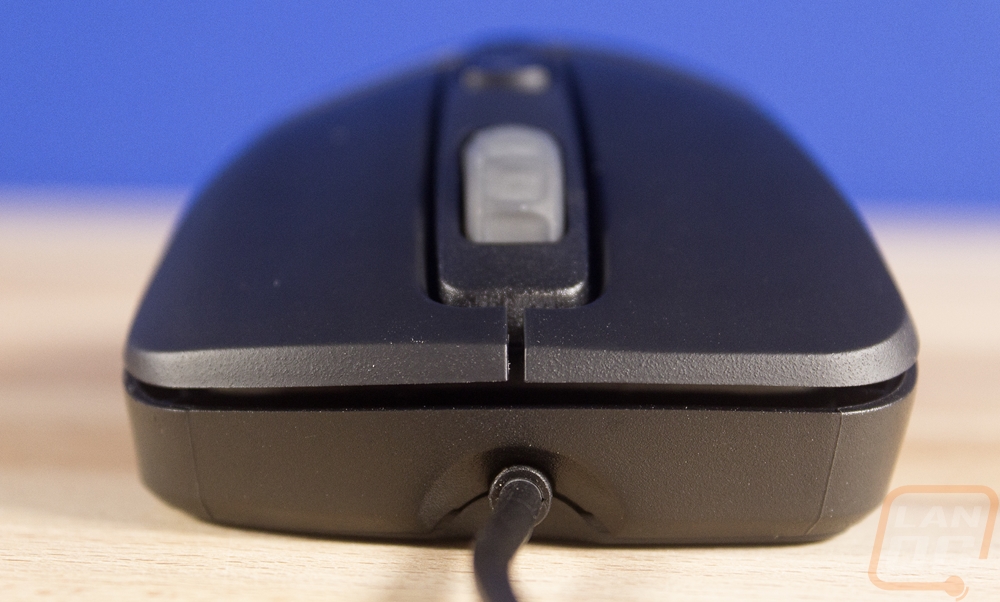
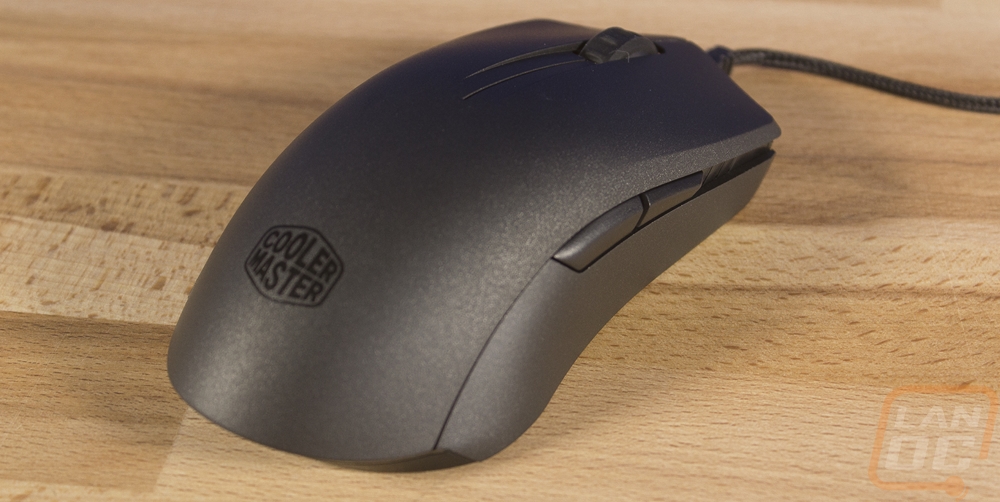
The view from the back helps show just how deep that left side dip is and how the left side buttons stick out over top of the dip. The right side does also have a very small dip on the pinky rubber grip to help when picking the mouse up as well. Beyond that we can see the new Cooler Master logo better, I’m not sure what I think of the backlit ring with the branding painted on. There is also an LED ring around the bottom of the back of the mouse as well. From the front, you can see how the short length of the mouse has the triggers as a steep angle going down towards the front. The triggers are both detached from the top of the shell and Cooler Master did go with Omron switches, though they went with the 20 million rated models, not the 50 million. The scroll wheel is semi transparent and had large scoops out of it for the grips then right behind it is a small DPI adjustment button.
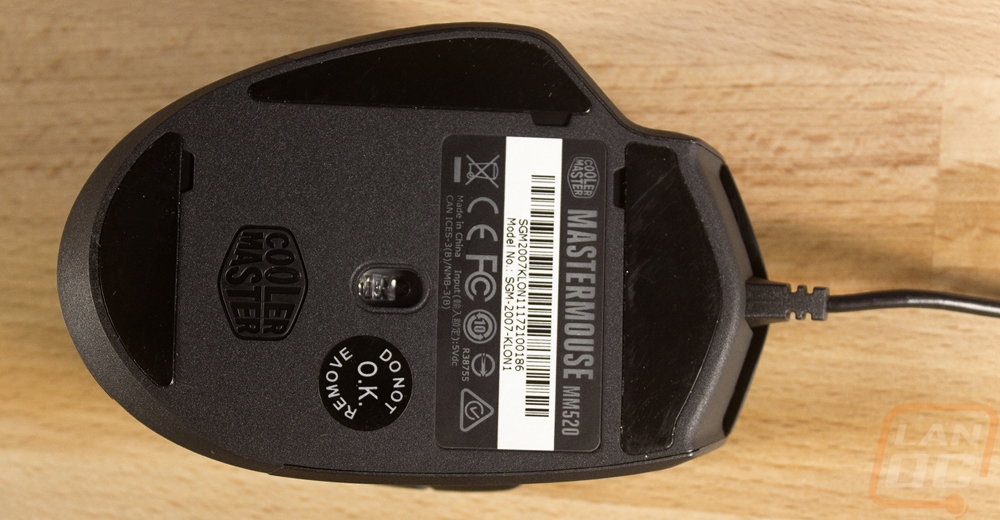
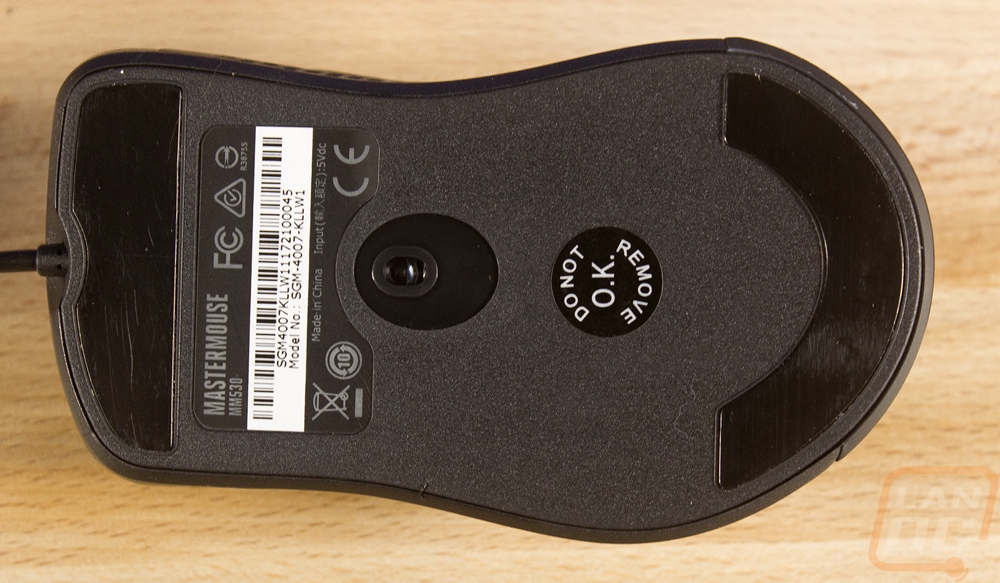
The bottom view of the MM520 helps show how short and wide its design is. Cooler Master went with large gliders on both ends as well as a third under the ring finger wing to handle that added pressure that the extra finger puts on the mouse. Each of the gliders is removable with a small spot on each to get a tool under them. Then most of the bottom of the MM520 has all of the certifications, branding, and a barcode with your serial number on it. The sensor is mounted mostly in the center if not a little to the side if you count the ring finger wing. They kept things simple and didn’t try to create their own special branded version of the 3360, opting to stick with the main version. The specifications do still list it as an Avago sensor even though it is now a Pixart product, but that doesn’t affect performance at all.
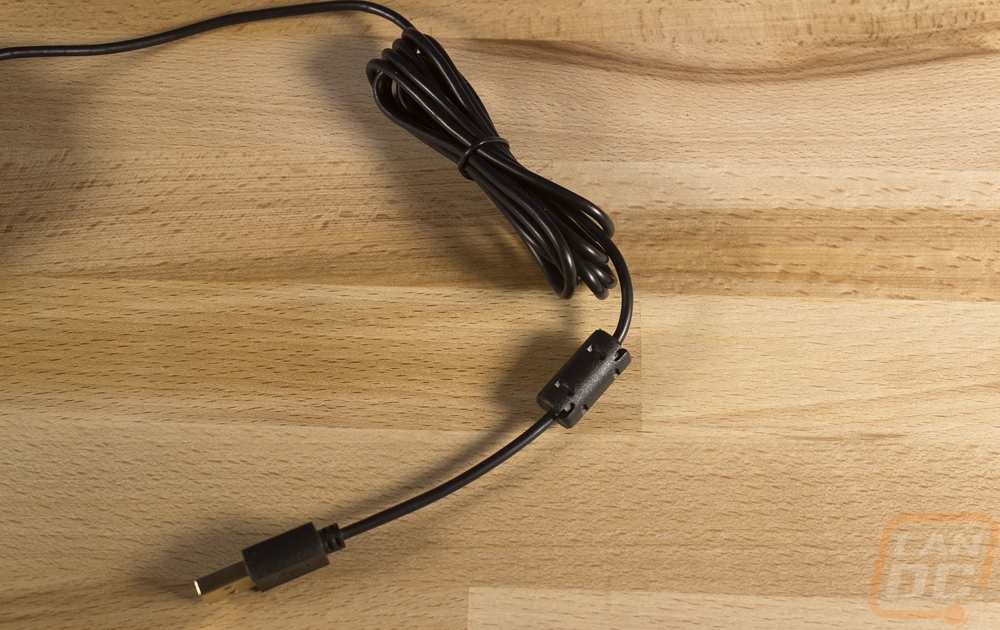
Then for the cord, they went with a standard 1.8-meter cord, the specifications sent to me said it was a braided cord but it is clearly a rubber lined cord. It is relatively flexible but not as flexible as the Sensei 310 that I recently reviewed. This is the same cord as on the MM530 as well.
MM530
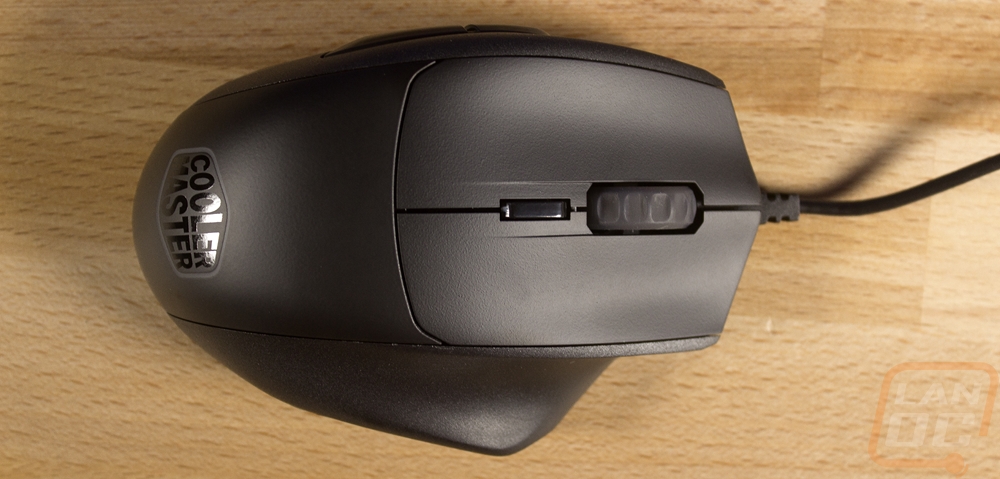
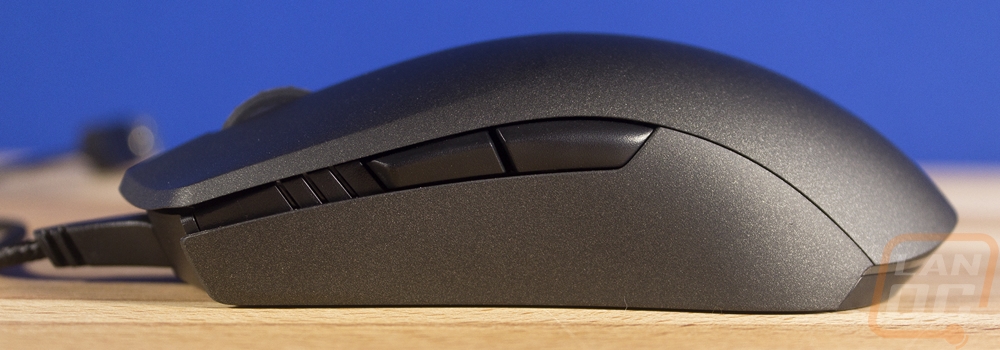
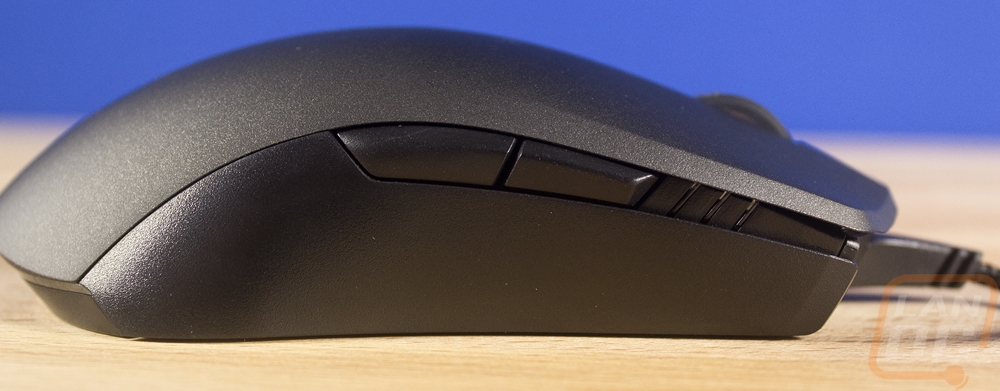
So the MM530 is completely different than the MM520. Unlike the Sensei and Rival 310’s that we recently covered, Cooler Master didn’t really start with the same foundation on the MM520 and MM530. This is based on the Alcor from Cooler Master and it is a right handed only design like the MM520 so left handed folks and people looking for an ambidextrous mouse should keep on scrolling down. The design is actually a lot like the Rival and both take some inspiration from the ever popular Deathadder as well. From the top down the mouse has a very coke bottle like shape with the left side of the mouse curving in the middle and the right side having a little flare out but not nearly as much as the MM520. They dropped the single DPI button from the MM520 and went with up and down buttons back farther from the scroll wheel. Speaking of the scroll wheel is still semi transparent and has the large scoops out of it. The triggers are also split from the top of the case and they have the same Omron 20 million use switches in this mouse as well.
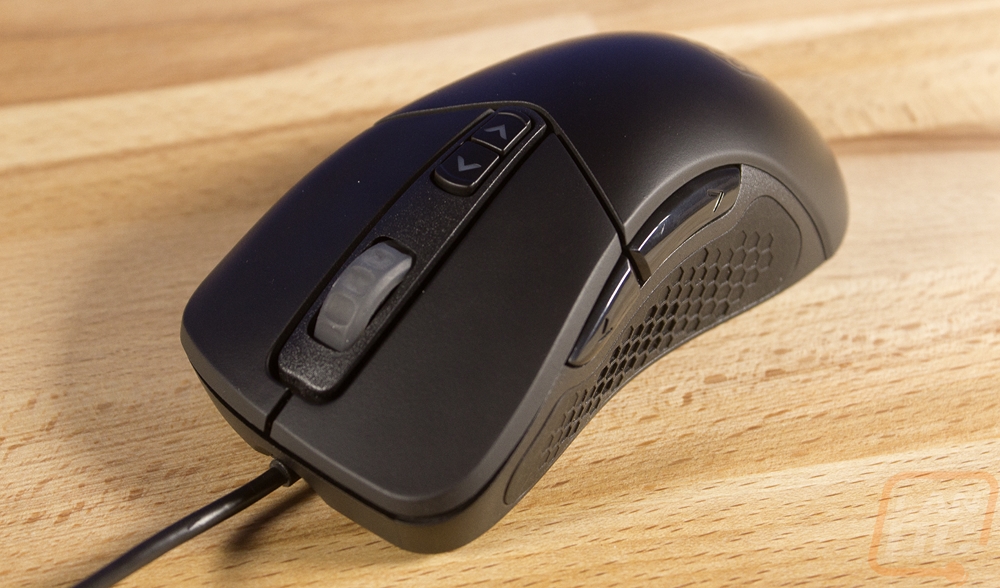
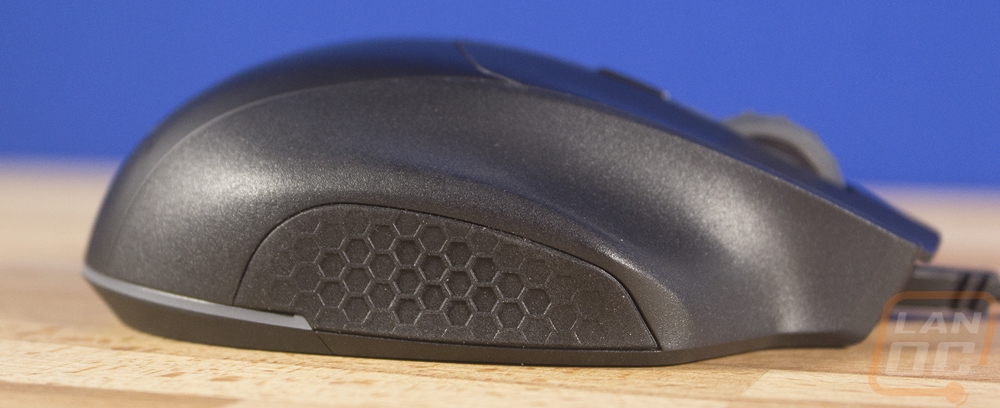
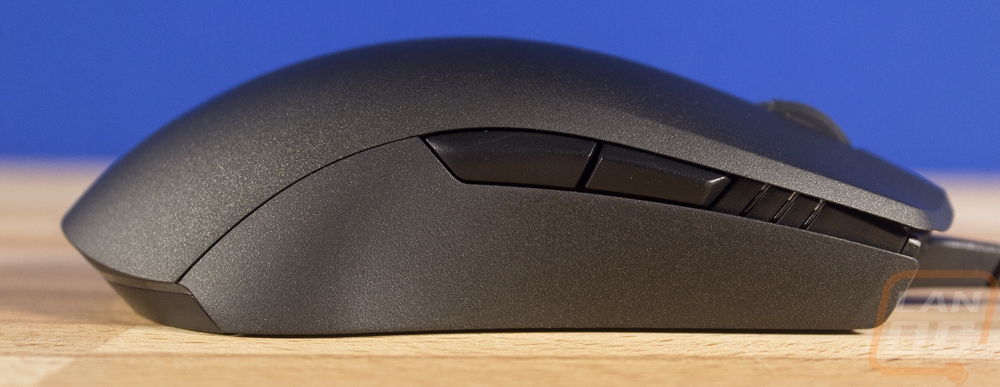
From the side profile, we can see the traditional shape with it peaking near the ball of your palm. The right side of the mouse has a large rubber grip that covers most of the side. It has the same honeycomb shape as the MM520 that gets deeper as you get closer to the middle. The left side also has the same rubber grip as well this time around along with its two thumb buttons. The buttons split at the same point as the top triggers and in my hand, the front button is where my thumb sits, I actually have to reach back to get to the back button. Normally I prefer my thumb to sit right on the split between the two.
From the back view, we can see that the overall shape leaned to the right a little more than the MM520 did. We once again have the Cooler Master logo with the backlit ring and the painted name but this time there is no additional lighting ring around the bottom. From the front, I was surprised that the triggers are actually almost level. Normal on a Deathadder style mouse the triggers have a little more lean that matches the overall lean of the mouse and the triggers will have a more cupped shape like the MM520 had. If you ignore the angle up on the top in the front point of view this could almost be a photo of the original Sensei.
The bottom of the MM530 is very different from the MM520. There are only two gliders this time around, with one on the front of the mouse and one at the back. The back has a U shape and wraps around to the side slightly. Surprisingly this one doesn’t have tabs to be able to remove the gliders later for replacement. I would have liked to of seen that. There is, of course, the sticker with the certifications and your serial number bar code. Then the sensor sits a little towards the front of the mouse but centered left to right. They again went with the 3360, a solid optical sensor so no complaints there.
MasterMouse Pro L
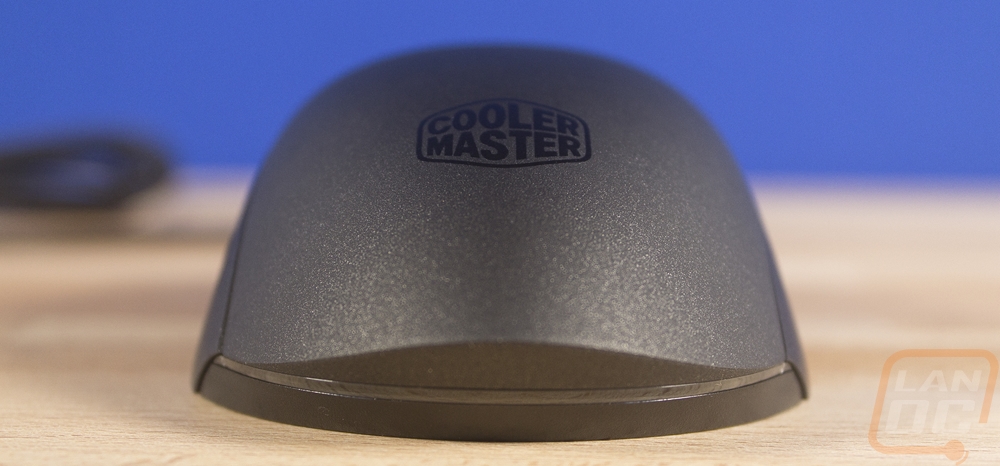
Okay the MasterMouse Pro L has actually been around for a little while, but like I said earlier I hadn’t gotten it in and I figured this was as good as time as any to check it out. Especially because it checked off a few features that I look for in my personal mouse. I like ambidextrous designs, love the 3360 optical sensor, and Omron switches. The shape looked good in photos but without it in hand, I wasn’t sure what to expect. Well keeping in mind that the Pro L is actually highly customizable with different side panels on both sides as well as the top, the first few pictures are going to be looking at the shipped shape, I will touch on the replacement panels towards the end to show how they differ.
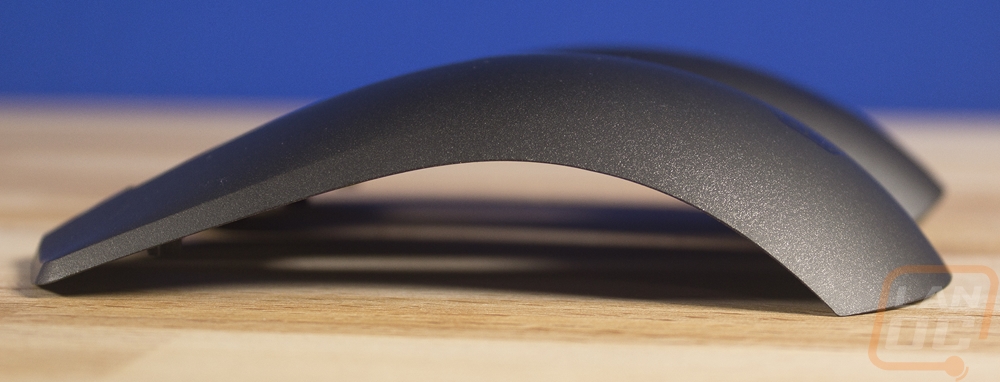
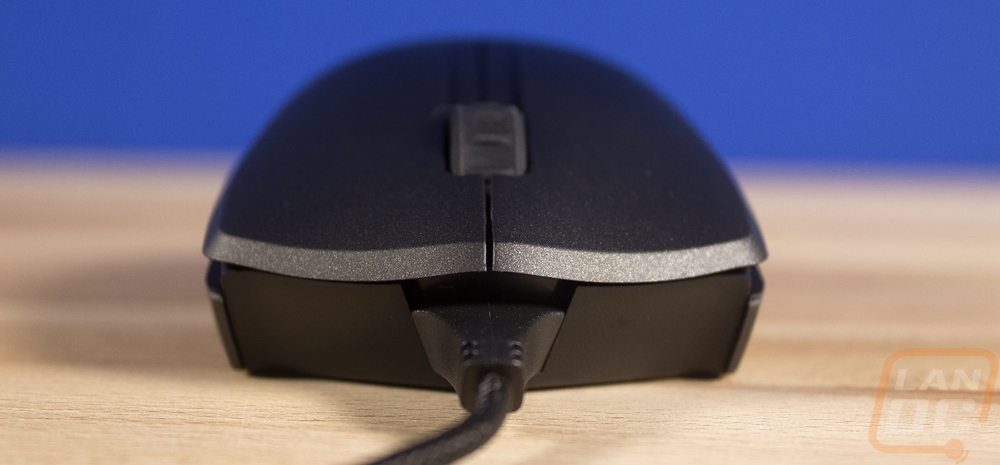
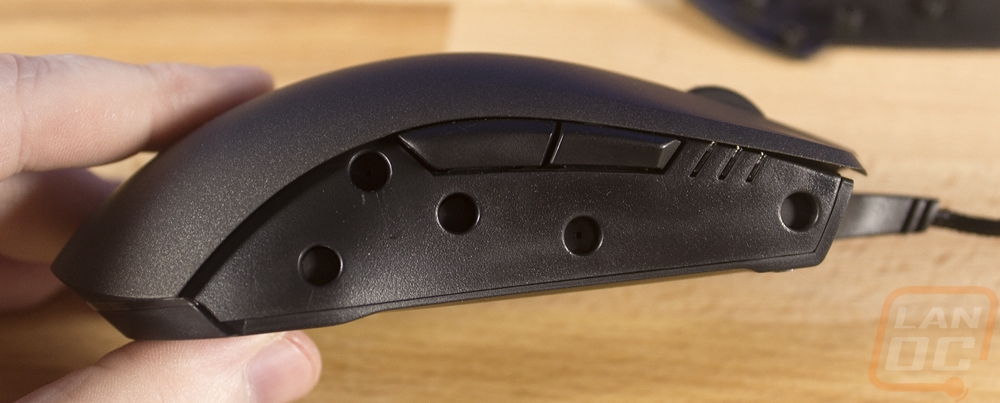
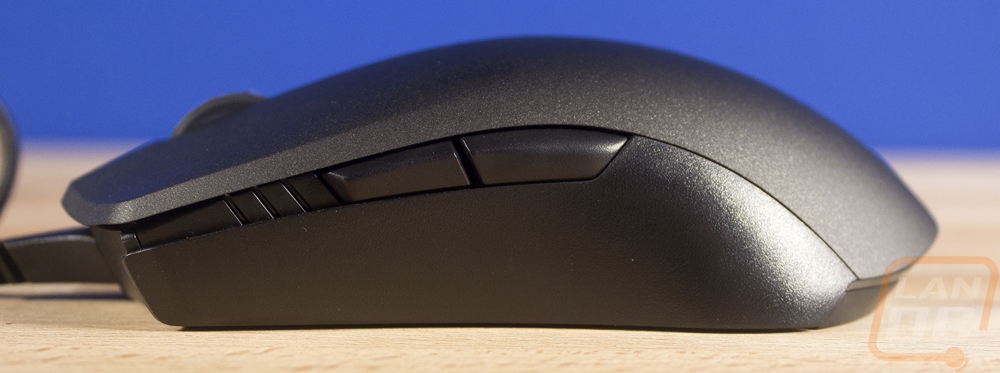
Anyhow the overall look of the Pro L is very dependent on the unique finish they have put on it. It is an all plastic design, so no rubber or silicon grips to mess things up but the finish here has more texture than I expected while still being a little slick to the touch. It is more like they put a finish that prevents fingerprints but I will have to see how it actually works in testing. The triggers are still attached to the top of the mouse (remember this is a little older) and they went with the same Omron 20 million count switches that the other two mice today have. This also has the same scooped scroll wheel design as well only this one isn’t semi transparent. The top down view shows us that both sides are exactly the same with a curved in shape going from the front to the back with hips towards the back sticking out just slightly.
Both side profile shots look the same because both sides do match. You have two well-placed side buttons on each side and both sides have a slight scooped shape to give a little traction when picking the mouse up, just how I like them. The sides are a lot like the Sensei/Xai design including the shape and location of the side buttons. The overall cover of the mouse peaks nearly at the middle as well where the Sensei peaks closer to your palm, I hope that doesn’t affect how it feels in hand too much.
From the rear point of view, you can see no lean to either side on the overall shape. The back does have an LED strip like the MM520 up under the palm but the Cooler Master logo doesn’t have the new weird ring of light around it. This is clean and just painted on. From the front, you can see that the triggers do have a little curve to them but other than that they do sit level. I think I would prefer the flat MM530 triggers here.
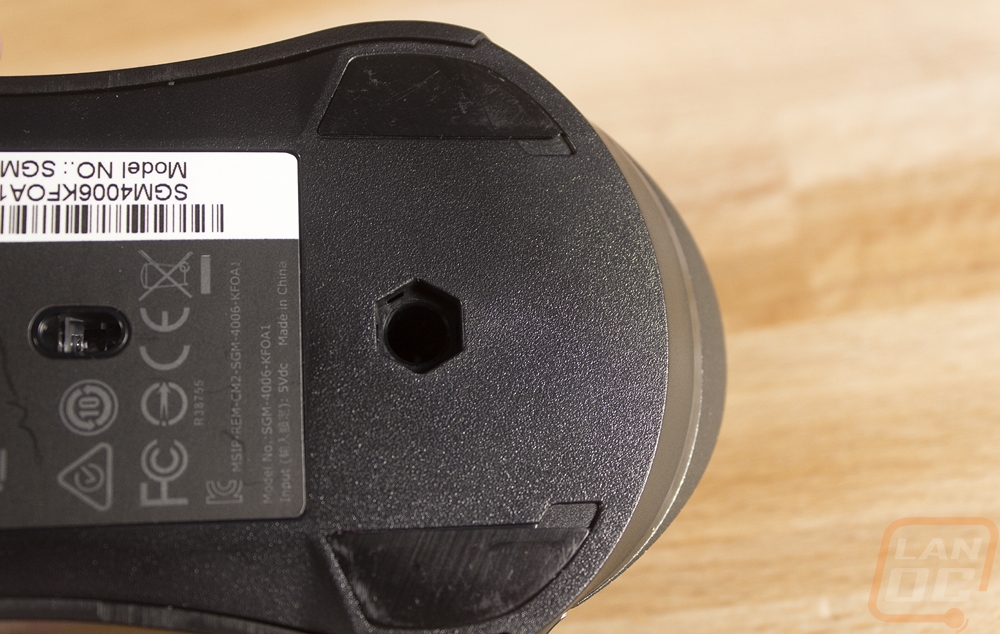
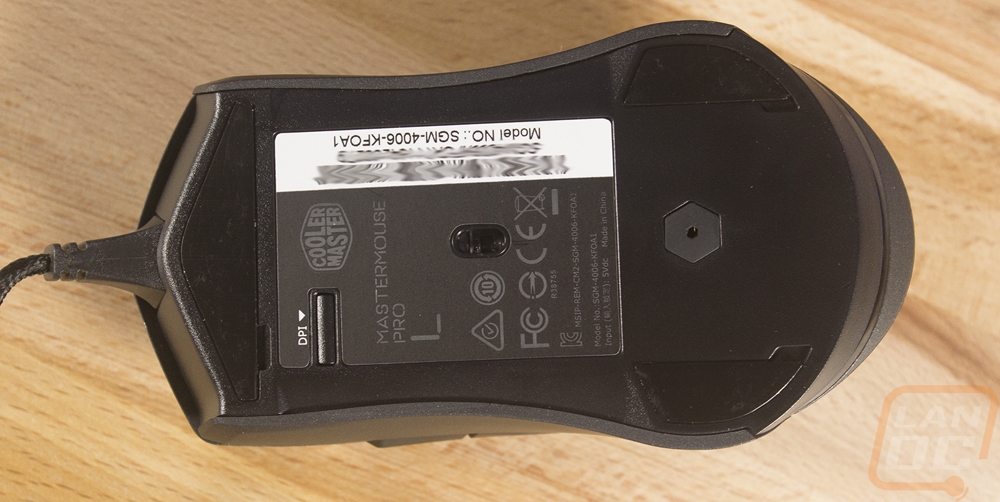
On the bottom of the mouse, the main sticker takes up almost the entire bottom of the mouse. There are three gliders with one wide one up front and two small gliders at the rear. They do have the tab to get up under them for replacement as well. I’m not a fan of having the DPI button all the way up under here. I mean it is less likely to be bumped, but you cant switch on the fly as well. As for the sensor, it is placed in the center both side to side and front to back. This is also a Pixart 3360 optical sensor like the others. This does show that the 3360 has been out for a while now, but it is a solid sensor with very few issues so I’m not going to complain about the age if it gets the job done.
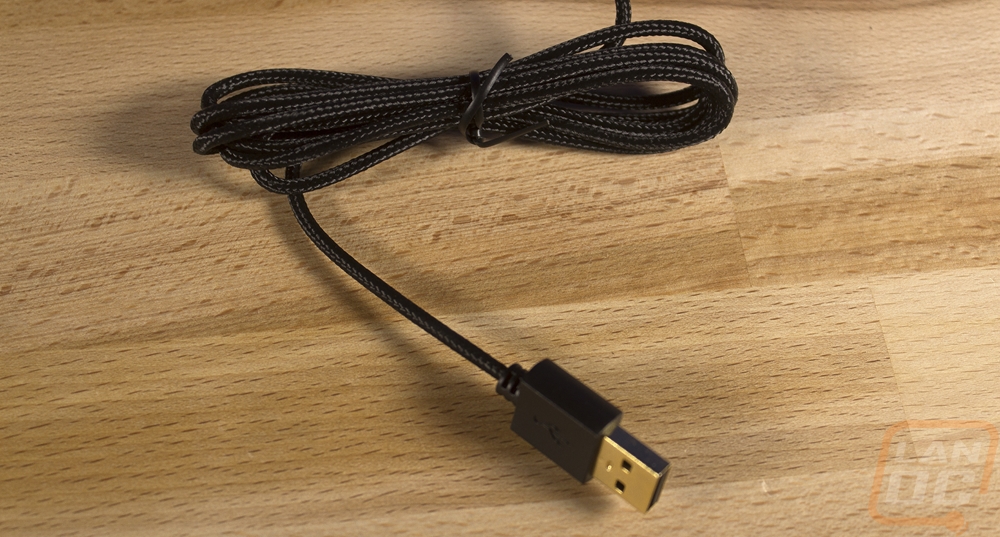
No, the Pro L has a braided cord rather than the rubber cord of the other two. Braided cords are liked by some and hated by others and right now the trend is to go with very flexible rubber cords, a refreshed version of the Pro L could use a new cord to avoid fraying and catching on your desk, but it looks great otherwise.
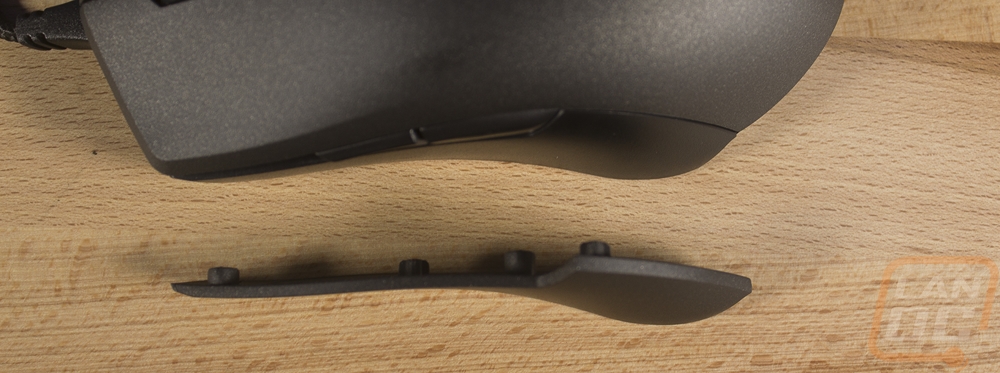
Okay here are the three replacement panels that you can use to customize the shape to best fit you. You get one for each side and a top panel as well. Enough to completely change the shape or you can pick and choose what works for you.
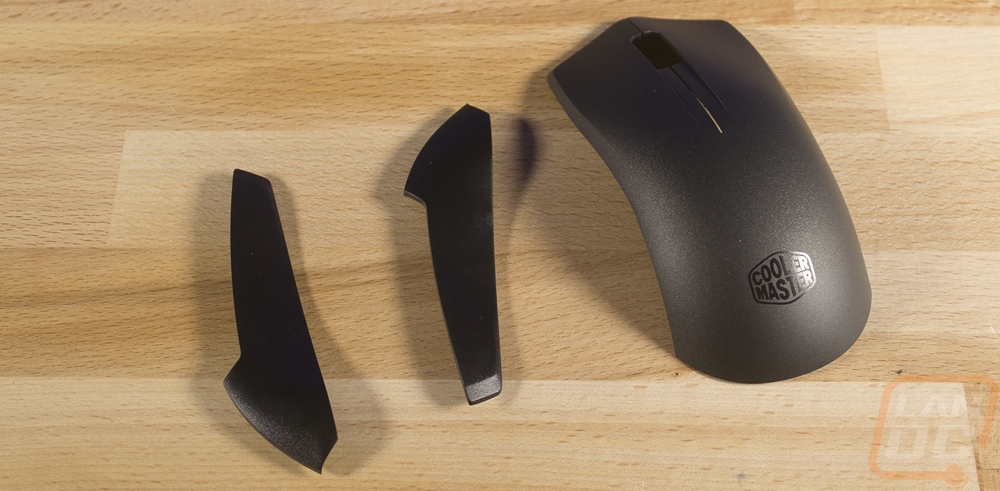
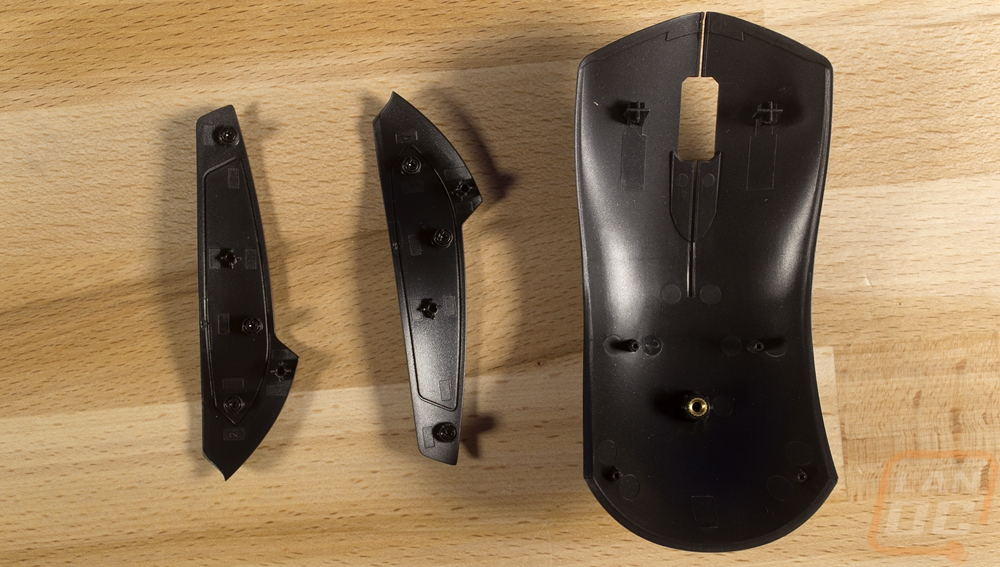
The two side panels are extremely easy to swap out. They are held in place with magnets so grab a side and it will come right off. They go on as easy as well. Both replacement side panels can be spotted because of their black finish that doesn’t match the gray of the rest of the Pro L. They basically take away from of that cupped in shape on the side of the mouse to make the mouse wider for larger hands.
Now replacing the top panel is a little more complicated. You have to flip the Pro L over and pull out the rubber plug to get at the one screw that holds the top on. Basically, the replacement is longer than the original. Swapping both it and the side panels out make the Pro L an even larger mouse. Personally, I preferred the stock panels though. I do wish they included a bag or something to keep the other panels so you don’t lose them.