Photos and Features
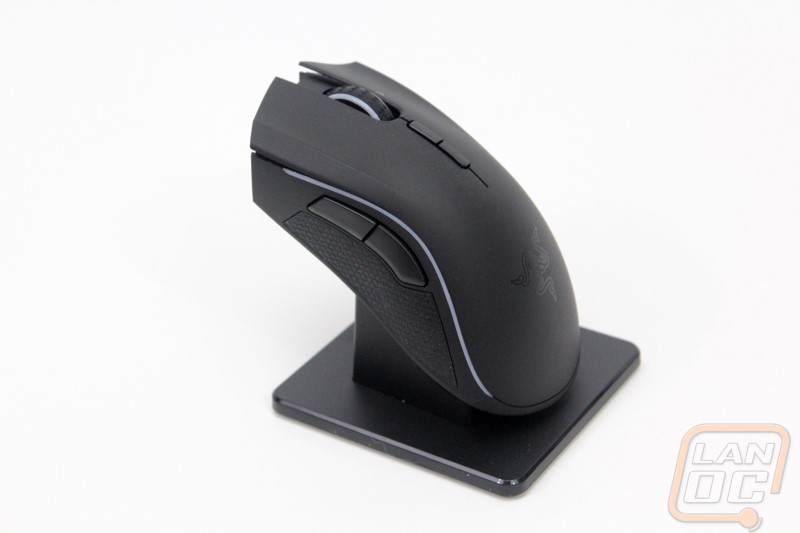
Like I said earlier the Mamba takes the shape of a Deathadder as its base then works from there. With the newly released Mamba that is no different. In fact, if you plug the cord into the Mamba and turn off the lighting it could be mistaken for the Deathadder. The classic Deathadder shape is that high swoop design that peaks near the middle. This makes the Mamba a great palm grip mouse because it pushes up into your palm by default. The all blacked out finish matches the standard Razer styling but when I first got my hands on the Mamba the first thing I noticed was the new rougher finish they went with. Seeing that I have in the past used the rubberized Deathadders as well as fully painted Deathadders as well I have seen just about every finish from grippy to glossy but this has to be the best yet. It feels very durable, similar to the auto paint like finish on the Transformers Deathadder but gives you grip similar to a more rubberized finish.
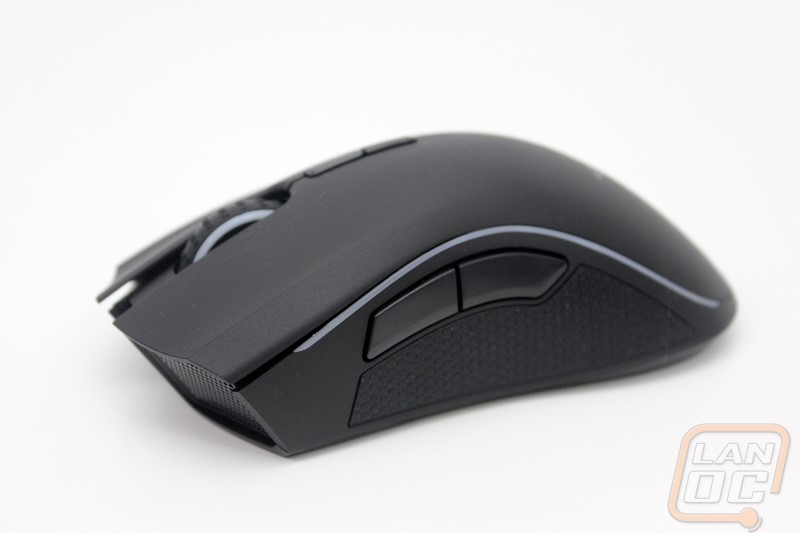

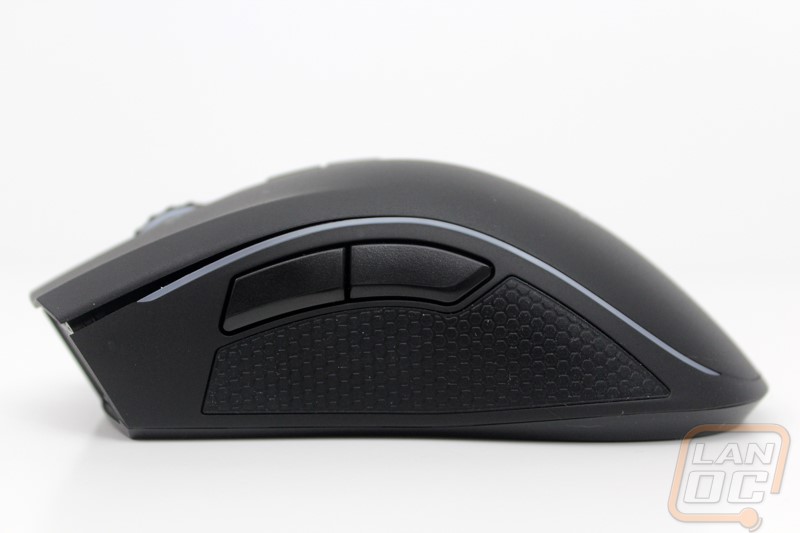
From the side profile you can really see how defined the shape of the Mamba is. Beyond that though there are a few big things on the left side. For starters there are two large thumb buttons. This is mouse button 4 and 5. I typically don’t use a lot of side buttons on my mice but I do always bind my TeamSpeak push to talk to one and when playing FPS games I use the other for my melee attack. In other words, having two side buttons is perfect for me, not too much and not too few. What I was a little concerned with when I first saw it though was the rubber grip under the side buttons. Frankly with nearly every mouse I test that has rubber on the sides the rubber feels out of place or it becomes greasy later on while in use. Surprisingly the Mamba didn’t have any of those issues. In fact, I didn’t even notice that that area was rubber until part of the way into my testing. The last thing going on here on the side is the thin white line between the side and the top, this is for Razers Chroma lighting that can be controlled by the software.
From the back profile we can get a much better idea of the rest of the Mamba’s shape. We know the side profile starts low on the back, peaks high in the middle then drops down to the triggers at almost an inch above the mouse pad. But it isn’t until we see this view that we can see just how different the left and right sides of the Mamba are for shape. The left side is favored and peaks MUCH higher than the right side. This lets your pinky and ring fingers to lay comfortably on the right side of the mouse.
On the right side of the mouse we can see just how much lower the side profile is with just a thin rubberized area. Up in the triggers though there is a bit of a grove to help your hand fall into place. Beyond that there aren’t any special buttons here, just the second half of the Chroma lighting.
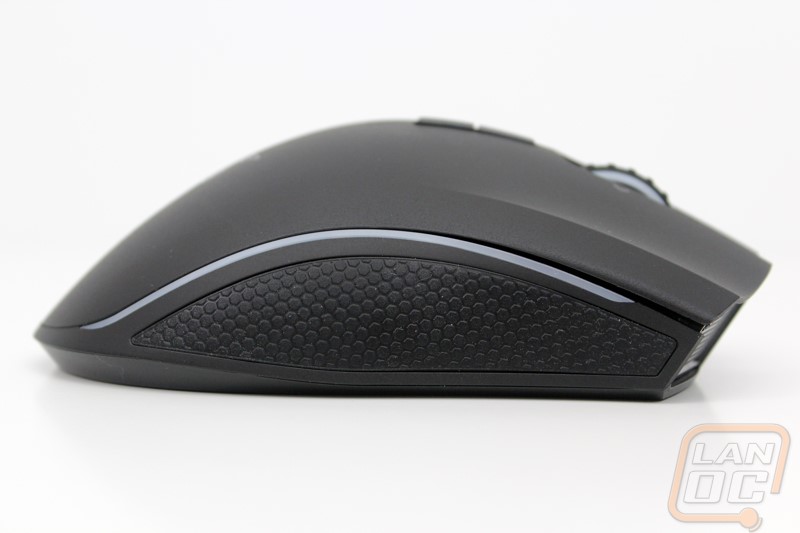
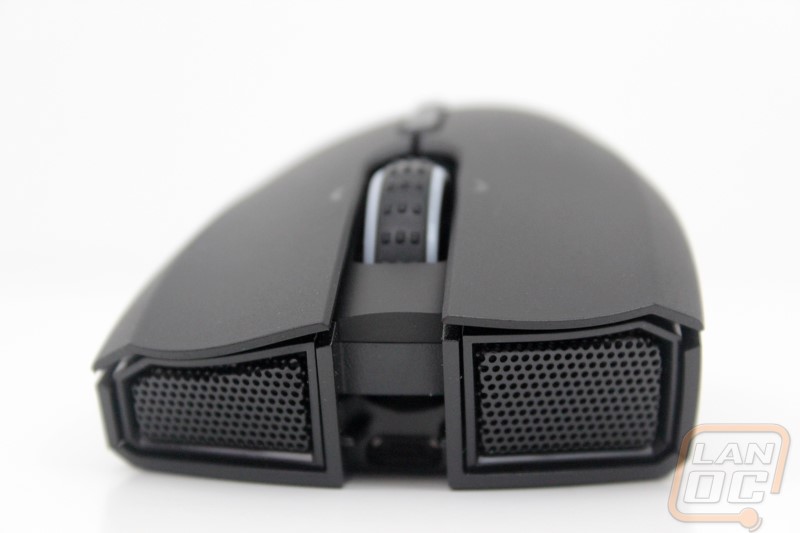
The front of the Mamba gives a peak at the mesh grills that are under each trigger. This reminds me a lot of some of the older Cooler Master mice where they would put lighting behind similar grills. We can also see that each trigger has a convex shape to help your fingers stay in place.
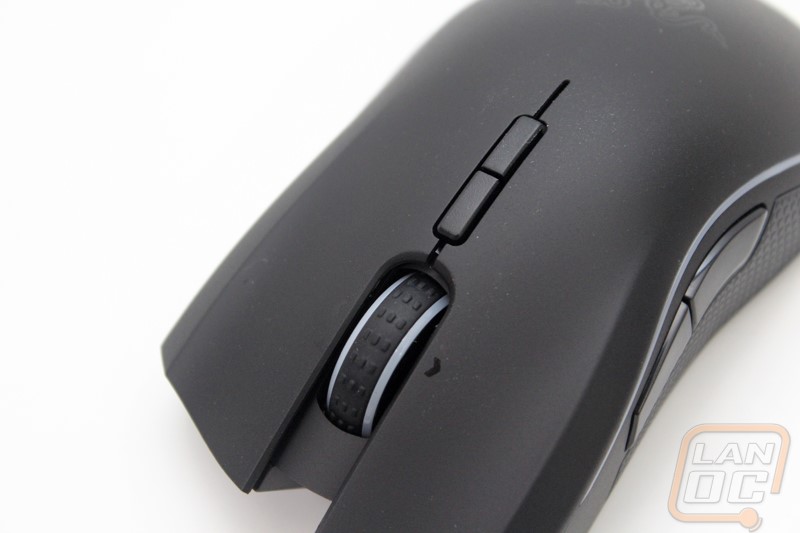
Up top in between the two triggers we have a plastic scroll wheel with a rubber grip with tiny nubs on it. Beyond scrolling the wheel also double as a few buttons. Not only can you push it in but it also has left and right clicks, something I have wanted to see on a Razer mouse for years. In addition to all of those programmable functions you also have the two buttons directly behind the scroll wheel as well. By default, these flip through DPI settings but they can be reprograms if needed. They are perfect for DPI settings though as they are back far enough out of the way to never get bumped in the heat of the moment but still close enough to get to quickly.
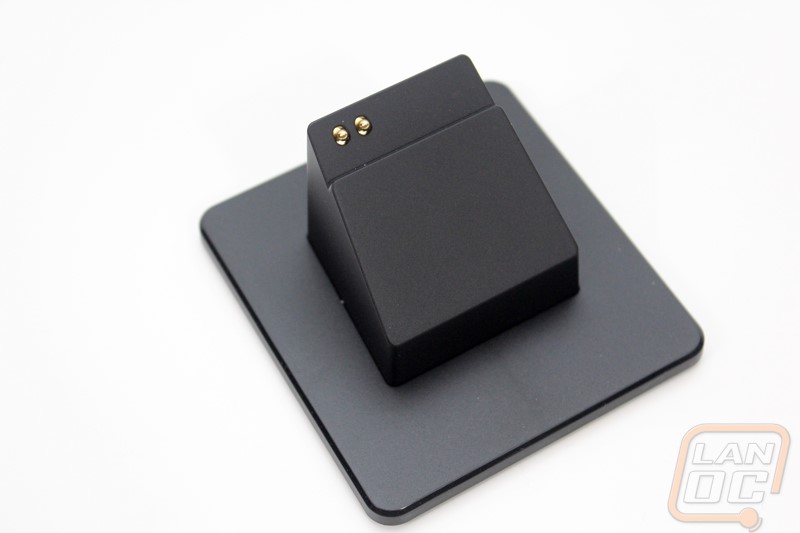
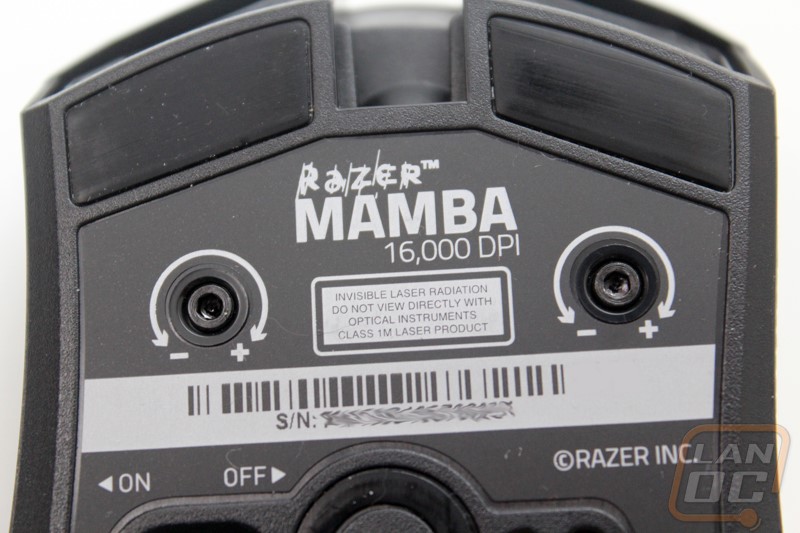
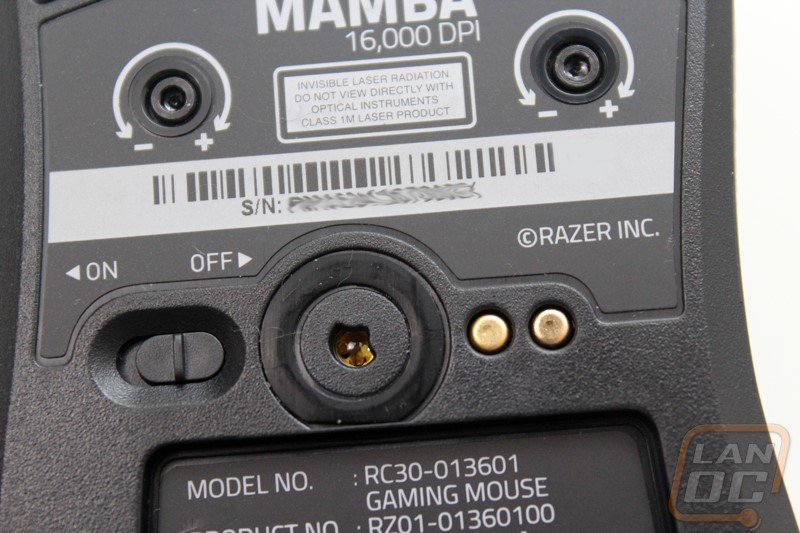
Next let’s take a look at what’s going on under the mouse. This has to be the busiest area on the entire Mamaba. For starters you have three gliders, one semi large one at the bottom and two smaller gliders, one under each trigger. This isn’t as much surface space as some of the Logitech mice, but is more than most SteelSeries have and frankly there isnt any more room for them with everything else going on. Also down here are all of the required logos as well as a full serial number for the mouse should you need to RMA it. There are three key things specific to the Mamba being a wireless mouse. The large square indent that takes up the bottom half is what holds the Mamba in place on its charging dock. Just above that the two metal contacts are how it charges when on the dock. Then to the left of the sensor is the on and off switch to turn off the Mamba when you aren’t using it or charging it.
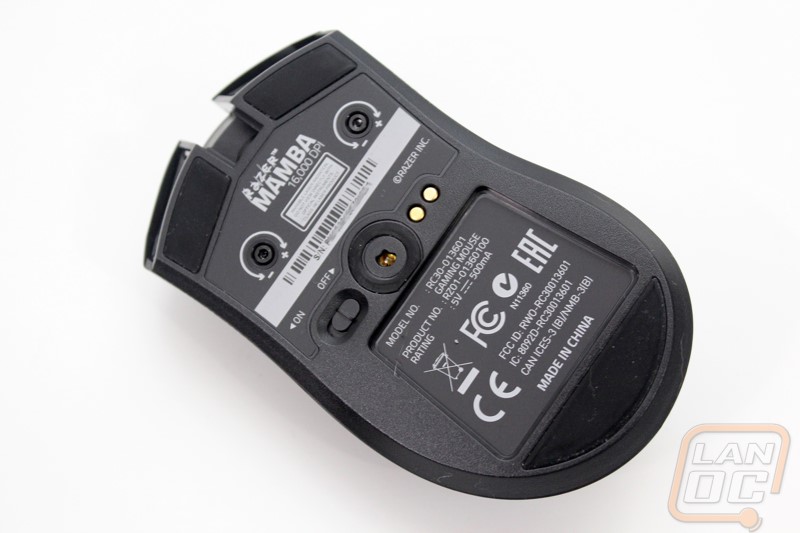
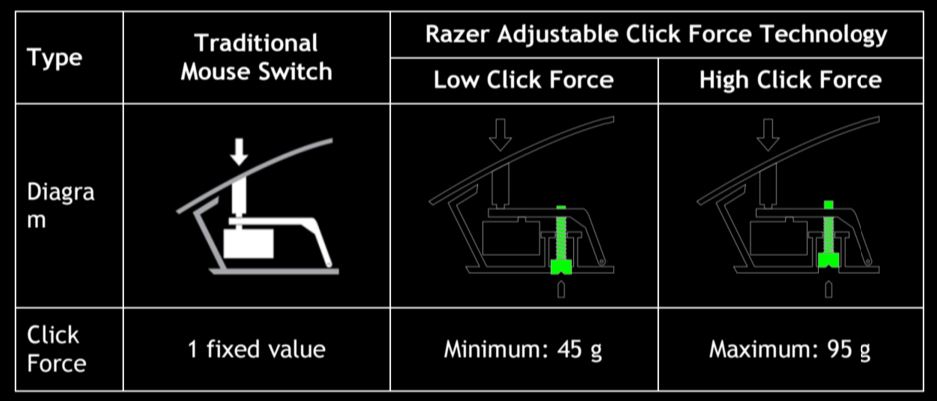
Taking a closer look at the sensor area we can see right away that this is a PTE sensor due to its yellow color. PTE stands for Phillips Twin Eye. Some of you might remember them from the issues a few years again with Z-axis tracking, something that drove me completely crazy when almost every mouse that came out had one. The Mamba specifically has the PLN-2034 PTE sensor, one that I haven’t tested yet so I will reserve my judgment for the performance section once I get testing. The other interesting thing here are the two adjustment screws on the bottom of the mouse. Razer went with a unique trigger switch design that allows you to tighten up or loosen up the switches spring to change the spring rate from as low as 45 grams to 95 grams at max.
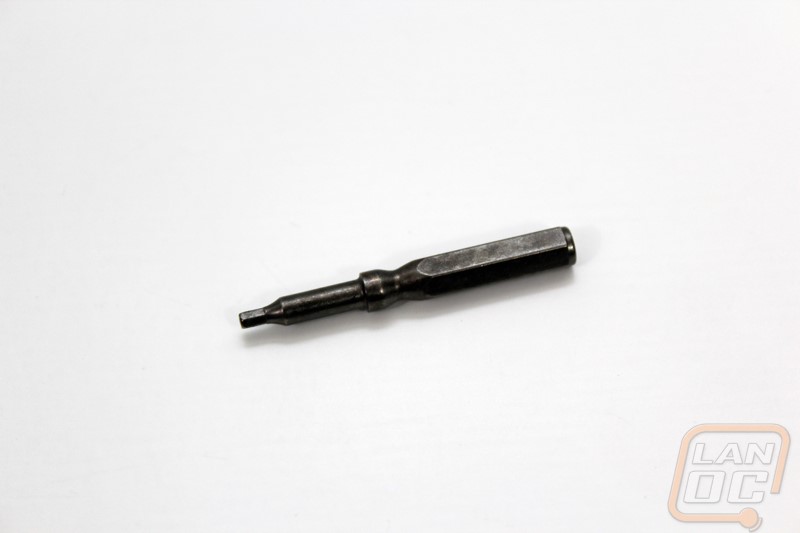
To adjust the spring pressure Razer provides a small tool to turn the screws. There really isn’t much to the tool at all. I do wish that they would have integrated it into the charging base though, I’m 100% sure that at some point if I use the Mamba for an extended amount of time I will lose the tool. In fact as we sit here I’m not even sure where the tool it now.
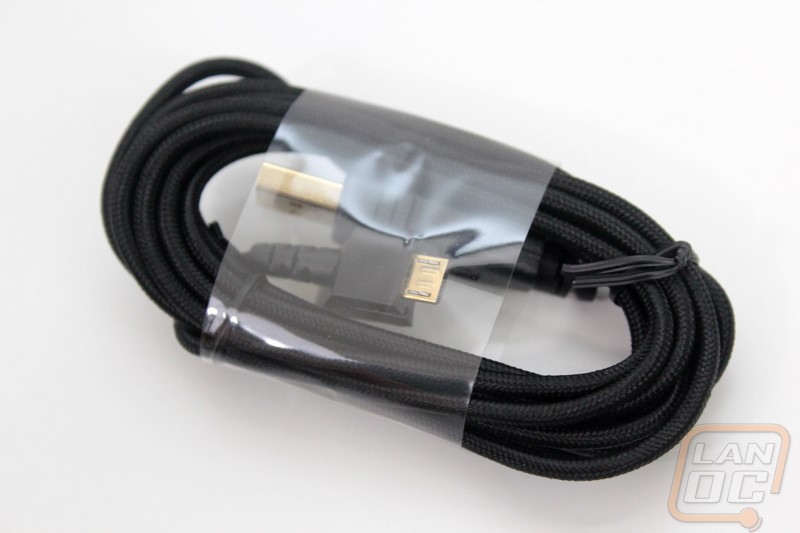
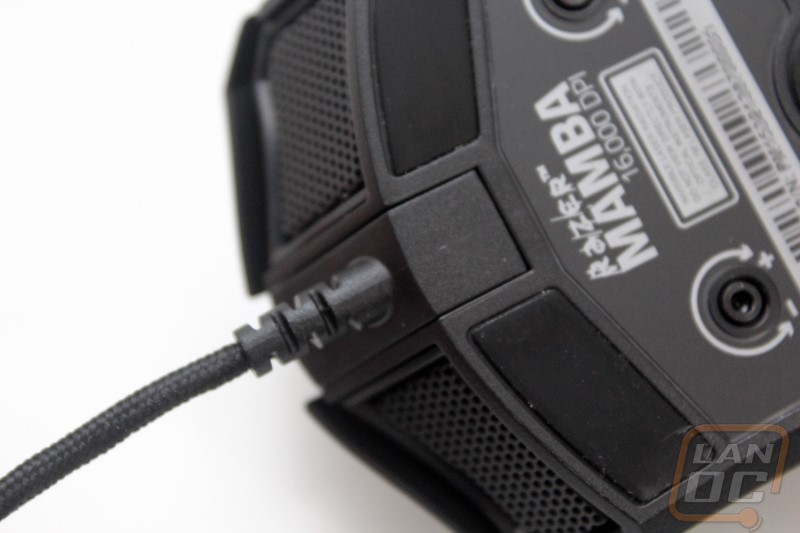
For the charging/data cord Razer included a sleeved USB cable with a micro USB connection on the device end. The Micro USB connection has a very odd shaped casing that helps lock the cord in when you plug it directly into the mouse. This is the same cord you use for the wireless base, you can unplug the base and run the mouse wired if you have any wireless issues at a LAN for example where there might be multiple devices on similar frequencies.
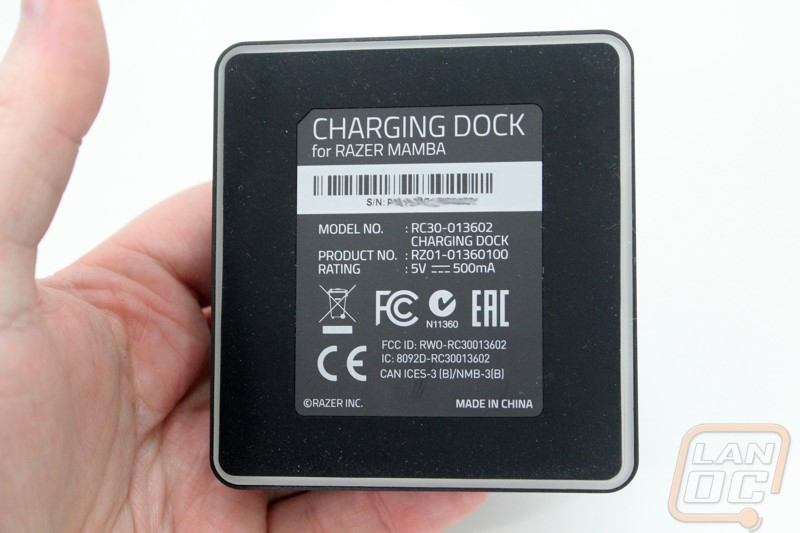
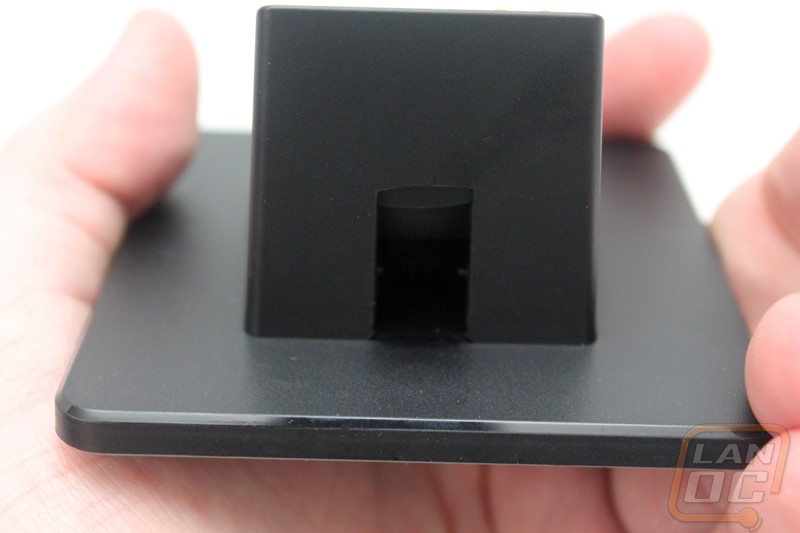
The charging base for the Mamba isn’t any different than the original Mamba with the exception of the addition of the Chroma lighting along the bottom edge. The podium that stands up had a square on top that holds the Mamba in place and then the two contact points charge the mouse. The bottom of the base has much of the same information that the mouse has including a serial number, product name, and information on the model and certifications. Around the sticker on the base is a rubber grip that is about a half inch wide all the way around. Add to that what feels like weights in the base, it’s not likely to be moving around at all. The Micro USB cable hooks up into the back of the base.