In spring 2014 Cooler Master introduced their Quickfire Rapid-I backlit TKL keyboard. As soon as it launched my old Quickfire Rapid was put aside for the new model in my LAN bag and I’ve been recommending them along with the Code keyboard that I use on my main PC to anyone who would listen. The reason I also pushed the Code is because the Rapid-I was only available in the TKL form factor. After all of the waiting Cooler Master has finally introduced their full sized model, the Quickfire XTi. I’ve been spending a little time with the XTI and I can finally sit down and talk a little about its features and let you guys know if it was worth the wait. Going into testing I was especially curious if I would like it enough to get me to swap it with the Code on my main PC.
Product Name: Cooler Master Quickfire XTi
Review Sample Provided by: Cooler Master
Written by: Wes
Pictures by: Wes
Amazon Link: HERE
| Specifications | |
| Model Number |
SGK-4060-KKCL1 (Blue switch) SGK-4060-KKCM1 (Brown switch) SGK-4060-KKCR1 (Red switch) |
| Key Switch Type | CHERRY MX Blue/ Brown/ Red |
| Key Rollover | NKRO (Windows only) |
| Keycaps | ABS, grip coated, removable |
| Polling Rate | 1000 Hz/1ms |
| Backlight | Full backlit, 35 colors, 5 settings |
| Windows Key Lock | Yes |
| Media Keys | Yes (via F keys) |
| Interface | Micro USB 2.0, full speed |
| USB cable | 1.8m braided, gold plated and removable |
| Dimensions |
43.9(L) *13(W) *4.1(H) cm 17.28(L) *5.12(W) *1.61(H) inch |
| Weight | 1114 g / 2.46 lbs |
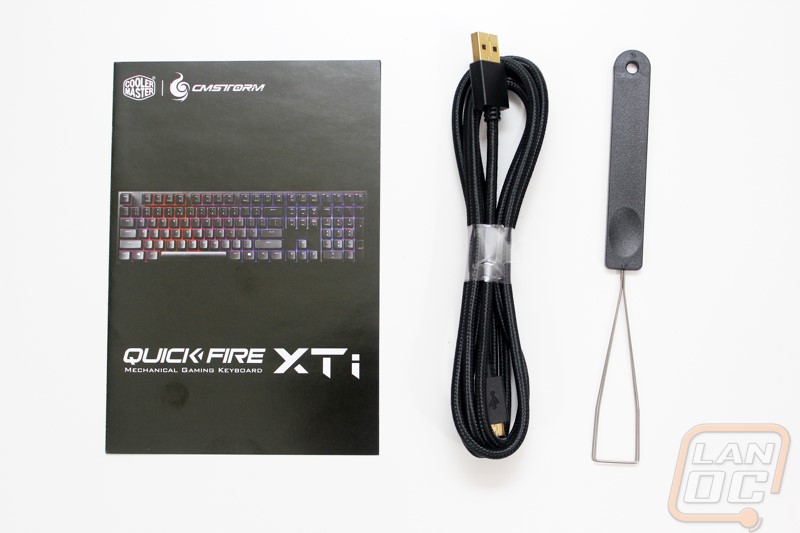
Packaging
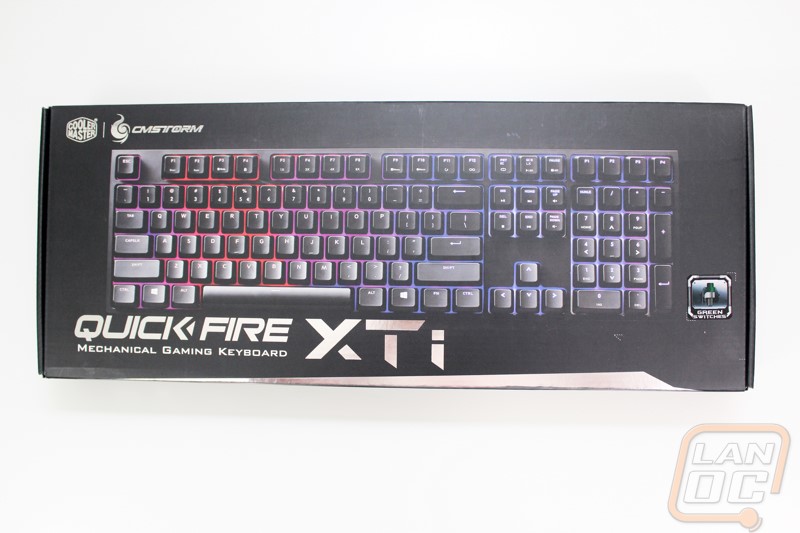
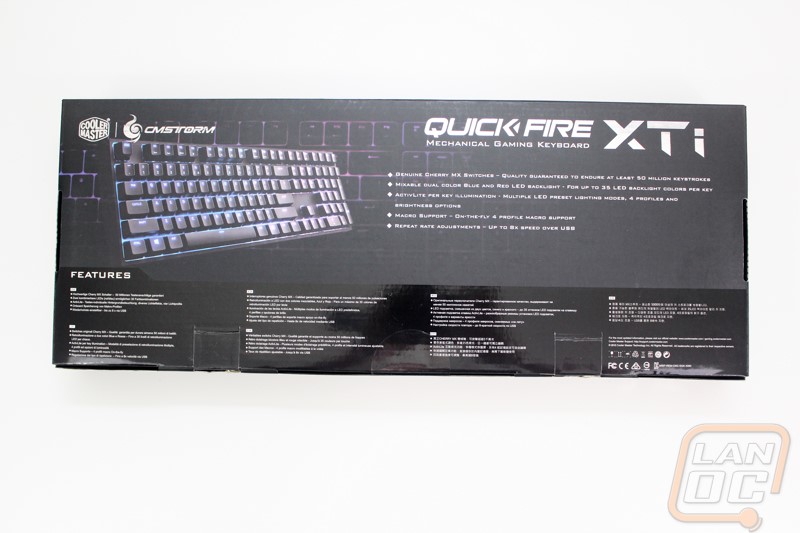
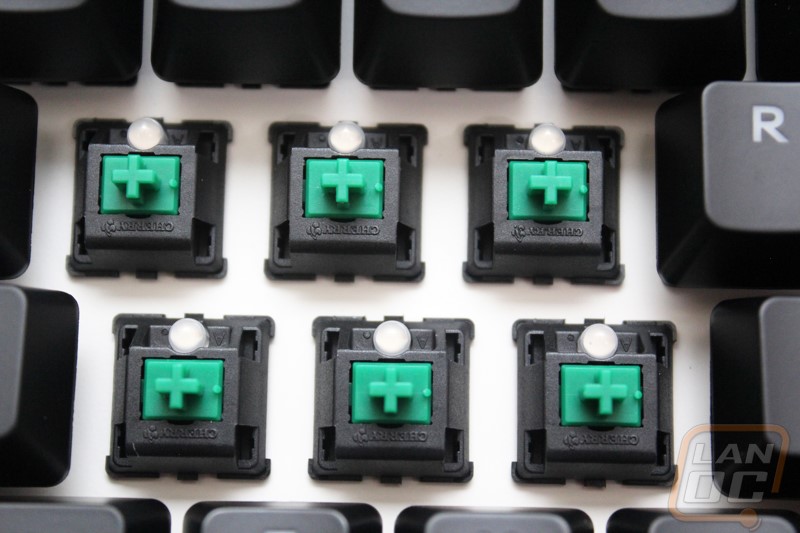
For the packaging for the XTi Cooler Master went with a simple black background design with a large nearly life sized photo of the keyboard on the top to show what is inside. They do have the normal Cooler Master and CMStorm logos as well as the Quickfire XTi logo in a metallic finish. They did include a small sticker on the front to let us know what color Cherry MX key switch they went with, for our sample they sent it over with greens, a switch that isn’t available currently in the XTi but I assume is something they are toying with as a one off that they sometimes sell on their own marketplace to enthusiasts. The back of the box has another photo of the keyboard only this time smaller. This left room for a feature list in the top section as well as the same list translated into multiple languages down in the bottom section. The back has the same black background but they also have a zoomed in photo of the keyboard in the background, showing off the blue/red backlighting.
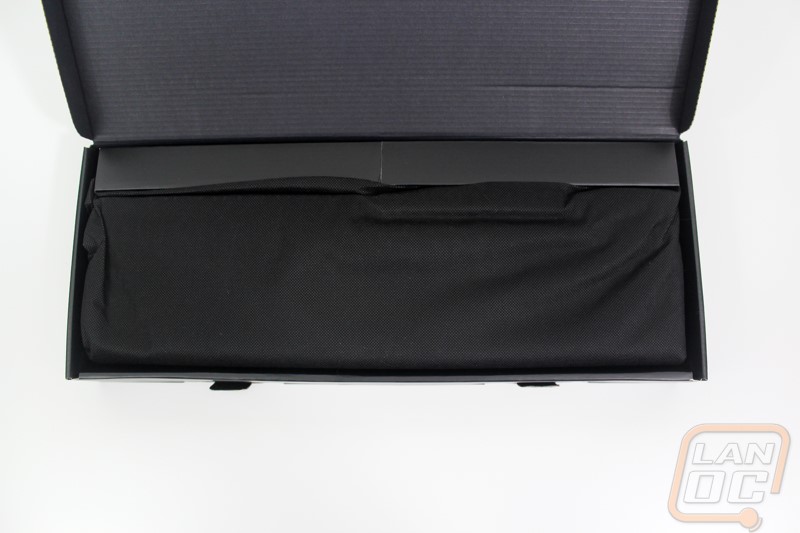
Inside the XTi comes wrapped up in a thick microfiber sleeve. The USB cable comes disconnected and tucked away up under the cardboard. You also get a wired keycap remover and a thin quick start guide. The keycap puller is nice to see because some manufactures have been recently avoiding RMAs on keyboards that the owners have mentioned removing the keycaps. Cooler Master including a keycap puller helps show that they don’t mind you replacing the caps.
Photos and Features
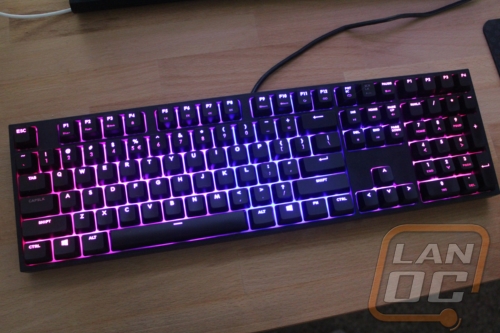
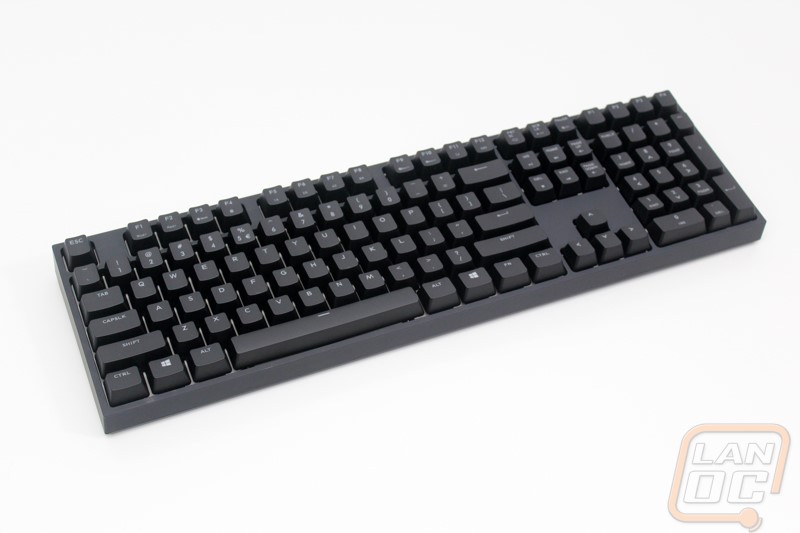
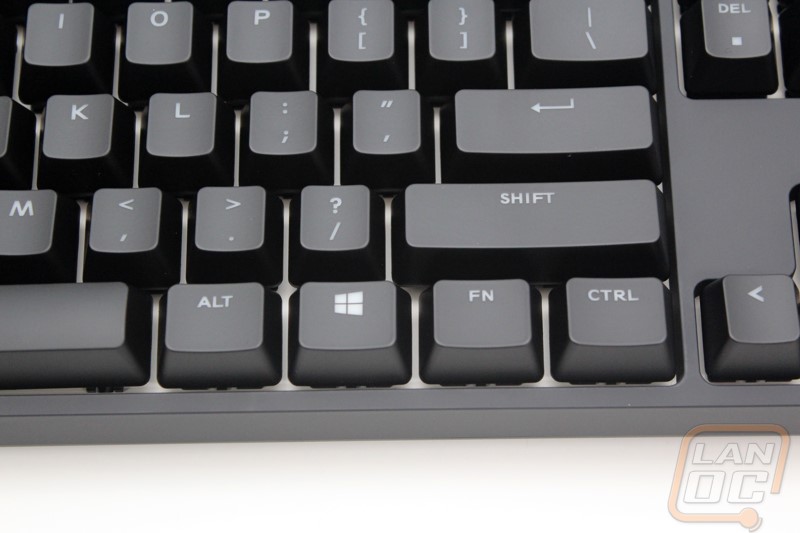
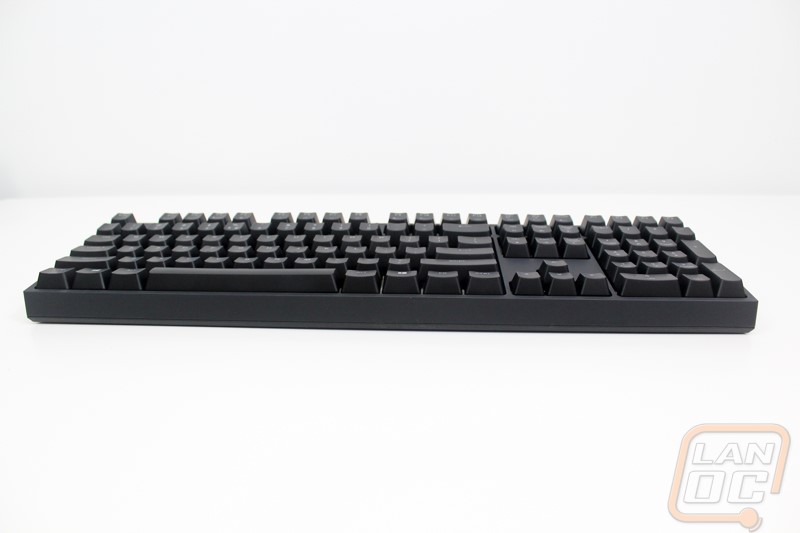
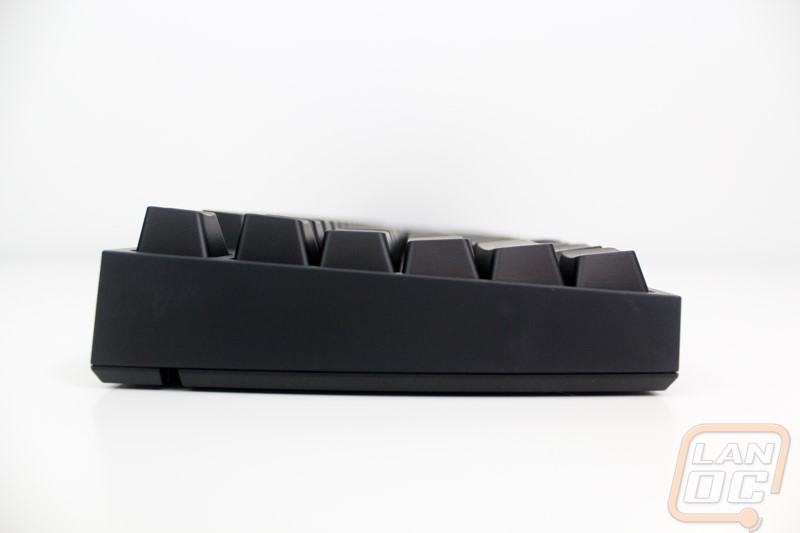
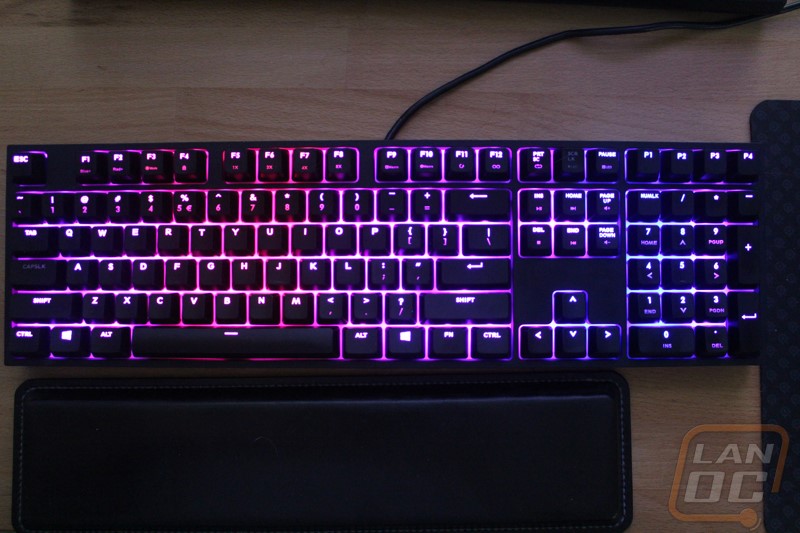
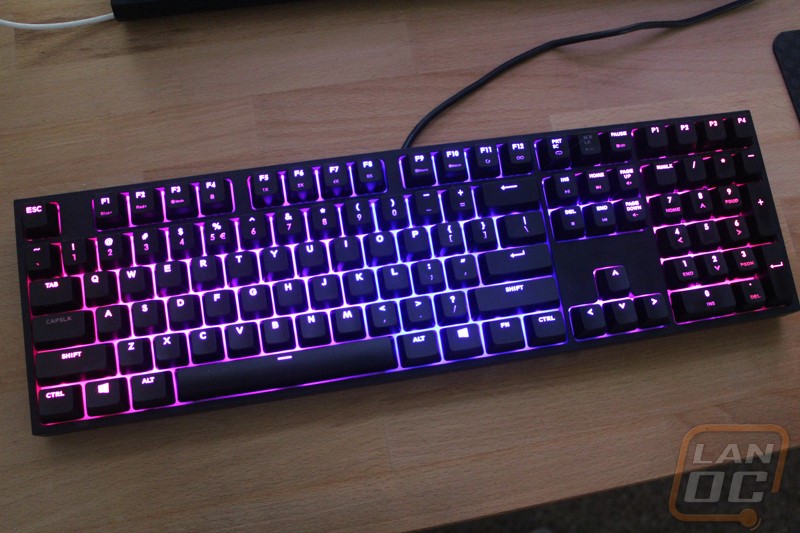
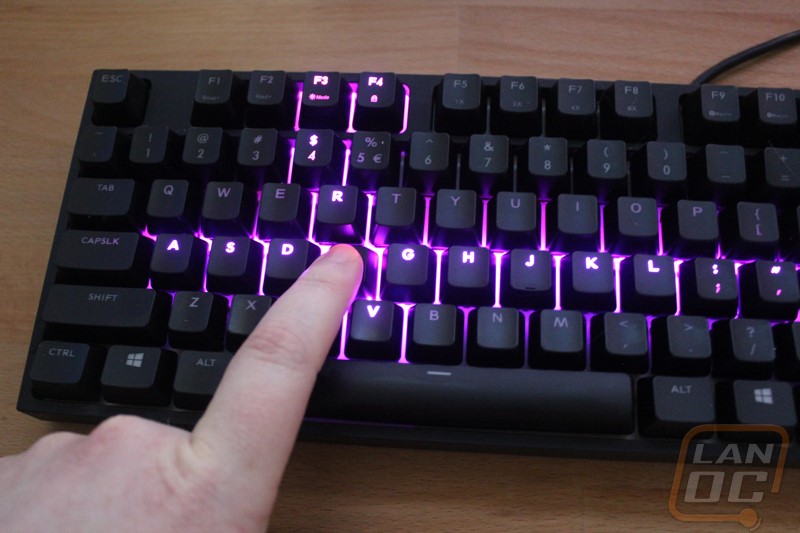
Just like the TKL Quickfire Rapid-I the Quickfire XTi has a very clean and simple design. You have a flat black casing with a thin bezel on the outside edges. The clean look is aided by Cooler Master avoiding using any of their logos on the visible areas of the keyboard. Seriously the didn’t even hide one back along the back edge like in the past! The keyboard has a full sized ANSI key layout meaning it has a full F key row, direction pad, and a full number pad over on the right side. Cooler Master went with a simpler font for their legends as well, something a lot of people complained about on some of their past models. The clean design actually puts me in an interesting position when writing this, there just isn’t anything to talk about in the overall design beside what I have broken down by photos below.

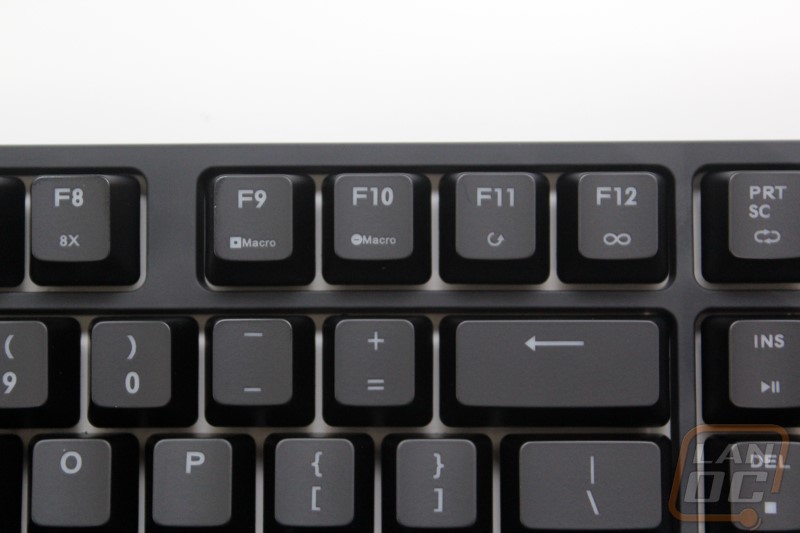
Like past Quickfire models Cooler Master oes take advantage of a function layer to add additional features to their keyboards while keeping the clean look. The first three F keys are the control keys for the backlighting. Unlike the Rapid-I they didn’t stick with the white backlighting so for the XTi we have a dual color red/blue LED. The controls here let you select the level of blue and red you would like to use giving you different shades of red/blue/purple. The third button is the mode button that lets you flip between multiple lighting effects just like the original. The fourth button is the windows key lock button that turns the windows key off for gaming.
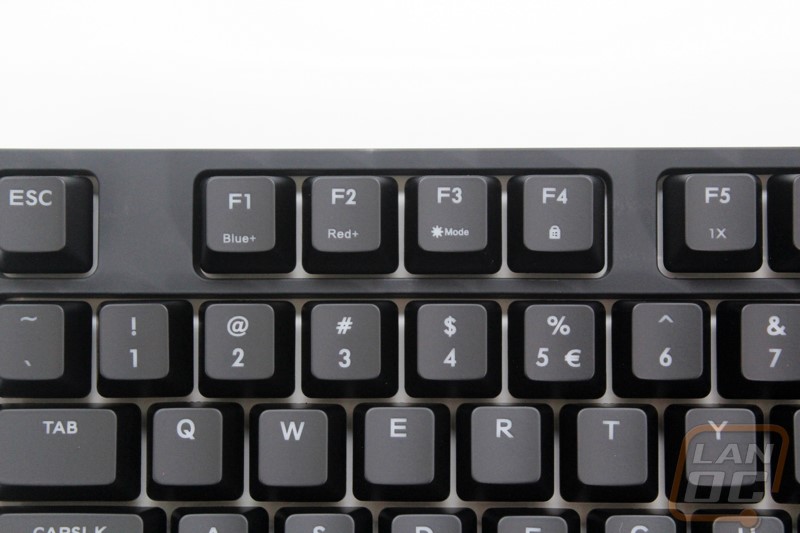
The next four F keys have 1x-4x on them. These actually control a rapid fire effect. You can set how quickly you would like the keyboard to resend the keypress while you hold it. In some situations having this on is a bad thing but in some games it could be helpful as well.
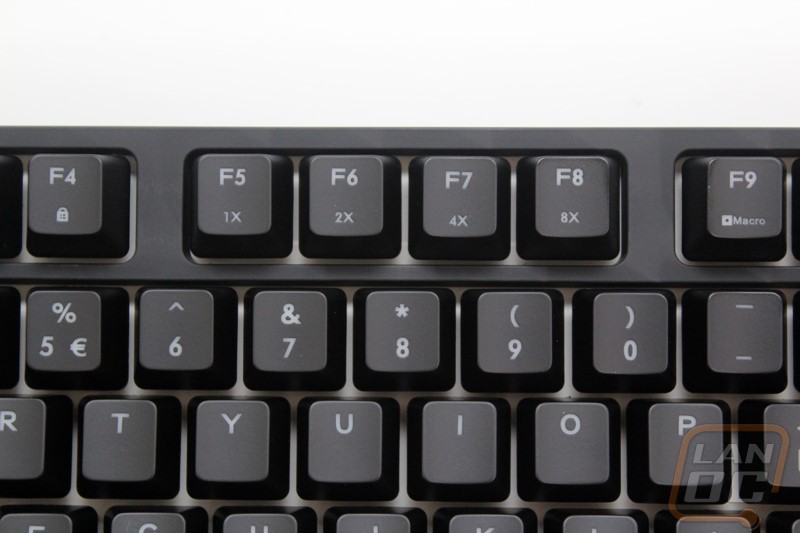
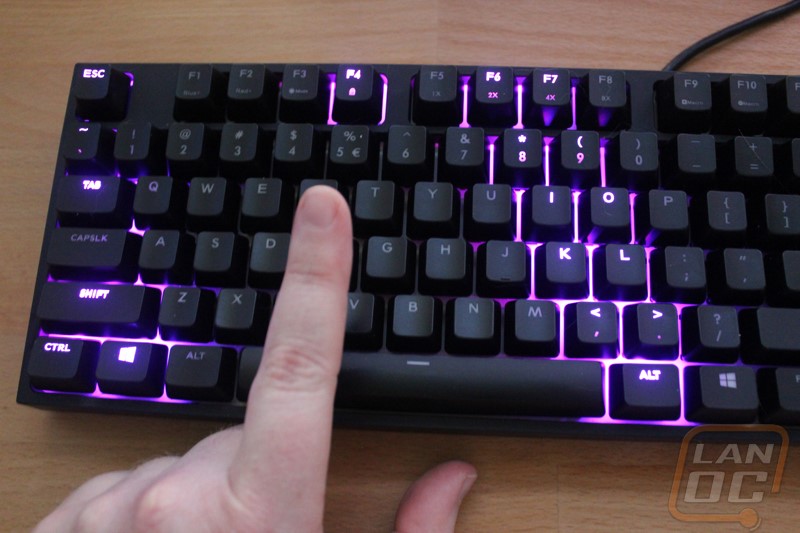
The F9-F12 keys used to be the media keys but for the XTi they moved to a completely new function. The XTi now actually lets you program macros without the use of any software. The first two keys here are the record and delete macro keys. To do this you press F9 to start recording, then you select the key you are reprograming, then you type your macro. From there we go back to the function layer and select from FN-F11 FN-F12 FN-PrintScreen to select the macro mode. F11 replays the macro once, F12 makes it a toggle switch, and print screen will set it to loop over and over. Then you press FN-ESC to exit out.
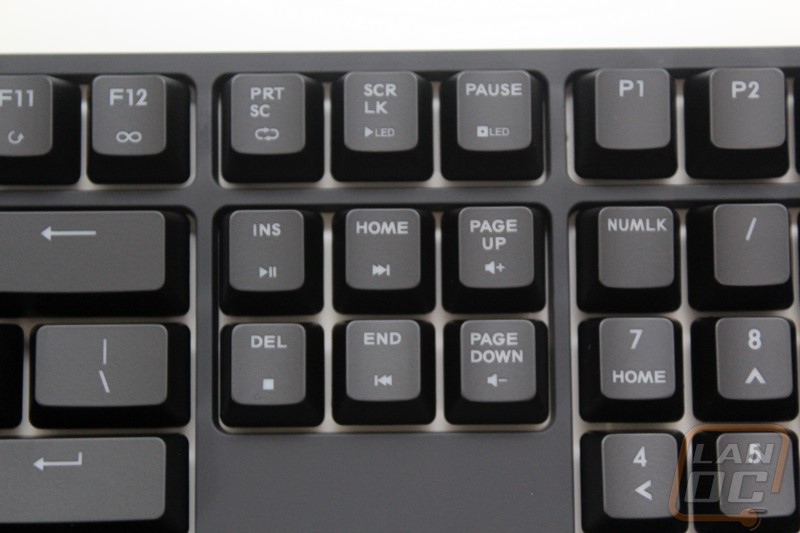
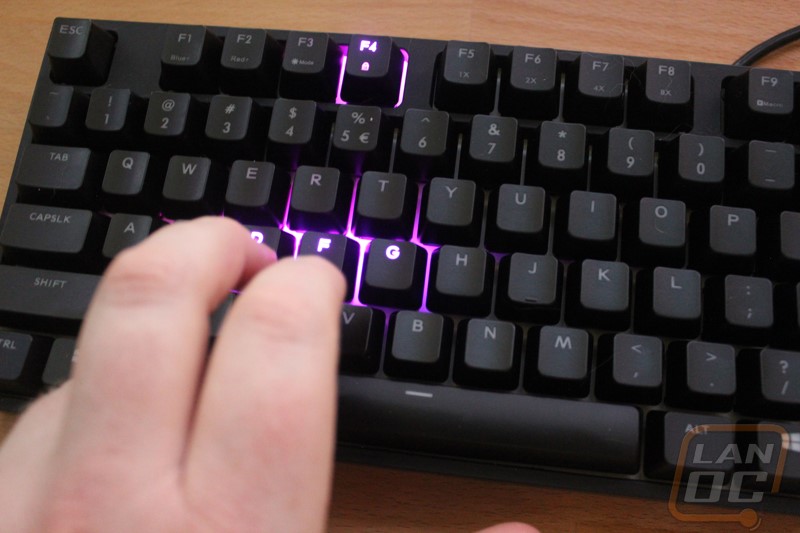
For those of you who were worried that they maybe dropped the media keys, they just moved them down to your home keys. This is actually the same place the Code has them and they are much easier to reach in this location. Up top above the home keys we do have one more set of function keys. Here the scroll lock and pause buttons let us program a completely custom LED layout. You use these two keys to record or delete the lighting layout. So you press FN-Pause to start recording. From there you hold function and use the F1 and F2 keys to select the color you want to place, the function key lights up as you do this to show you what you are working with. Then you click every key you want to be in that color. You repeat that step over and over until you have the layout you want. It’s not exactly simple, but it is very cool that you don’t need software to get it done. I do wish they would at least include proper inistructions on how to record this and macros with the keyboard though. I would consider myself to be fairly experienced and I still had to dig up a video Cooler Master published to learn.
On top of being a standard full sized layout, they also made sure to go with the accepted standard for the bottom row. A lot of manufactures have been going with an untraditional bottom row making it hard to replace the keycaps. The XTi is just begging for a new set of caps, the only issue is there aren’t many that support backlighting.
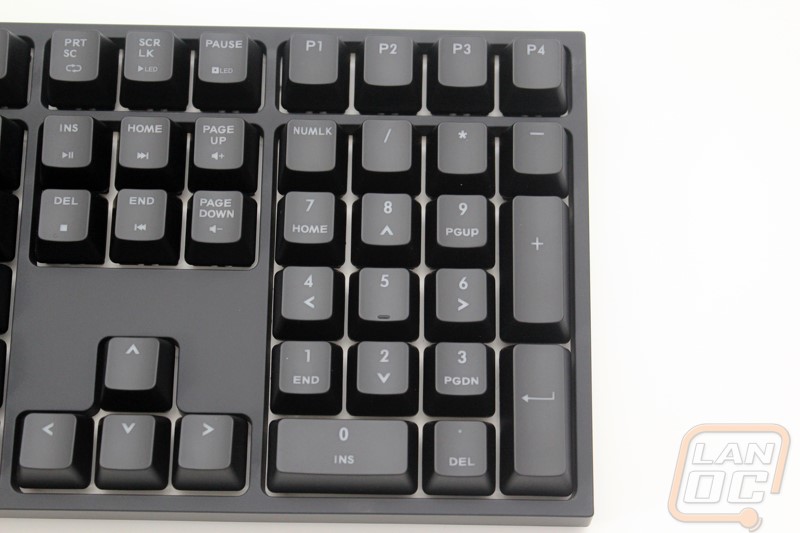
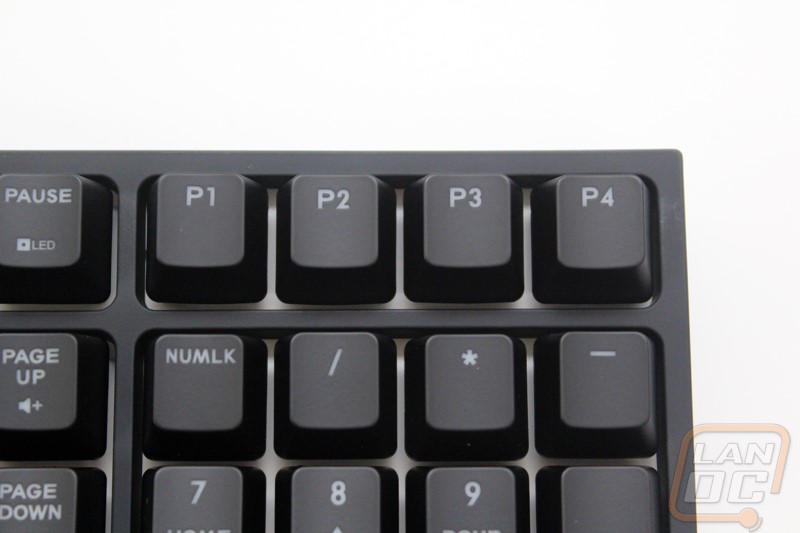
Over on the right side we have the full number pad. Up above it Cooler Master slipped four additional keys. The P keys let us flip through four custom profiles in addition to the base profile on FN-ESC. This lets us make custom lighting and macro profiles and flip to them on the fly.
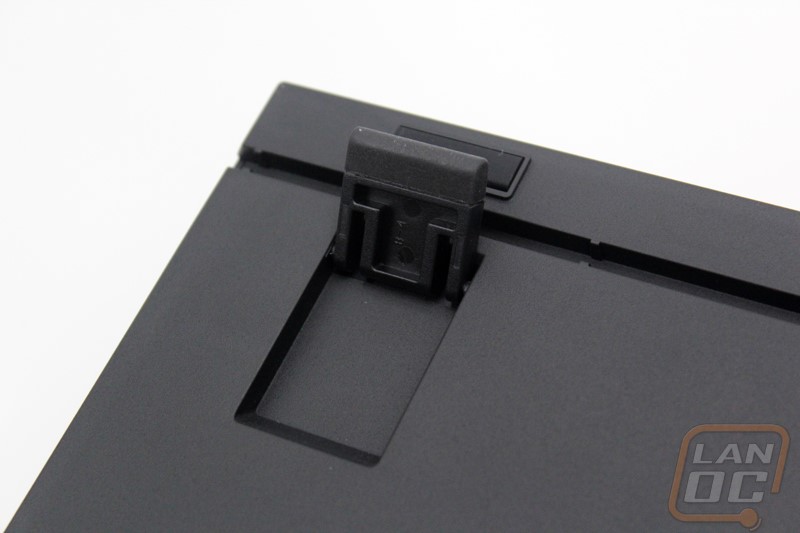
Like I mentioned earlier, the design around the sides doesn’t have anything going on as well. The same flat black finish carry’s on down the sides. The XTi does have a natural rake to the layout in addition to the rake that the keycaps provide and that you can add with the flip out feet.
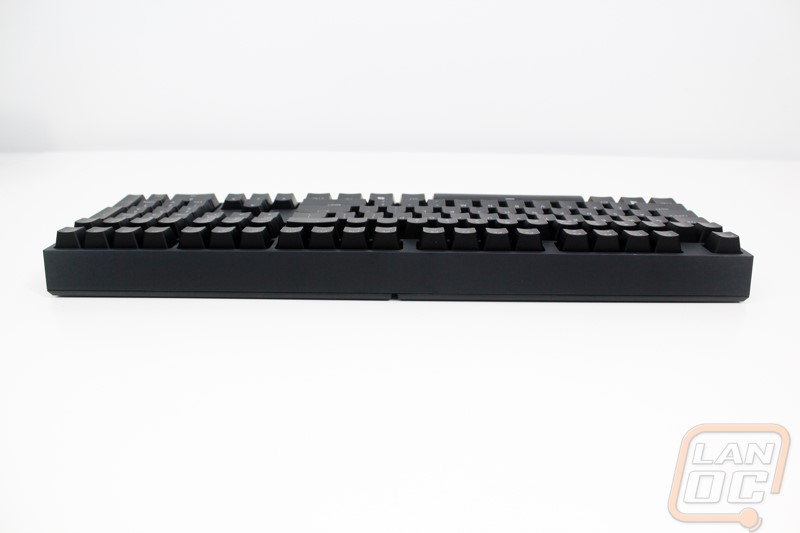
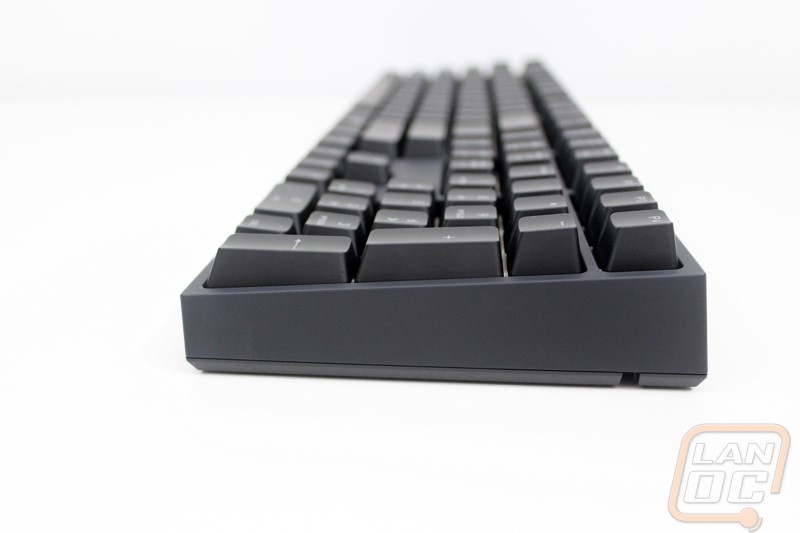
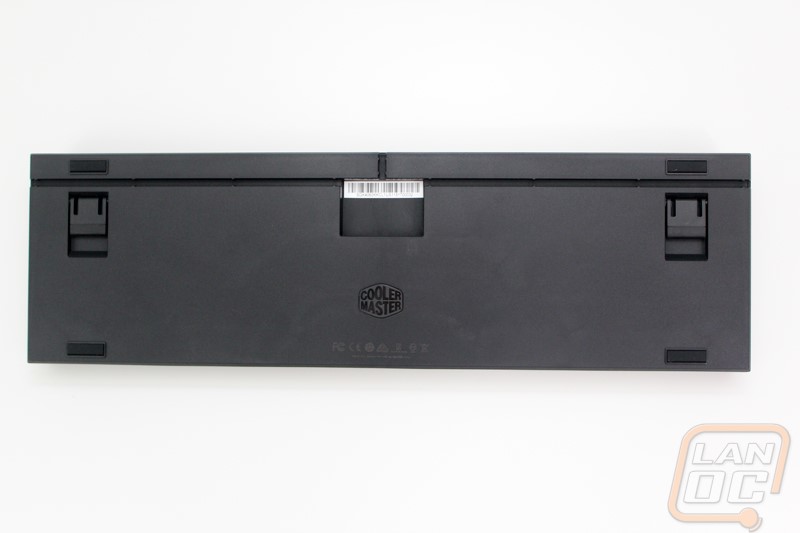
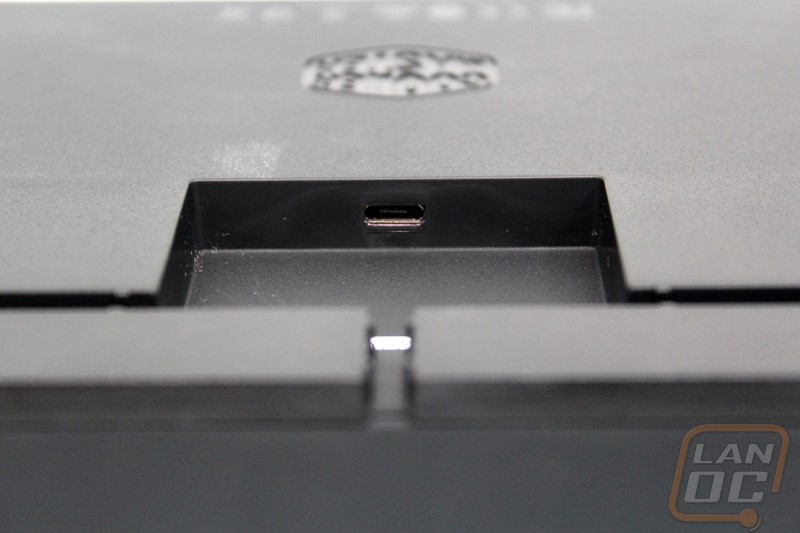
Only on the bottom of the XTi do we actually see a Cooler Master logo at all and even here they have printed most of the required logos in a print that doesn’t stand out too much on the black. Really the only thing that stands out is the white bar code sticker with the keyboards serial number that is tucked into the recessed USB area. For feet the XTi has four inch wide rubber feet on the corners. They also include flip out feet that also have rubber on the ends to help keep everything stable. For the detachable USB cable you have a micro USB plug tucked away. They left three cord options, you can run it out the center or out the left or right sides via a small cord track.
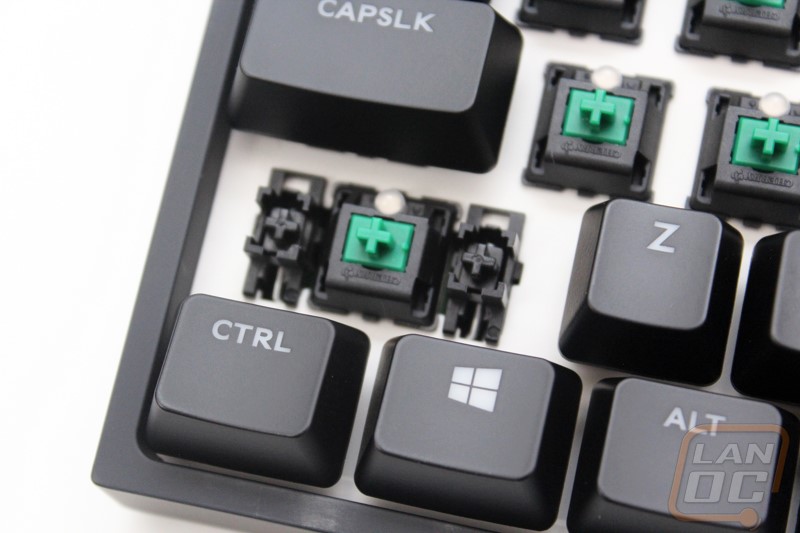
As I mentioned in the packaging section our XTi sample came with Cherry MX Green keyswitches. The XTi officially is available with Cherry MX’s blues, reds, and browns. The greens are currently not available. But still a lot of enthusiasts will be happy to see that Cooler Master has stuck with Cherry branded switches and not jumped ship to the easier and cheaper to get knockoff brands. With our keycaps pulled we can also see that the XTi uses a plate mounted design. This means the switches snap into a metal backplate and then have the PCB under that for a lot of additional strength. The backplate is painted bright white to help reflect the backlighting. Speaking of that, for the XTi they went with an LED that outputs red and blue meaning it can cover both and anything in between. I was surprised they didn’t go full RGB, especially considering Corsairs exclusivity is over. For the longer keys like shift and the spacebar Cooler Master went with Cherry stabilizers. This means you don’t have to fight with the small stabs that attach to the back of the keycap and that metal bar, it is all built into the keyboard, making replacing the keycaps even easier.
For the keycaps Cooler Master went with a standard OEM profile. This means rows R1-R3 (the bottom three rows) all angle up at different angles. Row four is mostly flat and then the top two rows are the tallest and angle down slightly. The keycaps themselves are made of a translucent ABS like just about any backlit keyboard. The base keycap is painted black and then the legend is etched out of the top. This does mean you can wear through the key with use, but this isn’t any different than any other backlit keyboard. The caps themselves aren’t especially thick but about the same thickness as any other non-aftermarket keycap.

Performance
For testing the Quickfire XTi I lucked out with my review schedule and had the Intel launch and an AMD CPU review that gave me a little additional time with the keyboard before sitting down to write this. Like always my testing was all done at my main PC meaning I used the keyboard over a wide range of duties with gaming and a lot of writing being the biggest two. This game me a chance to test the XTi both on its gaming performance in addition to its every day usage.
The full sized XTi replaced my everyday Code keyboard and didn’t manage to take up any additional space. In fact the thin bezels help it be a tiny bit smaller while still having the same key count, well actually more but I will get into that later. Being a full sized keyboard it is a little more fitting for an office environment than the 60% and TKL’s that I have been testing recently but that is a preference thing more than anything. For me I love the smaller keyboards but when it comes to having to get in Excel, Word, and using a calculator I just need to have a full keyboard on my main PC.
The XTi sample that was sent to us has Cherry MX Greens. I suspect that Cooler Master will be selling a few of this model in limited quanities but the official switches are Blue, Brown, and Red. They cover linier, clicky, and tactile models with that range while leaving the option open for special models later like the greens. Enthusiasts will be happy to hear that all three of the models use Cherry branded switches, I know there is a lot of push back on some of the knockoffs and so far at least Cooler Master has completely avoided that. The XTi types really well, even with the higher spring rate of the Greens didn’t give me any issues. Unlike my Code there aren’t any weird rattles or issues with the stabilizers and the board feels rock solid with no flexing.
I love that Cooler Master stuck with the detachable USB cable for the XTi. The hidden design does mean that some custom cables won’t fit in the small space, but the look is clean like a non-detachable design but you can still swap out the cord if you have issues. Having the three different cord management options to send the cord out the left, right, and back of the keyboard is nice as well, especially after the Novatouch having the right angled connector that forced the cord to only go one direction.
I’ve mentioned it many times on here in the past but typically I don’t use many function layer keys unless it is something that I only have to use very little like lighting controls. That said I do love that Cooler Master moved the media controls on the XTi over just above the direction pad. I saw this on the Code and it makes it possible to use the controls with one hand as you can hit the function key with your thumb and reach the control you need.
Speaking of the function layer I was really impressed with the added macro control. Without the use of any software at all, you can program a macro to any key on the XTi. Sadly they don’t give you any instructions with the keyboard but I did find a video from Cooler Master that explained it all. I will include it at the end of this page to help. You can record the macros on the fly. This also ties into the profile setup as well, you can swap between four custom profiles and a basic profile as well. That is what the four P keys are above the number pad.
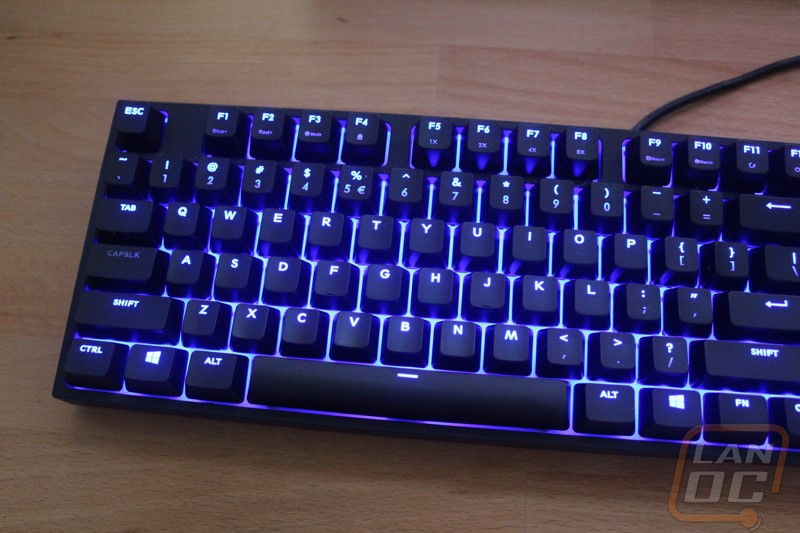
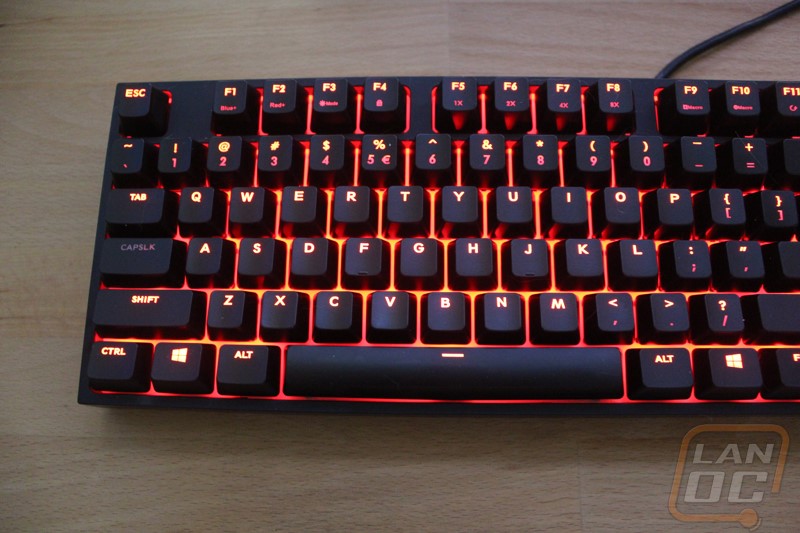
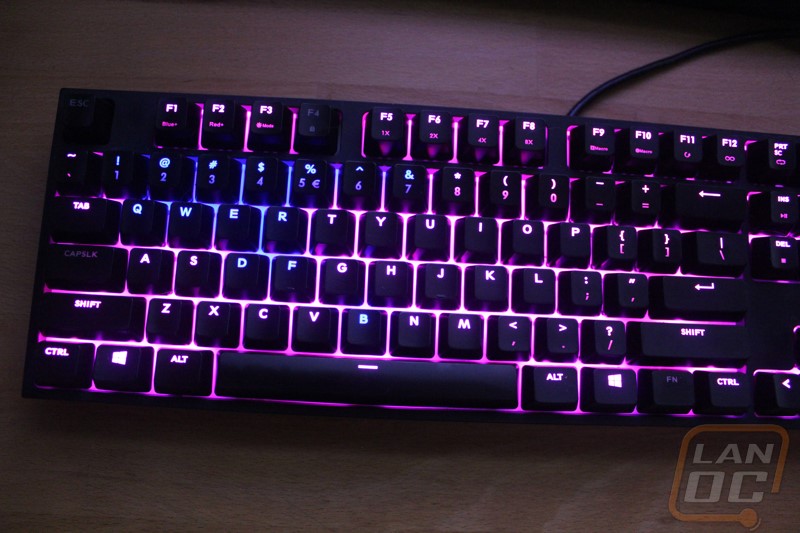
The big thing about the original Rapid-I was the addition and in a similar fashion the XTi also has its lighting as a big feature as well. The way the lighting works is you can use the FN-F1 and FN-F2 keys to control the red and blue backlighting. Basically each picks from multiple brightness settings for each color, you can get a pure red or blue background or by mixing the two you can do various red and blue shades leading into bright pinks and purples as well. I would have much preferred to see this be a full RGB keyboard or even stick with the original white. I know that sounds a little crazy because the lighting options are very cool but I like the clean styling that the all-white gives you and red and blue are both colors I don’t normally use. In most of my testing I actually ran a bright pink or purple or used one of the lighting effects. I also would prefer them to include a better option to be able to adjust the brightness. If you are planning on running pure blue or red you can adjust the brightness down but anything else is basically set at the highest brightness. Personally I like a bright keyboard, but I know some people might have a problem with it.
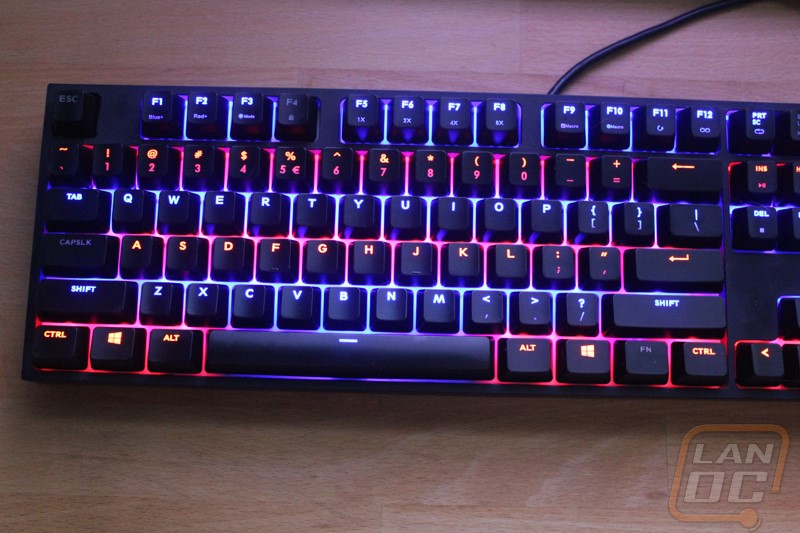
The Rapid-I really impressed me with its lighting modes and the XTi carries over those same modes and even includes a new one that rotates through the colors much like the full RGB keyboards do. I’ve got a few photos of all of the modes, here is a quick breakdown.
Breathing (Breathing roles through the color spectrum as well as black with the keyboard all in the same color)
Color Wave (Left to right wave through the color spectrum)
Activate on Touch (each key you press lights up and stays lit for a short period of time)
Waterdrop Effect (Light “ripples” away from the key you press)
Cross Mode (lights up the vertical and horizontal rows of the key you press)
The Rapid-I had a unique mode that let you turn on just specific keys that you want on but with the XTi having the Red Blue backlighting they had to do something a little more creative. Basically you can turn on the LED program mode then using the function key and the F1 and F2 keys you adjust until you get the color you are looking for. The Function key will light that color and then you can select what keys you would like to have that color. This lets you run through and create your own design using the 35 available colors/shades. Here are a few examples of what I played around with.
Overall and Final Verdict
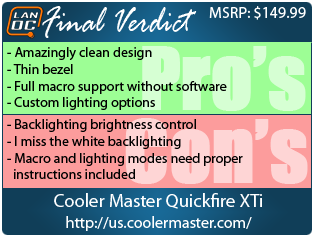
After spending time with the Quickfire XTi I can say that I am really impressed with the direction Cooler Master has gone. They took an already great design with the Rapid-I and slipped in a few features as well as a number pad and made it a well-rounded keyboard. The overall design is so simple that they didn’t even put a logo on the keyboard except on the bottom. That combined with thin bezels all around puts the focus on what is really important, the performance. For gamers they included full macro programing that can be done on the fly. They also let you have all of the lighting modes of the Rapid-I and add in custom lighting programing. Both the macros and the custom lighting profiles themselves aren’t that special, but to do it all without any software is.
But somehow in adding all of those features they did bring in a few downsides as well. For starters, they went with the red and blue backlighting when almost everyone else is moving to RGB setups. For me personally I would have much rather actually kept the white backlighting that matched the super clean design. The dual color backlighting also only allows you to turn the brightness down if you are running a solid red or solid blue, it would be nice if they slipped in a brightness control someplace although to be fair there isn’t much room for it with all of the other features. The other issue I have with the board is that with all of the fairly complicated features they added, namely the macro and custom LED profiles, they gave no clear instructions on how to actually use them. In fact two of the function keys that are key in setting your macros didn’t even have descriptions in the half a page guide they included. I ended up having to google search for a video that Cooler Master posted on YouTube that shows how everything works. It would be best if they took another half page and quickly explained how both of the features worked, but if nothing else including the video they made on their product page would help as well.
So I am left sitting here with this amazing keyboard that just happens to have a few small faults. For the past year I have been waiting for the full sized Rapid-I to be my main keyboard. So I had high hopes and expectations for the XTi and I thought for sure that it would end up being my main keyboard. While there isn’t anything wrong with it, the Red/Blue backlighting just doesn’t go with my desk setup. That doesn’t mean it is a bad keyboard, in fact it is far from it, I just think the Red/Blue backlighting pidgin holed them into a corner slightly where a full RGB or all white backlit XTi would appeal to more people. Speaking of appealing to people, how is the price? Well the MSRP is just under $150 although if past Cooler Master keyboards are any indication I would expect to see it for a better price online in no time. Even at the MSRP it competes well with its direction competition in the Code and the Ducky Shine 4. There is a feature gap between the XTi and the Code with the XTi coming out well ahead. The XTi is actually a LOT like the Ducky Shine 4, they both share the same backlighting colors and a lot of the same lighting effects. The XTi has the macro programmability and a thinner bezel.

Live Pricing: HERE


