Noise Testing, Fitment, and Screen/Software
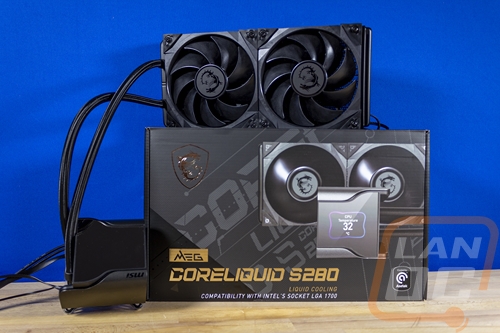
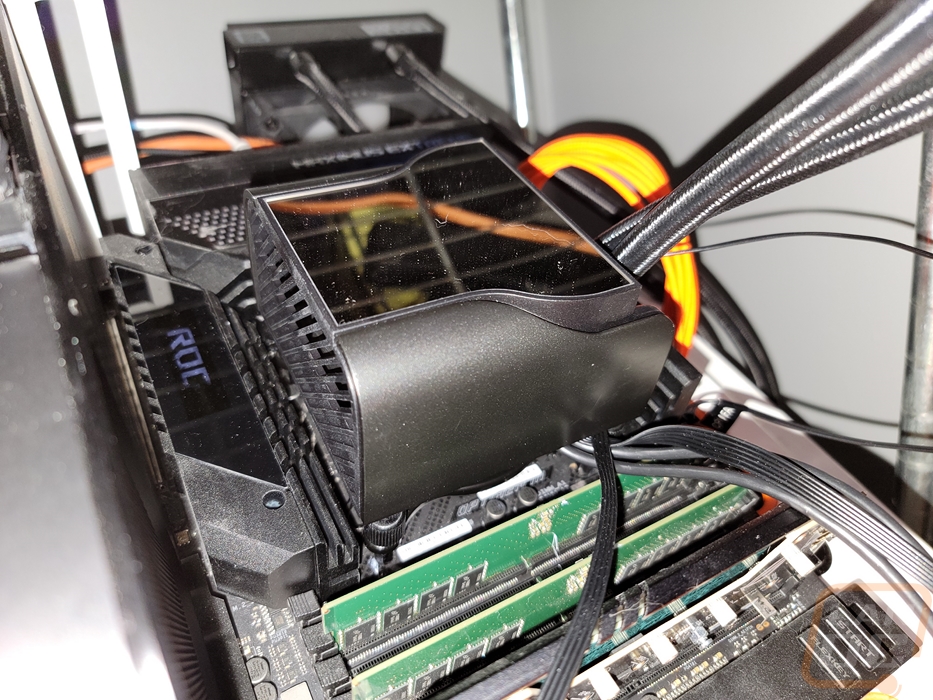
Before being able to test out the CoreLiquid S280 we do need to install it first which brings me to fitment. With air coolers, the height and width of a cooler play a big role in if it will fit in your case if your motherboard will work with it, and if the memory will fit. With AIO coolers most of that is a little easier to know. Your case should tell you what sized radiator it supports assuming it supports any at all. Beyond that, the height of the pump is normally short enough to be a none issue but we do need to double-check. Especially with the CoreLiquid S280 which has the screen and fan both built on top of the pump and water block. You can see that in this comparison of water block heights where the CoreLiquid S280 comes in at 83.53mm, 30mm taller than the other AIOs including the Corsair which also has a screen. Adding in that fan into the mix affects the height so you do want to make sure that the CoreLiquid S280 is going to fit in your case, it should fit most but there will be some SFF cases that it might not. LGA 1700 is supported and that is what I am testing on and being an AIO memory compatibility won’t be an issue.
|
AIO Cooler |
Fan Configuration |
Radiator Thickness |
Water block height |
LGA1700 Support |
|
Corsair iCUE H100i ELITE LCD Liquid CPU Cooler |
2x 120mm |
27mm |
57mm |
Yes |
|
MSI MAG CoreLiquid C280 |
2x 140mm |
27mm |
52mm |
Yes |
|
Sapphire Nitro+ S240-A |
2x 120mm |
27.5mm |
59.17mm |
Yes |
|
Cooler Master MasterLiquid PL240 Flux |
2x 120mm |
27.2mm |
40 mm |
Yes |
|
MSI MAG CoreLiquid S280 |
2x 140mm |
27mm |
83.53mm |
Yes |
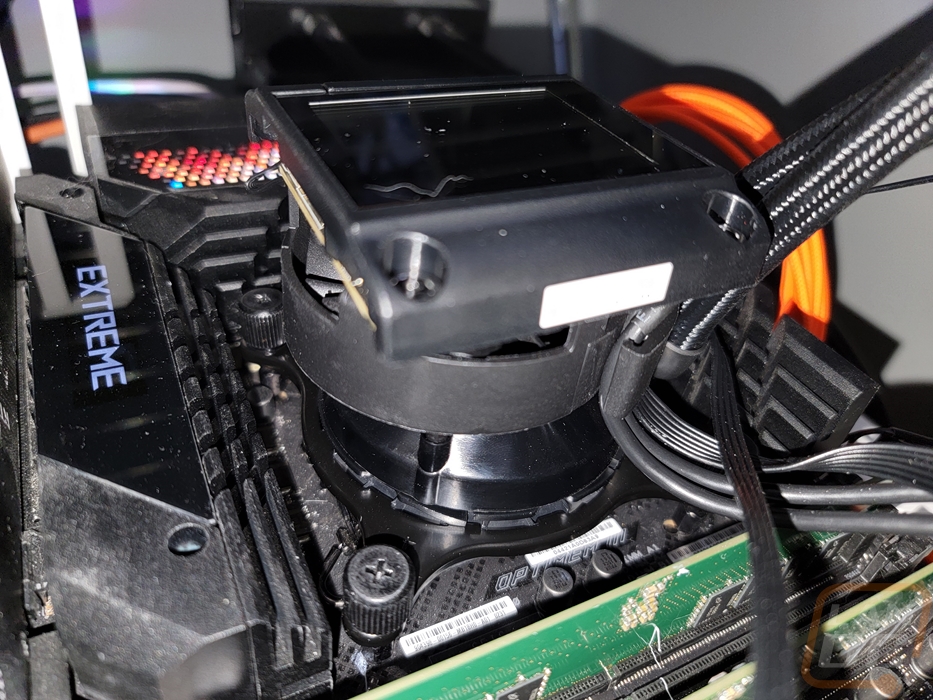
I did get a few pictures of the overall installation of the CoreLiquid S280. Its mounting bracket installation is a lot like the Corsair on LGA 1700. You have the backplate which supports 1700 and older Intel sockets with adjustable sliding mounts. You hold it from the back and have to screw in the included standoffs. Even with those tight it feels loose and getting the standoffs installed with fat fingers is kind of a pain with a motherboard like our ROG Z690 Extreme with huge VRM heatsinks.
Once the bracket is installed you drop the pump on to your CPU and you have four large thumbnuts to tighten down. These are thicker and easier to use than the Corsair but the large screen, the wiring, and the two water lines make getting at them tight. Once installed you can tuck your wiring off to the side and run it. Then the cover can be dropped on. It uses its magnets to snap into place but can take a little wiggle if the wiring or hoses are keeping it from going in place.
First up for our testing is noise testing. For this, I test in three different situations. I test with the fans and pump all set to 50% fan speed, again at 100% fan speed, then the third under load test is done while running our AIDA64 CPU Stress Test once temperatures have leveled off I test the noise level of everything. Each test is run with an A-weighting which is normal, then C weighted which takes in more in the lower frequencies. The CoreLiquid S280 has a noise focus with the very Noctua like Silent Gale fans for the radiator, but at the same time a small fan-like what is installed in the pump can add a lot of noise so I was curious to see where the CoreLiquid S280 would end up. At the 50% fan speed, it was similar in performance to the MAG CoreLiquid C280 that I previously tested. Turning the fans up more it was quieter than some of the other AIOs but still a little louder than the C280. After messing with things, the radiator fans weren’t the issue, the fan in the pump was so a little bit of tuning could keep things quiet. Speaking of quiet, once under load, the CoreLiquid S280 did well, running right with the Noctua NH-U12S which has just one fan.
|
Noise Testing |
50% Fan Speed A Weighted |
50% Fan Speed C Weighted |
100% Fan Speed A Weighted |
100% Fan Speed C Weighted |
Under Load A Weighted |
Under Load C Weighted |
|
Corsair iCUE H100i ELITE LCD Liquid CPU Cooler |
36.5 |
56.1 |
48.3 |
58.4 |
44.2 |
58.7 |
|
MSI MAG CoreLiquid C280 |
36.2 |
51.7 |
46.9 |
57.4 |
43.9 |
56.7 |
|
Sapphire Nitro+ S240-A |
35.7 |
54 |
50.8 |
58.1 |
37.8 |
56.5 |
|
Cooler Master MasterLiquid PL240 Flux |
35.2 |
53.8 |
45.2 |
58.6 |
34.4 |
54.5 |
|
Noctua NH-U12A chromax.black |
33.8 |
51.1 |
43.9 |
58.2 |
35.6 |
55.4 |
|
Noctua NH-U12S |
33.3 |
51.1 |
37.9 |
58.6 |
34.5 |
55.3 |
|
MSI MAG CoreLiquid S280 |
36.3 |
53.3 |
49.3 |
57.7 |
34.6 |
55.2 |
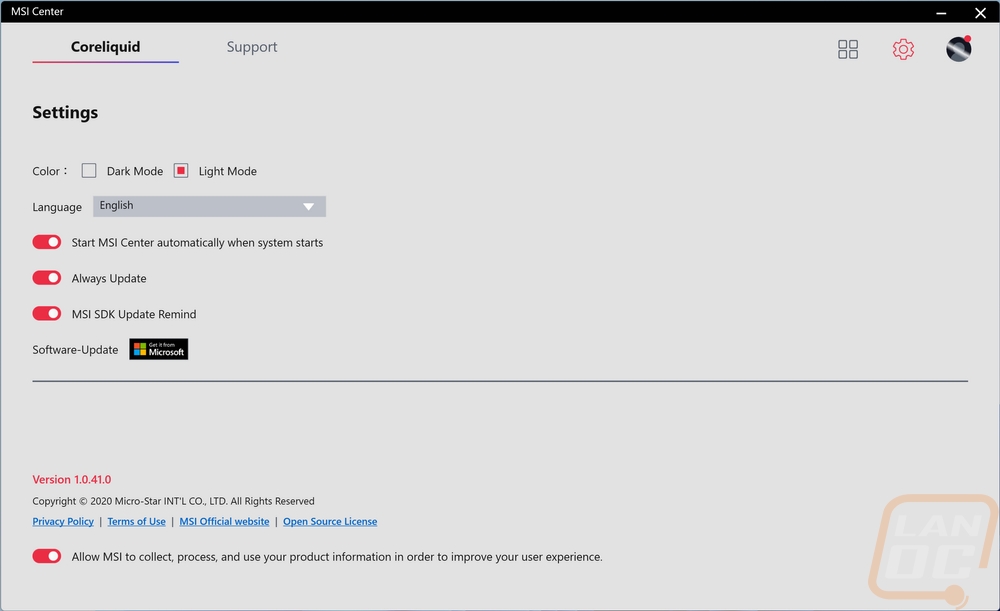
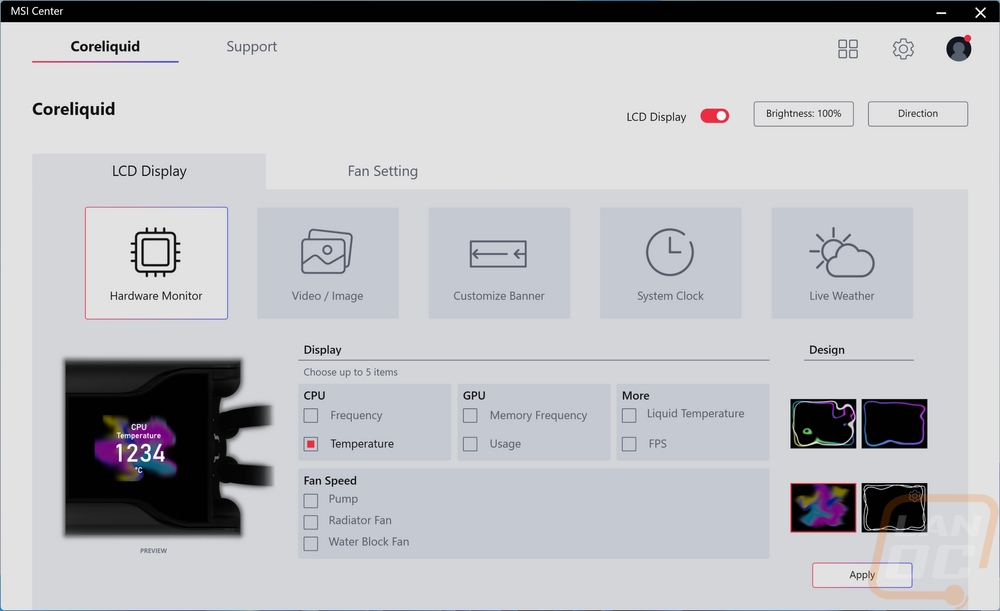
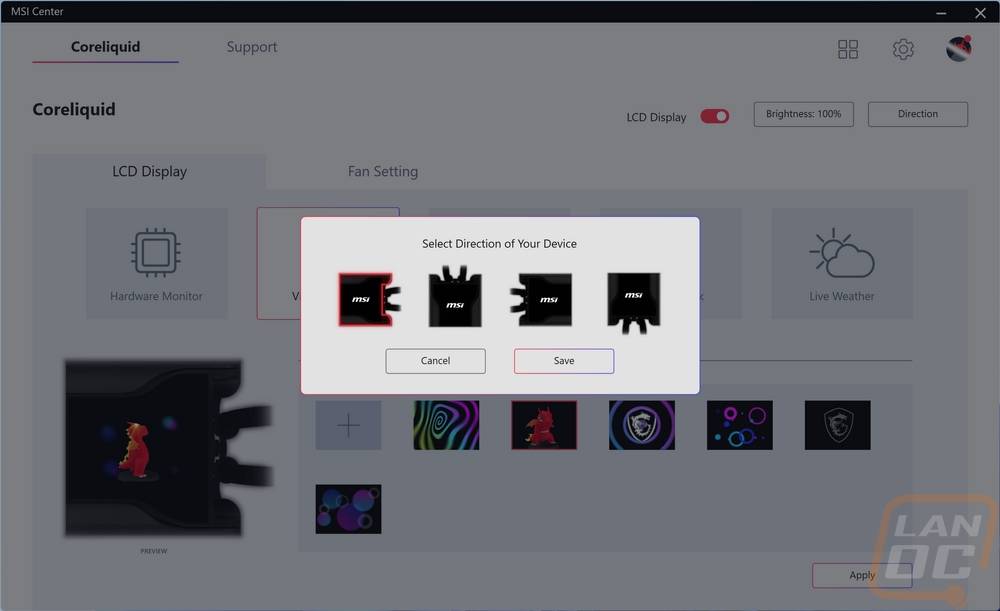
So with a lot of AIO coolers, you just need to hook things up to your fan header on your motherboard to control everything. But because of the integrated screen, the CoreLiquid S280 does have software. Without the software, you will just get a default animation on the screen. It uses a program called MSI Center which works with a variety of MSI products. With the CoreLiquid S280 installed once you install MSI Center, you have a tab up top specifically for the cooler. That has things broken down into two sections. You have the LCD Display settings and your fan settings. You also have a gear in the corner that gets you to the settings. This will let you switch the software between light and dark mode and you can set the language. Beyond that, you can tell MSI Center if you want it to start when your boot up and if you want it to check for updates automatically.
The fan setting page is relatively simple. It has four default settings, you can run silent, balanced, game mode, or custom. For all of our testing, I ran balance because that is the default setting. Silent will turn the fans off when temperatures are low and game mode gets more aggressive on the fan profiles. For all of those, you can see the fan profile for the radiator fans, the pump, and the water block fan in the bottom half of the screen. For the custom profile, you can adjust those white dots yourself. I do wish they had more than one custom profile and maybe one for full speed but most people will want to run one of the three default modes.

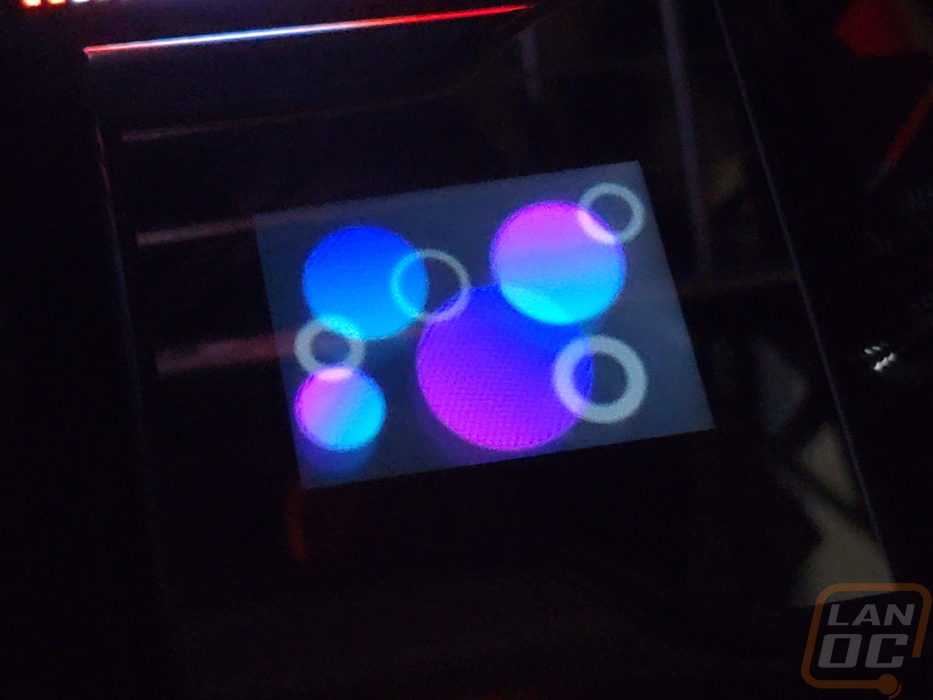
The LCD Display page looks similar to the fan setting page but there is a lot more control. The five mode squares are the main options. Then once you have one of those clicked below that you can adjust the settings for that mode. So for the hardware monitor, you can pick up to 5 options to display and pick one of the four animated effects to show in the background. I do wish you could show this information but put your own image or effect into the background.

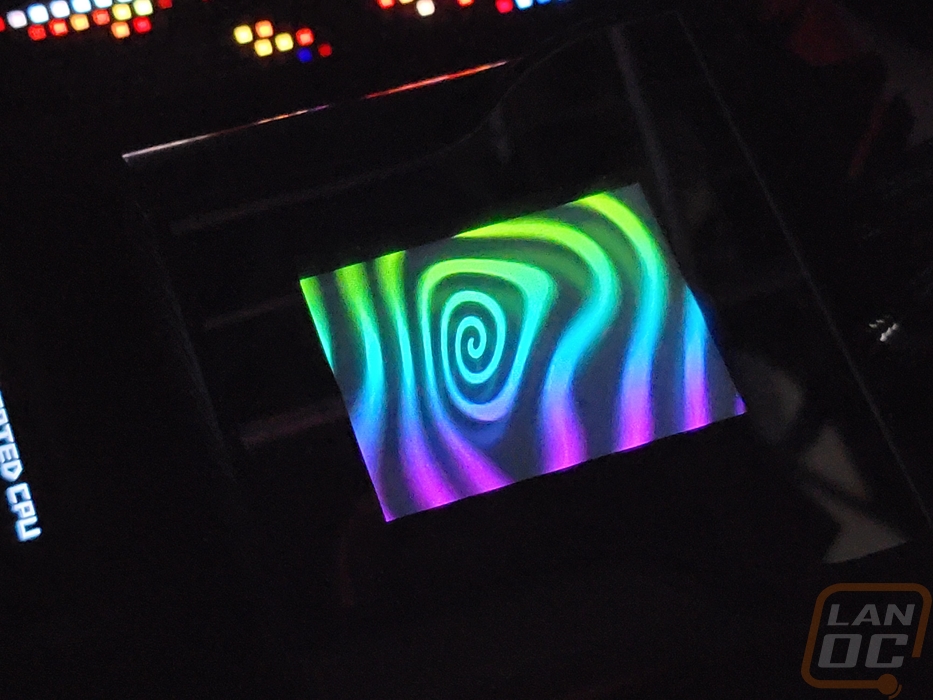
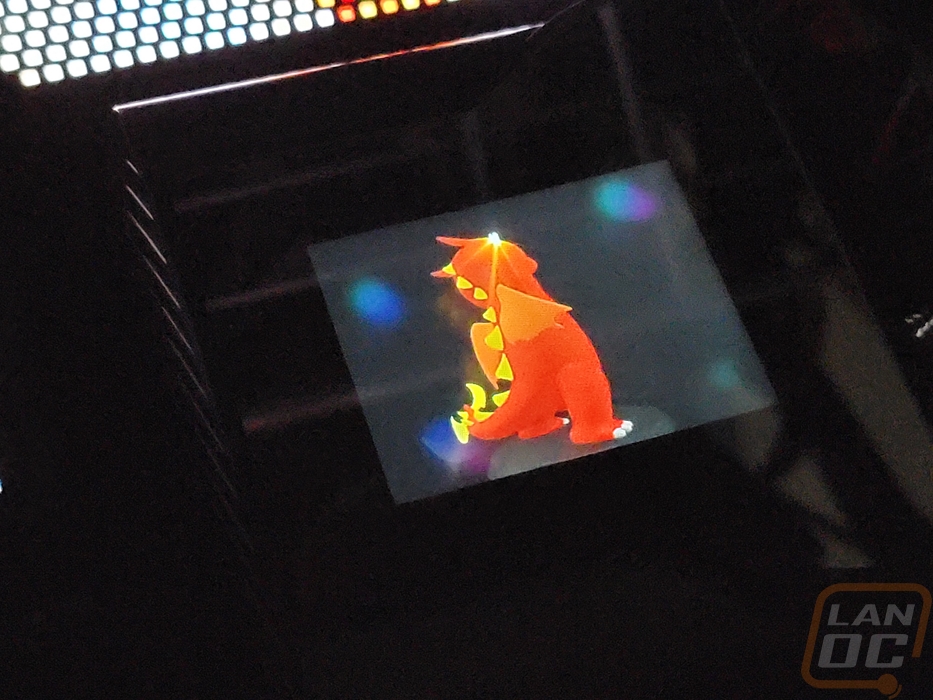
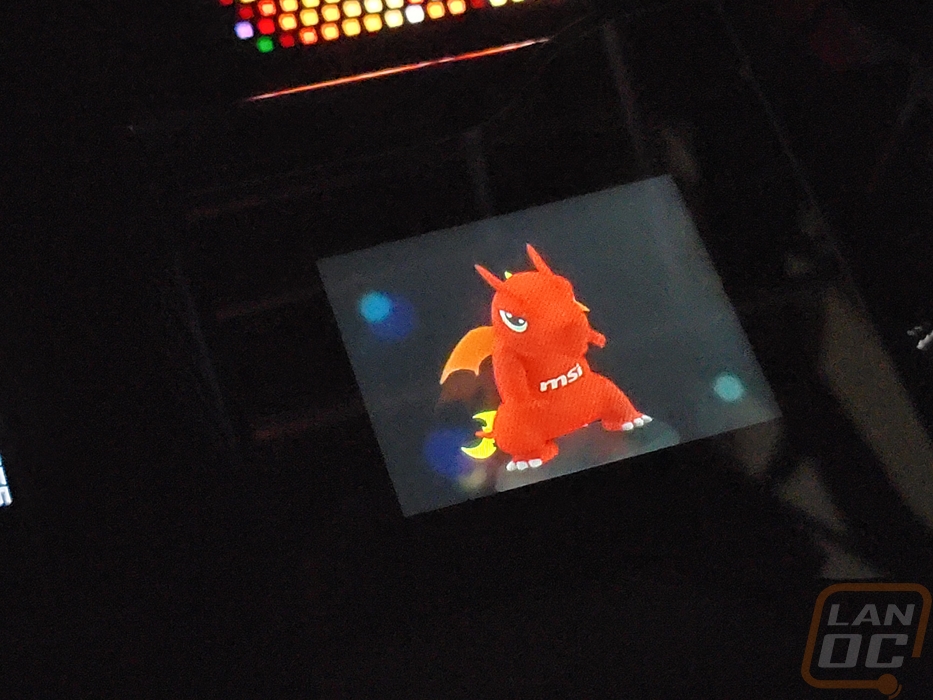
Next up you can upload your own image or video which can be a BMP, JPG, GIF, or MP4. You can also pick from the already uploaded options which are animated and a few have an MSI theme including the MSI dragon.
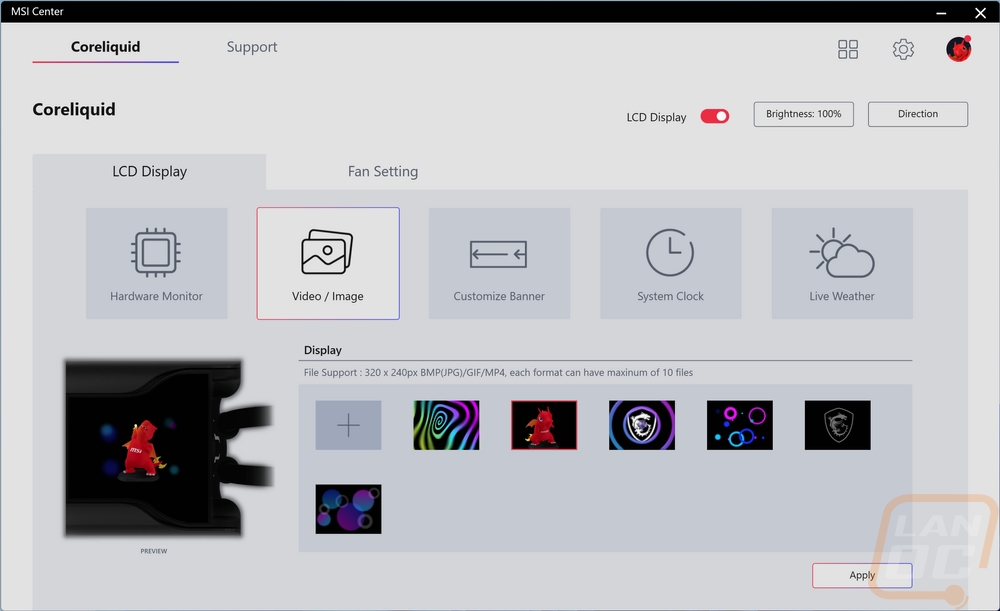

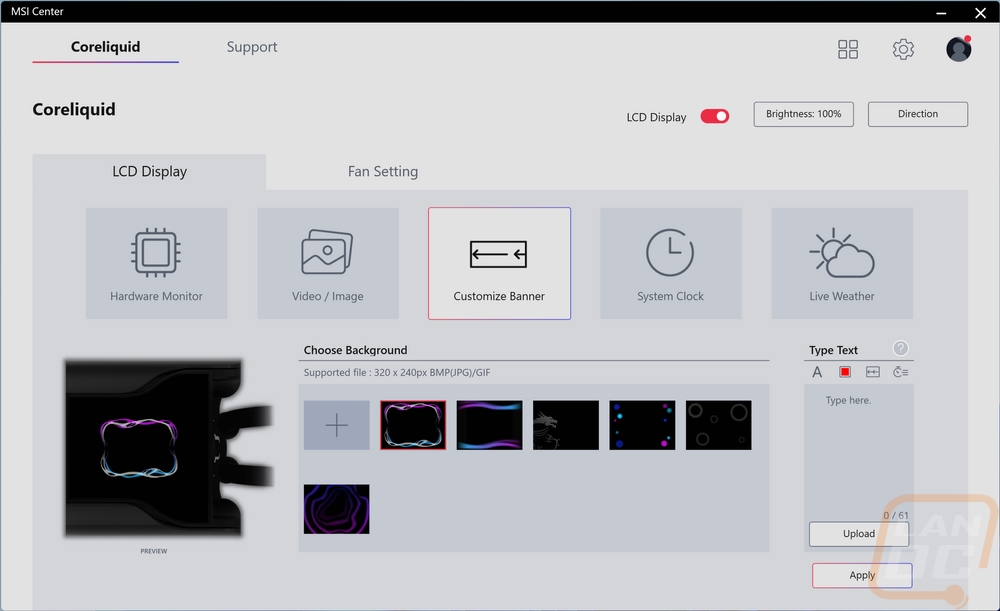
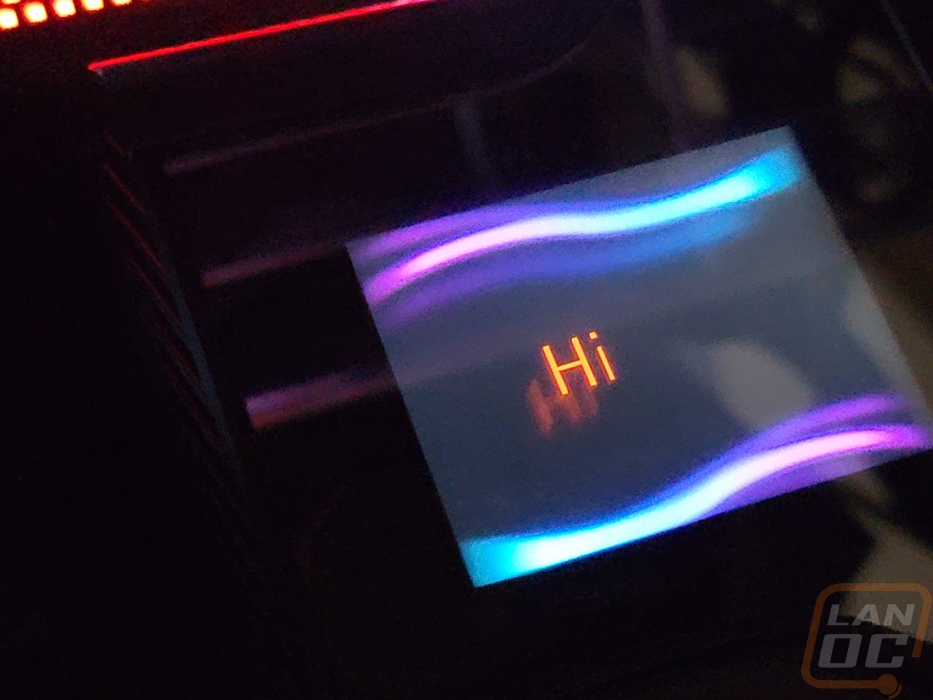
The banner page gives you a few additional backgrounds along with some from the hardware monitor page. Then on the right, you can type in text. You can have the text scroll, you can pick the font and color, and you can change the scroll speed.
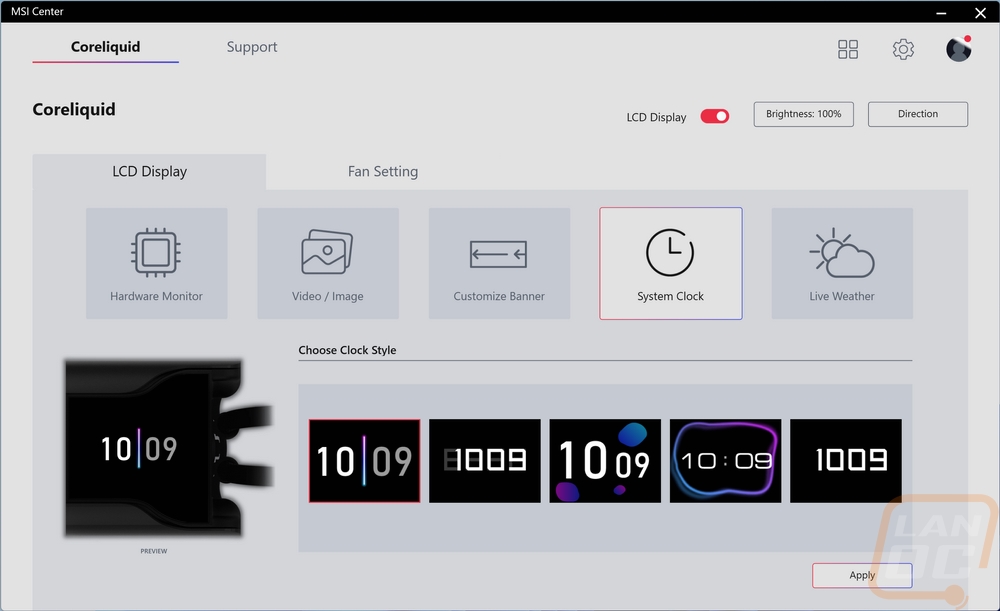
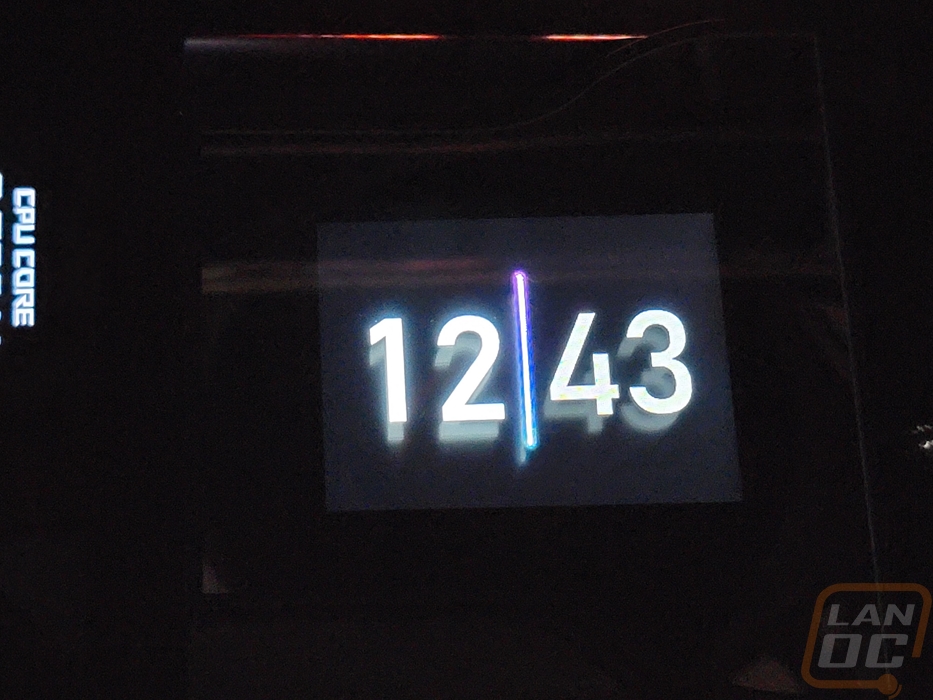
Next up is the system clock where you can pick from five different designs. These have different backgrounds and different font and font sizes for the time itself that will show on the screen. Again like the hardware monitor, I wish there was a little more control here. Being able to put your own background and if you could use your own font and font colors here could be a nice addition.
Last up is the weather. This will use your location and give you current weather updates including the temperature, humidity, rain conditions, and chance of rain. I don’t see many people needing this, but even as I say that my thermostat is just a few feet away and shows the current weather and the outside temperature and I use it ALL of the time. I do wish that you could have the option to put in your own zip code, I assume this is going off of your IP and some people’s IP will show in a different area.

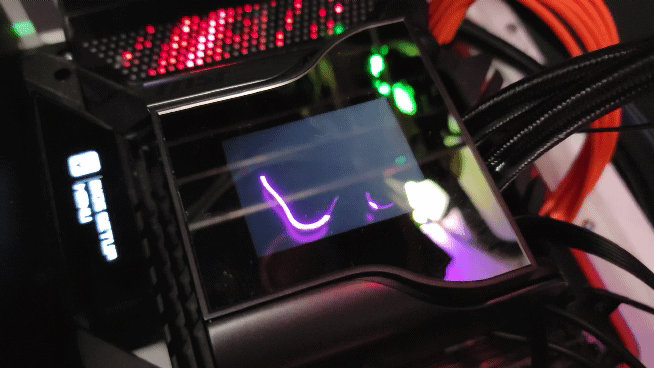
There is a little control available. For starters, you can select the direction that which the display is laid out. When I tested the Corsair this wasn’t an option and what is the point of a display that isn’t orientated in the direction you need so being able to pick any of the four directions is nice. You can also adjust the screen brightness or turn the LCD completely off if needed.
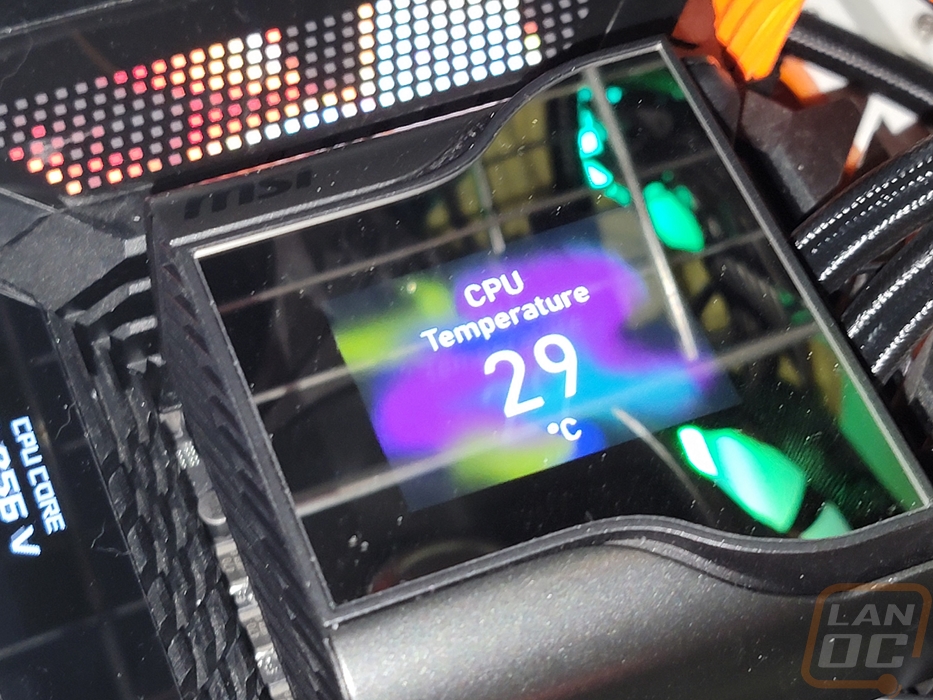
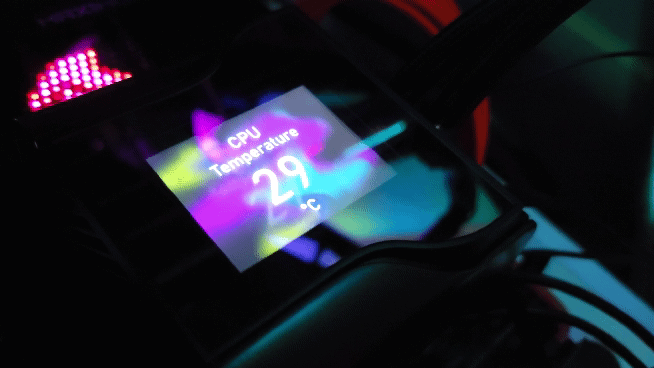
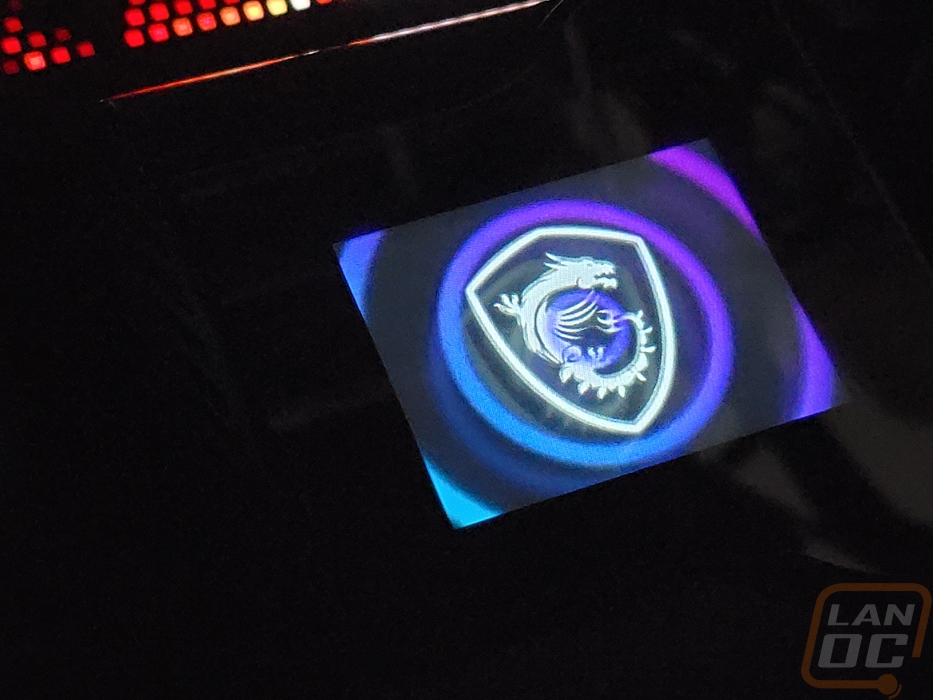
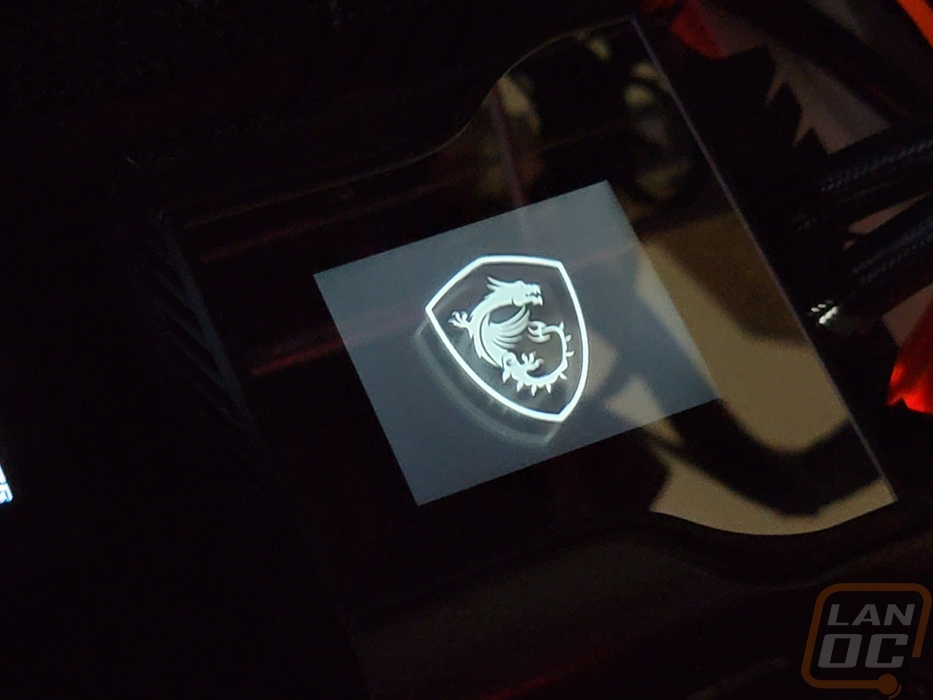
Overall MSI does give you a lot of control over the screen and the software is easy to use. The screen looks great at night but because they use a mirrored cover getting photos of the screen was a little difficult. It picks up a lot of reflections. The screen and then cover also can create another effect as well. If you aren’t looking right at the screen the gap between the cover and the screen itself can give a ghosting effect. You can see it in our photos because our test bench sits at an angle and also because taking direct on pictures was giving me fits with the reflections. In person, this effect isn’t nearly as noticeable but I do think in the future MSI could avoid issues by not having the cover or putting the cover up tight against the screen.