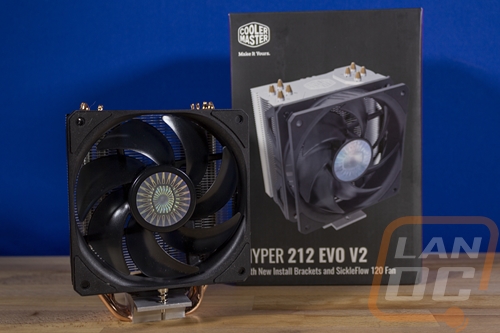
With a few different all in one coolers tested recently, I have been on a bit of a cooling kick. But I couldn’t end things up without checking out Cooler Masters's most recent introduction, the Hyper 212 Evo v2. Which I suspect a lot of you have heard of the Hyper 212. When I’m going a build that is more down to earth, 9 times out of 10 I end up recommending the Hyper 212, and its been that way for years. Cooler Master has lead the market with this 120mm tower cooler that is always priced like a smaller 92mm cooler. Its no wonder why it has made it into so many builds. So when they said they had a new model coming, I had to take a look and find out if this is still the go-to for budget builds. Today I’m going to check out the Hyper 212 Evo v2 and see what is different as well as find out how it performs in our 3 CPU test suite. Let’s go check it out!
Product Name: Cooler Master Hyper 212 Evo v2
Review Sample Provided by: Cooler Master
Written by: Wes Compton
Amazon Affiliate Link: HERE
|
Specifications |
|
|
CPU Socket |
Intel LGA 2066 / 2011-v3 / 2011 / 1366 / 1156 / 1155 / 1151 / 1150 / 775 socket |
|
Dimensions (L x W x H) |
120 x 80 x 155 mm (4.7 x 31. X 6.1 inch) |
|
Heat Sink Material |
4 Heatpipes / Direct Contact / Aluminum Fins |
|
Fan Dimensions |
120 x 120 x 25 mm (4.7 x 4.7 x 1 inch) |
|
Fan Quantity |
1PC |
|
Speed |
650 ~ 1800 RPM |
|
Fan Model |
Hyper 212 EVO V2 -SickleFlow 120 |
|
Fan Air Flow |
61 CFM (Max) |
|
Fan Air Pressure |
2.52 mmH2O (Max) |
|
Fan MTFF |
160,000 hours |
|
Fan Noise Level |
8 – 27 dBA |
|
Fan Power Connector |
4-Pin PWM |
|
Fan Rated Voltage |
12 VDC |
|
Fan Rated Current |
0.12 A |
|
Fan Safety Current |
0.37 A |
|
Fan Power Consumption |
1.44 W |
|
Warranty |
2 Years |
Photos and Features
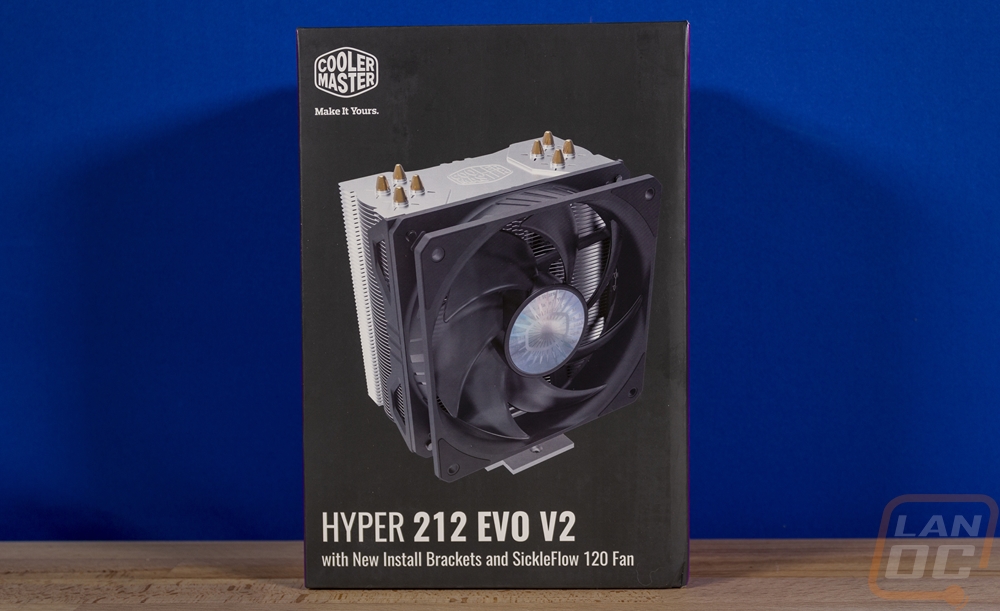
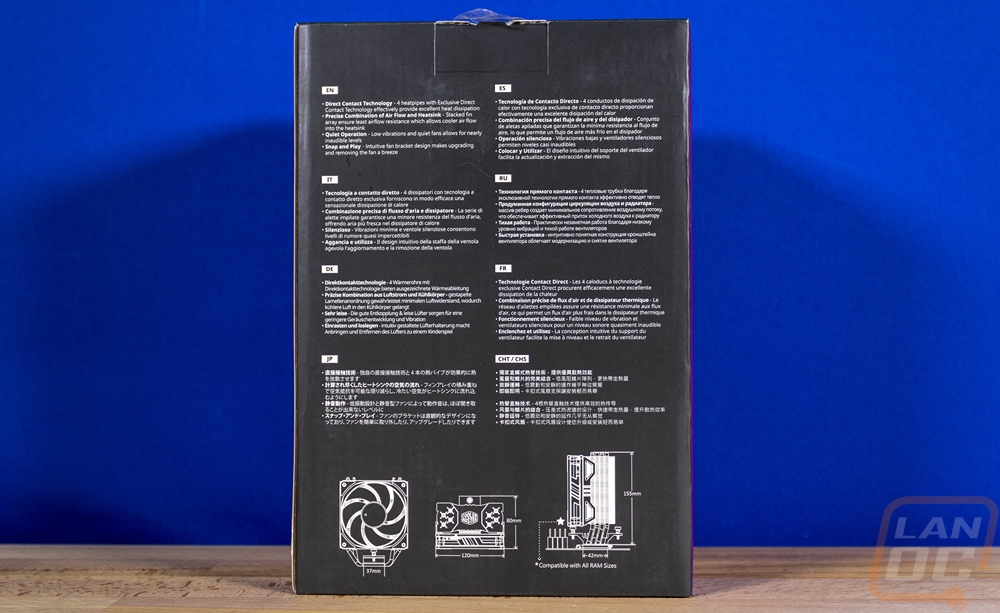
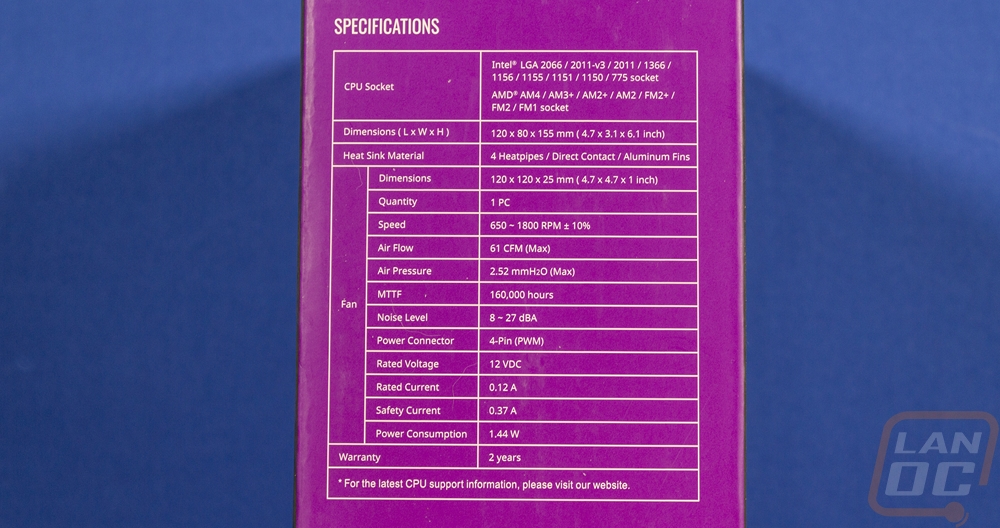
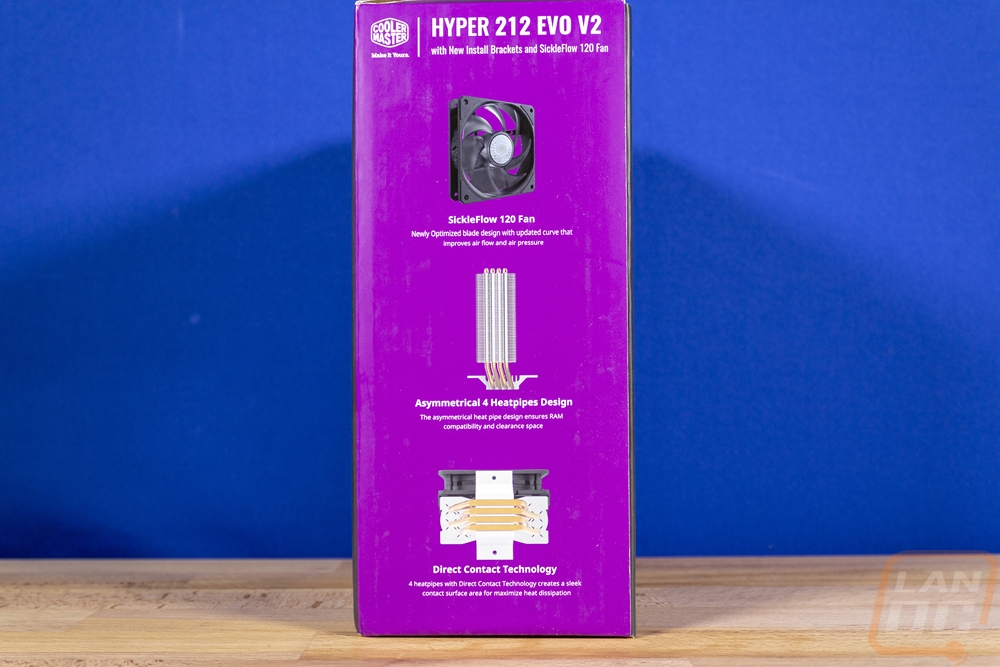
With Cooler Master always going with the purple theme, I was surprised to see the Hyper 212 Evo V2 didn’t have purple on the front or back of the box at all. They didn’t skip it altogether, it is on both sides. But I always liked the touch of purple to quickly spot who makes it. They have the Cooler Master logo in the top left corner and the product name is across the bottom and they bolded everything but the Hyper in the name. They even touch on what is different under that by highlighting the new brackets and fans. The front of the box also has a large picture of the cooler on an otherwise dark grey background. On the back, they list off four key features with a short description of each then repeat that across multiple languages. Then down at the bottom, they slipped in line drawings with dimensions which is nice to help when you need to know if it will fit in your build. They did include a full specification listing on the side as well as pictures to go along with the features on the other side which is nice.
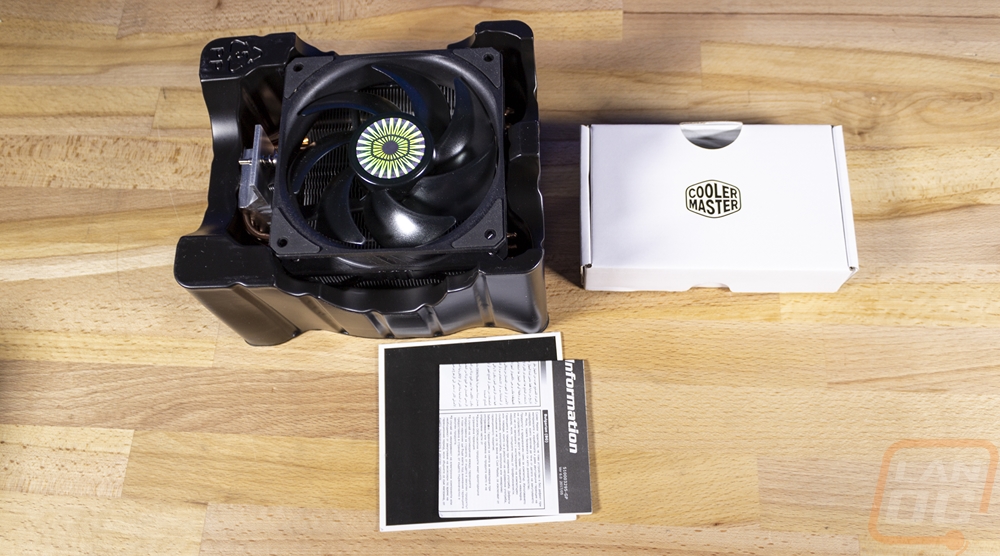
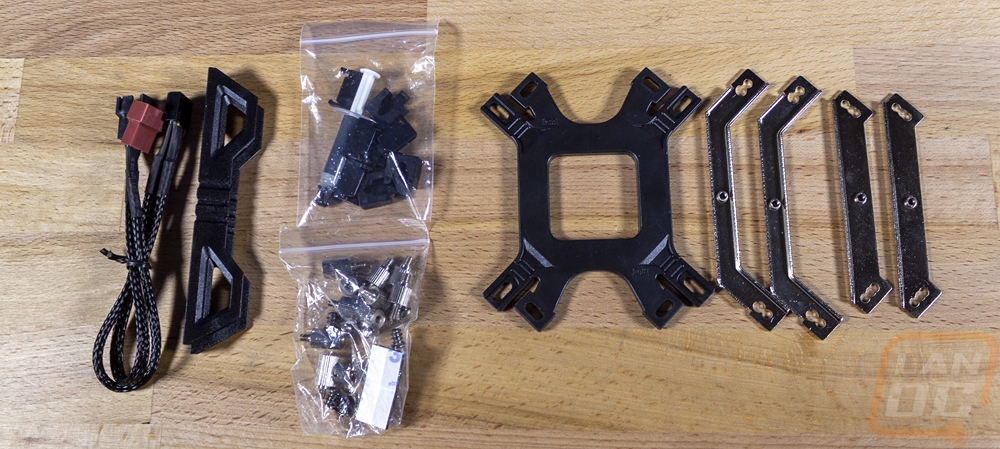
Inside the box, the cooler comes stuffed into a formed plastic tray. Along with that, you have all of the brackets and accessories in a small box that sits up on top. They also included some documentation in the form of a manual which includes installation instructions and a warranty paper with all of the legal information repeated across every language. Inside of the box they have included a backplate for both AMD and Intel installations as well as brackets for both. There are two baggies, one has all of the universal parts like the small tube of thermal paste and the black clips to use on the backplate. The other has a mix of Intel and AMD hardware as well as universal parts as well. Then there is a fan splitter cable and a set of plastic fan brackets, both are for if you want to run dual fans on the cooler. Given the budget for the cooler, its surprising they would include anything extra let alone what you need to help the cooler cool even better.

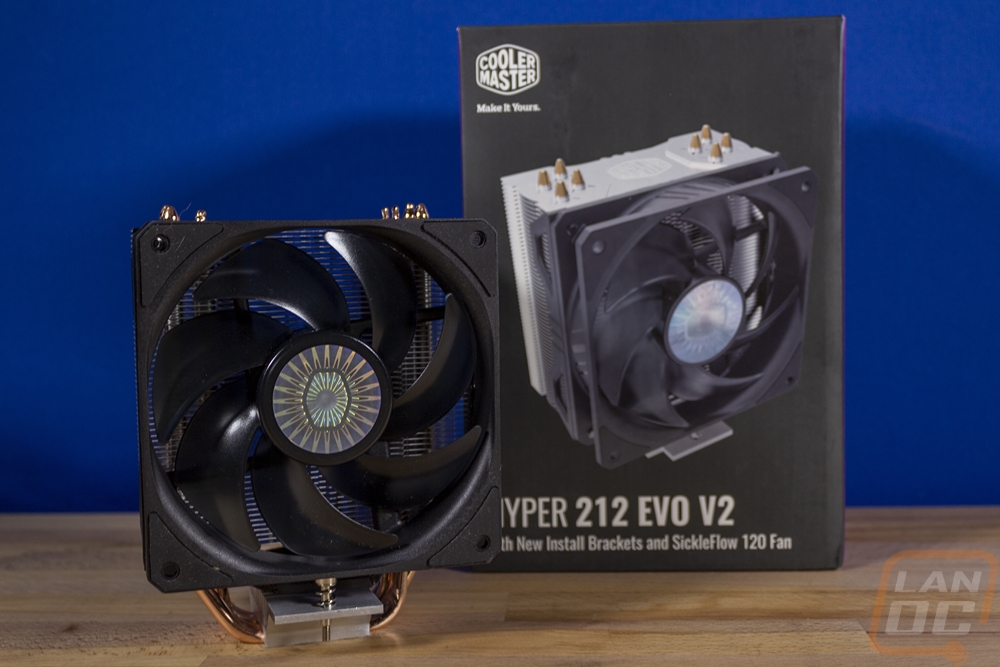
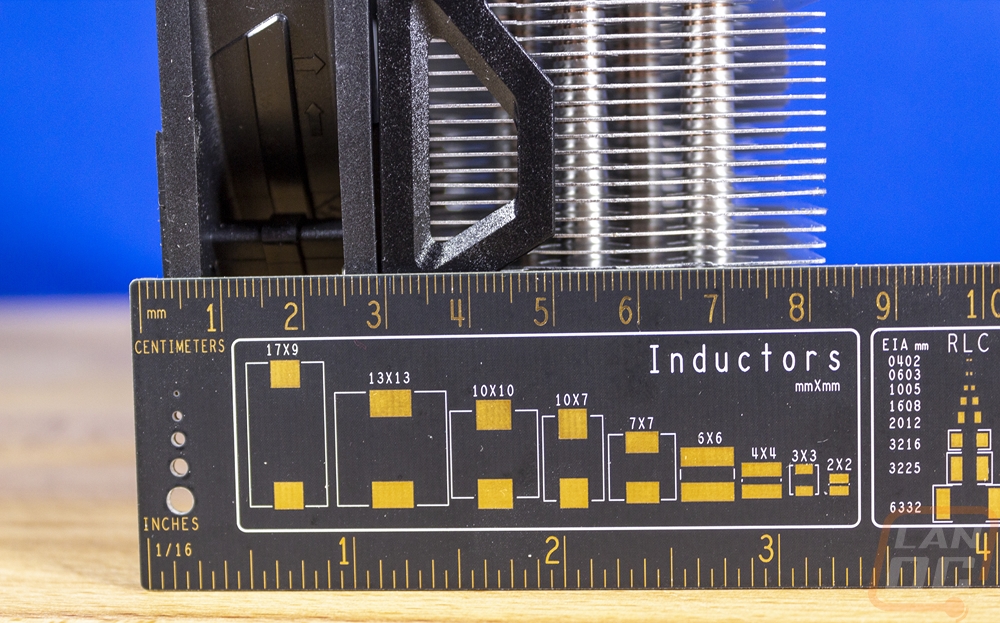
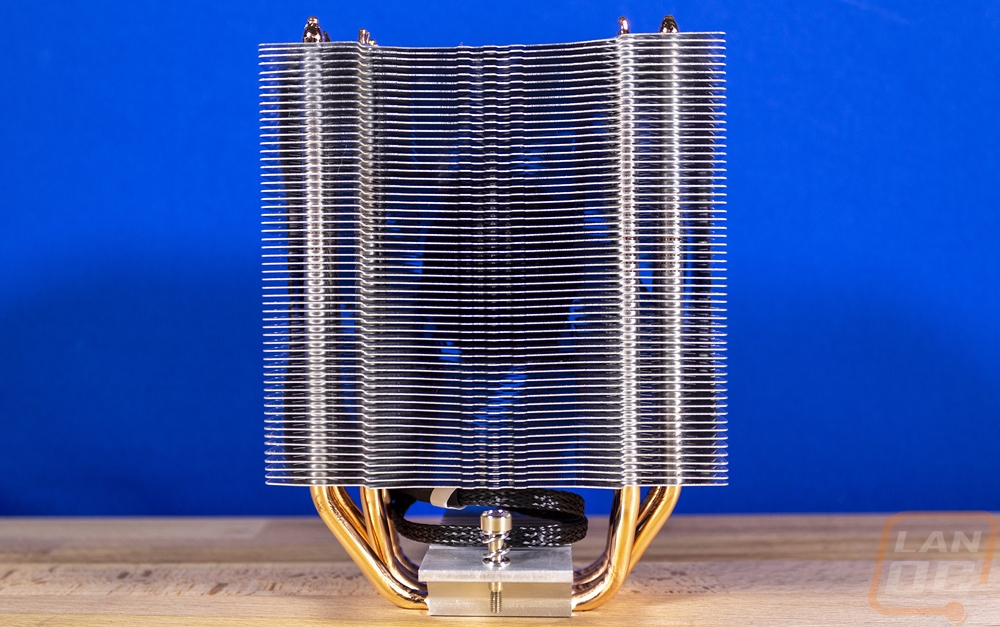
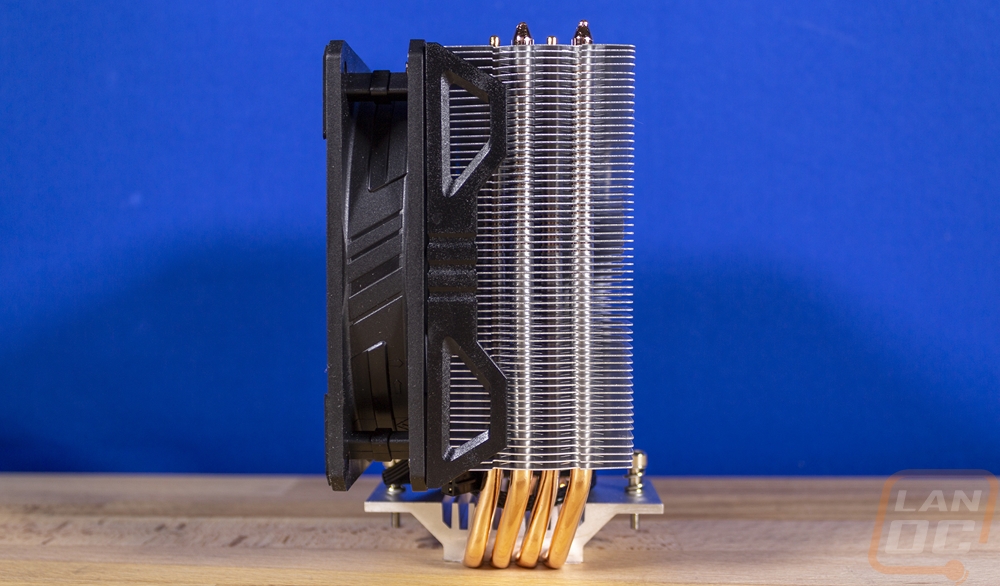
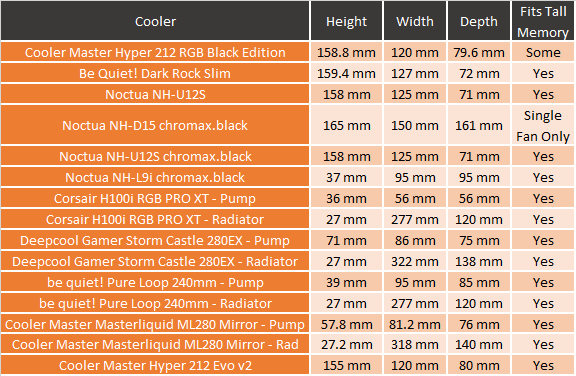
At first glance, the Hyper 212 Evo V2 looks just like past Hyper 212 designs and that isn’t a bad thing given their popularity. It ends up coming in at 120 x 80 x 155 mm or 4.7 x 31. X 6.1 inch in imperial. This is where we will find our first change in the V2 model. The original Evo is 159mm tall where this one is a touch shorter at 155. Cooler Master says that is to help with case fitment, though given how small of a difference it is it might just be a nice side effect of the new asymmetrical heatpipe design that I will talk about in a minute. Even so, it is sized to have almost universal compatibility when it comes to any traditional mid-tower case. Though this is still too tall for compact cases that support some tower designs like the M1 which is limited at 130mm tall.

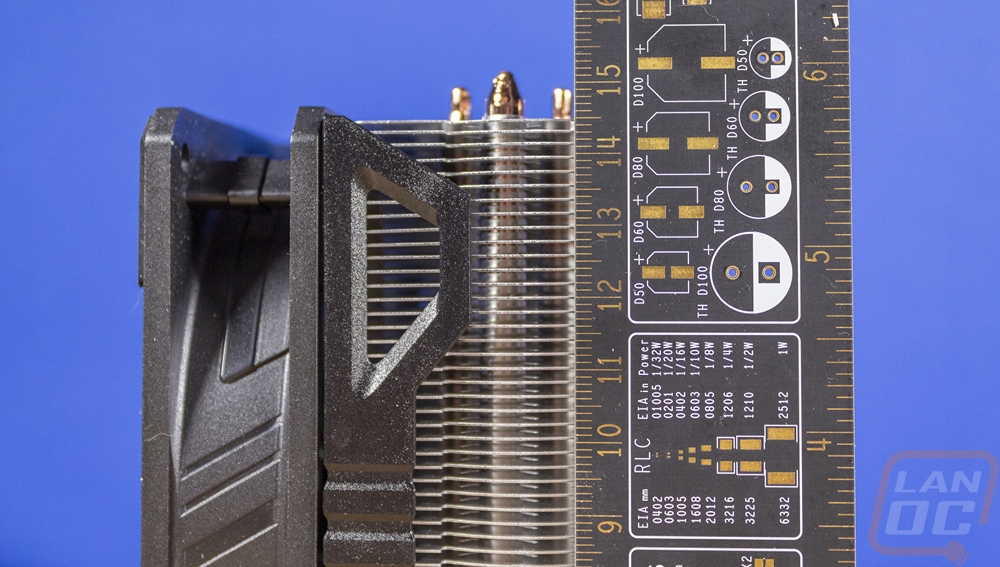
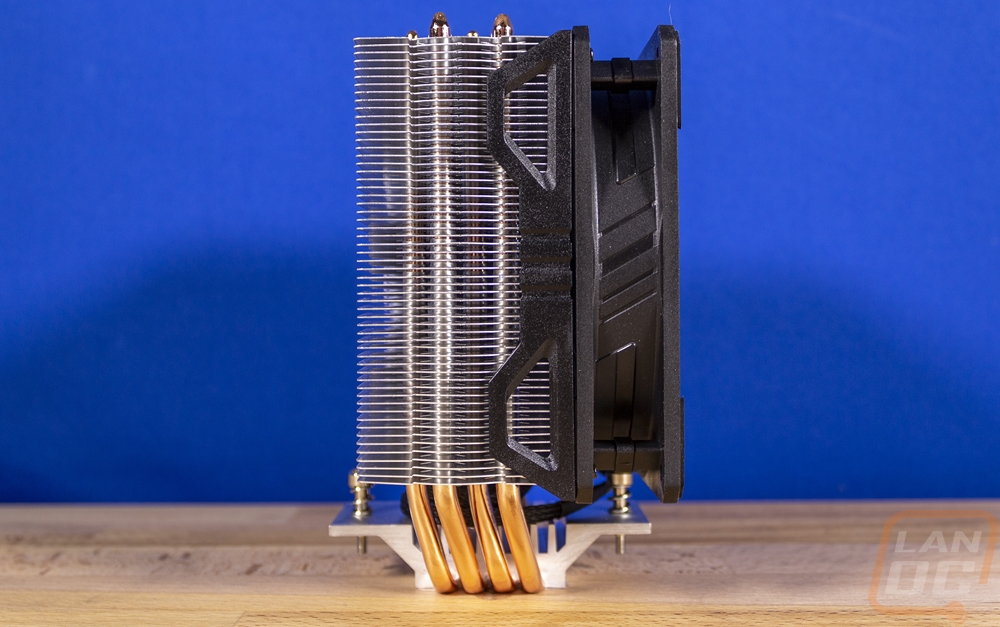
So the side profile of the Evo V2 lets us see that asymmetrical heatpipe design that I was talking about. The old design was just vertical, they have now added a little angle when coming out from the direct contact surface. This brings the heatsink over slightly to help get the fan up over top of the mounting bracket. This is important for memory clearance which now has full tall memory compatibility. This does give us a view
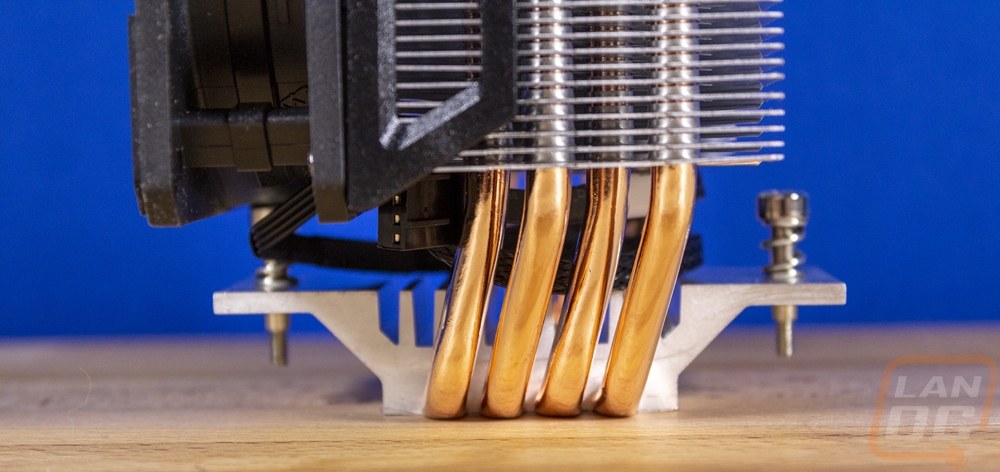
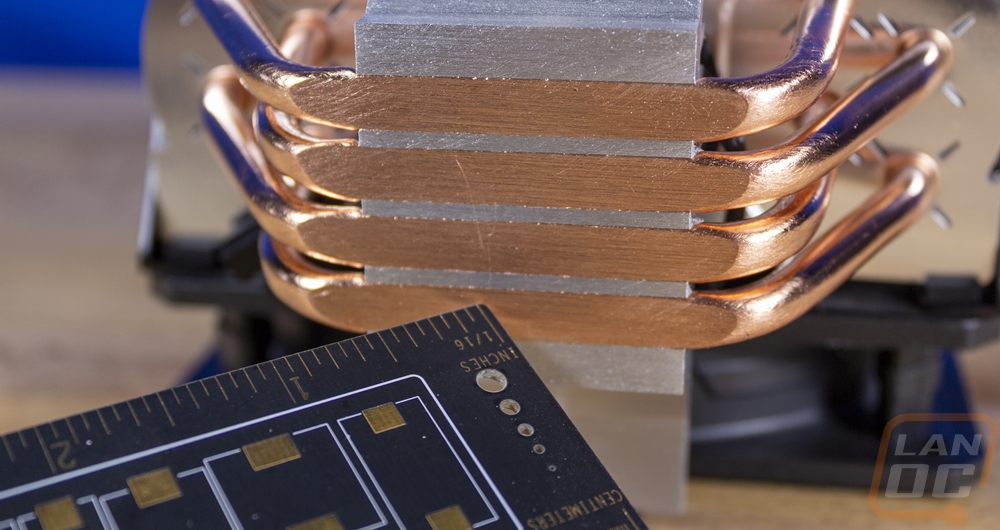
One of the main reasons the performance has always been good on the Hyper 212 lineup is the direct contact surface. They can skip having to have a perfect mirror finish and have the heatpipes directly up against your CPU which helps pull the heat up into the heatsink quickly. You have to make sure you have good thermal paste and a good application for the best performance, however. The contact surface is a little different than in the past however, they used to do a continuous direct contact which had all four heatpipes butting up against each other. Which makes me think these are slightly smaller as well. They then have an aluminum bracket that keeps them spaced out and has the two attachment screws for the mounting bracket. The mounting screws are clipped into place so you don’t lose them and they have a spring included helping get the correct mounting tension.
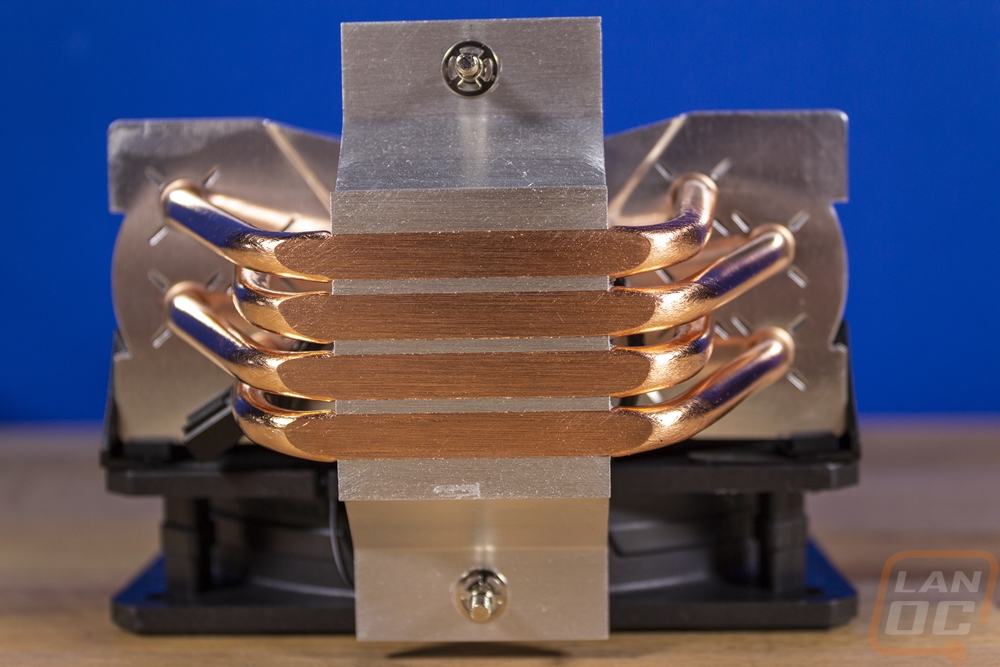

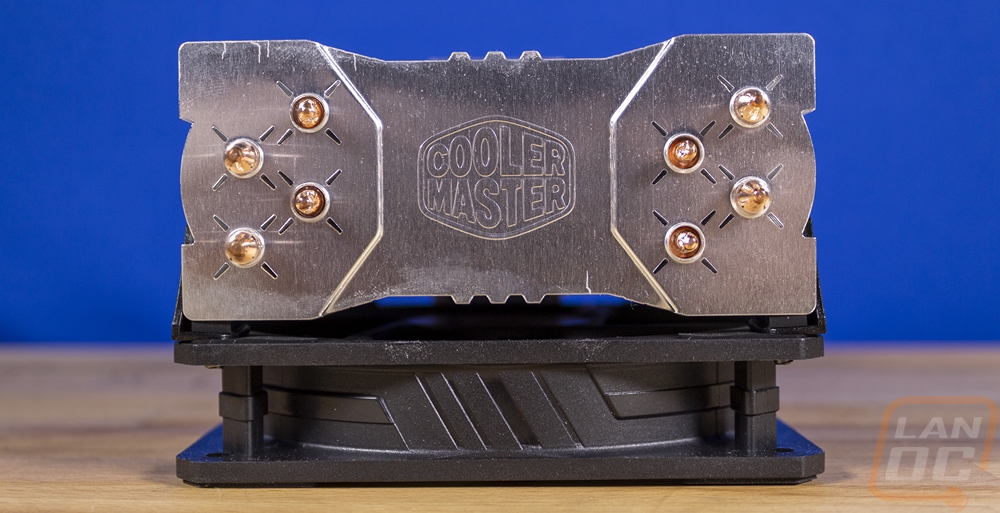
The four heatpipes have a U shape which means they are able to run up both sides of the heatsink and they do have them spaced out into two rows for each side which you can see through the heatsink and at the top. The heatsink itself is a normal sheet metal aluminum design. They have put a small opening behind the fan on both sides as well as on the sides you can see a hook shape cut into each for the fan mount brackets. Then up on top for a little styling, the top layer has an indented section in the middle, as well as the Cooler Master logo, etched into it.
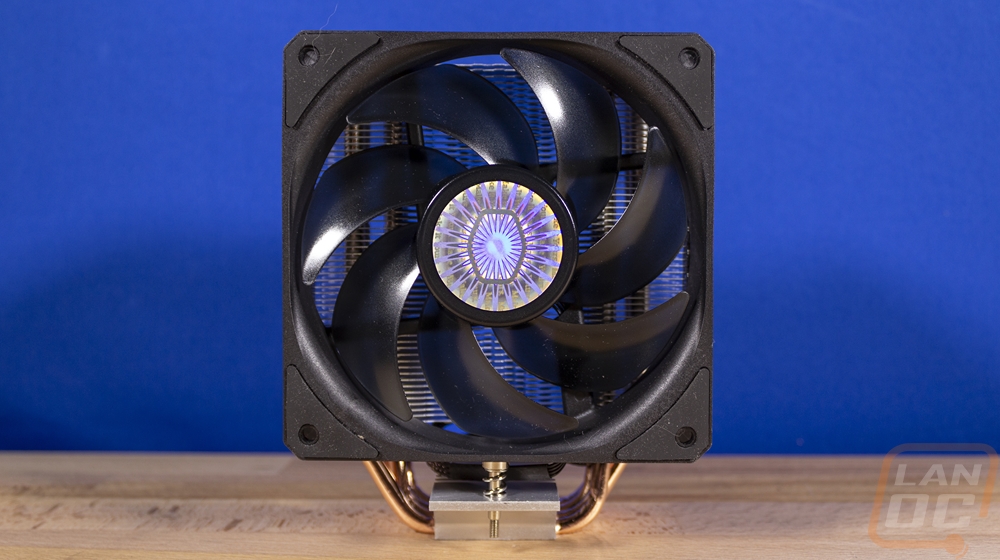
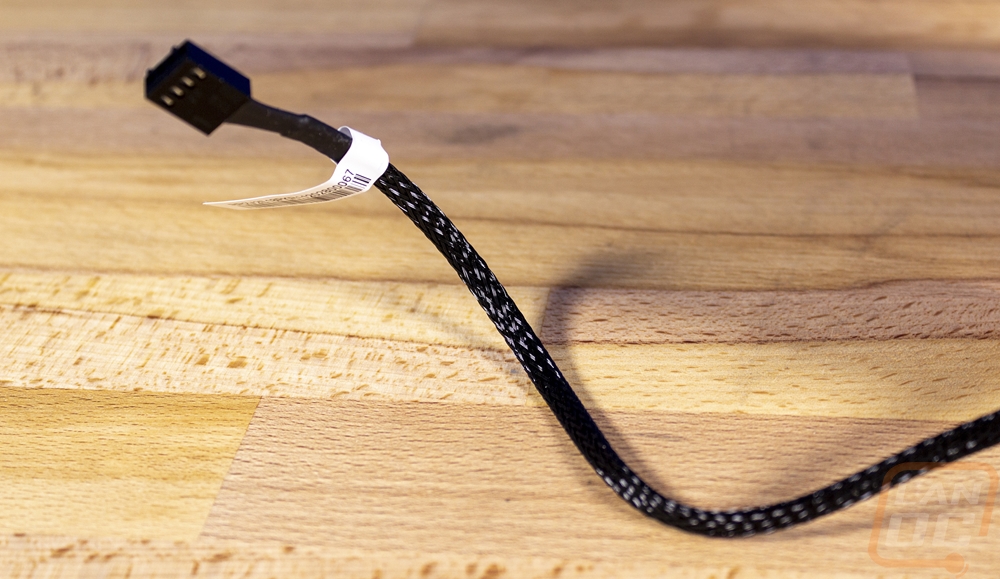
Now another big change for the V2 is the fan. They now have the SickleFlow 120 for the fan where the old fan was Cooler Master branded and was called the XtraFlow 120. The old fan ran up to 1600 RPM with 66.3 CFM where the new fan goes up to 1800 RPM at a lower max CFM of 62 but at a lower decibel level (31 vs 27). It also has better static pressure with the old fan outputting a max of 1.7 mmH2O vs 2.52 mmH2O on the SickleFlow. The SickleFlow is the same fan Cooler Master used on their ML280 Mirror that I just reviewed as well. They use rifle bearings and have a long expected life with it being rated at 160,000 hours which is over 18 years. The mounting configuration is the same as in the past but is still worth pointing out because they used plastic clips, not the wire clips that a lot of other coolers use. You mount them to the fan and then you can clip the fan on and off. The fan is PWM with its four-pin plug and does come sleeved with a thick weave, I would prefer a tight weave or no sleeving at all as long as it had the thin black flat cables that most fans have these days.
Test Configuration and Procedures
|
Testing Hardware |
Affiliate Link/ |
|
|
Current Pricing |
||
|
Case |
Primochill Wetbench |
|
|
Motherboard |
Asus Crosshair VIII HERO WiFi |
|
|
CPUs |
AMD Ryzen 9 3900X |
|
|
|
AMD Ryzen 5 3600X |
|
|
|
AMD Ryzen 5 3400G |
|
|
Ram |
G.Skill Trident Z Royal 3600MHz 16-16-16-36 |
|
|
Power Supply |
Corsair AX1200w |
|
|
Thermal Paste |
Noctua NT-H2 |
|
|
SSD |
Corsair MP600 2TB |
|
|
OS |
Windows 10 Pro |
|
|
Testing Procedures |
|
|
Noise Testing |
The noise testing is done with the fan manually set to 50% and 100% fan speeds. The meter is 18 inches away from the fan when testing. This is done using a Protmex PT02 Sound Meter that is rated IEC651 type 2 and ANSI S1.4 type 2. Tests are done set weighted to A and set to a slow response using the max function. The ambient noise level in the testing area is 33.3 decibels using the test settings. The under load testing is done the same, but during thermal testing using the AIDA64 Stress Test CPU setting. |
|
Cooling Testing |
Most of the temperature testing is all done using the stress test in AIDA64 set to FPU only for the maximum heat then again with CPU Stress for a more real world test. Onboard temperature results are typically not the most accurate, but in this case, I am comparing results directly from the exact same CPU and motherboard for each cooler. Each cooler was tested with three different CPUs (see the hardware listing). I also did every test twice, once at stock fan settings and another with the fan at 100%. Each test requiring at least 15 minutes of full load unless it gets dangerously hot. If the results are still climbing at 15 minutes the test will be extended out until an equilibrium is reached. It is also important to know that because I will be swapping CPUs out often I can’t use the stock thermal compound that is included with the coolers. For consistency, I am using Noctua NT-H2, simply because that is what I have an ample amount on hand of. All results are from the tDie sensor |
|
Blender Testing |
Blender testing is done similar to all of the AIDA64 Stress Tests only using the default Blender Benchmark to put load on the CPU. This is done using the full benchmark until temperatures level off and are consistent. |
Noise and Fitment
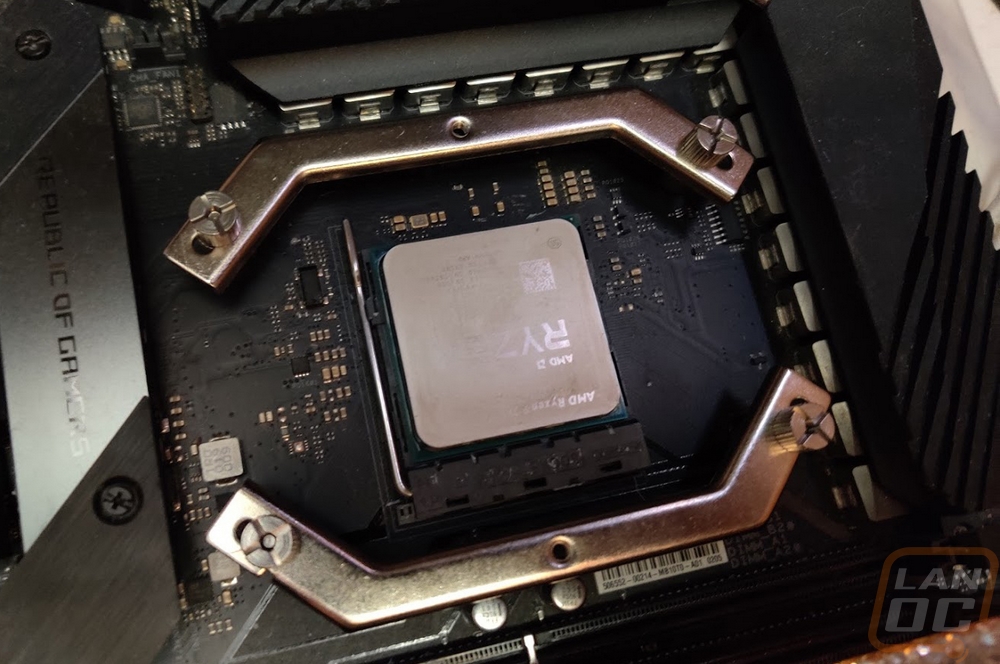
Before getting into testing I did need to get the Hyper 212 Evo V2 installed and frankly this isn’t something I look forward to with the old design. Cooler Master used to use the X shaped top bracket that you would have to slide through then spread out. With the V2 this was another area that they changed. They went with a slightly more modern design that is closer to what Noctua has been doing and some AIOs as well. They require you to use their backplate which you put pins in and then clip into place. These push up through the mounting holes and you installed these standoffs. I was surprised that this didn’t tighten all the way down on our board and I would prefer a design that sticks with the stock backplate which is metal.
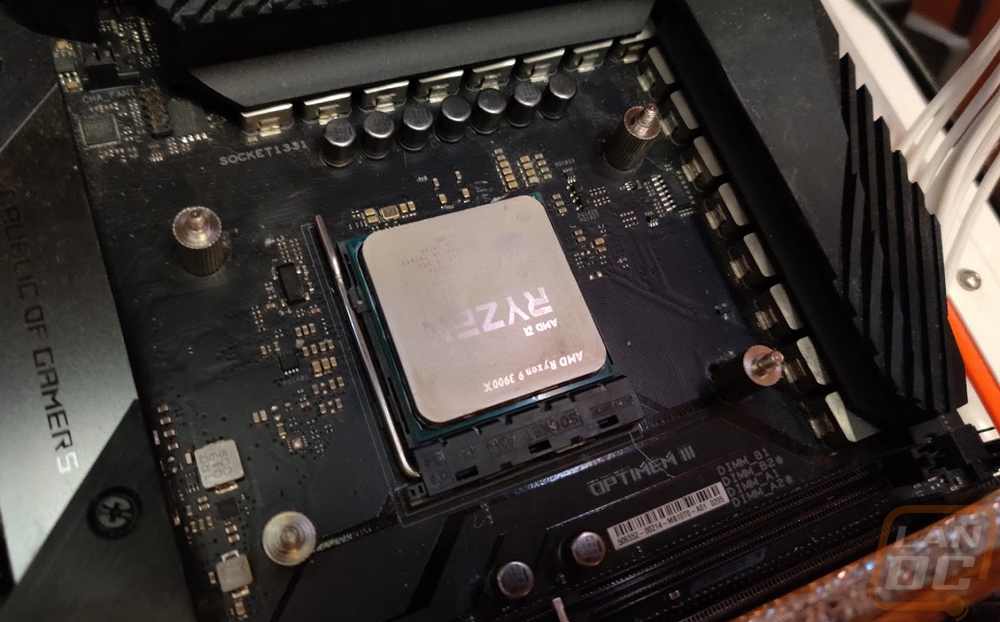
From there you install the two C-shaped brackets and lock them down with thumbnuts. This design still allows you to be able to remove the CPU if needed which is nice. Then you spread the included thermal paste and you mount the cooler on top with its two mounting screws. Just dropping the X bracket though makes a world of difference, you used to have to hold that in place and fight with it to get the four corners mounted.
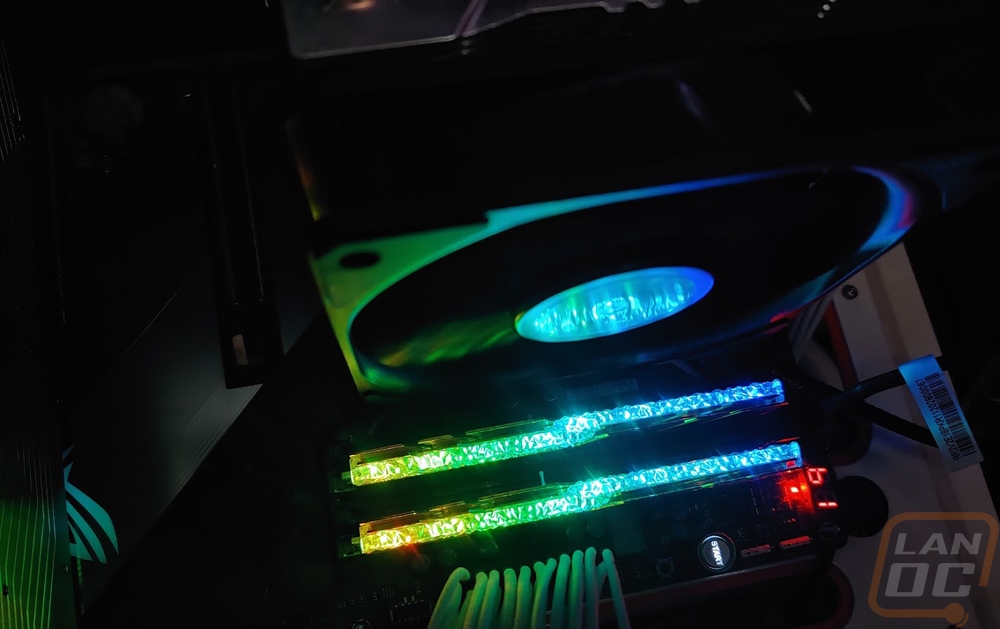
Once installed I did want to confirm the fitment with memory and you can see here on our board there was room and more on the fan side.
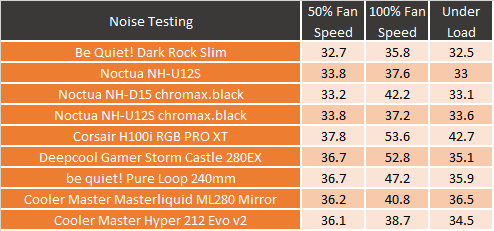
From there I jumped into noise testing. For that, I set up our decibel meter 18 inches away from the testbench and run through a few tests. I test at 100% and 50% fan speeds to get an idea of the noise range that the fan will make. Like with the SickleFlow fans on the ML280, the Hyper 212 Evo V2 did better than you might expect, especially at 100% fan speed where it was 38.7 decibels. This was still higher than the higher end coolers, but let's keep in mind the price range. Then for the most important test, I warmed things up with the AIDA64 Stress Test on the CPU workload for a half hour then recorded what the noise level was with the stock profile provided by our Asus motherboard.
Cooling Performance
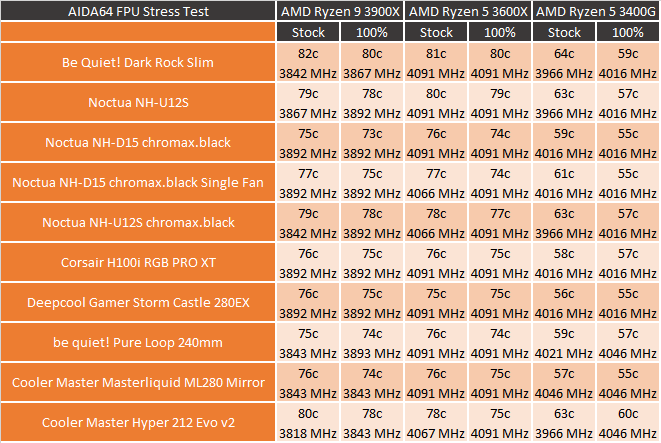
For cooling performance testing I do a whole series of tests. I run three different load types both at 100% fan speed and with the stock fan profile our motherboard provides. I do this across three different CPUs to get an idea of what to expect depending on what you are using the Hyper 212 Evo V2 on. This includes the 3900X, 3600X, and then the 3400G. I start with the AIDA64 Stress Test using the FPU load which is the most demanding. Because Ryzen CPUs like to cap at a specific temperature and downclock for these extra demanding workloads I also keep track of the clock speeds. Sadly our original Hyper 212 results seemed to be off and I had to remove them. At 100% fan speed on the 3900X, the Evo V2 came in at 73c which was running with the Dark Rock Slim and U12S. The same goes for the stock fan profile. With the 3600X the Evo V2 was two/three degrees lower than the Dark Rock Slim and U12S at stock fan speeds and 4/5 with the fan cranked up. Then on the 3400G it matched them at stock fan speeds and came in a degree behind at 100% but did get a step up in clock speeds.
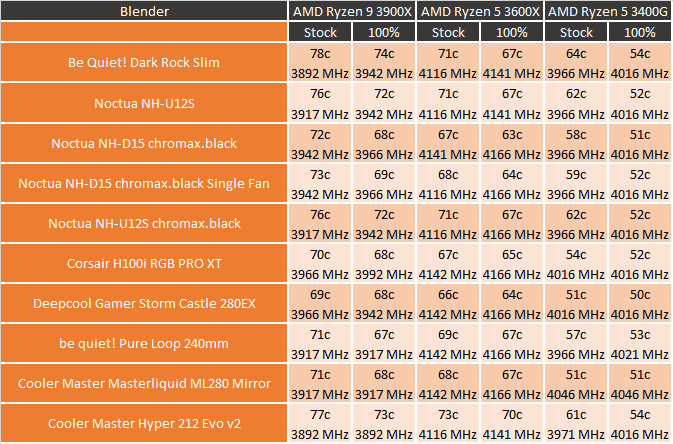
My next test used Blender as the workload, which is another FPU workload but is a real-world usage. With the 3900X the Evo V2 came in below the Dark Rock Slim in performance both on temps but matched it on the stock fan speed clock speeds where the Noctua NH-U12S ran slightly cooler with a bump in clock speed. On the 3600X the Hyper 212 Evo V2 ran warmer than the other two on both tests but did at least match them in clock speeds. Then for the 3400G, the EVO V2 came in a degree lower than the Noctua at stock fan speeds but two higher at 100% fan speed, but matched clock speeds at 100% and was a touch higher on clock speed at stock fan settings.
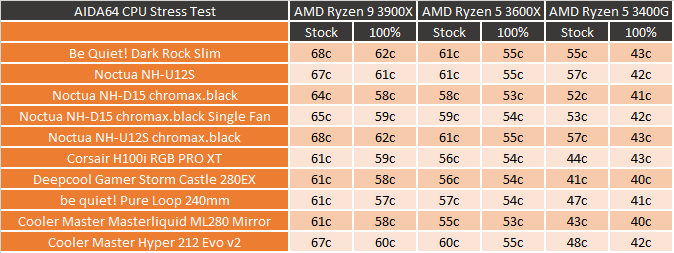
My last tests were back in AIDA64’s Stress Test again, but this time using the CPU workload which is a little more realistic with your everyday usage as well as in game performance. This workload doesn’t push things as hard and doesn’t require we keep track of clock speeds for each cooler. The Hyper 212 Evo V2 did well with the 3900X, being both the Dark Rock Slim and the NH-U12S at 100% fan speed and matching the U12S with the stock fan profile. With the 3600X it outperformed both coolers on the stock profile and matched the same 55c on the 100% fan speed. Then with the 3400G it was significantly cooler on the stock fan profile but matched the U12S at 100% fan speed and beat the Dark Rock Slim by 1 degree.
Overall and Final Verdict
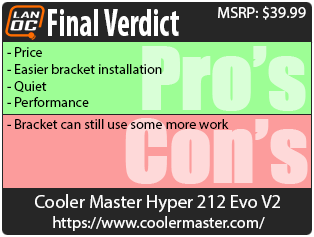
I came into things today looking to see what Cooler Master had changed with their new Hyper 212 Evo V2 heatsink. Given the past performance and the popularity, I was worried that changes could make the cooler lose its magic, but it is clear that Cooler Master knows exactly what people want here. Good performance, a cooler that will fit in most builds, and a price doesn’t make the cooler a big purchase when doing a budget build. All of that is still here with the Evo V2. The big changes they made are the new SickleFlow fan, a slight angle in the heatpipes that helps with tall memory clearance, an improved bracket design, and they now include the bracket and fan splitter needed to run two fans on the cooler. ALL of those are big improvements. The new fan is significantly quieter than the old design and the tall memory clearance means it should fit in any traditional mid-tower build. The new brackets make installation easier but not perfect. Losing those stupid X brackets is huge though. The extra fan bracket and adapter are a nice touch, though I would still be okay if those weren’t included.
Cooler Master has managed to keep the simplicity of the original designs and just improve on things. So this is just a natural progression. Performance was right there with the Dark Rock Slim and the Noctua U12S which are great coolers as well and both cost a lot more.
Speaking of pricing, the new MSRP of the Hyper 212 Evo V2 is $39.99 which is $5 more than the Hyper 212 Evo. I have to wonder if not having the hardware for the second fan would help get it a little closer. But even with the slightly higher price, this is still a value when you compare the performance against higher-end 120mm air coolers. The Noctua NH-U12S is just under $65 for example.

Live Pricing: HERE


