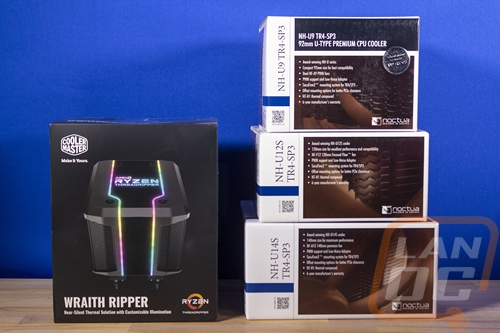
Not long ago AMD pushed their 3950X launch out into November and when they did that they also teased in that same announcement that it will come out with their Threadripper 3 processor family. With that, this isn’t a bad time to revisit the cooling options. Unlike every other consumer CPU, Threadripper is large enough that it actually required all of the heatsink companies to go back and redesign their heatsinks to get full coverage. With that there are a lot fewer options available for Threadripper. But there are two big names that stand out. Cooler Master partnered with AMD and is who designed and sells the Wraith Ripper heatsink which goes in line with the rest of the Wraith air coolers that typically come with AMD CPUs. Then there is Noctua, who went all out with three different models in their Threadripper lineup. Today I am going to check out all four of those coolers and see how they perform to help those of you waiting for the new launch or others who have been snatching up the marked down Threadripper 1 and 2 models.
Article Name: Threadripper Air Cooling Roundup
Product Names:
Review Samples Provided by: Noctua and Cooler Master
Written by: Wes Compton
Amazon Affiliate Links:

Cooler Master Wraith Ripper
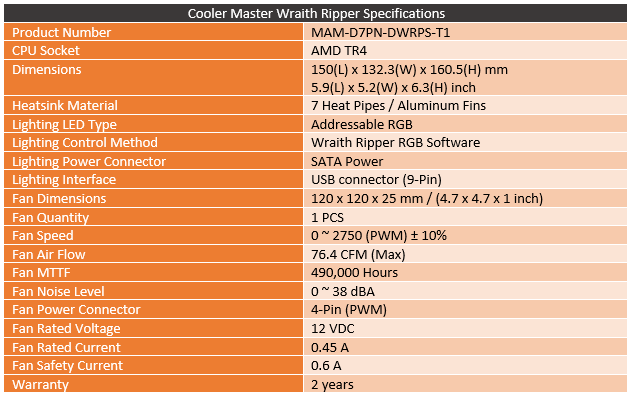
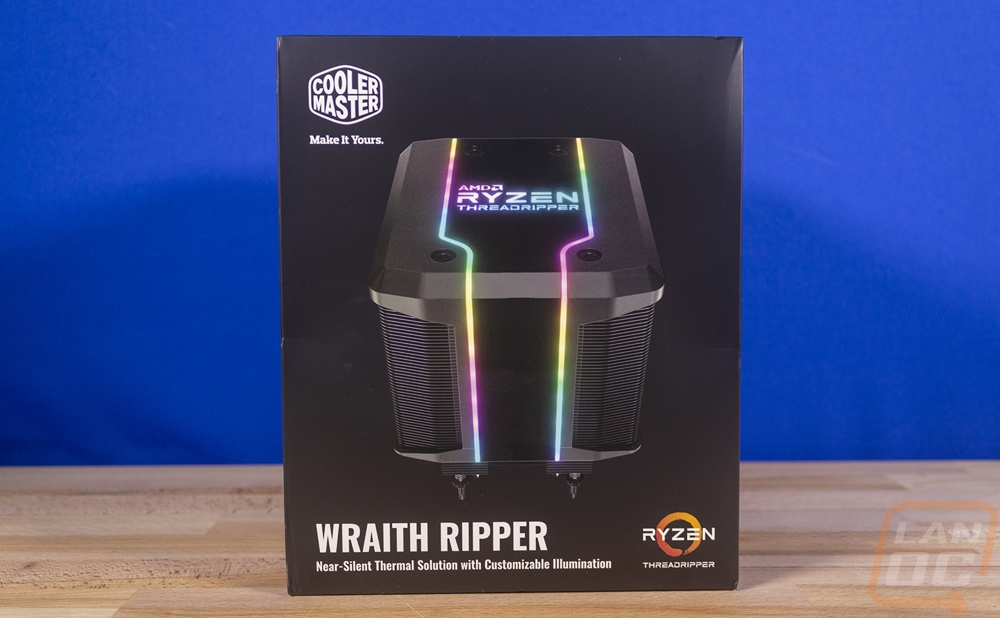
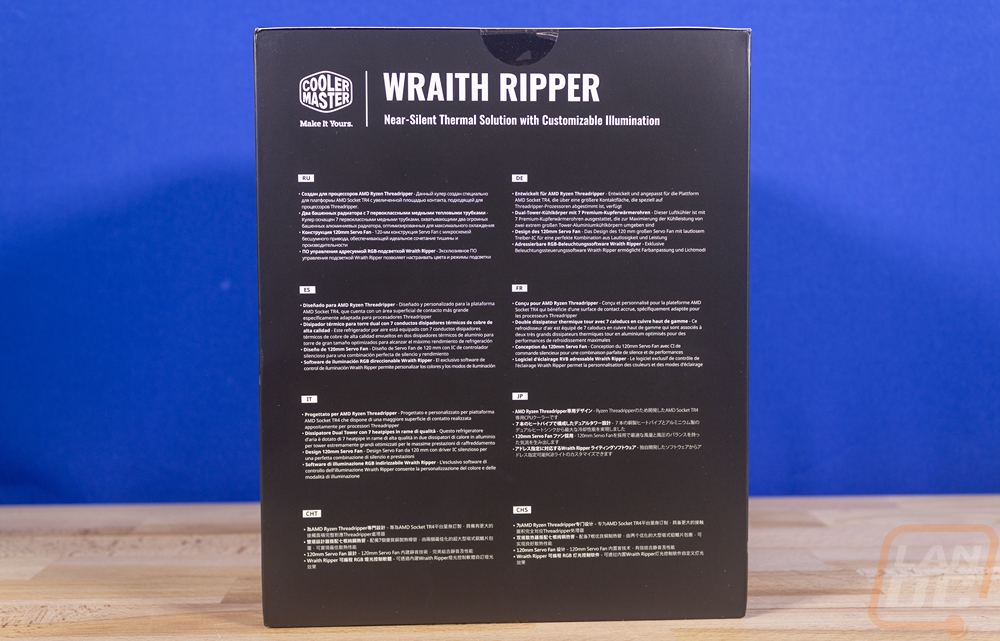
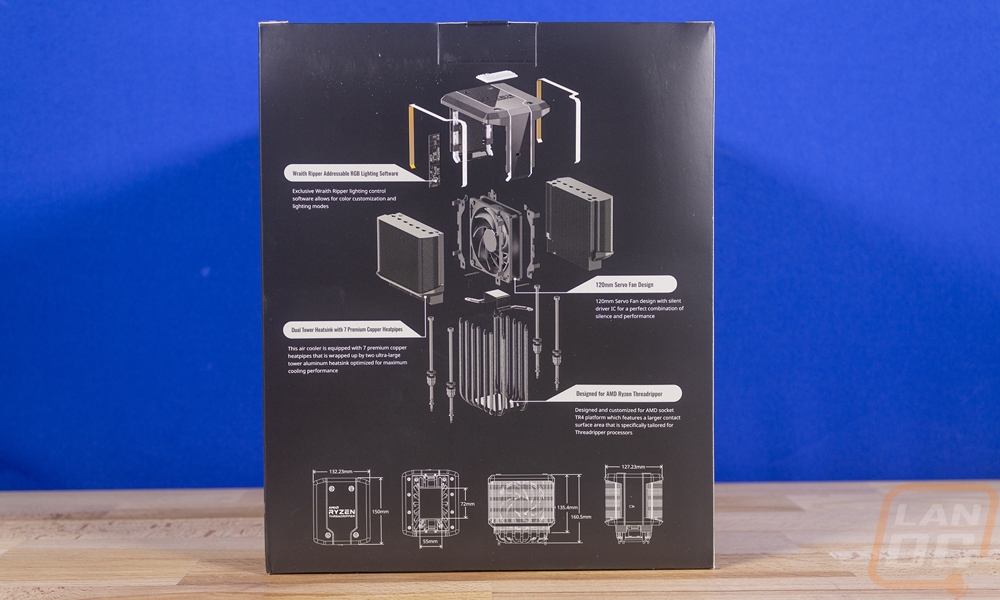
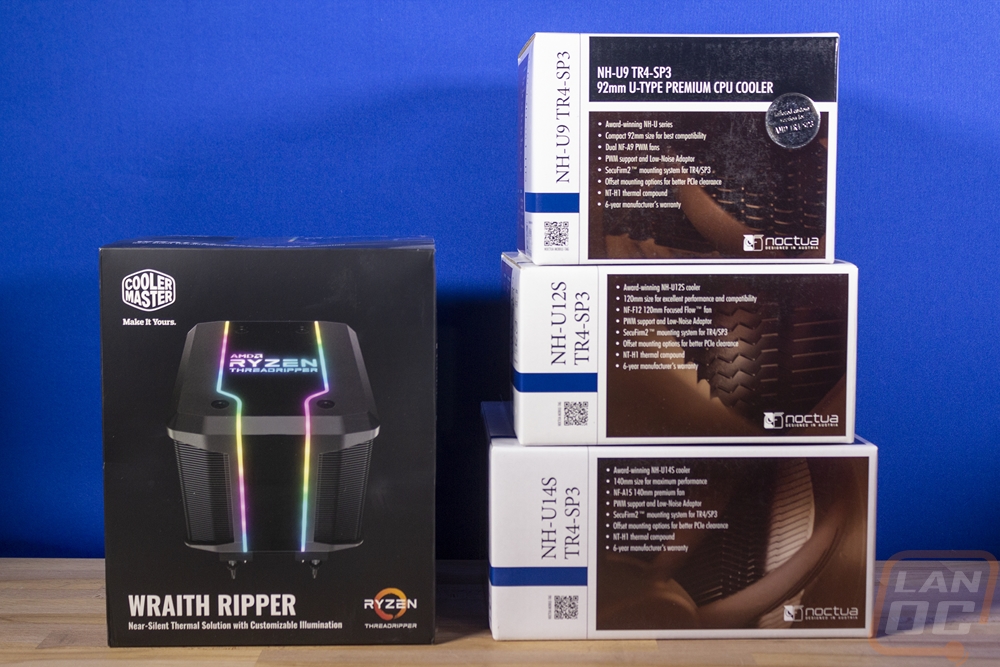
The Wraith Ripper packaging looks a little different than your standard Cooler Master heatsink. The box is all black and they feature a photo of the heatsink with the RGB on the front. For branding, Cooler Master has their logo but it isn’t too large. Then the name is down on the bottom left. Then, of course, the Ryzen Threadripper branding is there as well. The box is huge, I’m sure the article image shows just how big this box is even when put next to the Noctua coolers. One side of the box has features listed over and over in different languages. I love that there is a full breakdown image that shows you what makes the Wraith Ripper tick and along with that they have all of the dimensions of the heatsink. When it comes to large coolers that is important. Cooler Master also included a full specification listing on another side. Overall, if you were shopping for this in retail all of the information you need to know is there to help you decide and to make sure it is going to fit in your case.

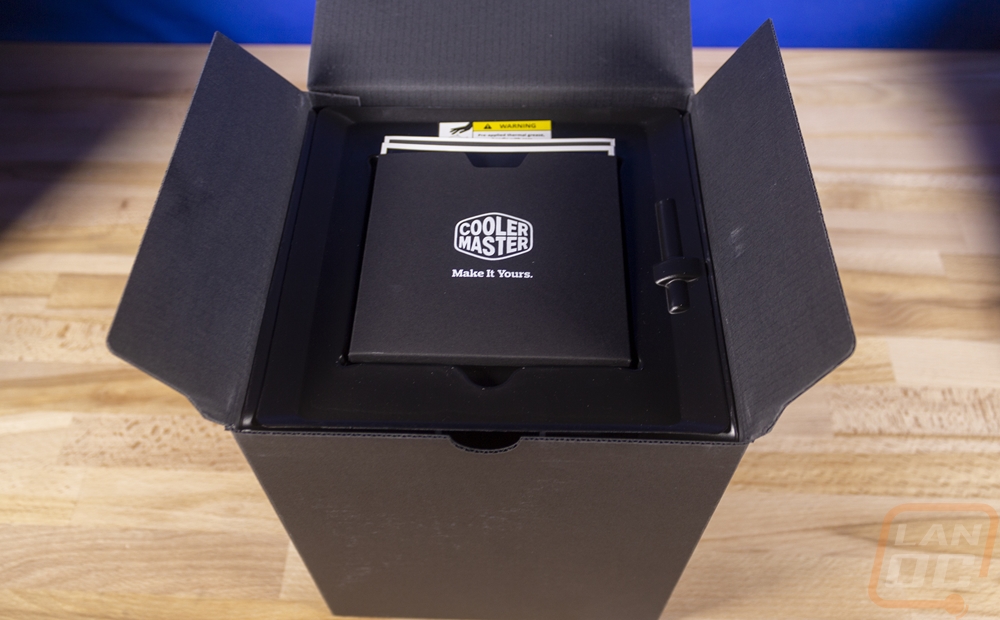
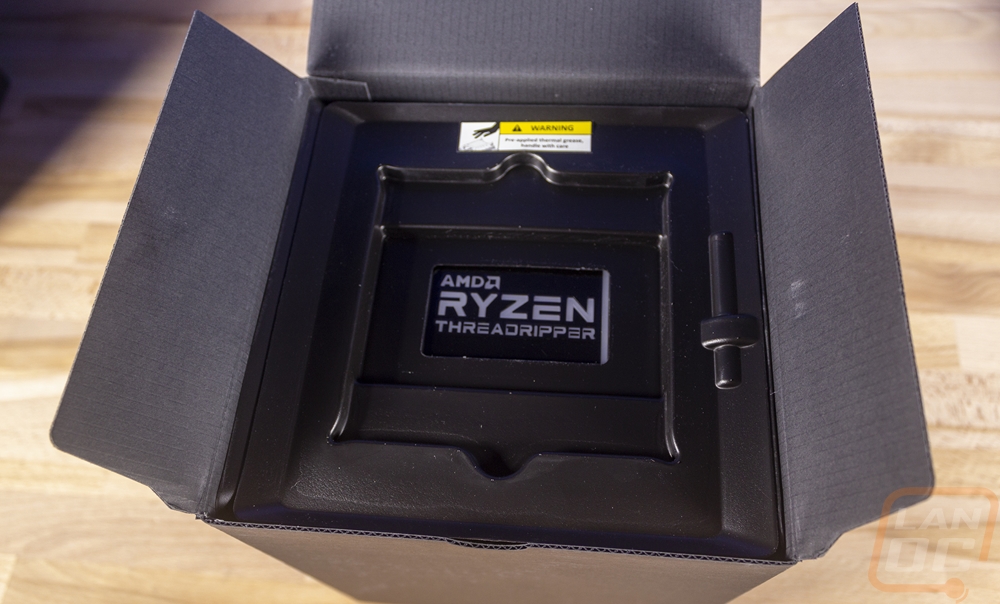
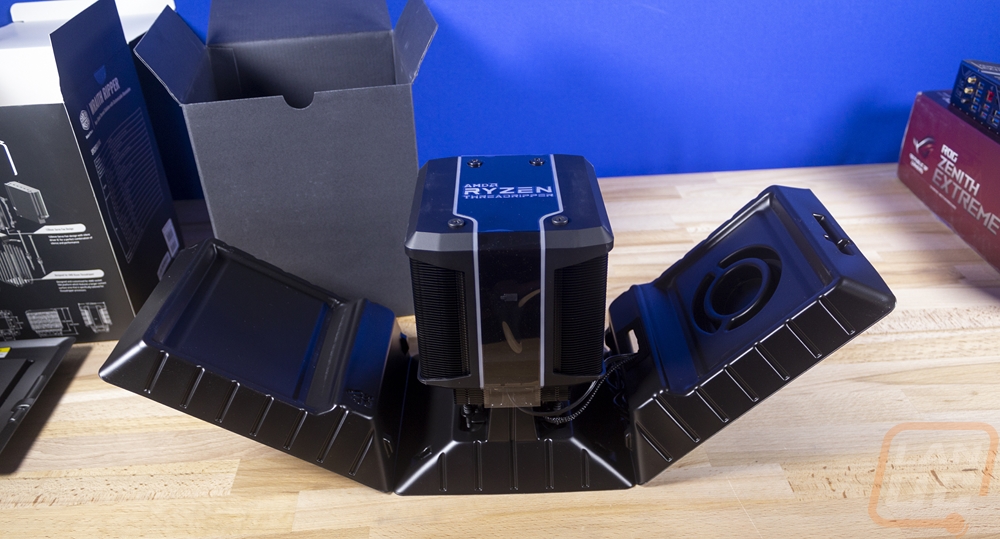
Also unlike most other Cooler Master heatsinks, the Wraith Ripper packaging feels like you are opening up something special. When you pull the box out from inside of the liner and open it up. Up on top, you have a small envelope with the documentation in it. But what surprised me is when you remove that, up under it they have a hole in the plastic where you are greeted with the Threadripper logo which looks like your Threadripper CPU on top. It is actually the top of the heatsink peaking through but it is a nice touch. Then when you pull that out of the box the plastic that is formed around the heatsink opens up and you have the whole heatsink right there for you.
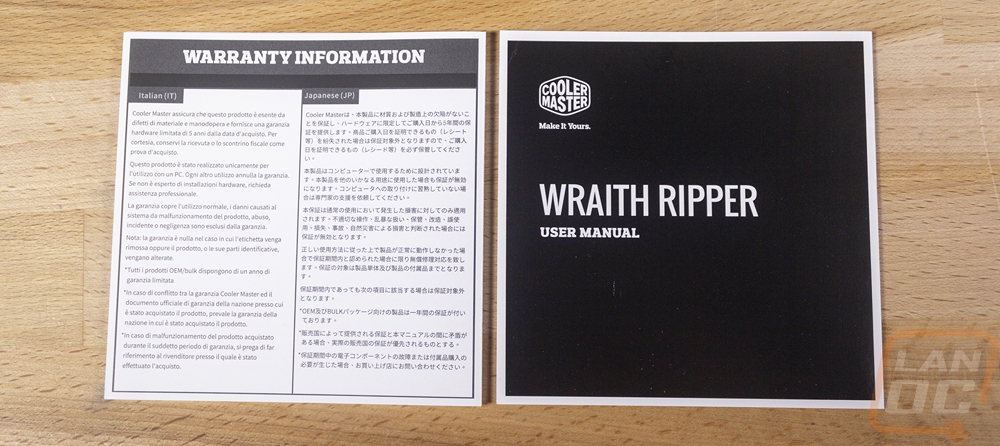
What is interesting is not getting anything else with the heatsink. I’m used to premium models sometimes coming with stickers, case badges, tools, etc. What you end up with is a warranty paper and then a small user manual. Compare that with what comes with each and every Noctua cooler later on, it is night and day.
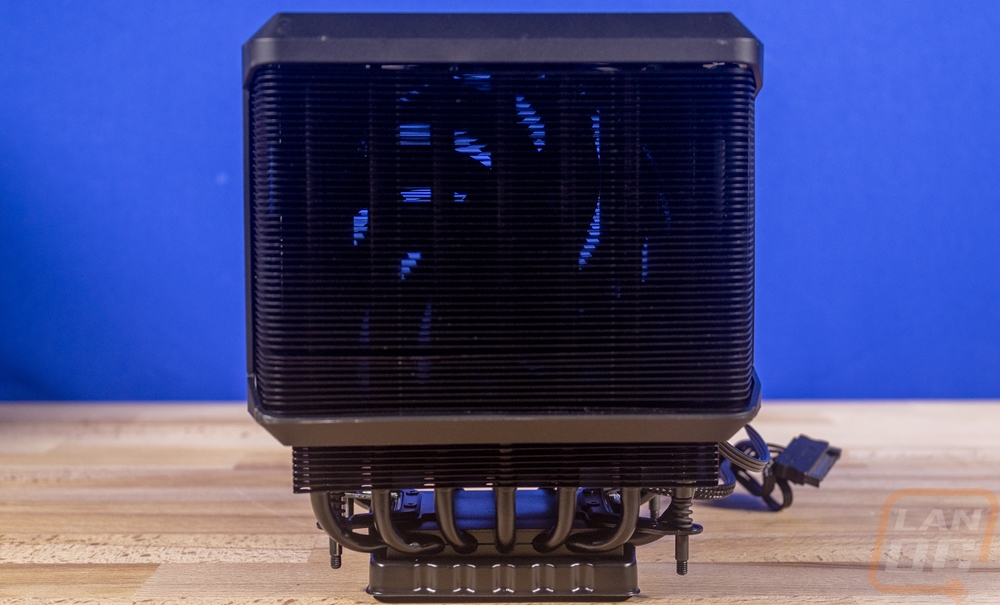
So I have to say it, the Wraith Ripper is an absolute monster. That is going to be the first thing you notice. From there, after you come to terms with the size, you will notice the branding up on top along with the lighting and then the all blacked out look. The heatsink in every area is black including the bottom of the contact surface and it also has the plastic shroud on it as well. The heatsink itself reminds me a lot of the Cooler Master V8 which has had two designs. The original had a single fan in the middle with heatsink towers on both sides and a shroud up on top to make it look like a motor. Take away the extra heatsinks that the V8 had and make the whole thing larger and you have that setup here, only with more RGB and more black.
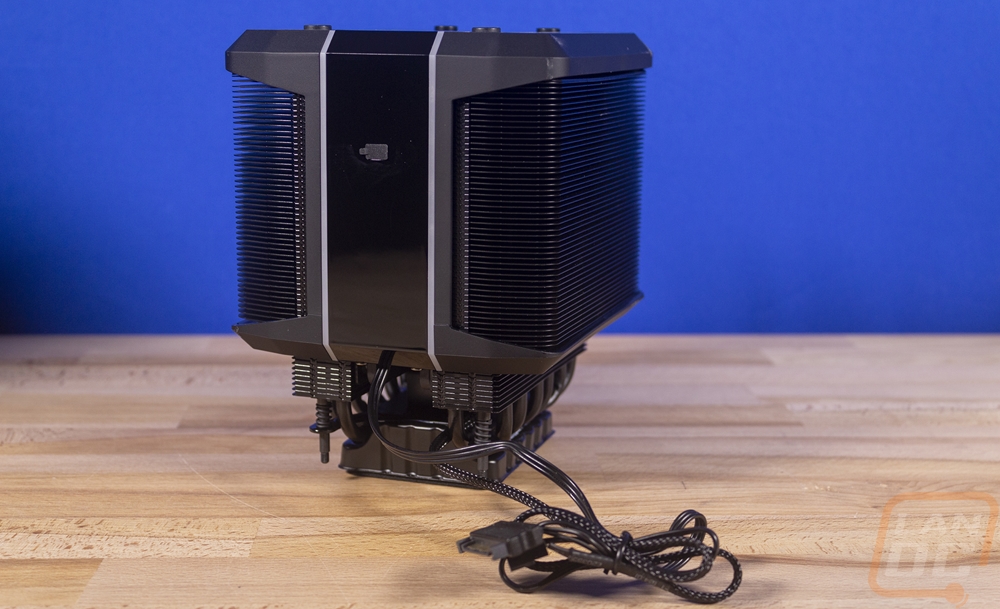

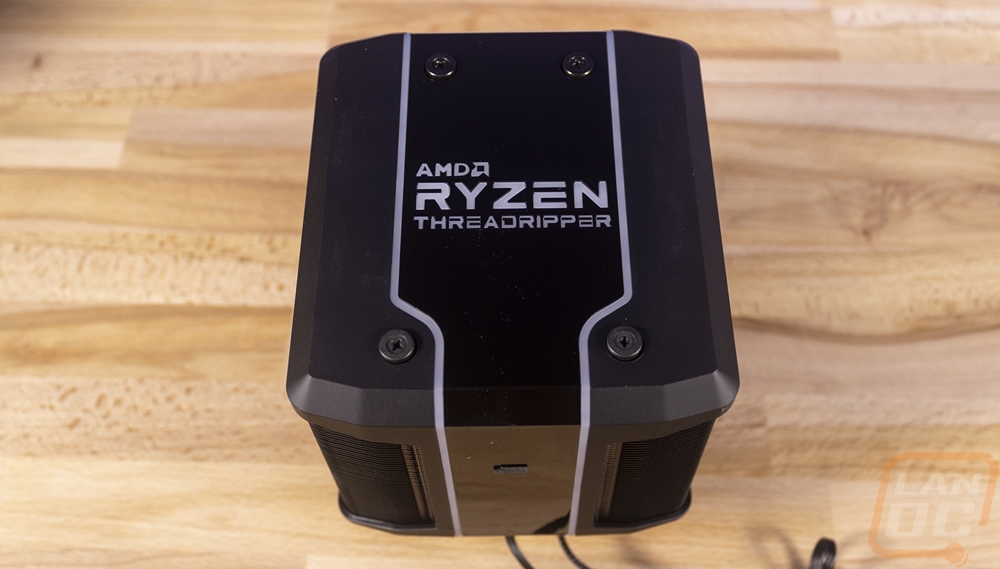
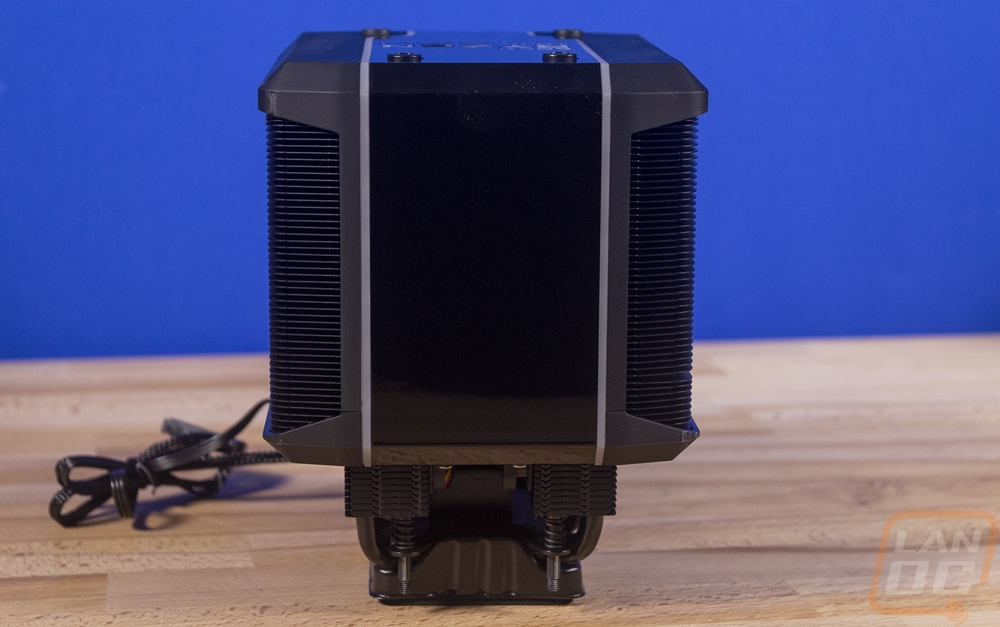
So starting up on top, the entire top of the heatsink is covered in a plastic shroud. This helps direct the airflow for the fan, but it is mostly a chance to deck the Wraith Ripper out in lighting. RGB lighting has been integrated on the Wraith coolers for a few years now and this one is no different. Well, I take that back, it does have a lot more lighting. But having lighting for a wraith cooler is almost standard, at least on the higher-end models. The top lighting has two strips of addressable LEDs that split up the two different plastic surfaces where you have flat plastic on the outside edges and gloss in the middle. You also have the AMD Ryzen Threadripper logo on top which is lit up as well. This has to be the best feature of the heatsink, getting to push that big logo right up to the window on your PC tells everyone what you are running. Normally I don’t like backlit branding all over my builds, but getting to show that you have Threadripper inside is right up there with having 2080 Ti glowing or Titan. They speak for themselves.
So the heatsink layout, as I mentioned, is two towers on the outside and one fan in the middle pulling and pushing air across them both. It is a little different than the normal one tower and one fan or two towers and two fans, but assuming the fan is powerful enough to do it, it is more space-efficient. Even the heatsink fins are all anodized black which looks amazing. Beyond that the shroud in the middle doesn’t have too much going on. Just the addressable RGB lighting strips doing down both sides. Speaking of which there is a tiny plug right in the center of the bottom side of the cooler. If you have used an RGB wraith cooler because you will recognize it, this is where the USB cable for lighting plugs in. It has to be one of the worst locations I’ve ever seen. It is way high up, so there is no hiding the cable, and it faces down towards where your top PCIe slot will be, I can see the cord being tight up against a GPU given the size of the heatsink.

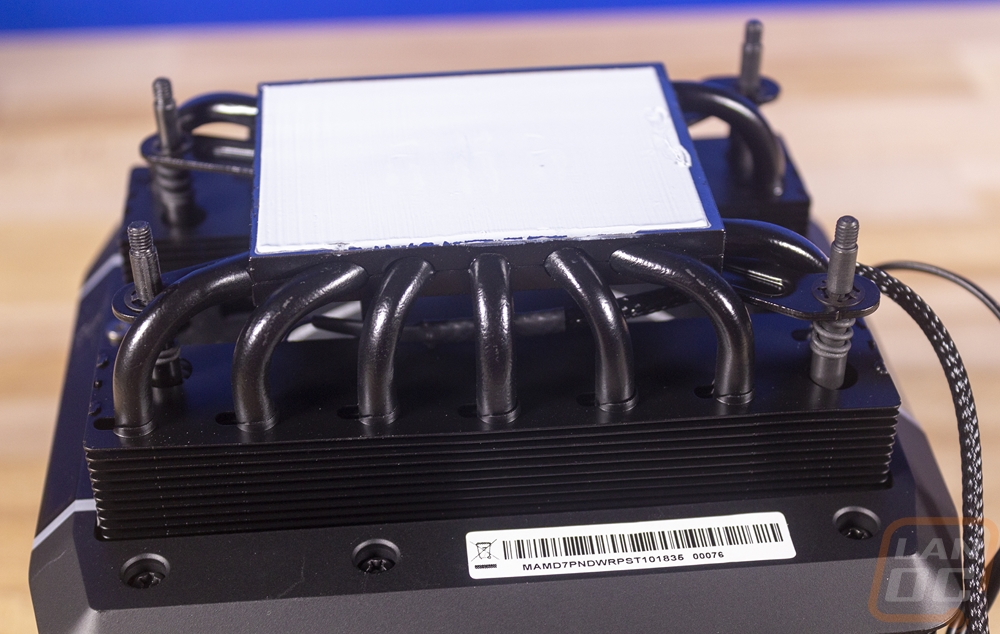
The bottom portion of the cooler is best described as “holy crap look at all of those heatpipes”. Each side of the contact surface has 7 heatpipes which is crazy! I have to point out that every detail down here is also all black which is awesome. Also the Wraith Ripper comes with thermal paste preinstalled. Given the size of the contact surface this should make installation easier. But with no extra thermal paste included you better hope you don’t need to remove and reinstall for anything. The bottom view also gives you a peek at the fan in the middle of the heatsink. It is a 120mm fan in you guessed it, BLACK. You can also see the mounting screws which run all the way through the heatsink sticking out the bottom.

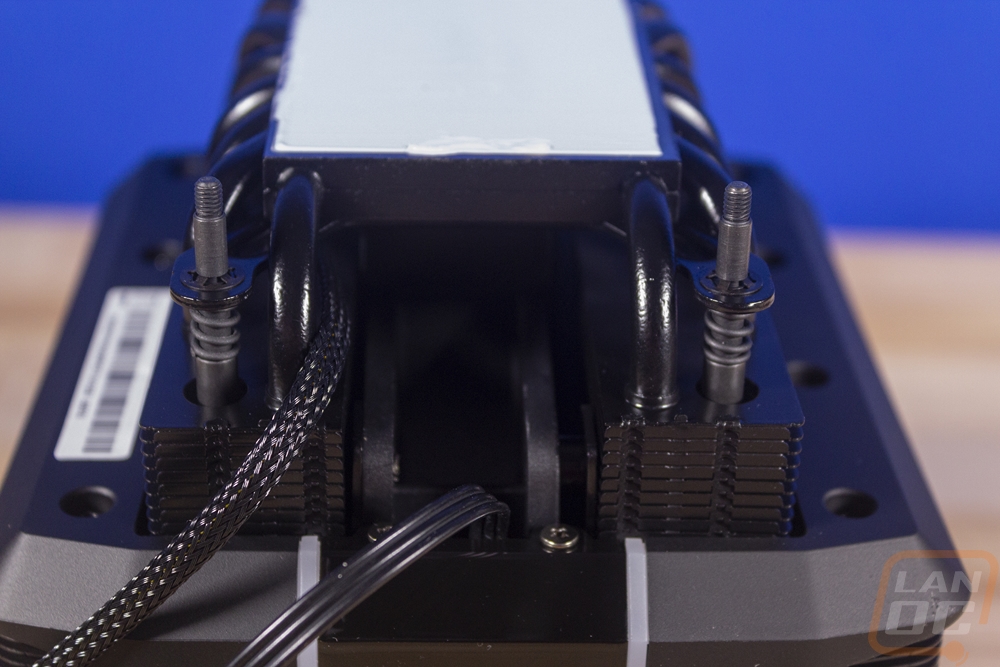
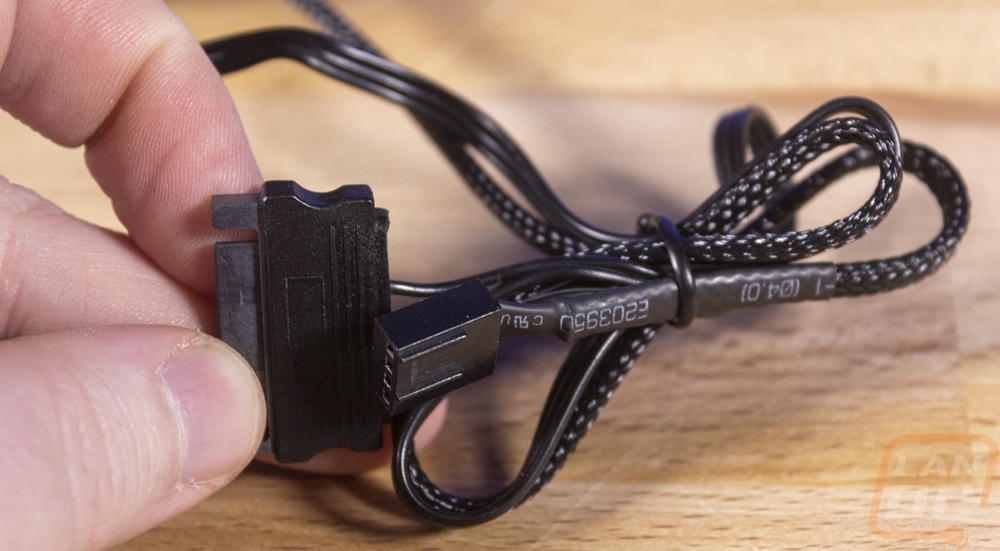
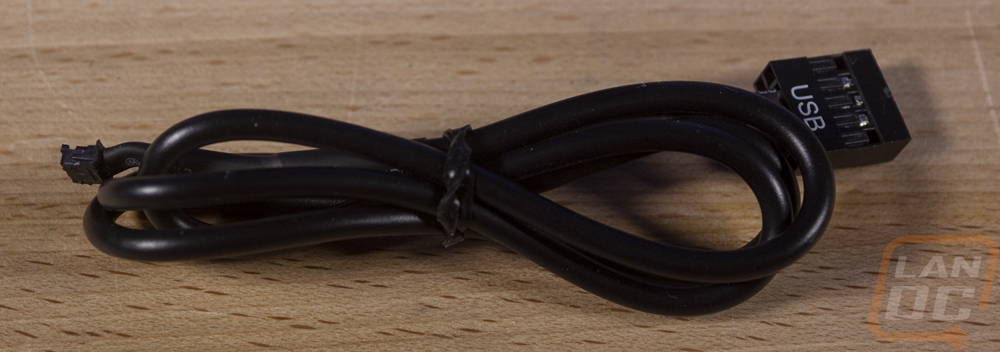
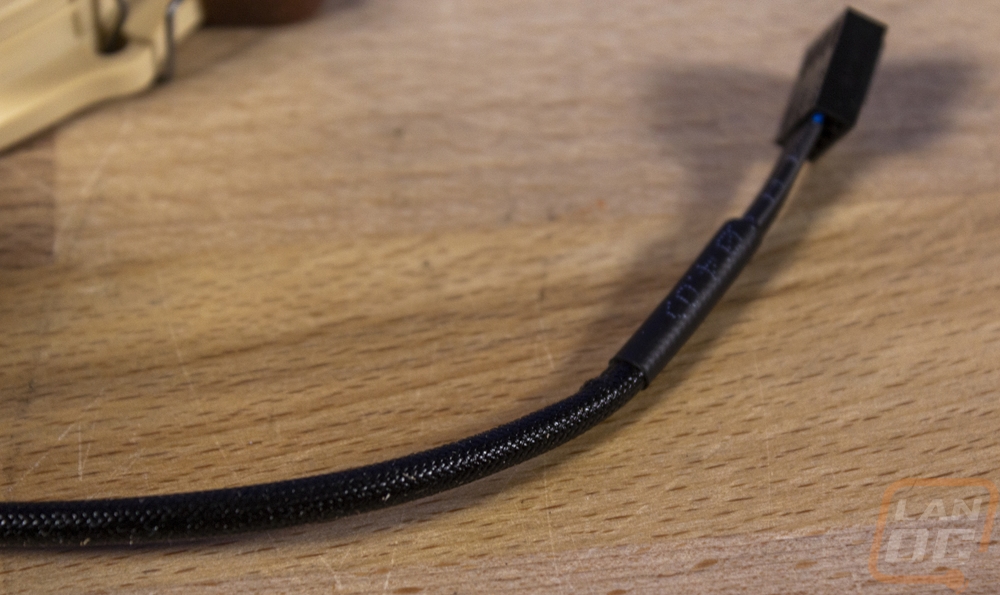
It's just a heatsink it should just have one wire for each fan it has right? That means just one wire for that 120mm fan the Wraith Ripper has tucked away in its inners. NOPE. Adding that addressable RGB lighting complicates things. So there are actually three cords and it’s a bit of a mess. I mentioned the USB cable that plugs into the middle of the heatsink. That is in our second photo, that is the same USB cable that the other Wraith coolers use including that small plug. But Cooler Master also requires more power and for that you have a SATA power cable, so plan for that. All three cables are black of course. But each of the three cables are a different style. The fan has a sleeved cable and a 4-pin PWM header and with that out of the bottom is the SATA power. That has a flat and flexible cable like a power supply. Then the USB cable is a round and thicker cable with an internal USB 2.0 header on the end.
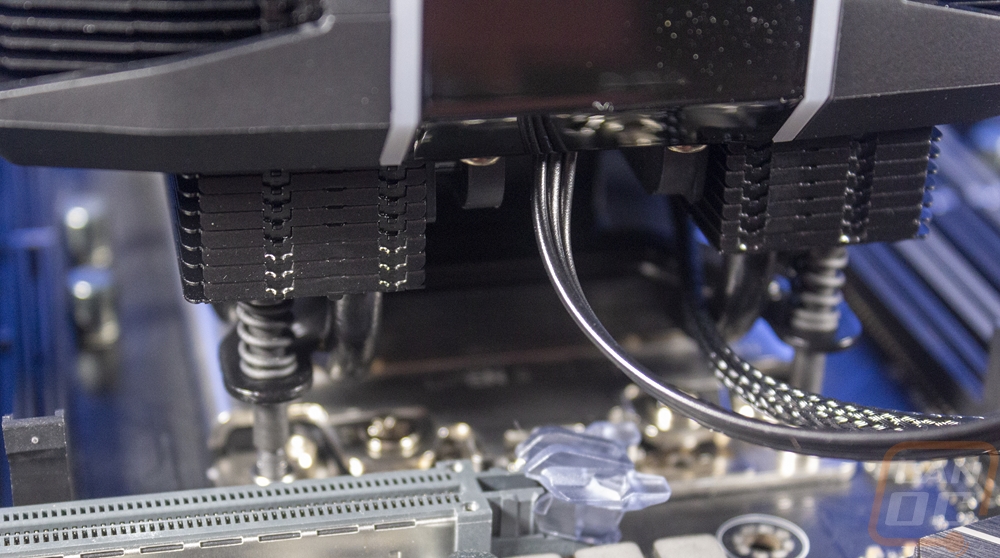
The Wraith Ripper just happened to be the firs heatsink I used on our Threadripper setup so I had the chance to get a few out of case photos of it in action. The installation had me torn. Physically this has to be the easiest heatsink to install I have ever dealt with. Because it is Threadripper specific there wasn’t any fussing around with brackets and then with the LGA socket, it includes mounting points. So you sit the Wraith Ripper down on top of the CPU with the preinstalled paste and at the top of the heatsink in the plastic there are four Philips head screws. These are the long screws that lock it down. It was just that easy. But then I had to mess with the three different cables. The rear USB plug is the worst and it is really ugly, there just isn’t any good way to hide the cable on such a good looking and clean heatsink, it’s a shame.
Noctua NH-U9 TR4-SP3
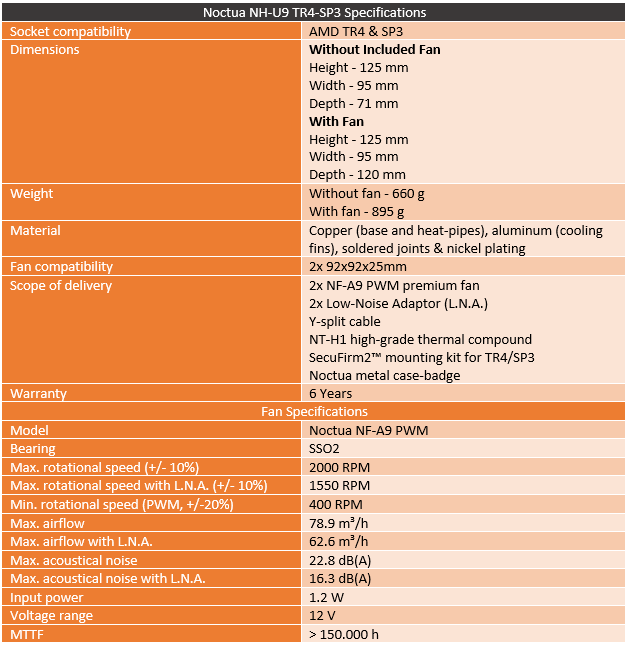
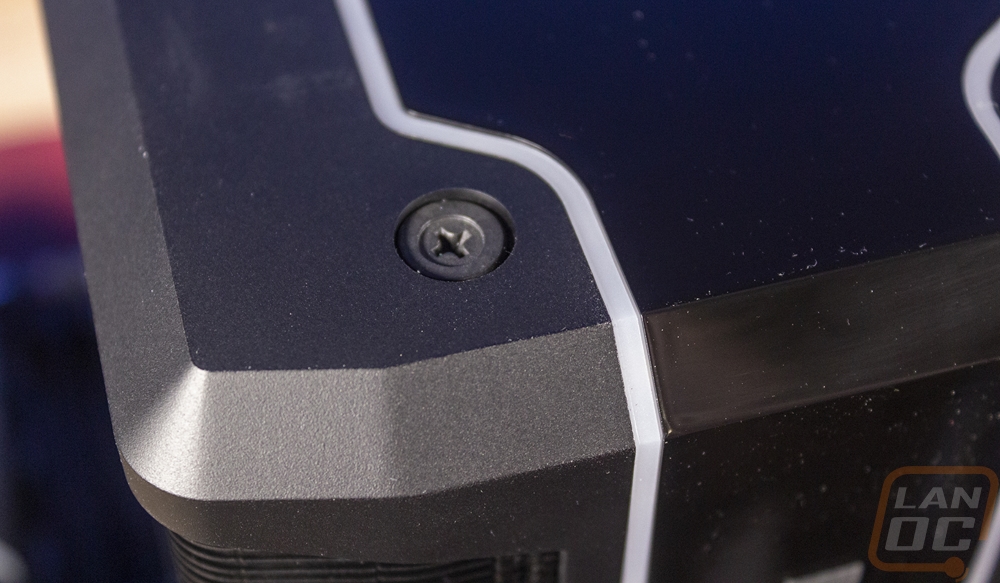
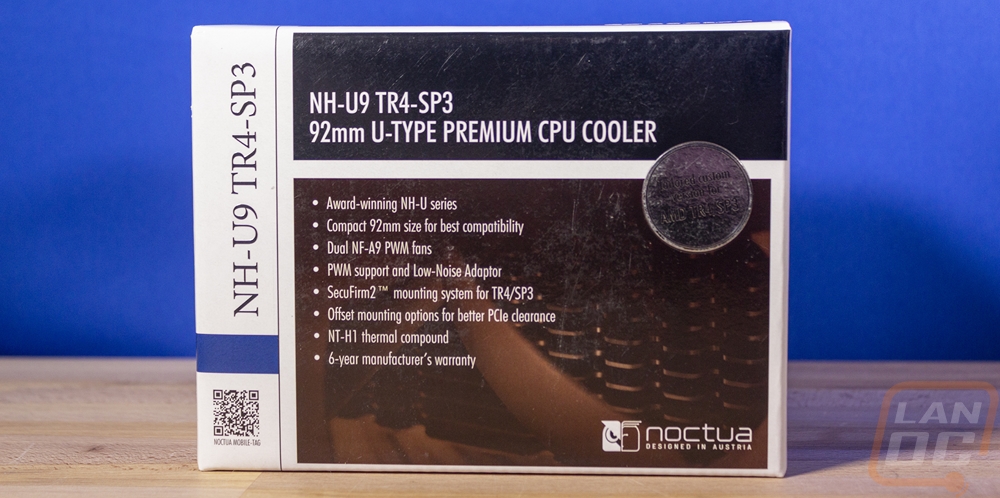
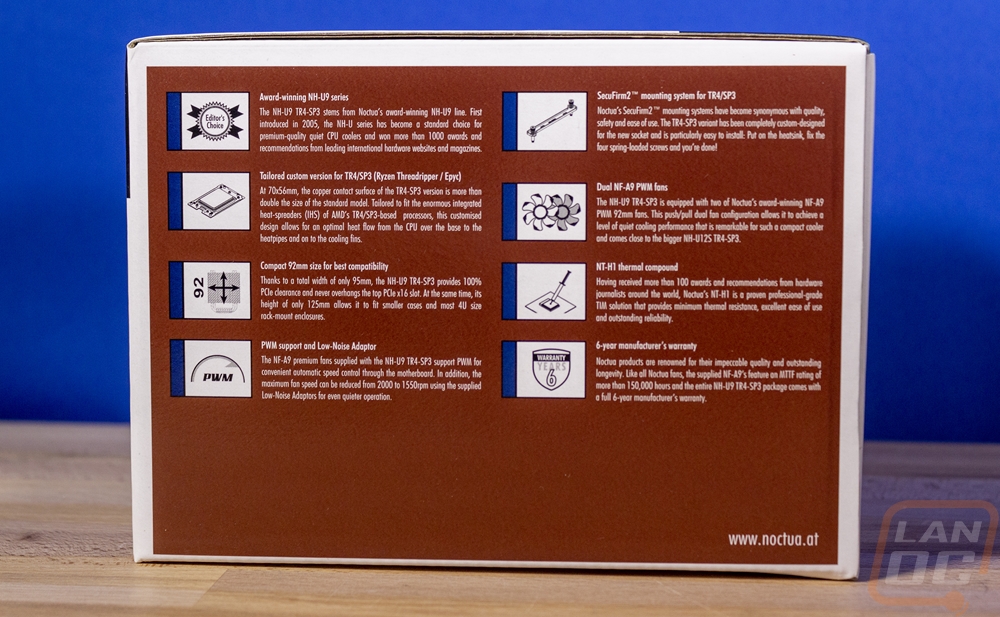
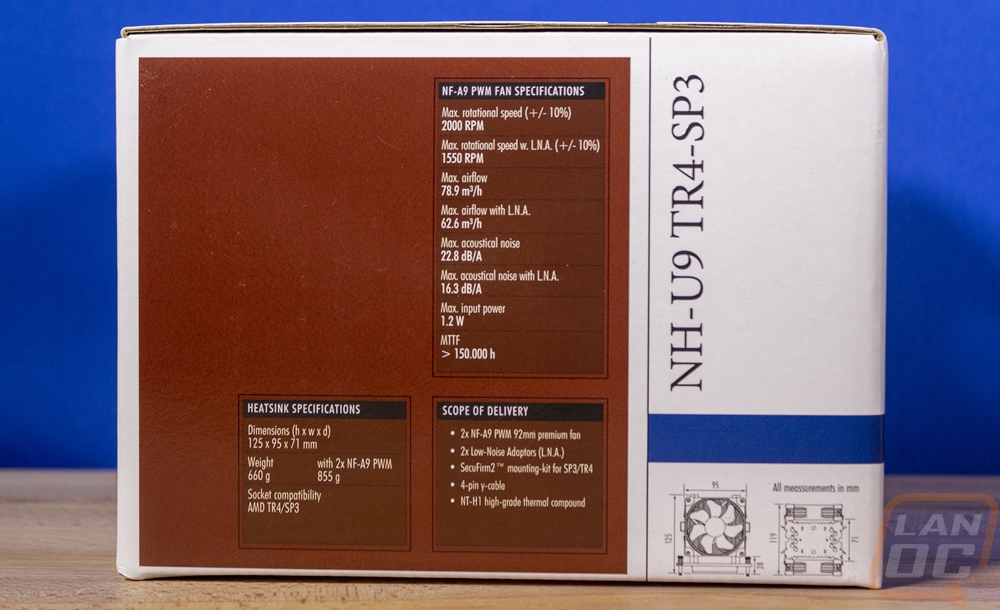
The packaging for the NH-U9 TR4-SP3 follows the standard layout for a Noctua cooler. This includes the mix of brown and black with white trim that all of their products have and the layout of where everything is on the packaging. This includes the product name being vertical on the left and horizontal up at the top and below that they explain what type of cooler this is, this is a 92mm U type cooler because of the heatpipe layout is in a U shape. The front then has a shortlist of all of the key features of the NH-U9. The only thing missing really is a photo of the cooler, in the background there is a zoomed-in picture of a heatsink, but for retail shopping it is always nice to be able to see what you are getting. Each of the features is broken down into more detail on the side of the box with a small line drawing and description. Then on the other side you do get a full specification listing of the heatsink and of the included fans as well as a list of everything that comes in the packaging. With that there is also a small line drawing of the cooler with the dimensions to help with making sure it will fit ahead of time.
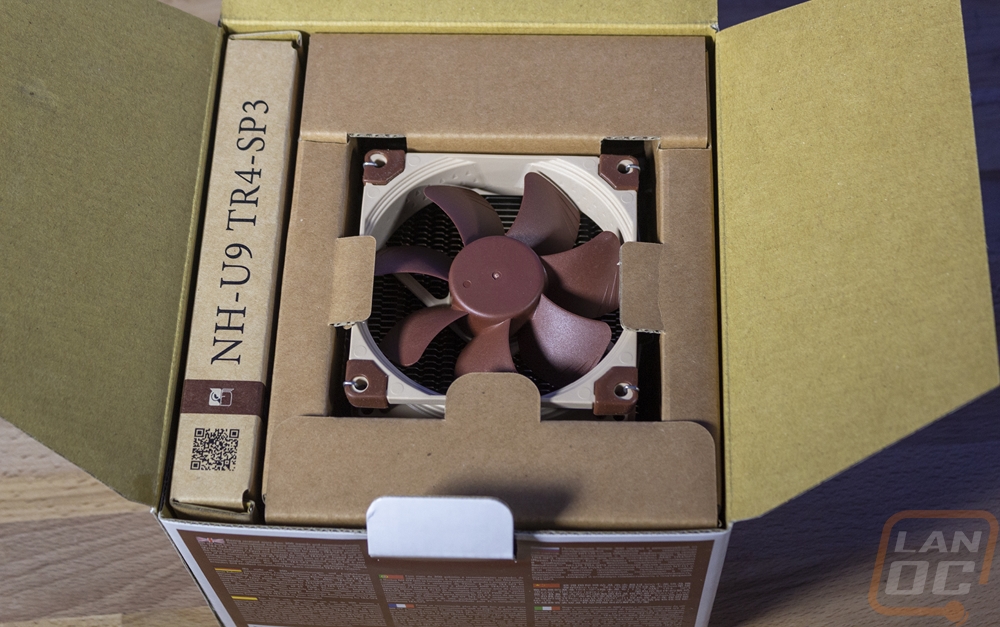
Long before the recent movement to be more sustainable with cardboard over plastic Noctua has always used cardboard for packaging and it is always crazy how they manage to put it all together to keep their heatsink from moving around. Alongside that is a small box with all of the accessories and documentation.
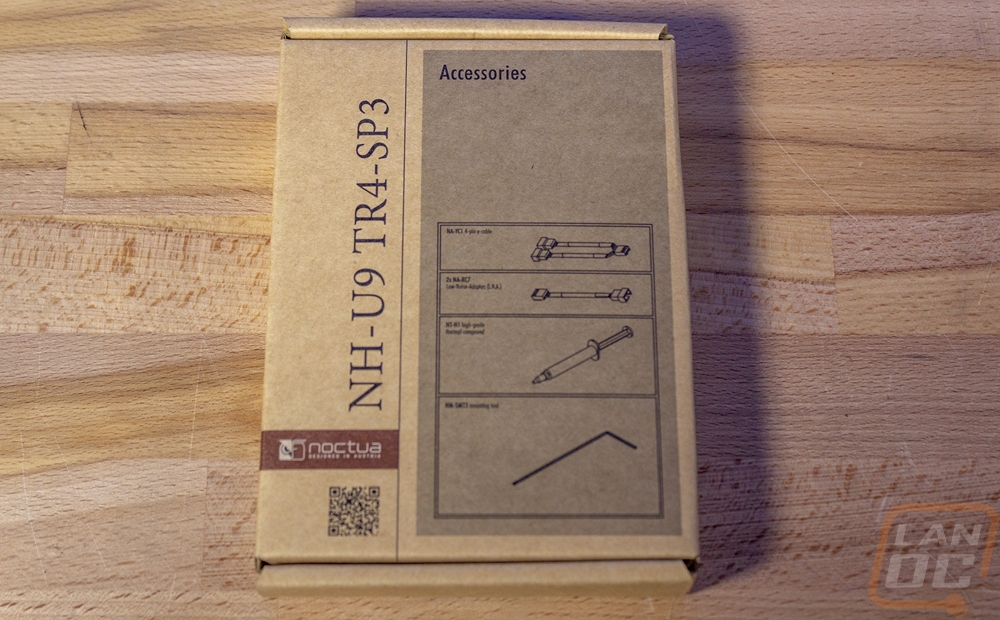
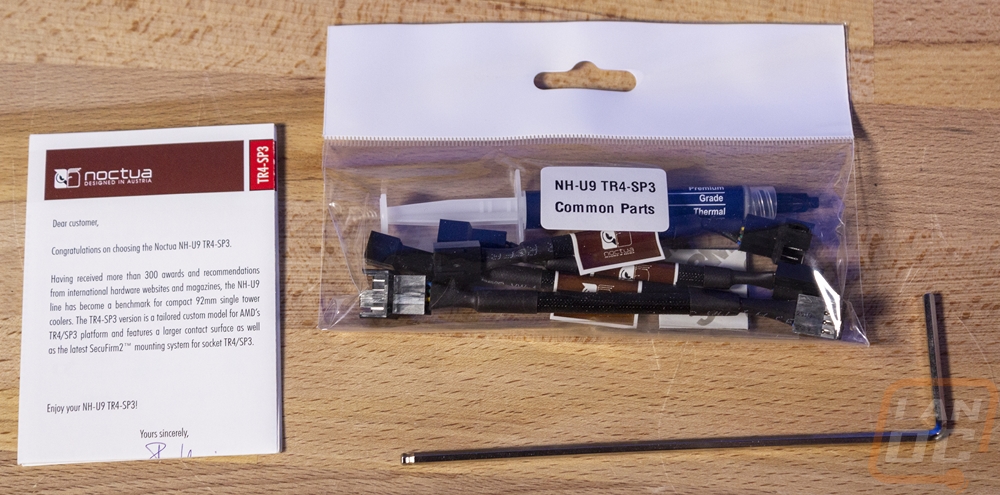
The box is decked out with the heatsink information on it and a list of most of what is inside on the top with line drawings even. Once you get inside you will see that most things are split up into a bag labeled NH-U9 TR4-SP3 Common Parts. Inside you get a Y adapter for the fans and low power adapters for the fans as well that will help run the fans at a lower RPM without any software tomfoolery. Noctua as always includes a FULL tube of thermal paste, not just a tiny one or a pre-applied amount on the heatsink. This goes unnoticed by some, but a full-sized tube of thermal paste often goes for $10 by itself, it's great that you always know you have some. There is also a case badge inside which is really unique because it is thick metal and painted with the Noctua logo, not just a cheap sticker. This has always been one of those areas where you could tell just to what level of detail Noctua would go. Then there is, of course, installation instructions and an included tool for installation. Normally this is a long screwdriver but I noticed that this is thinner and has a ball-shaped Allen head on it.
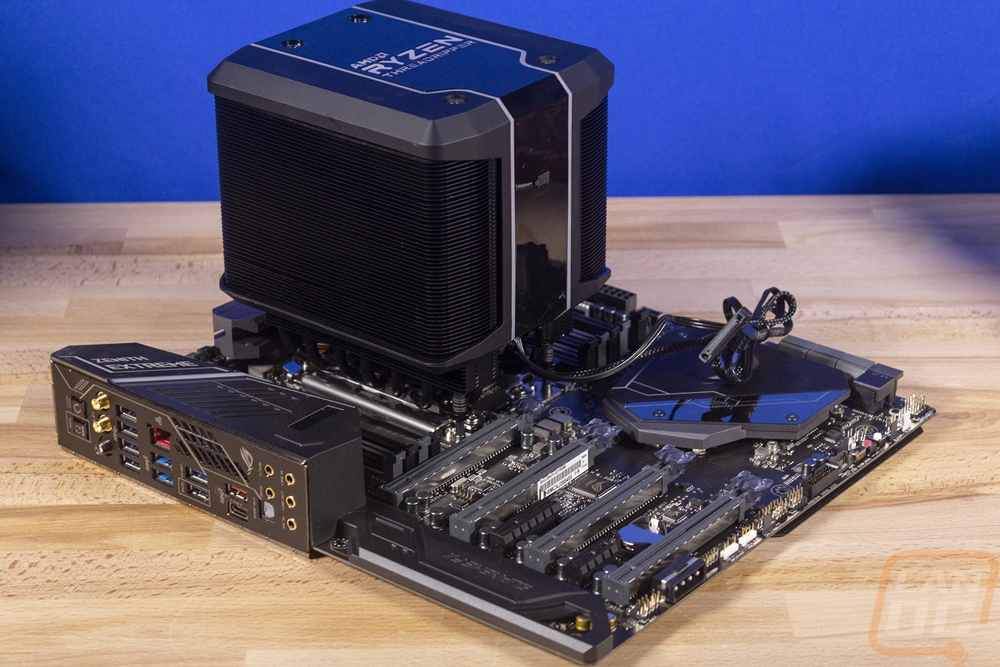
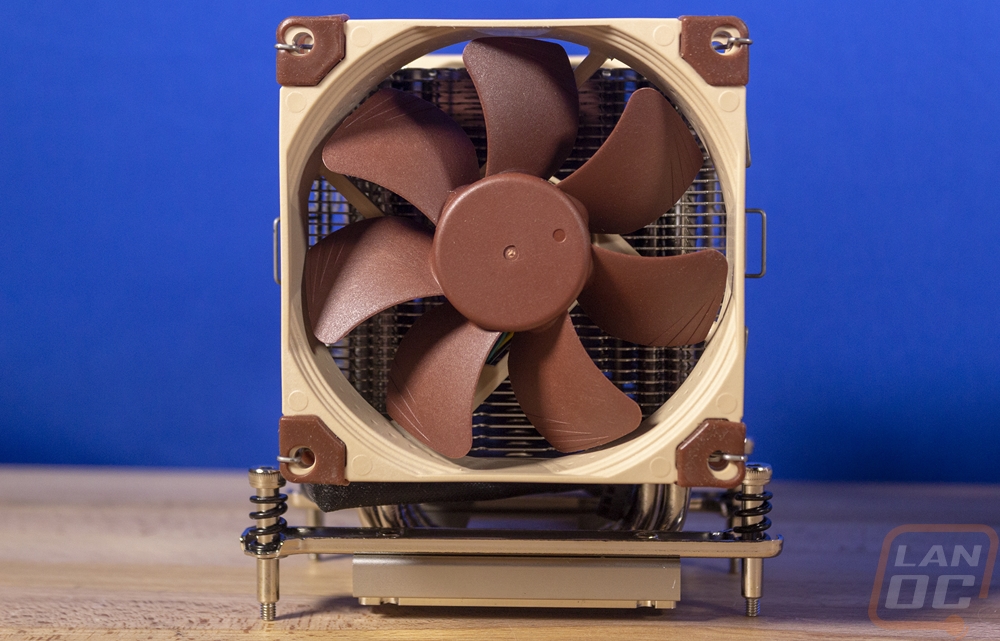
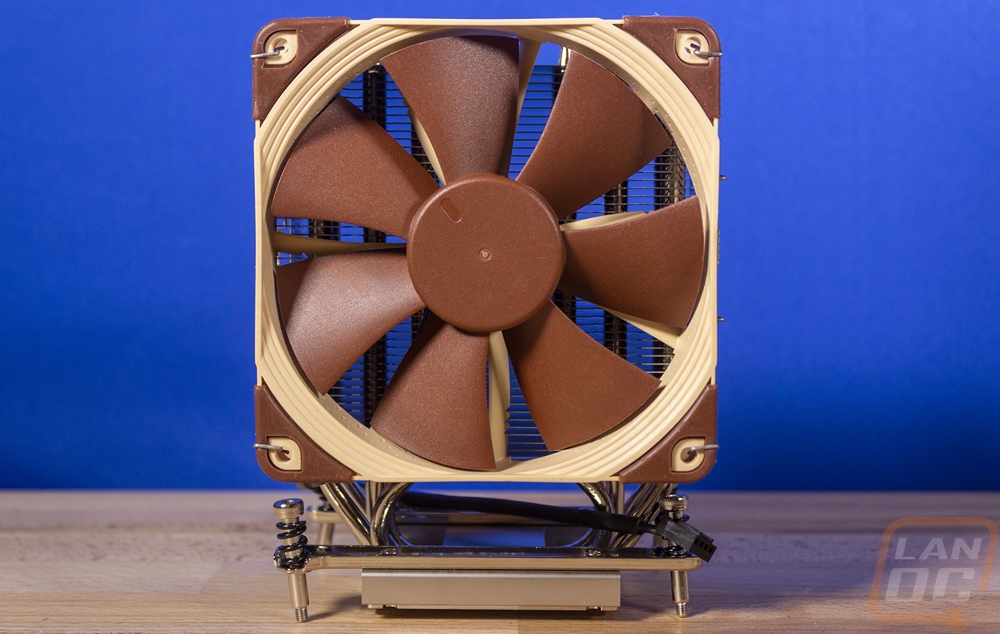
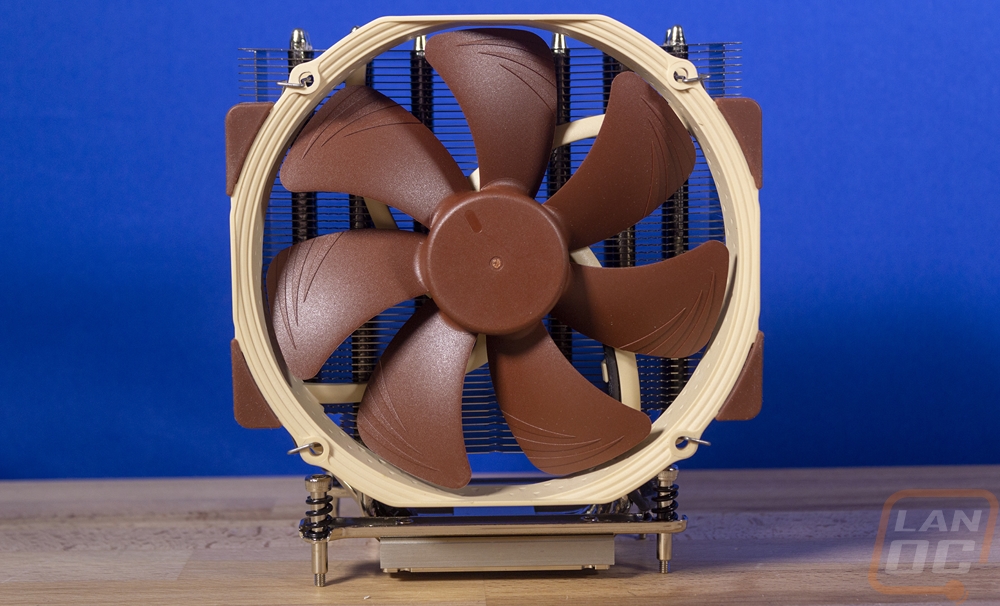
With the NH-U9 finally pulled out, this is in a different world than the giant Wraith Ripper that I looked at previously. The U9 is actually the same cooler that I used on our X299 based Crush build due to having a limited height available so I know it can be capable. It comes with dual 92mm Noctua fans running on both ends for a push and pull configuration and the entire heatsink, base and mount included is 125mm tall in total which might seem tall but is as small as you can get in a tower-style configuration.
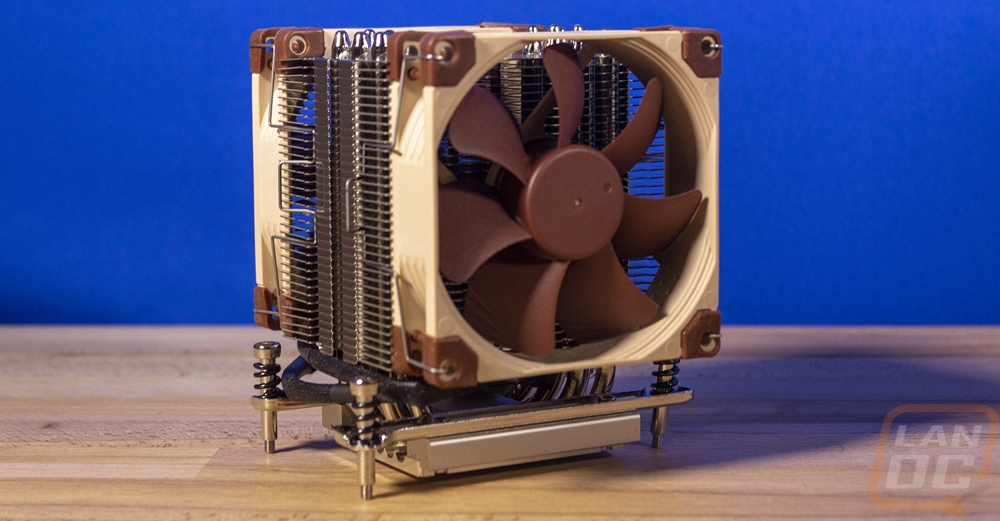
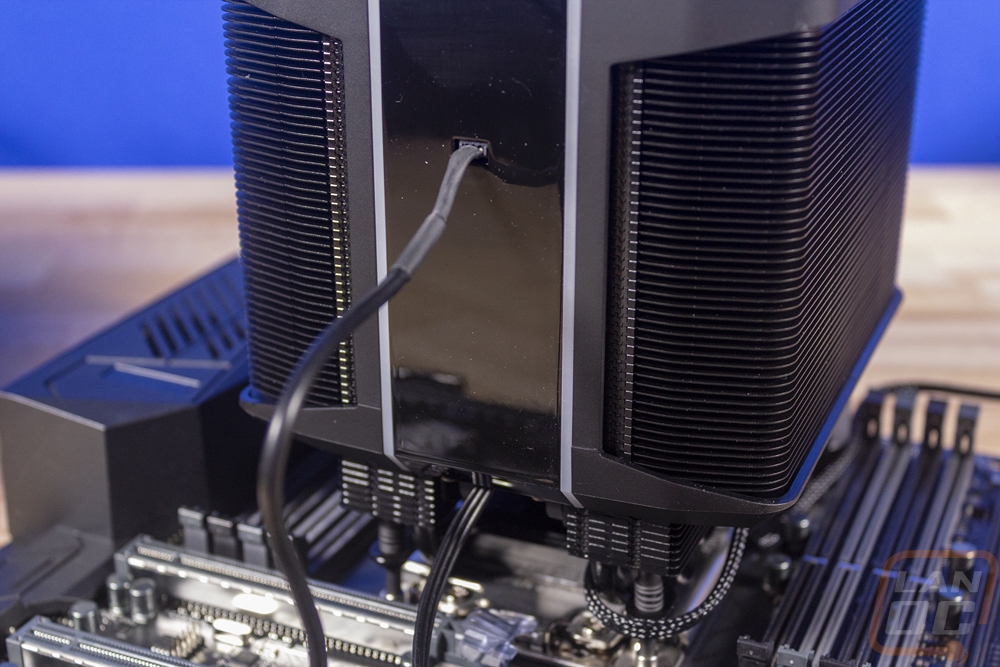
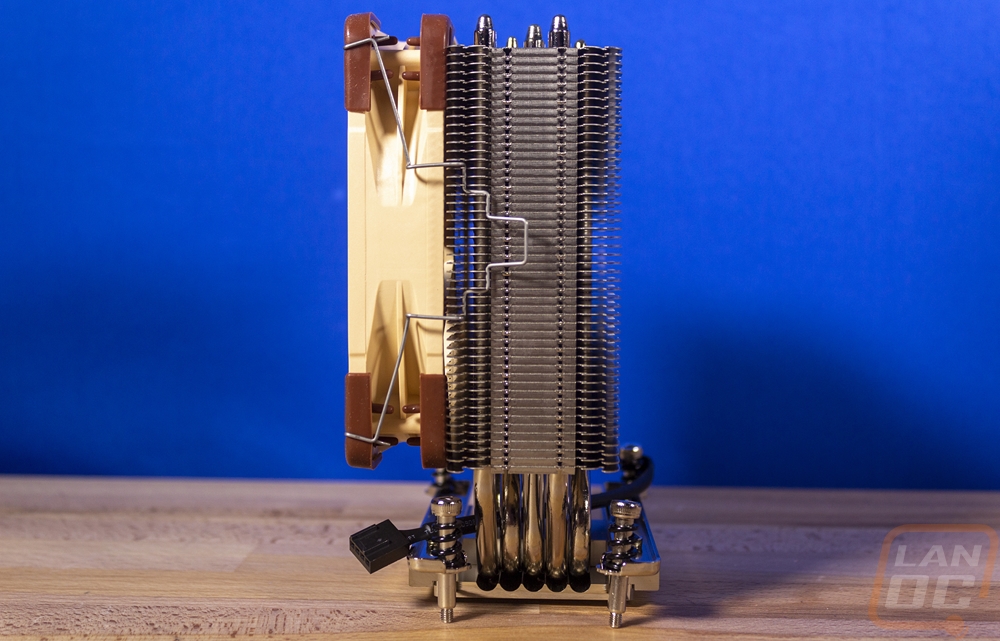
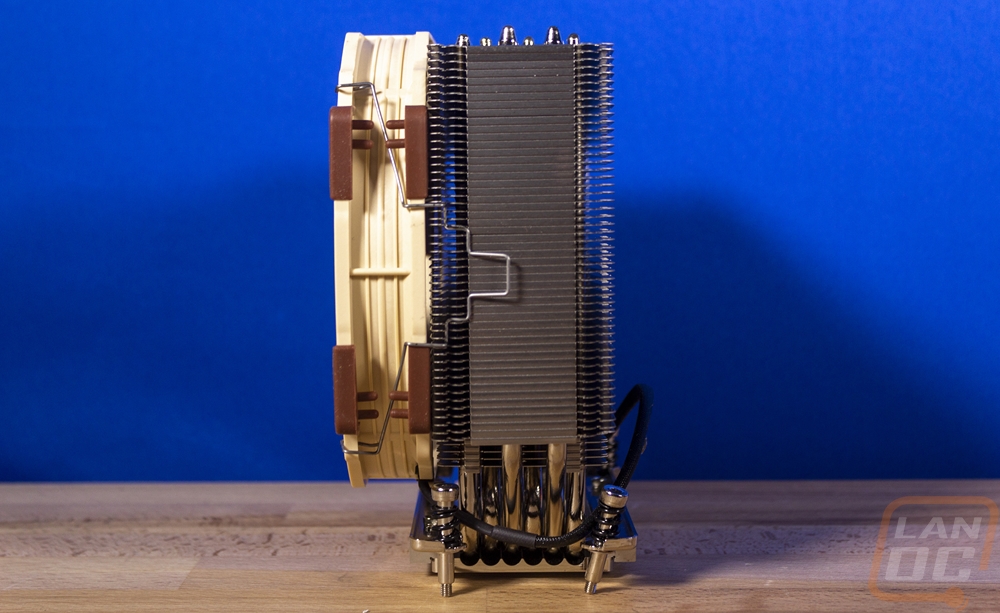
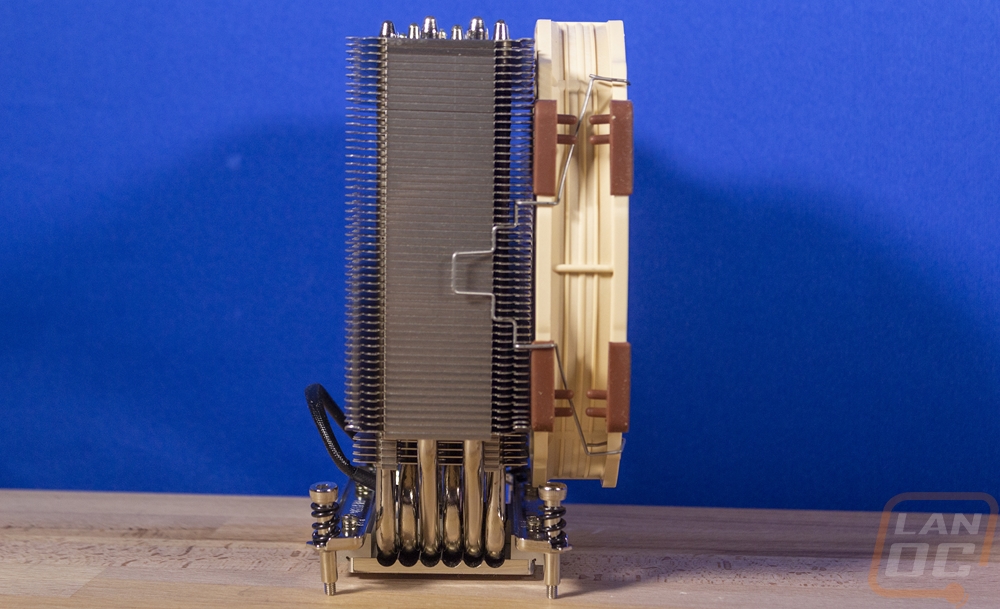
The side profile really shows the overall layout. The U shaped heatpipes pull heat up from the contact surface across both sides of the heatsink and the dual fans help cool things back down. When you pull one of the fans off you can get a good look at the fit layout which is very unique to Noctua. Each fin is thick and the spacing is a little wider than you might expect. On the fan side, there are bumps that run the full height of the can and the heatsink wraps slightly around the edge of the fan to help lock it in a central location.
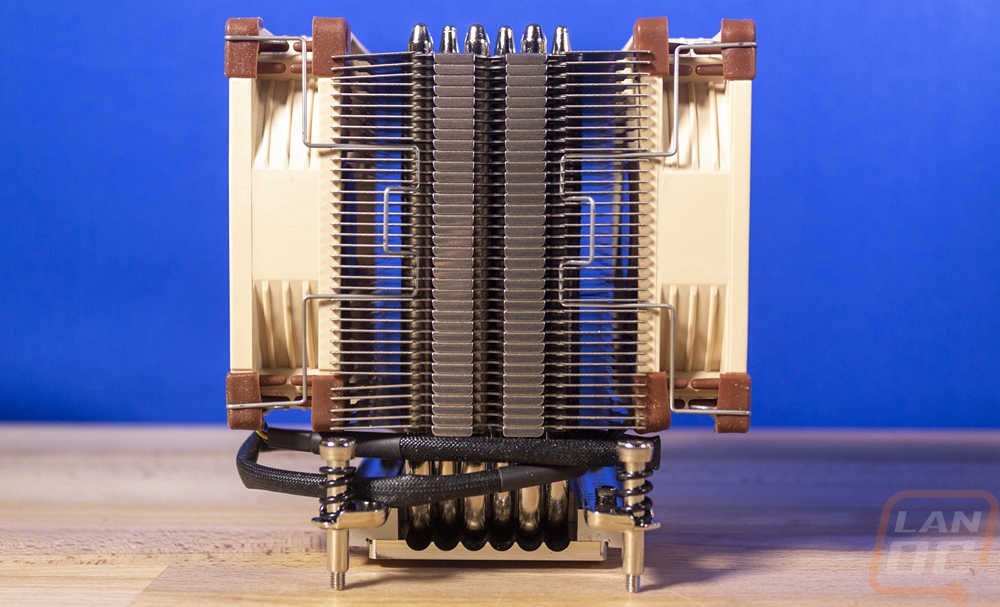
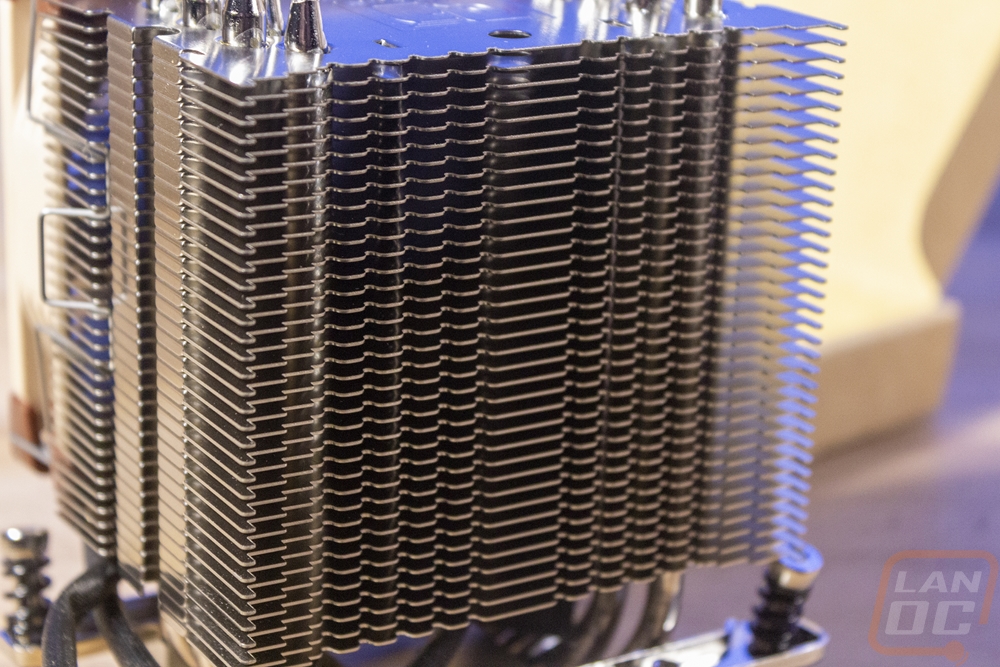
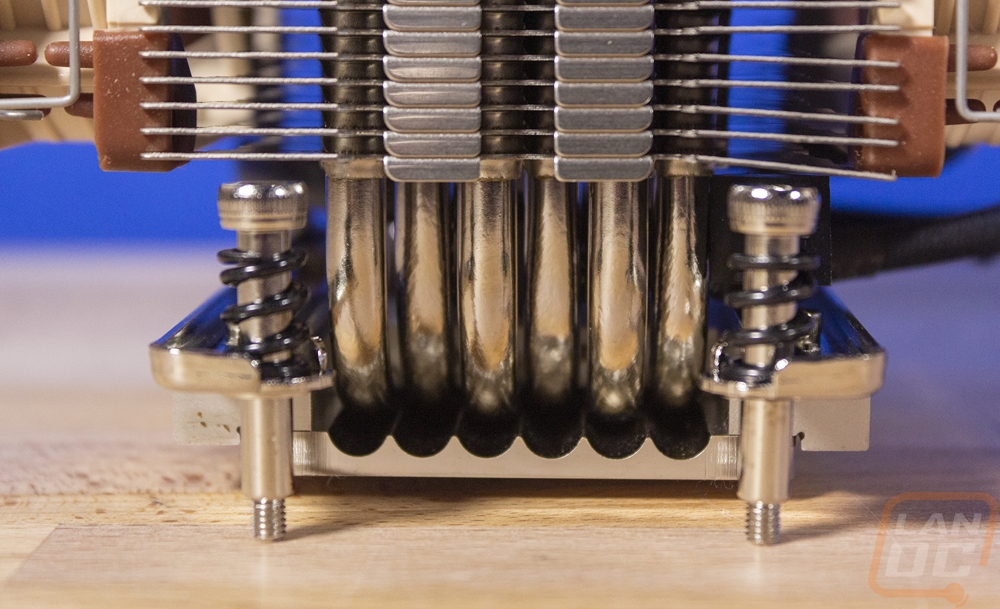
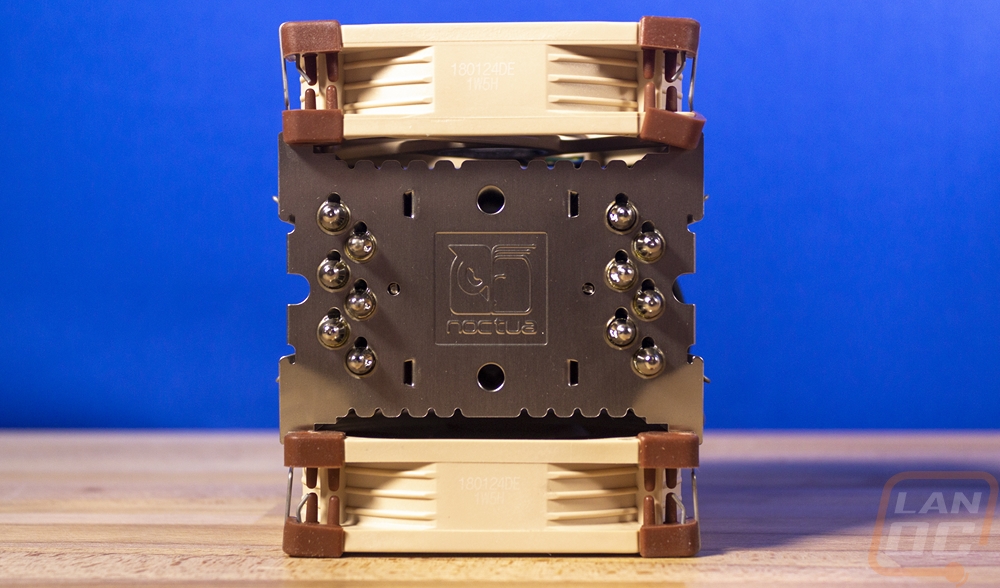
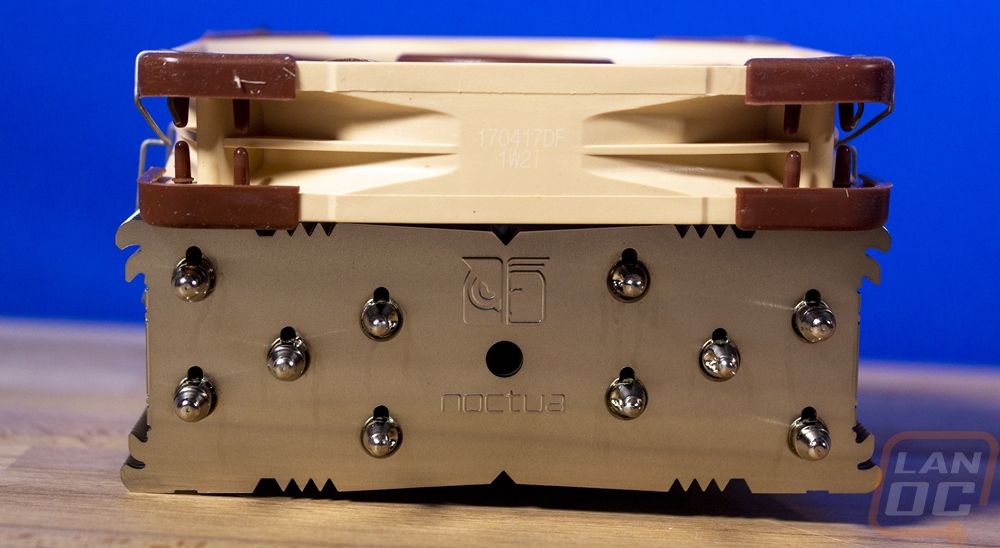
For being such a compact heatsink it has a crazy number of heatpipes which is one of the main upgrades used over the traditional NH-U9 models to support the larger Threadripper contact surface. It has six in total and they are actually staggered to even be able to fit next to each other at all. All six run the full height of the heatsink twice because of the U shape so in a way, it feels like 12 heatpipes. This view also gives us a good look at the mounting brackets as well. Like normal for Noctua, the brackets are screwed in place and can be replaced. Noctua is amazing about supporting future sockets with updated brackets, so if Threadripper changes mounting layout I’m sure they will have something out and ready in no time like they have had in the past for free for heatsink owners. The brackets have the offset mount layout which has two screws closer together on one side and farther apart on the other side. The screws have a spring and then an Allen socket on top to match the new tool included. The heatpipes aren’t direct contact, you can see the base has a machined surface.
As for the contact surface, in the picture above it looks a little hazy. There is a slight machined surface still, this isn’t polished to a mirror finish, but even so, the finish isn’t bad at all as you can see.

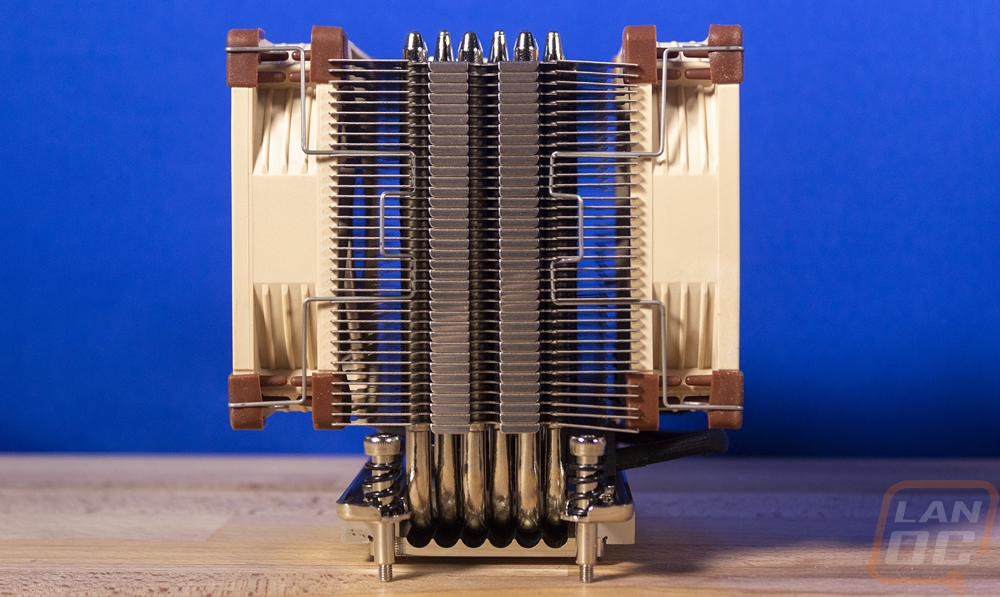
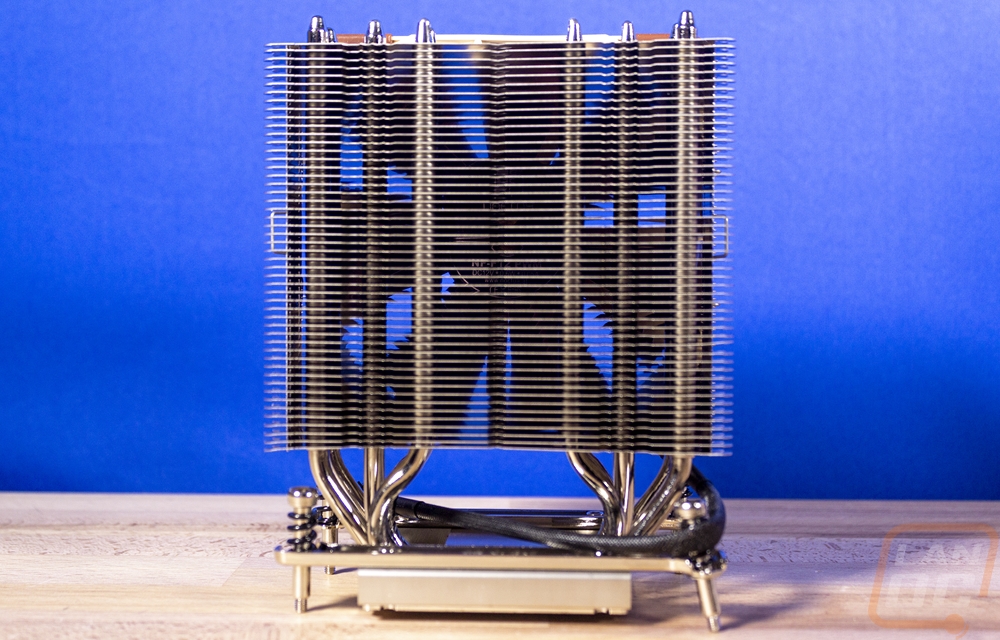
The top view also gives a good look at the staggered heatpipe layout and just how dense the small heatsink is with 13 heatpipes coming out of the top. It is a small detail, but every Noctua heatsink also has the Noctua logo stamped into the metal on top. You may or may not like their tan on brown branding for fans or their stubbornness to change until recently where they finally have all black heatsinks available. But the Noctua look is a classic one and you know right away what kind of quality to expect when you see it.
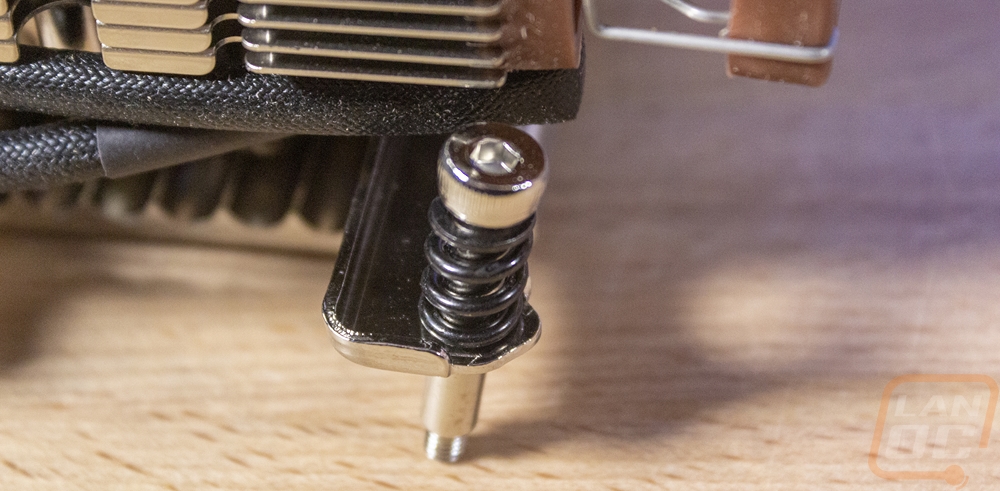
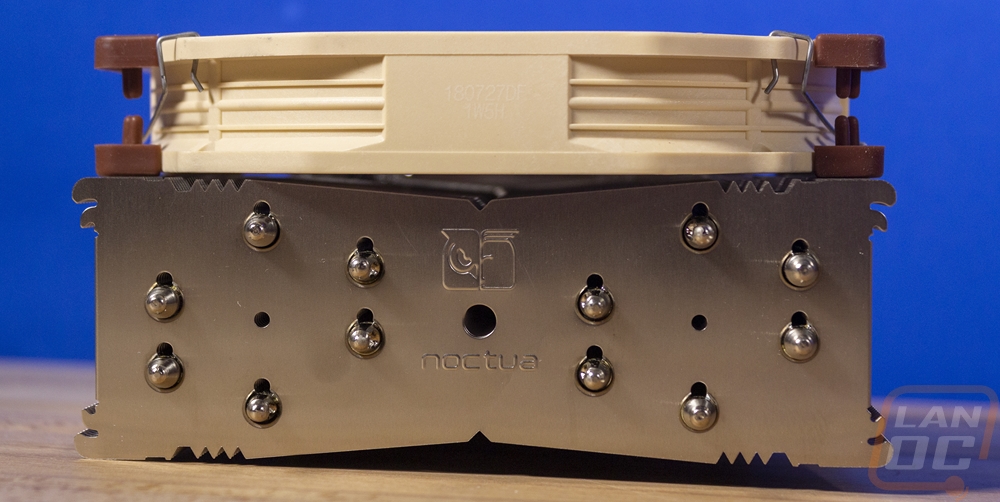
Here is another look at the mounting attachment layout. It isn’t a long screw through the heatsink like Wraith Ripper, this is back to the classic Noctua mount with a solid bracket and a screw/spring layout reached with the included long screwdriver or in this case Allen wrench. The screw does fit a touch loose where the Wraith Ripper screws because of their length are really solid and don’t tilt.
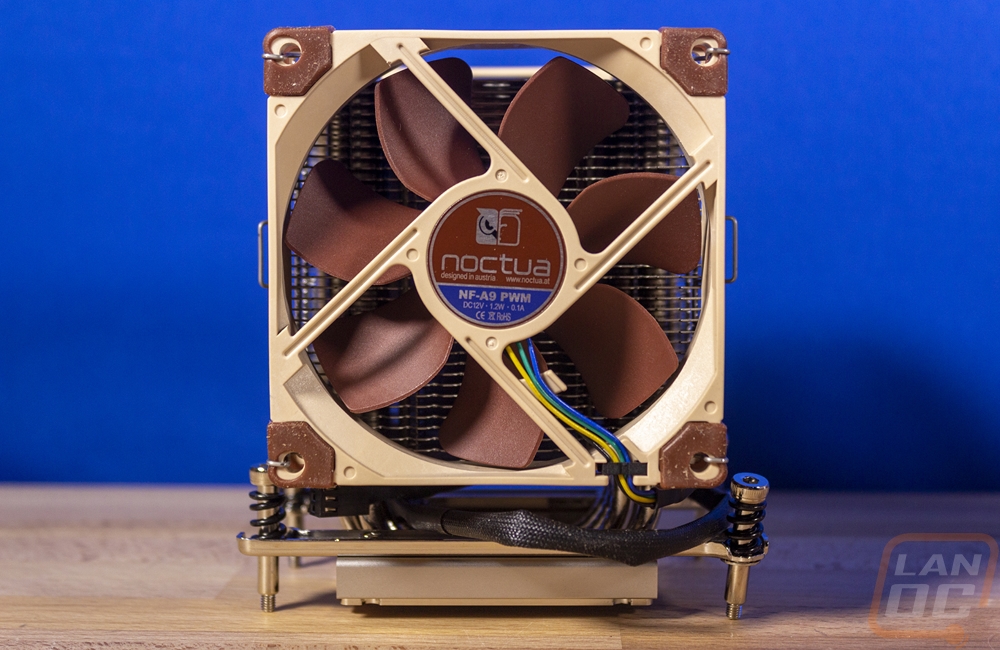
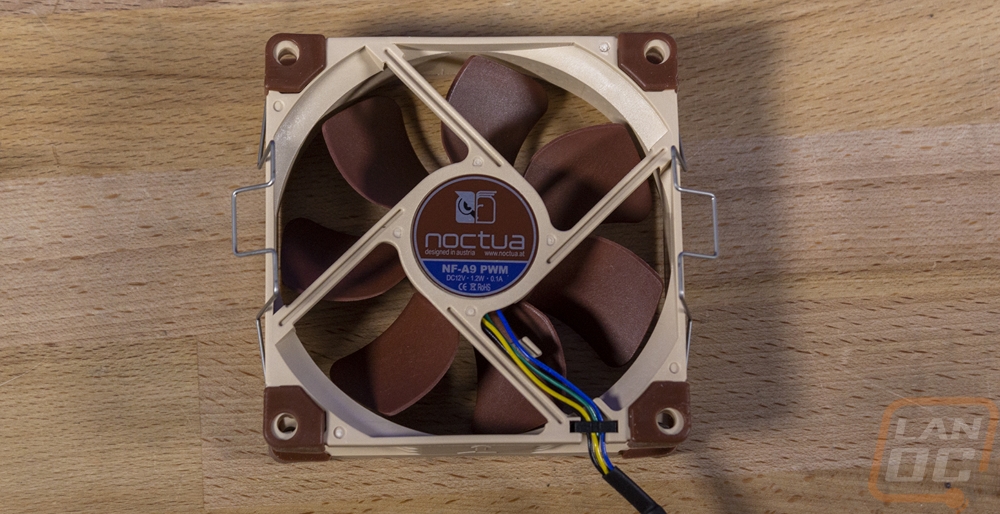
I touched on the 92mm fans included with the NH-U9 TR4-SP3 but pulling them off gives us a better look. Both are Noctua NF-A9 PWM fans which are the standard 25mm thickness, not the thinner A9 design that you find on some of their SFF heatsinks. You get the standard Noctua features though like SSO2 bearings, the tan and brown housing, and fan blade as well as rubber mounts on all of the corners to cut down on vibration. These fans run at 2000 RPM or 1550 if using the included L.N.A. The fans also come with a sleeved cable which Noctua has a unique sleeving that almost feels like it has a wax coating on it that is extra smooth. They also both come with metal clips that hold them on to the heatsink and with the U9 Noctua uses a different shape than on the other two that I’m checking out today where the clip sticks out more making them easier to work with. Frankly Noctua’s fan mounting solution was easy already compared to a log of other companies and easy to do inside of a tight case.
Noctua NH-U12S TR4-SP3
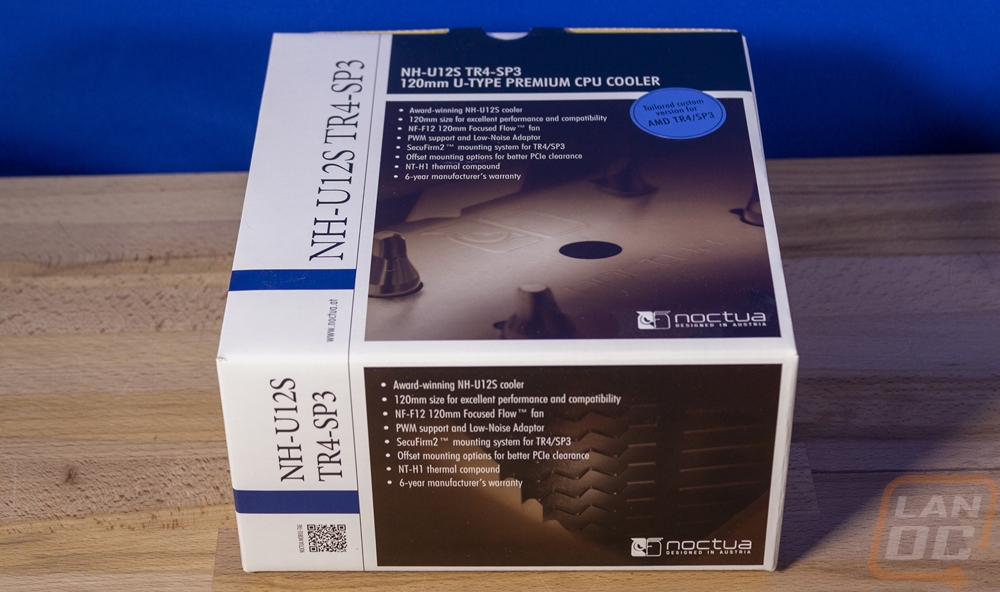
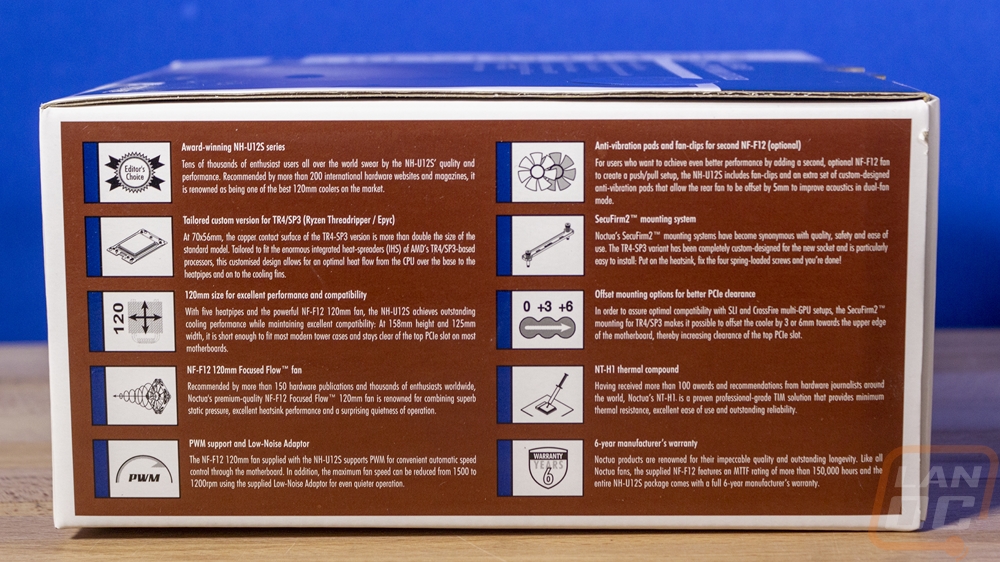
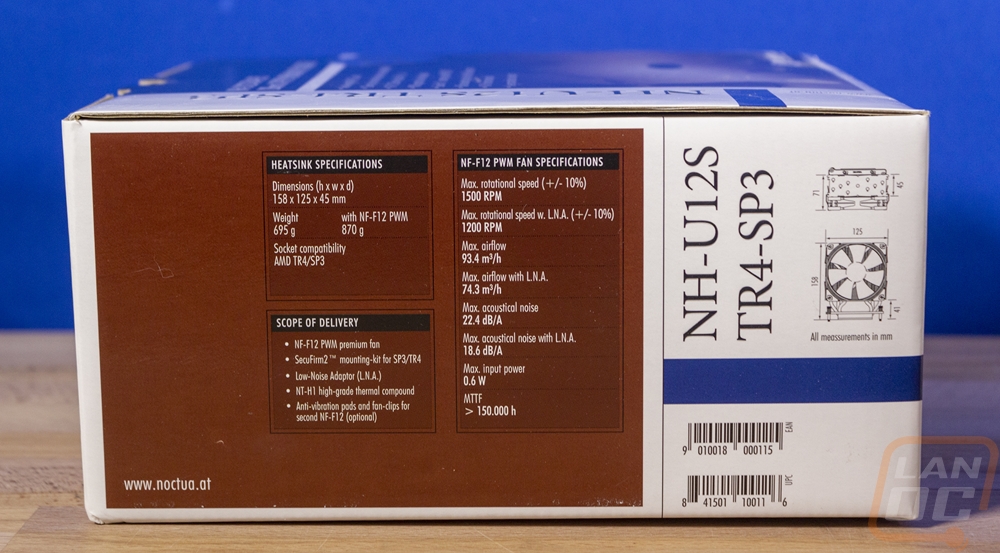
Now it might sound like I’m just repeating myself on a lot of this, but Noctua has a very standard look and layout for their heatsinks so the NH-U12S TR4-SP3 packaging looks a lot like the NH-U9 TR4-SP3 that I just talked about in the previous section. The packaging has that same white and brown theme and they have the model name both on the left and at the top with the heatsink type below that which is a 120mm U type cooler. This is similar to the U9 in that it is U type but at a larger size. Below that and on both the top and front Noctua has a shortlist of key features listed like the 6-year warranty, fan features, the mounting type, etc. All of those same features are repeated again on the right side of the box only this time each has a description below it and a small picture that helps with the explanation. Also on the packaging one side has a specification listing for the heatsink, the fan, and a list of everything included in the box which is awesome. That side also has line drawings of the heatsink with dimensions but I do wish the box would have a photo of the heatsink on it, I just like when I’m shopping to be able to see what I am getting and that is easy online but not so much when shopping in retail unless it is included on the box.
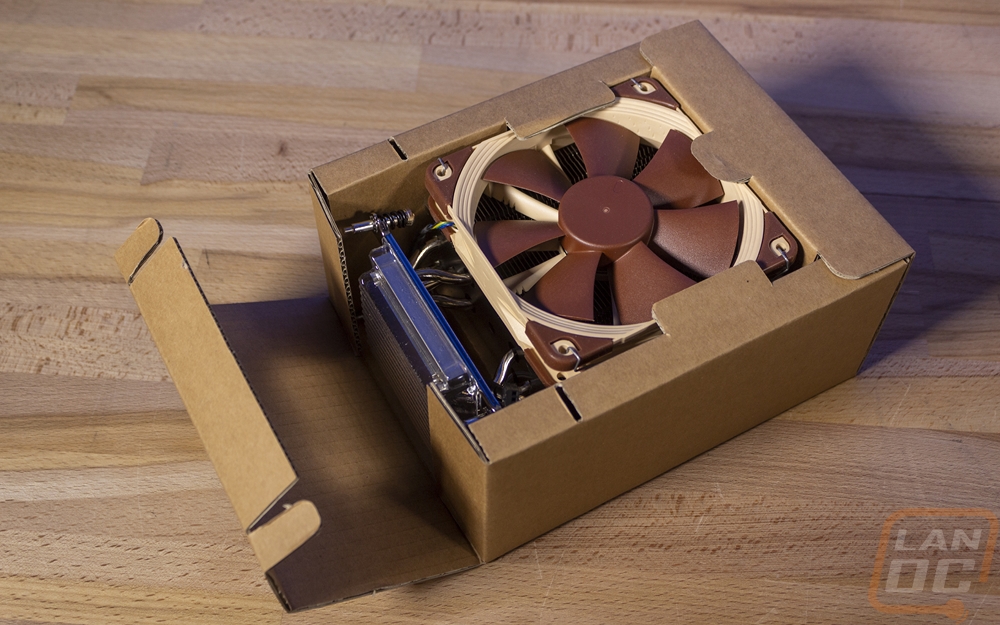
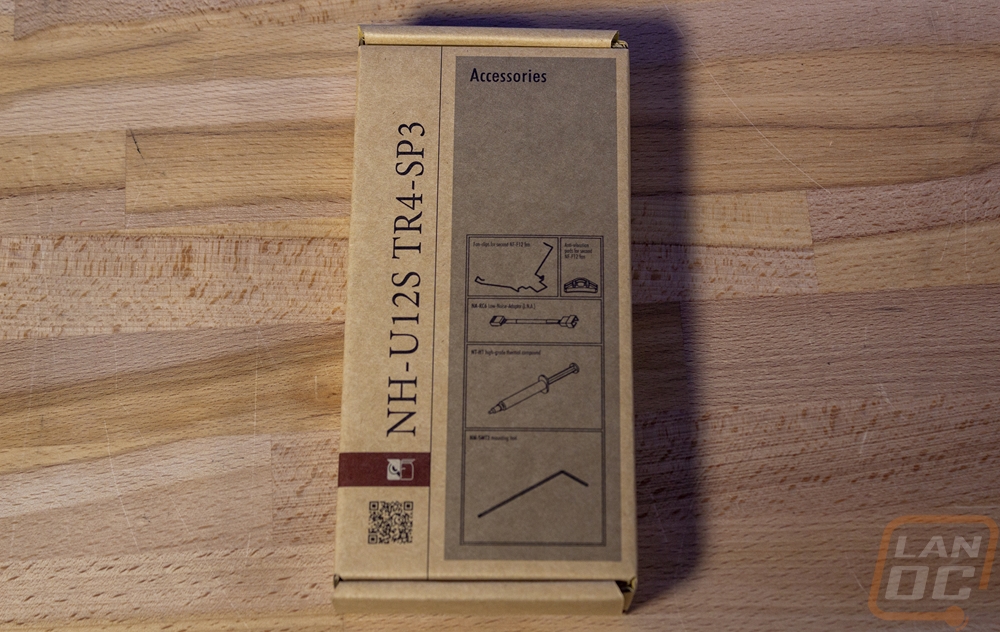
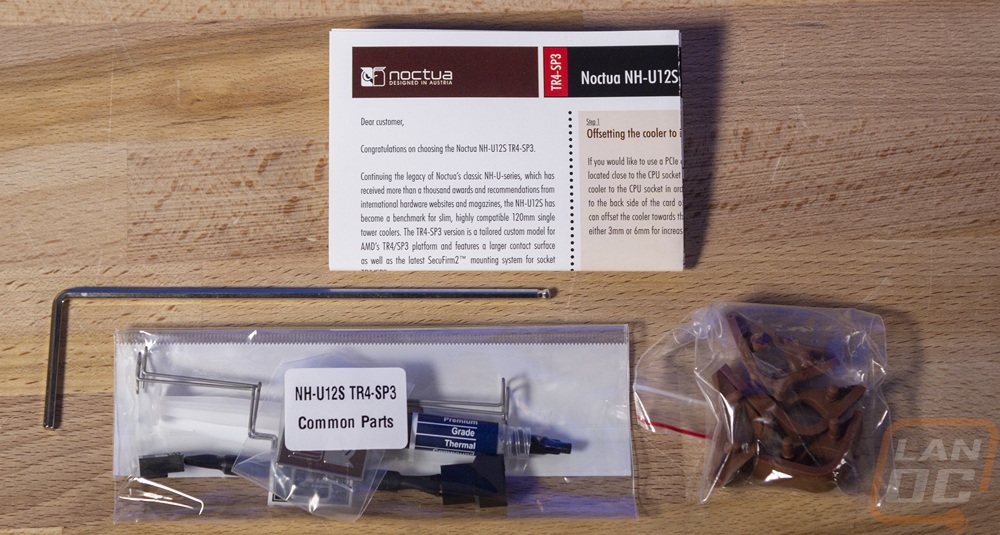
Inside the box, the heatsink comes wrapped up in an origami of cardboard which sticks with what Noctua has always done, simple sustainable, and no unneeded plastics on their packaging. Alongside that there is a small cardboard box. Inside that has the documentation in the form of a folded up paper and the accessories. I’ve talked about it a lot, but Noctua goes way above and beyond when it comes to accessories. Look at the Wraith Cooler that came with nothing at all other than paperwork. The U12S TR4 gets additional brown fan mounting pads, an LNA or low noise adapter for the fan that slows down the RPMs, an additional set of fan mounting clips so you can add another fan for a push-pull setup, and even a full tube of thermal paste! You also get a long Allen wrench for installation and a thick all-metal case badge that has the Noctua logo molded into it then painted.
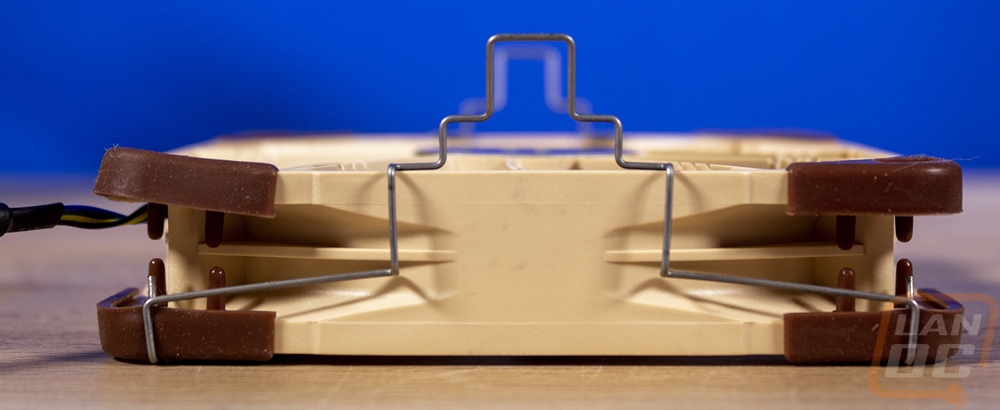
So the overall layout and size of the NH-U12S TR4-SP3 is very familiar to me. We use U12’s on all of our test benches that aren’t water cooled so I have been dealing with installing and removing the U12 over and over, especially during CPU testing. I have always gone with it because at 120mm it is a full tower cooler but it doesn’t fall into the crazy category with dual towers or being large enough that it might not fit in every case. Being Noctua it is a premium cooler, but size-wise it is about as average as you can get. The U shaped heatpipe design complements the tower shape really well and with both the standard model and the Threadripper specific one I am looking at today it runs a center-mounted tower in relation to the base, a lot of times this is offset because you want it centered once you include the fan, but Noctua leaves the option to run a second fan for a push-pull configuration as a way to upgrade your cooling capabilities. Of course you have the tan and brown NF-F12 PWM fan included and the total height of the cooler is 158mm which isn’t a lot taller than the 125mm of the NH-U9 but it makes a big difference in use. This is for a standard case configuration where the NH-U9 is focused on more compact builds, this is why I used it on our Crush project build. It fit in the compact Bullet BH7 case. Funny enough my Threadripper build is in the slightly taller BH8 which is where I am testing these heatsinks today.

From the top view, you can see the heatpipe configuration. There are a total of 5 in a U shape which gives us 10 up on top. Noctua has them well spaced out to get really good distribution across the heatsink, not like the NH-U9 which has them packed in a lot tighter at the ends. They still left room to include the Noctua logo which is stamped into the top. You can also see the hook shape on the outside edges that works with the fan clip design and the V shapes cut into the heatsink to help lower fan noise as well.
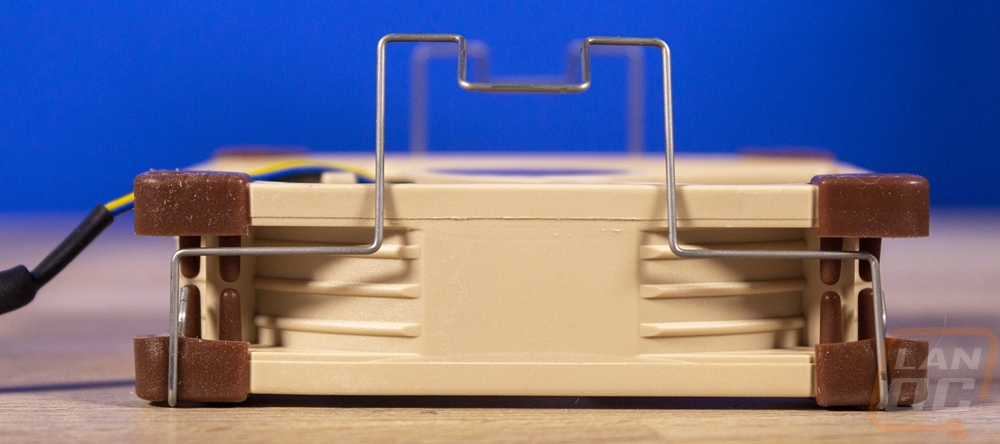
That evenly spaced out heatpipe design is possible because of the crazy bending they do down here at the bottom of the heatsink. You can see from one point of view where all five heatpipes come out front on top of the contact surface, one is a standard U shape then two are bent to go to the outside edge and two for the inside. These two pictures also give us a good look at the mounting configuration which is the same on all three of the heatsinks. Noctua allows for them to be swapped out later with them being screwed on. I said it once already but they are awesome at keeping up with socket changes. It might not seem important because LGA 2011, LGA 1050, and AM4 have stayed consistent for a while now other than the change from AM3 to AM4. But Noctua provides owners with free new brackets to move your old heatsink on to new platforms if/when they come out where most other companies would try to sell you a new model. Combined with that 6-year warranty, you are getting a long term heatsink with Noctua.
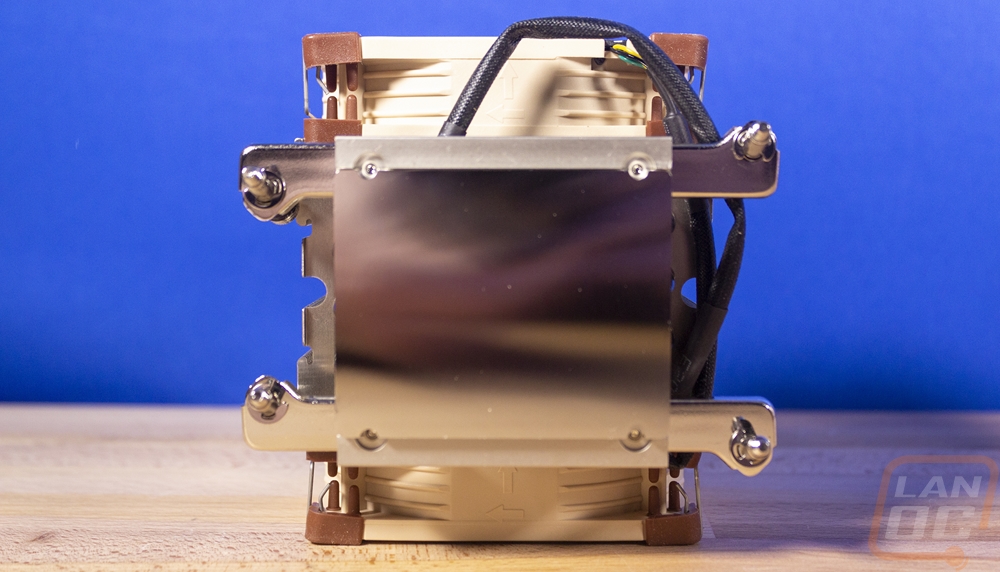
So the big change for the TR4-SP3 model is with the contact area at the bottom. The number of heatpipes and everything else about the U12S is the same. In fact, you can use the cool Chromax covers on this model just like the others. But the contact area has been made significantly larger to support that huge Threadripper CPU. As for the finish, this is the standard Noctua finish. It isn’t mirror smooth like some water blocks, you can see machine marks in it but it is close to mirror when you put something up next to it to see.
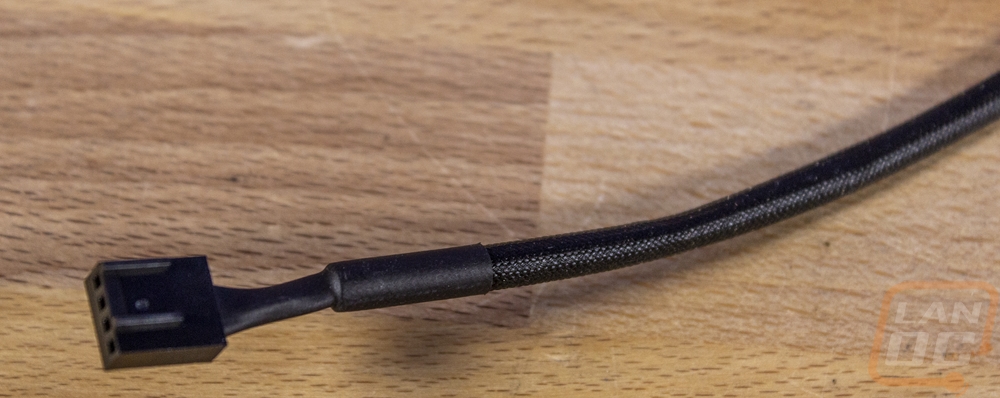
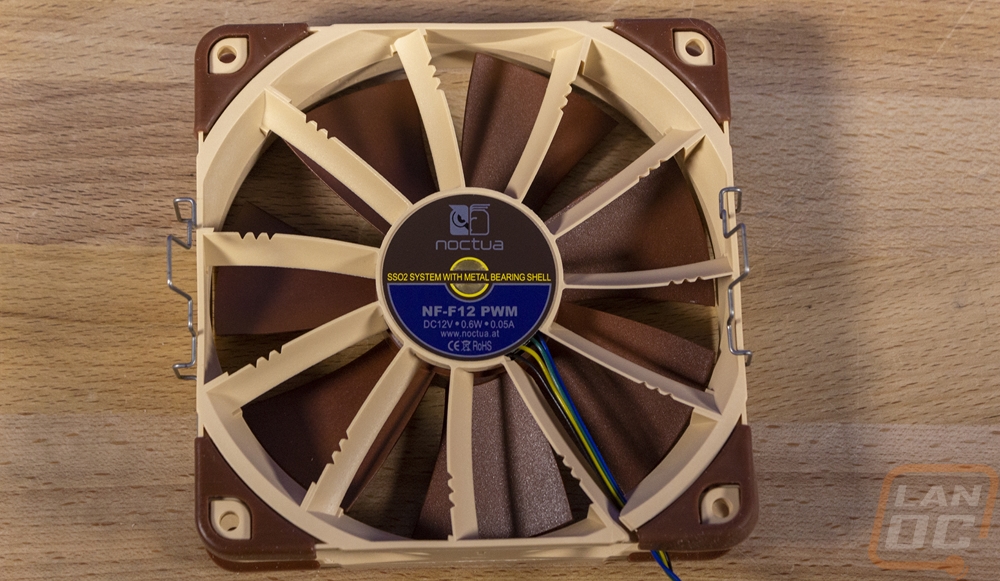
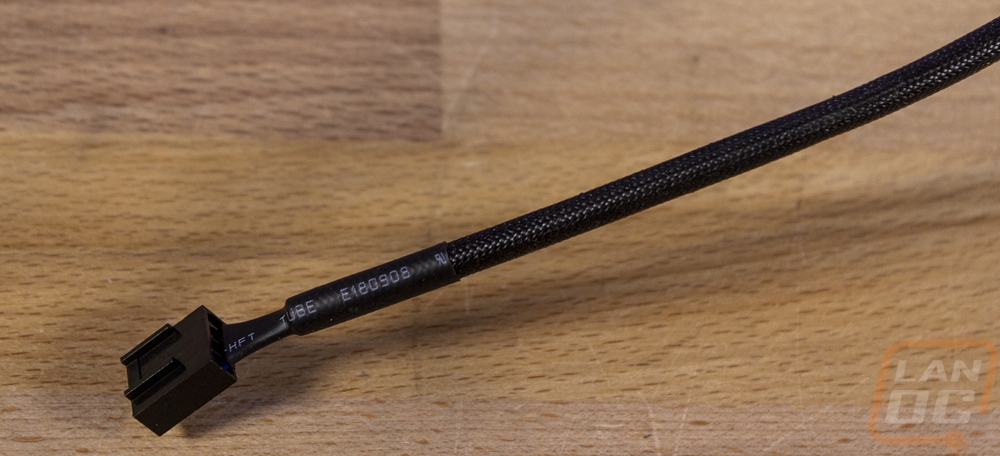
The NH-U12S TR4-SP3 comes with just one fan, the Noctua NF-F12 PWM fan which has an SSO2 bearing inside and unlike the A9 that came with the NH-U9 the NF-F12 has a lot of Noctua’s fan features like the cuts in the angled fins on the back of the fan and the noise-reducing vibration pads on every corner. If you haven’t ever held or used a Noctua fan you might not understand it, but their fan blade is a little more thick and solid compared to cheaper fans and the bearing is ultra-smooth, you can tell the difference just giving the blade a flick between this and a cheap fan. The wire mounting clips clip on to the fan and stay on and allow for easy attaching to the heatsink. A lot of wire mounts like this can be a pain, but these stretch out just enough to make it easy and also hold the fan tight and because they stay on the fan you don’t have to fight with making sure they stay on when installing the fan in your PC. The fan also has a short-sleeved PWM cable which has a sleeving unique to Noctua that as I have said before feels almost like it is coated in wax.
Noctua NH-U14S TR4-SP3
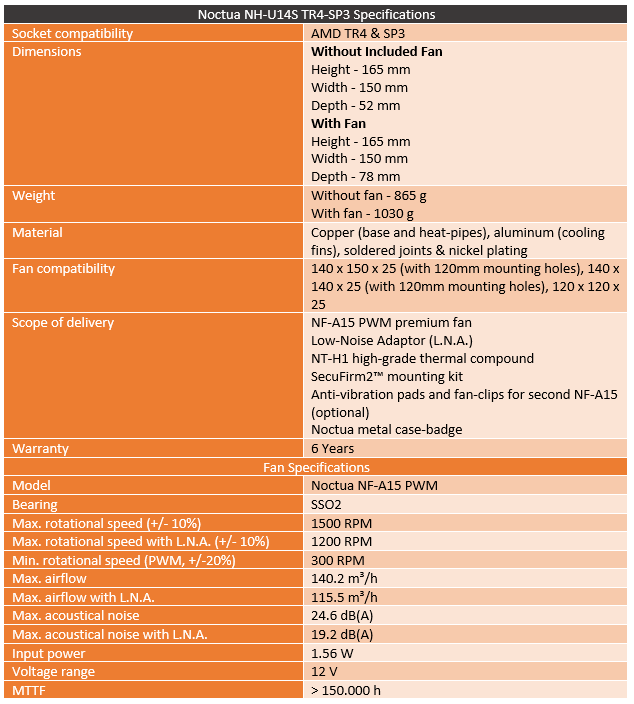
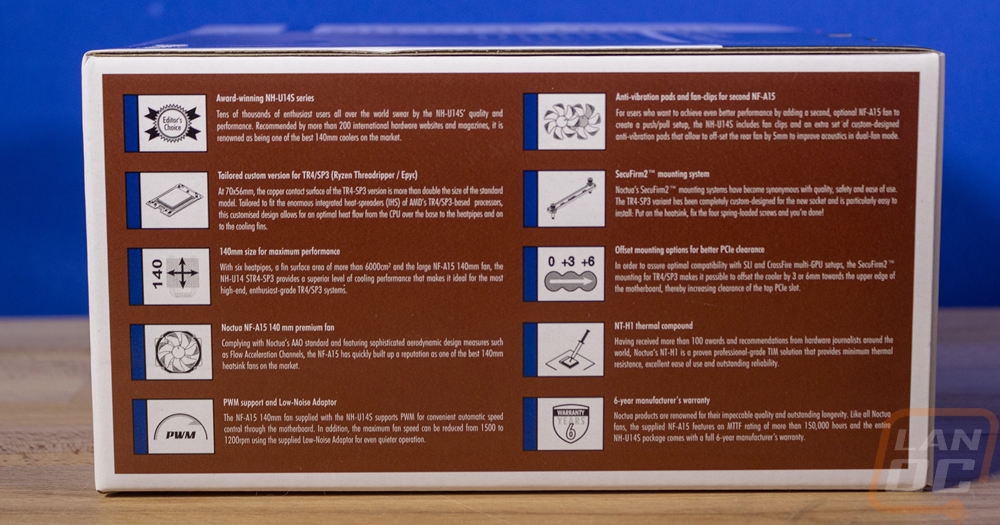
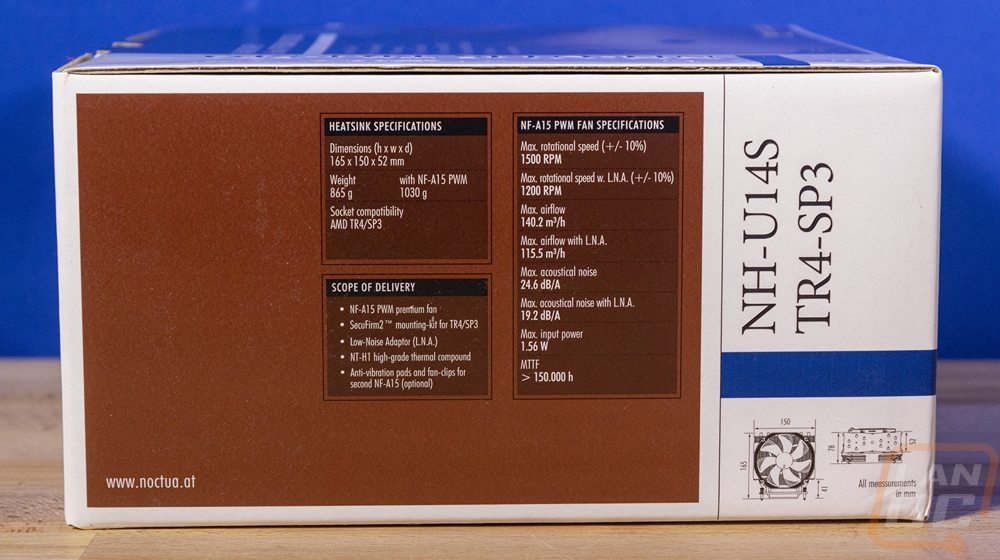
So the NH-U14S TR4-SR3 is the largest of the three Noctua heatsinks and the box size does reflect that. But beyond that, the packaging looks a lot like the NH-U12S TR4-SP3 because of the same white background with brown styling. The picture in the background gives hints of the heatsink but no direct photos. Then on the side the model name runs up in the white and is repeated again up on top only smaller than the first one. Below that they list what kind of heatsink this is. This is a 140mm U-Type cooler, like the two before it only larger. The model name reflects that as well with the 120mm U12S and the 140mm U14S. Noctua lists off the key features on the top and front of the box but they dive into more detail on the right side. This is where they have a description of each feature and a small image that helps with the description for each. Then just like on the other coolers, they have all of the specifications on the left side including the heatsink, fan, and a list of what comes inside. The only picture of the heatsink is the line drawing here which does break down the dimensions really well, but I would love to see a full picture of the cooler somewhere, not just the zoomed-in images on the top and front.

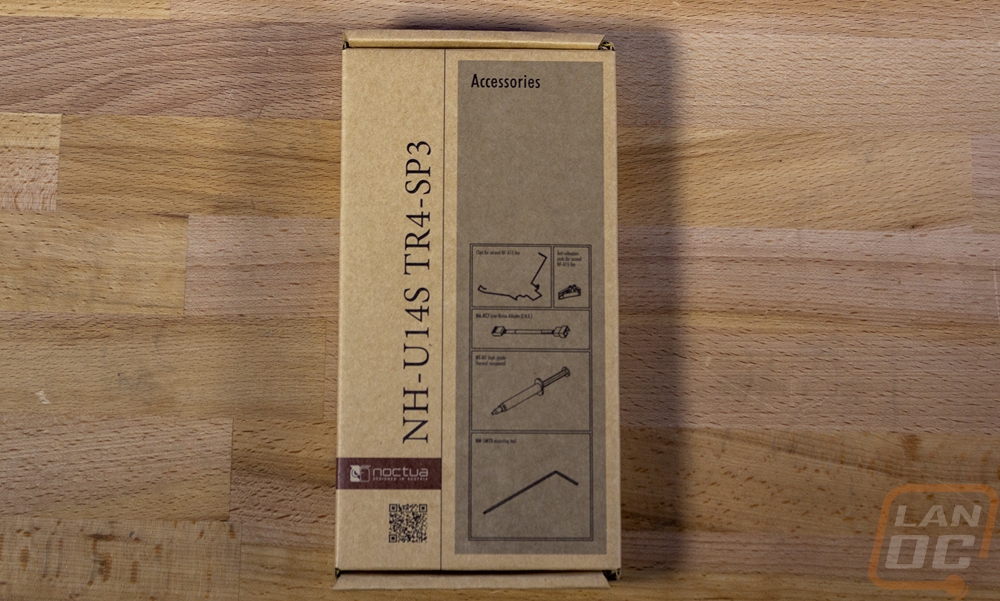
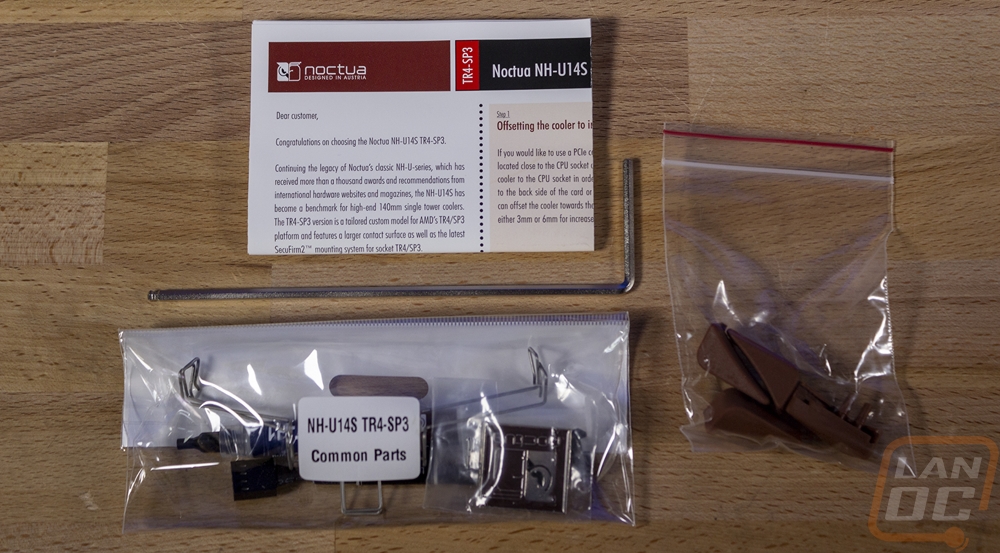
Like the other coolers, the U14S comes in a cardboard housing inside of the box to keep it safe and to be sustainable. Then there is a small accessory box. Inside you have a folded up instruction manual. There are more vibration pads and the tall Allen wrench. Then like the others, you get a full-sized tube of thermal paste and the thick metal painted case badge. You also get an extra set of fan clips so you can add a second fan for a push-pull configuration if you want as well as a Low Noise Adapter.
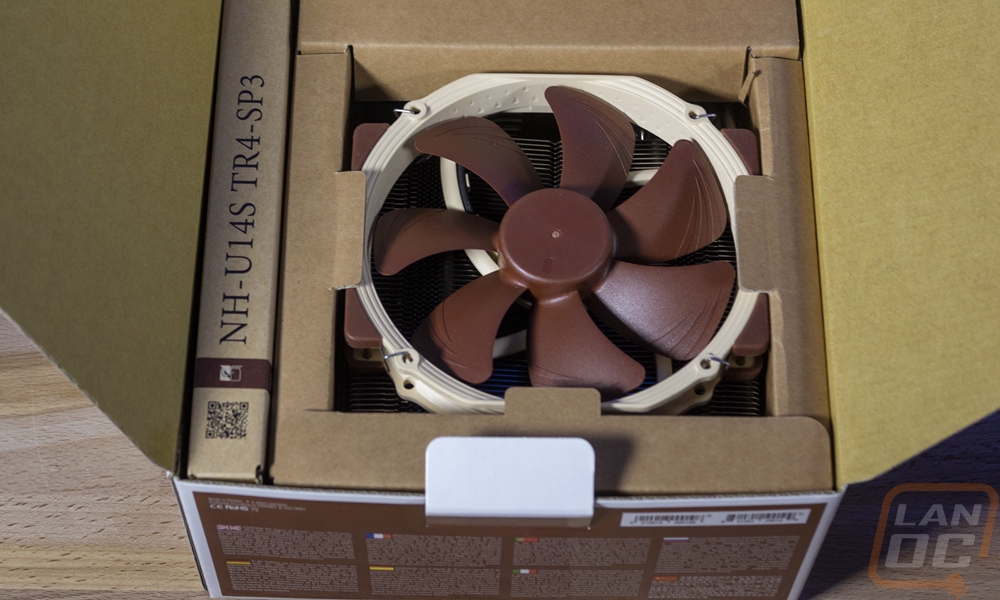
So the NH-U14S TR4-SP3 is extremely similar to the NH-U12S TR4-SP3 with its tower configuration and as Noctua puts it, U-Type design. They call it that because of the U shape to the heatpipes that make up most of the cooler. They run down from the top across the top of the base and then back up the other side, giving you twice as much heatipipe without packing a ton of small heatpipes in. The NH-U14S TR4-SP3 looks a lot different than the U12S however because of the change in the fan. It does still have the tan and brown look but by using an NF-A15 PWM fan this is a big cooler. The heatsink itself is wider than the NH-U12S by 25mm, taller by only 7mm, and it is also 7mm thicker as well. But adding the fan on adds even more to the overall height making it 165mm tall in total. That is a touch taller than the Wraith Ripper, but being a single tower design it is still a lot smaller overall. It still has that classic Noctua look and like the U12S, because the Threadripper model doesn’t change anything on the top ¾ it still supports the Chromax covers for the heatsink to switch this from exposed aluminum to black or white along with them offering a black Chromax fan as well and trim color options.


The view of the top on the NH-U14S TR4-SP3 helps a lot in seeing the heatpipe configuration. It has a total of 6 heatpipes, just like the non-TR4 model. Like the other Noctua heatsinks tested today. Those heatpipes are all a U shape with the contact area near the middle so in total the top has 12 pipes sticking out. This allows for the 6 pipes to pull double duty without having to be too small to fit over the base of the heatsink. They are spaces out though with a circular layout on both sides. The top of the NH-U14S TR4-SP3 also has the Noctua logo stamped up on top like all of their heatsinks. You can also see a few design choices with the shape of the heatsink fins here. On the outside, the double hooks on each corner are what make those fan clips so easy to use. Then the heatsink itself has the same V-shaped cuts in it on both sides just like the U12S did but this one also has more of a wide V shape to the heatsink itself, giving a gap near the center between it and the fan. The tower design isn’t offset like the NH-U9 was so when running just the one fan it does overhang that direction. But Noctua does include the clips to give the option to add a second fan for push-pull if needed.
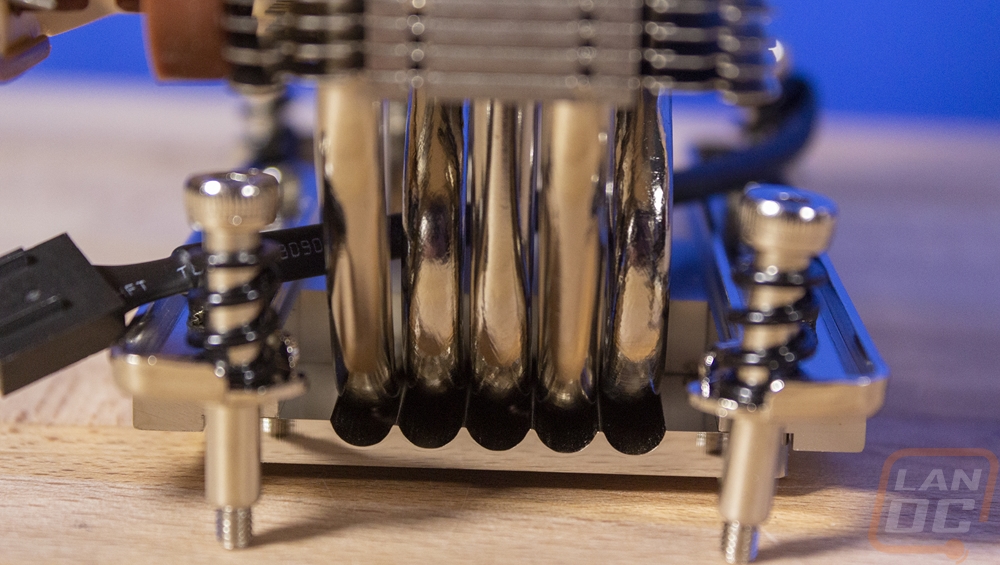
The side view of the heatpipes shows the 6 heatpipes layout and how they couldn’t add much more, even with the large contact area for TR4. The heatpipes are split up with three going to the outside and three to the inside to get that circle layout.
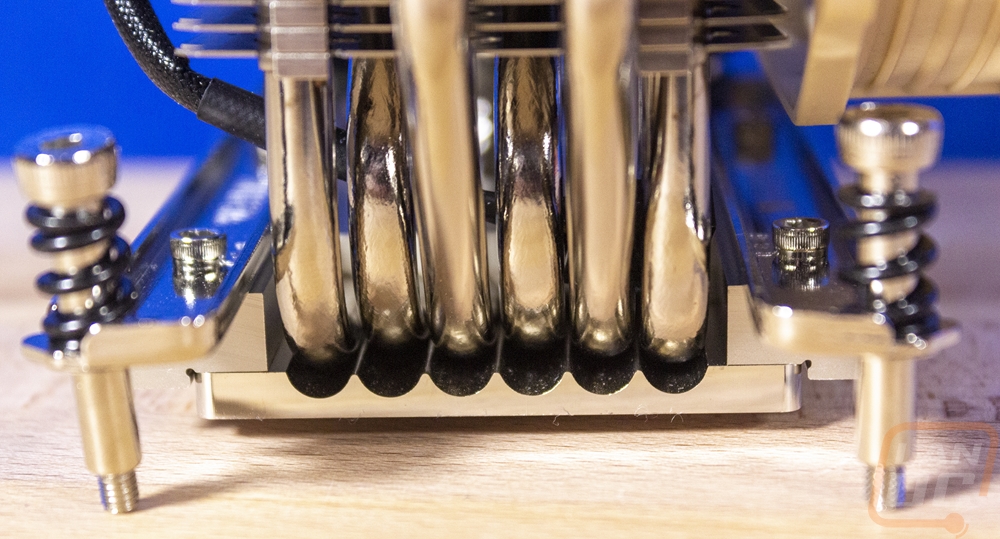
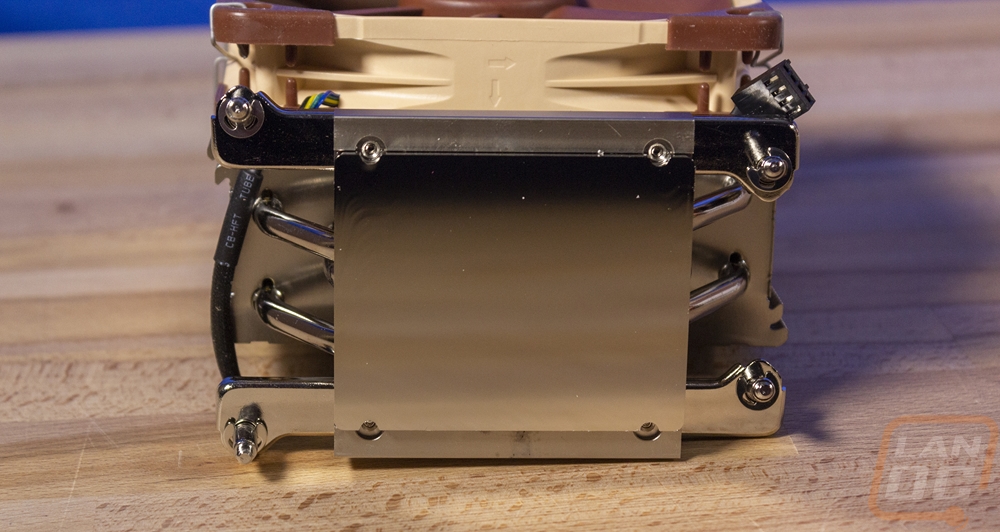
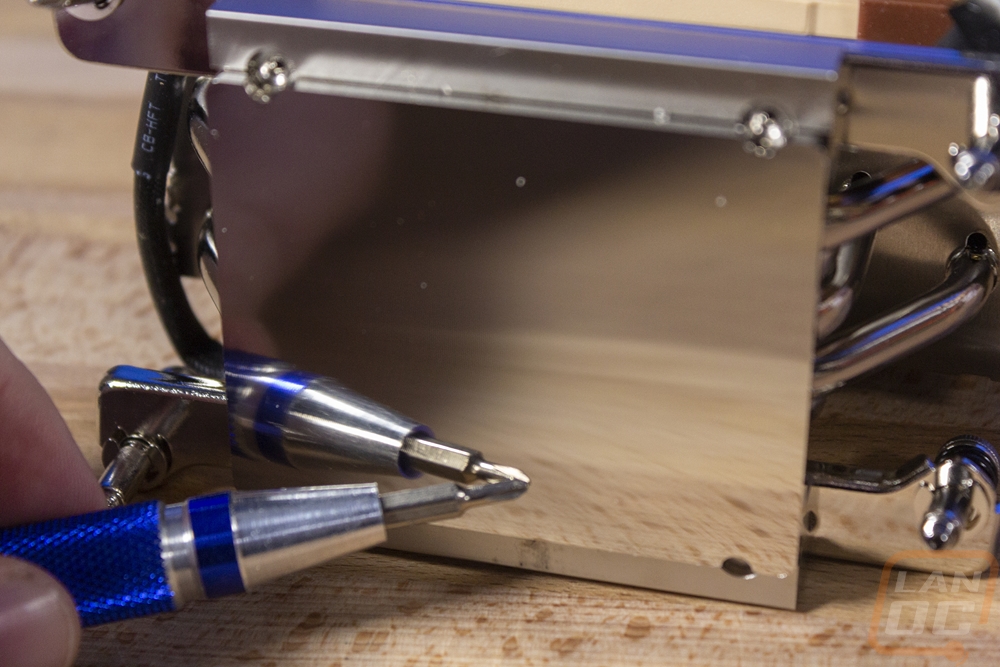
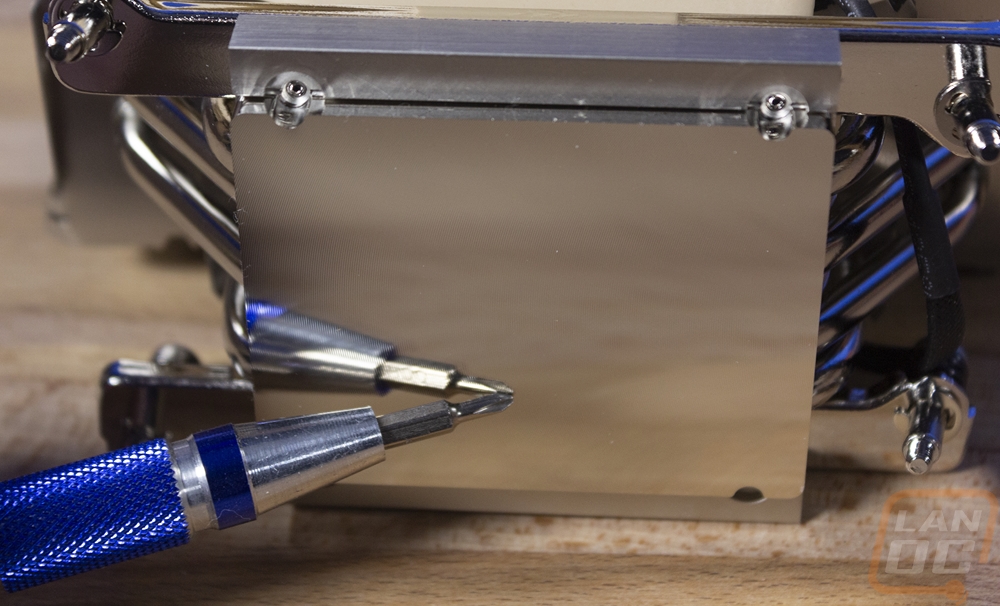
Then you have the contact area for the NH-U14S TR4-SP3 which, like the three other TR4 Noctua coolers, has been redesigned to be larger for the huge Threadripper size. The heatpipes aren’t a direct contact configuration, Noctua uses a machined surface with a few mm between it and the heatpipes. That surface does have some machine marks left, it isn’t a mirror finish like some heatsinks and waterblocks. But as you can see, it isn’t too far off once you have something in the reflection.
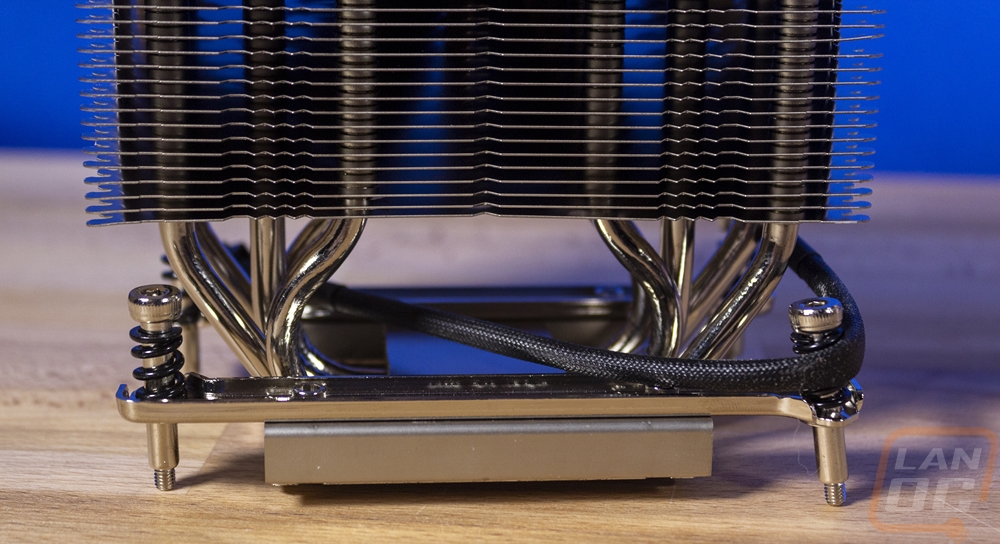
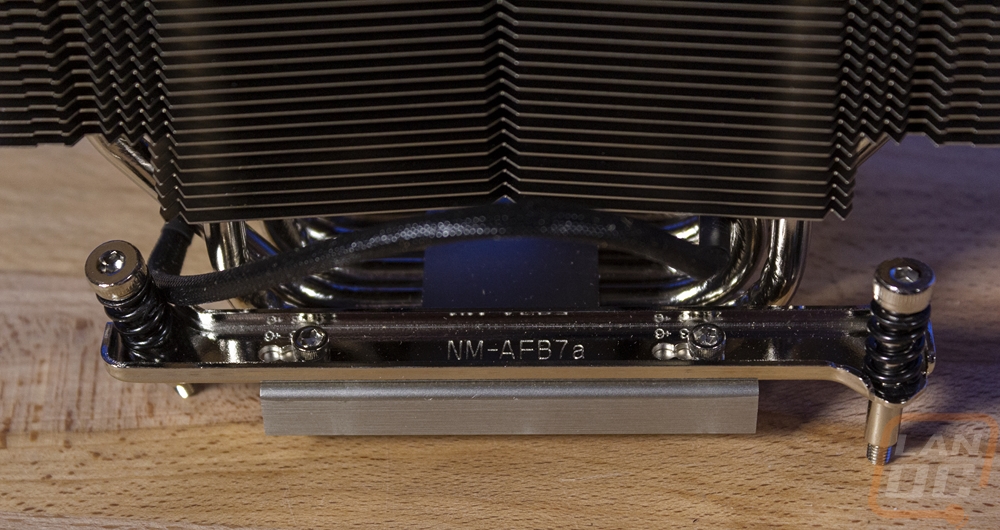
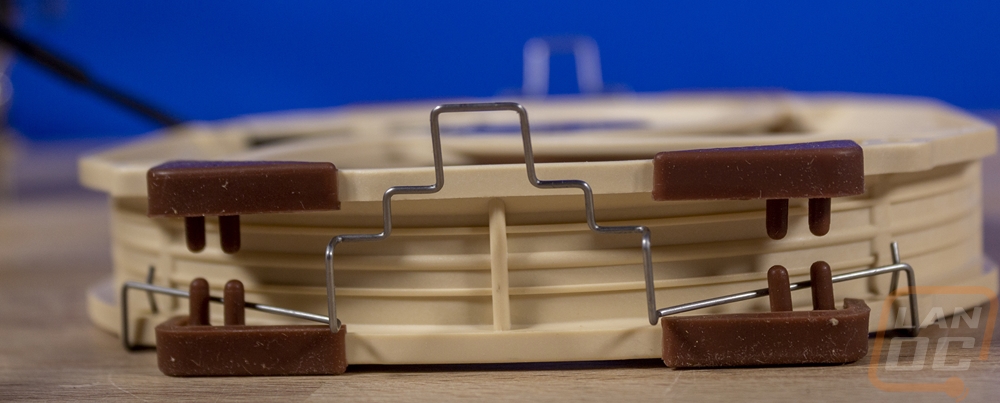
The TR4-SP3 bracket design is so simple, it is a straight bar from one end to the other with the mounting screws offset depending on which end it is on to get the mounting layout AMD went with. Each has a short screw with an Allen socket head which is unique for Noctua who normally uses Phillips head mounting. Unlike the Wraith Ripper which had long screws that ran to the top, these shorter screws also have a little more lean and adjustability to them. The bracket itself is screwed on, even though this is an exclusive design that doesn’t fit any of the other sockets you can see Noctua left the option in case AMD changes the mounting later on or if Intel’s LGA 3647 comes to the consumer market like AMD SP3.
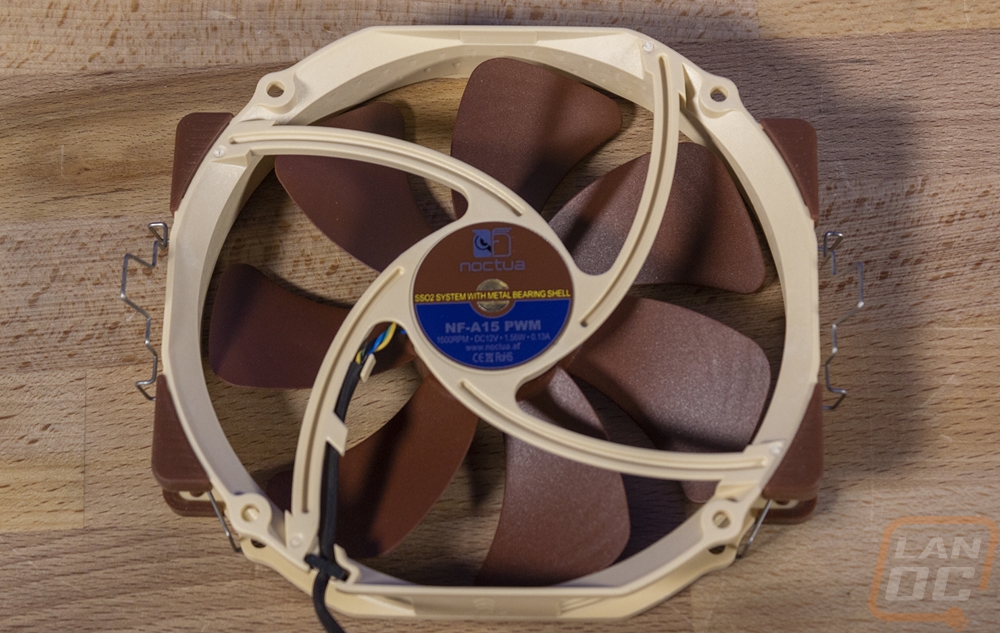
The NH-U14S TR4-SP3, like the NH-U12S TR4-SP3, comes with just one fan along with the clips to be able to mount a second fan if needed for a push-pull configuration. It comes with the NF-A15 PWM fan which is a unique design in that is has the mounting holes for a 120mm fan but it has more of a round shape to accommodate a larger fan blade. It is actually 150mm in total size as the fan's name would imply but the U14S name implies it would be a 140mm fan. The extra size runs up over top and below the heatsink for a little additional cooling. This fan runs at 1500 RPM or 1200 RPM with the Low Noise Adapter hooked up. Beyond that it has a similar feature set with the same SSO2 bearing and the brown blade and tan housing. It also has the anti-vibration pads, though they are a little different because they aren’t located with the mounting holes like the other fans. The cable is sleeved and has that Noctua wax-like finish like the other fans. The mounting clip is similar to the U12S which isn’t a big shock given the NA-A15 PWM’s 120mm mounting holes.
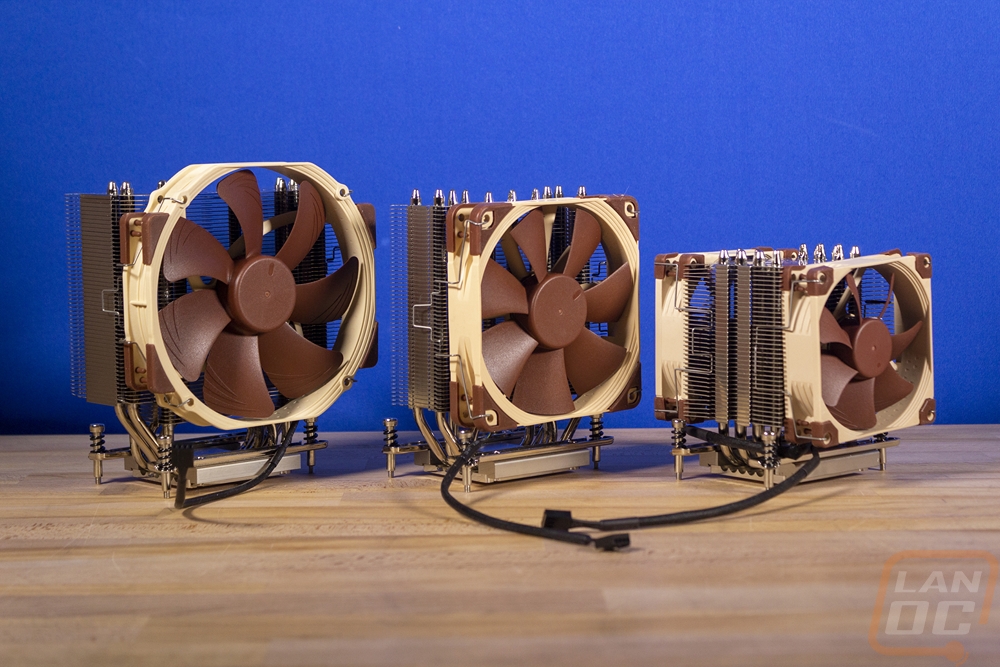
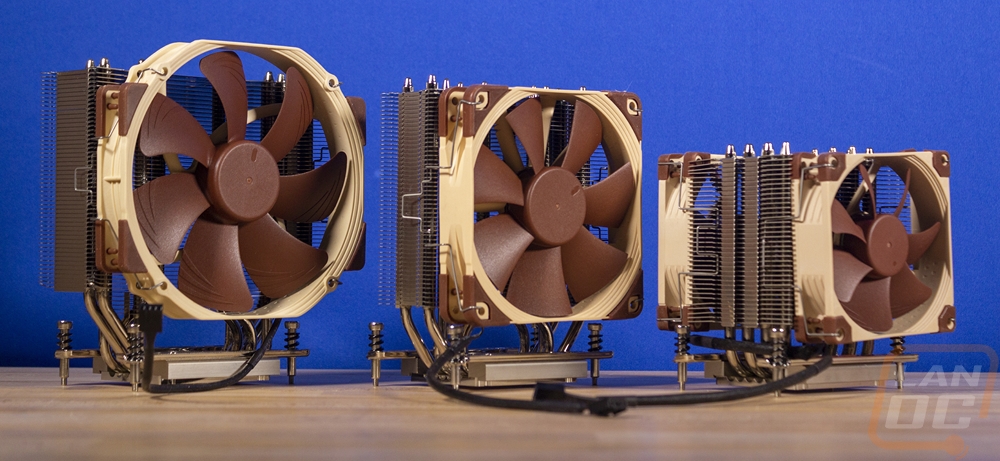
Here is a picture of the three Noctua coolers together to help give a little comparison for the size difference between the three. The NH-U9 is obviously the smallest but it is also significantly thicker to help with that, especially after it adds two fans into the mix. The U12S and U14S are a lot closer in size. But the U14S is both wider and larger but the height difference isn’t as big as you might expect. It is 7mm taller before you add in the fan. It is the huge 150mm fan that mostly extends the height.
Testing Configuration and Procedures
Cooling Performance
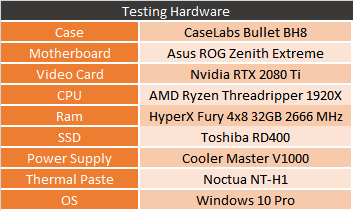
For cooling testing, I have documented my entire process as well as the test platform in the previous section. But to keep things simple I ran three batches of tests across all four heatsinks. All of this was done in my actual PC. I normally stick to testing on our benches or test platforms but it just so happened my only Threadripper setup was put in to use after my work PC gave me issues. I have been using the Wraith Ripper that entire time but I was excited to see how all four coolers compared. The platform is all in a CaseLabs Bullet BH8 case with an ROG Zenith Extreme board and a 1920X CPU.
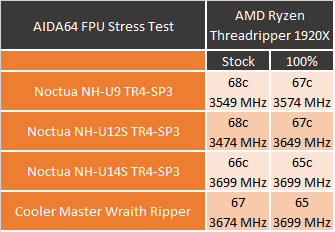
My first test is by far the most demanding. I use AIDA64 and its Stress Test with the FPU focused CPU load type. I learned with my Ryzen test platform that this is a quick way to put the coolers under more load than I could with any real-world test. So this is without a doubt a worst-case scenario. You might be wondering why I have both the temperatures and the clock speeds, this is because I found that at 67/68c our 1920X running at completely stock settings will throttle. The temperature readings are using the TDie result which doesn’t have any adjustment in that reading. AMD has designed the platform to throttle the clock speeds down to keep temperatures from going above that point. The same happened in our Ryzen testing as well. So I have all three Noctua coolers than the Wraith Ripper from Cooler Master at the bottom. I also tested everything twice, once with the fans turned to 100% and the second time with what I would call stock fan speeds. The fan profile is set by the motherboard, I just run the Asus AISuite III fan calibration and let it work things out.
So what was the end result? Well The NH-U9 and NH-U12S both called at 68c and throttled back with the stock fan profile and the Wraith Ripper capped at 67c but did the same thing. The difference though was with the clocks themselves. The NH-U9 clocked back to 3574 MHz, the U12S 3474 MHz, and the Wraith Ripper clocked back to 3674 MHz. The Wraith Ripper was really close to the 3699 MHz that I saw across the board when not being downclocked but the top two on the list really were hit hard. The U14S was the only cooler tested that didn’t down clock, but at 66c it was very close. Cranking the CPU fan up to 100% (the case fans were already running at 100% for all of the testing just to prevent hot pockets or the case from skewing results.) all four coolers improved. The NH-U9 and U12S both still were throttled back but much much better than before and you can see the U12S redeemed itself where at the lower fan speeds the dual fan configuration seemed to help the U9. The U14S and Wraith Ripper both came in at 65c and the 3699 MHz clock speed.
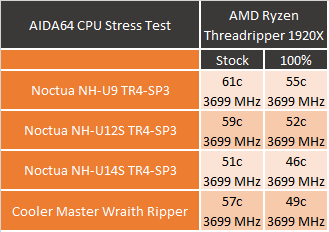
My next test was still in AIDA64, but this time around I used the CPU workload which is more realistic in its load. You can tell right away just how big of a difference it makes. All four coolers in both 100% and stock tests came in below that 67/68c throttle point this time around. The worst result was the NH-U9 with its 92mm fans and smaller cooler size at 61c with the stock profile and behind that the U12S at 59C. I was surprised however to see the Wraith Ripper next, it is the largest of all of the coolers tested. Then the U14S being first at 51c. 100% fan speed helped of course but the temperatures dropped but the order of the coolers was still the same in that test as well.
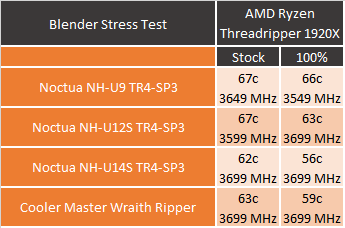
My last cooler performance test was a new one. I hate just doing a synthetic load and calling it good so I added in Blender. A real-world application that is ultra-demanding. Here I ran the full benchmark on the CPU while waiting for peak temperatures. This did also push the NH-U9 and the NH-U12S both up into the throttled range again. With the stock profile the U12S was the worst and the NH-U9 with its dual fans did slightly better at 3649 MHz. This isn’t far off from the 3699 MHz normal, worlds better than in the FPU test. The NH-U14S and the Wraith Ripper, on the other hand, came in at 62c and 63c with the U14S being slightly cooler. Turning the fan speed up to 100% showed there was still room in all four coolers with them dropping down below the throttle point even though the NH-U9 still throttled back slightly at 66C. The U12S did much better here at 63c but the U14S was still the best of the bunch at 56c.
One thing I did learn in my testing is that learning what your throttle point is important when configuring your fan profile. You will notice that in all of the coolers that throttled, cranking the fan up to 100% fixed the issue. The stock profile being created by Asus wasn’t taking into account that 67c is really our max temperature, they still leave room in the fan profile to go up to sometimes 80c before reaching max fan speed. If each was set to 67c as the max and then went down from there, it would prevent throttling altogether. Moving forward past my testing today, I plan on making my own custom profile for my personal use and if you are running Threadripper with air cooling you should as well.
Noise Testing and Fitment
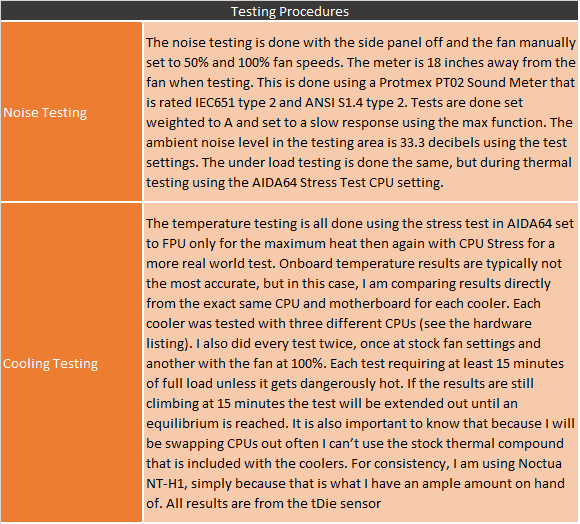
Of course, cooling performance is important, but if it drives you insane while doing it you aren’t going to want to keep that cooler in your build right? For this I set up without the top panel and did three tests. I tested the noise levels from 18 inches away. I did this at 100% fan speed and 50% fan speed. Then I used AIDA64 Stress Test with the CPU setting and let the cooler run the stock fan profile. Once at max temperature I used the meter to note the noise level there as well. Basically we can see the loudest the cooler will go and at 50% you get an idea of how that level ramps up. Then I get real-world levels when the CPU is under load.
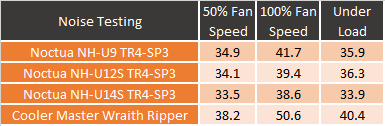
So how did the four coolers do? Well, this is Noctua’s test to lose, they are known for their low noise levels from the start and you can see it in the results. At 100% fan speed the NH-U9 with its dual 92mm fans was the loudest of the Noctua coolers and the 50% reflected that as well. The U12S was better but the U14S was the best. Under load the U12S was the loudest though, those dual 92mm fans on the NH-U9 keep helping it a lot. The U14S was worlds apart even from the other two Noctua coolers. The Wraith Ripper, on the other hand, was noisy in comparison in all of the tests. Being 9 decibels louder than even the loudest Noctua was impressive considering how decibels scale up. Overall I wouldn’t call the Wraith Ripper loud at all, but I would consider it to be noticeable. The NH-U19 was noticeable at full speed but beyond that you just don’t hear them when you have other noises in your house. For my testing with the Noctua fans, especially the U14S I actually had to go and unplug my refrigerator because it was effecting my testing and it was in a completely different room. You have other ambient noises around you and the U14S just completely blends in.
I also need to address the different sizes of the four heatsinks, you can’t really say that the U14S is the only cooler to buy for example. It depends on the look you are going for, your case and its clearances, and also the memory you are running. Sometimes even the motherboard changes if things will fit. For example my Crush build in the CaseLabs Bullet BH7 is almost the exact same size as the BH8 case, but they added just a touch on the height that finally allows full-sized coolers. That was the difference in be running a big cooler on the X299 CPU and the NH-U9 that I use.

So we know the NH-U9 is the smallest of the coolers tested but just how small is it. Well, it is mostly its height that is small, it comes in at just 125mm tall in total. But the cooler is a lot deeper with a thick heatsink and the dual push-pull fan configuration helping still pack in cooling. That wide cooler is going to go over your memory slots in just about any configuration as you can see below.
The NH-U12S is the next smallest at 158mm tall and it is wider as well, but it is the thinnest when it comes to depth. The extra height helps a lot, but being so skinny it doesn’t even get up over top of the memory on the Zenith Extreme. Even adding a second fan shouldn’t cause any problems.
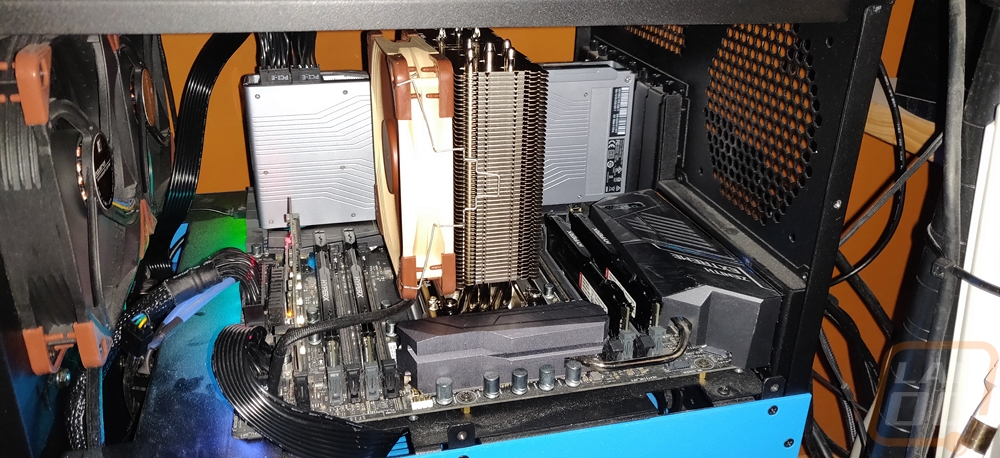

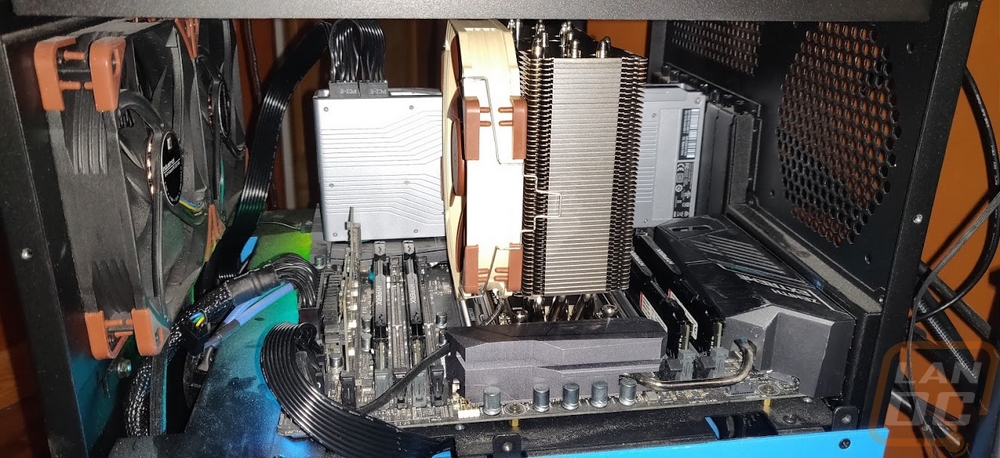
The largest of the Noctua coolers is the NH-U14S and this is the cooler that I was worried might not fit in the BH8 as it comes in at 165mm tall. It is wider again which also had me a little concerned that it might get close to the video card but neither ended up being an issue. You can see that there was still another full inch above the fan at the top and room to work around the GPU as well, though if the motherboard had its x16 slot at the top, not two slots down that would be an issue. Normally you could just flip the heatsink to be horizontal but because of the rectangle-shaped CPU you can’t flip this one around. Then on the depth the NH-U14S is thicker than the U12S but only by 7mm which wasn’t enough to get it close to the memory slots. It looks like the rear slots might be closer if you add a second fan, however. Especially if you run the same fan which would touch right on the top of the memory if over it.
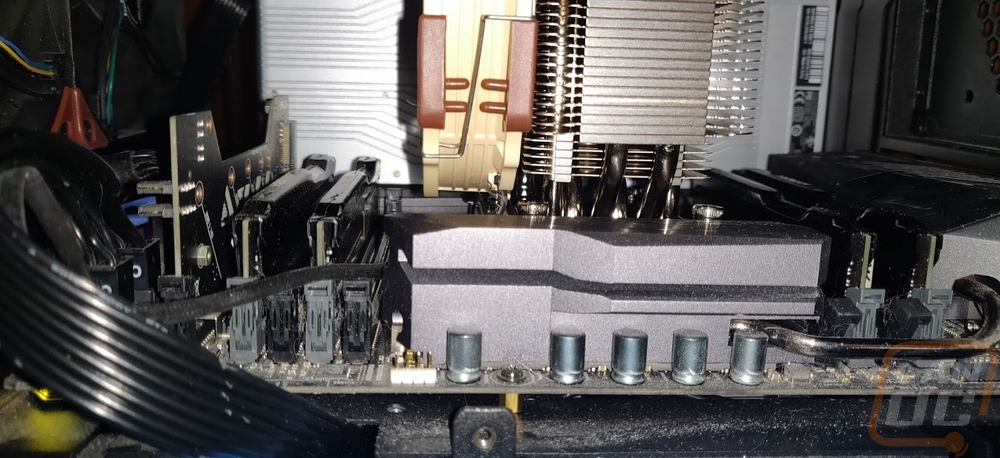
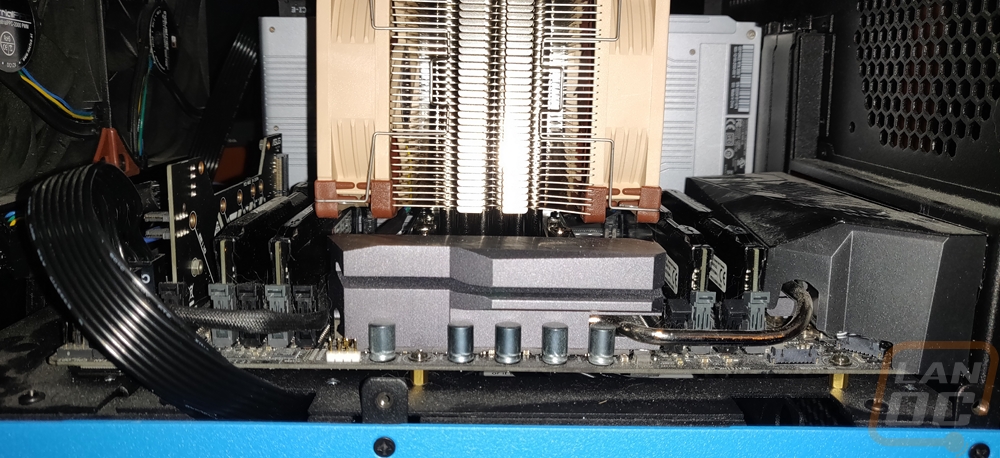
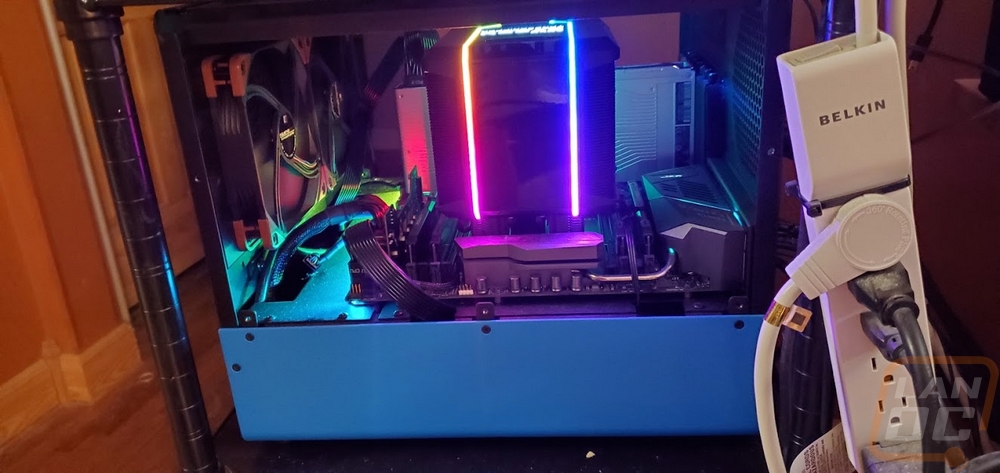
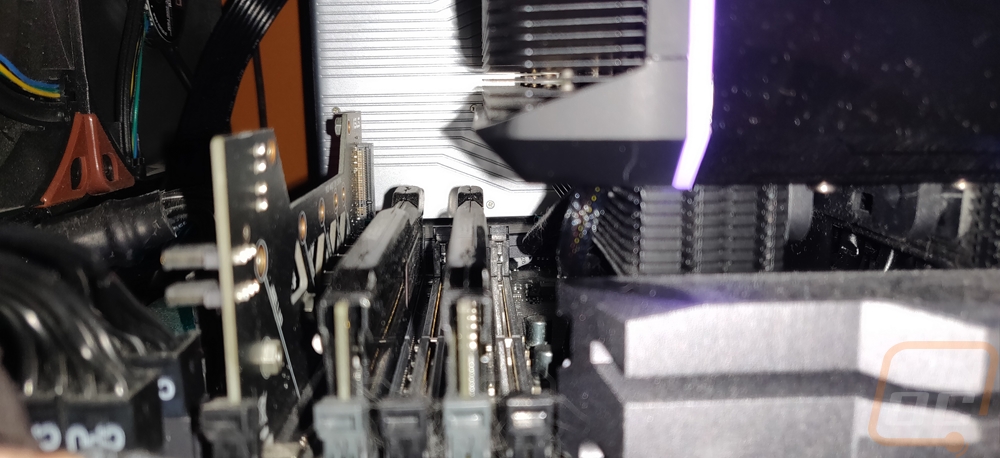
So the Wraith Ripper by most dimensions is the largest of the four coolers. This is exaggerated even more by the plastic housing covering everything up. The U14S is 4.5mm taller, and 17mm wider, but the 150mm depth is even more than the dual-fan NH-U9 and at the height it makes for a very large heatsink. I have this one listed at fits most tall memory, but not a hard yes. This is because when you look at the Wraith Rippers layout on the bottom corners they have an angle to help with clearance. But it covers the first slot. On the covered part there is some extra room, so medium height memory would be fine or as you can see on my setup. Even with tall memory, if I’m only using half of the slots that inside slot doesn’t get used. The Wraith Ripper is also the only cooler of the four that is decked out in a build matching black and has the addressable RGB LEDs as you can see in the picture below. It’s a great looking cooler, maybe the best looking cooler even.
Overall and Final Verdict
So the performance testing came with a few different surprises. The huge Wraith Ripper, while good, wasn’t the best in cooling performance and when it came to noise it was the worst of the four coolers tested. The NH-U9 TR4-SP3 was, of course, the smallest heatsink tested and it struggled in some situations. But what surprised me was that the NH-U9 did better than the NH-U12S in a few situations when the stock fan profile was used. Simply put the dual fan configuration helped the NH-U9 a lot in those situations. But this was also the case of the fan profiles that our Asus board was put together didn’t jive well with the 67/68c limit of the Threadripper CPU. Once that temperature was reached Threadripper started to turn down the clocks and not in the daylight savings type of way. If the fan profile was set to turn the cooler fans up to 100% by that point, it would help a lot. In fact, after all of my testing when I put my Threadripper PC back together I did just that, creating a profile that would complement the CPU so I wouldn’t get slowdowns.
But none of the coolers were exactly bad. The end result was that you have options even if you don’t want to water-cool your Threadripper build. Frankly, I don’t blame you for looking at air cooling, especially for Threadripper. The huge surface area of the CPU means that most of the AIO coolers on the market will at best not even cover all of the CPU cores. On top of that, one of the main AIOs that was designed for Threadripper had huge reliability issues, which is on top of the reliability issues that AIOs already have lol. At least you know with one of these coolers you get exactly what you expect for as long as the fan works, and if that happens it is an easy fix. Speaking of the life of the coolers, all three of the Noctua coolers have an impressive 6-year warranty. The Wraith Ripper from Cooler Master has a two-year warranty which is fine until you put it next to Noctuas.
Speaking of putting things next to each other and them standing out. The Wraith Ripper is on a whole other level when it comes to looks and styling. I was a little put off by its size, the thing is huge. But I love that it is all blacked out, including the heatpipes and the heatsink. But it is the addressable RGB lighting and the Threadripper logo up on top that set it apart. The only downside is the stupid USB cable that plugs in right in the worst spot possible.
So why would you get anything other than the NH-U14S for performance or Wraith Ripper for looks? Well the NH-U9 is just there to give an option to small form factor builds and it makes me very happy that they provide that option. It’s the NH-U12S that ends up being the odd man out. The NH-U14S isn’t much larger but the performance difference between the two in both cooling and noise levels is impressive. I love the NH-U12S normally as a real-world “standard” size tower cooler. But if you are going Threadripper, you might as well go with the NH-U14S assuming you can fit the additional height.
So what am I going to use? I actually have plans for a custom loop in our Threadripper build, but between now and then I am using the NH-U14S because of its performance. I had the Wraith Ripper in my build and I am giving up that styling by switching and frankly, the Noctua cooler sticks out in a bad way in my all blacked out interior. But I am looking forward to the fan to not ramp up and down as often. That said if someone was asking, here would be my breakdown. Wraith Ripper if you want it to look good, if not you will be investing in Chromax covers and fans. For those looking to do a shorter build like in a case like the BH7, the NH-U9 will be a solid option.
Either way, keeping your new Threadripper build cool should be handled and given how much you most likely saved picking up a TR1 or TR2 CPU with the markdowns as they get ready for Threadripper 3 should cover the cooler cost and a lot more! That even handles the Wraith Ripper pricing which is a little crazy at over $110 anyplace I look for it. At that price decking out the NH-U14S with Chromax hardware to black it out is actually not out of the question.
Live Pricing


