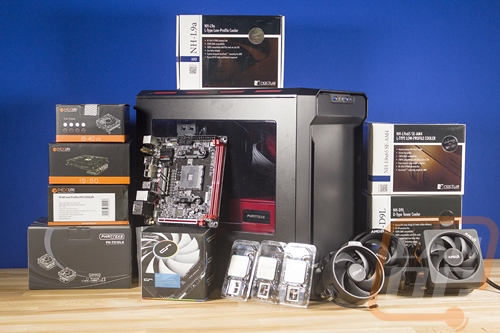
My interest in Small Form Factor builds has grown over the years as my office space has slowly filled up and had less space and each time I take a PC to a LAN event. We have built our Lunchbox project builds all the way back to when nothing was available but that isn’t the case anymore. There are countless case options, tiny power supplies, ITX motherboards with full sized features, and even video cards that will fit in tight spaces. Most recently with the AM4/Ryzen introduction, I was extremely excited to finally have the chance to run an ITX build with a proper high-end AMD CPU. Up until recently, you could really only do it with their APUs. Well even months after the Ryzen launch ITX boards were basically not available, but that is all starting to change with boards getting in stock from Gigabyte, Asrock, and Biostar. Well to celebrate that I decided to bring together a collection of at least most (I’m sure someone will contact me asking for X brand) of the ITX sized coolers that currently have AM4 support. A few of the coolers I got in are pushing the limits of ITX. But today I’m going to check each of them out, make sure they fit an AM4 ITX board (and ram), and test each cooler for noise and temperatures using Ryzen CPUs from the R7, R5, and R3 platforms. Hopefully, we will get a better idea of what fits, what doesn’t, what looks amazing, what is quiet, and what will work with each level of performance. It’s a lot to take in so let’s go ahead and get started.
Article Name: Ryzen ITX Cooler Roundup
Review Samples Provided by: Noctua, Phanteks, ID Cooling, Cryorig, Corsair, and AMD
Written by: Wes Compton
Pictures by: Wes Compton
Amazon Affiliate Link: HERE
AMD Photos and Fitment
For AMD’s coolers, I dug through our boxes and pulled out one of each of the coolers available with Ryzen. Now I know that each cooler is designed to work within the thermal properties of its own CPU range but I wanted to see how they all work overall.
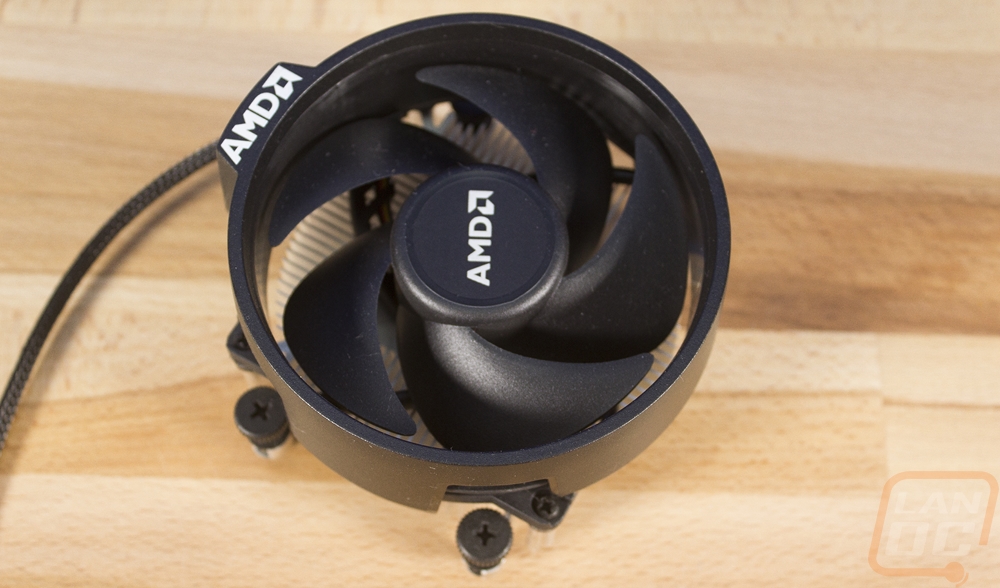
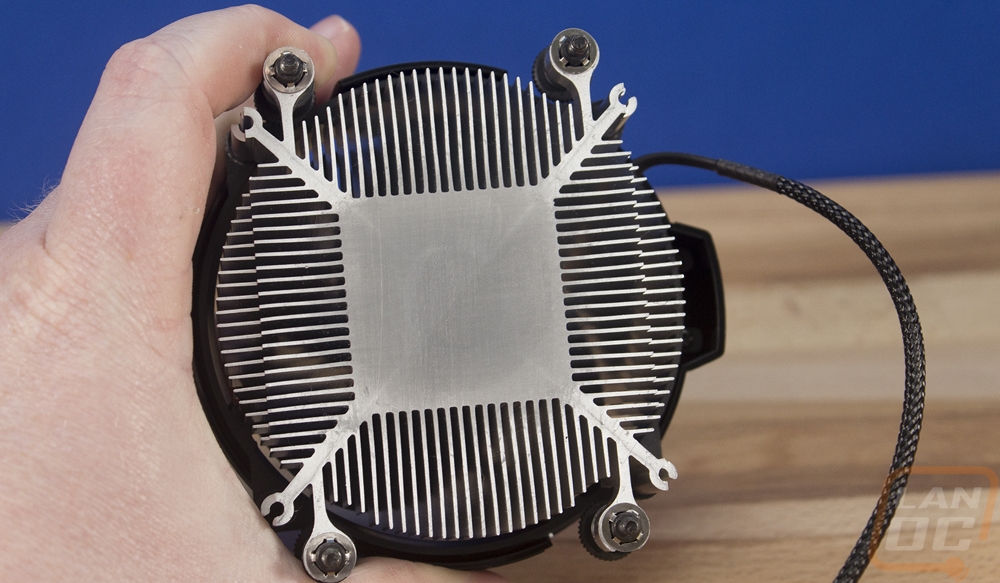
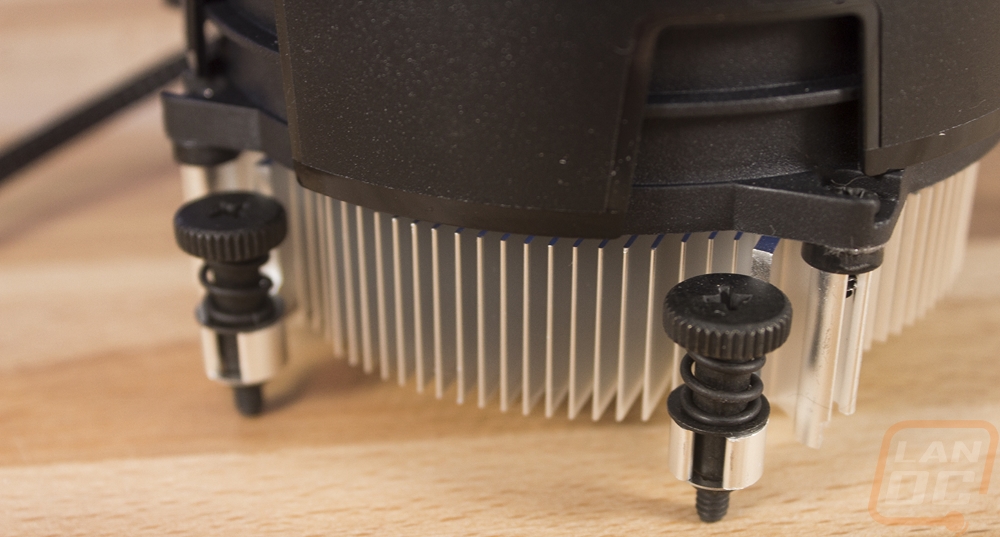
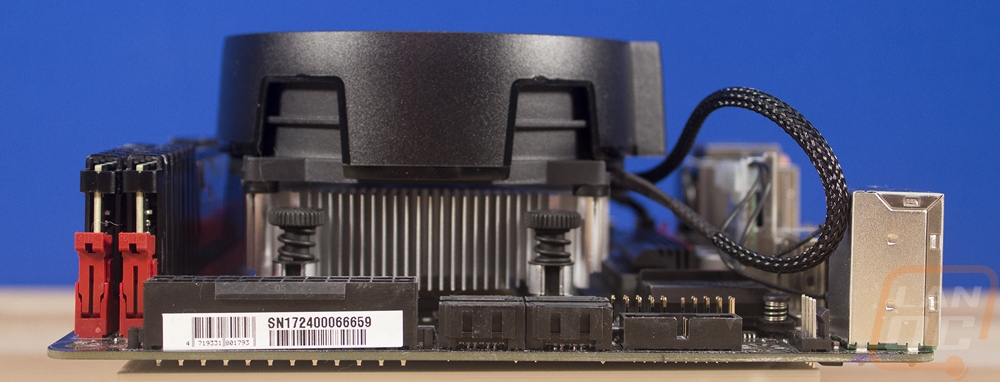
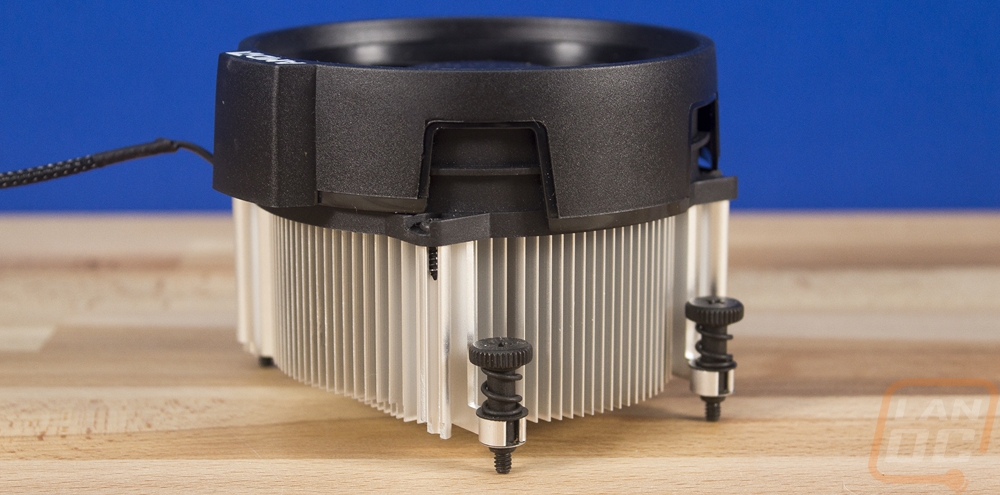
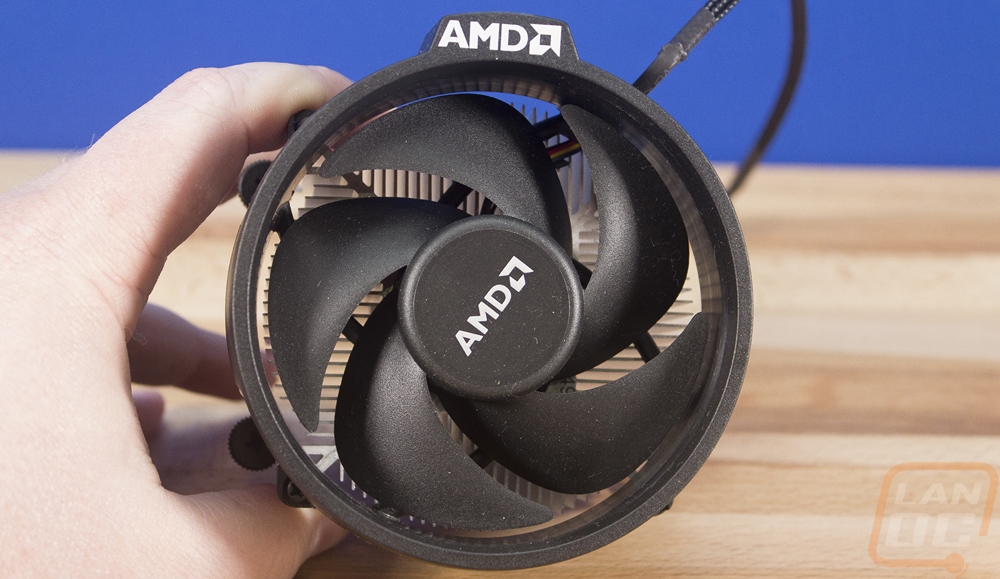
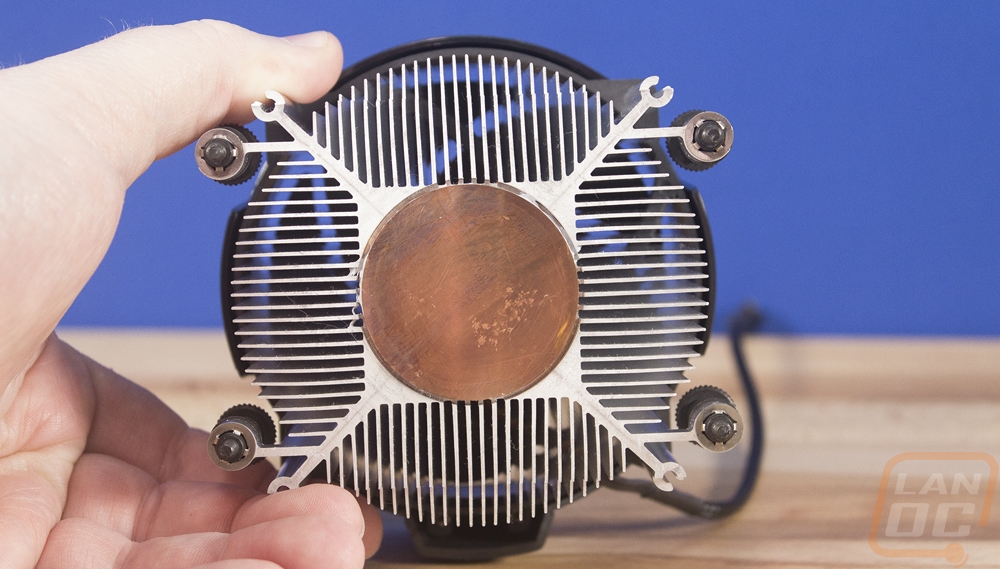
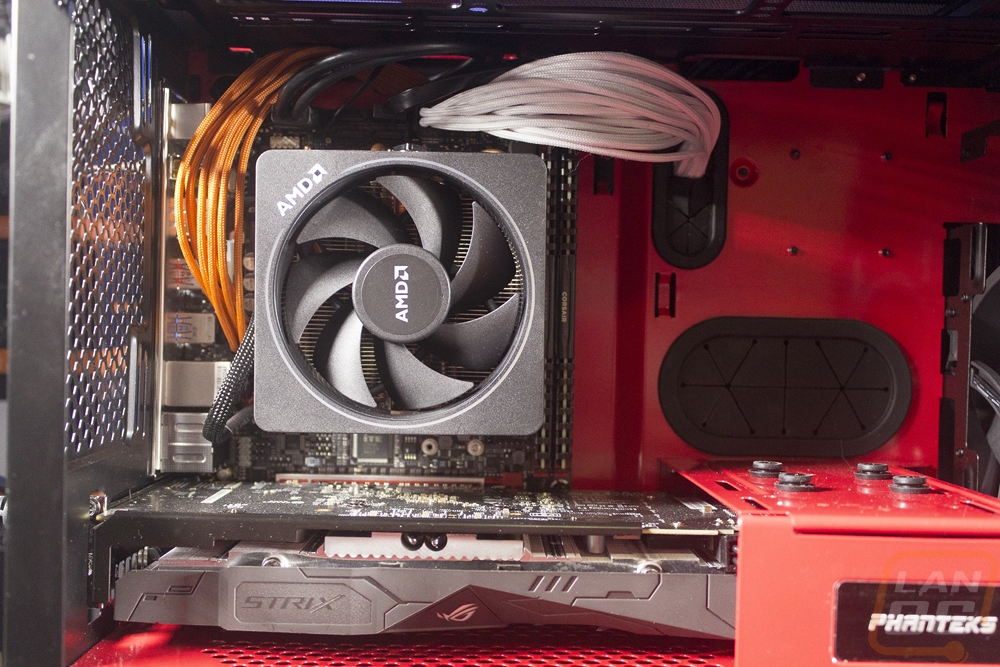
The first cooler is the Wraith Stealth. This cooler is most similar to the standard Intel heatsink. It has an aluminum construction with a middle mounting point and then a fan blowing down over the heatsink. The CPU contact surface is really rough and is aluminum as well. The fan has AMD branding on it and the fan shroud also has a small AMD logo. Th fan cord is at least sleeved but overall this is as basic as they come. You can see just how much smaller it is than the other AMD coolers as well with its height being similar to the Intel design. For mounting though it does at least use the new screw down mounts that utilize the stock backplate.

The same design carries over into the Wraith Spire only this cooler is taller. It has the exact same fan design as well as the shroud but it utilizes more surface area to get more cooling capacity. It comes in at 71mm, 17mm taller than the Stealth and just a few short of the Max. When you flip it over though you will notice that they at least used a copper slug to get a better contact surface on top of the CPU. It uses the same screw mounting setup that I like as well.
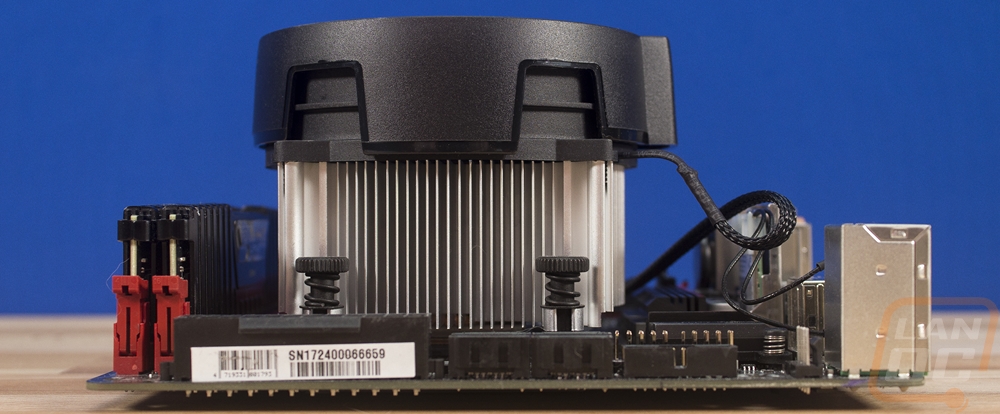
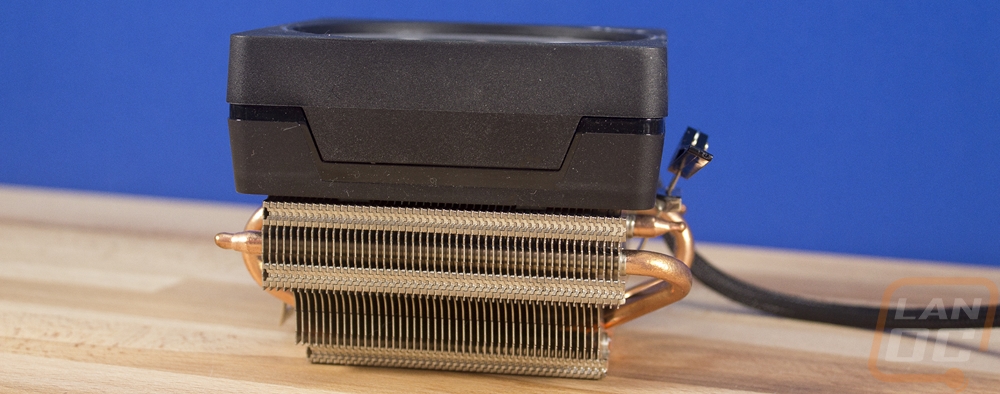
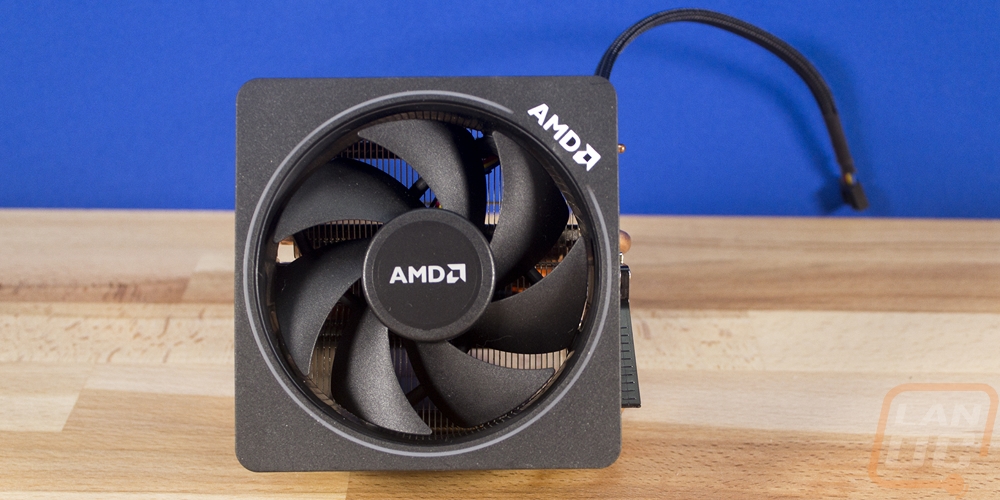
The Wraith Max cooler is a nice departure for a stock cooler. It was first introduced last year and rather than going with the round shape of the other coolers and Intel’s coolers it uses its space a little better with a square shape. It uses a similar heatsink design as aftermarket coolers with thin aluminum fins and four copper heatpipes pulling the heat up from the contact surface up into the cooler. Then up on top is has a plastic shroud around the top down fan. The shroud does have the AMD logo on it and for this year they added an RGB ring around the fan as well. The lighting rotates through colors by default but you can also hook it up to USB or to an RGB header on your motherboard. For mounting it has the old school latch design that uses the old plastic AMD mounts on the board.
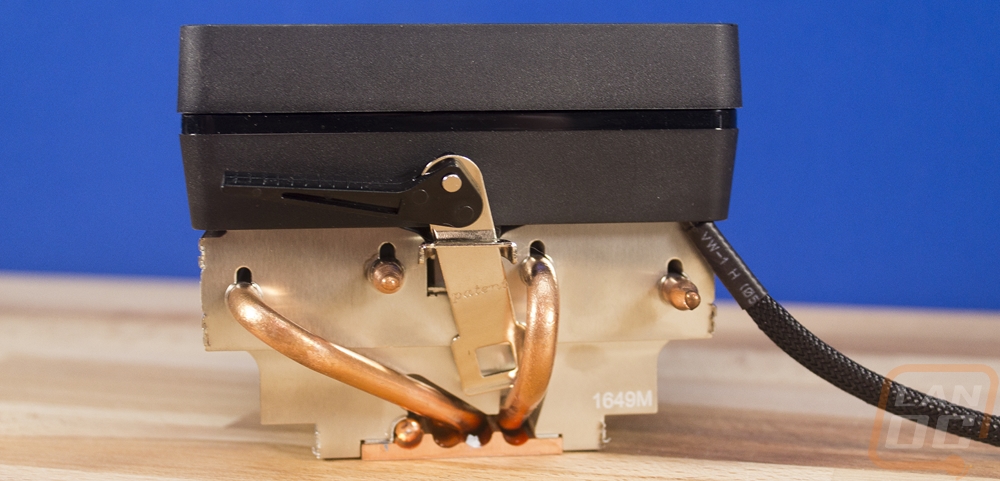
Installing the AMD coolers was a little from both the good and bad trees. The Stealth and Spire coolers utilize a new screw mounting system that attaches to the stock AMD backplate. So to install them you have to remove the two plastic clips and then just screw these down. They come with thermal paste pre applied. They are both much easier than Intel’s stock coolers and the easiest to install of all of the coolers tested. The Wraith Max, on the other hand, is a little older with the exception of the new RGB ring on it. It uses the old school AMD clip system. So you leave the plastic clips on your board then hook one side over the clip, then stretch the second out and over the clip. Once attached you flip the level over to tighten everything down. Sadly I hate this setup. The hooks could really use a touch more length so you can easily get them over the hooks without looking like older AMD coolers had. So this one ends up being a huge pain to install in the case and if you ever take it out that spring lever is going to pop up and hit you in the knuckle nearly every time.
|
Cooler |
Height |
Fits Tall Memory |
AM4 Bracket |
|
AMD Wraith Stealth |
54 mm |
Yes |
Included |
|
AMD Wraith Spire |
71 mm |
Yes |
Included |
|
AMD Wraith Max |
85 mm |
Yes |
Included |
Corsair Photos and Fitment
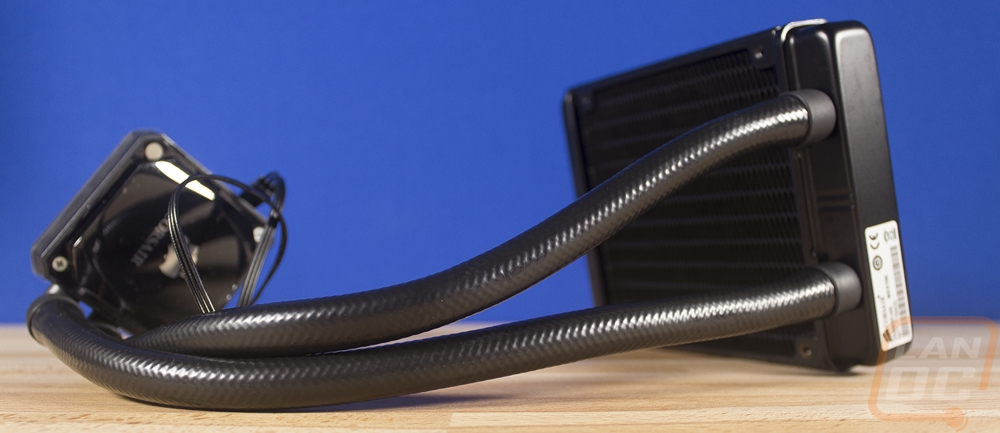
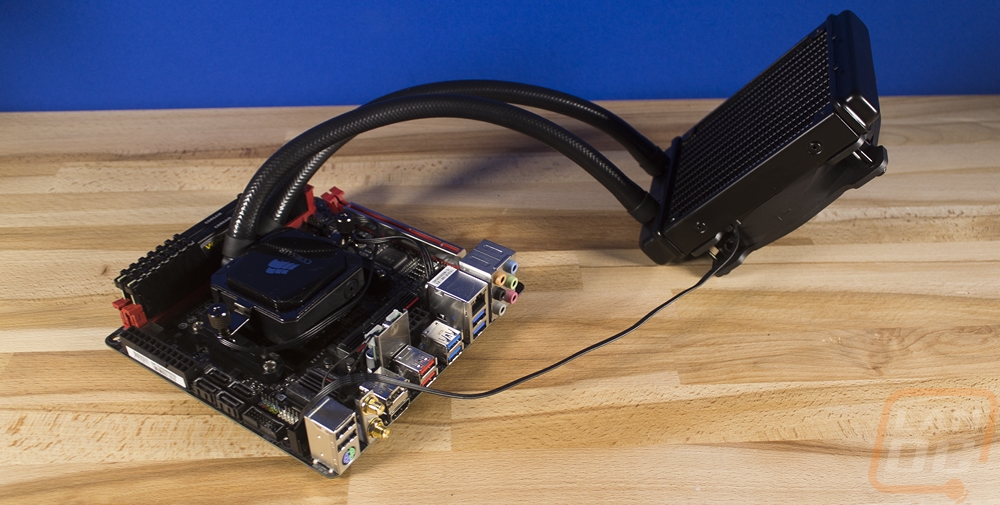
Okay, so I’m sure you might be wondering why there is a water cooling kit slipped into here. Well with some SFF cases people have managed to fit 120mm AIO kits into them. In fact, in some situations, there is better support for this than a medium height cooler because the pump and block is lower profile when installed. I took a look around at basic 120mm AIO kits with just one fan and there were only a few options available. It seems most companies have moved on to focus on dual 120mm AIOs. Add in limited AM4 support and I was left with either a Cooler Master kit or the older Corsair H60. Corsair happened to have some in stock and sent them over.
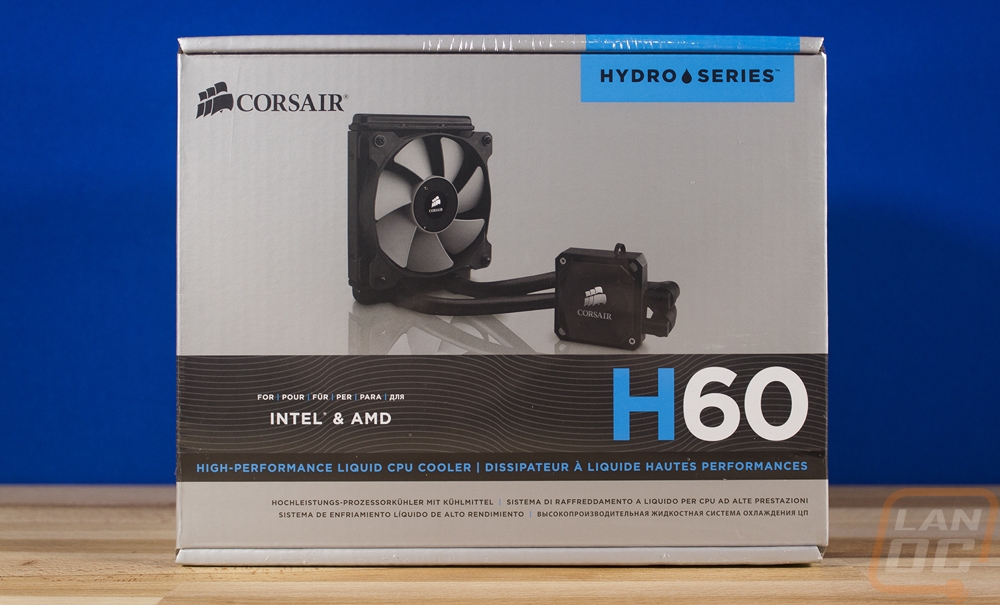
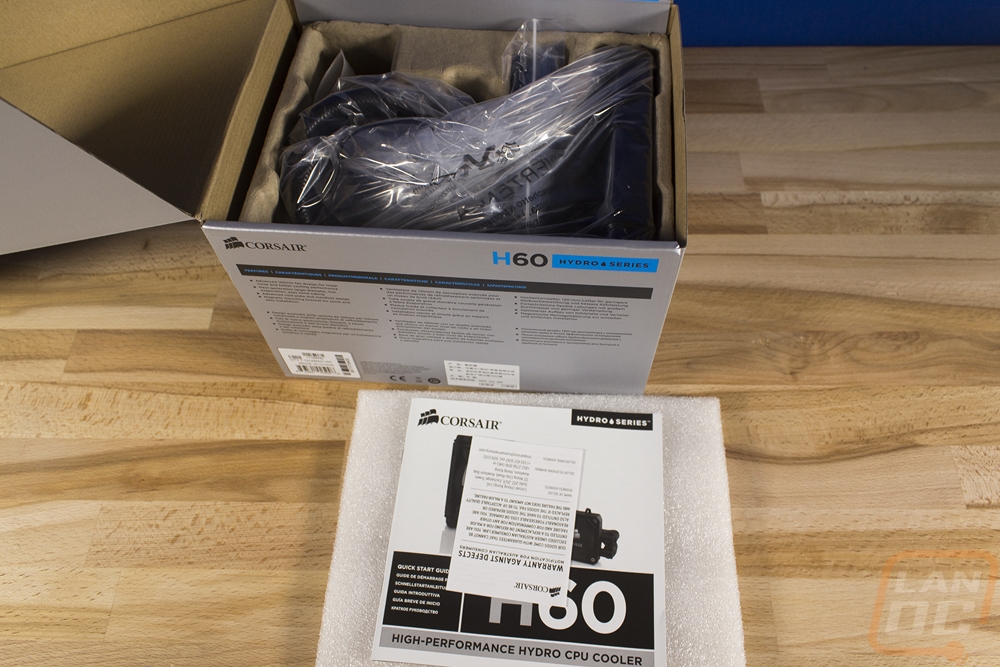
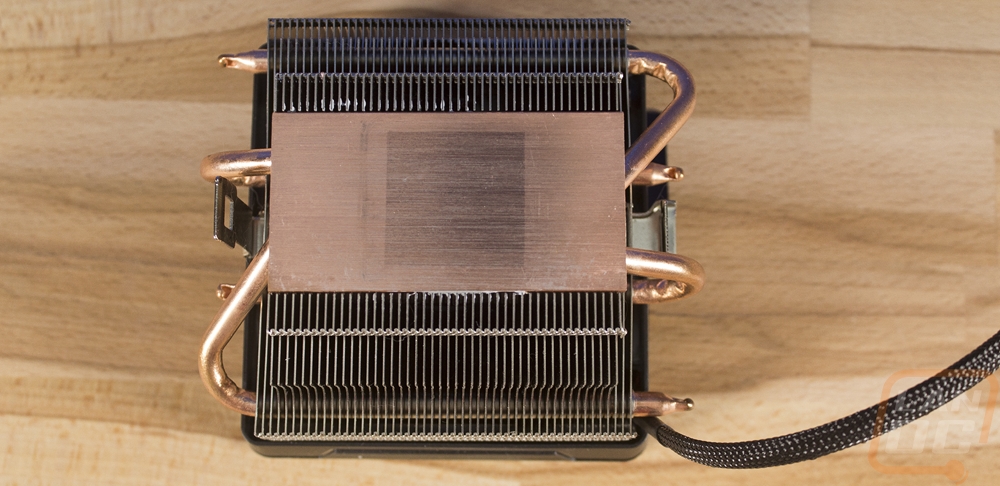
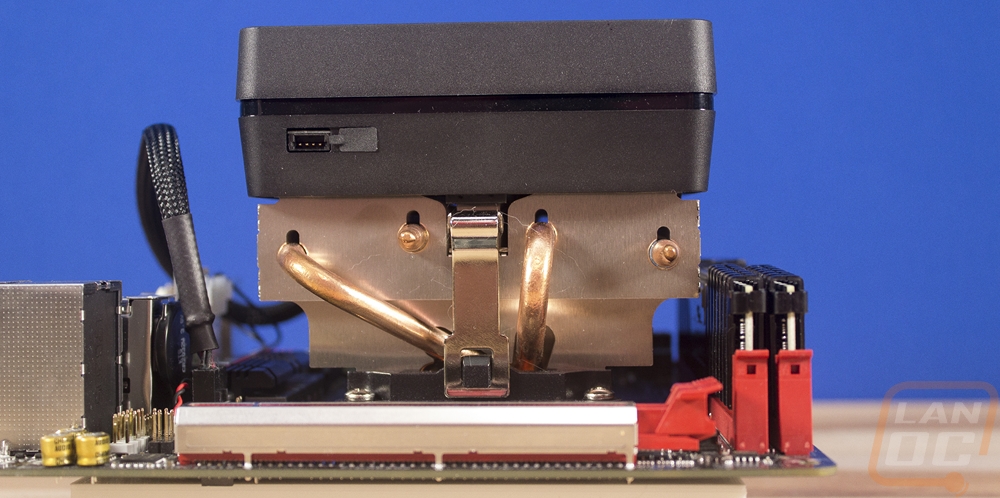
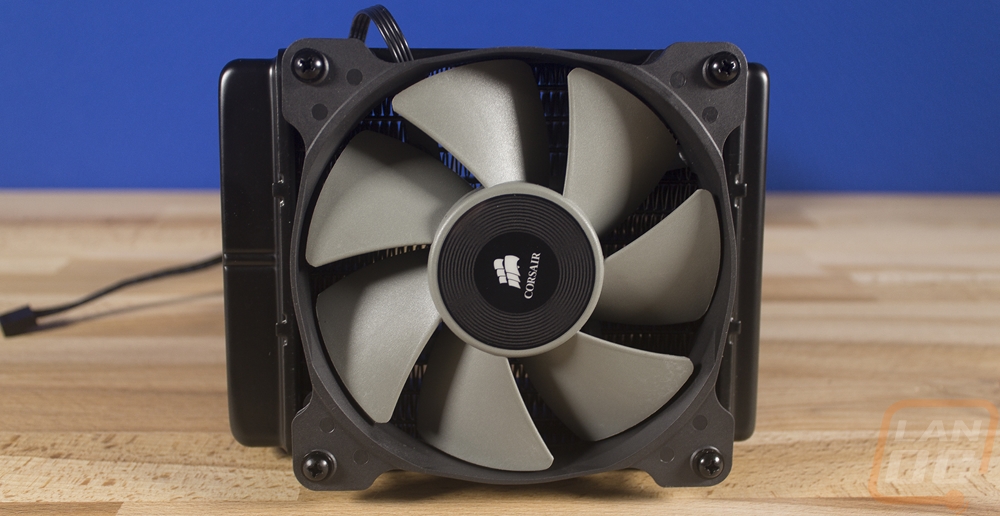
I’ve worked with the older H50’s and a lot of the new Corsair kits but the H60 has never come into the office. When you open it up you get the main loop, a single basic Corsair 120mm fan, Intel and AMD brackets, and a bag of screws. The pump is unique because of its square shape where most other AIOs stick with the circle shape that comes from the OEM. This unique design means it needs its own brackets so I was originally worried that even though they have AM4 listed for support that it wouldn’t. As it turns out, while the Intel bracket comes with its own backplate and everything, the AMD bracket uses the AMD backplate and clips.
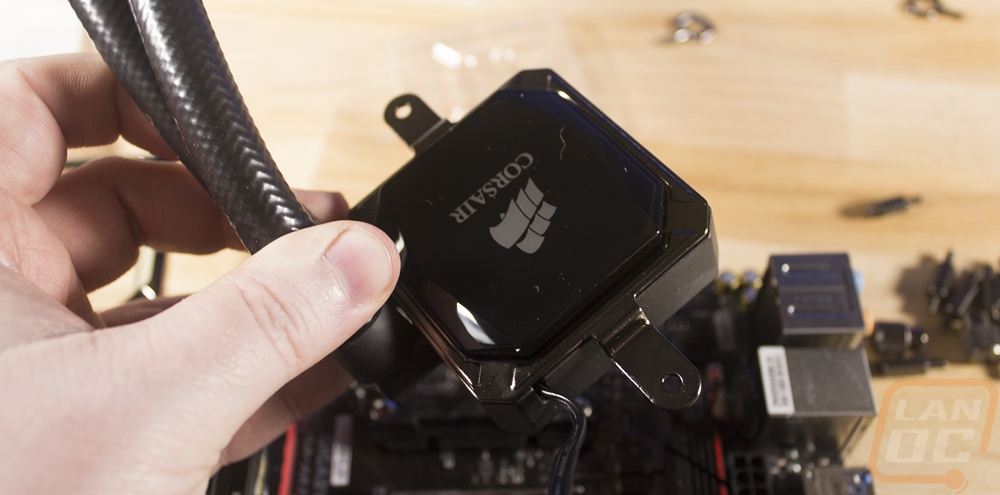
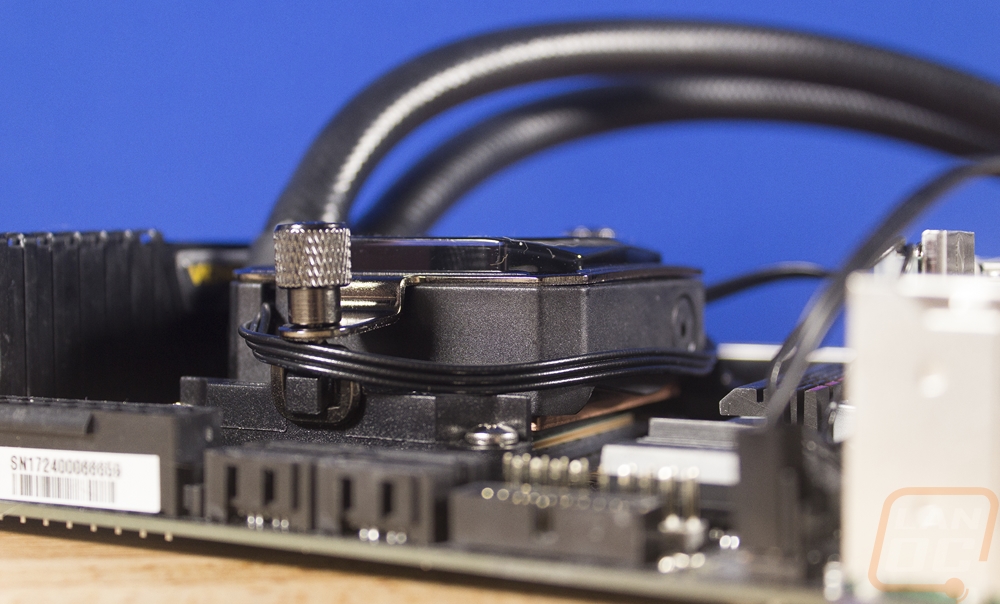
I normally hate the stock clips but Corsairs setup here was really cool. To start you drop the AMD bracket on top of the pump. They use strong magnets to keep it perfectly in place. Then from there, you put the two hoops over the AMD clips then slide the pump down over and use two of the thumbscrews to tighten everything down. This ended up being as simple or simpler than the other bracket designs while still using the clips. Even swapping out CPUs three times for this build went smoothly, you just have to be careful to not lose the two hoops as they are really small and while fall when you pull everything back apart.
|
Cooler |
Height |
Fits Tall Memory |
AM4 Bracket |
|
Corsair H60 |
Pump – 30mm Radiator/fan - 52mm thick |
Yes |
Included |
Cryorig Photos and Fitment
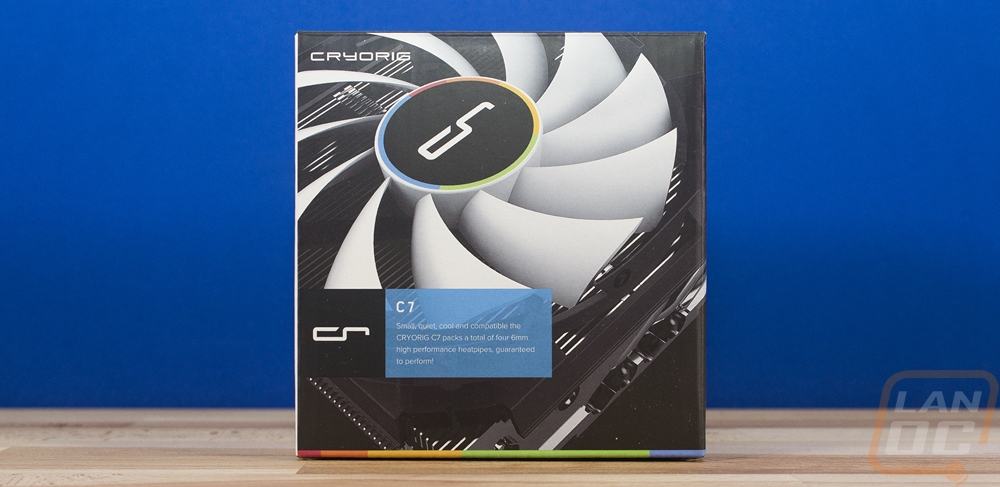
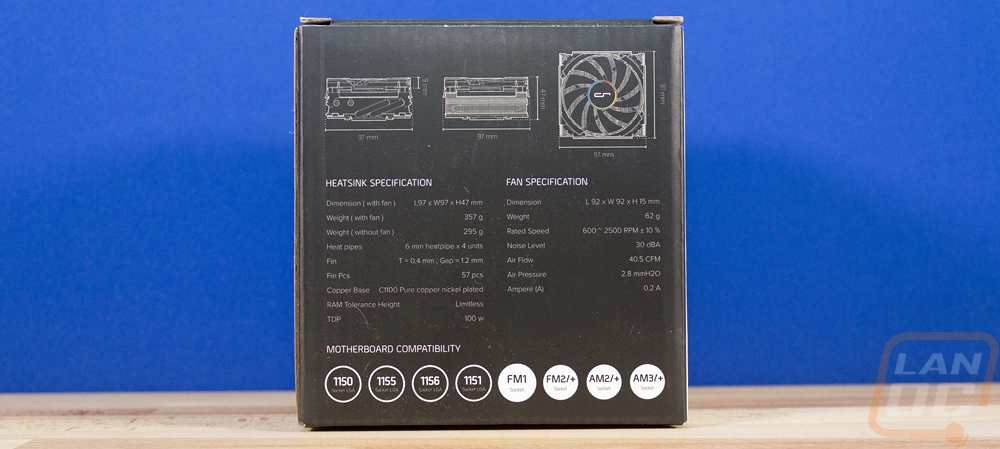
So Cryorig just sent the one cooler, their extremely popular C7. This is known as one of the best low profile coolers for console form factor cases and I’ve been wanting to check it out for a long time. The 47mm height is 10mm taller than the Noctua L9a. It ships in the smallest box of all of our coolers as well as having the flashiest box with a zoomed in photo of the cooler on the front. They did get the specifications on to the side though and in a retail store, this is extremely important when picking out components. They ship it with a full tube of thermal paste and you get a tool for the mounting as well. Currently, it doesn’t ship with AM4 brackets though, you will have to request those from them directly.
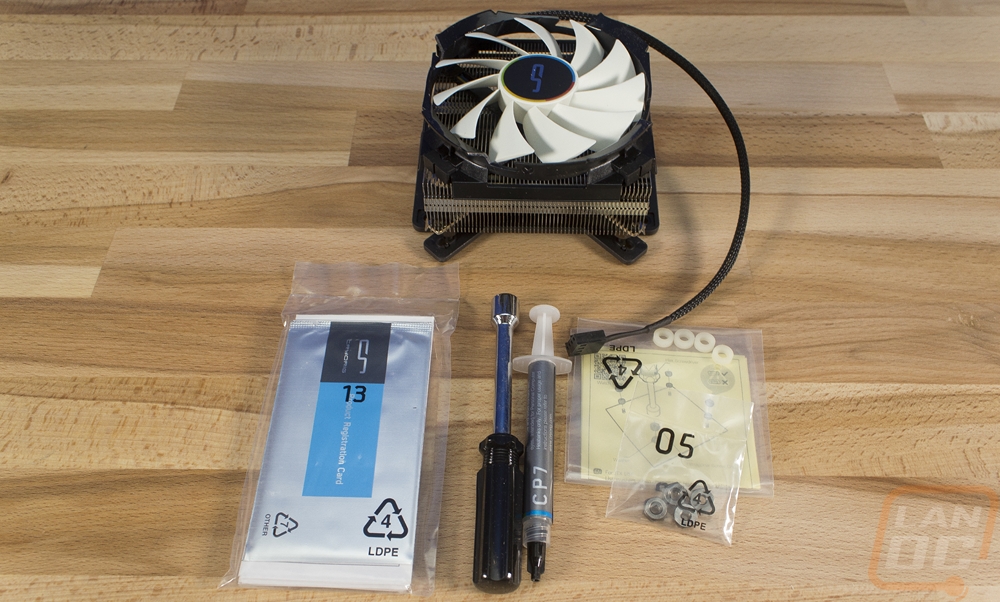
The cooler itself has a mirror finish for the mating surface and then it jumps right in to heatsink right after that to best use the space. It does have four heatpipes tucked away inside of the heatsink and you really only see them on one of the ends. Then on top, they have a custom designed fan that blows down over the heatsink and that clips on via plastic clips.
As for the installation, well we did have to wait and get in the proper mounting kit for AM4. So keep that in mind, I’m sure they will be including them with the C7 soon though. It ships with an Intel configuration. The bracket setup is very creative though. The brackets have a 45-degree angle to them when you use them for Intel coolers than you just rotate them a little for AMD. The backplate and main hardware works with every socket. You put your thermal paste on the CPU and mount the cooler on top. Then you flip the motherboard over or go through the back CPU access hole in your case to put the backplate on. The backplate has small clips that hold it into place so you have to push hard to get the bolts to go through the holes. Then from there, you use the included socket driver to tighten down the four nuts. This is similar to the Noctua for simplicity and better than the ID Cooling IS-40v3. Having it work with both Intel and AMD is a nice bonus over the Noctua as well.
|
Cooler |
Height |
Fits Tall Memory |
AM4 Bracket |
|
Cryorig C7 |
47 mm |
Yes |
Included |
ID Cooling Photos and Fitment
When doing my research looking for popular ITX coolers ID Cooling came up. I had seen them before but it wasn’t someone who we had covered in the past. Most of their coolers had AM4 support right out of the box and they even had a small cooler that was similar to the Cryorig C7 and the Noctua L9a. I reached out about what we were looking to do and surprisingly they got back with me quickly and sent out three different coolers to test.
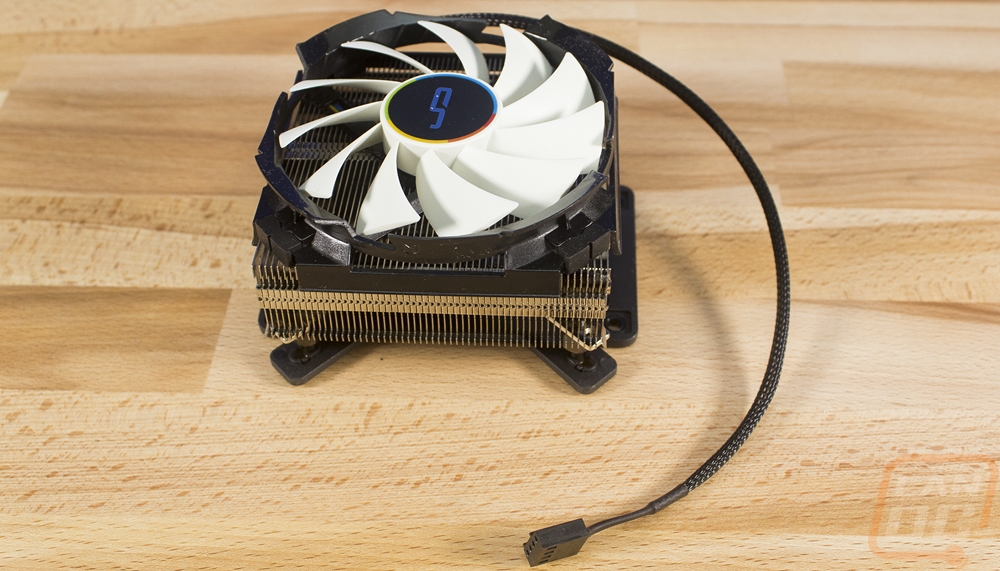
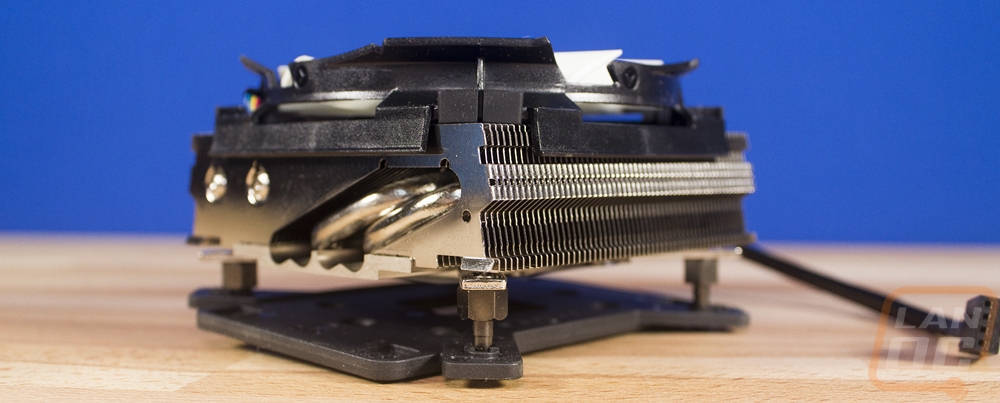
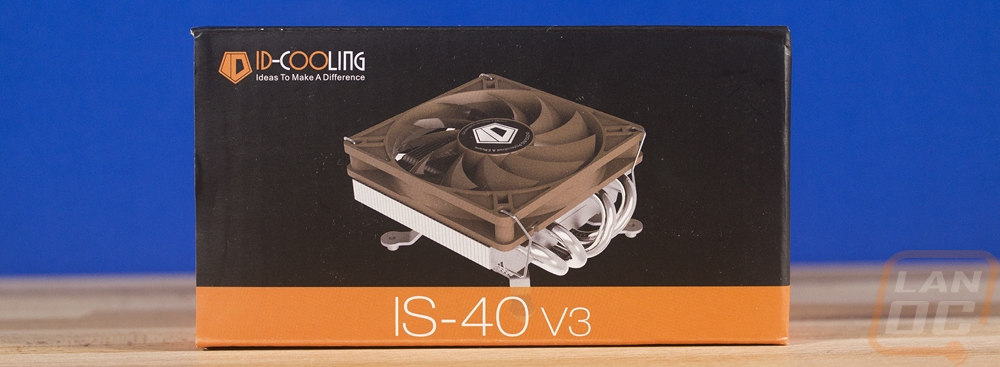
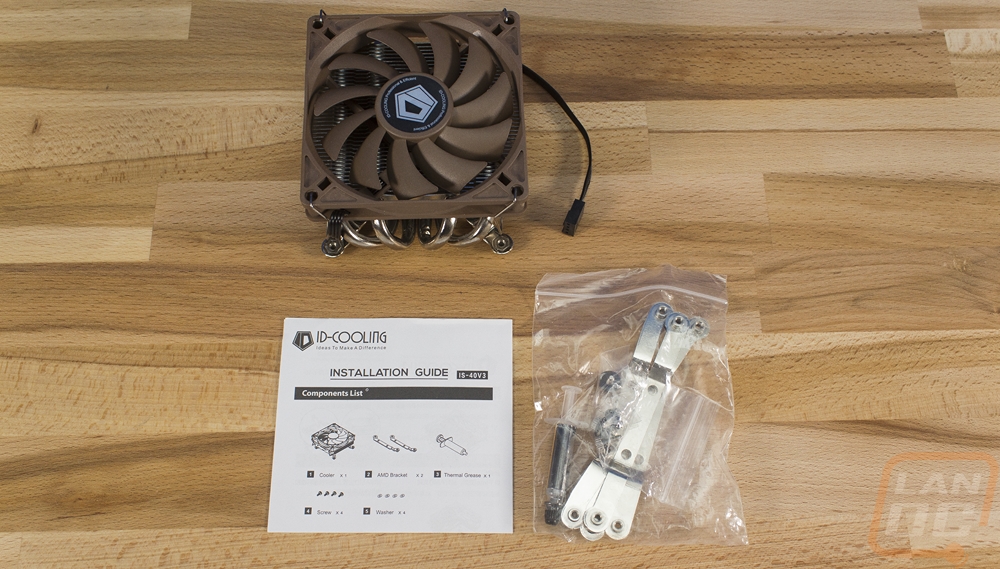
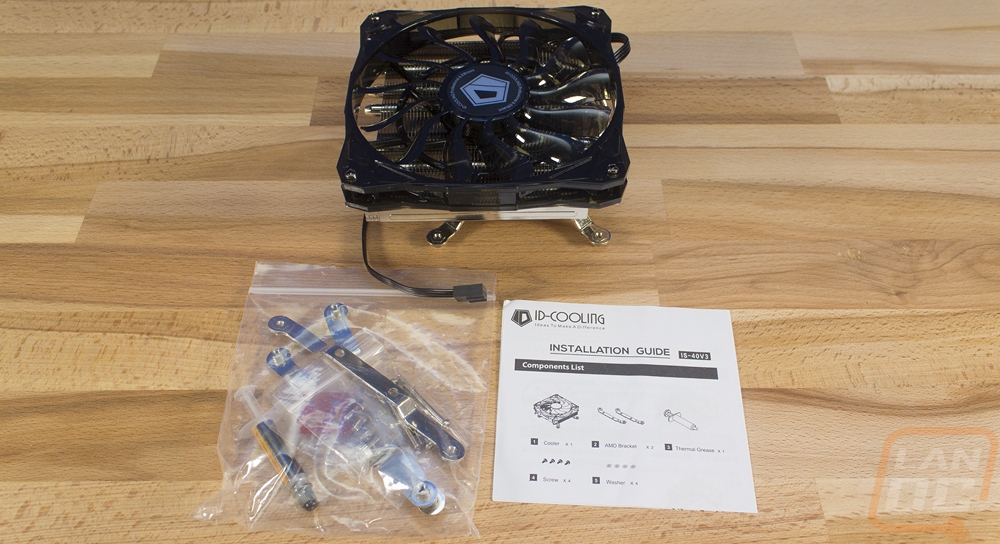
The first cooler is the IS-40 v3. This isn’t even the smallest cooler that ID Cooling makes. They actually had a whole range of tiny coolers, but this specific cooler was really popular on Reddit and Forums as a recommendation in the Cryorig C7 and Noctua L9a range. At 47mm this is the same height as the C7 but the L9a is still smaller. They ship it in a simple box with just a photo of the cooler and an orange strip around the bottom. Inside you get one small instruction paper and a bag with both AM3 and AM4 brackets and a tiny tube of thermal paste.
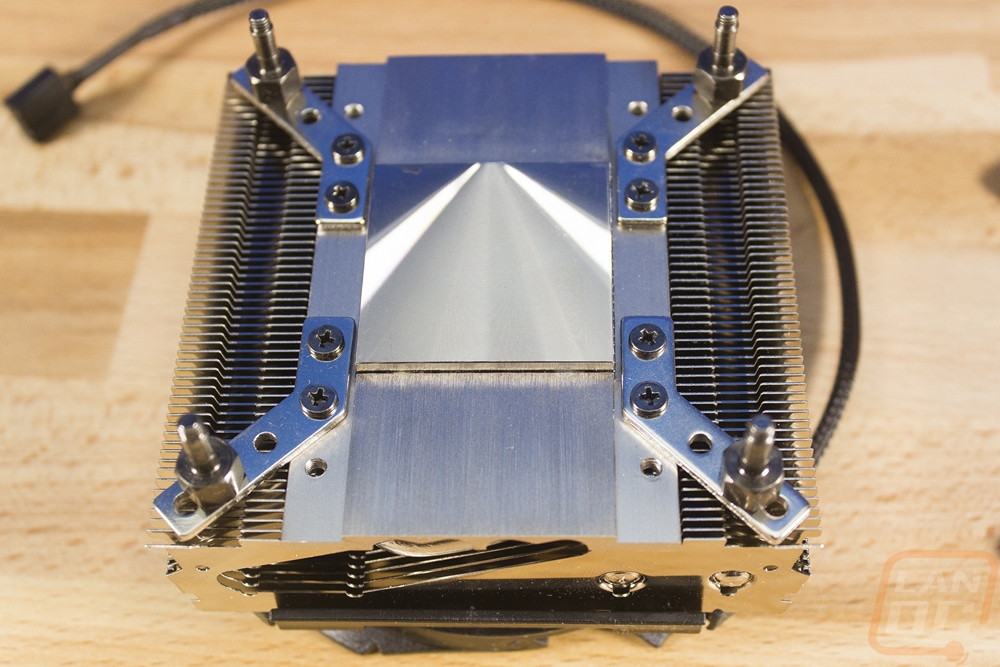
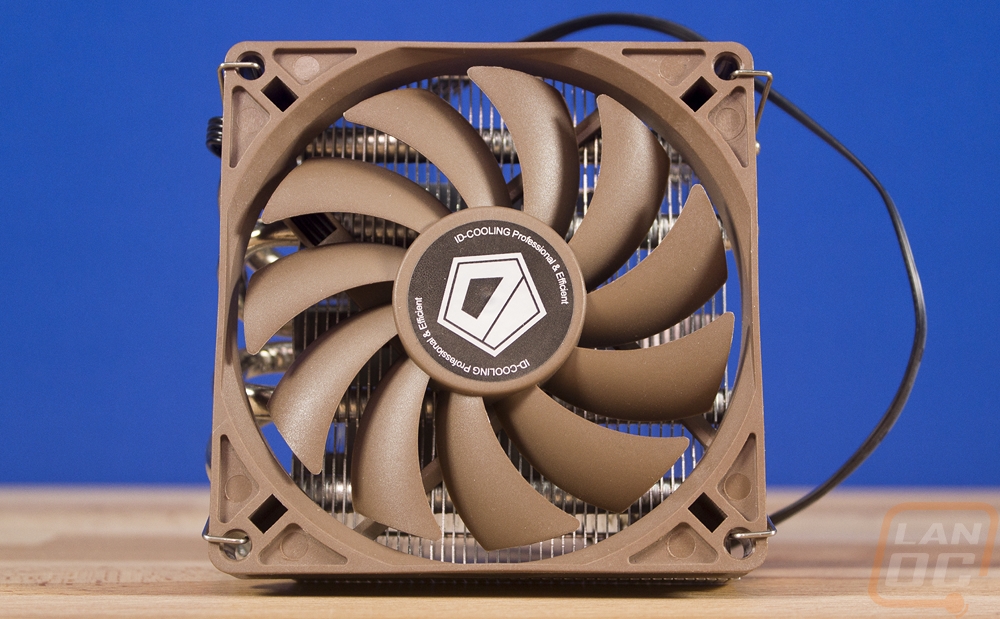
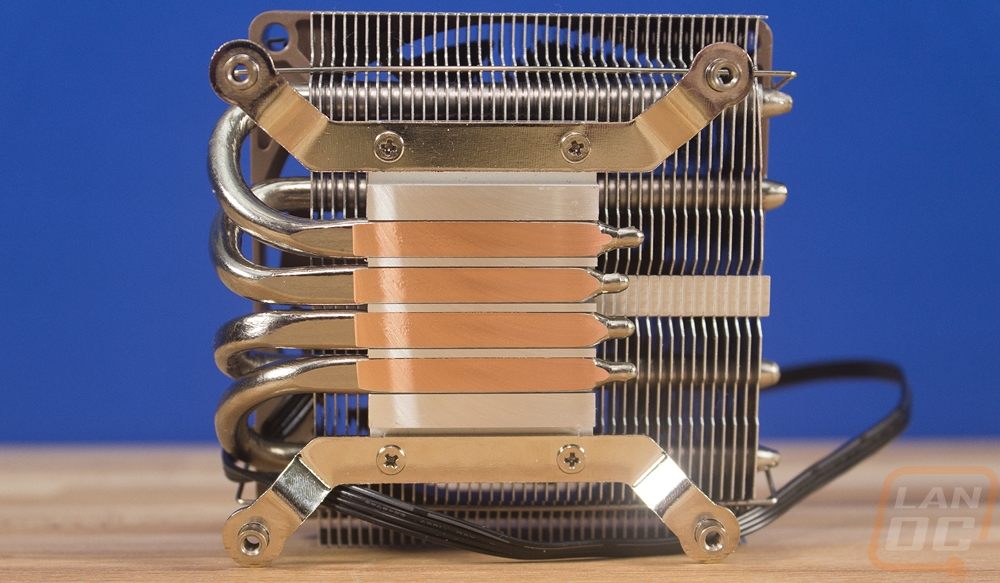
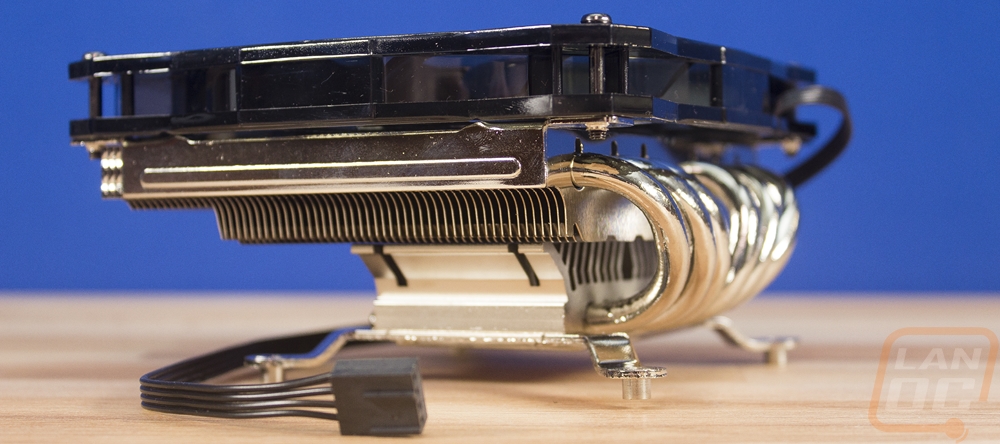
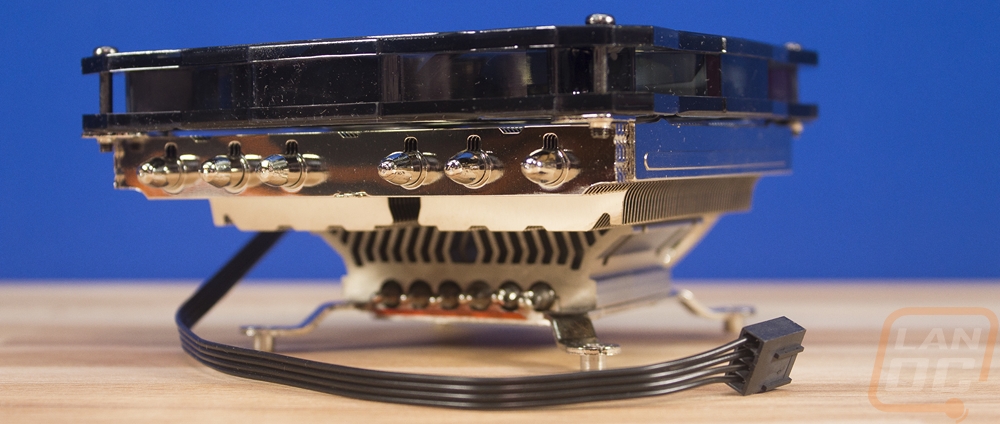
The cooler uses a thin 92mm fan in ID Cooling's signature off brown color. It blows down over the heatsink. Unlike the other two ultra low profile coolers, the heatsink design does actually get thinner as you go down, I’m surprised they didn’t take advantage of the extra space. They use four direct contact heatpipes running from your CPU up and around to pull the heat up into the heatsink. Then on the bottom, the brackets can be swapped out using four small screws. That fan color is going to take some time to get used to, just like Noctua, but I do like that they at least use a thin flexible black cord.
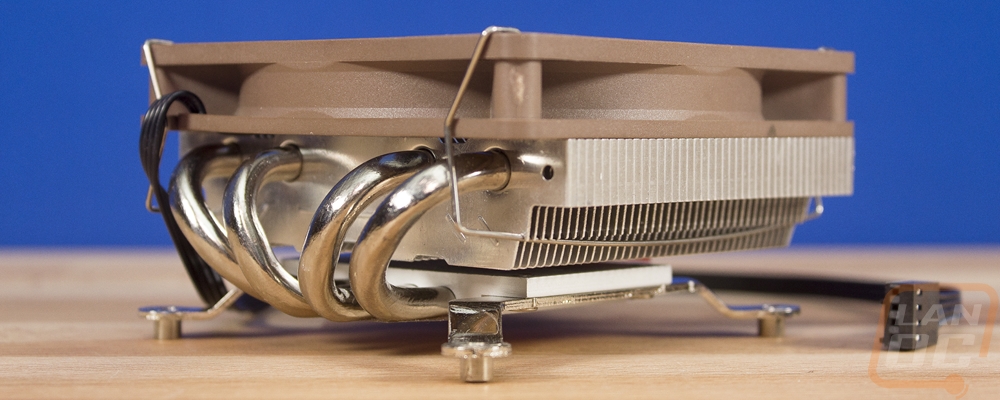

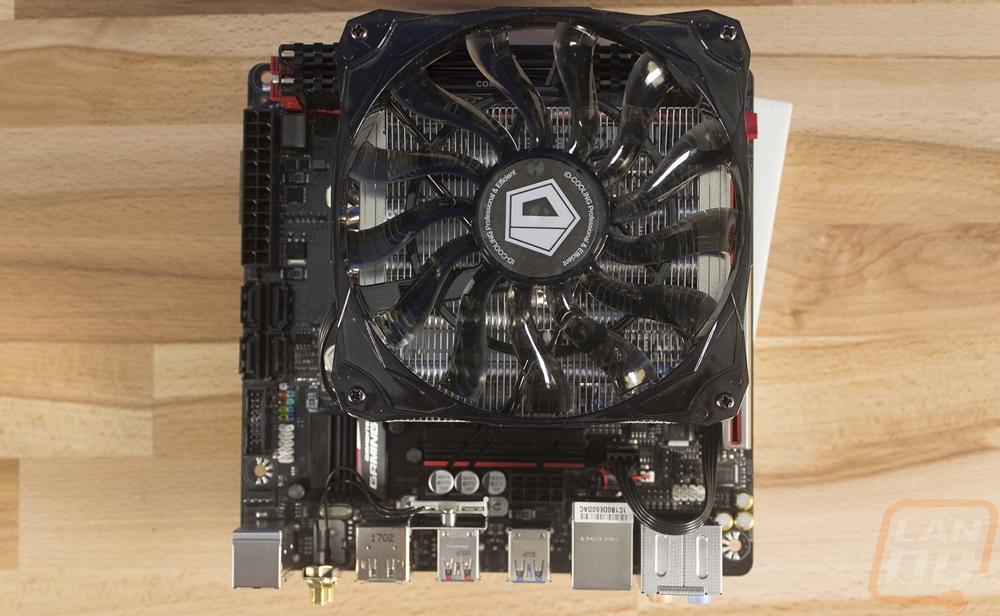
When installed the IS-40 v3 clears the memory completely so tall memory isn’t an issue. Being just 47mm tall it barely sticks up over the rear I/O and memory anyhow.
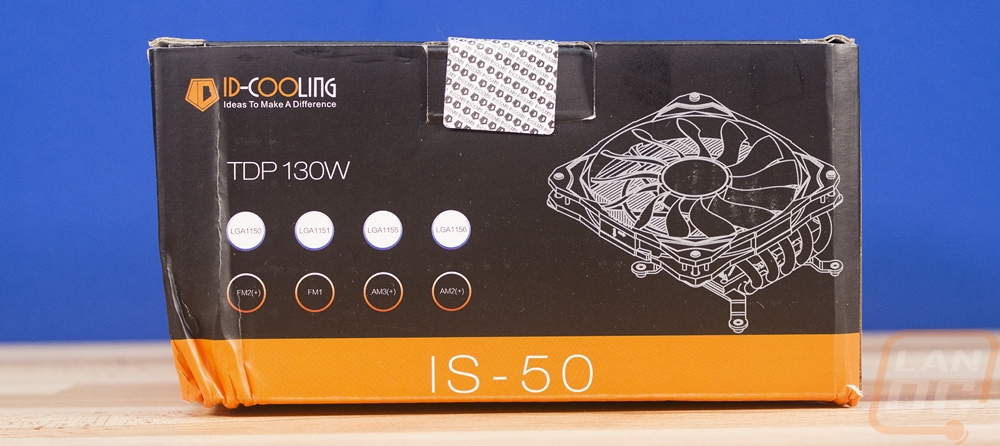
Next, we have the IS-50. This one has the same black box with an orange strip only this time they just used a line drawing not a picture of the cooler. The box on this one took a bit of a beating as well but the cooler came in just fine. Inside you get the cooler, the same small instruction paper, AM4 and AM3 brackets, and the tiny tube of thermal paste.

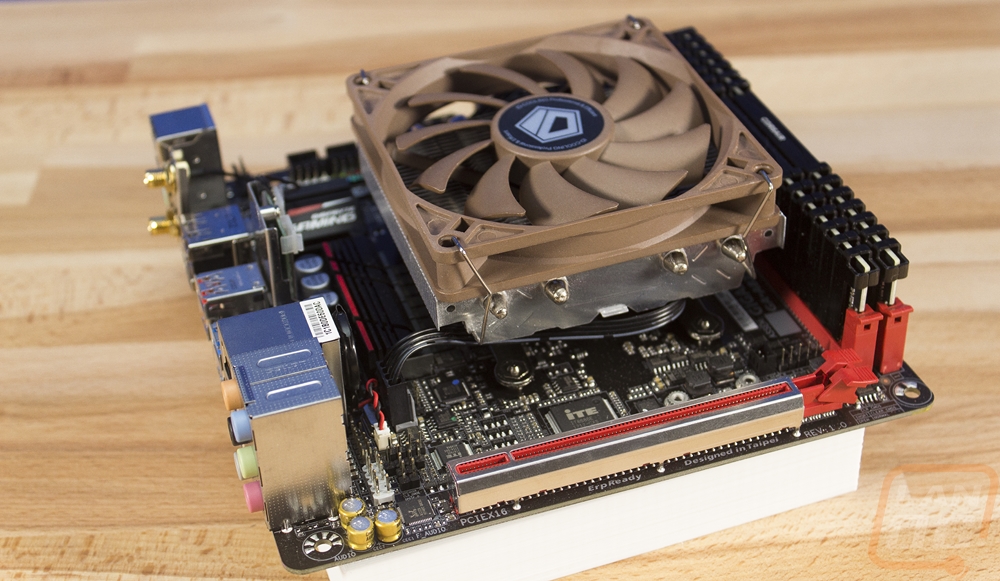
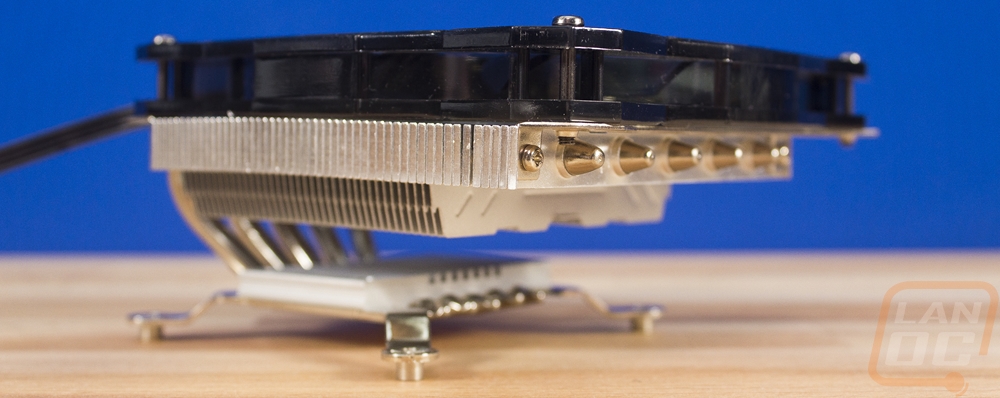
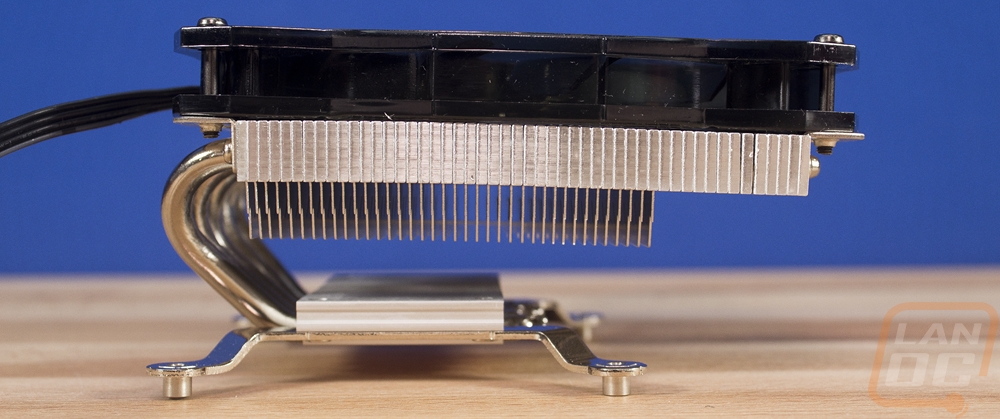
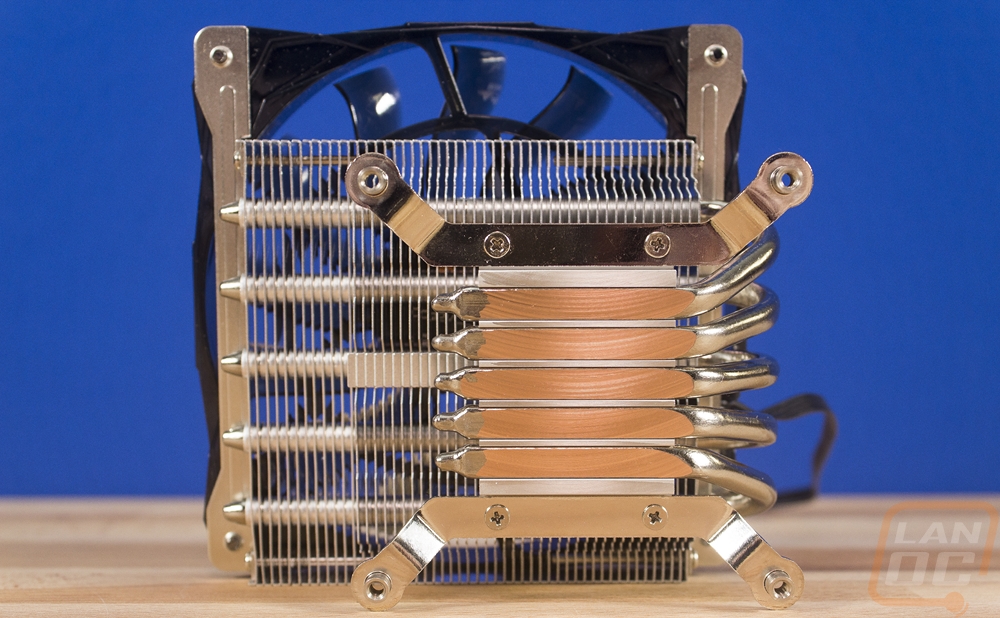
This cooler is a departure from the design of the IS-40 v3. This is still a top down blowing design but for this one ID Cooling stepped up the size of the fan from 92 to 120mm. With that, they expanded the size of the heatsink as well but oddly enough the thickness of the cooling fins is about the same as the IS-40, only this time there is a big gap between the cooling fins and the heatblock. There is once again direct contact heatpipes on the CPU contact surface but for this cooler, they went with 5. The cooler itself came in a little bent from the side profile, I will have to fix that later will a light pull. For overall thickness this cooler comes in at 57mm, the fan isn’t much thicker, most of this is from that air gap in the middle. The fan is also a new design as well, dropping that weird ID Cooling brown for a glossy black finish that people should like more.
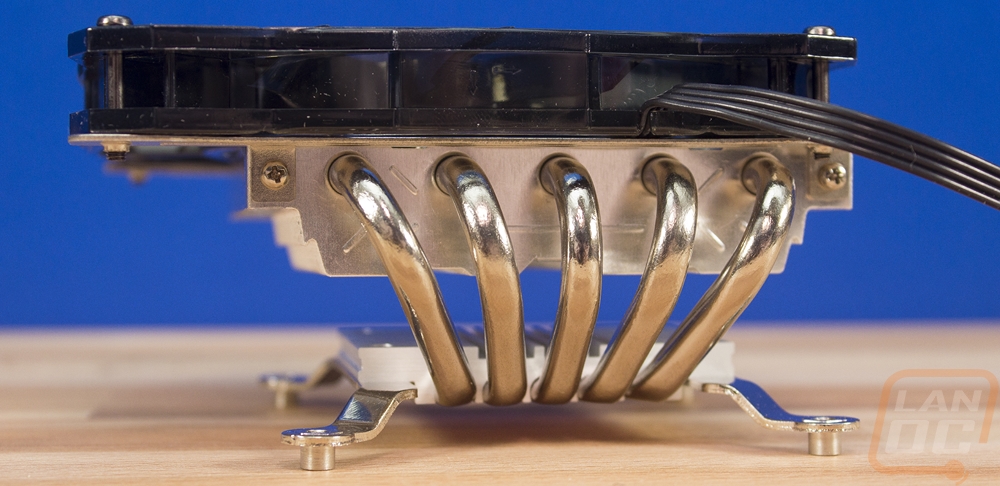
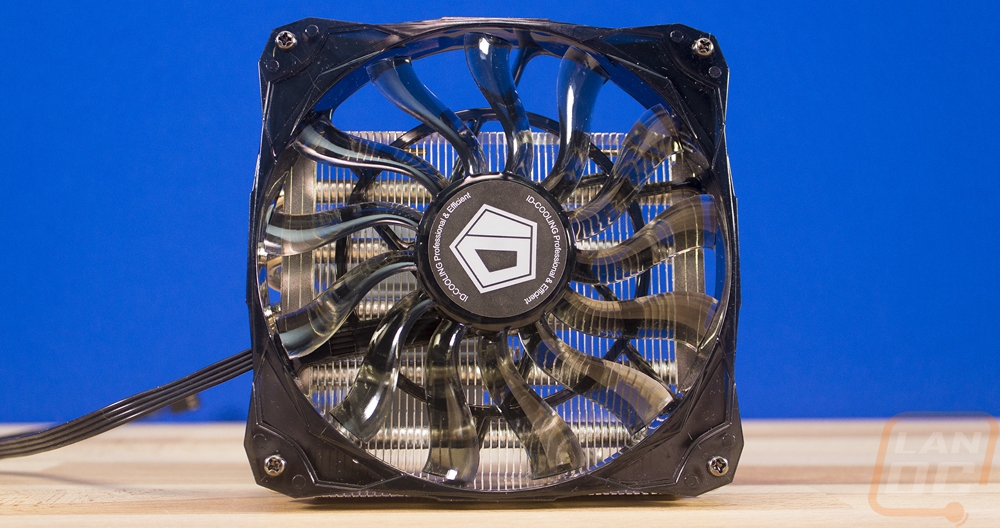
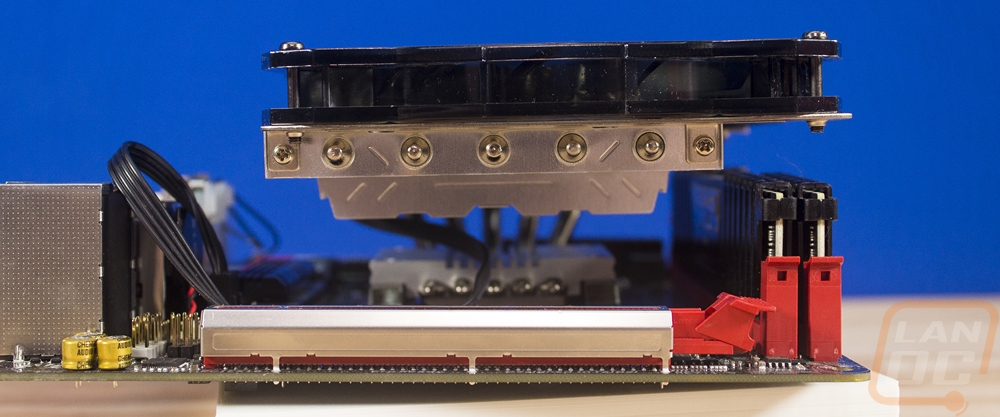
When installed this design does reach up over the memory and it does prevent you from using tall memory sticks. In fact, if you need to get to your memory at all you will have to remove the cooler. This design blows down on to the memory though so they should run cooler. From the top down view, you can also see just how much of the board is covered up by this design. The fan is larger than the heatsink but it even overhangs past the memory so ultra small cases that aren’t wider than the ITX board aren’t going to fit this one.
The last cooler they sent was the IS-60, another low profile cooler. This time the box didn’t have a picture or a drawing just a white panel with the product information on it along with the black and orange from before. The picture of what was inside looked just like the IS-50 really. You get a similar looking cooler, the same basic instruction page, AM3 and AM4 brackets with the Intel brackets pre-installed on the cooler, and then a tiny tube of thermal paste.

The cooler itself actually looks a lot like the IS-50 but there are a few key differences. So they have the same 120mm fan on top but this cooler is as wide as the fan to better take advantage of the airflow. This means it also doesn’t work with extra tall ram. Then they bumped the heatpipe count up to 6 from 5 and they went away from the direct contact design for a mirror like finish. The space between the main heatsink and the CPU block is also filled with a smaller cast aluminum heatsink to use every bit of the space. The fit is really tight though, even on the Gigabyte board that goes way out of its way to push the two ram slots all the way to the edge of the board for better cooler compatibility, but as you can see from the pictures below it does work.

Installing the three ID Cooling coolers was basically the same for each. They all use the same mounting brackets with just the 40v3 having different mounting bolts. They do ship with the Intel brackets so you will have to swap those out. I also did have one of the three missing one of the two AMD brackets. The brackets attached from the bottom to the heatsink with four screws total. The brackets have standoffs built in so they run through the holes in your motherboard and then from the back you install the four bolts. They don’t use a backplate and I’m not a big fan of that because of the pressure it puts on your board and because you risk scratching up the PCB from the bottom.
|
Cooler |
Height |
Fits Tall Memory |
AM4 Bracket |
|
ID Cooling IS-40V3 |
45 mm |
Yes |
Included |
|
ID Cooling IS-50 |
57 mm |
No |
Included |
|
ID Cooling IS-60 |
55 mm |
No |
Included |
Noctua Photos and Fitment
Noctua was actually AMD's launch partner, when Ryzen 7 launched Noctua heatsinks with AM4 brackets were included. So it wasn’t a big surprise that they had a good selection of AM4 compatible coolers when looking at ITX form factor coolers. After speaking with them, they ended up sending over three coolers and two AM4 bracket kits. Two of the coolers we have used and are still using on past LAN rigs but the D9L. I originally was going to have them send the NH-U9S that I’m using in my relatively small Crush build but the D9L was interesting so I’m excited to check it out.
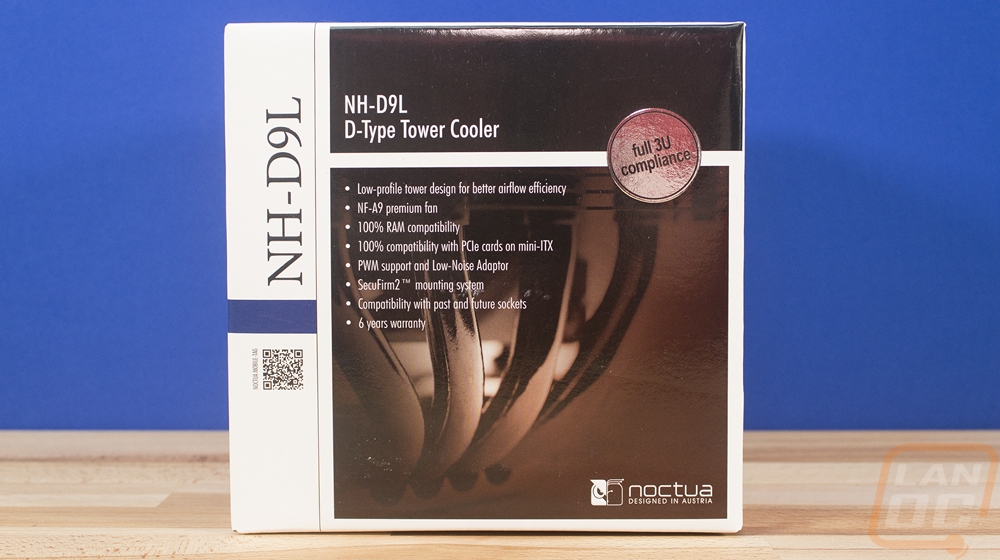
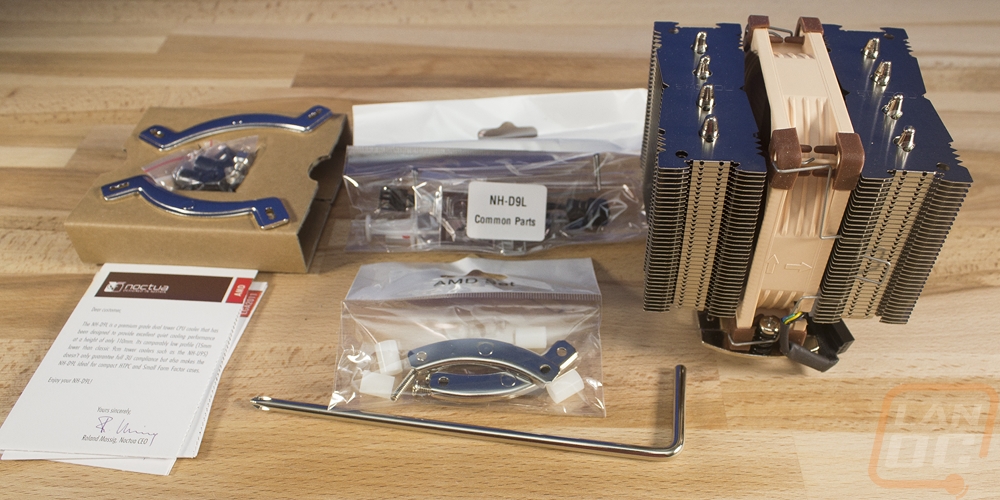
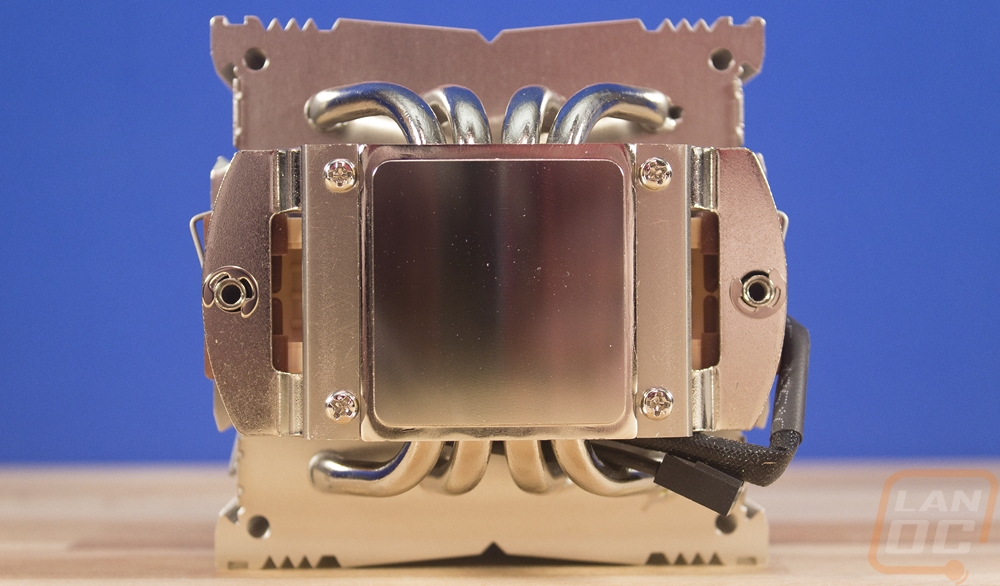
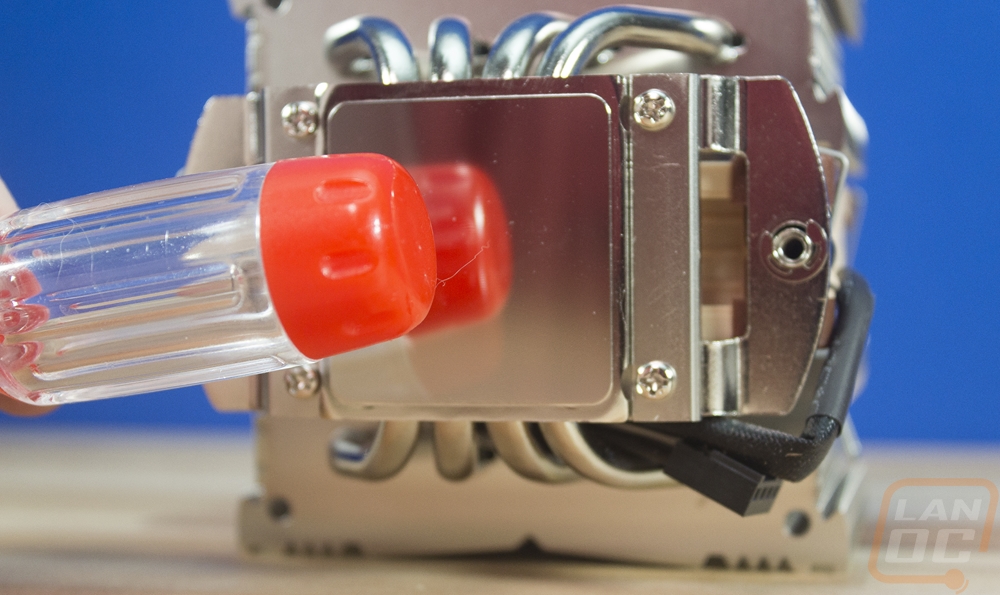
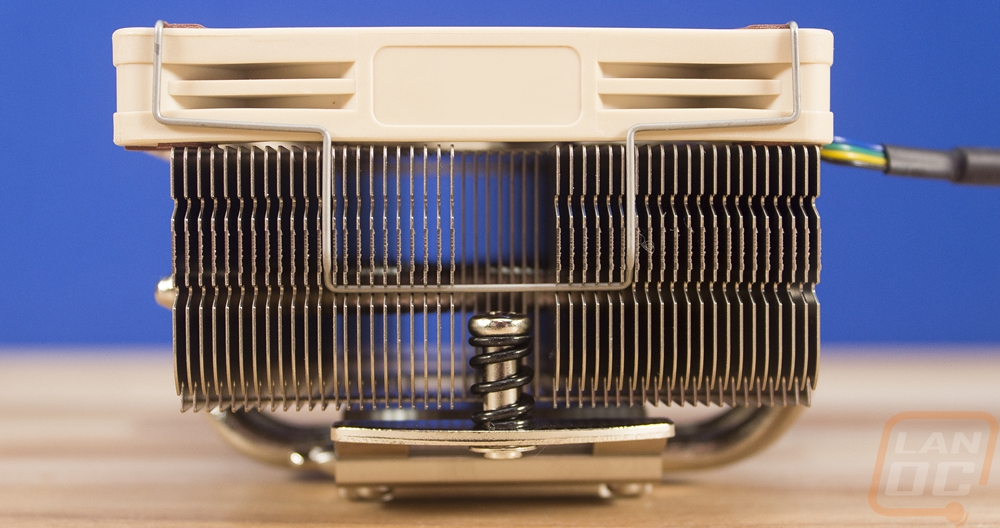
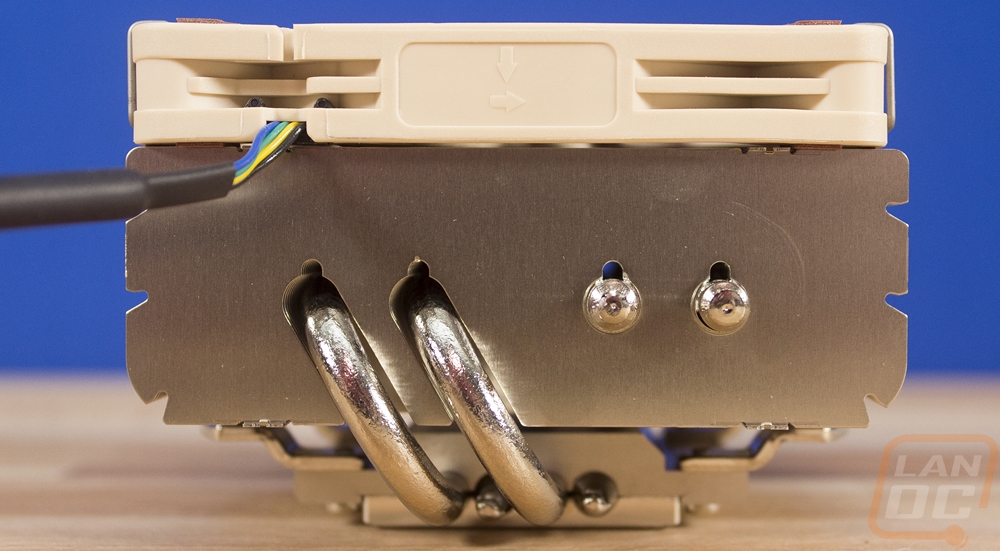
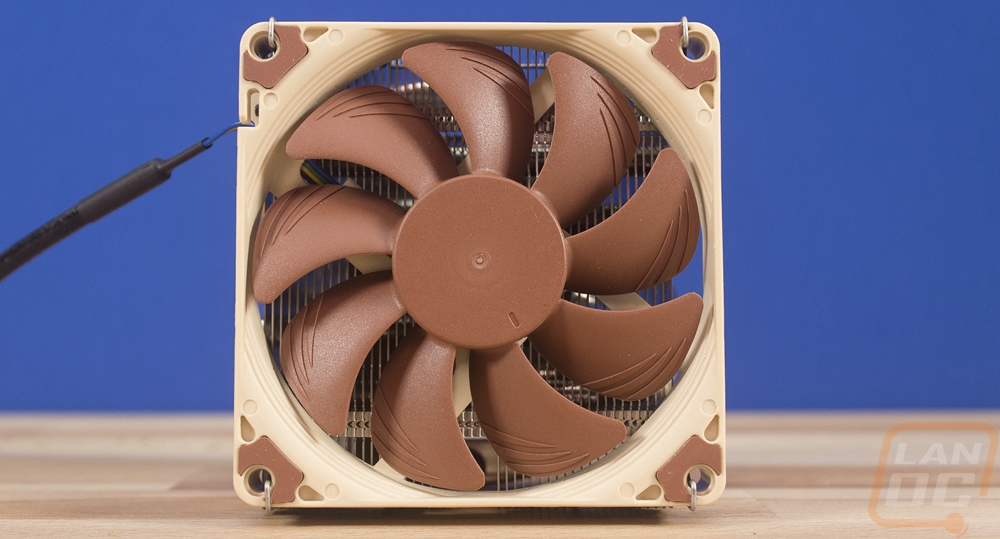
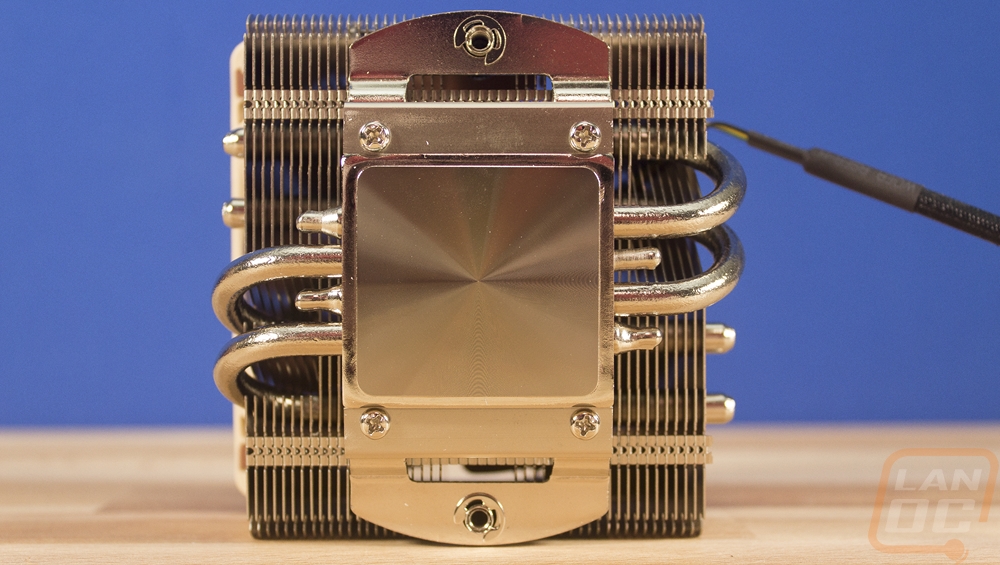
I started off with the D9L. It shipped with the normal goodies that Noctua includes. You get a screwdriver, a full tube of thermal paste and a few different brackets. I needed to use the AM4 bracket kit they sent though. The D9L was a little different than the U9S even though they both have the same 95mm fan. The D9L is 3U compatible for server height and at 110mm it is the tallest cooler I’m checking out today but I do think it will fit in some SFF ITX cases where other tower coolers wouldn’t so I included it. They went with two towers with four heatpipes running between them and over the top of the CPU. Then to keep the height down the fan drops all the way down to the CPU block. They could have gone with an 80mm fan but this larger fan gets the same airflow with a little less noise. The bottom has a decent reflection in it and it uses traditional Noctua mounting solutions so you can expect free upgrades for just about ever.
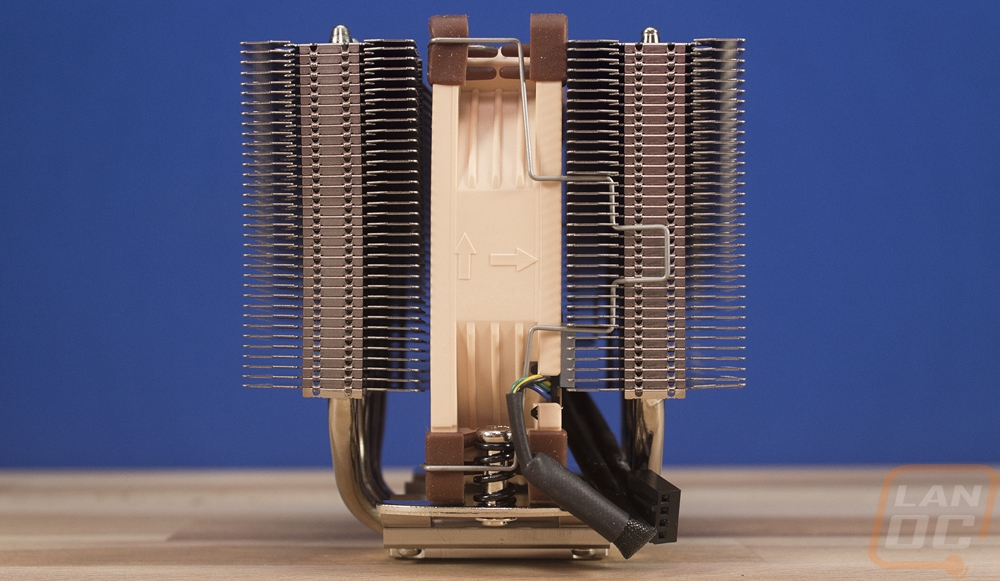
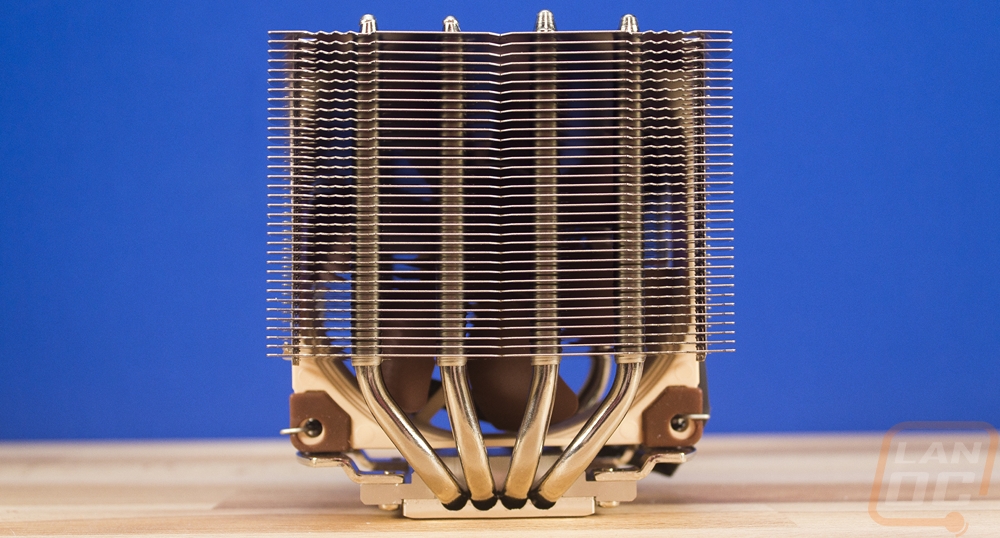
Installed it does clear the RAM and allow for full height memory. Being a tower cooler it does still stick up over the motherboard a lot. I didn’t have the fan pushed all the way down in the picture though, it is a little shorter when it is all the way down.
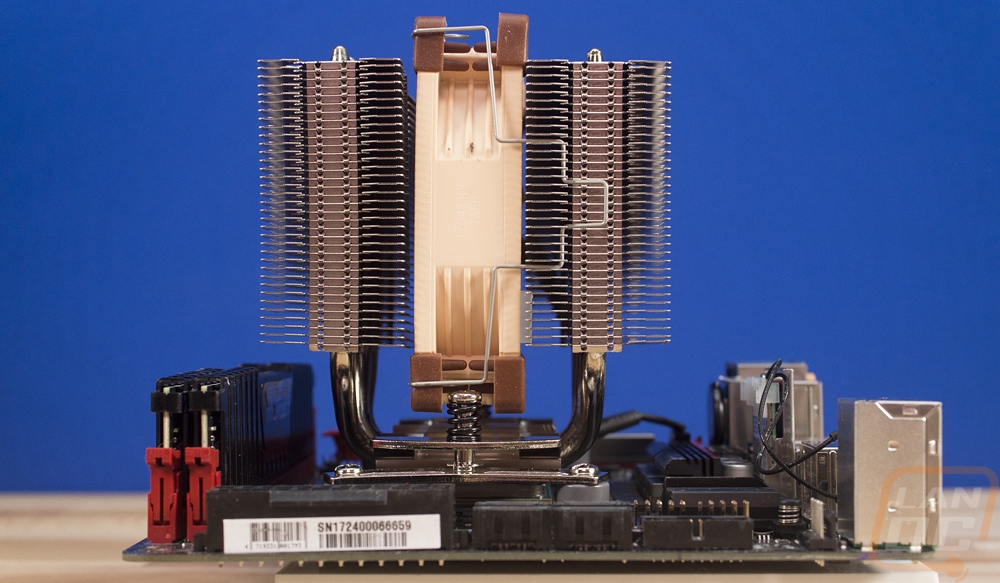
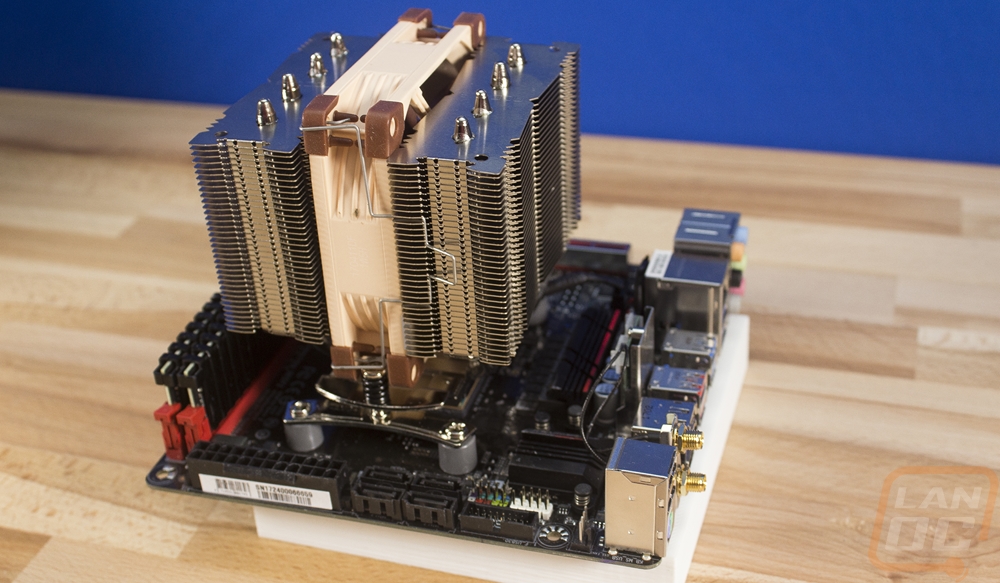
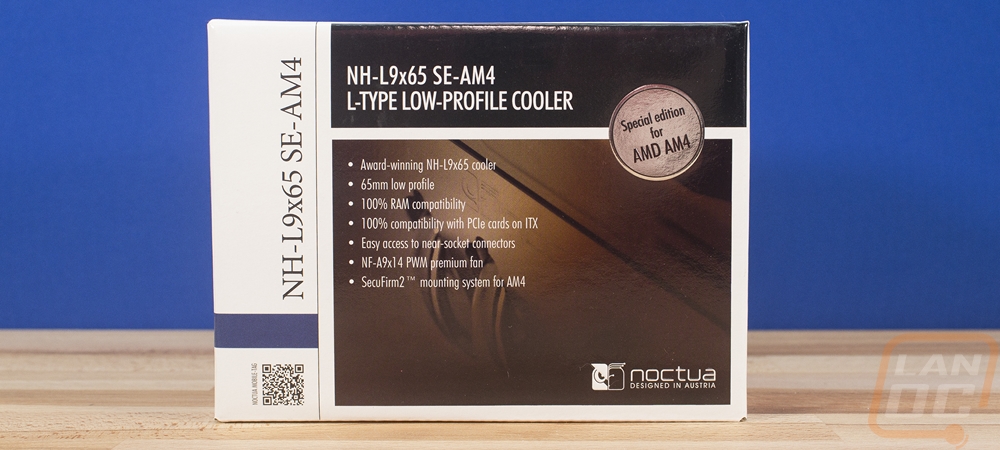
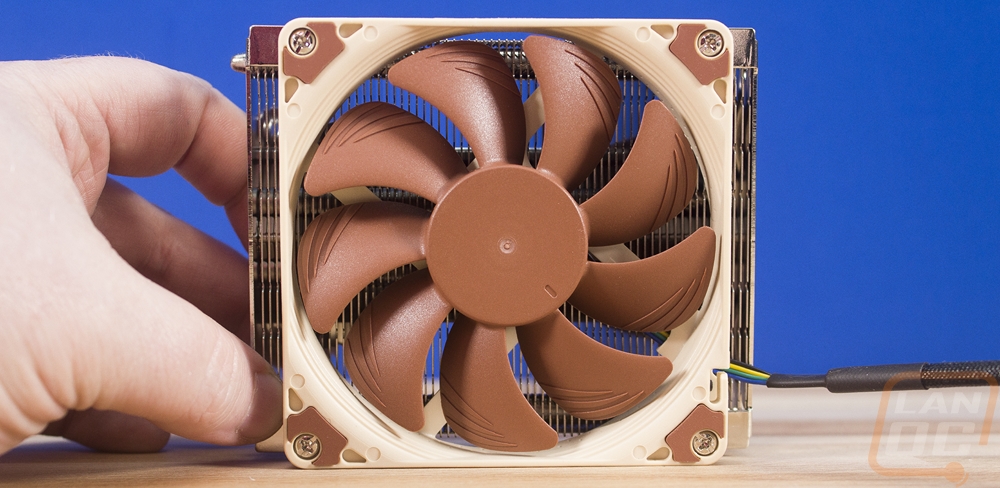
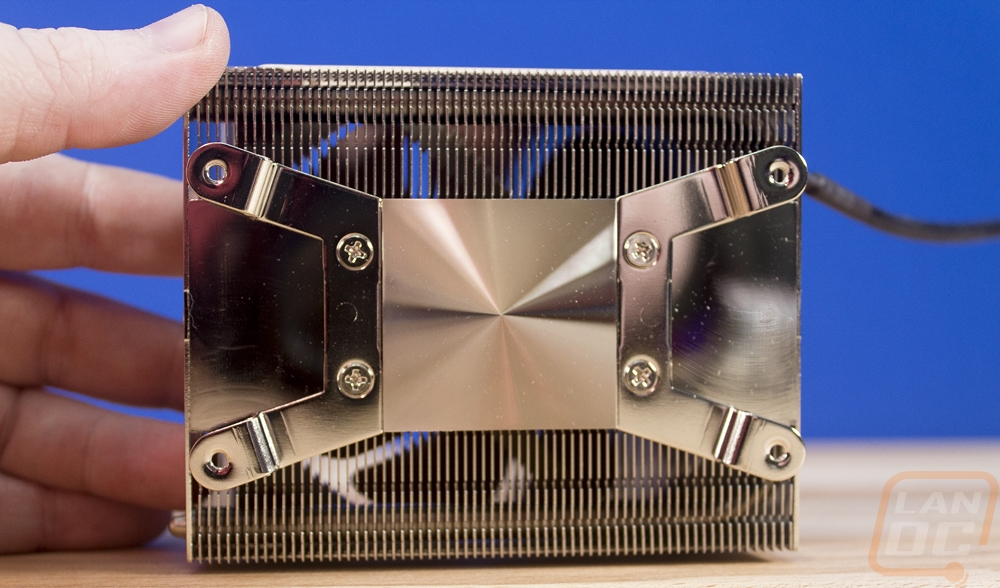
So the L9x65 is unique in that it comes in a special AM4 edition right from Noctua so you won’t have to worry about getting the bracket with this cooler. Once again you get the screw driver and a tube of thermal paste but being the AM4 edition you don’t get the other brackets so keep that in mind. This one also uses a 95mm fan but the fan is a thinner lower profile model and it is pointed down on to the heatsink. They have 4 heatpipes again here, but they are split up with two going one direction and the other two going the other direction. Pulling the heat up into the mean of the heatsink. As the name implies it has a 65mm height and there are cutouts in the heatsink for the two mounting screws. I tested and reviewed this cooler a while back on Intel as well.

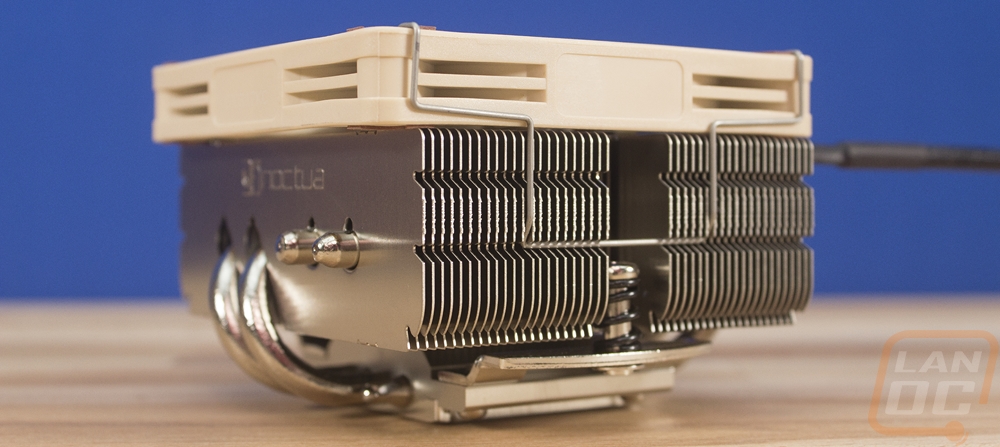
As always the Noctua color scheme is a love or hate thing and unlike the D9L, this model has the fan facing up so you are more likely to see it as well. For our Lunchbox 4 build, I even designed and 3d printed a cover for ours to help match it to our build. Here is a link.
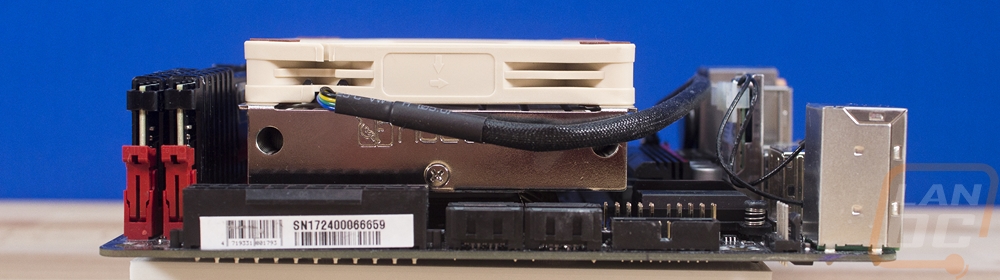
Installed we can see that the fan does hang over a little bit. They did this to not have the heatpipes sticking out any more than the fan. It has no overhangs so clearance around it is perfect as well.
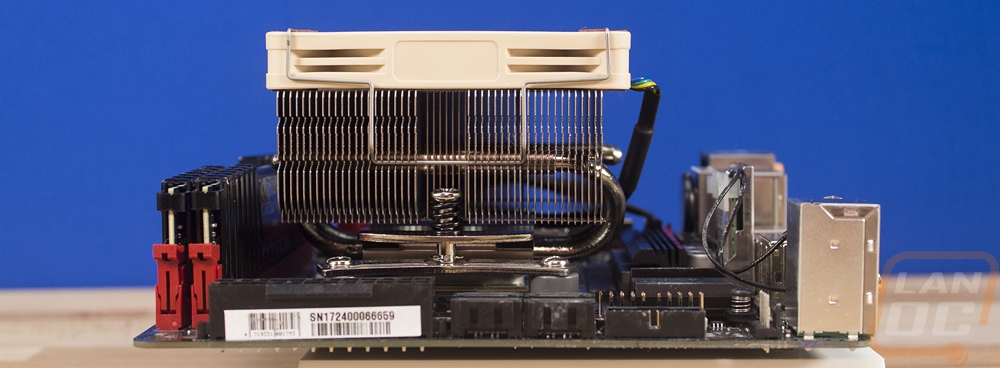
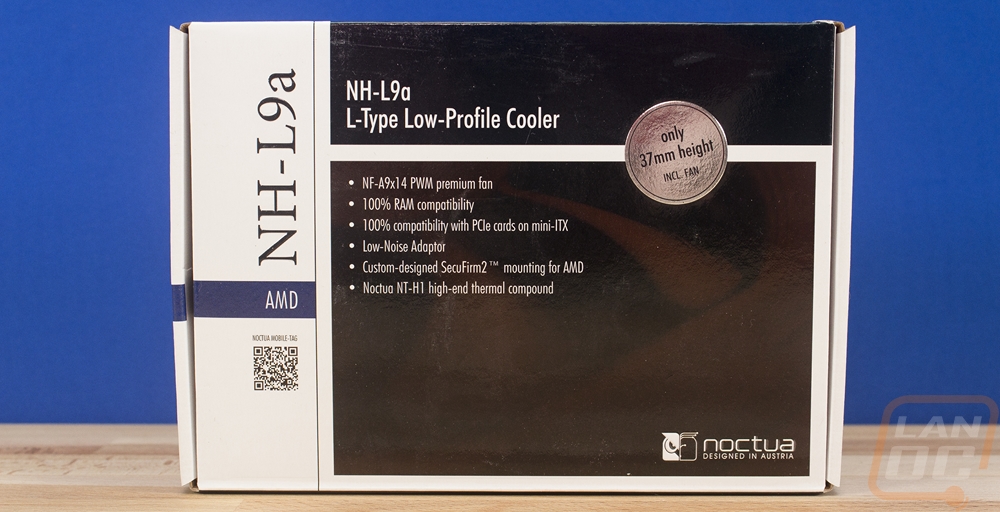
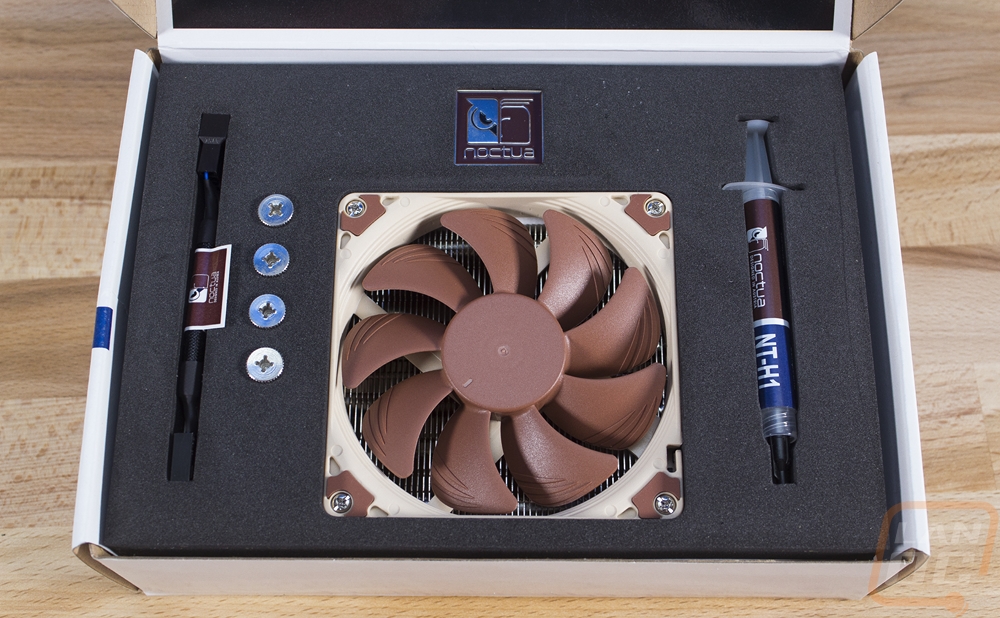
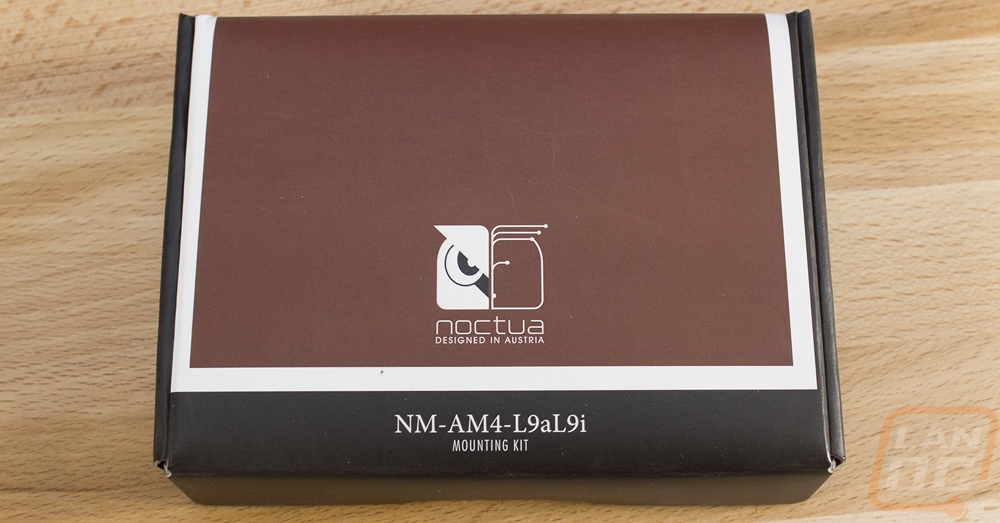
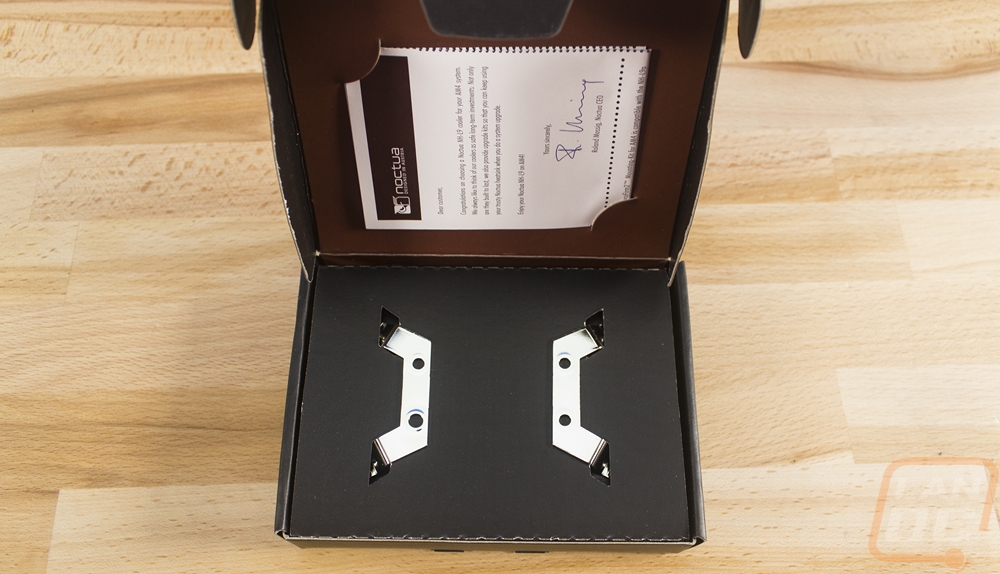
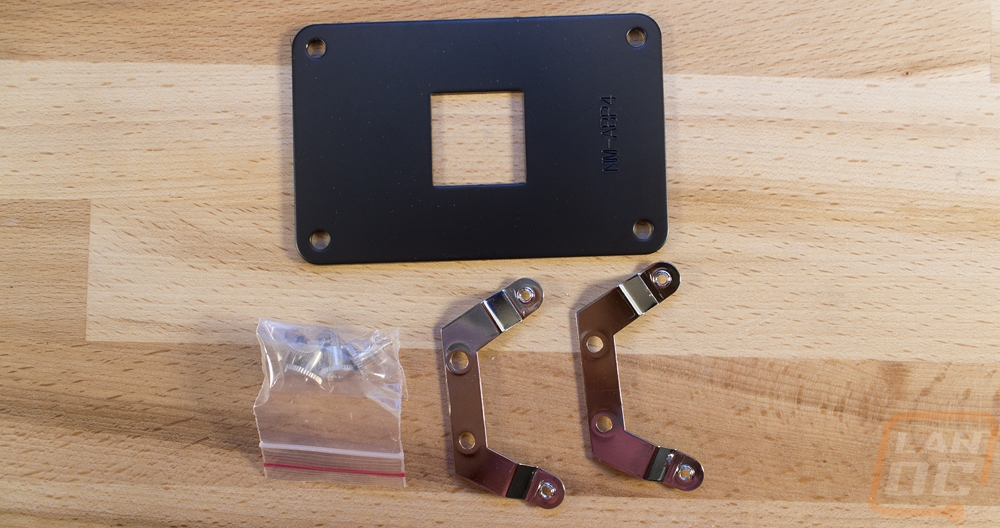
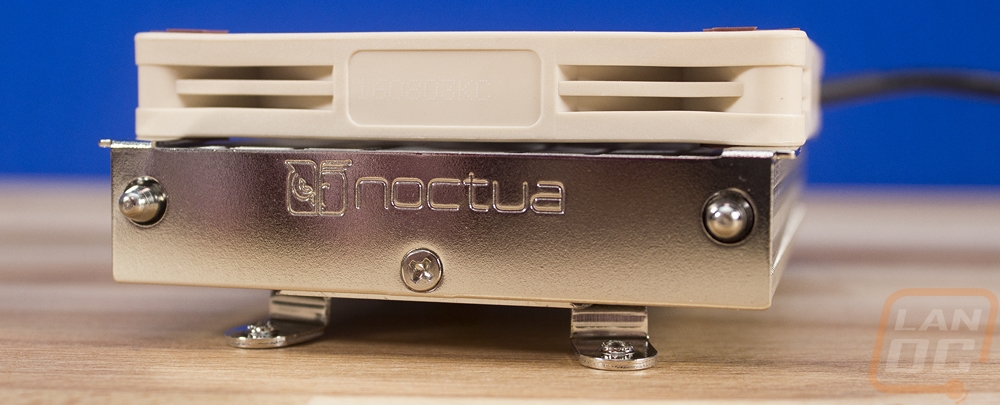
The last and smallest cooler I’m testing is the NH-L9a. L being for low profile and the a meaning this is an AMD model. The Intel model would also work in this situation because you have to use the AM4 bracket kit for this to work on Ryzen anyhow. While there aren’t the normal bags of brackets for this one, you do still get a tube of thermal paste along with Noctua’s awesome case badge. The AM4 kit gets you all of the mounting hardware, the backplate, four screws, and the brackets for the cooler. At 37mm this thing is extremely tiny. When you check out the side profile it is even more interesting to see that the fan, while thin, is still almost as thick as the heatsink. Noctua went all out on the overall finish here with a nice chrome finish all over. The heatpipes are completely hidden with just ends poking out on the one end from them. The bottom brackets mount right to the cooler and then through the board and backplate so it is all very efficient.
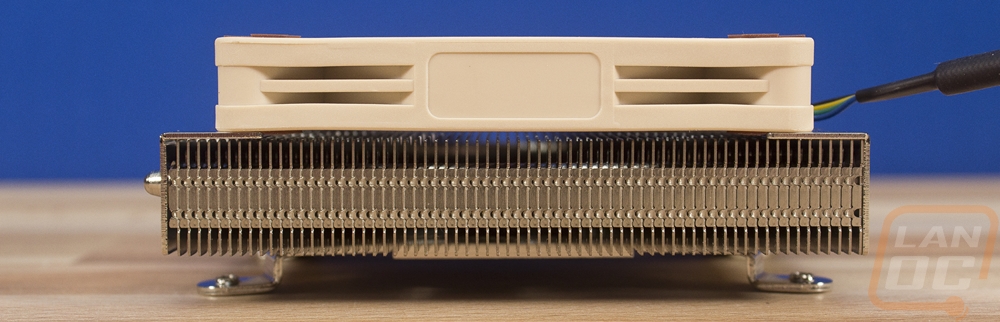
Just look at how short the cooler is, it barely gets up past our low profile memory. Of course, you can get to everything on the board because this tiny thing isn’t in the way.
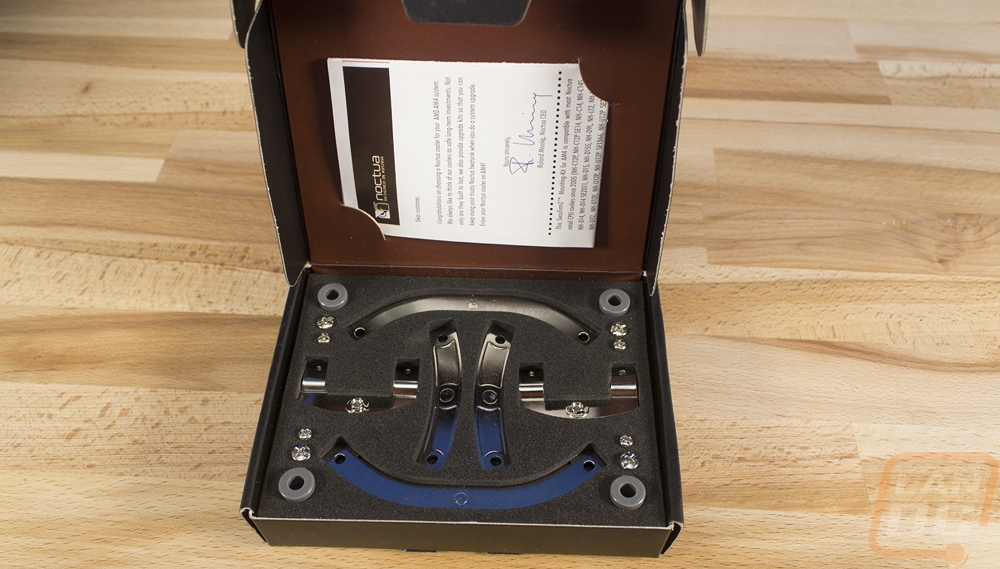
Installation of the three different Noctua coolers was really split up into two categories with both being very familiar. I run a lot of their coolers in our builds and test benches. The D9L and the L9x65 both use the same traditional Noctua mounting solution. With the D9L you will have to get an AM4 bracket, that Noctua provides for free. The L9x65 has a special edition that includes the AM4 brackets in the box. Basically, you remove your stock brackets but keep the backplate. You use four thick plastic washers to raise up the mounting brackets to the right height and you use the included screws to lock everything down to the stock backplate. You have the option to use long brackets for a sideways installation or the short brackets for a vertical mount. I went with the short brackets and for these two coolers, it doesn’t make much of a difference anyhow.
With the main bracket installed you then put thermal paste on the CPU ( Noctua includes a full-size tube) and screw the heatsink down to the bracket. The D9L required that I pull the fan out of the middle to do this each time and the L9x65 had to have the fan removed from the top of it as well to screw it down. They were both held in place with simple brackets.
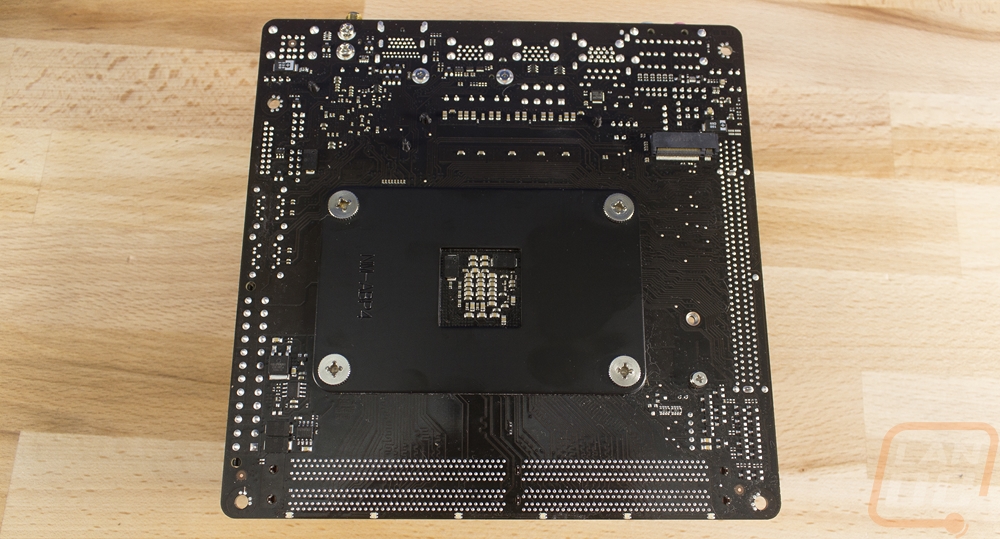
Here is a shot of the L9x65’s backplate, installed. You mount from behind with this cooler using the four screws. Keeping the mounting low profile to get that 37mm mounting height.
|
Cooler |
Height |
Fits Tall Memory |
AM4 Bracket |
|
Noctua L9a |
37 mm |
Yes |
Free Order |
|
Noctua L9x65 SE-AM4 |
65 mm |
Yes |
Included |
|
Noctua D9L |
110 mm |
Yes |
Free Order |
Phanteks Photos and Fitment
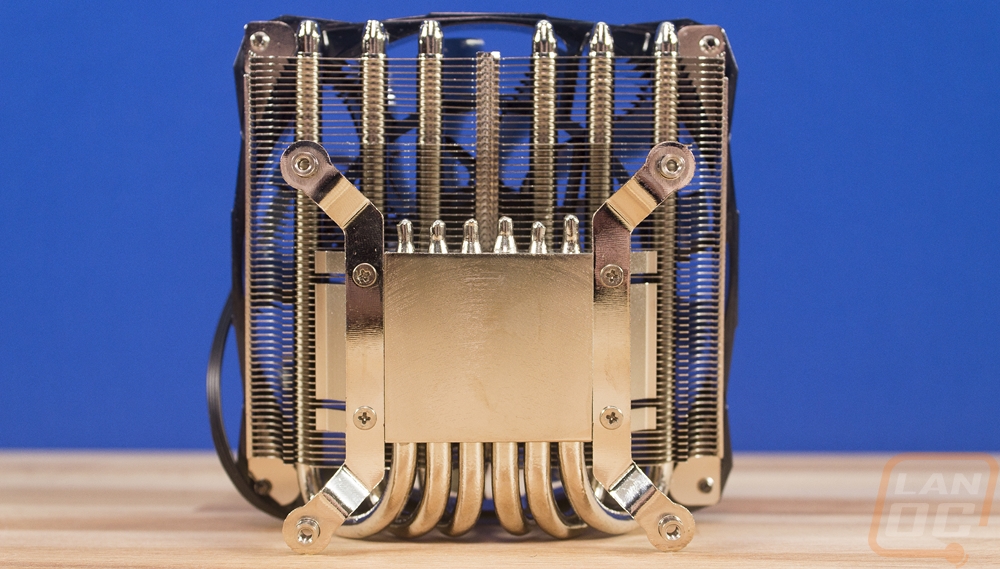
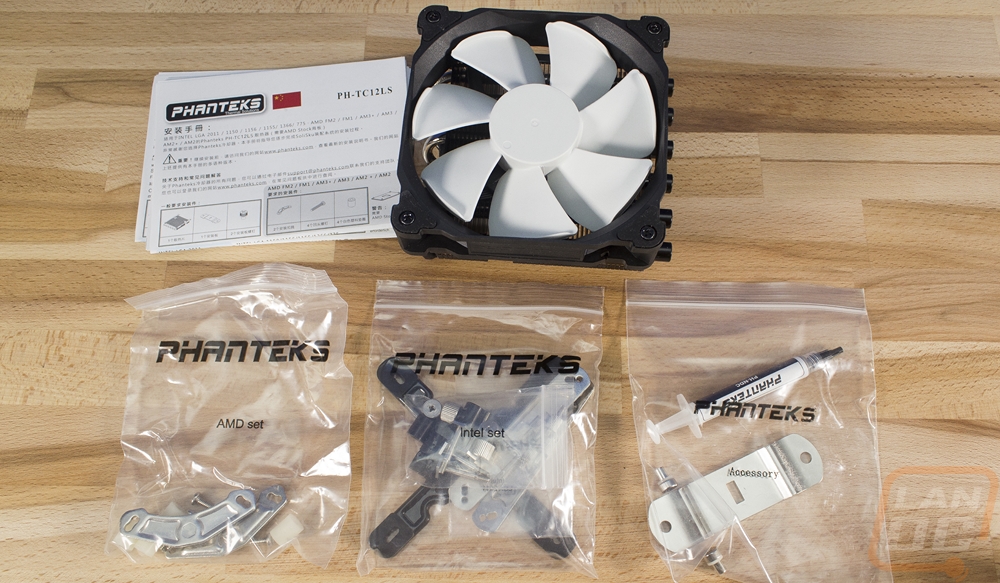
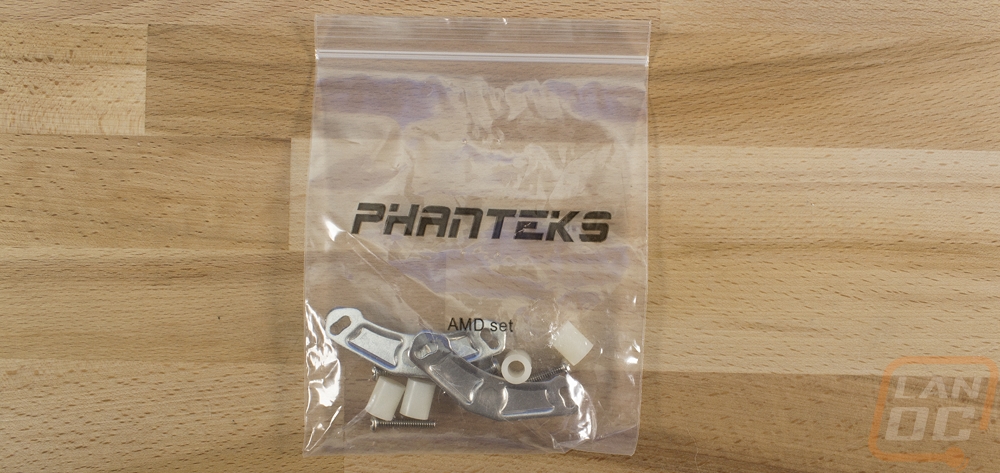
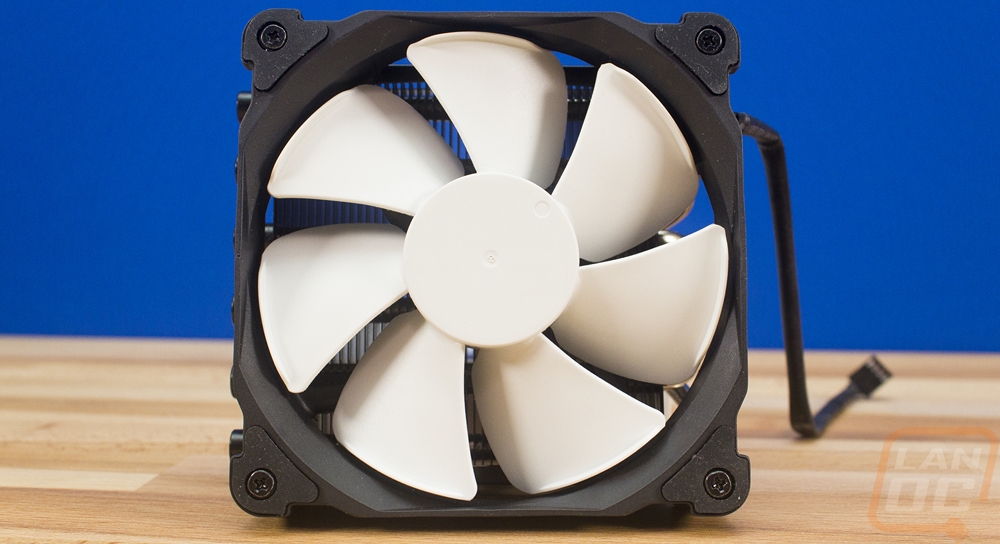
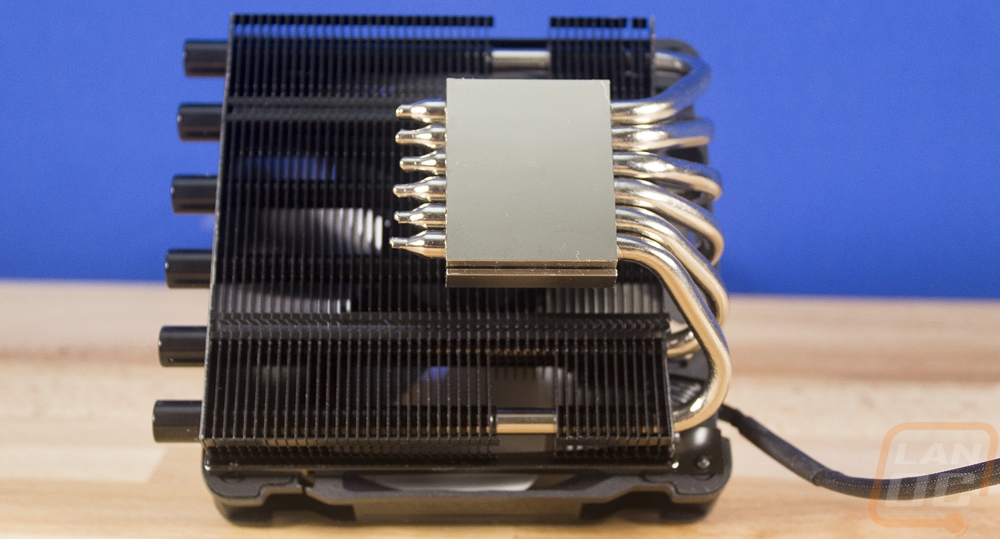
So with Phanteks, they just had the one cooler that could fit in an ITX build and it is on the larger side of what I’m looking at today. At 74mm tall it isn’t too bad for height but it is a horizontal design. So they are able to fit more cooler in a shorter profile at the expense of the overall size. When you dig in you get a stack of instructions, AMD and Intel bags as well as a third bag with a tube of thermal paste, screws, and a hold down bracket. The cooler itself is the best-looking cooler out of all of the coolers tested. It is anodized black with a black and white 120mm fan on top. The fan is really high quality and Phanteks even went as far as putting cops over all six of the coolers heatpipes.
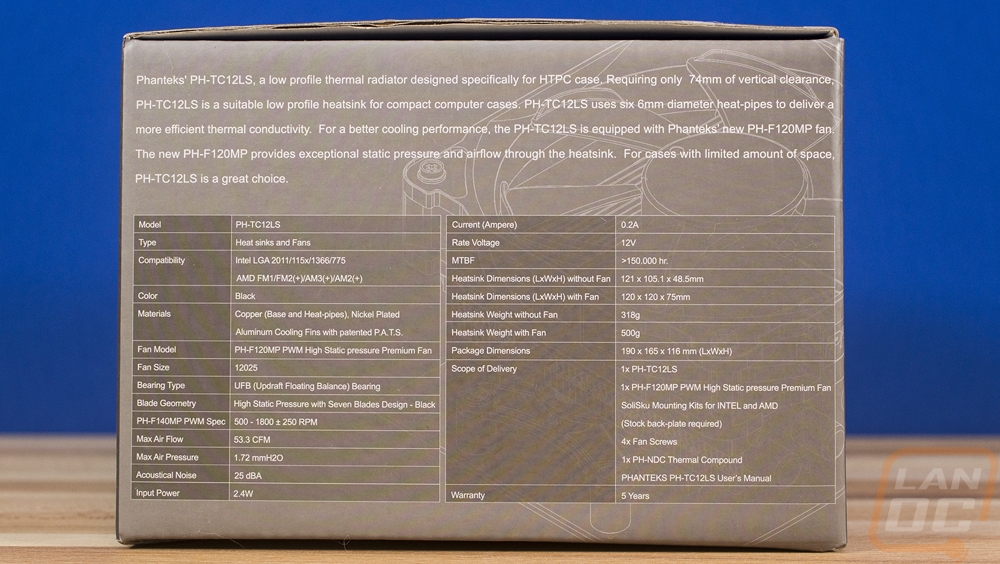
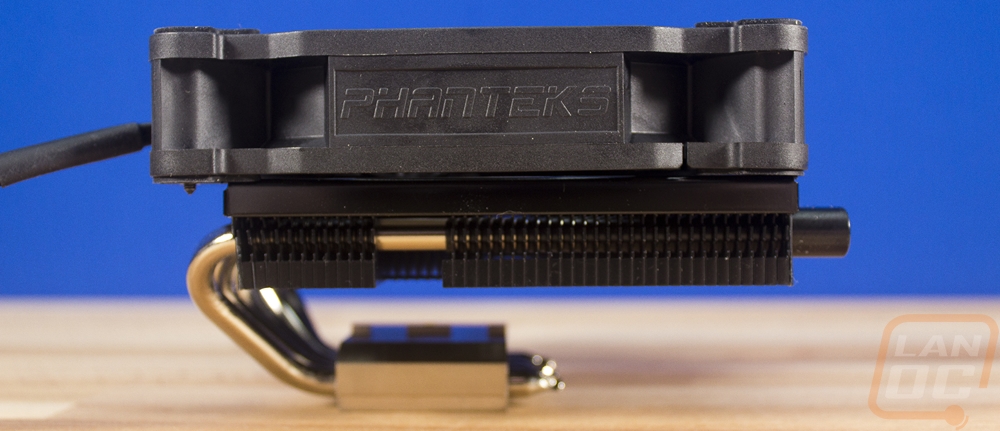
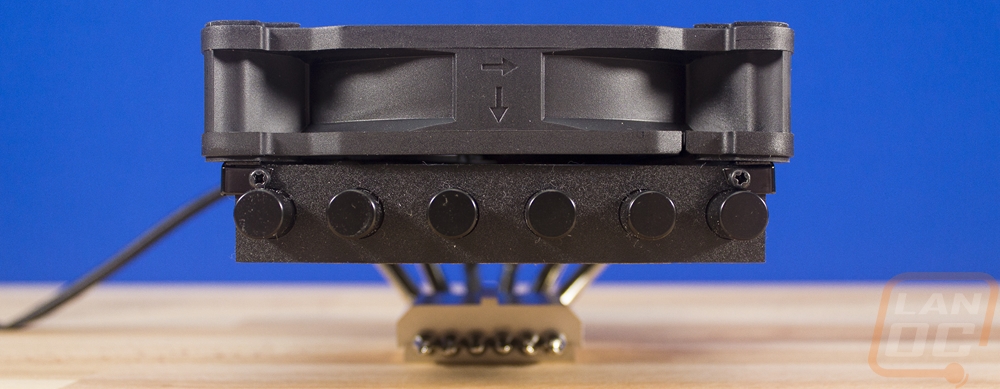
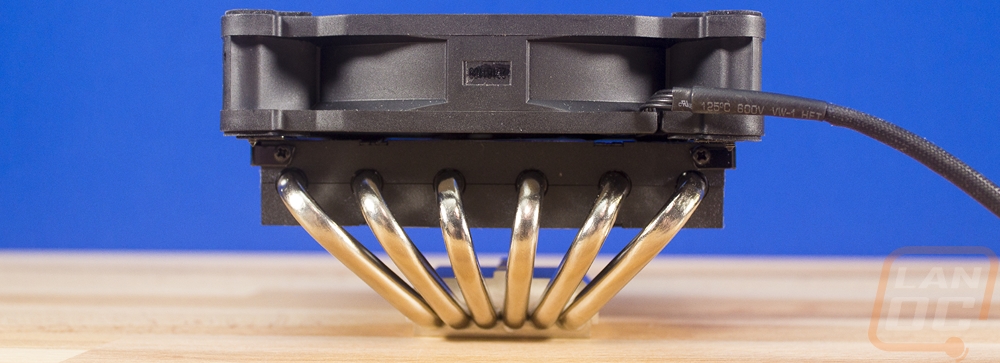
The heatpipes are the only chromed part of the cooler and you really aren’t going to see those when everything is installed. Six is a crazy number of heatpipes though. The surface is also extremely smooth. Check out the reflection in the photo below.
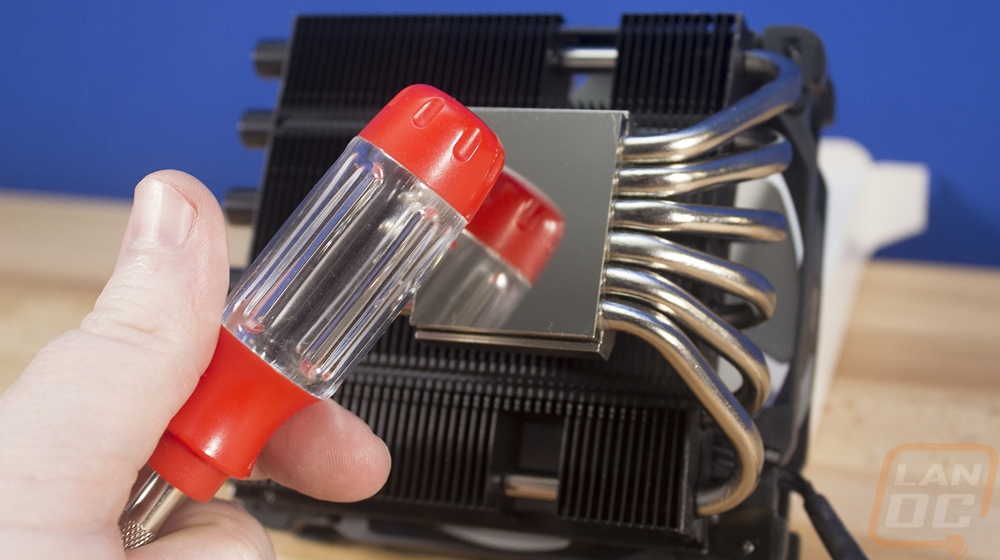
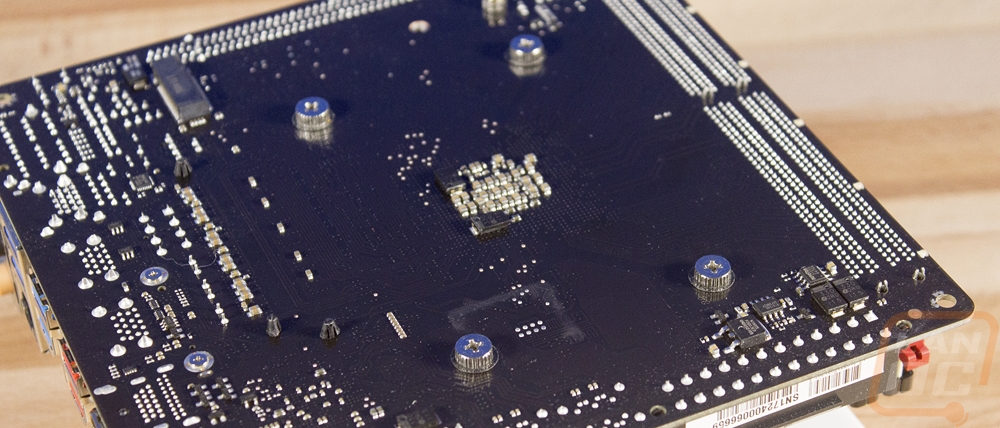
As for installing the PH-TC12LS, my first installation was out in the open for the photos below. Even in this situation, I was surprised at how difficult it was to get installed. This one is similar to the Noctua kits in the base bracket design. You use the stock AMD backplate, use plastic spacers to raise the mounting points up, then screw down the two brackets. From there you use thermal paste and then install the bracket right? Well yeah, but this is where things became difficult. The hold down bracket doesn’t attach to the heatsink, it is only held in place with pressure and a cutout that lines up with a key on the top of the block. So this moves around, then on top of that, the mounting screws also are loose. To make matters worse the fan has to be removed to get a screwdriver down into the screws. It can be done, but plan on fighting with it. Especially if you do it in your case.
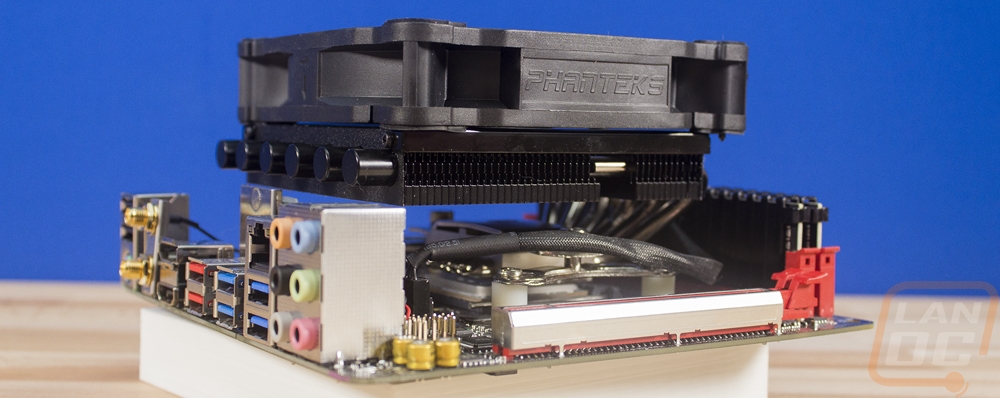
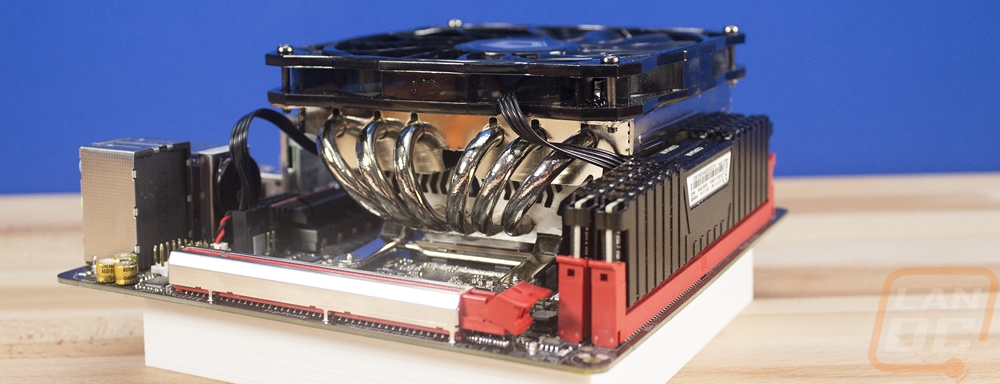
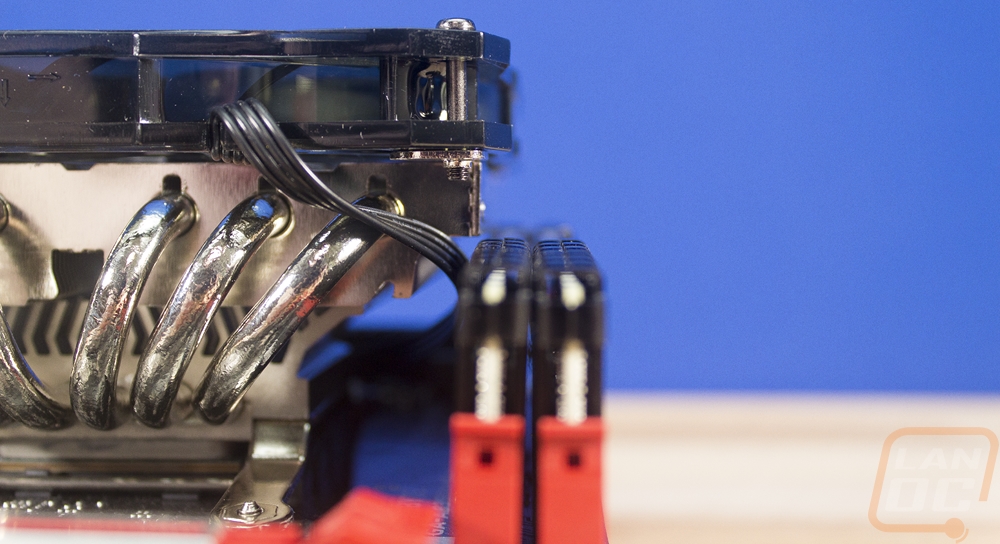
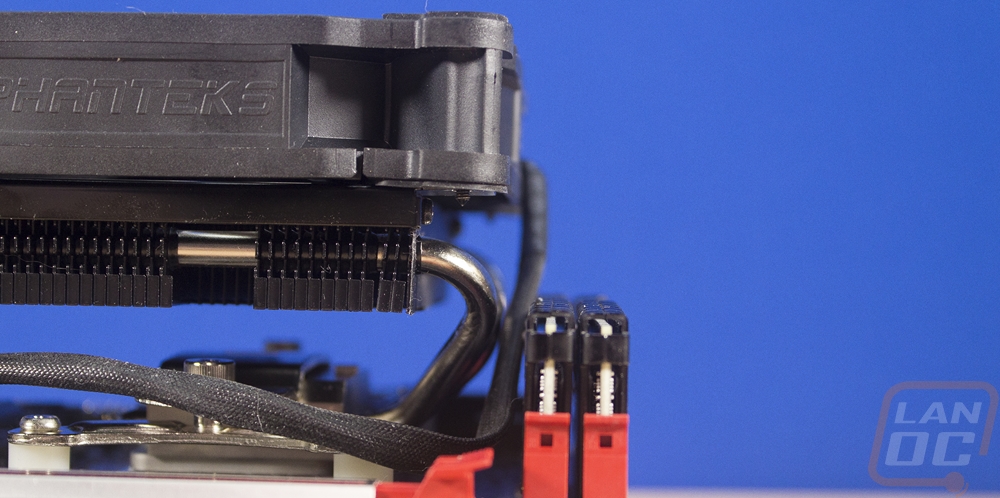
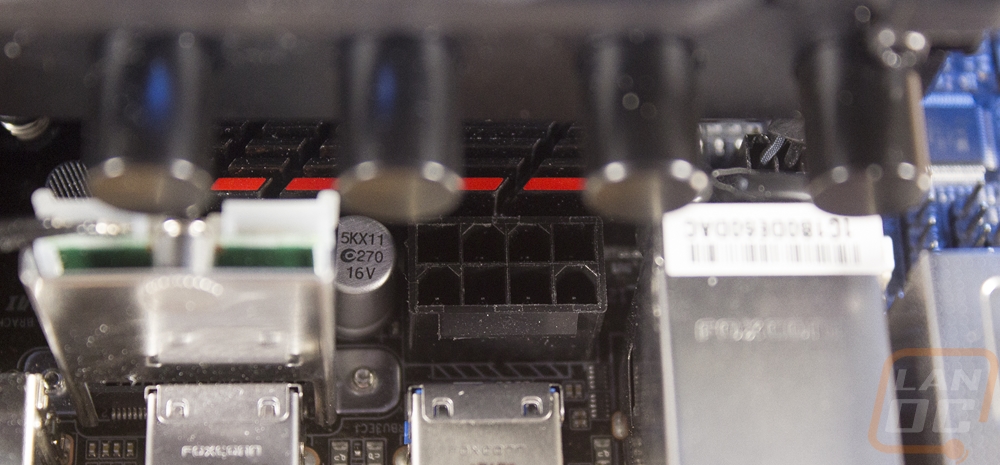
Once installed we can see just how it all clears the Gigabyte board. Depending on how you mount the cooler you can cover up the rear I/O area or your memory. This means you have to pick between making the oddly placed 8-pin on the Gigabyte board harder to get at or cover your memory. If you have shorter memory covering them would be the better option anyhow for the cooling. At 74mm tall installed this cooler is a little taller than the AMD Spire and shorter than the MAX so height shouldn’t be an issue. I was able to plug the 8-pin in with the heatsink pre-installed but depending on your case it could be even harder.
|
Cooler |
Height |
Fits Tall Memory |
AM4 Bracket |
|
Phanteks PH-TC12LS |
74 mm |
Depends on the orientation |
Included |
Testing Configuration and Procedures
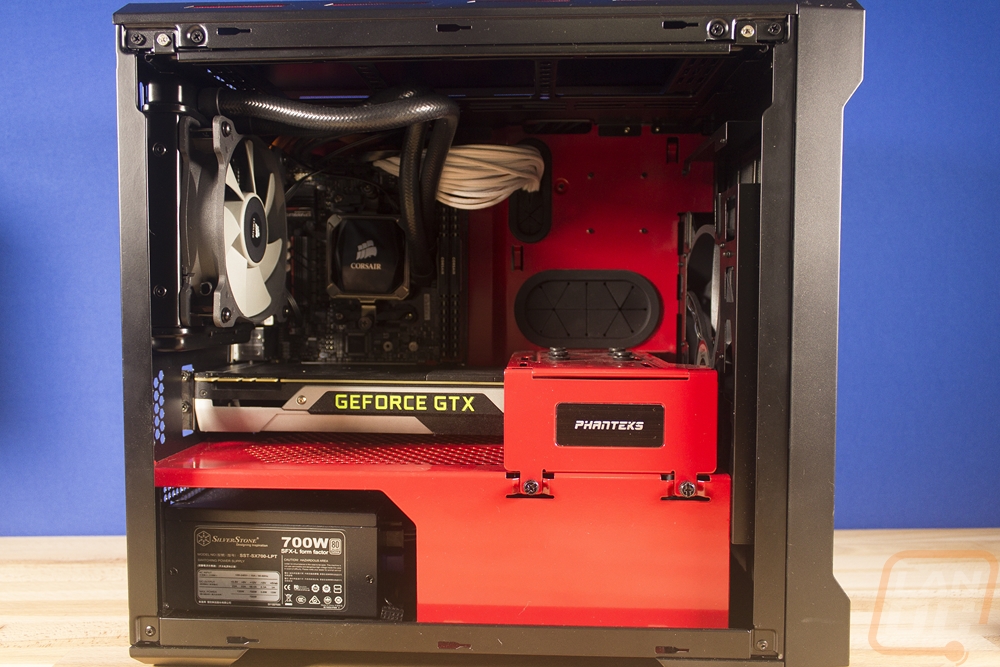
Rather than use one of our normal test benches I put together an ITX build specifically for testing this configuration. Ideally, I would have been using an even smaller case, but the Phanteks Enthoo Evolv ITX is small enough to test some fitment issues but it does allow for taller heatsinks than true SFF cases would allow so keep that in mind. From there I mostly just patched together what I could find including a Corsair RM650X that they sent over to help.The ram was picked because the two kits were the shortest and tallest kits I had on hand with known Ryzen support.
|
Testing Hardware |
||
|
Case |
Phanteks Enthoo Evolv ITX |
|
|
Motherboard |
Gigabyte AB350N Gaming WiFi |
|
|
Video Card |
Asus Strix RX 570 |
|
|
CPUs |
AMD Ryzen 7 1800X AMD Ryzen 3 1200 |
|
|
Ram |
Corsair Vengeance LPX DDR4 GeIL EVO X RGB DDR4 |
|
|
SSD |
Apacer AS720 |
|
|
Power Supply |
Corsair RM650X |
|
|
Thermal Paste |
Noctua NT-H1 |
|
|
OS |
Windows 10 Pro |
|
With the hardware, all put together I also locked down the testing plan. The goal here was to cover most questions you would have when looking at ITX coolers while also making the testing repeatable for anyone who would want to check our work or compare the results of one of their own coolers to any of the coolers tested.
|
Testing Procedures |
|
|
Fitment |
The goal with fitment testing is to make sure each of the cooler will fit the cramped ITX board. While doing this I am also checking for compatibility with both a low profile ram and a tall ram. In addition, we are documenting the overall cooler height from the CPU pad to the top of the cooler. Not every case is going to fit every cooler tested, but with the heights, you should be able to figure out if it will work with your case. |
|
Noise Testing |
The noise testing is done with the side panel off and the fan manually set to 50% and 100% fan speeds. The meter is 18 inches away from the fan when testing. This is done using a Protmex PT02 Sound Meter that is rated IEC651 type 2 and ANSI S1.4 type 2. Tests are done set weighted to A and set to a slow response using the max function. The ambient noise level in the testing area is 33.3 decibels using the test settings. |
|
Cooling Testing |
The temperature testing is all done using the stress test in AIDA64 set to FPU only for the maximum heat then again with CPU Stress for a more real world test. Onboard temperature results are typically not the most accurate, but in this case, I am comparing results directly from the exact same CPU and motherboard for each cooler. Each cooler was tested with three different CPUs (see the hardware listing). I also did every test twice, once at stock fan settings and another with the fan at 100%. Each test requiring at least 15 minutes of full load unless it gets dangerously hot. If the results are still climbing at 15 minutes the test will be extended out until an equilibrium is reached. It is also important to know that because I will be swapping CPUs out often I can’t use the stock thermal compound that is included with the coolers. For consistency, I am using Noctua NT-H1, simply because that is what I have an ample amount on hand of. |
Cooling performance
Now I’ve been writing about hardware for nearly 10 years and I just have to say that this project ballooned into a crazy amount of testing. When I started this roundup I was just planning on testing everything on one CPU at stock and 100% fan speeds. I decided later to go with three different CPUs to get a better look at what options might be best for each cooler.
I then spent two 13 hour days testing only to figure out that my results were wrong. I was using the wrong temperature reading for one, but I also noticed that with a lot of the coolers my results were all the same. As it turns out with the Ryzen 7 and Ryzen 5 CPUs I was actually pushing the CPUs all the way up close to the TDP and they were throttling down. Because of this, I decided to toss everything and start over. This time documenting the clock speeds as well and using the correct temperature readout as well. But to go along with that I also recognized that the FPU stress test in AIDA64, while being the best way to completely heat up a CPU, doesn’t represent a normal CPU load as well. So I doubled up my testing again and added the CPU stress test setting as well. Huge thanks to AID64 for working with me through email and later over skype as well to figure out why my results were off and to help refine my testing.
So when it was all said and done, an article that I originally planned on having done in less than a week now needed something like 80 hours of testing, not counting the time needed to cool down between tests and the time it takes to swap between CPUs and coolers. Not to mention taking photos, editing photos, and writing everything. I’m only talking about all of this because this is how things snowball lol. Everyone should be warned!
So now that you know why I did each of these tests, let's take a look at the results we ended up with. So the Ryzen 7 and Ryzen 5 CPUs both had the 20c offset and from what I can tell a 75c/95c temperature is the TDP. So they did throttle down to stay below that. That is why you see a lot of the 75c results, especially with the 1800X. These are desktop CPUs that I’m attempting to run using extremely small heatsinks. So in the FPU results be sure to note the clock speeds to separate results from different capped results. Also huge props to AMD for the way the Ryzen CPUs handle the heat, they are able to pull a lot to keep thermals down.
So in order to best take all of this information in it is best to remember that the coolers tested do range in size. Specifically, you have some like the Noctua L9a that are only 37mm competing with coolers up to 110mm tall so there isn’t any one answer to what is best. You need to figure out how much room you have in your case then you can see what the best performing cooler is at that height
|
|
|
|
Noctua L9a |
37 mm |
|
ID Cooling IS-40V3 |
45 mm |
|
Cryorig C7 |
47 mm |
|
AMD Wraith Stealth |
54 mm |
|
ID Cooling IS-60 |
55 mm |
|
ID Cooling IS-50 |
57 mm |
|
Noctua L9x65 SE-AM4 |
65 mm |
|
AMD Wraith Spire |
71 mm |
|
Phanteks PH-TC12LS |
74 mm |
|
AMD Wraith Max |
85 mm |
|
Noctua D9L |
110 mm |
|
Corsair H60 |
Pump – 30mm Radiator/fan - 52mm thick |
One thing is clear right away, the Ryzen 3 1200 can run with any of the coolers tested and in every case the after market coolers are an improvement over the stock Wraith Stealth cooler that it comes with. So most of my focus is on the 1600X and 1800X that push the limits of the coolers more. With the 1600X I was surprised that the Wraith Max was actually the best performing air cooler. With this demanding test you really can only go with the Wraith Spire, Wraith Max, C7, IS-60, D9L and the PH-TC12LS if you don’t want to be thermally limited. Of those, the C7 was the shortest and the IS-60 had the best cooling while still being relatively short.
For the Ryzen 7 1800X things were even hotter as expected. The Wraith MAX once again impressed me being the coolest of the air coolers tested with the stock fan settings. The Noctua D9L was the best air cooler with the fan cranked up but it was the tallest cooler tested. Of course the water cooling, even being just a 120mm kit was still better than the rest but that is only if you can fit it in your case. Overall it is larger than all of the other coolers by a large margin and the tubing was long even in our large ITX case.
The main thing to take from this though is that if you plan on slamming the CPU as hard as the FPU stress test does you might want to stick with a 1600X unless you have room for a larger cooler.
|
AIDA64 FPU Stress Test |
AMD Ryzen 7 1800X |
AMD Ryzen 5 1600X |
AMD Ryzen 3 1200 |
|||
|
|
Stock |
100% |
Stock |
100% |
Stock |
100% |
|
AMD Wraith Stealth |
75c 3292MHz |
75c 3391MHz |
75c 3491MHz |
75c 3541MHz |
47c 3092MHz |
45c 3092MHz |
|
AMD Wraith Spire |
75c 3541MHz |
75c 3591MHz |
74c 3691MHz |
71c 3691MHz |
44c 3092MHz |
39c 3092MHz |
|
AMD Wraith Max |
70c 3691.2MHz |
68c 3691MHz |
64c 3691MHz |
61c 3691MHz |
39c 3092MHz |
37c 3092MHz |
|
Corsair H60 |
56c 3691MHz |
54c |
54c |
54c |
33c |
32c |
|
Cryorig C7 |
75c 3491MHz |
75c 3541MHz |
74c 3691MHz |
72c |
42c 3092MHz |
40c 3092MHz |
|
ID Cooling IS-40V3 |
75c 3516MHz |
75c |
75c |
75c |
45c |
42c |
|
ID Cooling IS-50 |
75c |
75c |
75c 3641MHz |
75c |
43c 3092MHz |
42c |
|
ID Cooling IS-60 |
75c |
75c |
71c |
70c |
40c 3092MHz |
39c |
|
Noctua L9a |
75c 3466MHz |
75c |
75c |
75c |
44c 3092MHz |
40c |
|
Noctua L9x65 SE-AM4 |
75c |
75c |
75c |
70c |
43c 3092MHz |
39c 3092MHz |
|
Noctua D9L |
72c 3691MHz |
65c 3691MHz |
65c 3961MHz |
59c 3691MHz |
39c 3092MHz |
36c 3092MHz |
|
Phanteks PH-TC12LS |
75c 3616MHz |
75c 3641MHz |
70c 3961MHz |
67c 3691MHz |
40c 3092MHz |
38c 3092MHz |
In the second batch of testing with the AIDA64 CPU setting in their stress test the temperature numbers all look a lot more manageable. This test is closer to what you will most likely be seeing when gaming or using your PC in the real world. As you can see we finally weren’t running the CPUs all the way up to TDP so throttling wasn’t an issue this time around. The Ryzen 3 1200 was once again a non-issue with any of the coolers. The smallest cooler the Noctua L9A still ran cool with this CPU.
The Ryzen 5 1600X started to heat up a little more but again even the L9A could handle this while seeing temperatures I would be happy with. Going up to the larger coolers did drop the temps down into the 40s but whatever fits in your build is going to work at this range and load.
Then with the Ryzen 7 1800X, I was surprised to see that this load didn’t really push the 1800X much past the 1600X. The L9A was still able to handle things shockingly with the hottest aftermarket cooler being the IS-50. The Wraith MAX was solid as well, as expected but I’m really digging the Phanteks PH-TC12LS. It is taller but not as tall as the D9Lor the Wraith MAX yet it performed really well here.
|
AIDA64 CPU Stress Test |
AMD Ryzen 7 1800X |
AMD Ryzen 5 1600X |
AMD Ryzen 3 1200 |
|||
|
|
Stock |
100% |
Stock |
100% |
Stock |
100% |
|
AMD Wraith Stealth |
69 |
67 |
65 |
57 |
41 |
36 |
|
AMD Wraith Spire |
62 |
54 |
57 |
50 |
38 |
34 |
|
AMD Wraith Max |
53 |
47 |
51 |
44 |
35 |
33 |
|
Corsair H60 |
44 |
39 |
42 |
39 |
30 |
28 |
|
Cryorig C7 |
60 |
55 |
56 |
50 |
37 |
34 |
|
ID Cooling IS-40V3 |
63 |
57 |
58 |
53 |
39 |
36 |
|
ID Cooling IS-50 |
62 |
60 |
56 |
54 |
37 |
36 |
|
ID Cooling IS-60 |
56 |
54 |
53 |
50 |
34 |
33 |
|
Noctua L9a |
63 |
57 |
63 |
56 |
42 |
39 |
|
Noctua L9x65 SE-AM4 |
60 |
54 |
58 |
51 |
39 |
34 |
|
Noctua D9L |
54 |
45 |
50 |
43 |
34 |
31 |
|
Phanteks PH-TC12LS |
57 |
51 |
54 |
48 |
36 |
33 |
Noise Testing
I couldn’t do all of this testing without taking a look at the overall noise output of each of the coolers right? Going in I wasn’t really sure what to expect really. My experience with the AMD coolers has been really good but against coolers like the Noctuas? Well, it ended up being the Phanteks cooler that blew me away here. With the speeds turned all the way up it was the quietest of all of the coolers. The large fan size does help though, they didn’t have to run it as high of an RPM to keep things cool compared to the C7 and the L9A/L9x65. That said the L9A was right behind, even with its higher RPM. None of the coolers were really loud but the Cryorig C7 and ID Cooling IS-40v3 with their small fan sizes did end up being the loudest air coolers. The Corsair H60 also surprised me here, not only was it a little loud, but I also couldn’t get it to run at anything but 100% for the fan. So while the cooling was great it isn’t going to be a good option for noise.
|
|
50% Fan Speed |
100% Fan Speed |
|
AMD Wraith Stealth |
36.3 |
45.6 |
|
AMD Wraith Spire |
36.4 |
45.6 |
|
AMD Wraith Max |
37.9 |
49.7 |
|
Corsair H60 |
51.9 |
51.9 |
|
Cryorig C7 |
39.4 |
50.4 |
|
ID Cooling IS-40V3 |
40.6 |
50.9 |
|
ID Cooling IS-50 |
36.3 |
45.1 |
|
ID Cooling IS-60 |
36.4 |
45.6 |
|
Noctua L9a |
35.2 |
44.7 |
|
Noctua L9x65 SE-AM4 |
35.1 |
47.1 |
|
Noctua D9L |
35.3 |
45.9 |
|
Phanteks PH-TC12LS |
34.1 |
42.9 |
Overall and Final Verdict
So like I mentioned in the performance section, at the end of the day there is no way to pick any one cooler as the winner here. There are just too many variables with the amount of room you have in your build being the biggest one. Obviously, if you can wedge in a 120mm AIO into your new SFF build that is going to be the best option for cooling. But a lot of the really small cases don’t have that kind of clearance. Not to mention it was noisy.
It is also going to depend on the CPU you need and just how much load you plan on putting on it. If you are going with the 1800X and you need to be able to run a full FPU stress test on it for hours on end really the only options are the Wraith MAX, the Noctua D9L or the H60. Those are the only three that didn’t thermal throttle. Doing the same test with the 1600X had the Wraith Spire, Wraith Max, Cryorig C7, ID Cooling IS-60, Noctua D9L and the Phanteks PH-TC12LS all handling the load. Then with the Ryzen 3 1200, every cooler would work.
A few coolers did stand out though. The Phanteks PH-TC12LS has to be the best-looking cooler that I tested. It also was the quietest and didn’t do a bad job with the mid range loads. The Noctua D9L was a monster for its size for both cooling and noise but it is a little taller than I think most SFF builds will take (it is a great pick if you are building in a Case Labs Bullet BH7 or smaller though). The Cryorig C7 was the best performing low profile cooler and the Noctua L9A was the lowest profile cooler and was surprisingly quiet. Then you have to give props to the AMD Wraith MAX for its performance as well.
I also went through and put together a pricing list. What I found was the H60, Wraith MAX, and two of three Noctua coolers were all on the high side. So if you are building on a budget you have to keep that in mind as well. The Phanteks seems to be a good value for what you are getting, as is the Cryorig C7, and the ID Cooling coolers.
|
|
Price |
|
|
AMD Wraith Stealth |
Comes with R3 1300X and R3 1200 |
N/A |
|
AMD Wraith Spire |
Comes with R7 1700 (RGB), R5 1600, and R5 1500X |
N/A |
|
AMD Wraith Max |
$59.00 |
|
|
Corsair H60 |
$64.99 |
|
|
Cryorig C7 |
$29.99 |
|
|
ID Cooling IS-40V3 |
$24.99 |
|
|
ID Cooling IS-50 |
$36.99 |
|
|
ID Cooling IS-60 |
$44.98 |
|
|
Noctua L9a |
$39.95 |
|
|
Noctua L9x65 SE-AM4 |
$49.95 |
|
|
Noctua D9L |
$54.85 |
|
|
Phanteks PH-TC12LS |
$39.99 |
It's funny, you would think after all of this testing I would have one or two coolers that I would be jumping up to recommend. In the end, most of the coolers I tested were actually really good, but none of them are perfect. I hope a few people will be able to use the information I have put together to pick out the cooler that works best for them though. I know I will be referencing back to it later as I get into builds.


