Installation and Performance
So before getting into testing, I did need to get the CLC 280 installed on our test bench. The test configuration is our X99 board so I was able to keep the Intel bracket that came pre-installed on the cooler. Combine that with the pre-installed fans and the water block having thermal paste already applied made installation extremely easy. To get the block mounted I just had to find in the accessory bags the four 2011 socket risers that screw into the sockets mounts and raise up the mounting points. From there you have to also find the four big thumbscrews. They have grips to be installed by hand or a Philips head on top to be screwed in.

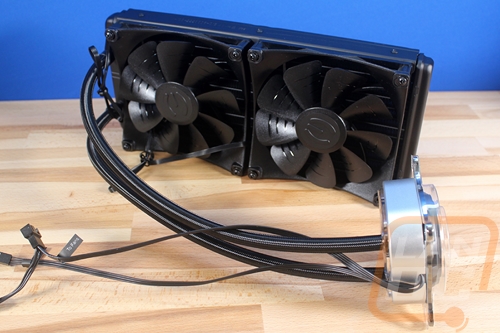
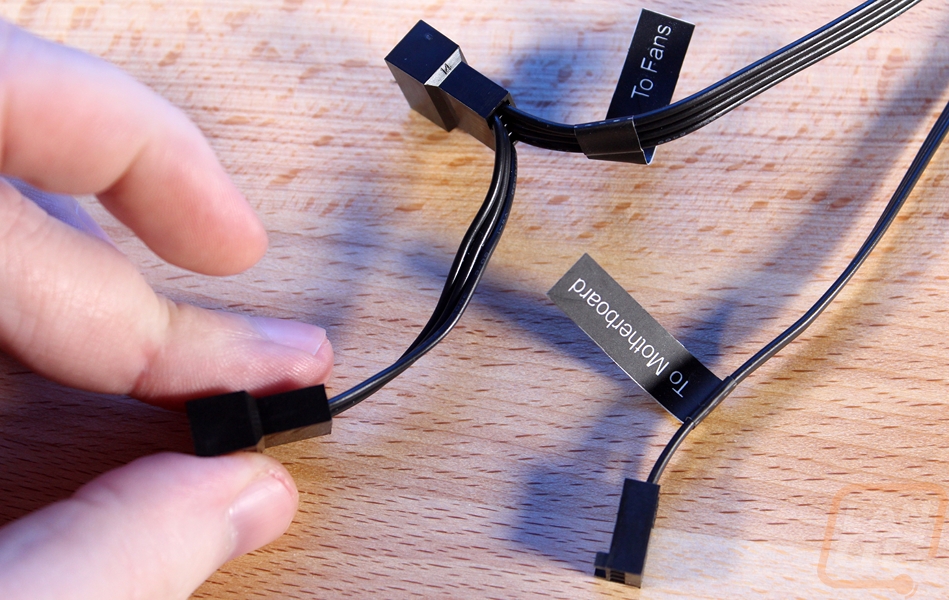
From there I had to mount the radiator, like I said the fans come pre-installed so I just had to use the included screws to mount it to our test bench. Sadly the hoses weren’t long enough to reach for a proper installation so I mounted it vertically so they would reach. From there I just had to wire everything up. Normally you have to hook the two fans up to the motherboard directly or with a splitter but EVGA went with a unique design that powers the fans from the controller itself. So you hook one wire up to the motherboard's CPU fan header and then there is a second fan lead that you hook both fans up to. Both are labeled as well to help. Then lastly you take the included USB cord and hook it up to a USB 2.0 header on your board and then into the water block. It is right-angled for better clearance but I did have to remove the ram from our test system to hook it up then reinstall the ram and It was tight going back in, so keep that in mind if you are installed the CLC 280 on a board with ram slots close to the CPU socket like on X99 boards.
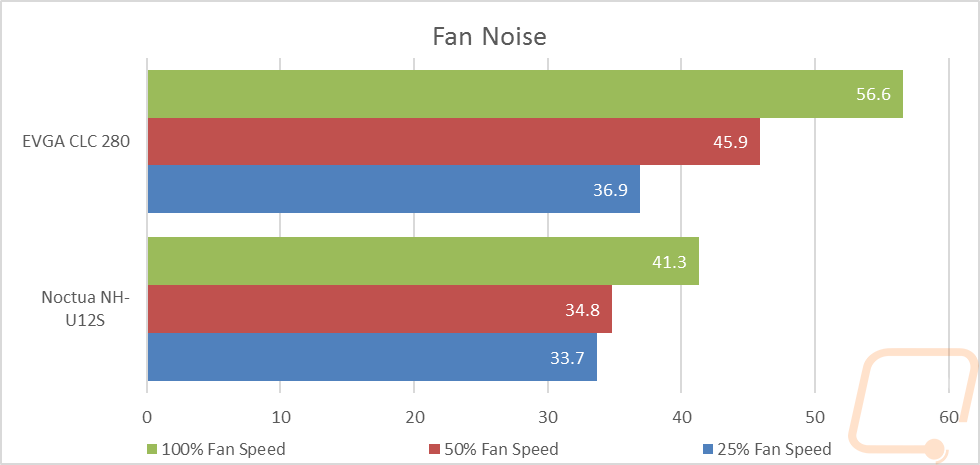
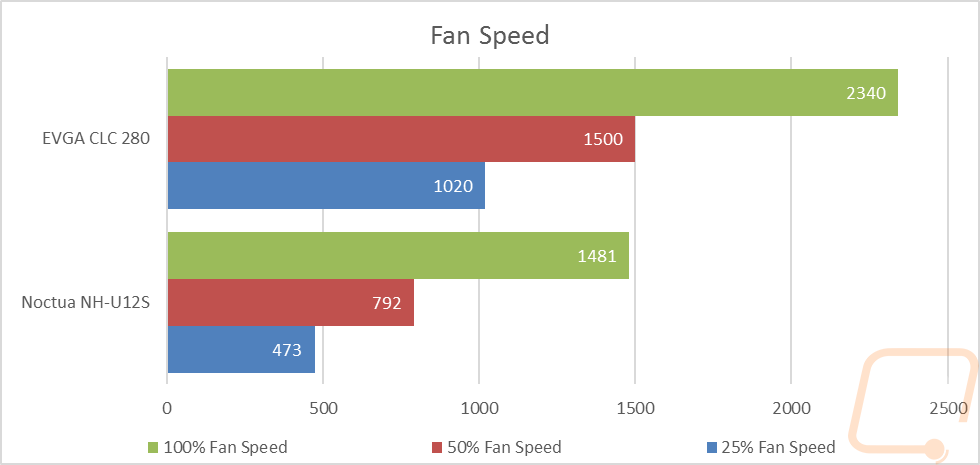
To start off my testing I tested the two fans included with the kit at three different fan speeds. I ran at 100%, 50%, and 25% to get a good look at the range and I documented both the RPMs and the noise levels with those. Because we also replaced our decibel meter I also retested the Noctua NH-U12S as well. The fans maxed out at 2340 and even at 50% fan speed were actually at the highest speed the Noctua cooler reached so I wasn’t too surprised when the CLC 280 was significantly louder. The kit is also running two fans and they are also larger as well and frankly in person at 100% fan speed, it was loud and even scary with those exposed blades at that speed. Down at 25%, the kit was very quiet though.
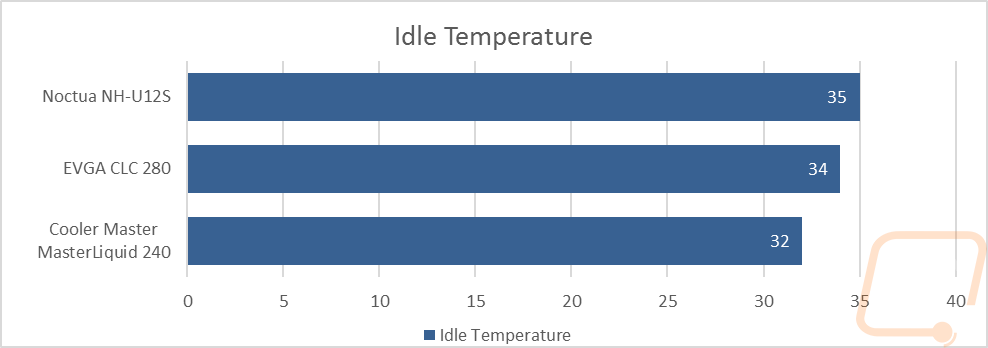
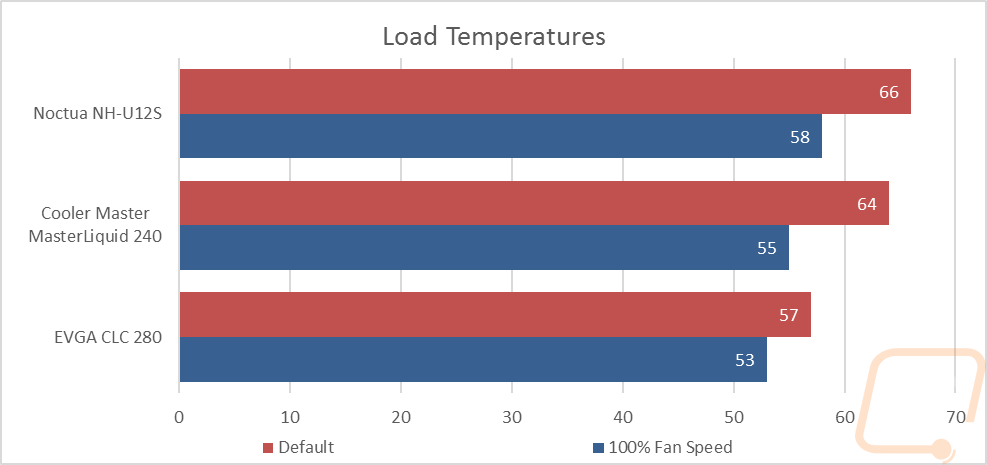
Then for temperature testing, I documented the Idle temps and then heated things up with Prime95 to see how well the kit cooled. Going up against a single fan air cooler and a smaller AIO did give the CLC 280 an advantage though. The end results were really good with the kit running the coolest out of the three tested. I tested with the stock fan profile and again with the fans cranked up and it was especially better with the stock fan profile. I will say that the kit never really had to crank up into the 50 and 100% fan speeds, even when putting it under load so that did help a lot with the overall noise performance.
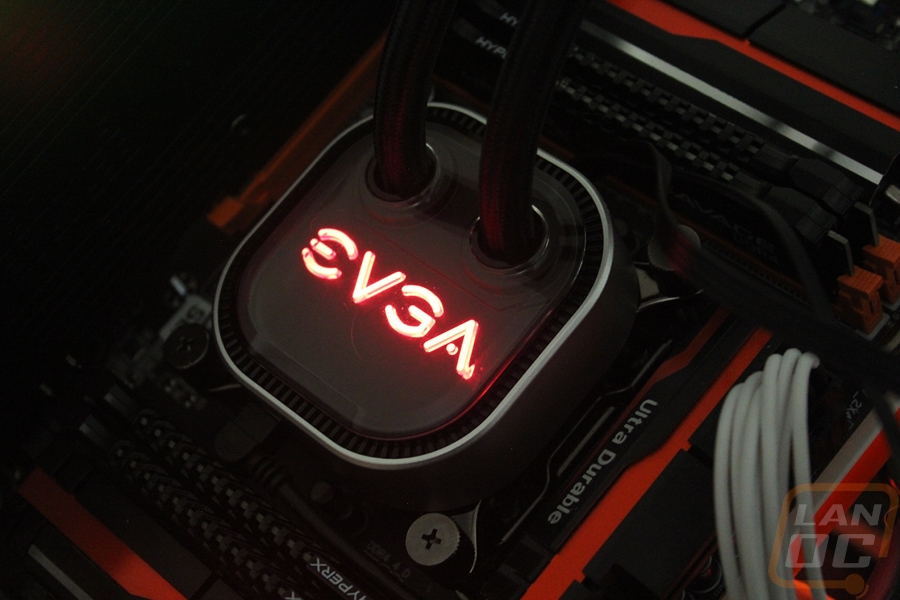
I was also impressed with the lighting on the CLC 280. The backlit EVGA logo on top of the kit was simple but with the RGB lighting, I was able to adjust it to different colors. Orange was still an issue, for whatever reason, it is rare to be able to get a good orange with an RGB kit and the CLC 280 couldn’t even get close so you may have to toy with it a lot to get your colors perfect.