Installation
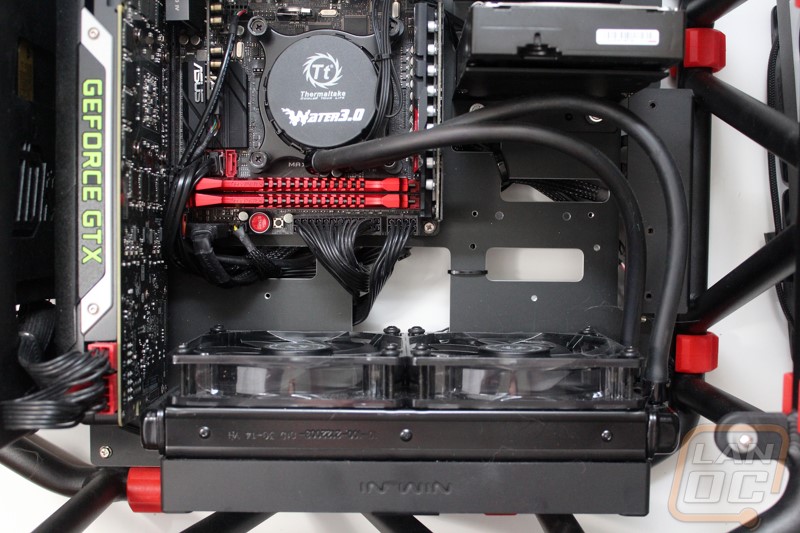
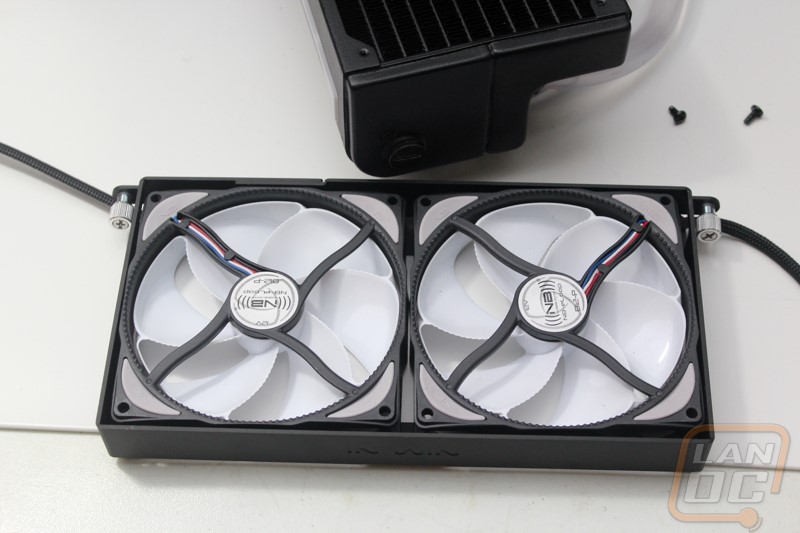
Before I can get into my testing I did have to get the H220 X2 Prestige installed first. Frankly the installation for the kit isn’t much different than a normal AIO water cooling kit but the kits design with normal custom water cooling parts and compression fittings did mean I could go above and beyond when installing everything. Specifically the whole point of getting the kit in was to give one of our LAN rigs an upgrade so with the build being a little smaller I wanted to make sure the kit fit perfectly and I also used the included Mayhem dyes to tint the coolant to match the rest of the build. First off this is what I was working with before, a standard AIO kit with four 120mm fans in a push pull configuration. The fans all have red lighting as well to match the build but in this case I really wanted to try out the Noiseblocker NB-eLoop fans included with the prestige kit. So I started off by pulling the old kit out.
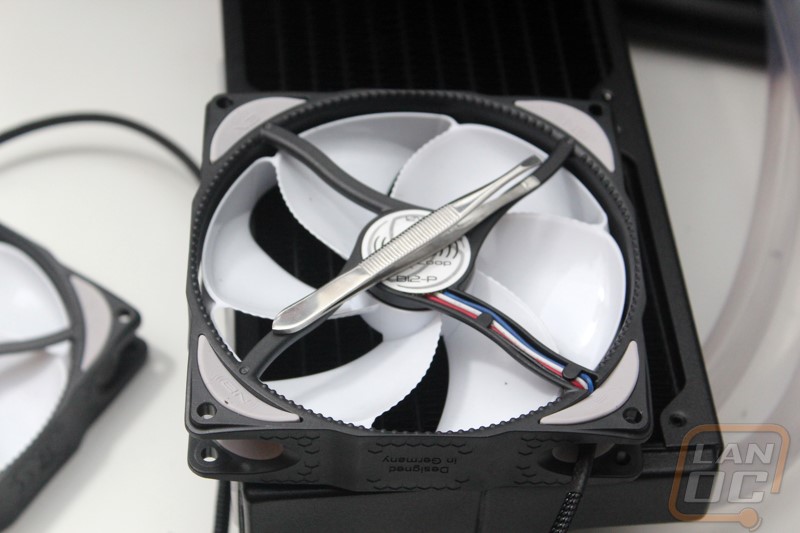
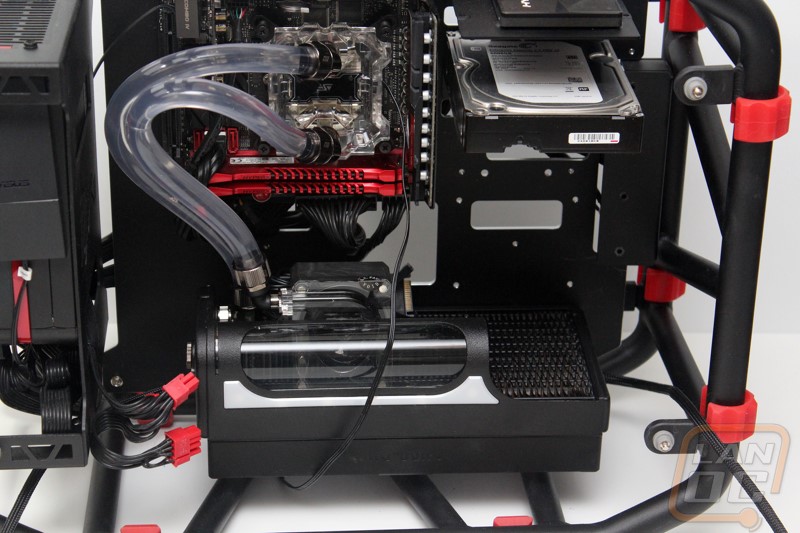
Because I needed to install the fans into the fan tray of the D-Frame I had to remove them from the kit. Funny enough when I did this I actually found a pair of tweezers stuck to the magnet and hidden perfectly by the thin plastic mount. I dropped both fans into the tray making sure to line the cables up for the best wire management. From there I used the longer radiator screws to reach all the way through the fans to the radiator because the original screws were much shorter. Screwing the fans in was all it took to get the radiator/pump/reservoir combo of the H220 X2 installed. This just left me installing the Apogee XL2 waterblock. Basically I mounted the backplate using the four included nuts. Then the waterblock screws onto those four nuts with the preinstalled spring loaded screws. Of course in between that I also installed thermal paste as well.
With the kit installed from there I just had to get it wired up. This is the only part of the installation that is more complicated than a normal AIO water cooling kit. To power everything you have to find a place for the PWM fan splitter to mount, it uses double sided sticky tape on the back to stay in place. You power everything with a SATA power (there is a second SATA power needed for the pump itself as well) and then you have to hook up the splitter to the CPU fan header. Once hooked up you just have to run the two fan wires, the pump wire and the lighting wires. They all have to be in the correct spots as well so not only are you trying to keep a whole mess of wires clean but you need to get everything hooked up correctly.
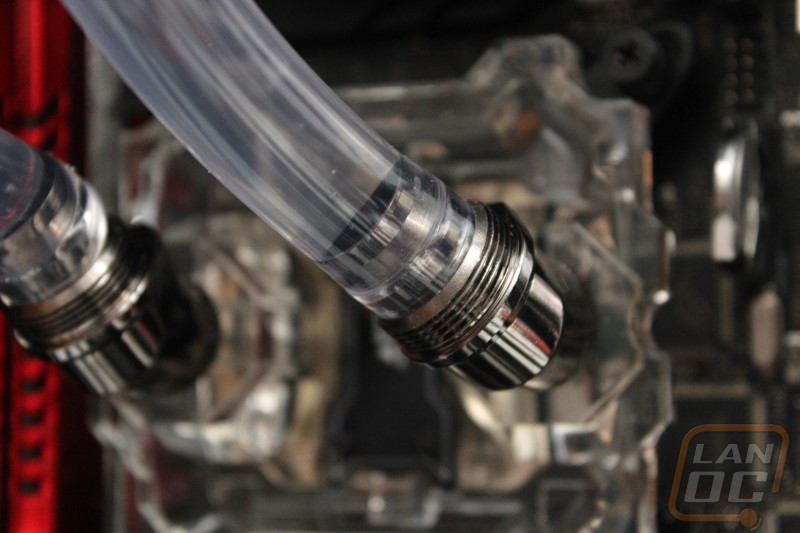
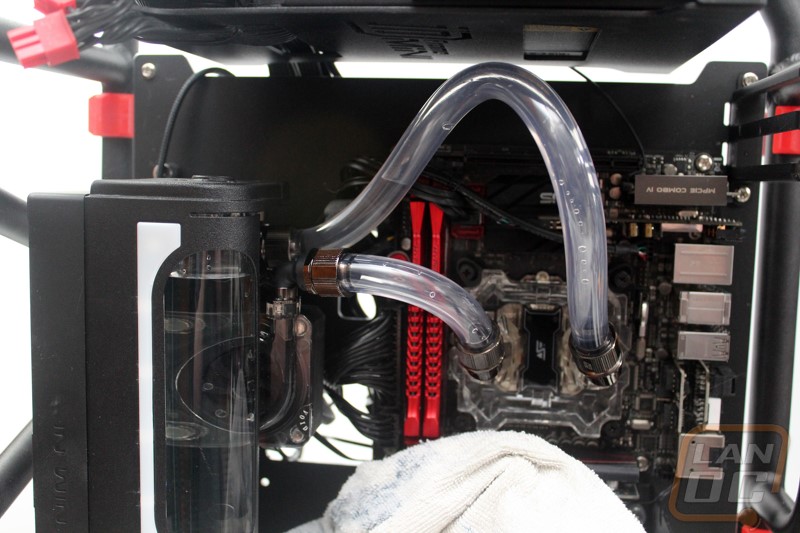
Before powering everything up I noticed right away that the tubing length on the H220 X2, while perfect for a normal sized build, was going to need to get a little shorter for our ITX build. Shortening the lines would also help take a lot of the bind out of the tubes and take pressure off of everything. To do that I had to undo the compression fittings by unscrewing the cap and sliding it up the line. From there I put a towel down and pulled the first line off and drained the line.
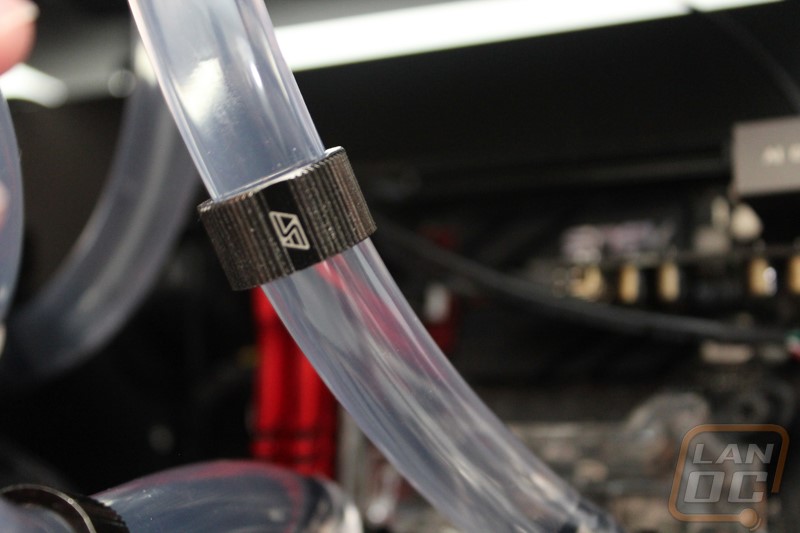
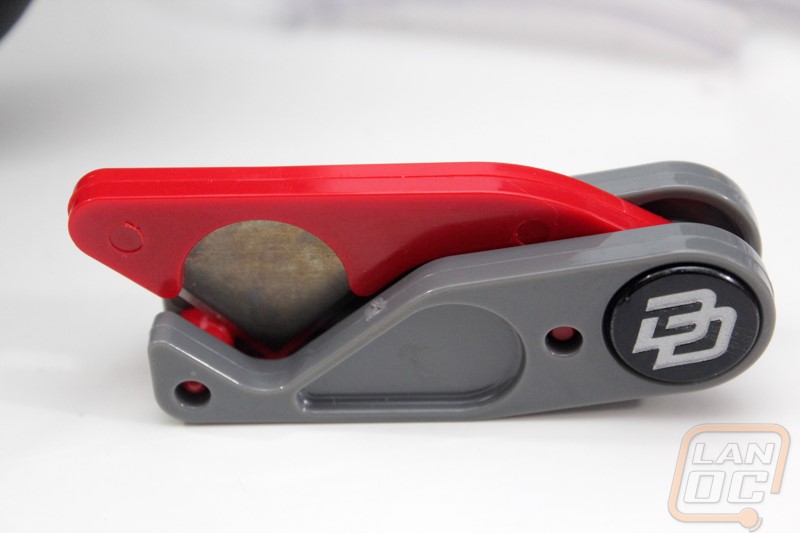
To cut the line there are a few different types of tubing cutters, I normally use a larger model but because I was working in the case I used my trusty Danger Den razer cutter.
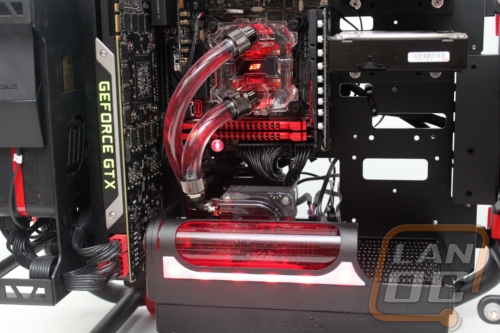
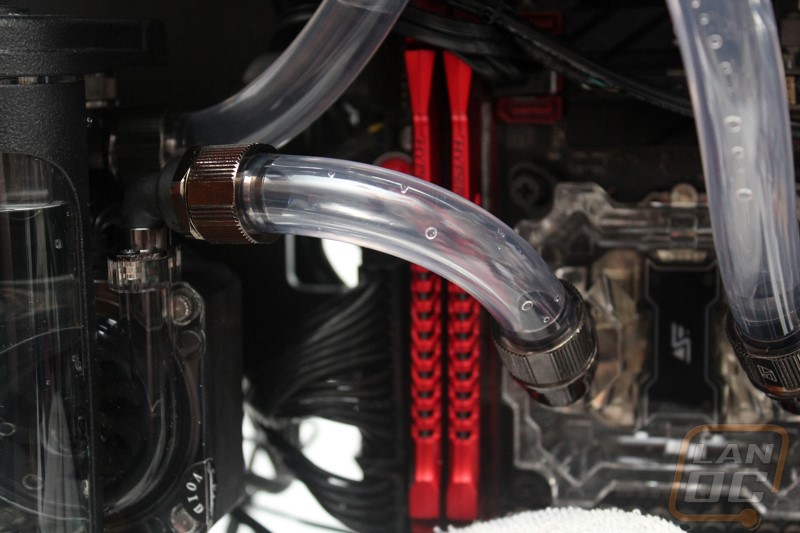
I cut the lines shorter one at a time and reconnected them. As you can see below the difference was night and day. The shorter lines took all of the pressure off of the fittings and looked like a completely custom kit. Once I had everything together I turned everything back on and leak tested.

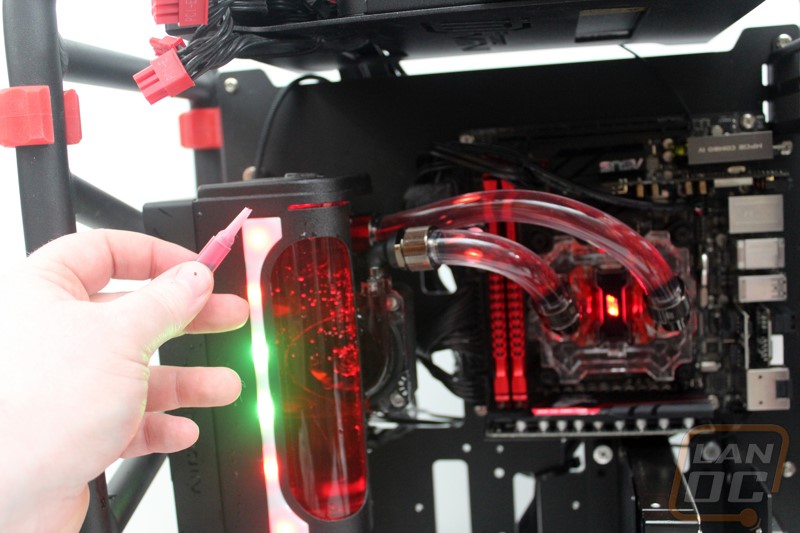
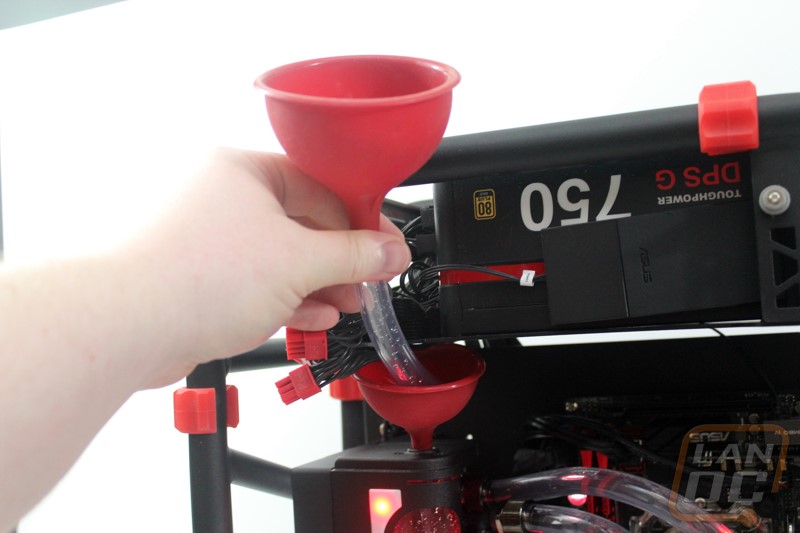
As you can see I did lose a lot of coolant when doing this. I replaced the coolant with distilled water by removing the fill port on the end of the radiator and topping everything off. It is important to note that the fill port is a little finicky because there is a radiator wall basically just inside of it so when filling it you need to make sure the system is turned off and you have to hold your funnel up slightly so the wall doesn’t block the end of the funnel. Doing all of this inside of our case was a lot tighter than I would have liked as you can see from the photo below. I ended up pulling the radiator out of the case slighting to speed things up. Once filled you will still have to fight with getting all of the air bubbles out as well. Let me be clear, the kit when shipped had no air bubbles, digging into everything did open up the loop to having air in it. I had to turn the case every which way and work most of the bubbles out.
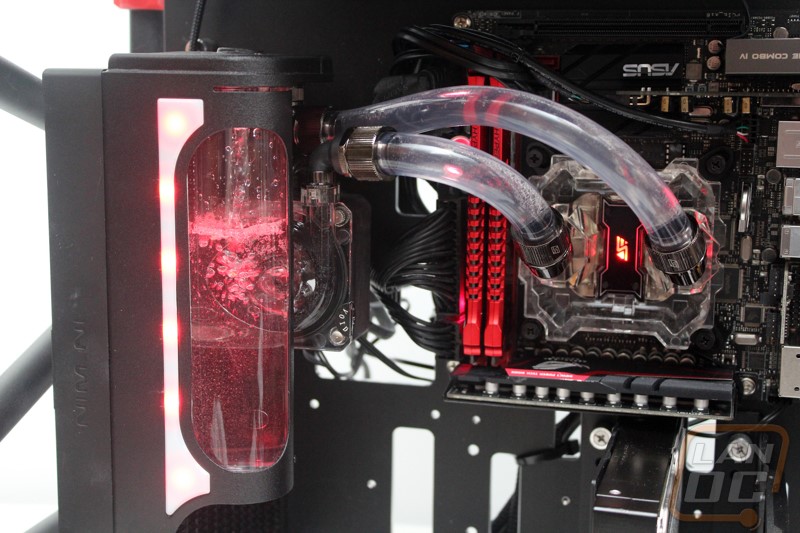
Last but least with it all together I pulled out the three pack of tiny Mayhems dyes that Swiftech includes and dyed the coolant red to match our build. You just put drops into the fill port until the coolant matches what you are looking for. This means you can mix all three colors to get the perfect color.