It is easy to get carried away with size and bulk in the air cooler market. Many tower coolers have moved on to incorporate 140mm fans into their designs and push the limits on available board real estate around the CPU socket. Still there is a market for value market air-cooling that doesn’t take up space and still gives you competitive performance for your dollar. Recently we took a look at the NH-U12S and today we are back with a smaller cooler offering by Evercool. This four heat pipe 120mm air cooler promises to offer you a cooler processor without the need to hand over your wallet. Join me as we take a look at the Venti and see if this budget cooler is worth your time and money.
Product Name: Venti
Review Sample provided by: Evercool
Review by: Debo
Pictures by: Debo
|
Specifications |
|
|
Cooler Unit |
|
|
Model Number |
HPQ-12025 |
|
Material & Finish |
Aluminum fins / copper heatpipes |
|
Socket Compatibility |
Intel: LGA 775/1155(1150)/1156/1366/2011 AMD: AM2(+)/AM3/FM1 |
|
Dimensions |
125 x 68 x 160mm |
|
Weight |
588g (w/ fan) |
|
PWM Fan |
|
|
Dimensions |
120 x 120 x 25mm |
|
RPM @ 100% |
2200 rpm |
|
Airflow |
128 m3/h; 75.13 cfm |
|
Noise @ 100% |
38.1 dB(A) |
|
Lifetime |
60,000hr |
Packaging
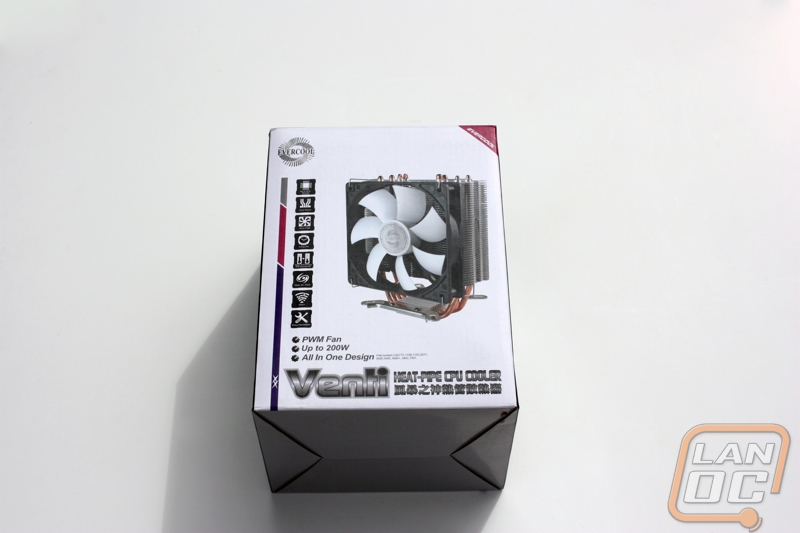
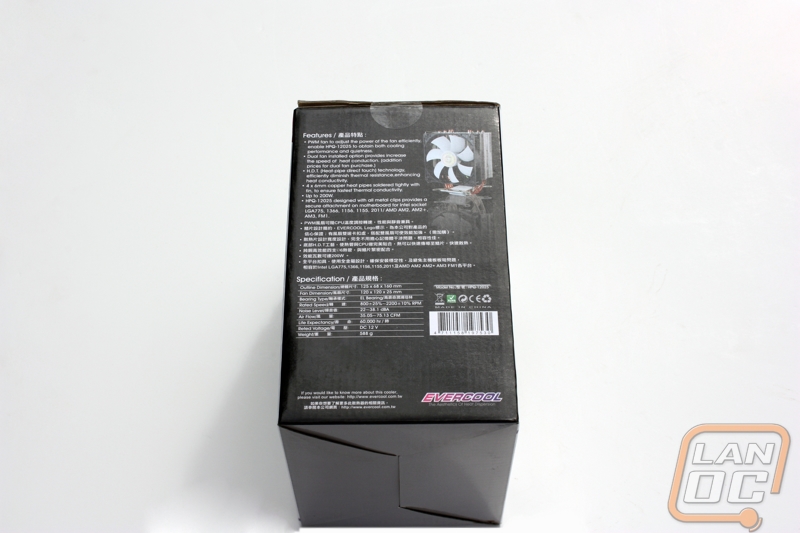
The Venti comes in basic consumer packaging with a mostly white and black color scheme. On the front of the box we get our first look at the cooler along with the ever popular bubble point features. The back of the box is a mirrored copy of the front, so there isn't anything different to see there.
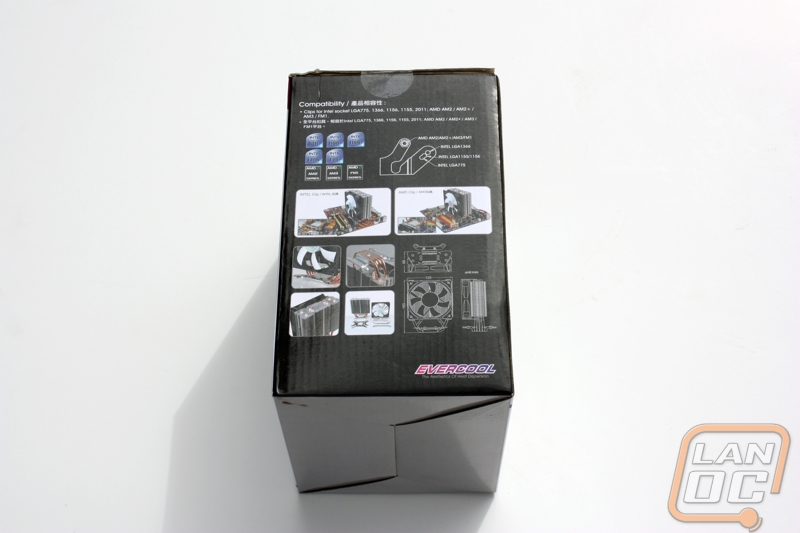
On the first side of the box we get our socket compatibilities as well as a wire drawing laying out the Venti’s dimensions. One thing to note here is the coolers impressively thin profile at only 68mm even with a single fan installed. Included here are also a few photos of the cooler out of the box.
The other side of the box lists off our features and specifications. A few things of note from here is the fact that the Venti is a direct contact cooler meaning the copper heat pipes make direct contact with the processor instead of running through a contact block like most coolers we have reviewed. Another thing to note is the Venti actually allows the option to install a second fan if you wish.
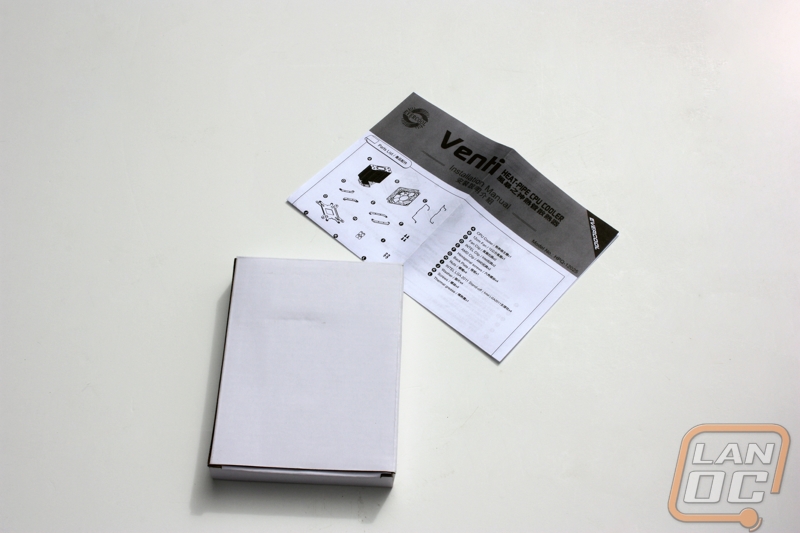
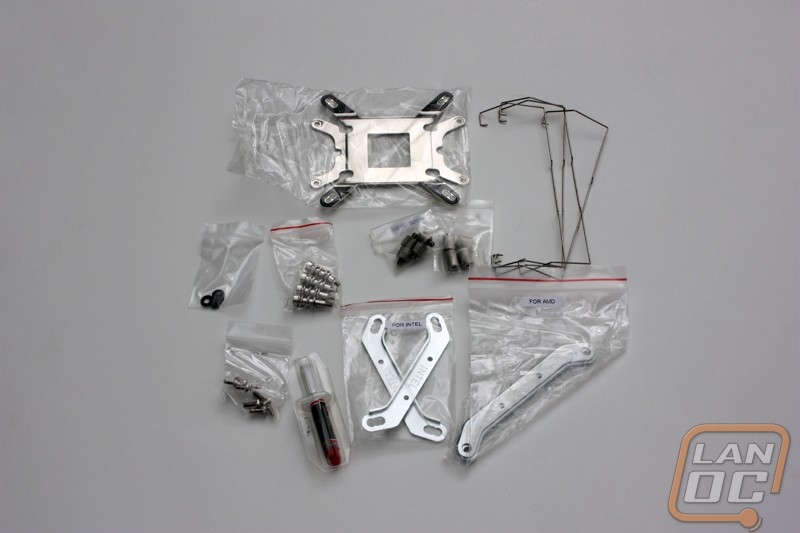
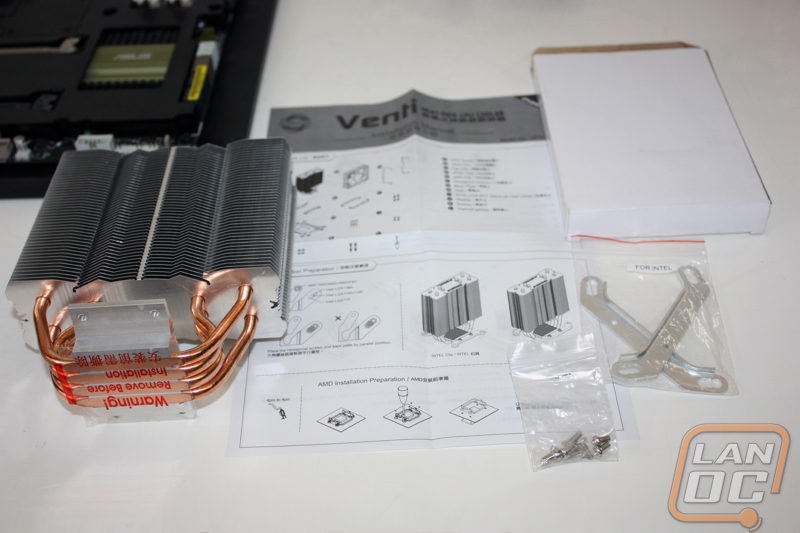
With the outside covered we are free to dig into the Venti’s contents where we first find our installation accessories packed away in a simple white box alongside our installation guide. While a second fan is not included with the Venti, Evercool is nice enough to supply a second set of fan clips should you wish to install one. All the parts for installation come tucked away in separate little bags as well as a small tube of T-grease 800 Series thermal compound.
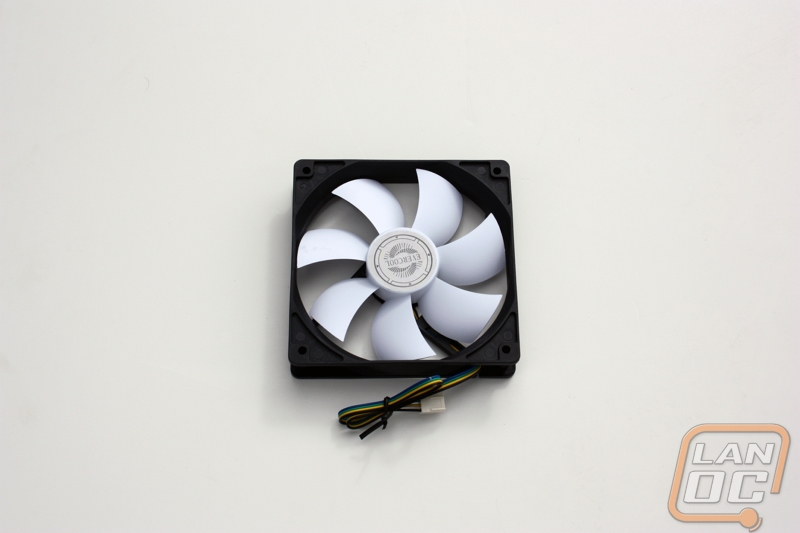
The PWM fan included with the Venti to move air across the fins is quite the powerhouse at 2200 rated rpm and over 75 rated CFM. The unfortunate tradeoff is the fans higher than usual noise level rating which means we can expect, more than likely, the noise level during our peak test isn’t going to impress. The case fan rating does make you wonder about how performance will be affected, however.
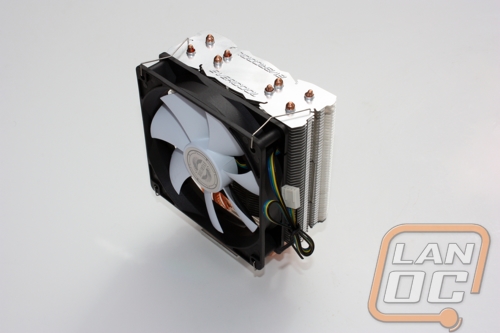
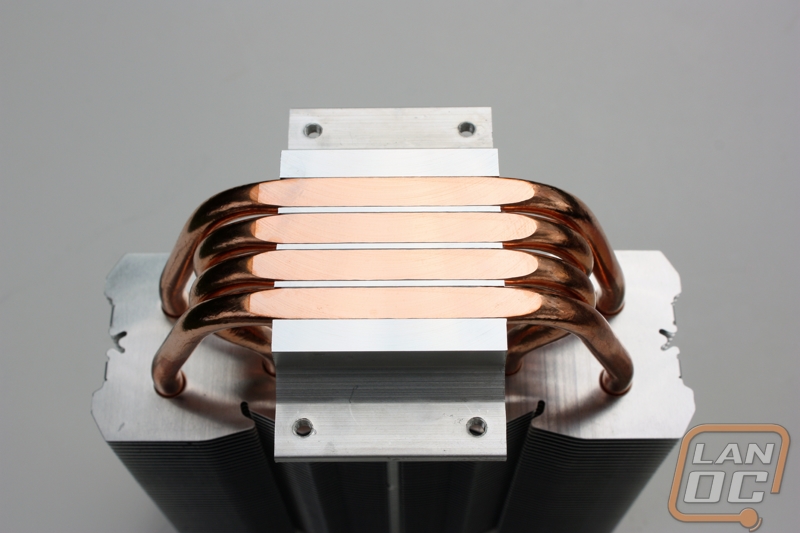
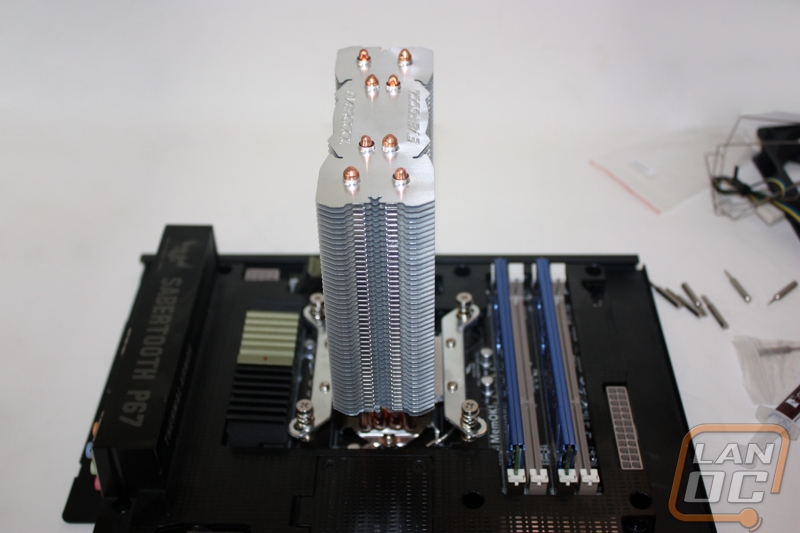
Finally, we get our first look at the Venti main unit and the first thing you notice is the eye-catching copper color of the four heat pipes. Unlike most coolers the heat pipes do not have the usual plating which gives the Venti a unique styling. This choice is likely due to the Direct Contact design of the cooler. Each of the fins is soldered directly to the heat pipe for maximum heat dissipation though unlike what we have seen with recent Noctua heatsink reviews, the sides of the fins remain in an open orientation.
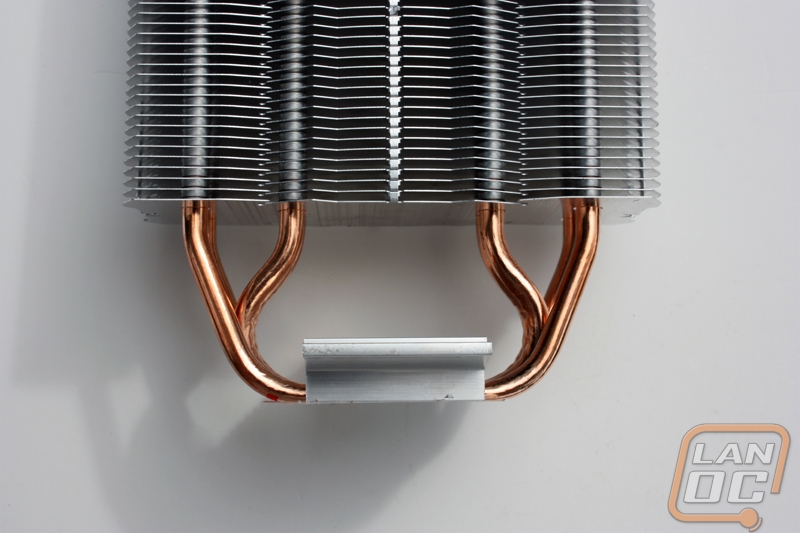
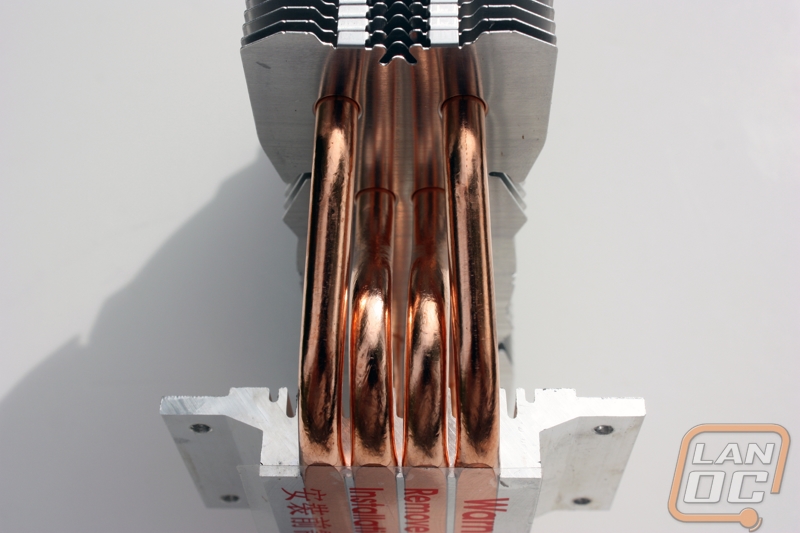
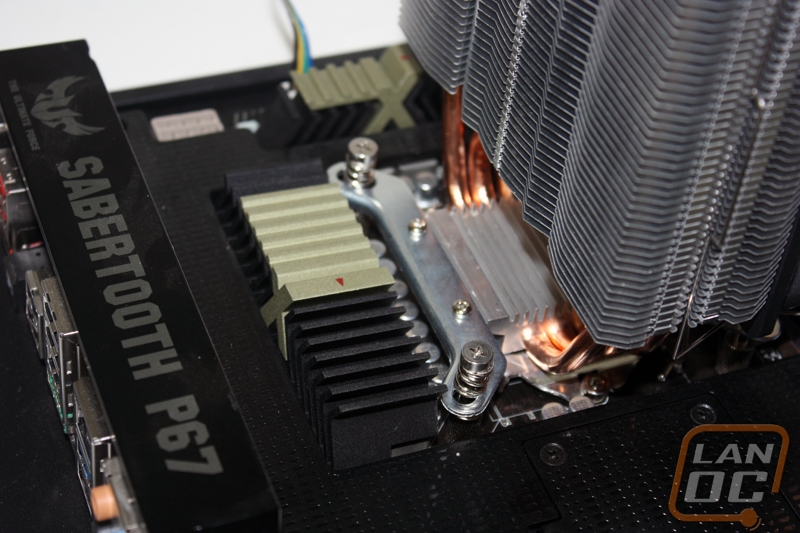
Next, we take a look and the heat block and the direct contact design that has the heat pipes making direct contact with the thermal paste on processor. This design is something of a rarity because of the amount of engineering required to eliminate bumps, crevices and imperfections in the blocks face due to the individual heat pipes but Evercool’s tooling here looks spot on with a similar tooled finish we’ve encountered in other reviews.
Testing Methodology
Our testing rig is as follows:
• Processor: Intel Core i5-2500 @3.3GHz
• Motherboard: Asus Sabertooth P67
• HDDs: Seagate Barracuda ES.2 1TB
• RAM: 8GB Kingston DDR3 1600
• Video Card: NVIDIA GeForce GTX 760
• Case: CoolerMaster xB
• OS: Windows Home Premium x64
A total of two tests will be run. These tests are as follows:
• A Peak Test with the supplied cooler and fan setup running Prime95 for a total of 30 minutes.
• A Real World Test using the supplied cooler and fan setup running 3DMark 11 for a total of 30 minutes.
The Peak Test is meant to test the absolute worst case scenario you could throw at your perspective cooler and will both be conducted with the CPU fans running at 100% RPMs under load. The real world test is something a bit less stressful, meant to give you an idea of the coolers performance in a more day-to-day sense.
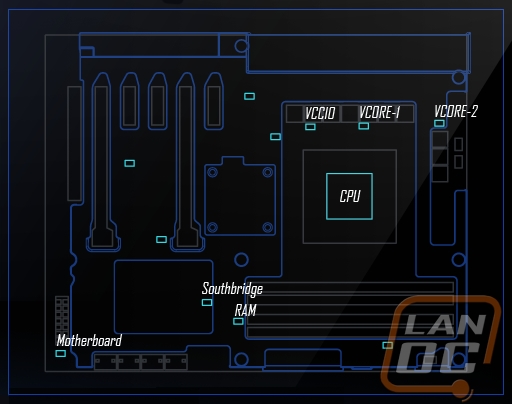
All tests will be performed using Noctua NT-H1 thermal paste in order to eliminate that variable from testing. CPU temperature reading will be taken using RealTempGT, RAM DIMM temperatures will be taken with a non-contact infrared thermometer and the remaining temperature results will be taken using the Sabertooth P67’s own temperature sensors using the following layout.
The Peak test will also be subject to noise level measurements taken with a digital sound level meter every 10 minutes throughout the test to be averaged into an overall comparison score during both load and idle timeframes.
Installation
We will be installing the Evercool Venti to our test bench using the included installation guide. Our test bench uses an Intel LGA1155 CPU but due note the other sockets and processors the Venti has support for.
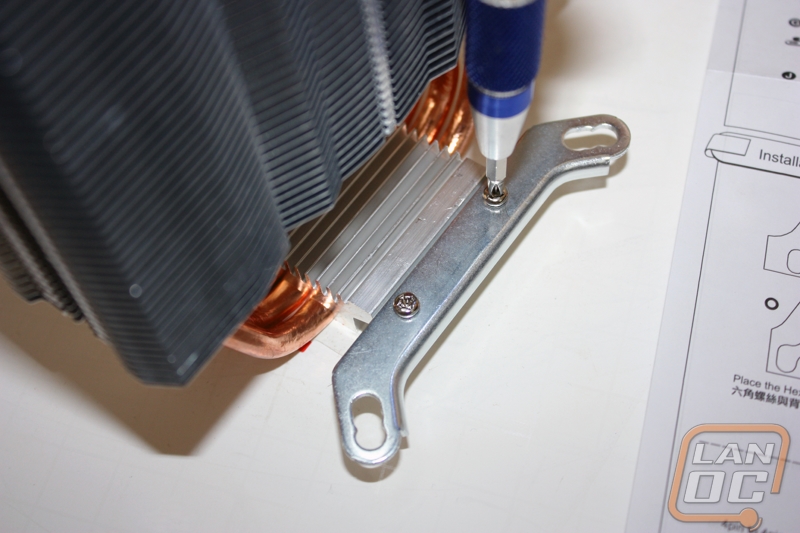
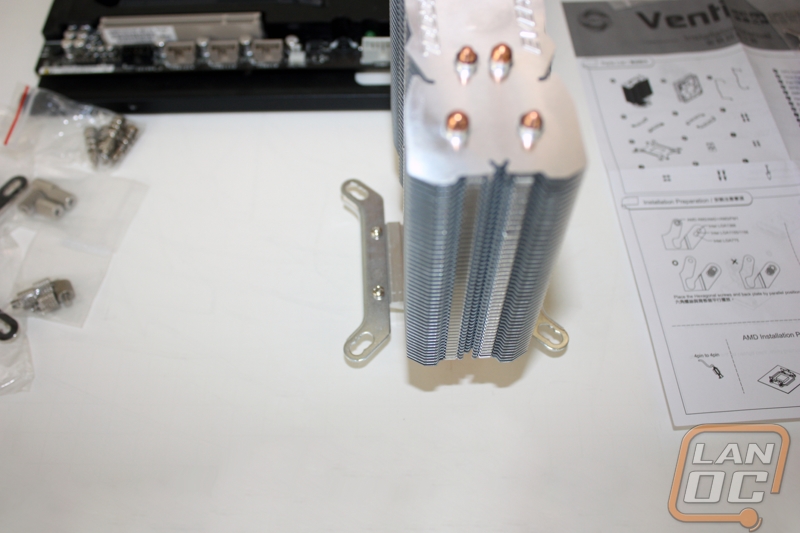
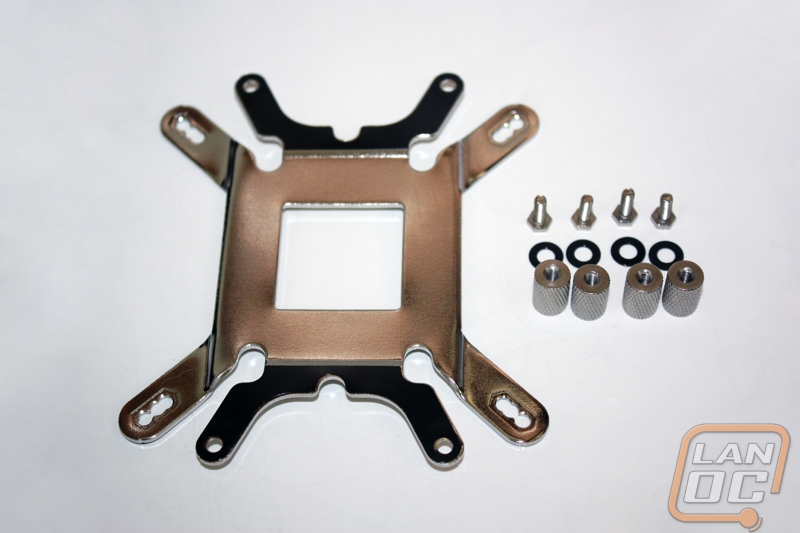
The first step is attaching the Intel brackets to the CPU block. This is as simple as lining up the included screw with the holes on the wings of the block and tightening them down. Each side has a pair of screws and the whole ordeal is incredibly simple as both the Intel and AMD mounting bracket piece are designed in a way that they cannot be attached upside down or in reverse.

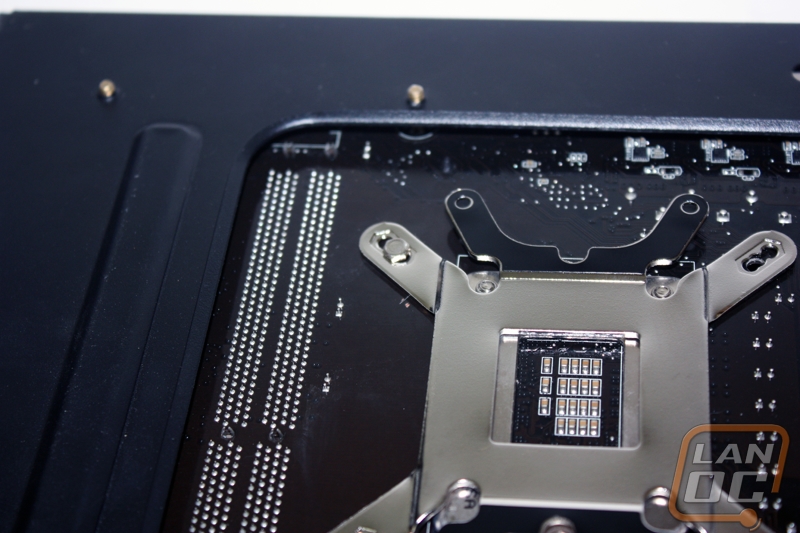
With that done we move on to securing the backplate, which is quite the adventure after our past few reviews. The Venti’s backplate installation borders on a three hand job as the whole setup requires thirteen parts and lacks the help of any adhesives. First, you must orientate the backplate onto the rear of the motherboard and then thread one of the screws through the correct hole. When this is complete, you need to thread a plastic spacer over the screw and screw down a metal spacing screw to secure the whole thing together. Upon doing this four times the backplate is secured in place and ready to go. I found that taking each screw one at a time and holding the backplate and screw in one hand while tightening down the spacer screw with the other was the best method. Installing the backplate is a job I would likely suggest performing before installing the motherboard into your case if you do not have a removable motherboard tray.
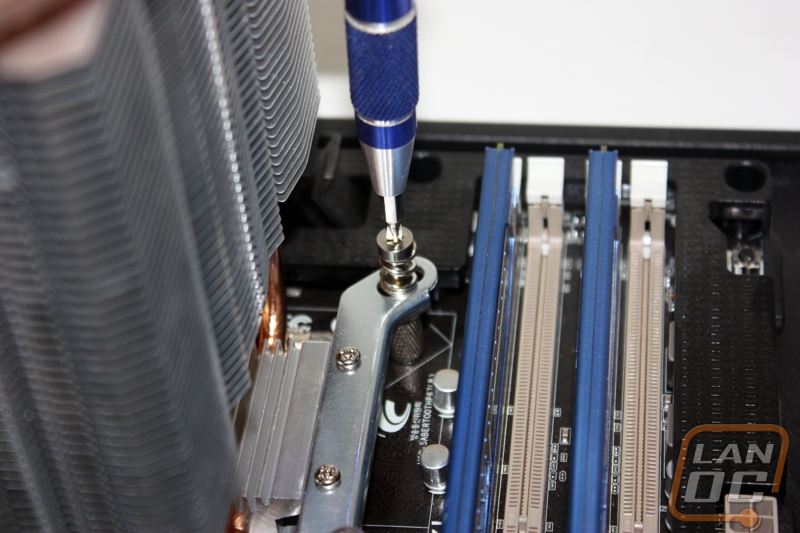
The backplate is, by far, the hardest part of the ordeal as all that is left is to tighten the cooling block down and secure it to the processor. This is accomplished by four constant tension spring screws which are another simple line up and screw down task. With that down you have your Venti cooling tower installed. The fan can attach to either side of the tower with a pair of two of the metal clips.

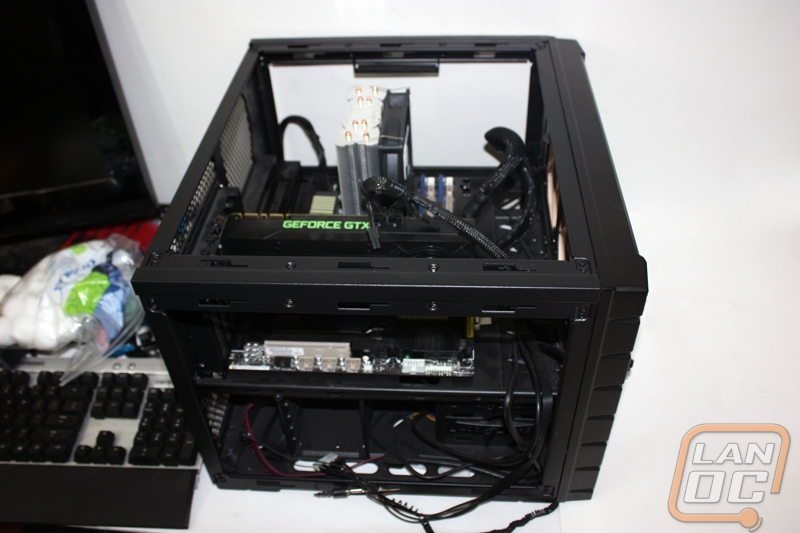
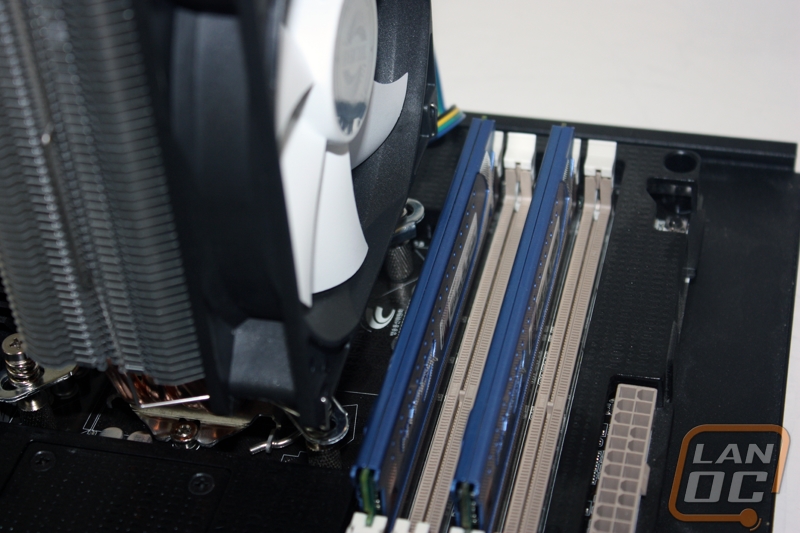
Once fully installed you can see the sheer amount of room available around our RAM DIMMs, board heatsinks and fan connections which is always a nice thing to see.

Performance
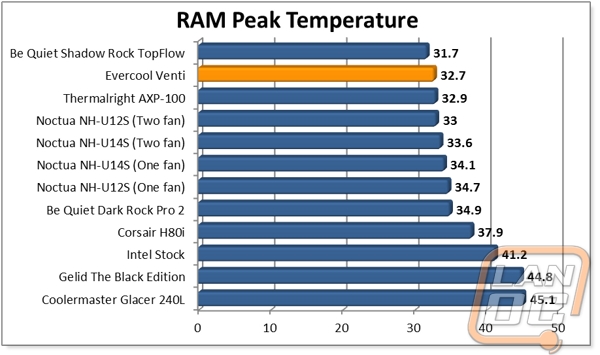
I was expecting big things from the Venti’s direct contact design and in our peak test this little 120mm tower cooler did not disappoint. The pure copper heat pipes and powerful fan managed to dissipate more heat than any other 120mm air cooler we’ve tested to date, even beating out the two fan orientation of the NH-U12S handily in processor temps. The RAM test results are also quite impressive with the powerful 75 CFM sitting right on the RAM DIMMs during operation and providing comparable performance to top down designs.
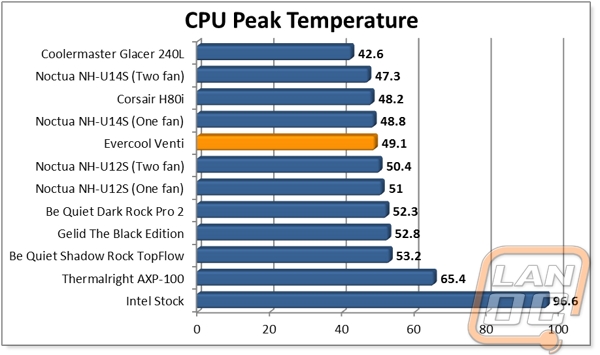
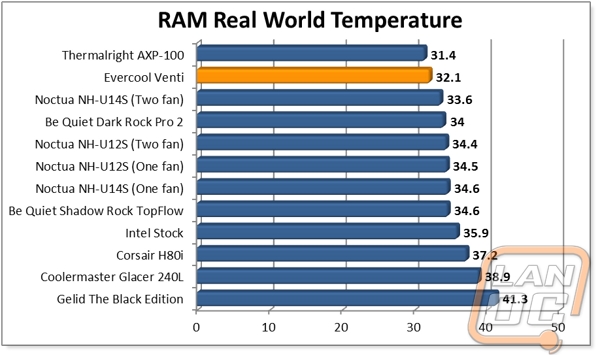
In our real world tests, the Venti kept the cool air flowing as it even managed to best the much larger Dark Rock Pro2 in a more real world environment. RAM temperatures were more of the same as well as the Venti cemented itself as one of the best dual purpose coolers we’ve run through our test battery.

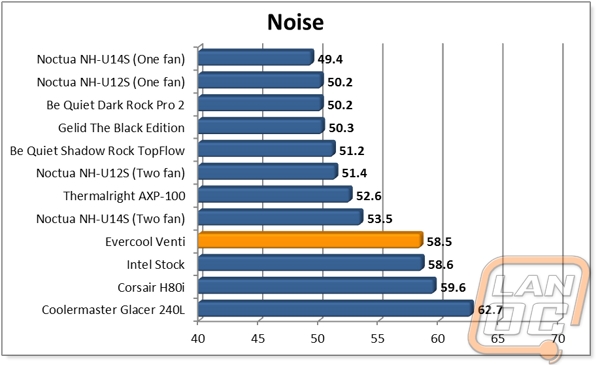
I said earlier in the review that the Venti’s included PWM fan boasted and abnormally high sound rating at 100% operation and it is here where we find the coolers only failing with dB(A) ratings nearly mirroring a stock air cooler. Still this isn’t much of a downfall if you look at the pure performance gains for nearly equal sound. The emitted sound at 100% operation is not distinct or whiney and could probably been curve with the addition of some form of vibration absorbance.
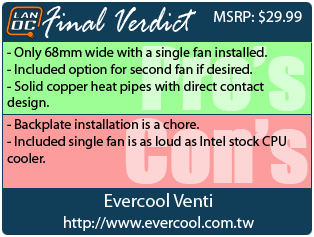
Overall and Final Verdict
After testing, the Venti finds itself atop the ladder for 120mm CPU coolers we’ve run through our battery and that is an impressive feat for what most would consider to be a small value cooler. Even with only a single fan, the Venti manages to come in at a very thin 68mm which offers much in the way of board real estate which is all too important in the world of air cooling. The direct contact design and the natural looking copper heat pipes are also nice to see and coupled with the powerful included fan the whole package seems to be aimed at pure performance overs on a budget.
The backplate installation is a chore to be sure and something I would like to see improvements made on. The included fan, as previously stated, is just as loud as a stock cooler but for so much more of an increase in performance. Whether this is a downside is really up to the individual to make the call but I still have to list it as something going against the Venti in this market dominated by silence.
Most companies play it safe with budget cooler designs but Evercool didn’t and it shows through brightly with the Venti. If you’re on a budget and working with the limited space of a mid-tower or other similarly small space builds you can do far worse and if noise is not an issue, give the Venti a strong consideration.