Installation and Performance
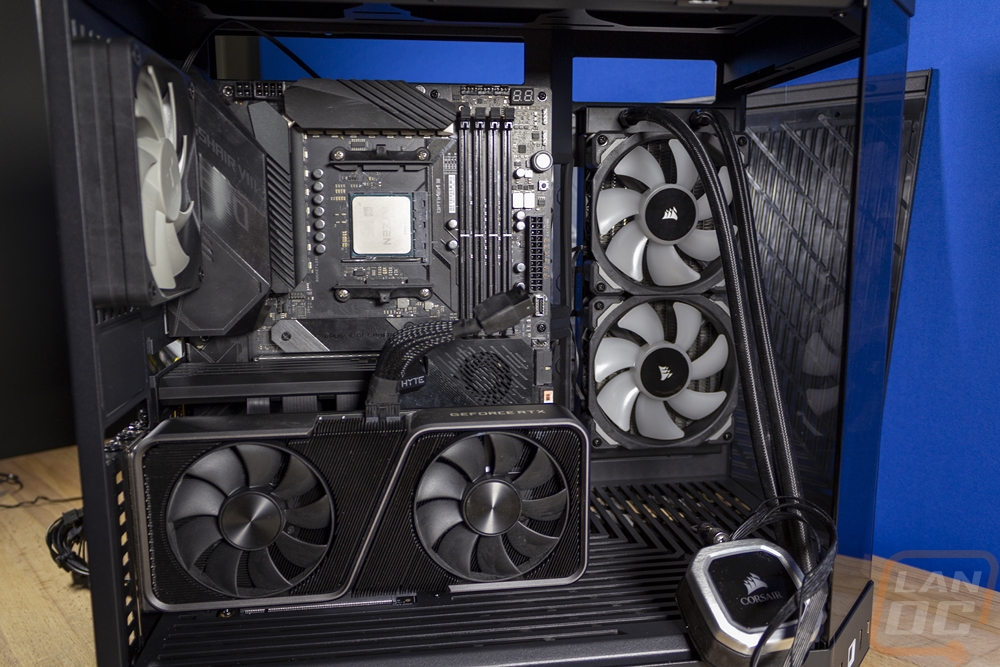
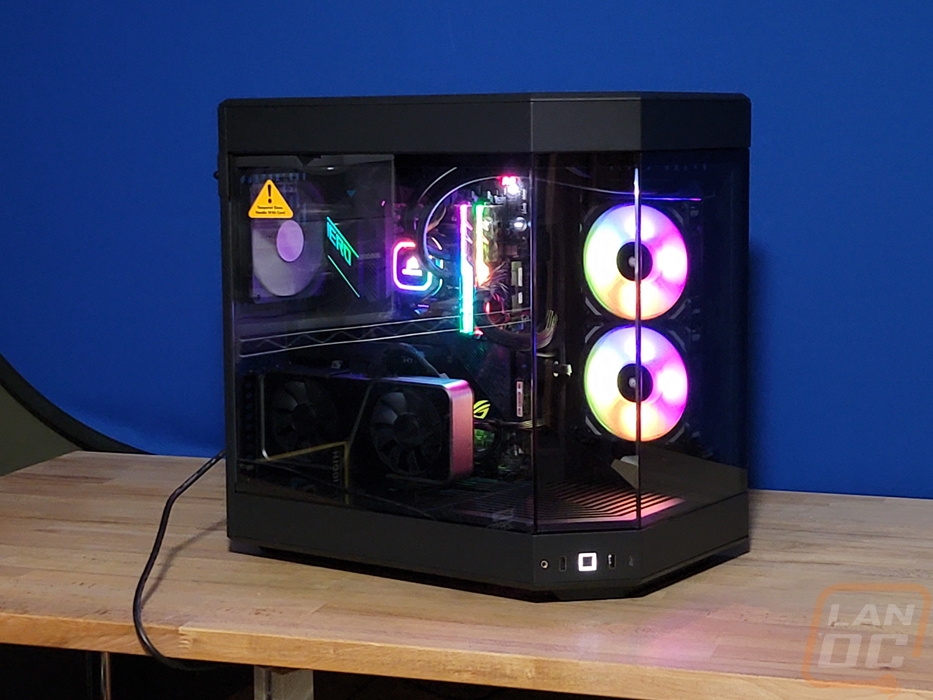
Before testing the Y60 I did need to get our test system installed into the case. For components, I went with our old test bench which has an Asus Crosshair VIII HERO WiFi motherboard and a 5900X CPU, Trident Z Royal memory, and a Corsair H100i RGB Platinum AIO cooler. Paired with an Nvidia RTX 3070 Founders Edition. For the power supply, I used a Cooler Master V700. None of those are cutting edge, but they are in line with the average higher-end system. Especially someone who is maybe upgrading into a new case and not upgrading components yet until prices come down.
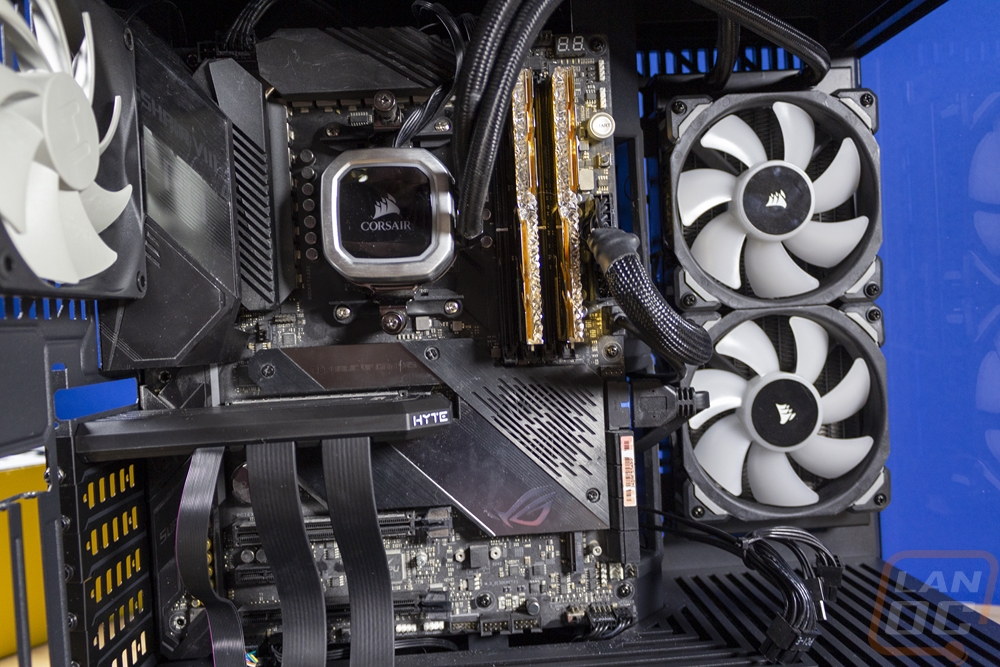
I started by installing the motherboard with the SSD and CPU preinstalled. This went mostly smoothly other than fighting a little bit with the wire for the rear exhaust fan. It is positioned to face towards the motherboard I/O and with a rear I/O that has a cover on top it was especially tight but I did get it to fit. The Y60 has one motherboard standoff with a peg which helps hold things in place while you install the motherboard screws. Next up I mounted up the radiator for our Corsair H100i AIO cooler. I wanted to get this installed and out of the way quickly and because the Corsair kit uses the stock plastic hook mounts the hardest part for this was preinstalling the two fans then holding the radiator in place while trying to install the screws. An extra set of hands would be a huge help with this part, the 240mm radiator isn’t the largest supported so it mounts up off of the bottom of the case. Taking the front glass out would make this easier with just one person but I was able to get it to work without the extra glass removed. Once you have it started there is a lot of room to get at the rest of the mounting screws from the back.
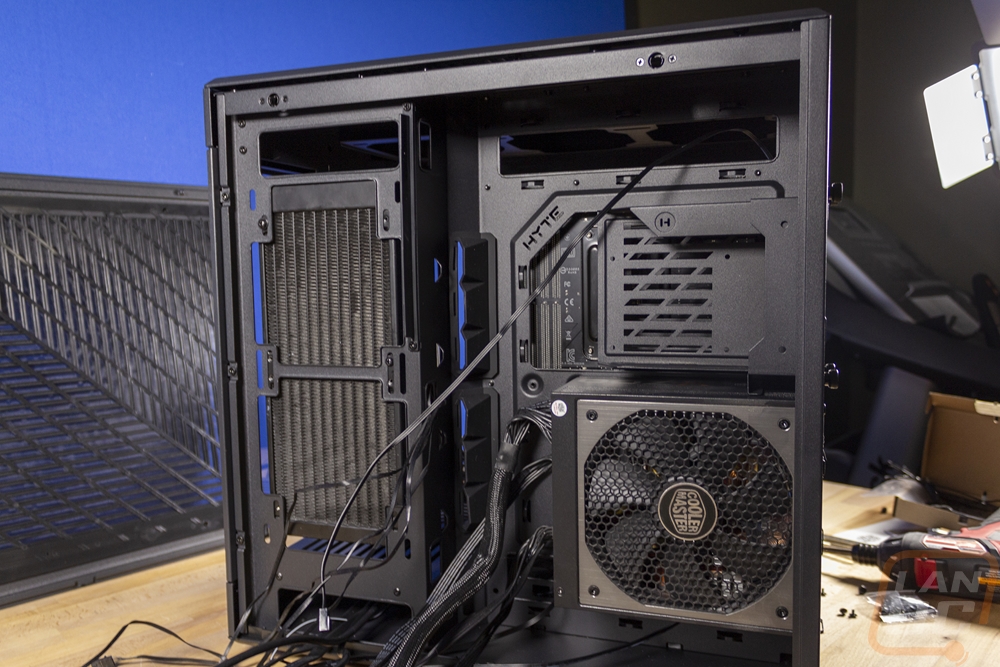
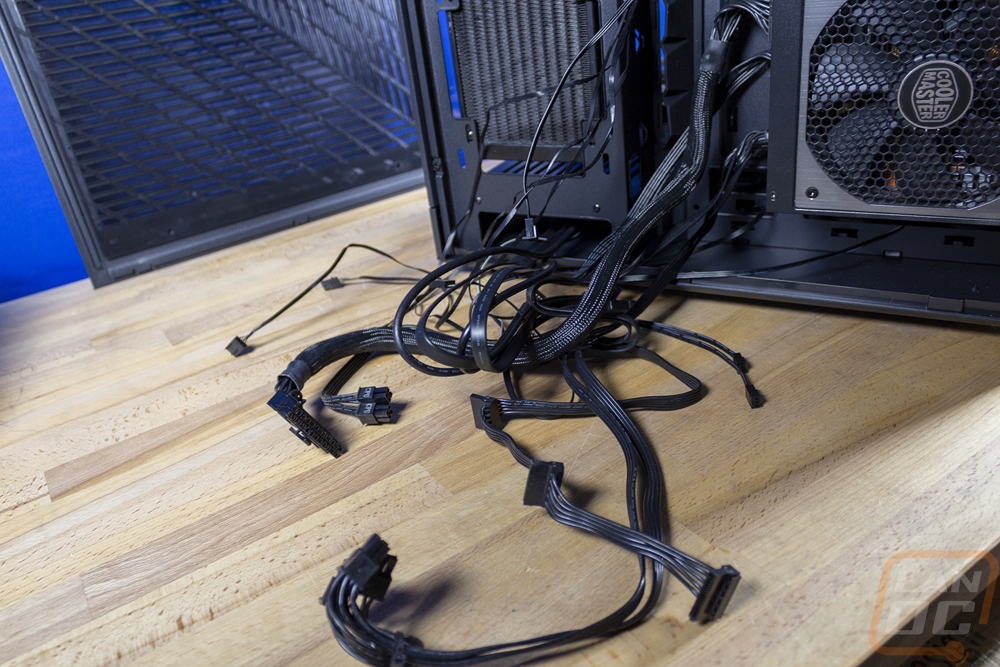
With the big components installed in the front, you can start dealing with the wiring. RGB lit fans can be a big pain so I would recommend cleaning up those wires before you install the power supply or you will have a mess of cables like I have here. You can also run the front panel connections from the case itself. Then after all of that, the power supply isn’t too bad. I did struggle a lot with the weirdly shaped grommets though when I put the power cables through. I pulled both grommets off and fought to get them back in place.
With the wiring done I then went back to finishing the water cooling, I didn’t mount this before the wiring because it can get in the way of running everything. Then lastly I installed my video card. The Y60 has your card featured out in front which also means that if you install it too early it will be in the way of everything. I did this and figured out quickly that it was easier to get it out of the way.
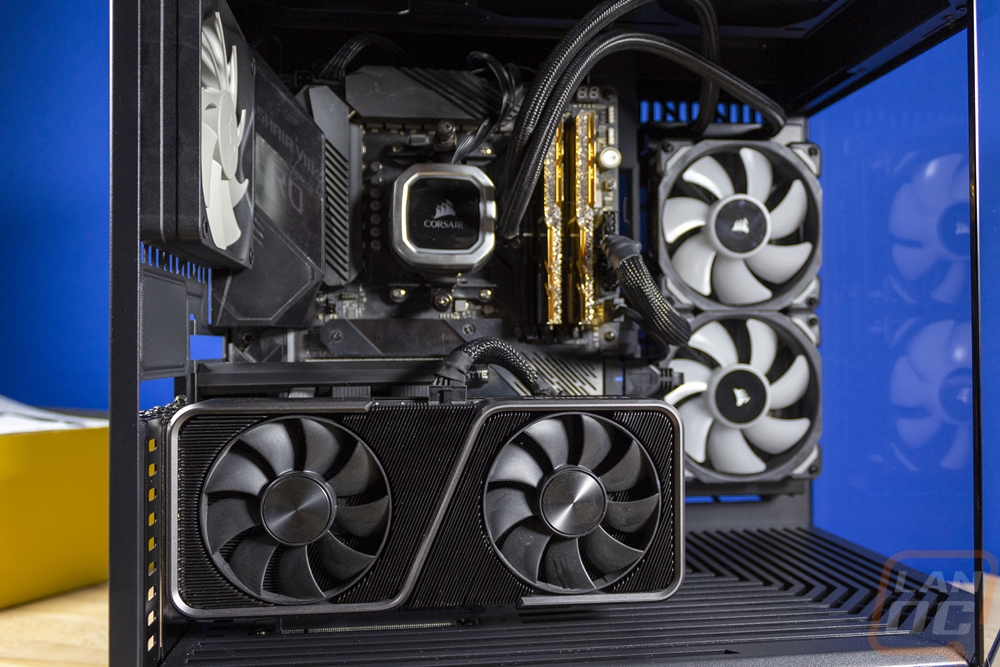
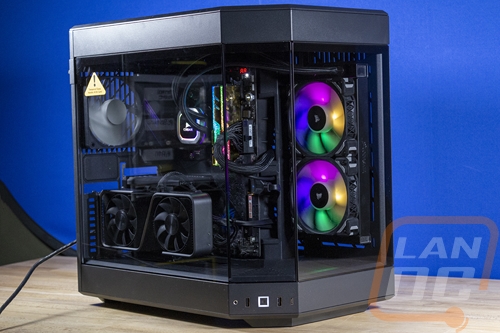
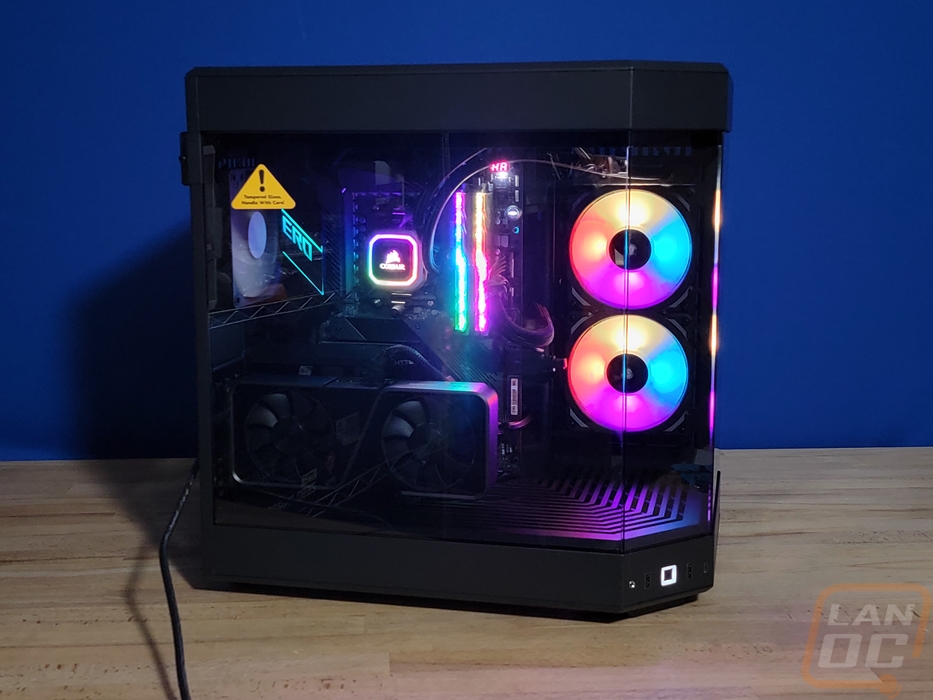
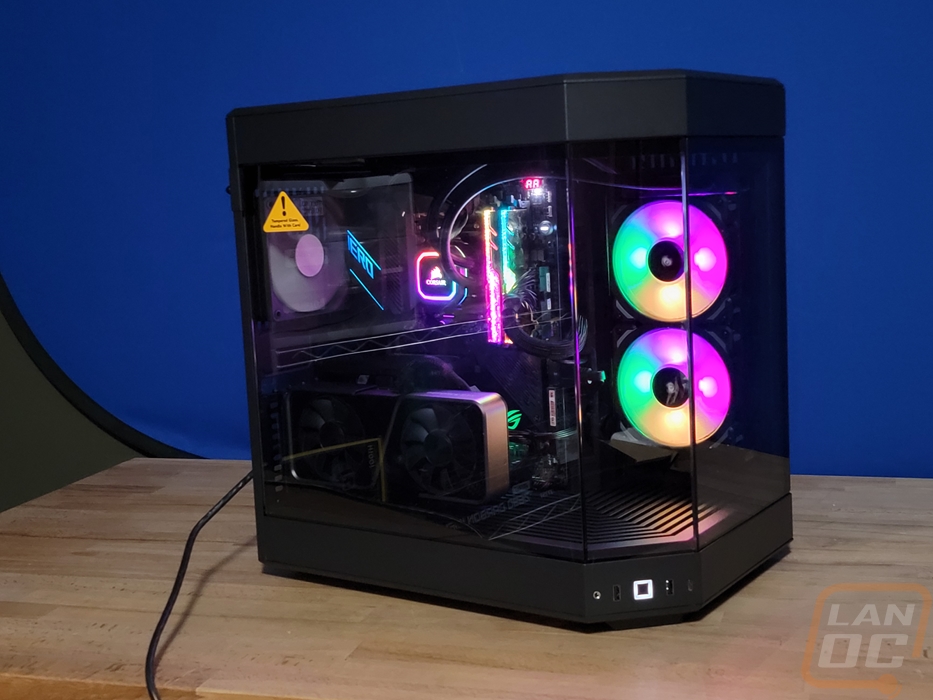
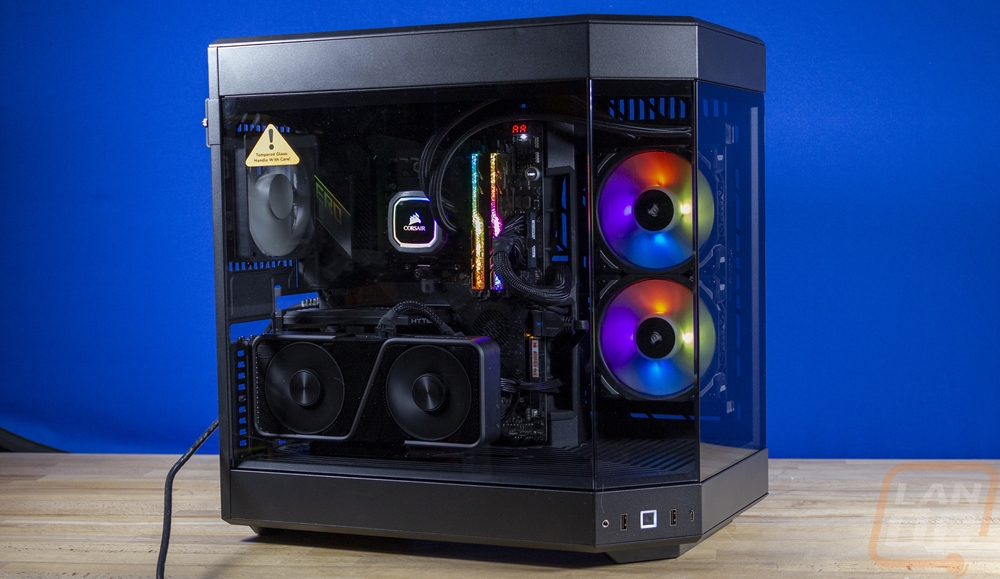
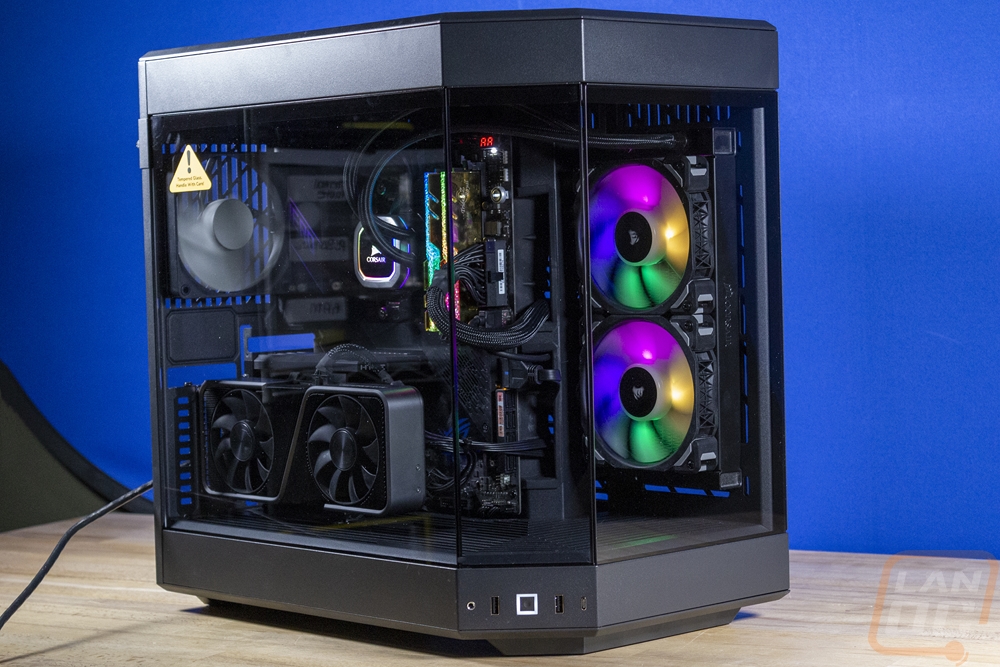
Other than our Trident Royal memory standing out with its gold finish, the system all together looks amazing. Checking the Y60 out from the front, side, or a mix of both lets you see everything inside of the case which is obviously the goal. Using lighting like the RGB fans to draw attention to different areas is nice and even though our Founders Edition card doesn’t have any lighting to get your attention, having it featured right on the front really puts it right out front. This isn’t a case you are going to want to run if you are hiding a tiny temporary video card, the video card is the crown jewel in a Y60 build, and given how much they cost these days I wouldn’t blame anyone for wanting to show a cool GPU off. I will say though that as good as things look with the all-in-one cooler, I bet it would look a lot better with a custom loop even if it is just for the CPU. With how far back the radiator sits, it is a big reminder of just how thin AIOs are. A nice push-pull configuration wouldn’t be a bad idea here if you aren’t able to get a thick custom radiator.
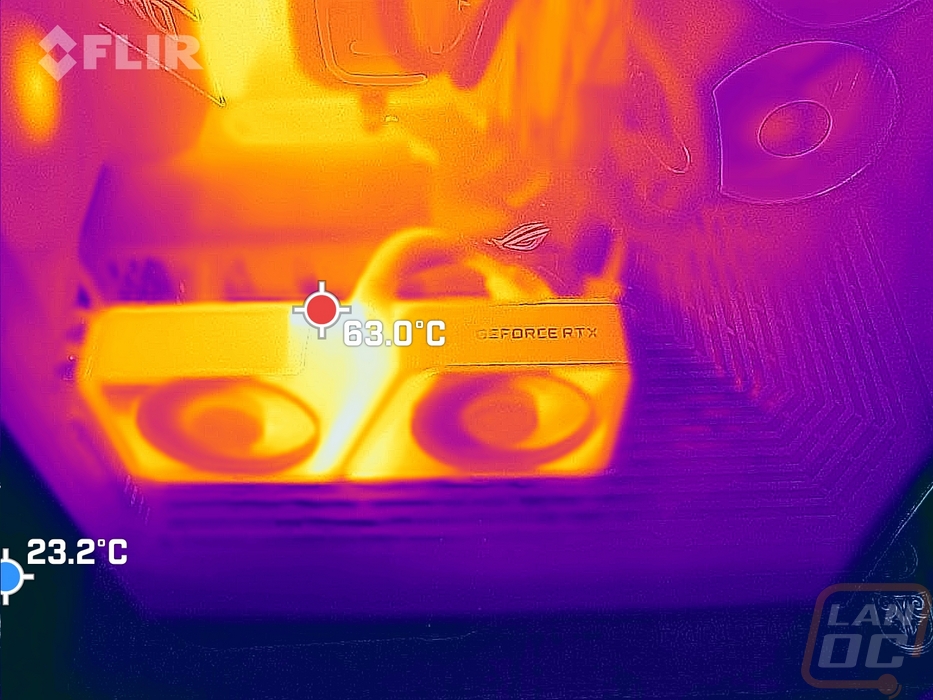
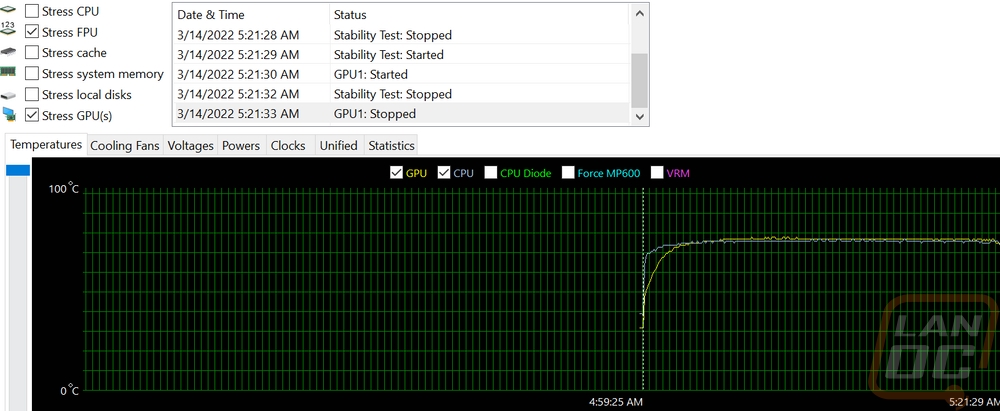
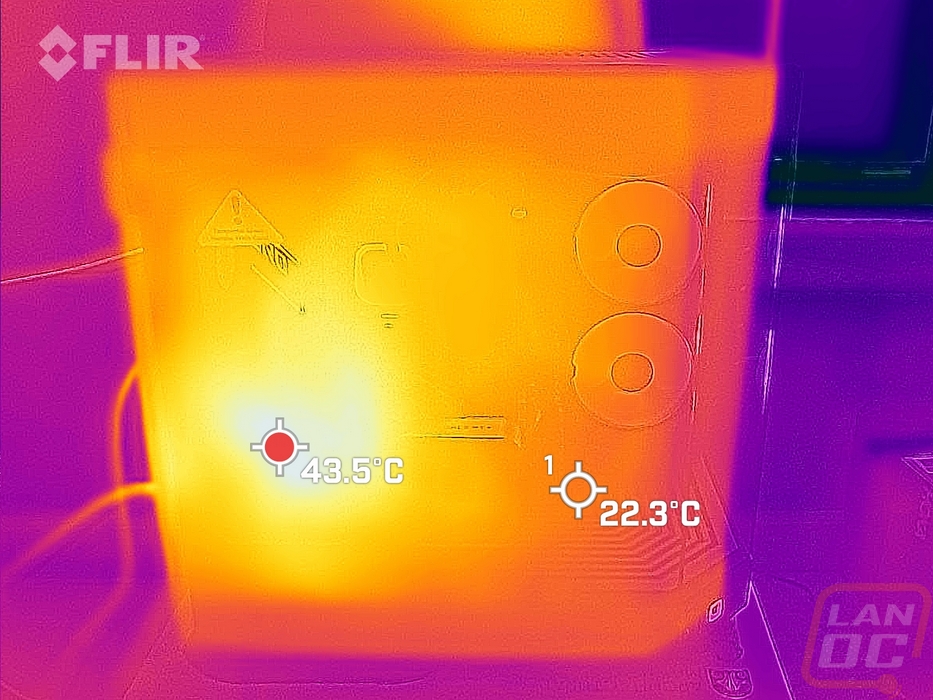
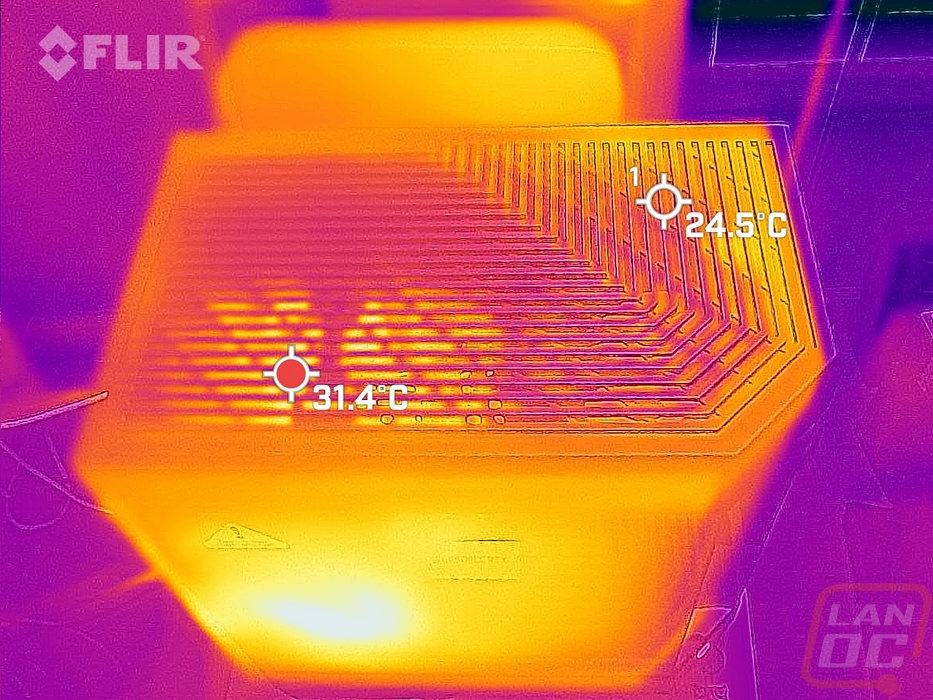
For testing, I was curious if the cold floor design of the Y60 would fix the normal hot spot around the bottom of the GPU. I set the GPU to the GPU workload in AIDA64 and at the same time put the FPU workload on the CPU and let all of that run. Being a Founders Edition card, it did level off at the same 71c that our open-air testbench saw, and the 5900X was right there as well which given the FPU workload makes sense. Then I used the thermal camera to take a look around the Y60 on the exterior then with the glass off to see inside.
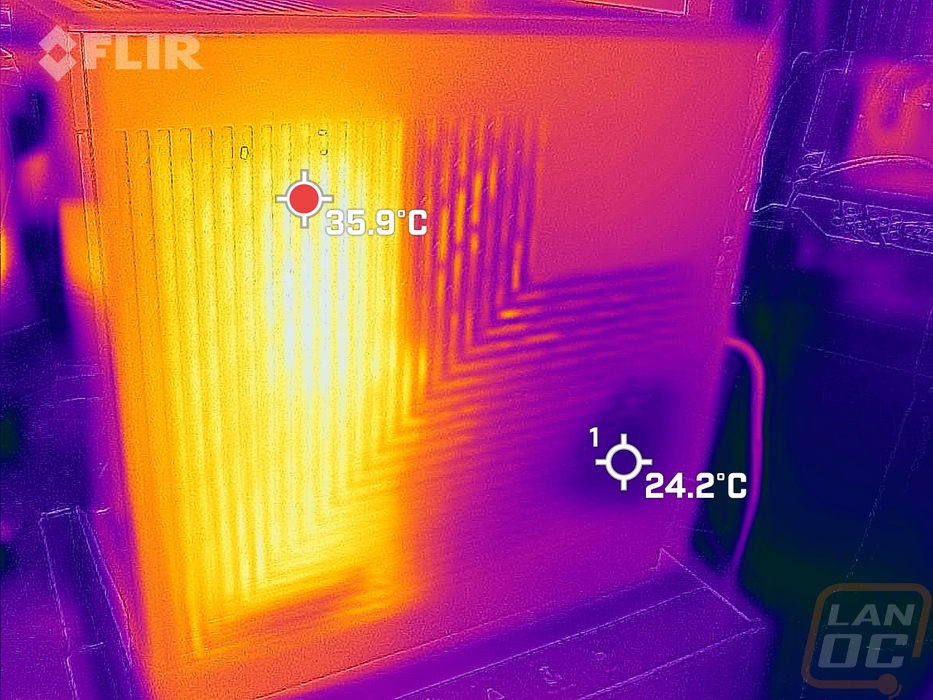
With the glass on we can see that on the GPU side there is some heat warming up the glass near the top of the GPU but I was surprised how cool things were around the base of the GPU area. Even at the hottest spot, the heat transfer wasn’t too bad. The top of the Y60 even without fans is also getting some heat out of the top on the motherboard/GPU side of the case which makes sense. I do think that two more fans in the top to help continue to pull the air being blown up from the cold floor wouldn’t be a bad idea if you wanted things to run even cooler.
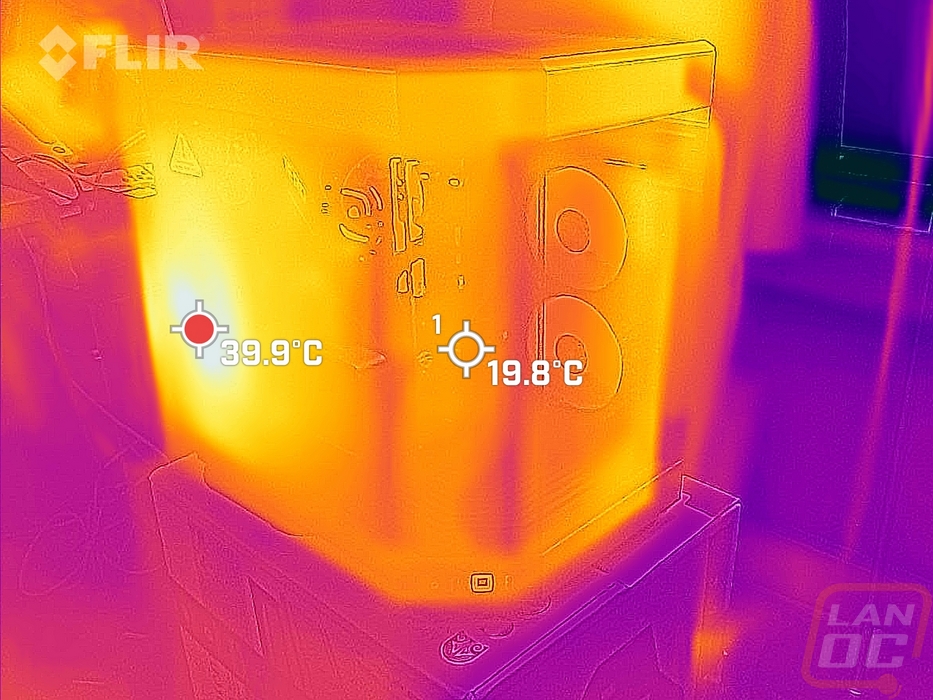
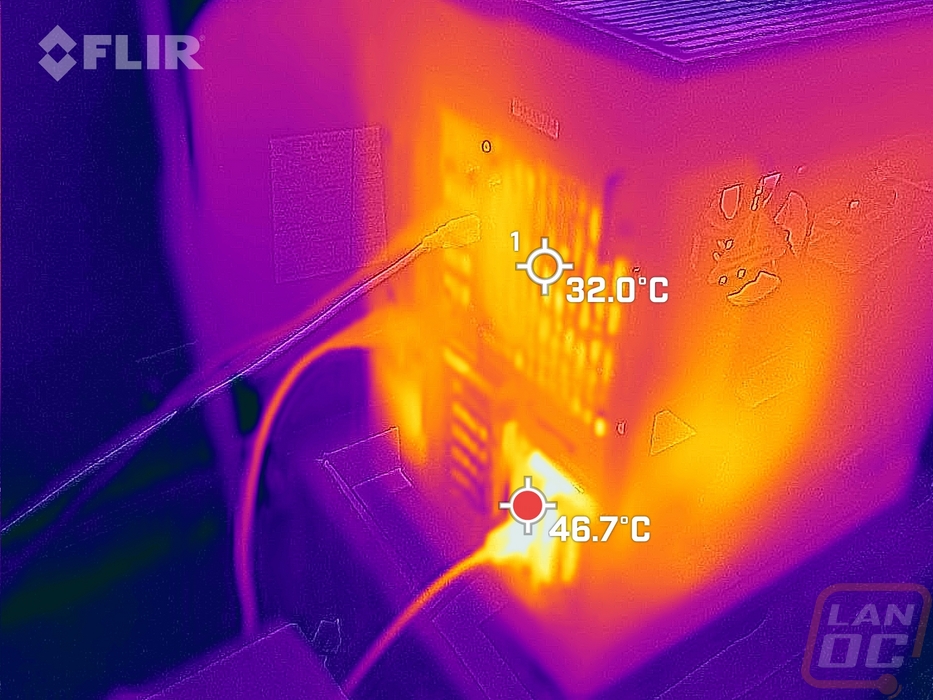
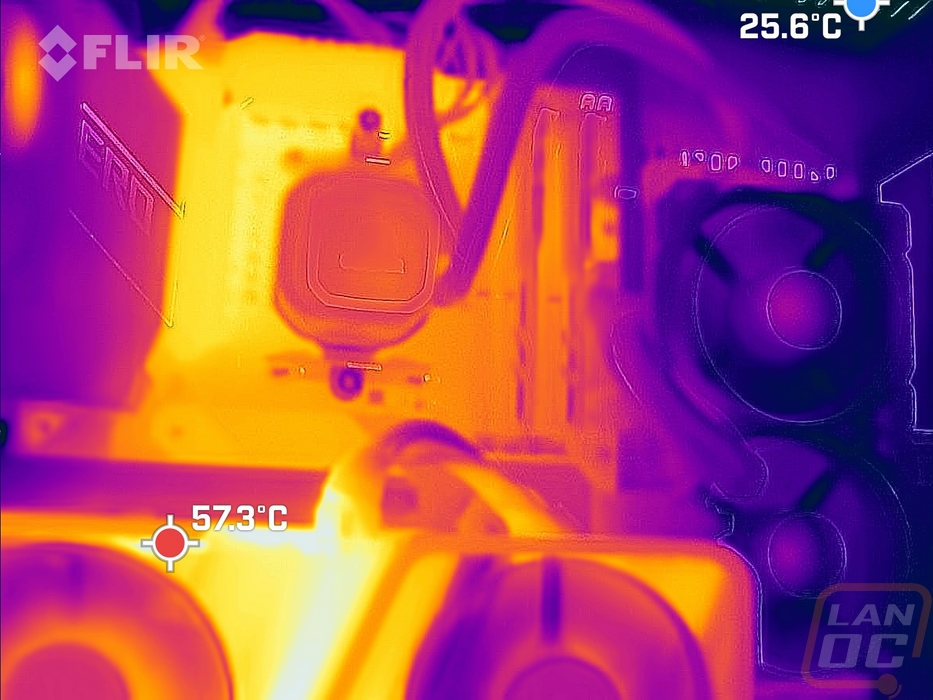
Here is a shot of around back where the watercooling is blowing through the back/side panel. It does look like there is some bleed out the sides because the radiator mount isn’t directly up against the side panel but not enough to be concerned with. Then the coolest spot is where the power supply is pulling air in for its intake which isn’t being affected at all by the CPU warmed air.
These three pictures are all with the side panel glass removed and looking in. The GPU is of course the hottest point, namely at the top where the RTX 3070 does vent out of the top. The radiator fans and radiator area are all running cool. The VRM area is the hottest area on the motherboard but not at all hot enough to be an issue, especially given the FPU workload which really heats them up.