A lot of you will most likely be familiar with iBUYPOWER, a system builder who we have also covered cases from in the past. Today they are announcing their latest brand called HYTE which is going to focus on lifestyle and PC components. They are launching with a case that I’ve been looking forward to for a while now. They teased their Revolt 3 back at CES but we had no idea about the HYTE brand. iBUYPOWER has had the Revolt lineup in the past as their LAN-focused systems. Well, the Revolt 3 continues that focus, but with a completely new look. As the LanOC name might imply, we love LANs around here and I especially have a soft spot for SFF builds that make it easier to take your system to and from events. Dragging a monster build to and from a LAN is one of those things you do when you are younger and you eventually learn and avoid it. The new Revolt 3 from HYTE is designed with a handle in the top and with a focus on making it easy to transport for LAN events and esports which iBUYPOWER is also heavily focused on. So today I’m going to see what all the Revolt 3 has to offer and then see if it will be the next system that I’m taking to events. Let’s check it out!
Product Name: HYTE Revolt 3
Review Sample Provided by: Hyte
Written by: Wes Compton
Amazon Affiliate Link: HERE
|
Specifications |
|
|
Material |
Aluminum, Steel, ABS |
|
Color |
Black, White |
|
253 x 178 x 409mm (9.9” D x 7” W x 16.1” H) |
|
|
Motherboard Size |
ITX |
|
Radiator Support |
120, 240, 140 , 280mm up to 35mm thick |
|
Clearance |
Graphics Card: Most cards up to 335 x 140 x 58mm* |
|
Air Coolers |
Up to 140mm tall can be used, dependent on location of CPU socket on motherboard. Cooler must also fit in the footprint of the motherboard |
|
Expansion Slots |
3 |
|
Internal 3.5 Bays |
1 |
|
Internal 2.5 Bays |
2 |
|
Front Interfaces |
USB 3.2 Gen 2 Type-C x1 |
|
Dust Filters |
Front (metal mesh), Top, Sides, Rear (magnetic) |
|
Case Weight |
14lb (including PSU) |
Packaging
Well normally we would have a full look at the retail packaging, but with this being the launch of HYTE they did something special with some of the Revolt 3’s including ours. They have a special edition Revolt 3 for the first 200 purchases that come in a custom hard plastic flight case. If you are looking to get one with this case, from what I understand it is a thank you to the earliest adopters on the HYTE.com website. Apparently you won’t know if you were one of the first until it comes in though I do hope they consider offering the flight case in the future as well because there are people who buy hard carrying cases for their SFF builds and it does help protect your system when transporting it. Anyhow, I wanted to make sure everyone knew how you can get your hands on this, lets now take a look at the flight case itself!
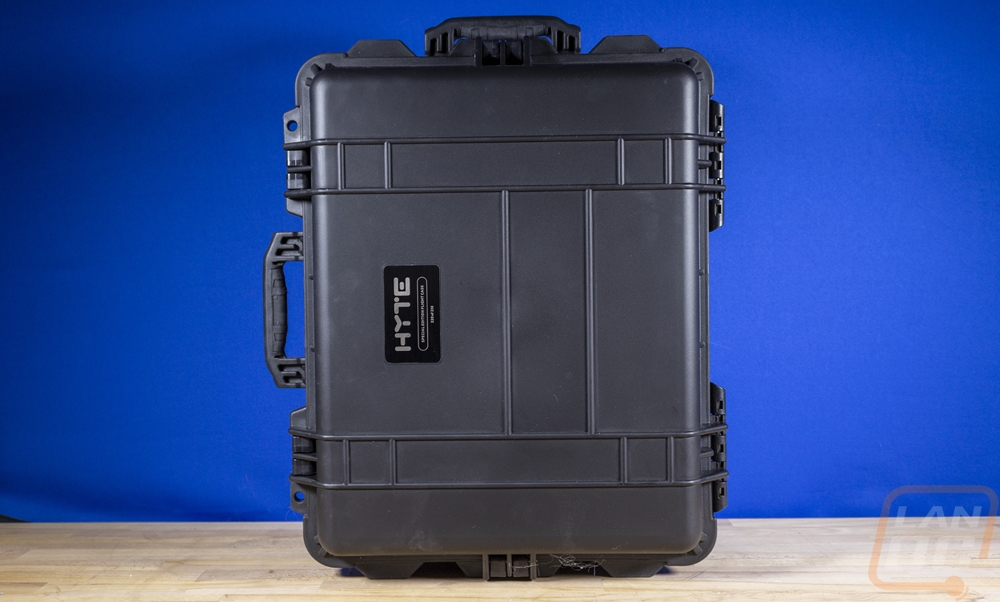
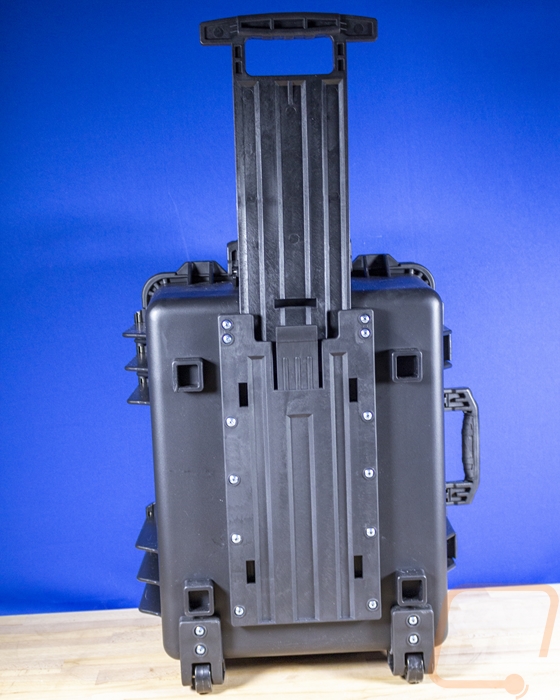
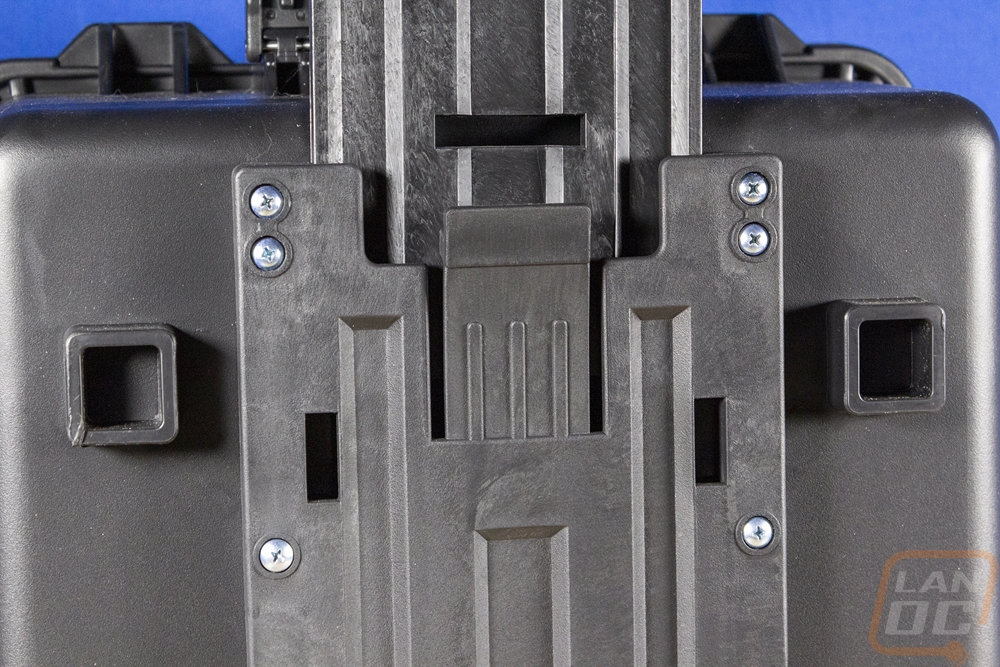
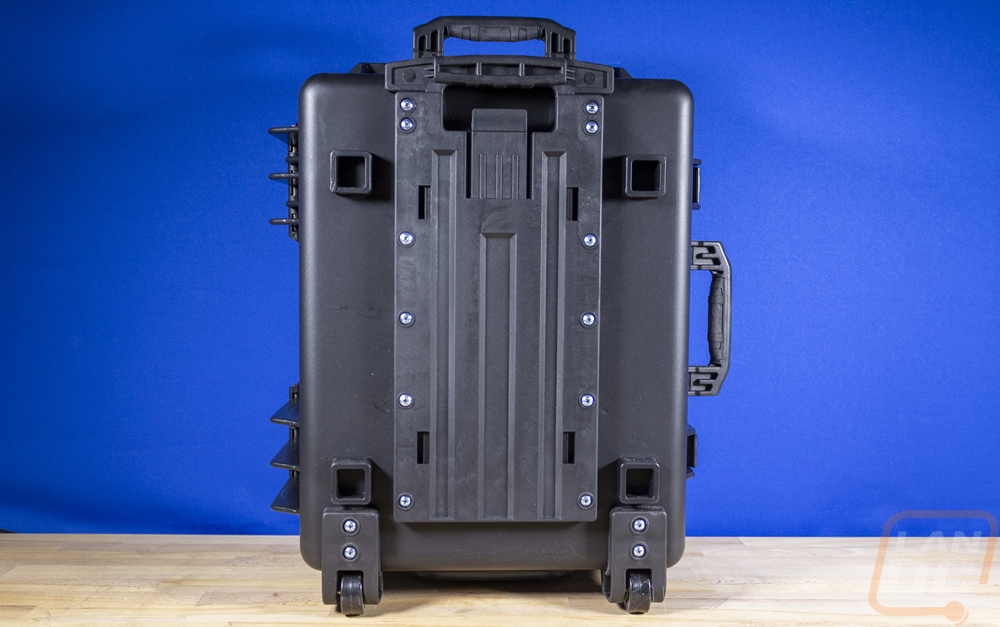
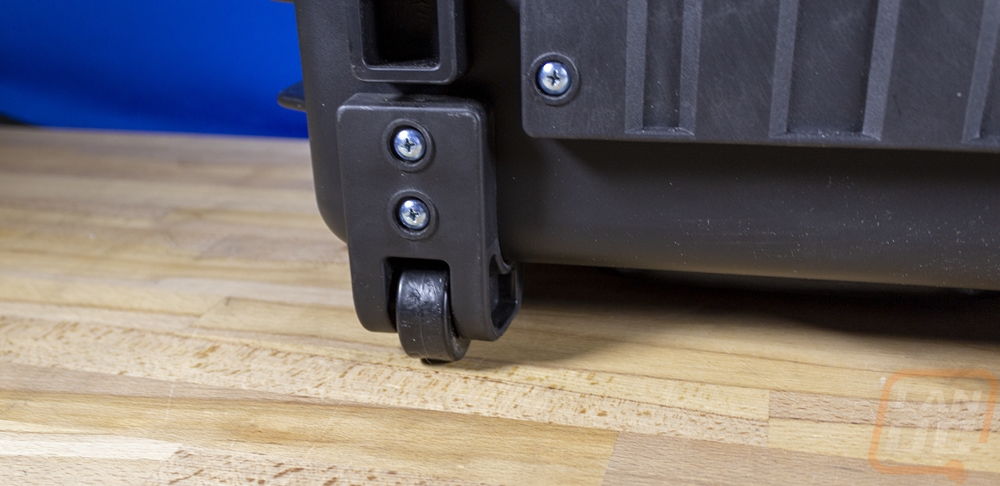
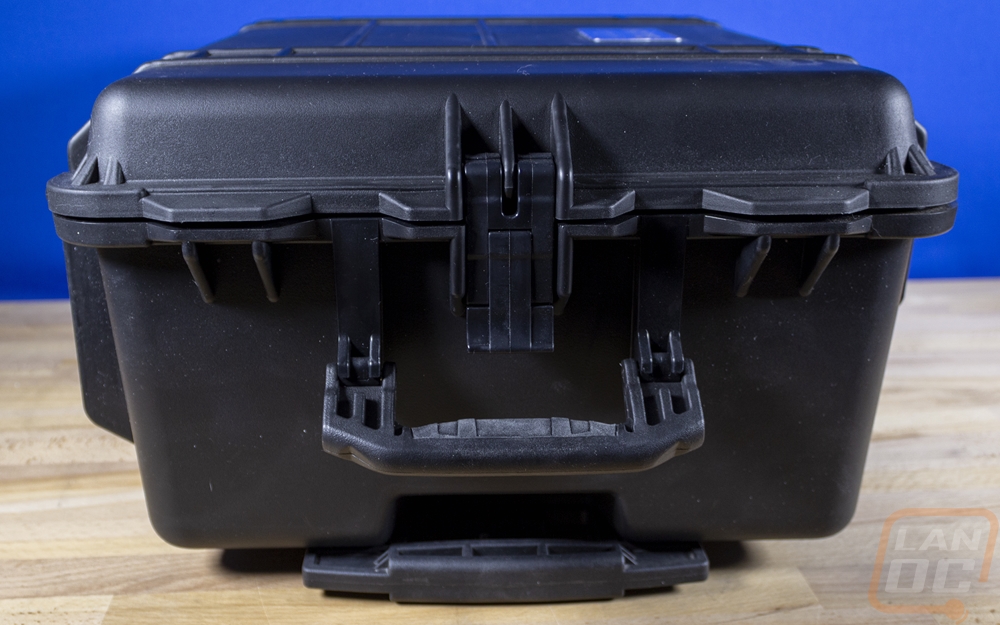
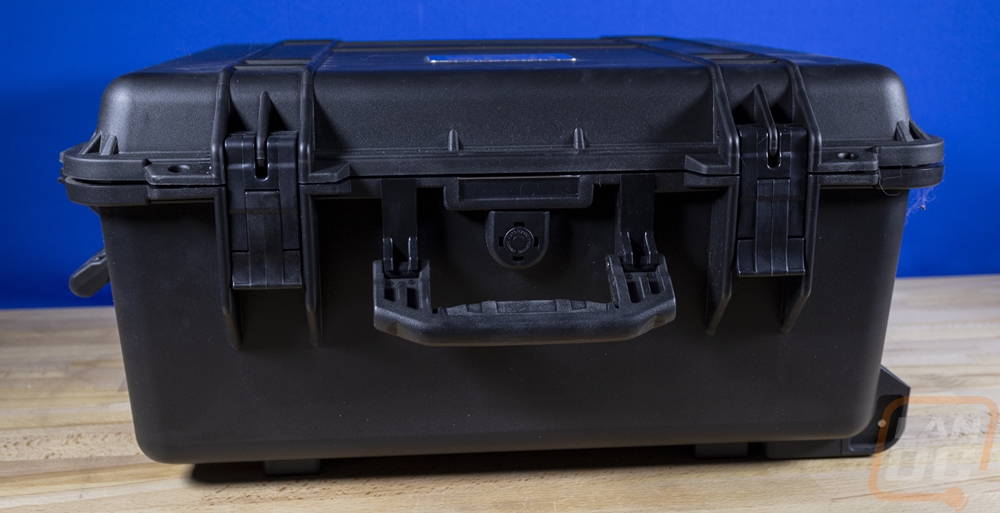
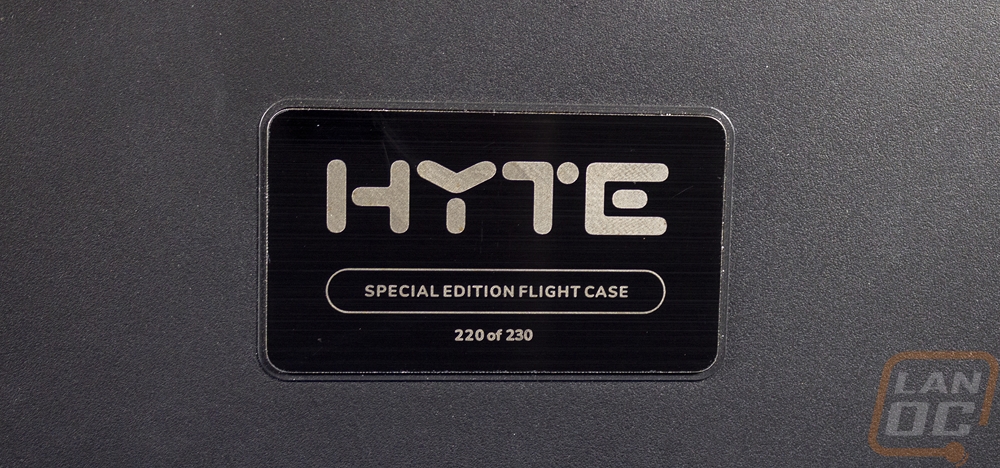
The flight case by my measurements came in at 22 inches tall, 18 inches wide, and 10 and a half inches deep. That is a touch above the standard carry-on size, Southwest for example has their size limit at 10 x 16 x 24, but we all know that LOTS of people go over the carry-on size limits and this one is so close that it may not get noticed. The case itself is 13 pounds, so keep that in mind with your system weight as well but we will check in on that later when we have the system together. But overall this is a relatively standard carry-on style hard case. It has two wheels at the bottom and the pull-out handle to make it easy to pull behind you. There are latches on both of the sides and two on the long side that keep it sealed and you can add locks as well. They also included a cool special edition badge on top which is numbered, ours is 220/230. I assume the 230 count here includes the 200 for the early adopters and then the 30 are press/reviewers which is good to know we aren’t cutting into someone’s chance to get one at launch. The case also has normal carrying handles on the top and the side if you need to carry it which avoiding the vibration of a rough surface for example might be a good idea.
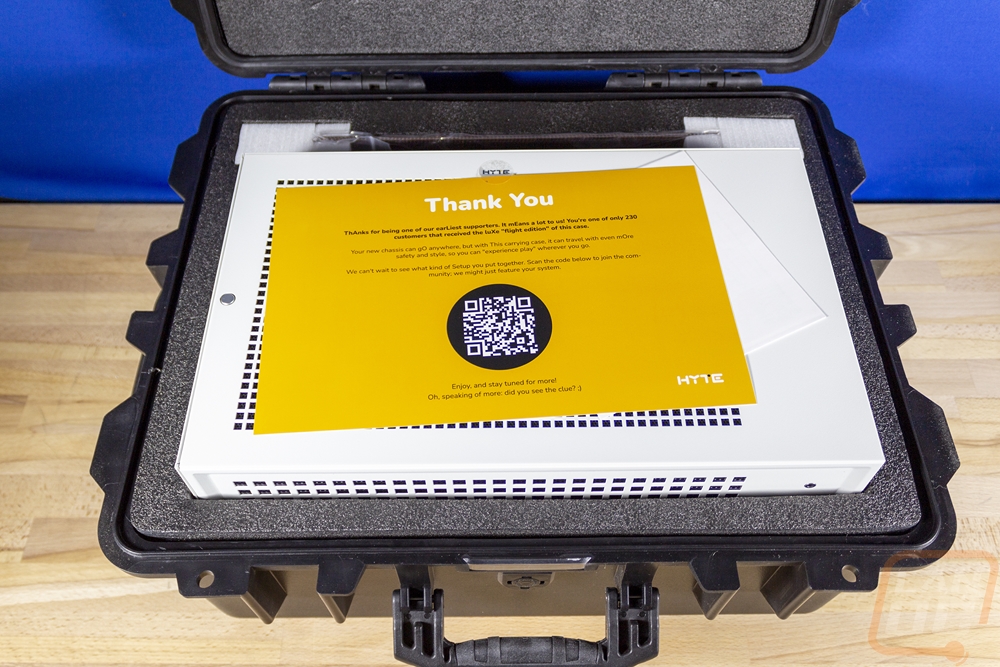
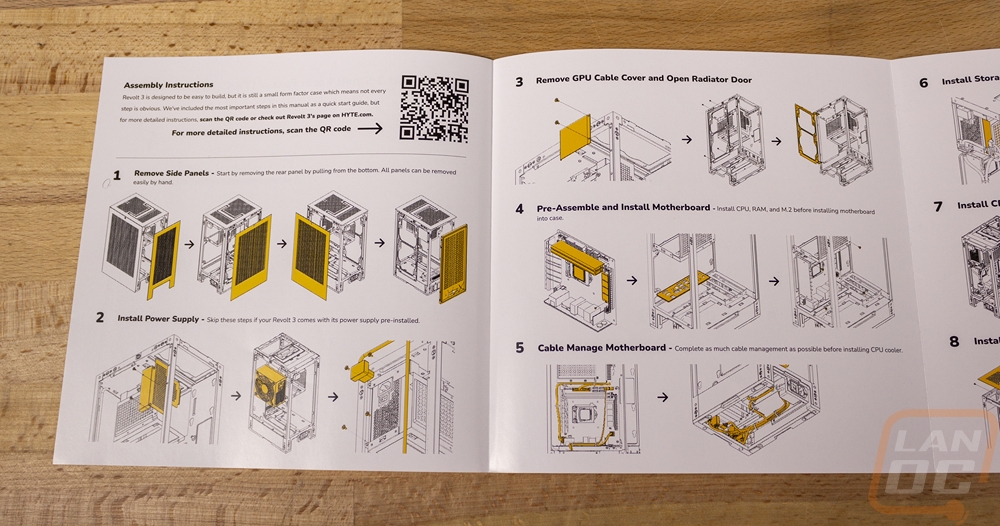
Inside right on top, they have a big thank you card for the luxe flight editions with a QR code as well. They also left a nice clue in the text as to what the next HYTE brand product will be as well. Under that, you have the installation manual. The instructions are simple. They start with the specifications and pictures and a list of everything included. Then they have small line drawings with the component you are working with color coded to run you through building in the Revolt 3. They also have a QR code pointing you to a more detailed online set of instructions as well.
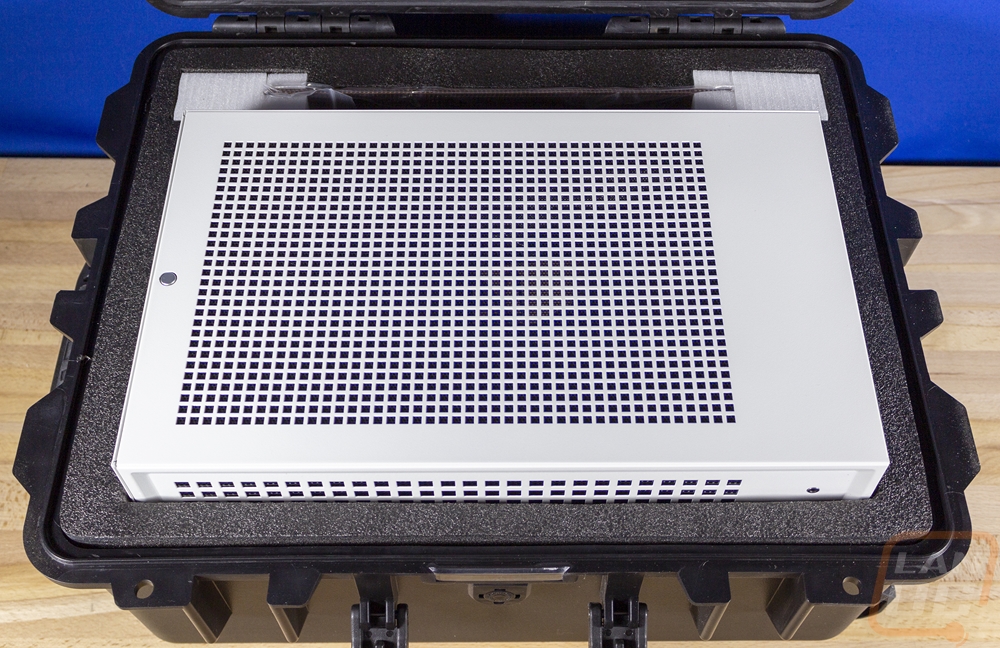
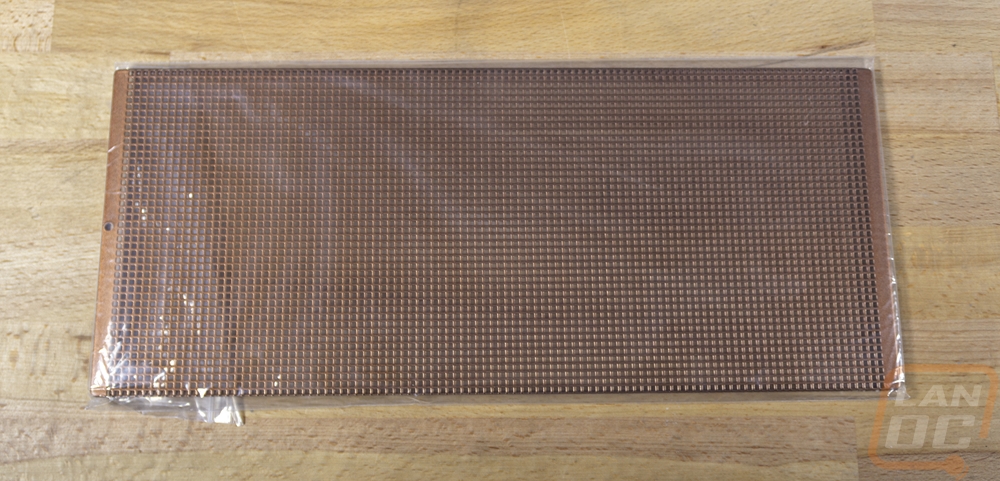
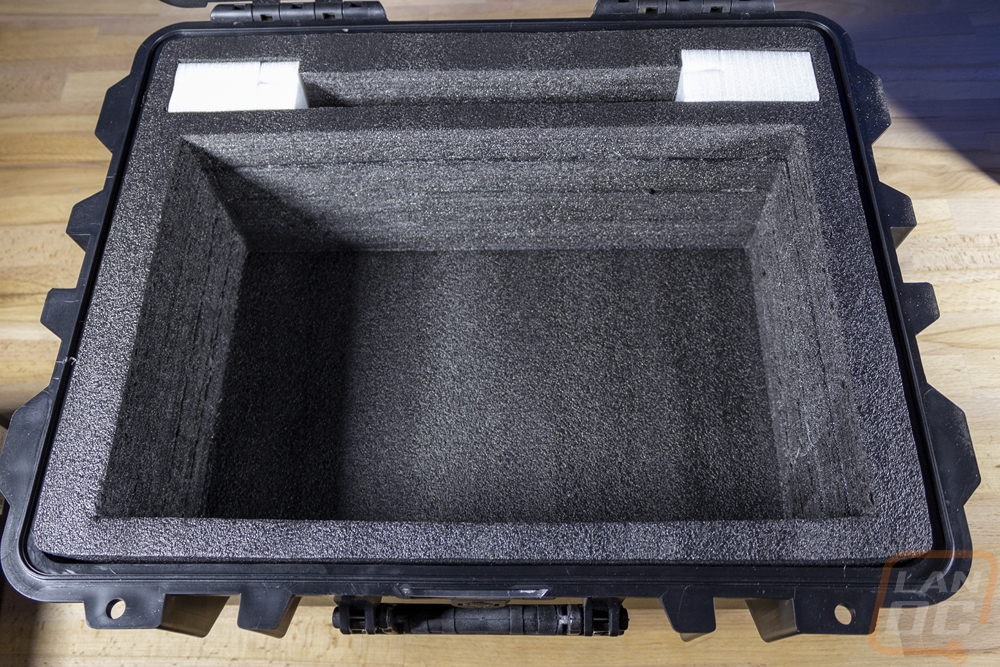
Under the documentation, you can finally see the Revolt sitting in its thick foam home in the case. They have it cut perfectly to fit the case. Between the hard plastic and then this foam it is extremely well protected. The top also has its own cut foam to fit around everything as well. Then at the back, there is a long slot that you can use for cables or a keyboard. For the special edition, you can see they filled it will a special copper grill that you can swap out with the base black grill for the front of the case and they used white foam here to hold the grill but that foam can be pulled out for when you use this space later.
Outside
Just to address the elephant in the room, this does look a lot like the NZXT H1. iBUYPOWER and NZXT don’t just share their love for capital letters. They have worked closely together for years to make custom cases for iBUYPOWER systems and more recently when iBUYPOWER got into the case market they were variations on NZXT cases. So the Revolt 3 having similarities to the H1 isn’t a big surprise. What surprised me was just how much they changed. Even just looking at the case dimensions 253 x 178 x 409mm it is different from the H1’s 188 x 187 x 388mm. So the Revolt is taller and deeper and a little bit skinnier. Those are BIG changes. The Revolt 3 comes in at 18.42 liters where the H1 is 13.64, so the Revolt 3 is still SFF but a little on the higher end but right in line with the capacity of the always popular Cooler Master MasterBox NR200.
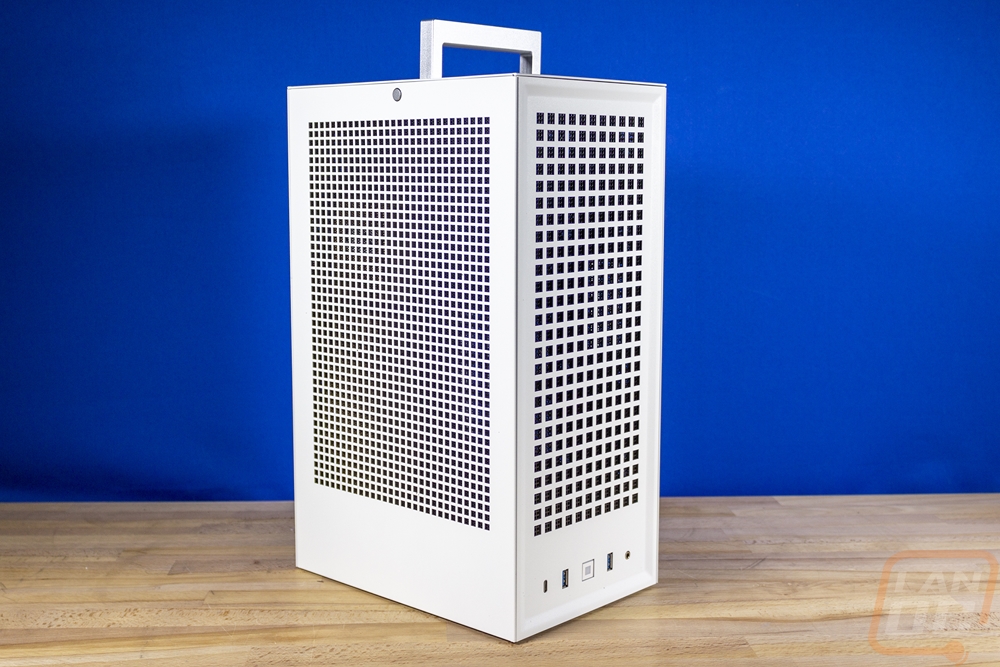
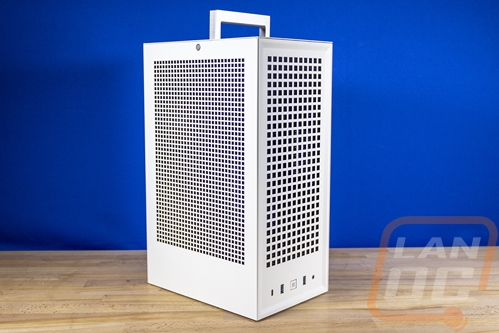
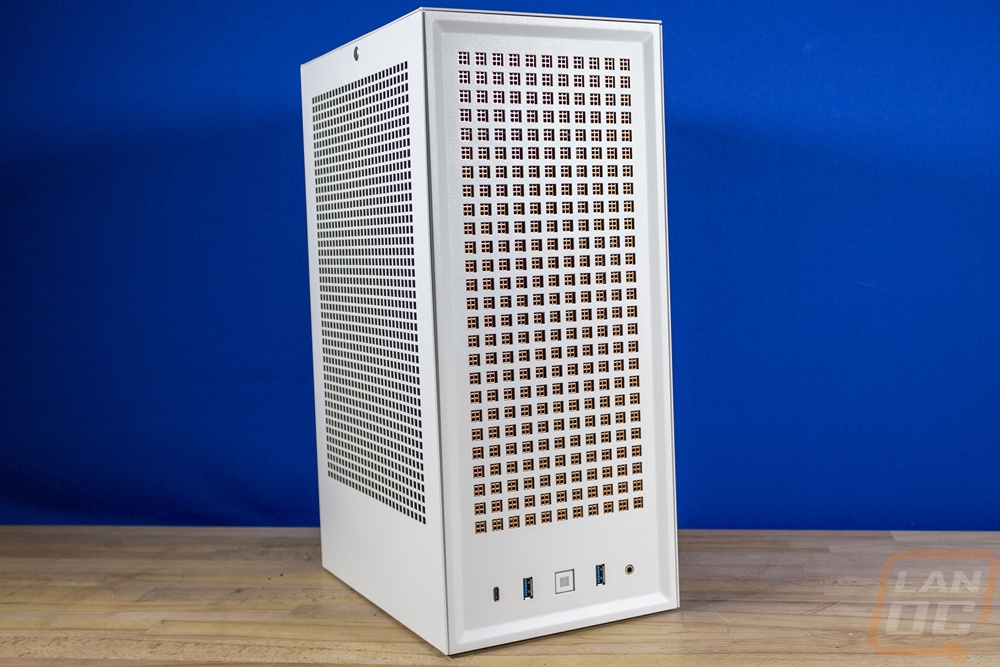
The Revolt 3 comes in white or black and then has an all-black interior with the exception of the launch special edition with the additional bronze mesh for the front that is included. Like the dimensions that I mentioned before imply, the Revolt 3 is an SFF tower case which I like for a LAN system because it also means a smaller footprint. A lot of LANs will provide you a 3 foot by 3-foot space which can fill up quickly with your monitor, your keyboard, and mousepad so a small footprint helps. Unlike the NZXT H1, the Revolt does not have a glass side panel at all. All four sides are mesh with a square hole design cut into the outside panels. The square holes offer a lot more airflow than the round holes that the H1 has and help give the case its own unique look.
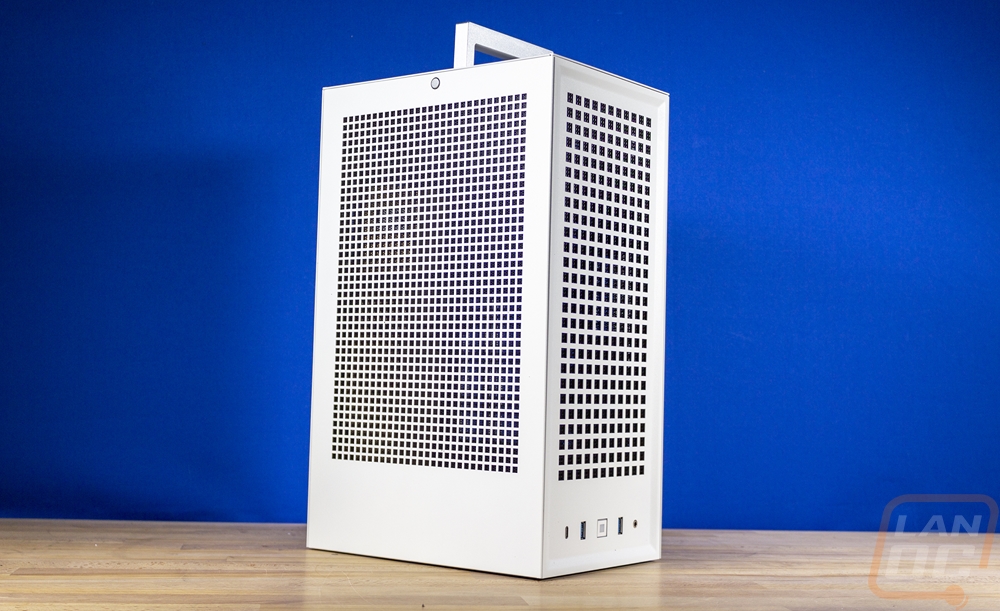
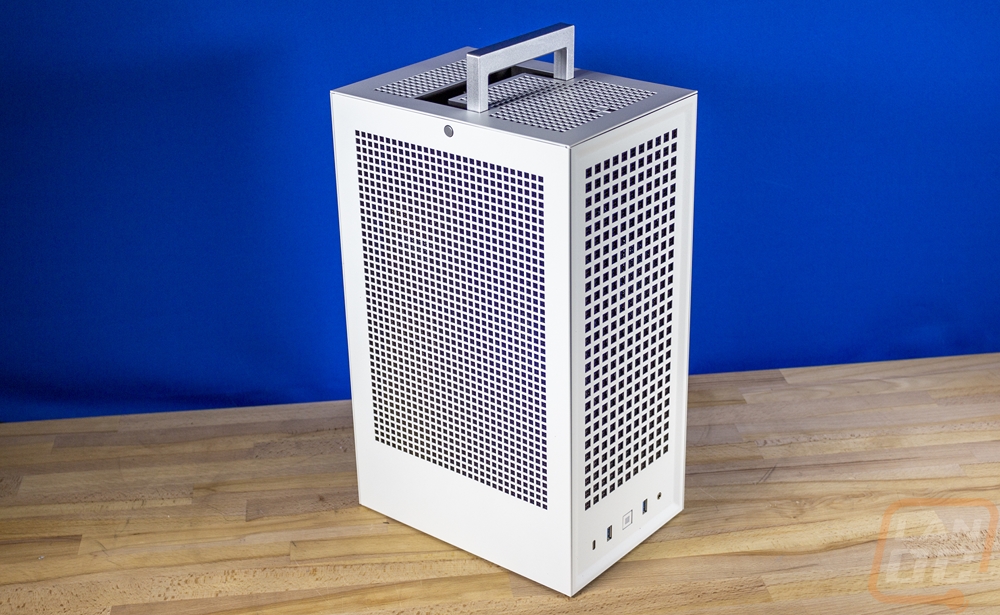
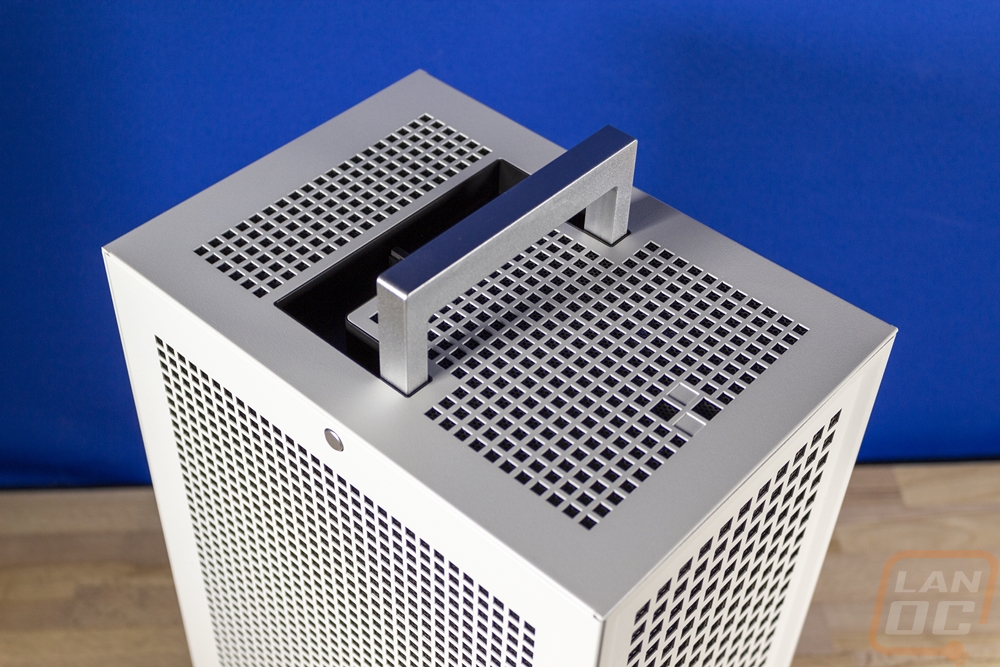
Up on top of the Revolt 3, they also have more square holes, but the biggest feature here is the built-in carrying handle. Unlike most cases with a handle, HYTE has integrated the handle so that when you aren’t carrying the case it sits flush. They have a spring loaded mechanism that you push down on to pop the handle up and they use magnets to hold it down. When you have it up, magnets also hold it in that position as well. Near the front, the squared airflow holes also have an interesting four square design.


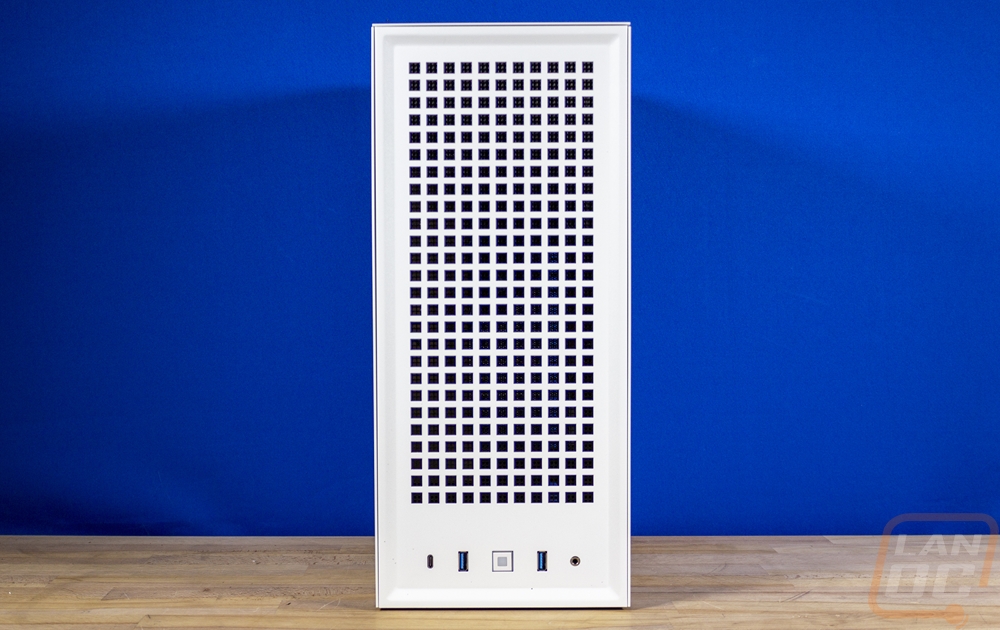
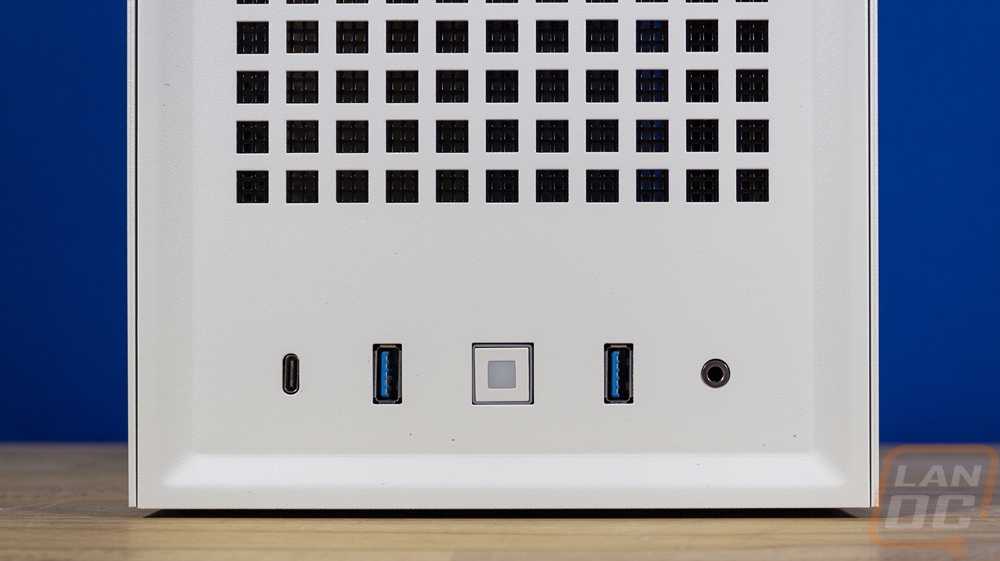
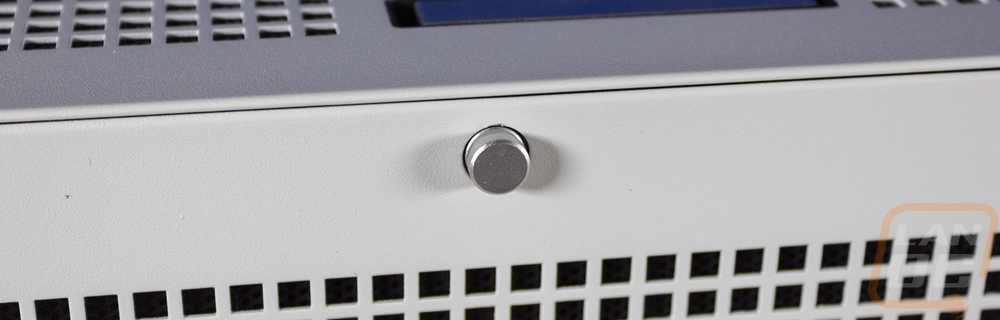
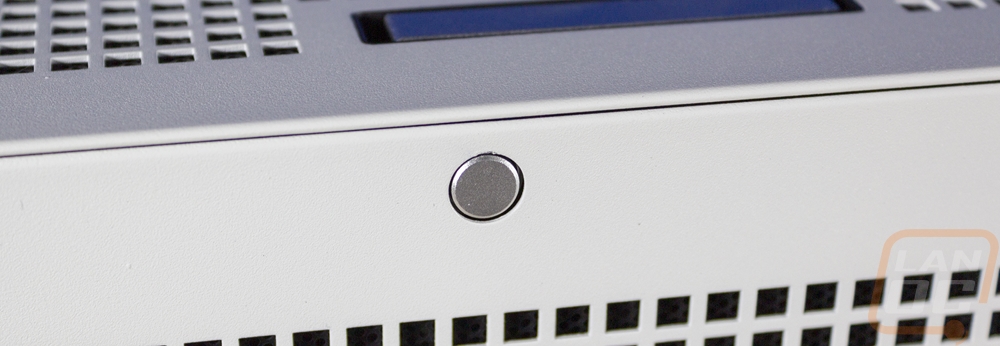
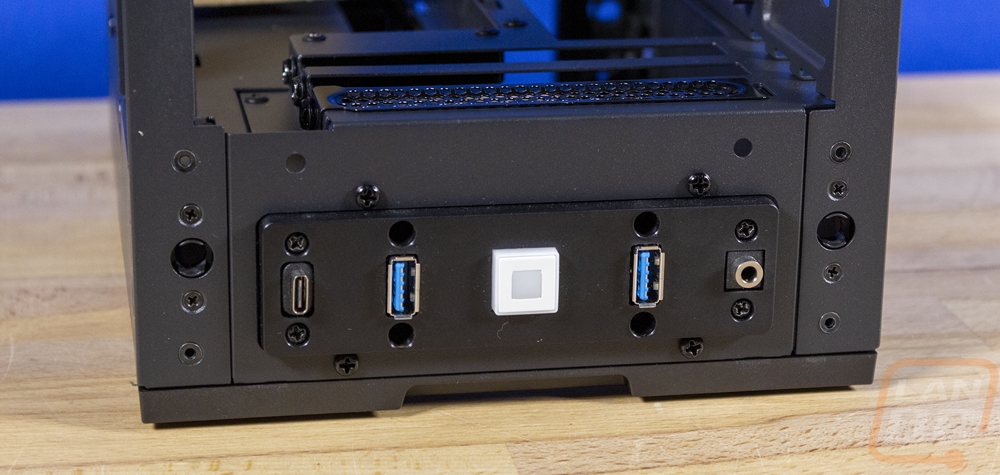
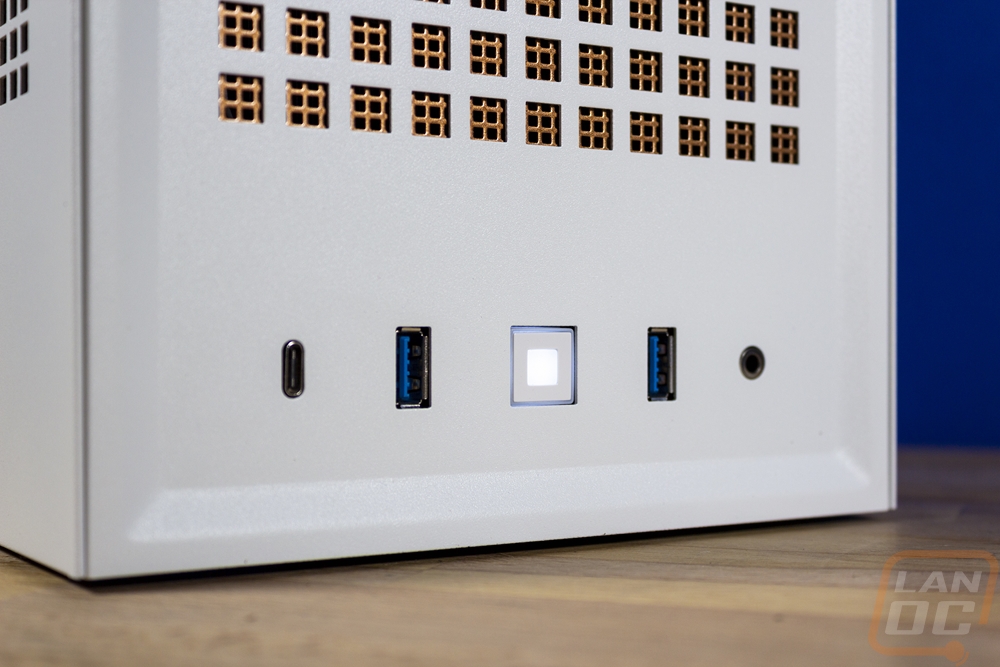
The square hole design carries down the front of the case. The front panel is also the one panel that has a little additional shape added with a small bevel around the edge that gives the front a slightly sunken shape. All of the front I/O connections are at the bottom of the front panel below the ventilation. In the center is a square power button and on each side of it, there is a USB 3.2 Gen 1 Type-A connection. I like that they spaced these out a lot which gives you a lot of room when using thick USB drives and devices. Then on the left, there is a single USB 3.2 Type-C Gen 2 connection and on the far right there is a single shared microphone/headphone jack. That will work with headphones that already have the single shared jack but they did also include an adapter as well that splits this into two connections for anyone using a more traditional setup with a microphone and a headphone plug.
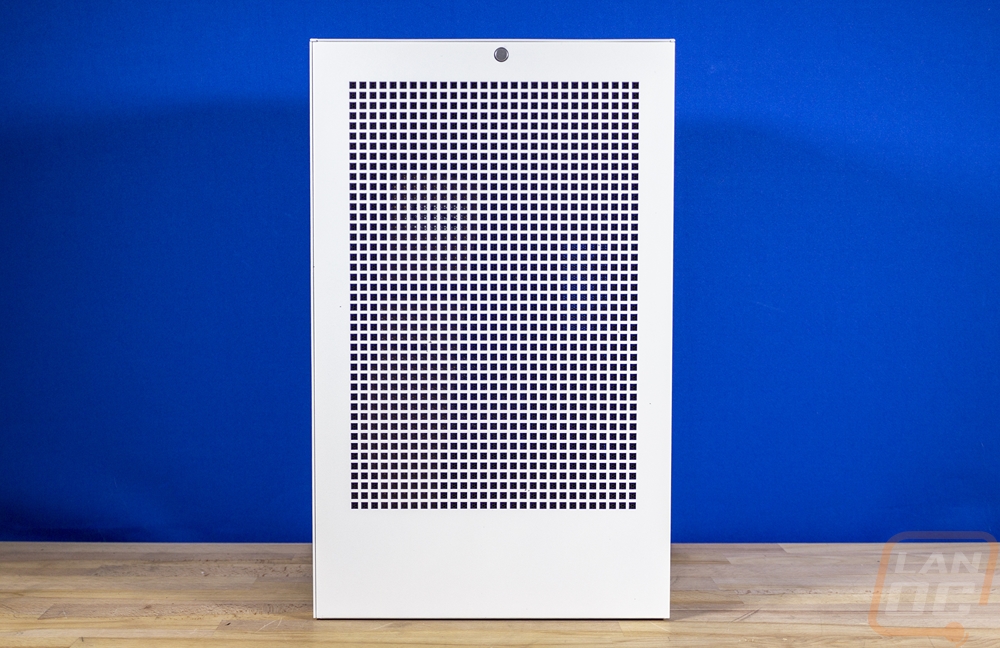
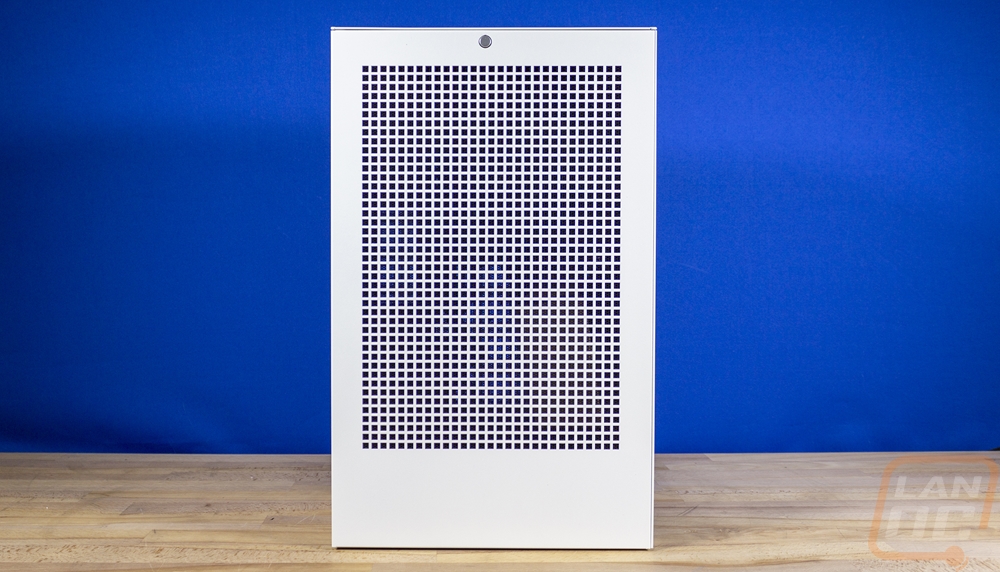
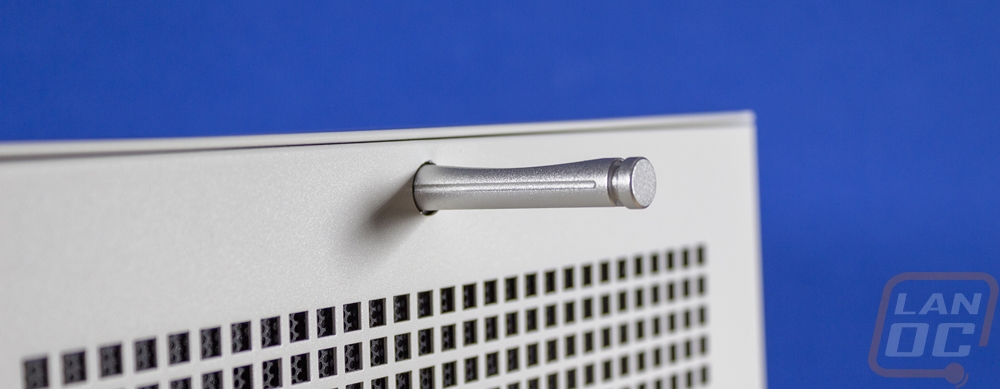
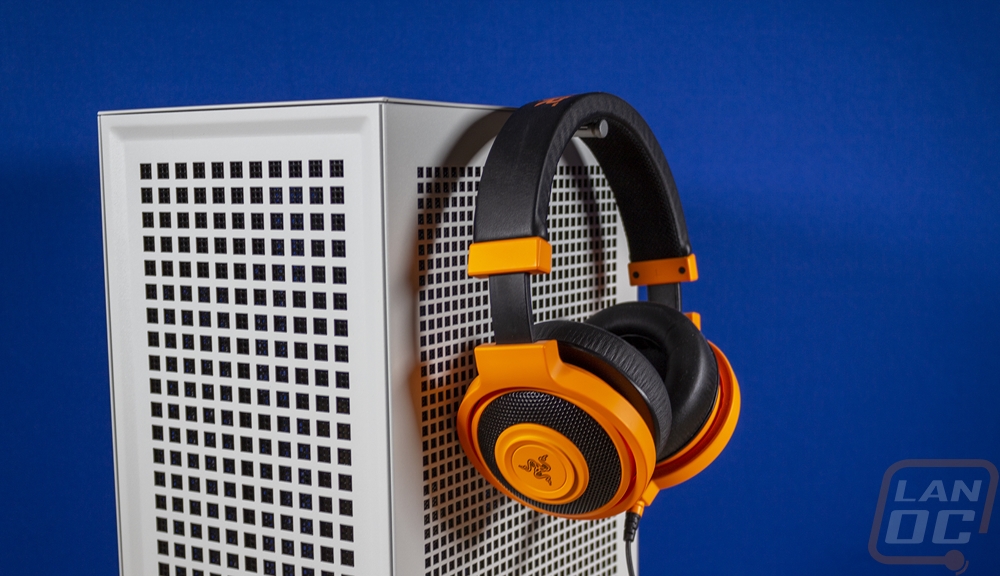
Both the left and the right sides of the Revolt 3 have a very similar setup with just one small change. The same square holed ventilation rungs down both sides with around an inch of solid panel at the edges and a thicker area down at the bottom without ventilation. Up at the top, both sides have a small silver dot. This is unique to the Revolt 3 and is a pullout headphone hanger. They push to pop out then have a small edge to help you pull the hanger out. Both sides have the same hanger but this is where the two sides are different. The location of the hanger favors slightly to the front of the case, so each side panel is specific to that side. The pop-out hangers also have a slight curve cut into the top to help keep your headphones in place as well.
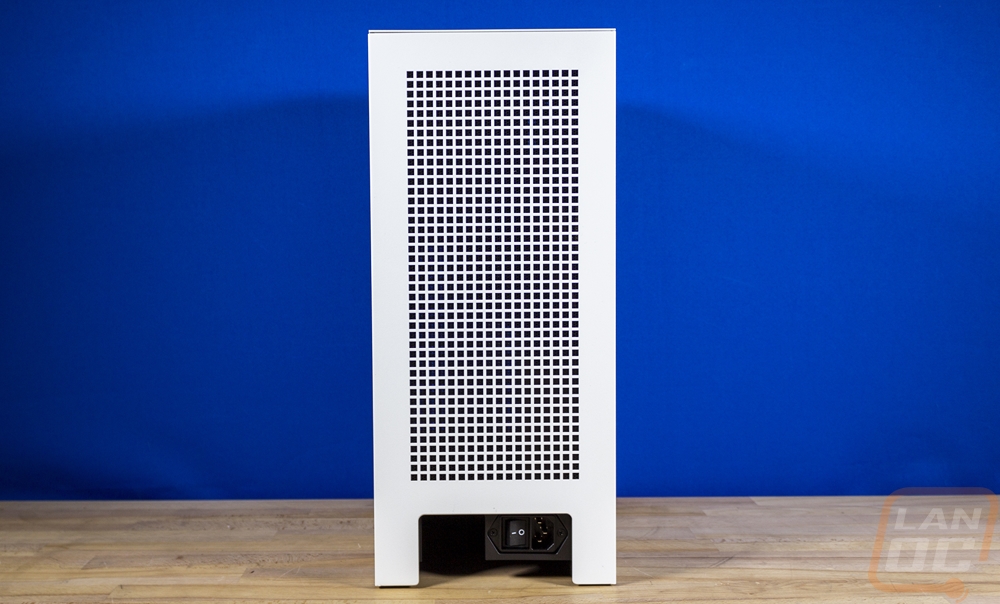
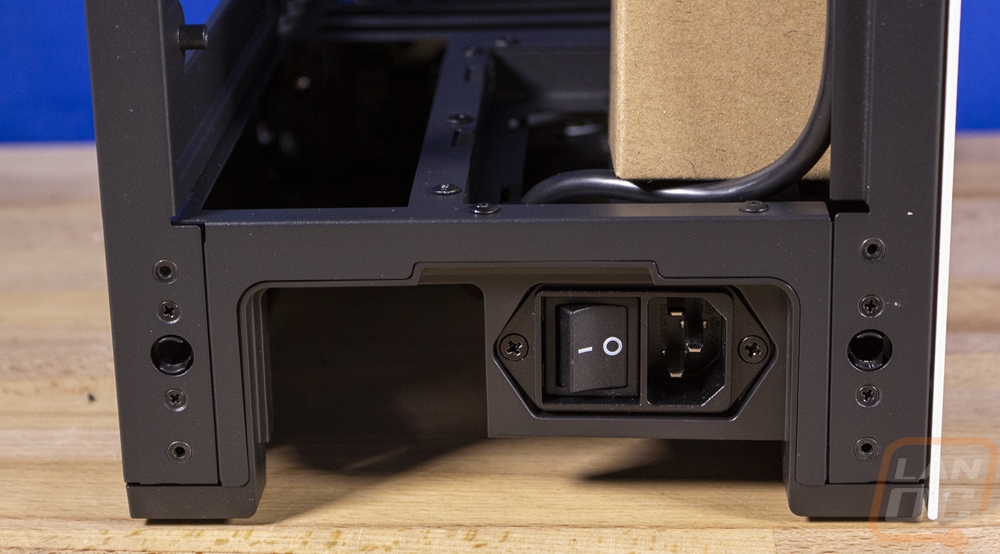
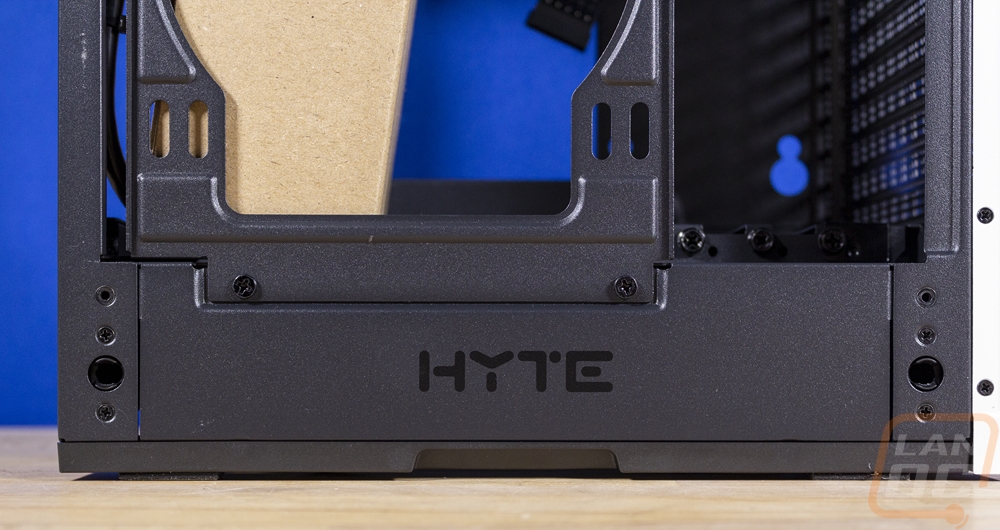
I know I sound like a broken record, but the back of our Revolt 3 has the same all-white finish with squared ventilation holes covering a majority of the panel. The only thing different here is that the back doesn’t have the beveled edge like the front panel and down at the bottom there is an opening. All of the PC connections run into the bottom of the case, this is where they can run out. You can also see the power supply connection which faces out here along with the on and off power switch which is easy to reach.
Inside
Working with the Revolt 3 is shockingly easy for an SFF case. All four of the side panels can just be pulled off and just snap in place. This gives you quick access to the inside when needed without any tools and you can also get at the mash filters as well. This is also how you swap out the black mesh for the copper mesh included with the launch kit. With the side panels off you can also see that HYTE did make sure to label the side panels with an L and R stamped on to the back as well which should help not mix those up as well.
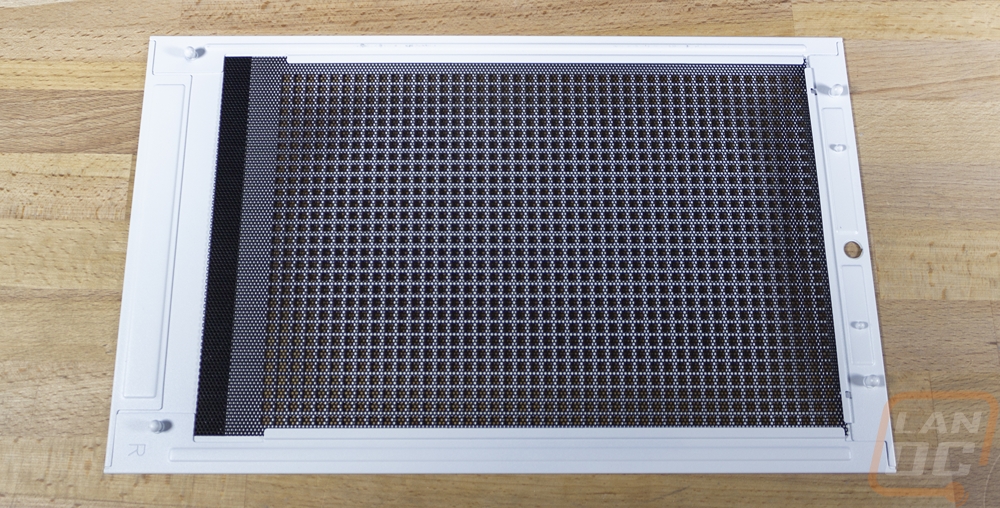
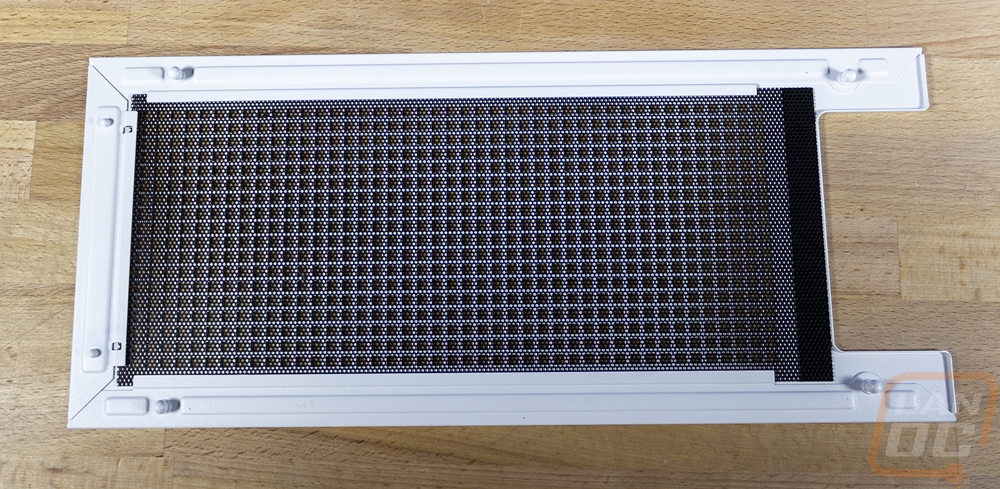
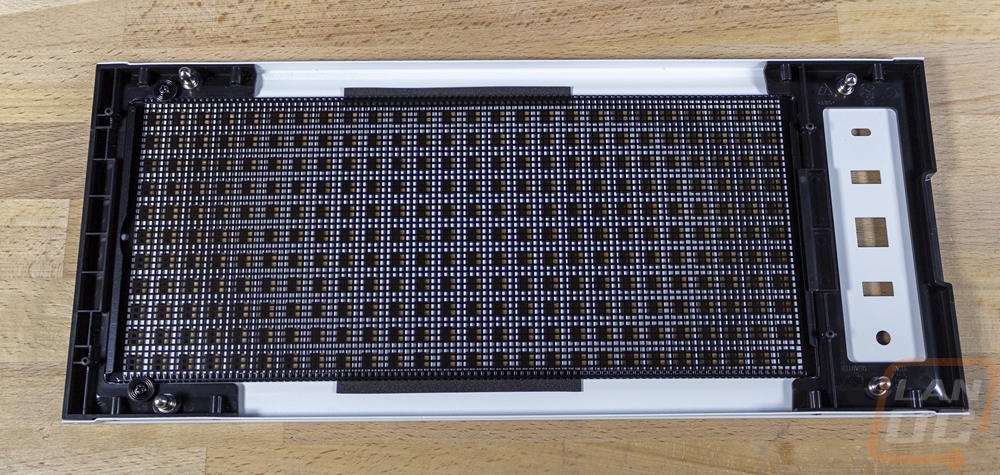
The front panel is a little different with its mesh. The others have a normal fabric mesh, but this panel has a metal panel that is painted black. It has two screws up near the top that you can remove to swap it out with the brass panel. This design also means you could paint the black mesh any color you want to add a little color to your build as well for a quick and easy mod.
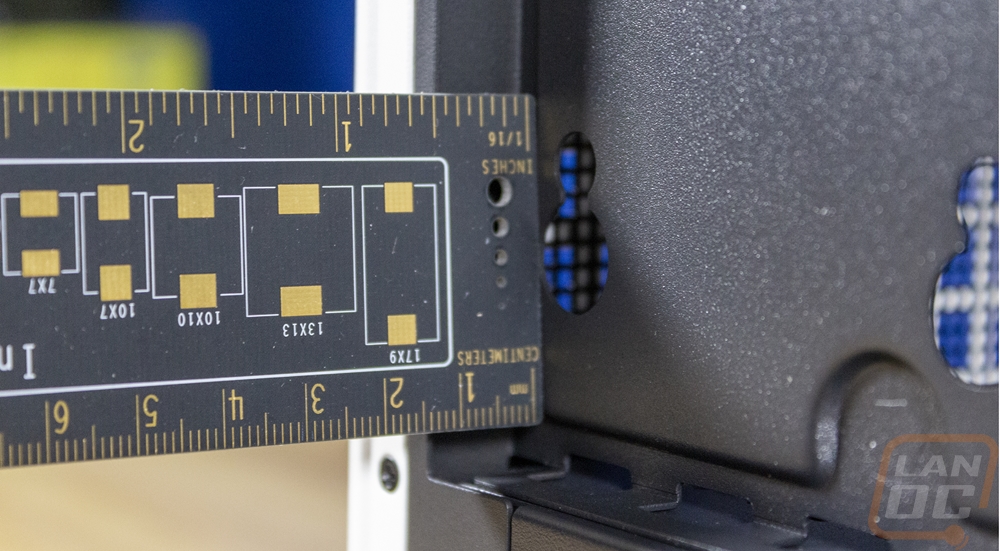
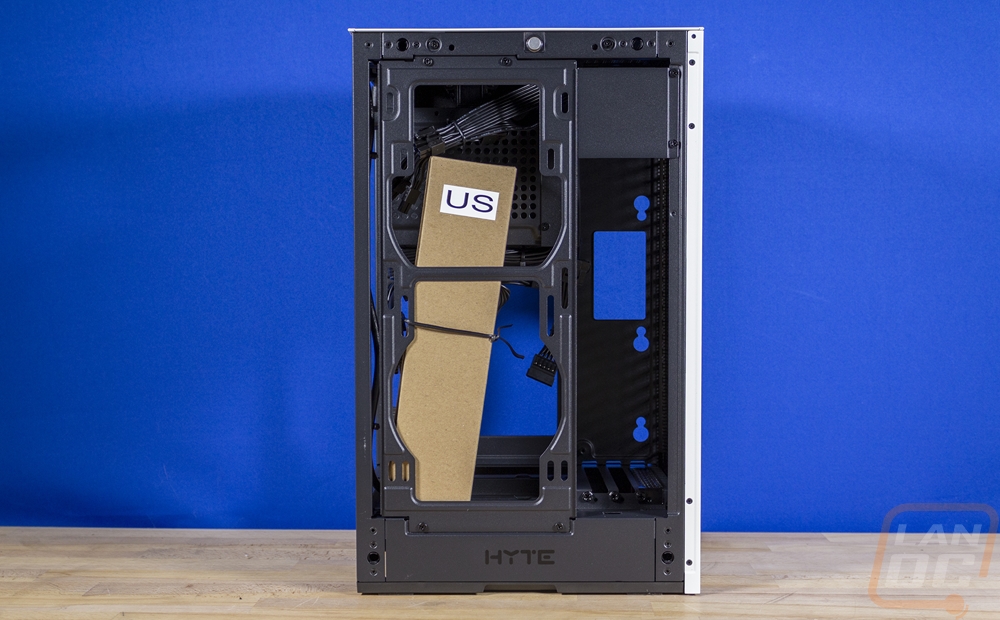
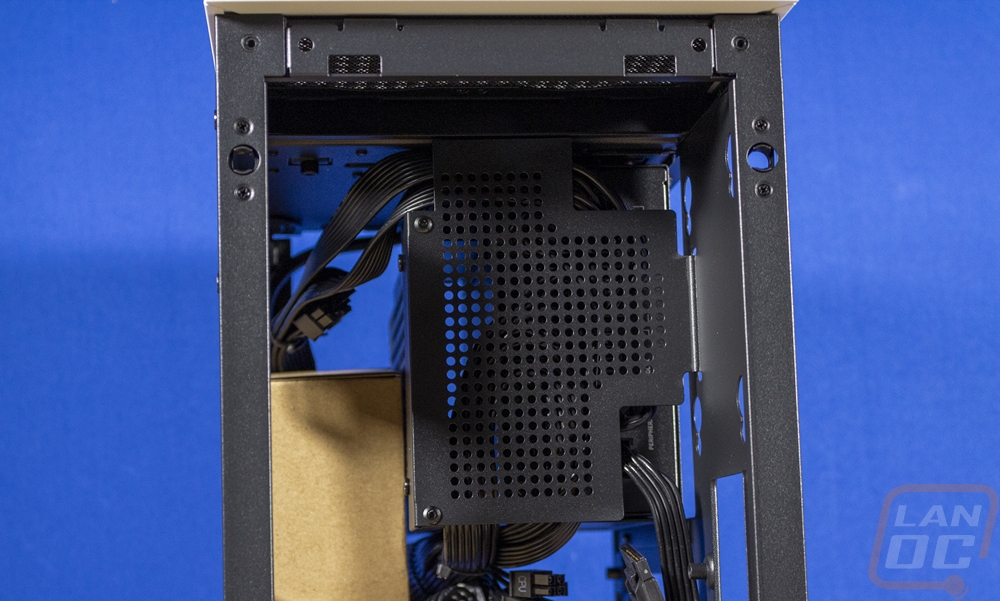
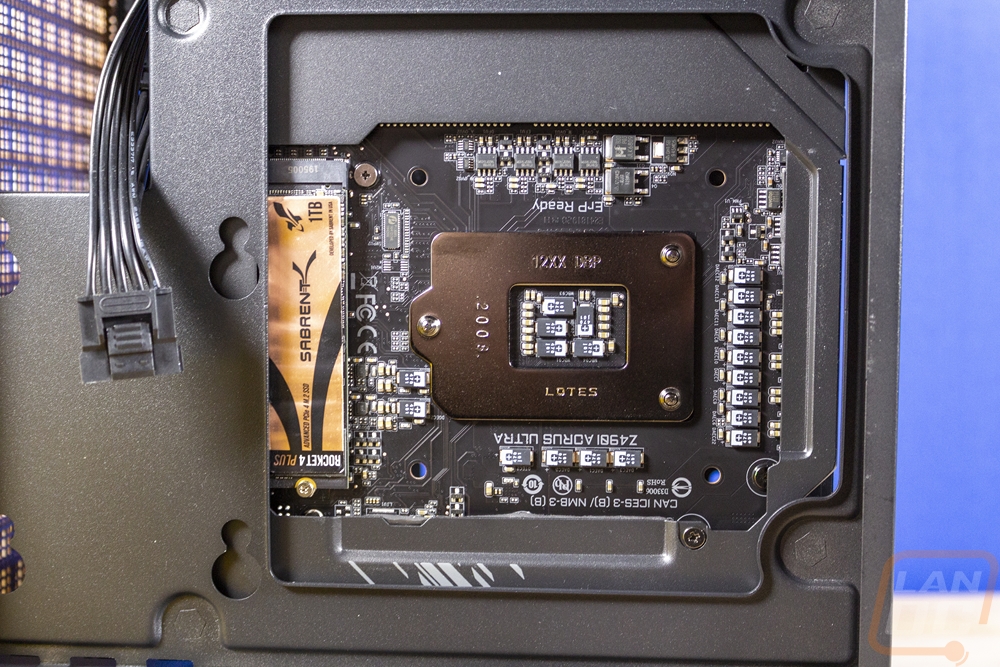
Officially it is the right side of the Revolt 3, but it is also the area behind the motherboard. You have a huge opening to give you access to the back of the motherboard for CPU cooler installation and more recently for M.2 drives as well. There are also two 2.5 inch drive mounts back here as well on the left with the four screw slots. They include screws and rubber mounts to slide in place there. Then up top, you have the power supply opening. The Revolt 3 comes with a power supply in the retail version but if you want to provide your own directly from HYTE you can get the case without a power supply. The one included has iBUYPOWER branding and is an SFX-L 700 watt 80 Plus Gold model which has custom length cables to help fit in the case. If you provide your own you can go with the shorter SFX or SFX-L sizes. The back of the motherboard tray area has around a half inch of space to fit those SSDs or if you need to hide a controller box back here.
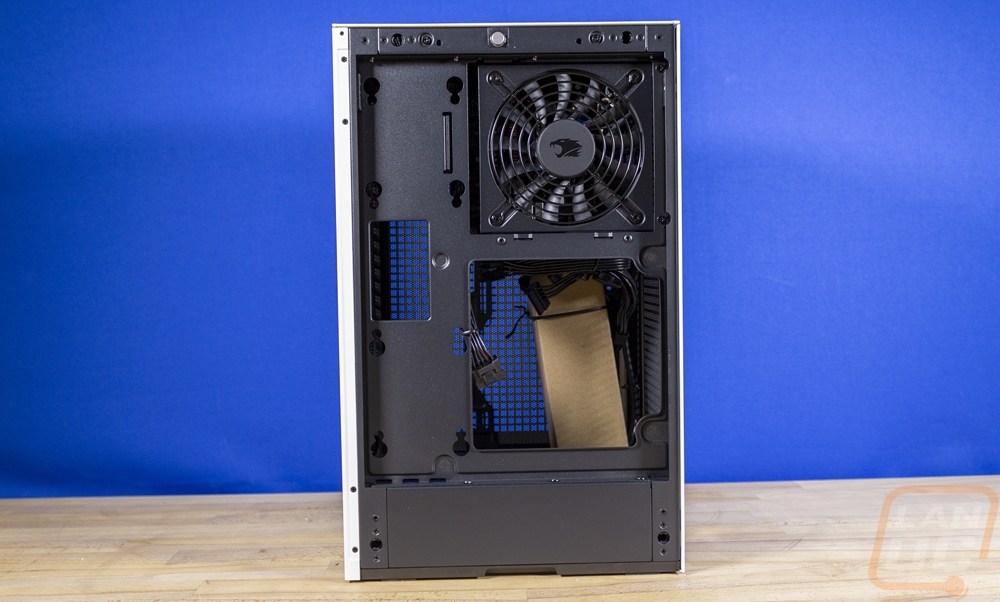
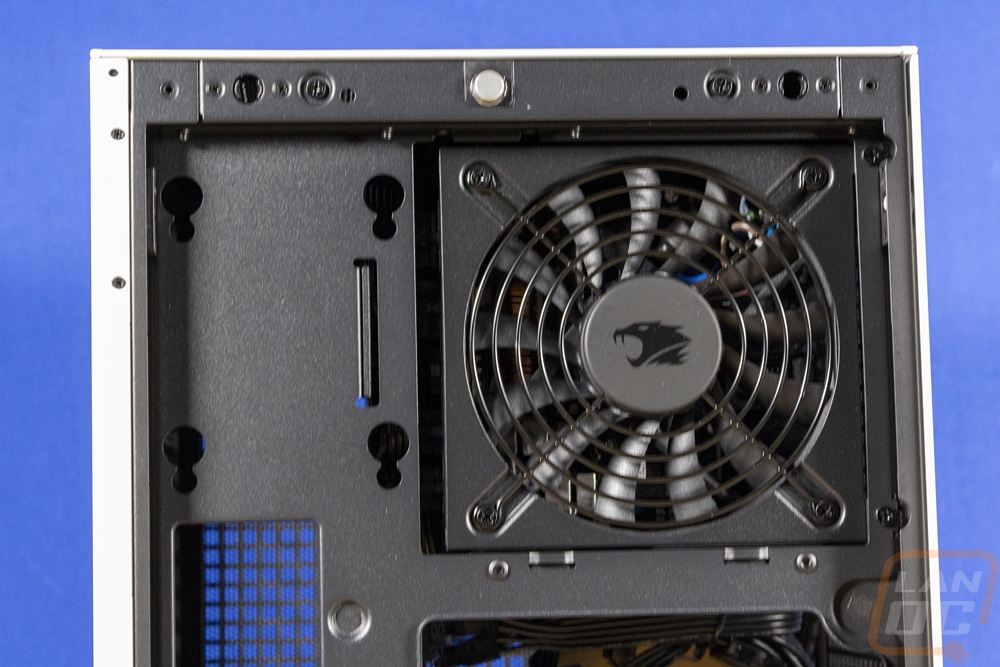
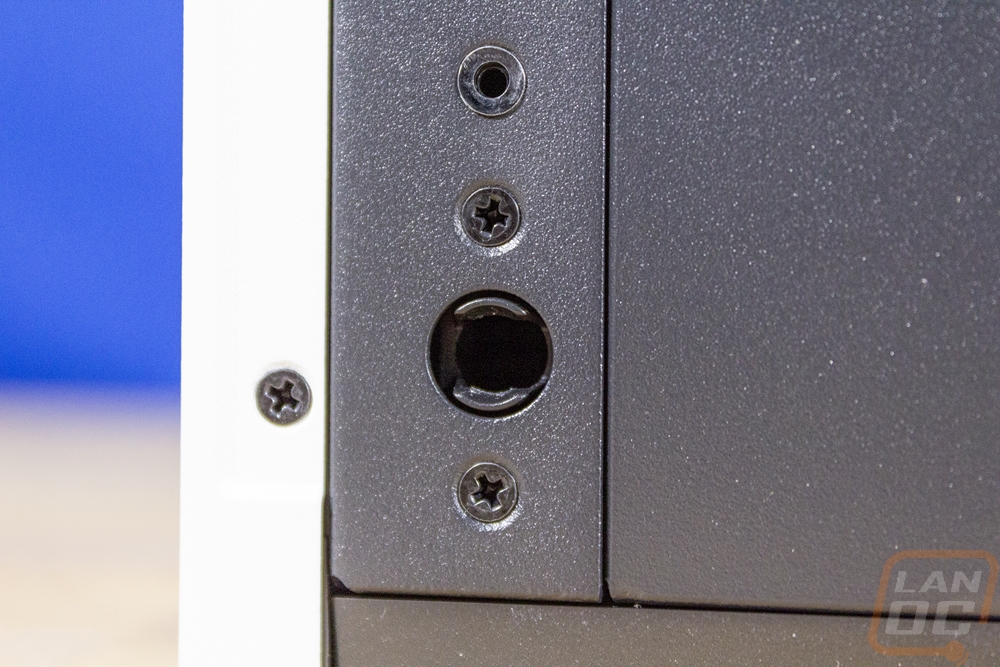
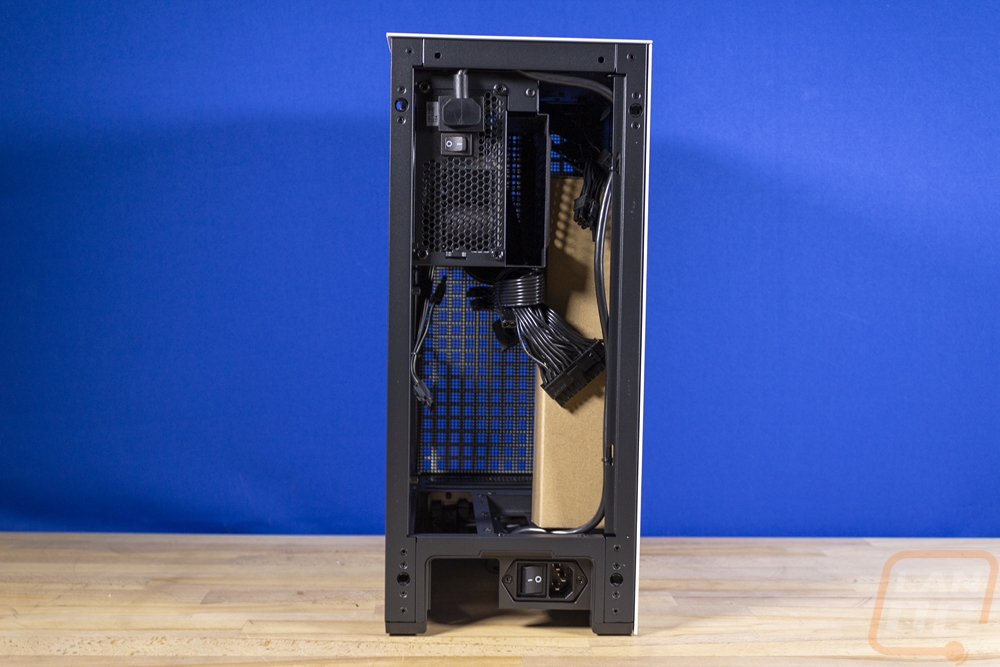
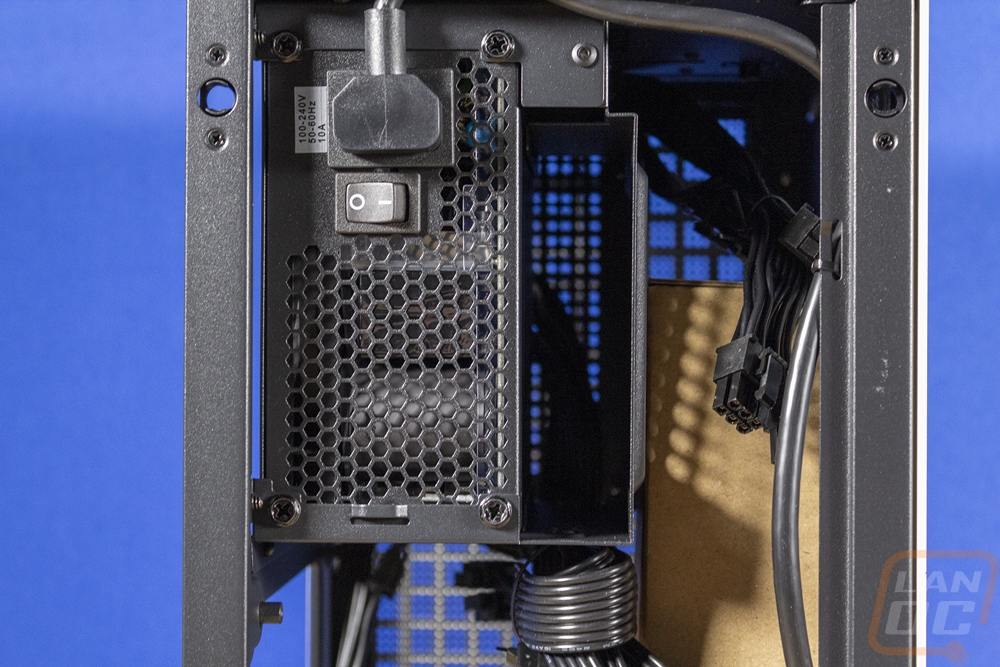
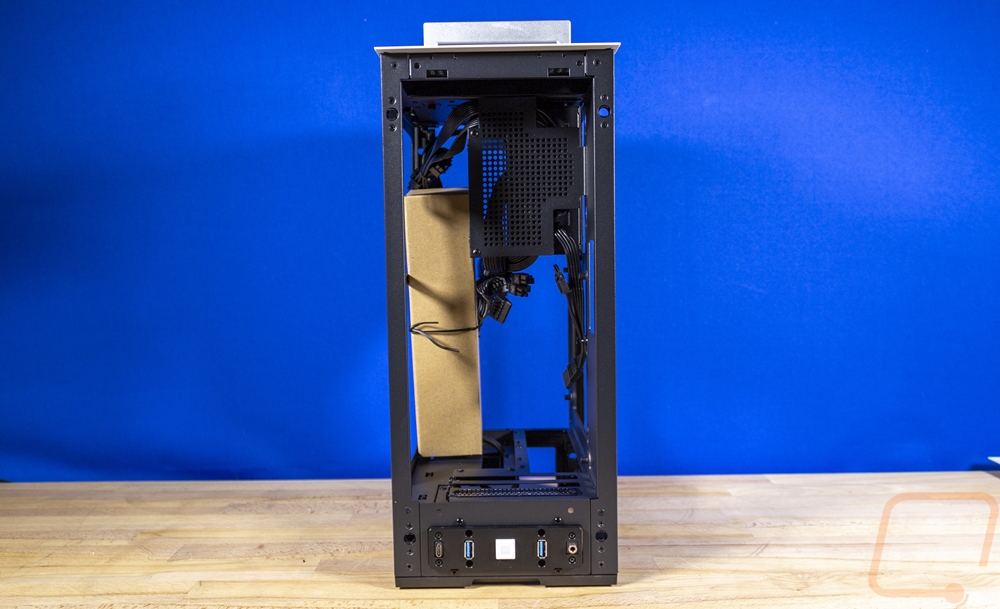
Next up we have the back of the case. Up top, you can see that HYTE is using a power cable extension with a hard 90 up top to plug into the SFX-L power supply and then to wrap around down to the bottom of the case where you plug your actual power cable in. I did want to point out that the PSU comes turned off at the PSU as well so make sure before starting things up to flip that switch. The PSU does fit in that top bracket perfectly and the bracket also has a second opening which is where they have tucked in a single 3.5 inch hard drive opening. In total, you can fit two 2.5 inch drives or SSDs and the one 3.5 inch hard drive on top of the one or two M.2 drives that you can fit on your motherboard depending on the board. For an SFF build, that is a lot of space. Down at the bottom where the power cable plugs in they have a second power switch and the rest of that bottom opening is where any cable plugged into your motherboard's rear I/O will come out.
The left side of the Revolt 3 has just one big thing going on. This is where you can mount your AIO cooler or fans. The mount is actually a door, but it still uses four screws as well, two up top and two at the bottom. They have support for dual or single 120 or 140mm fans and the door design is there to simplify everything and to give access to the rest of the system later. You can pull this door panel off and remove the screws (I wish it just had two to make this quicker) and swing the cooler out and you have full access to the motherboard and video card.
The front of the Revolt 3 is also the video card side of the case. So even though there isn’t a window, this is the side that will be pulling in cool air for it and the front of the case is least likely to be obstructed which is nice. This side is very open with the side panel pulled off giving you full access to the GPU. Down at the bottom, all of the front I/O are still there as well, including the button which matches our white panels.
Looking through the front section down into the inside we get a little more insight into the motherboard layout as well. You can see the rear I/O opening which also has a hole above it for cable management. Then next to that are the three PCI slots. Being an ITX build there is only room for one device, but HYTE has left a LOT of room for just about any video card with three full slots of width, 140mm of height, and up to 335mm in length.
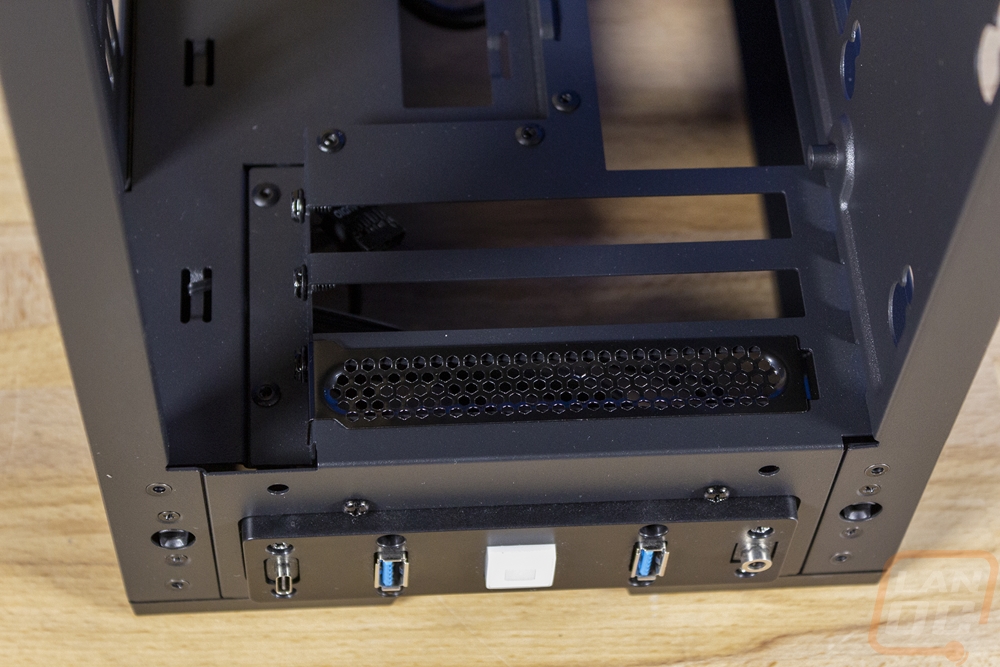
Looking in on the bottom of the Revolt 3 we can for one see the four inch long rubber feet that it uses to keep the tower from sliding around. Beyond that, though there is a big opening from the bottom to the bottom of the main section of the case. Some of that space is used for the cables going to the front panel and for the rear power cable. But this is also where the motherboard's rear I/O panel ends up as well as the GPU I/O as well. So you will be plugging in any extra devices here and running those cables out the back. For LAN events this may not be much because you could use the front panel connections for your keyboard and mouse. There is one thing to consider though, if you use flash drives you will need to save the space on the front I/O because a long flash drive isn’t going to fit in this space (a shorter drive will work fine however).
Installation and Performance
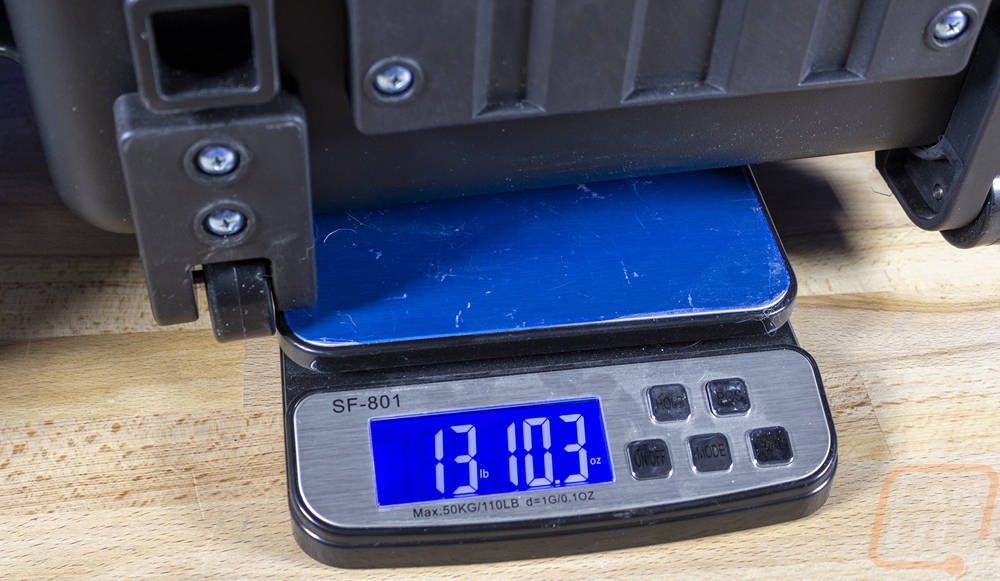
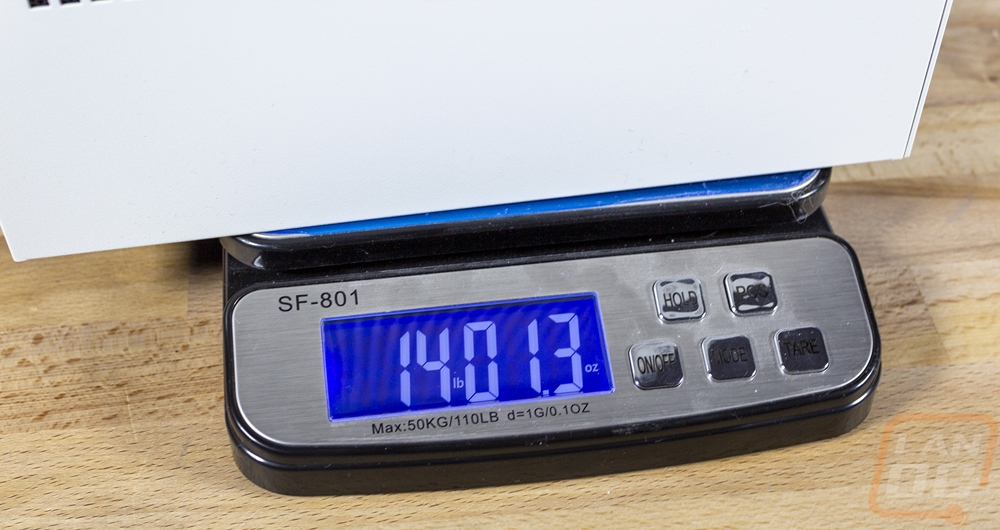
Before getting started I did get the Revolt 3 back on the scale. The top carrying handle has a weight limit of 30 pounds and with the flight case, I was curious how much everything would be together so I wanted to get a starting point. The Revolt 3 with the included 700-watt power supply came in at 14lbs and just over 1 oz. The PSU is some of that but overall given its size it isn’t a very lightweight case like some of the all-aluminum designs out there.
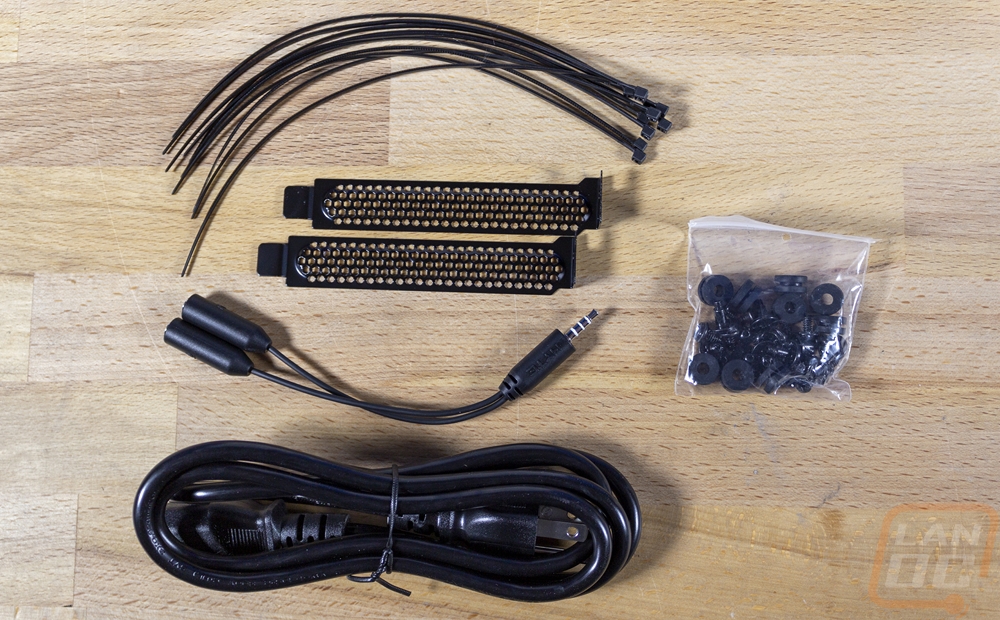
The accessory box inside of the case came with a few things. You get a power supply cable of course for the included power supply. There is a microphone/headphone adapter cable for anyone who wants to use a traditional split plug design on the front I/O connection with its single plug. You get black zip ties and then a small baggie of black screws and rubber mounts for the hard drive/SSD installations.
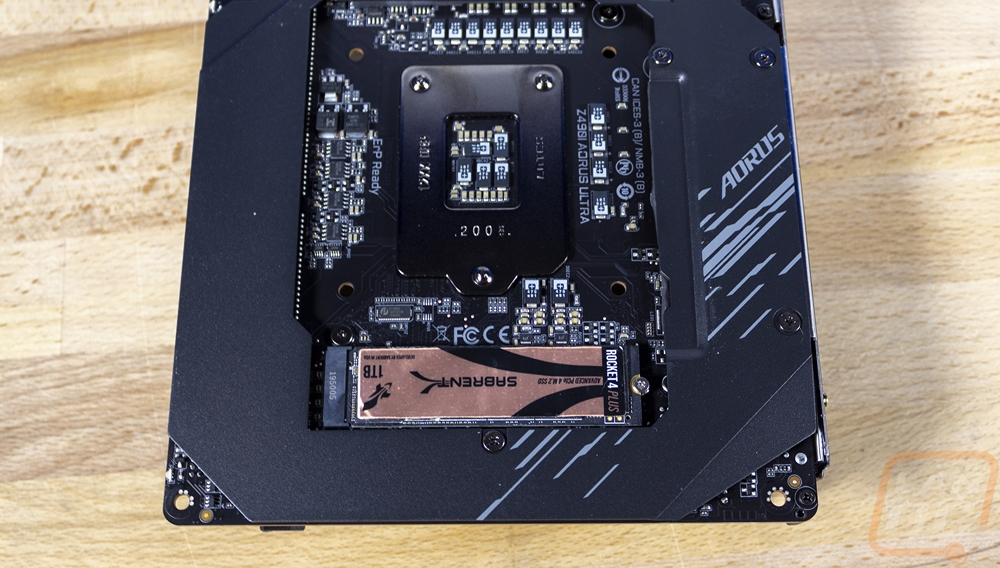
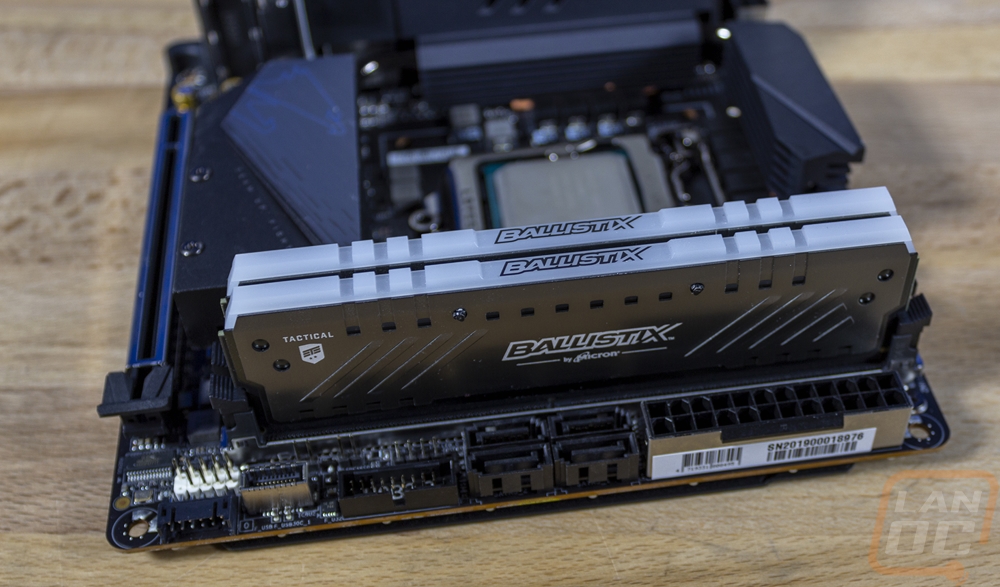
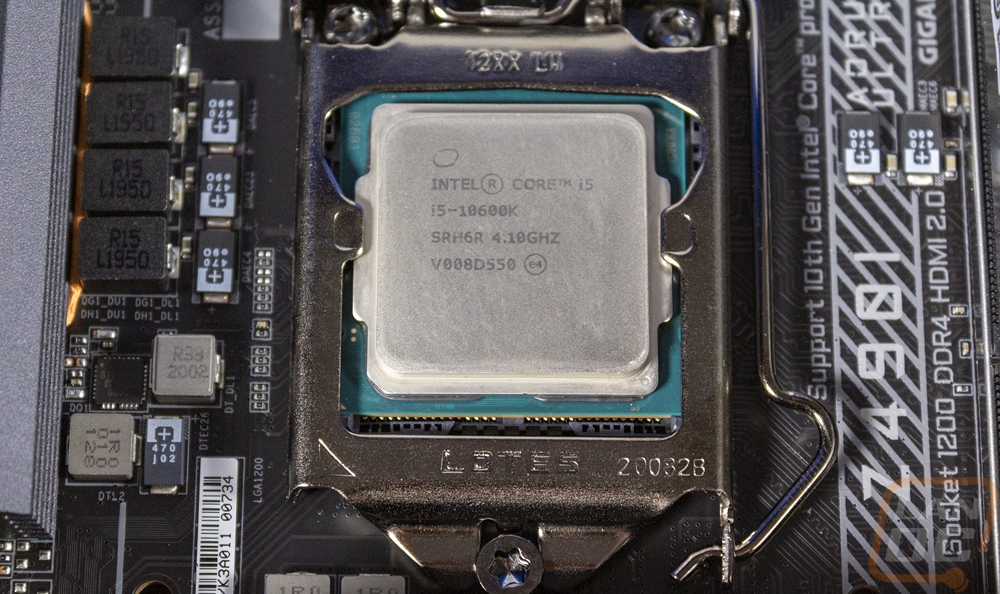
Rather than just build a temporary system in the Revolt 3, I am hoping to eventually make it out to LAN events so I wanted something that would be able to handle anything. I went with the Gigabyte Aorus Z490I Ultra combined with the Intel i5-10600K. It isn’t an i9 with a crazy over 5GHz boost clock and 12 cores. But it has 6 cores and is close to 5GHz with its 4.8 GHz boost clock and has a solid 4.1 GHz base clock. A good mix of performance while not having to worry about thermals too much as well. For memory, I went with an older Crucial Ballistix 3000 MHz kit which I may switch out later to a higher capacity kit. Then for storage, I wanted to keep everything simple and fast. I installed the Sabrent Rocket 4 Plus on the back of the board and the Crucial P5 on the top under the heatsink. Both are 1TB and NVMe, I installed windows 10 on the Sabrent and have extra room on the P5 for more game installs in addition to the main drive.
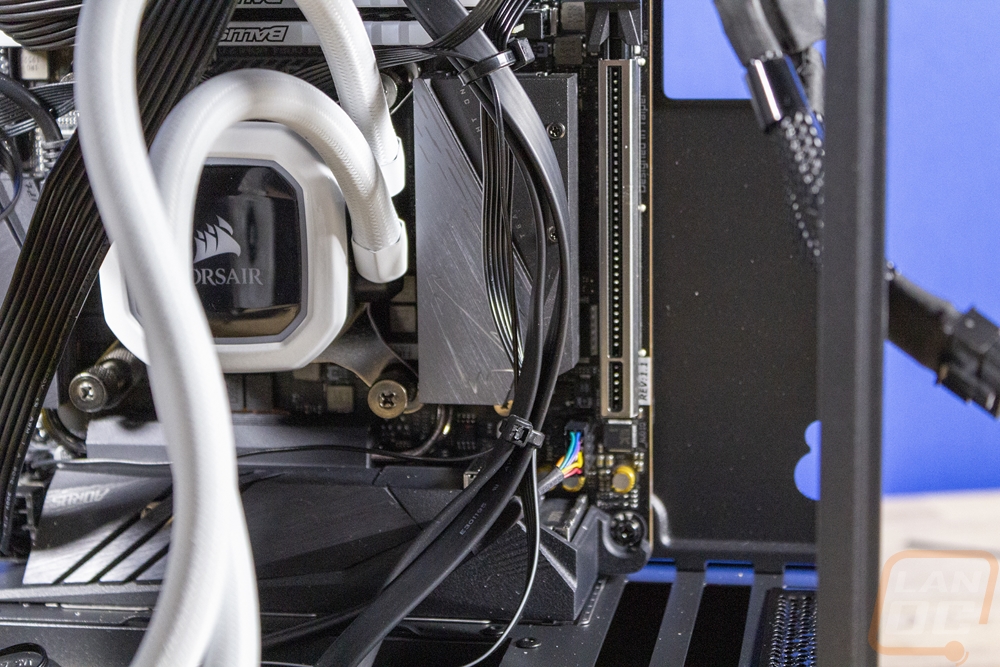
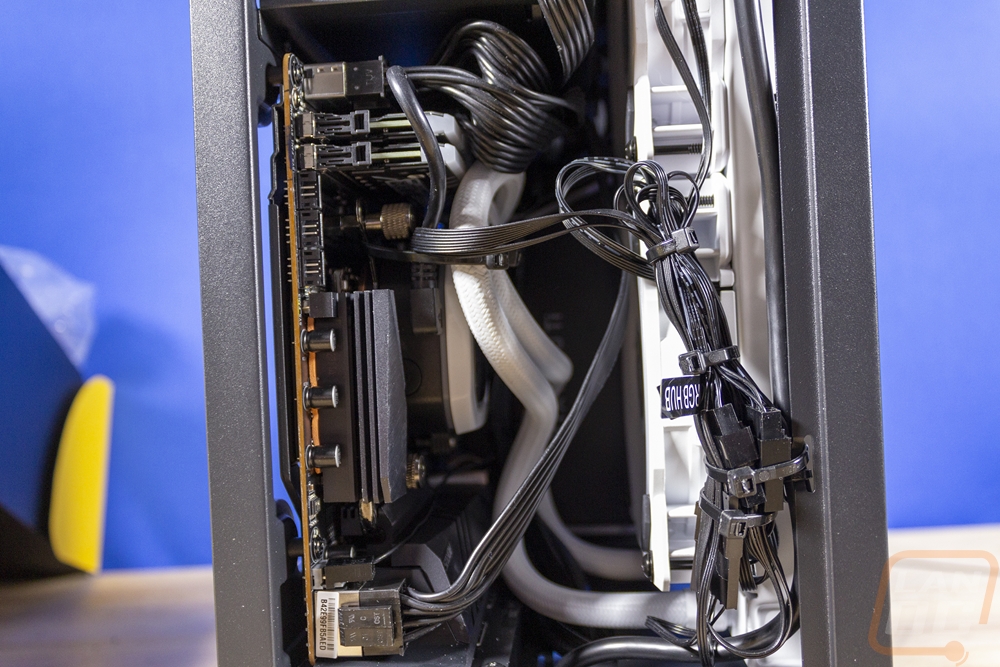
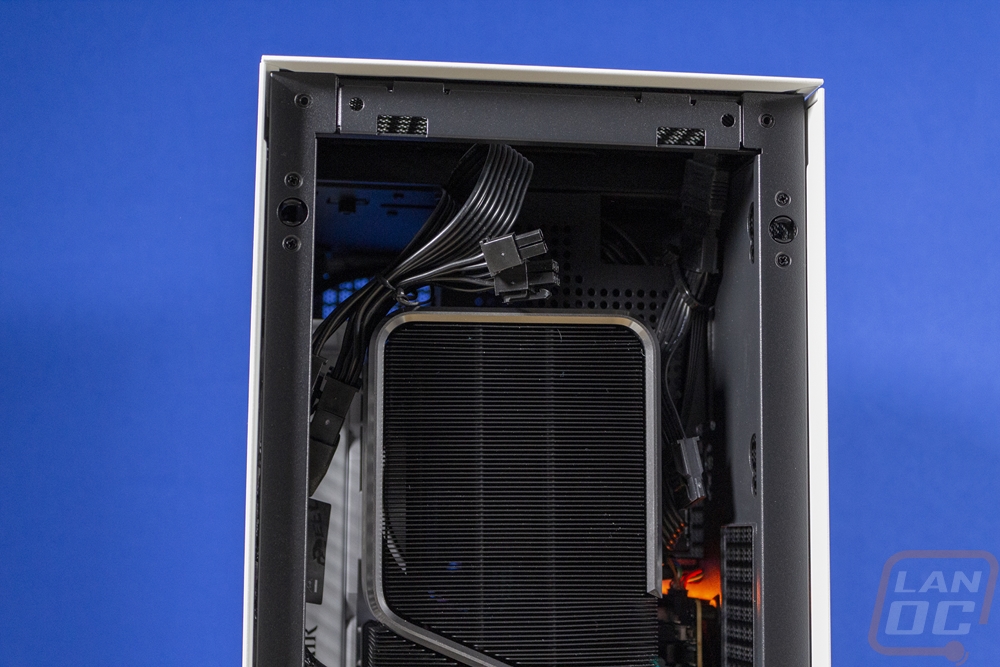
With everything installed into the motherboard ahead of time, it made installation a lot simpler. Slide it in and install the board and we are already halfway done! I just needed to get the wiring hooked up, the AIO, and the GPU. The PSU wiring was mostly simple, they have shortened cables to help with things but it did cause problems with the 8-pin CPU power on the Aorus motherboard which was near the rear I/O down on the bottom left corner. I ended up having to run this across in a way that goes over the CPU which if we went with air cooling could have caused some issues. Speaking of air cooling, the Revolt 3 does support it, you can run up to a 140mm tall cooler, but it is obvious that the design favors water cooling with an AIO where you can get more surface area in the same space. The 24-pin motherboard was up on top of our motherboard which was reached easily by the PSU but it does create a lot of wires all in that one area. Not having tall memory helped here but this is also the same area where the Aorus board has some of its other connections like the USB 3.0 and the USB 2.0. For the USB 2.0, they used a weird adapter cable which adds more wires in this area as well but is needed for our AIO cooler.

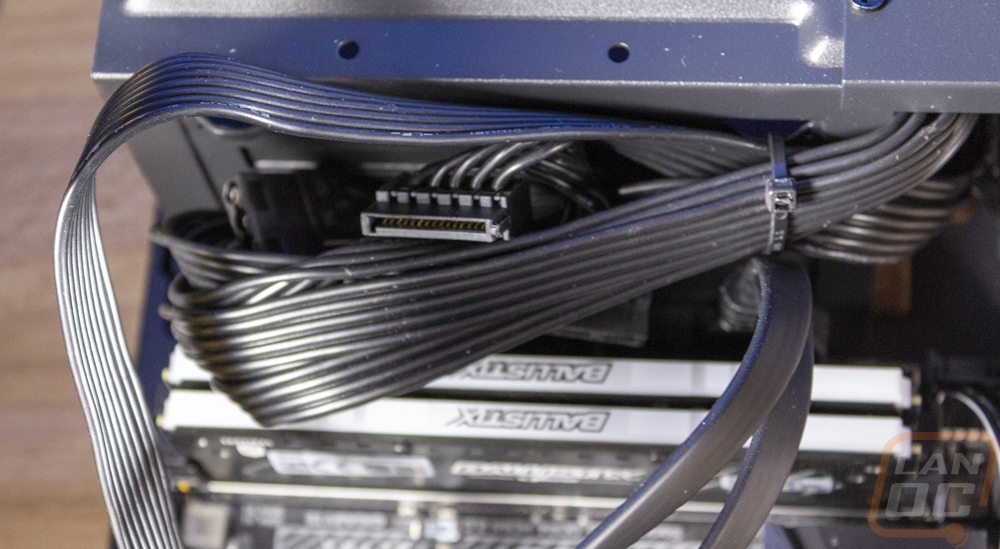
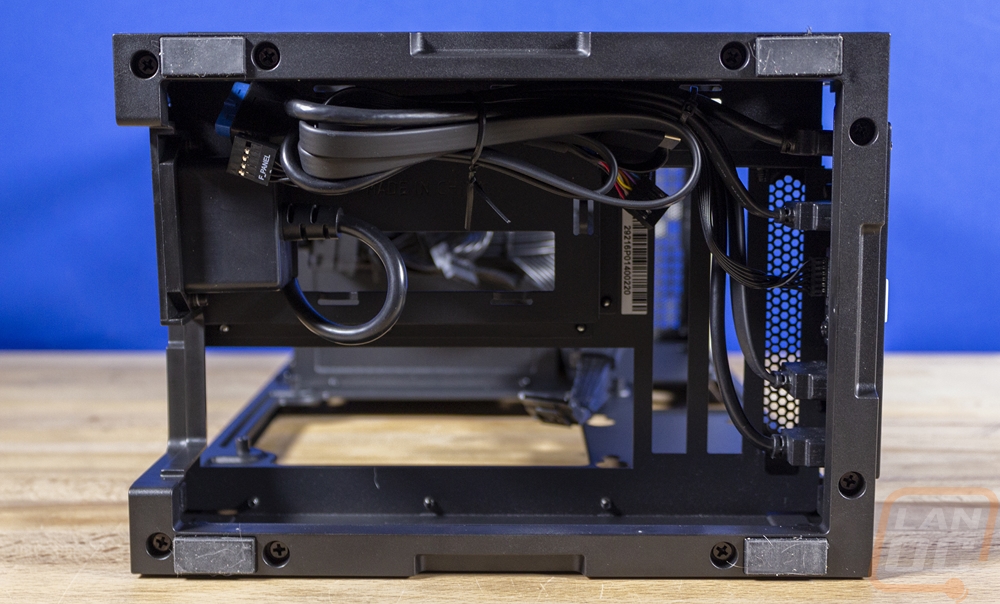
The front panel connections all run from the bottom and go through that one cable hole above the rear I/O. I do wish there was maybe a small slot for a few small wires to get to behind the motherboard tray or event over the video card. The front panel USB 3.2 Gen 2 plug is also different. They didn’t go with the newer Gen 2 internal connection which our board had and instead used a standard Type-C. So it uses the Type-C connection on your motherboard's rear I/O. I was hoping we would end up with two gen 2 type-C ports but the front is basically just a passthrough.
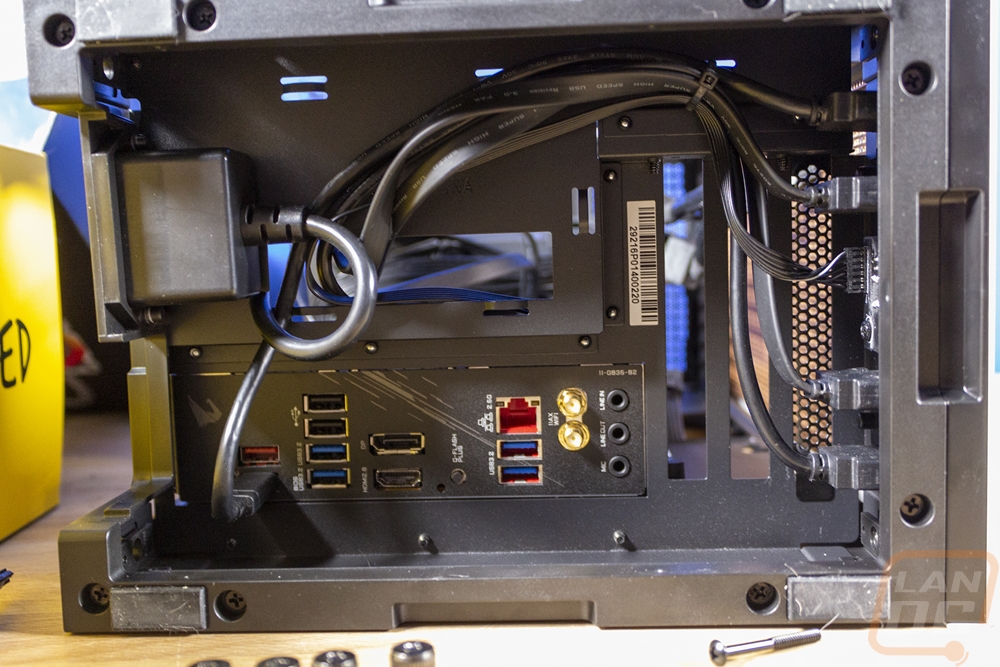

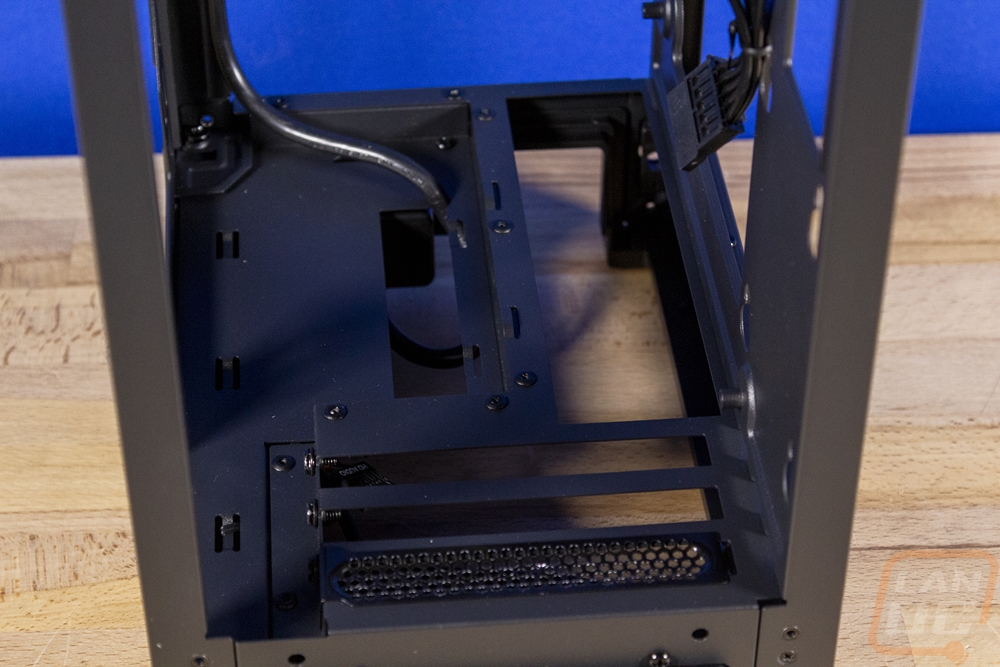
At the back, the opening they left does a great job of allowing room to get at the CPU and in our case the M.2 slot as well. You can also see that the included PSU also has a power cord sticking out back here to help with the 2.5-inch drives back here if you use them.
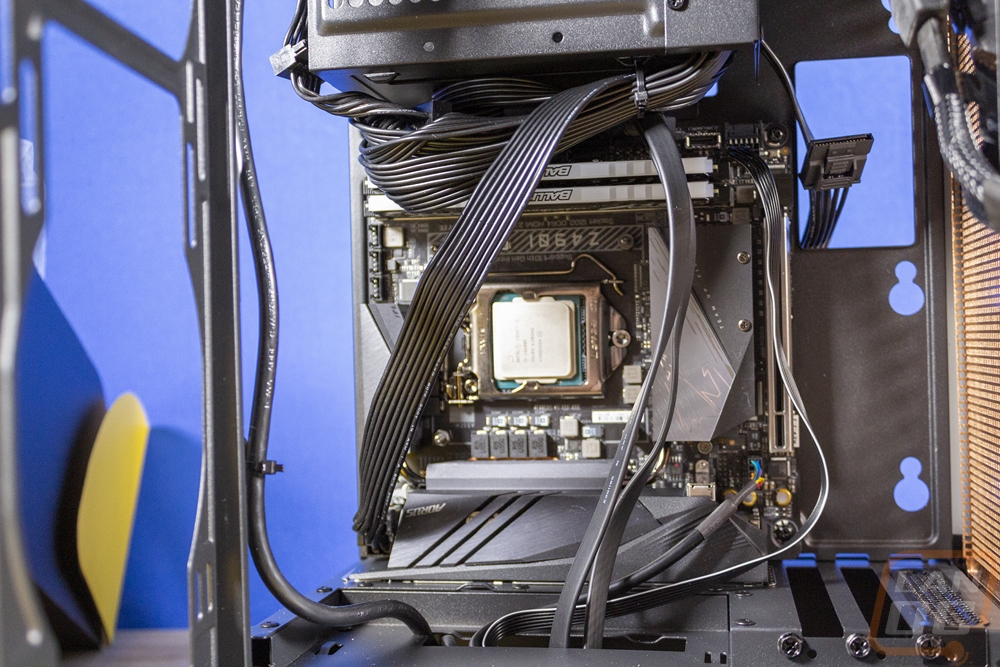
Here is a look at the CPU power when hooked up, like I said there wasn’t any way to avoid it running right over top of everything. The placement of the hole at the bottom of the case where the front panel connections come in is similar as well but I did later clean those up a little with cable ties.
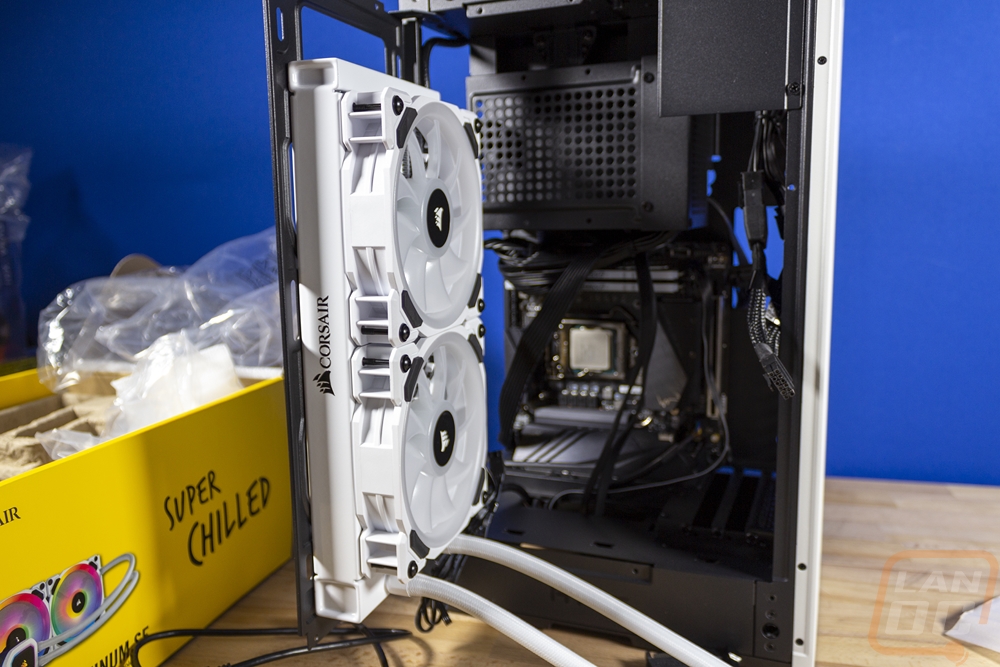
The swing out door for the AIO or fan installation was really nice when installing the Corsair H100i RGB PLATINUM SE. I installed the fans on the radiator outside of the case and the same goes for making sure I had the correct bracket installed on the water block for our CPU. From there you just mount the radiator to the door and install the pump side. You do need to keep your wiring all to the left to make cleaning that up simpler and so that when you use the door it doesn’t get pulled on. Then for the water cooling lines install them at the bottom and try to give them room to loop around the pump when the door is closed.

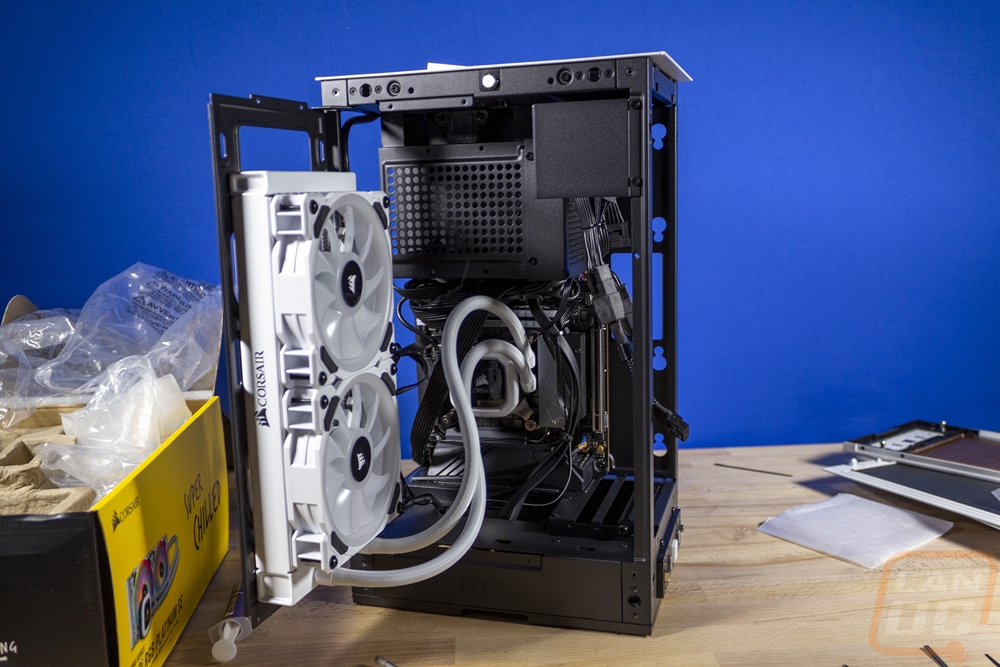
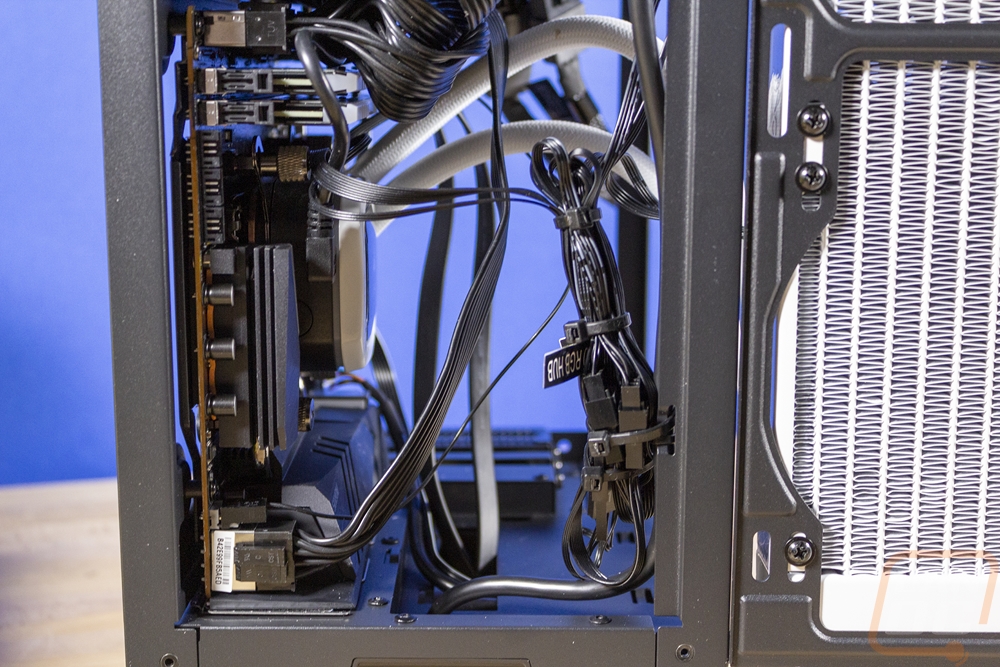
All of the fan and RGB wiring was then cleaned up with zip ties and with I did the same with those front I/O cables on the GPU side. Installing the GPU was easy because you have access from both the front of the case and the side. The weird Founders Edition power adapter complicated things slightly but was still workable. I should also point out that HYTE even included three PCI plugs for the highest-end GPUs that might need them. Each plug is a 6+2 so you have any combination you might need. Once I closed the AIO mount door I did end up using a zip tie on the water lines. They didn’t touch the fans without it, but I wanted to have a little more room for airflow around the cooler, and I didn’t want the lines to touch later on after transporting the case. I would suggest everyone look in the side and double check for cables and the fans before powering things up to save yourself any future trouble.
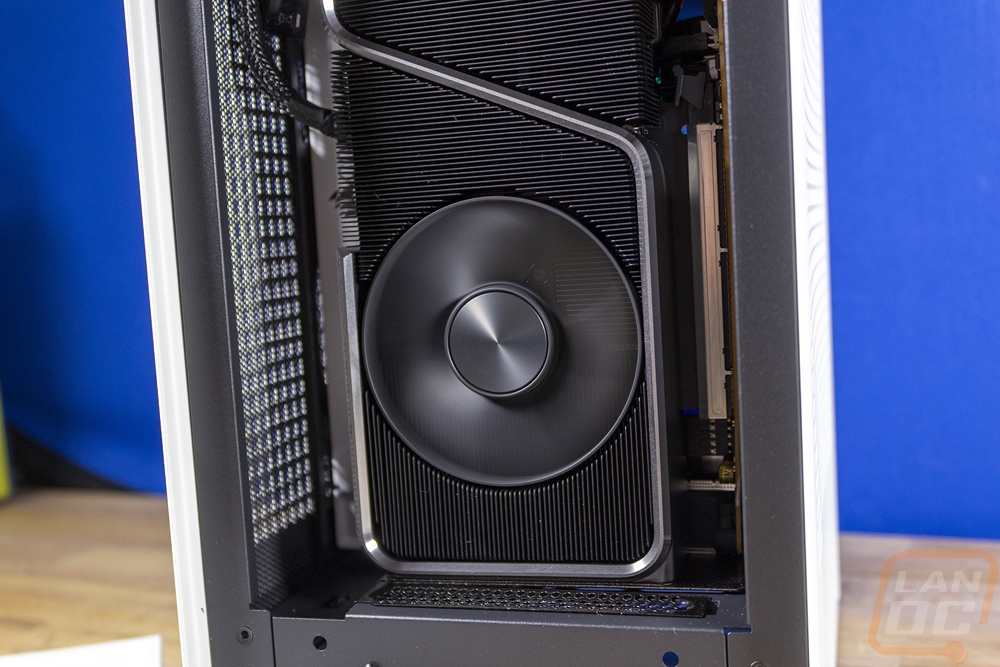
Here is a look at the RTX 3070 Ti Founders Edition installed in the Revolt 3 and this is a full-sized card. It helps give scale to the room they left for larger aftermarket cards to be able to fit which is rare in any SFF case.
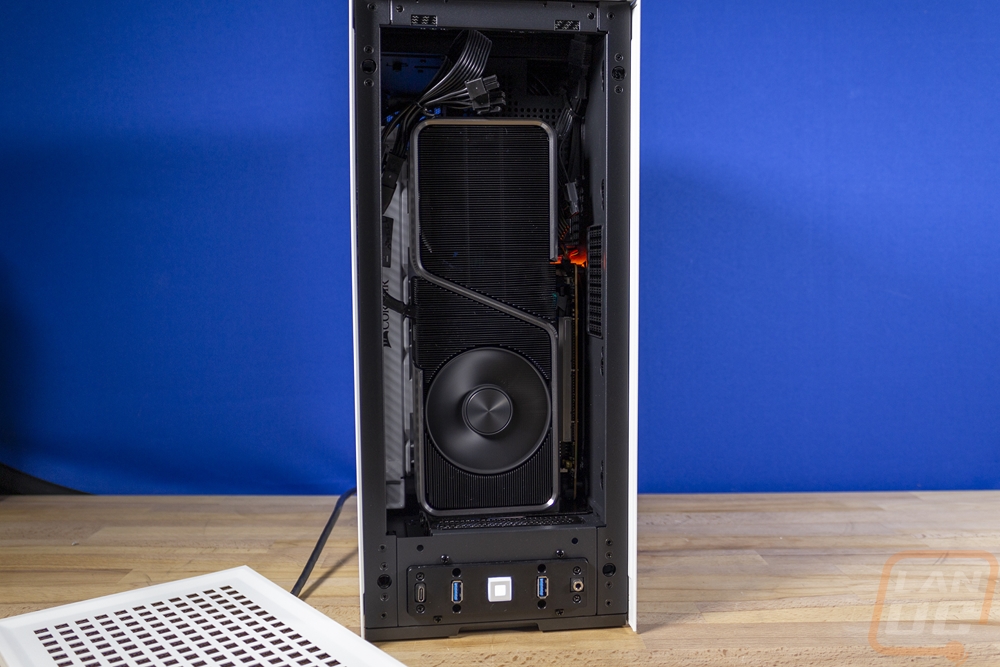
I did also swap out the front mesh to check out the brass accent on our white Revolt 3. It looks good but I think I still favor the black or maybe a bright custom painted color.
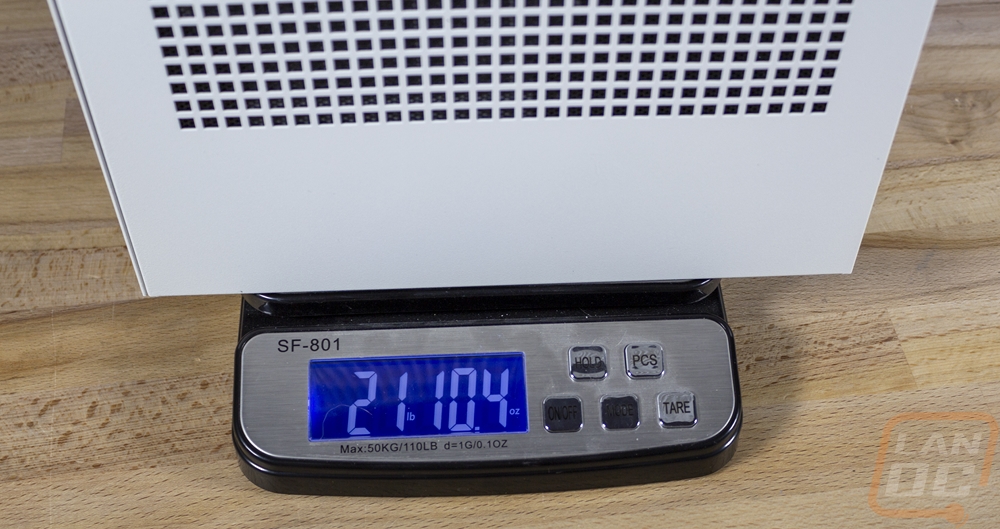
With everything together, I did get the system back on the scales which totaled in at 21lbs and 10oz. There is room for that to be higher depending on your configuration. If you have a 3.5 inch hard drive for example that would add over a pound and a half, two 2.5 SSDs wouldn’t add much but if either were hard drives it would add more. Then if you went with a dual 140mm AIO where ours is a dual 120mm setup you would add more weight as well. Altogether though it is still going to be under the 30 pound limit on the handle so no worries there. Add in the flight case which was 13 pounds and our setup would be close to 35 pounds, plus tucking your power cable, keyboard, and mouse into the case so it will fit under the 40-pound limit for a carry on as long as you don’t add to much weight in with the peripherals.
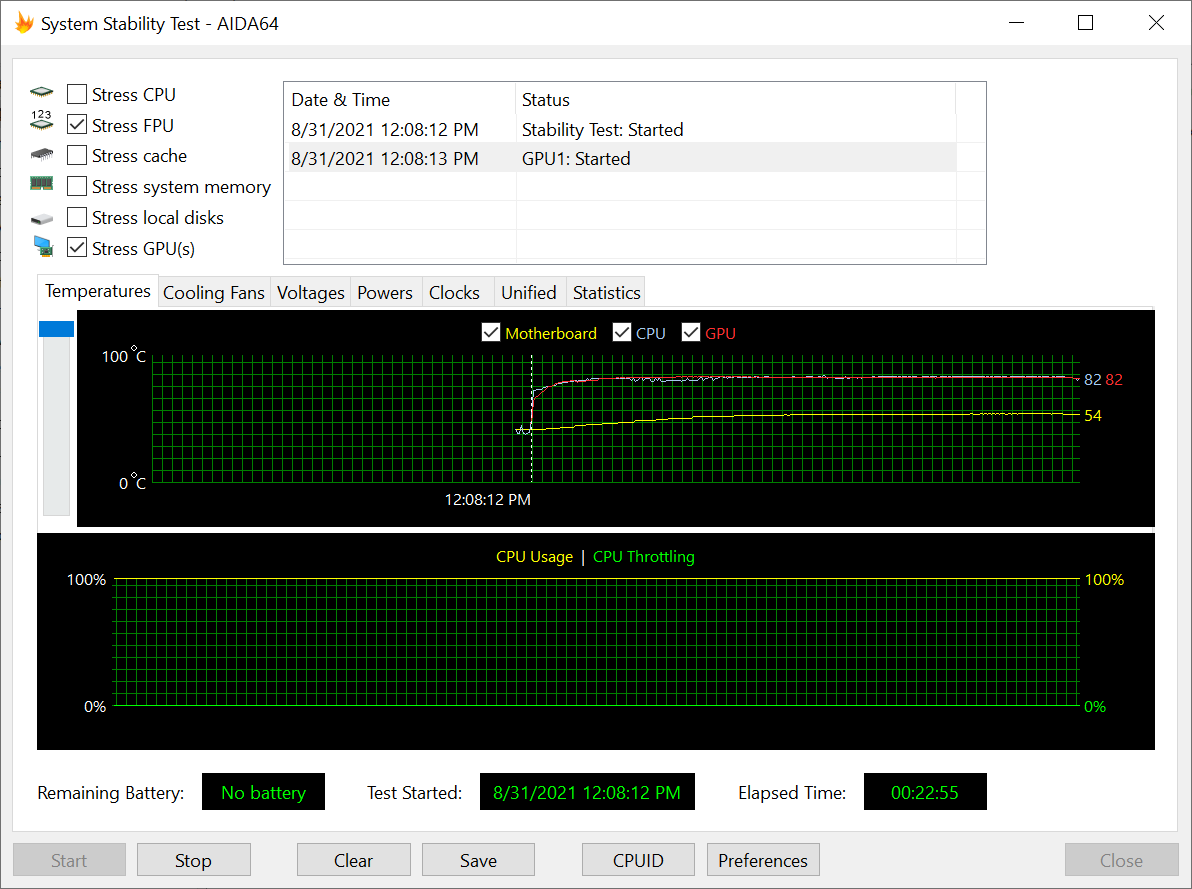
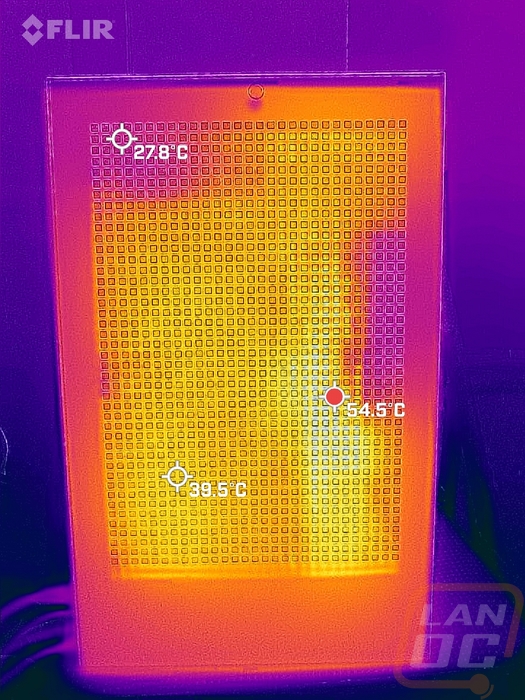
With everything together, I tossed Windows 10 on and jumped right into testing. My main focus was that the 3070 Ti and the 10600K would both be able to run cool and had the thermal headroom to run at full capacity. To test this out I started with a worst case scenario using AIDA64’s stress test to run the 10600K at 100% using the FPU workload which is far above will be seen when gaming and had it stressing the GPU as well at 100%. I did this to make sure they wouldn’t overheat and to get a look at thermals using our Flir. The CPU and GPU both settled at 82c with this extreme workload and the motherboard ran cooler at 54c. There wasn’t any CPU throttling but the CPU did run 8c higher than when doing this same test in an open-air configuration (with the same cooler). That isn’t bad considering I have the AIO set to push air out so it is pulling in air warmed from the GPU inside of the case. I may eventually switch the AIO to pull cool air in to test it out but I suspect that this is going to be the best configuration as it pushes the hottest air out. The GPU was also running 9c warmer than the same test on the open-air bench.
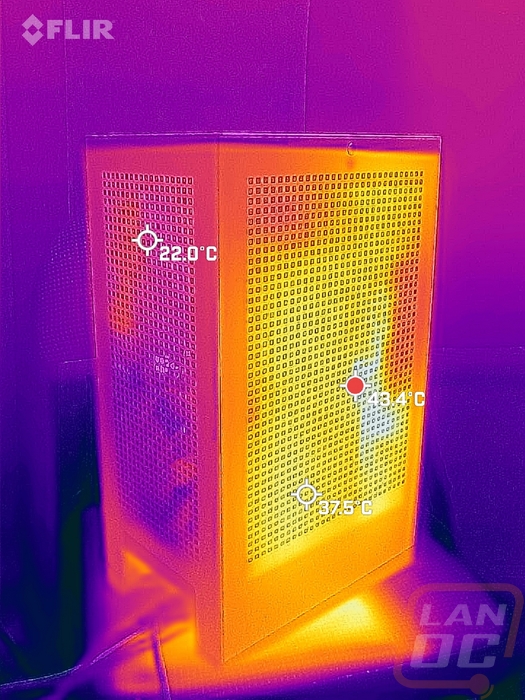
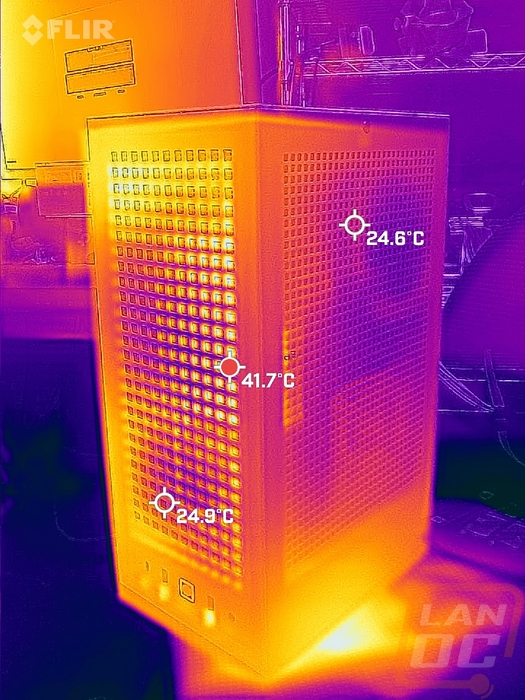
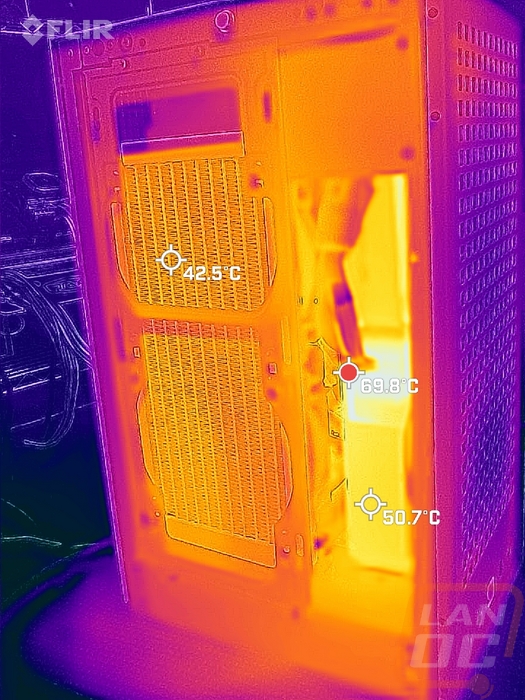
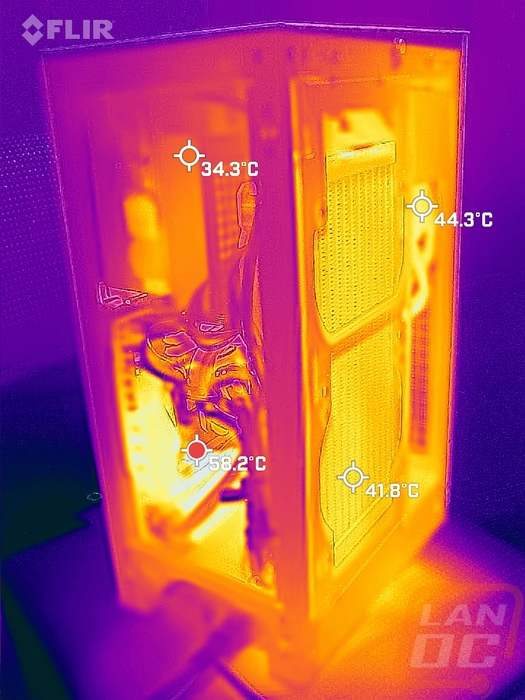
Here is a look at the thermals when running our worse case setup. The left side of the Revolt 3 is of course pushing out a lot of hot air with the AIO blowing out that direction. The right side is half the temperature as the left. There is a little heat ending up down in the bottom of the case which surprised me. I assume that is blowing out the end of the Founders Edition card. That does bring up a good point though. The Revolt 3’s configuration doesn’t work at all with an older blower design which is something normally I would prefer in an SFF build because it isn’t blowing the hot air into the case. Here though it would be blowing it all in that small compartment under the motherboard with your cables and almost no ventilation.

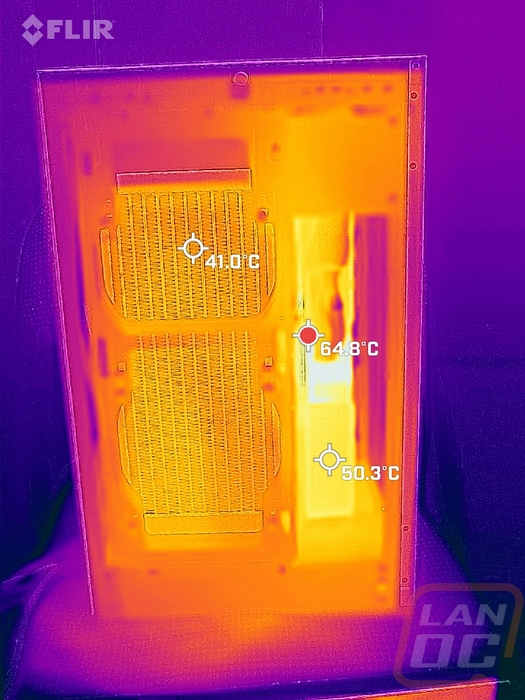
I pulled the side panels off so we could see the thermals inside as well. The hottest area is right at the center of the top of the GPU where Nvidia has their Founders Edition cards pushing air out of the top. The motherboard was warm but was also in line with what the motherboard sensors were showing in AIDA64.
Noise isn’t a Revolt 3 specific thing because the only fan included with the case is the fan in the power supply. So your noise levels will depend on what GPU you go with and what you do for cooling. Overall in my testing, the noise was only really an issue when I did the worse case test when the GPU and AIO were running at full capacity. The rest of my testing which included playing games and everyday use wasn’t an issue.
Speaking of other testing. I did test using Time Spy to check out how the combination performed. The 12189 score isn’t too bad.

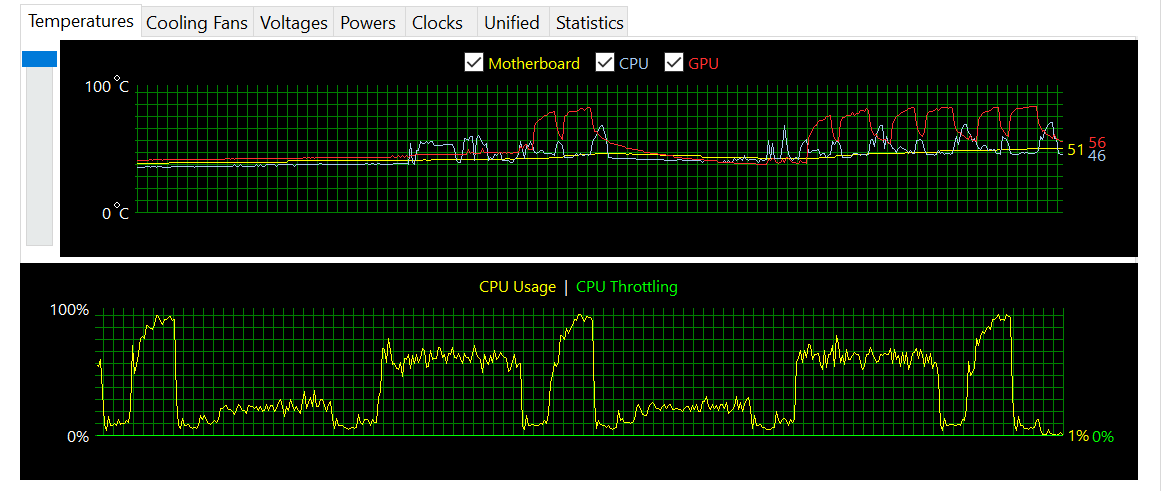
I also tested using 3DMark Time Spy set to loop to get a better look at the temperatures in a more realistic situation. The GPU was still reaching similar temperatures as before at the peaks but the CPU was running much cooler when not being loaded using the FPU workload.
Overall and Final Verdict
Like I said before, I’ve been looking forward to this one for a while. iBUYPOWER showed off early versions of the Revolt 3 back at the start of the year with CES and they were very receptive to feedback as well at that time. It’s great to see that original design evolve even more into what is now a really cool SFF tower case. I brought up NZXT and the H1 early on because the design and styling does share a lot with it and iBUYPOWER and NZXT have always worked close. The Revolt 3 is significantly different than the H1 in just about every aspect size included. For example, the easy-to-remove side panels aren’t on the H1 and the Revolt 3 has room for better cooling and drops the riser cable all together which has caused big problems for the H1. I also can see the side panels and mesh behind them being used for easy customization to color match to your favorite colors, team colors, and for esport events, it could even be used to match the side of the map or red and blue like a lot of events do to set the team sides apart.
HYTE did a great job of focusing on the LAN/esports aspects with the Revolt 3. The built-in pull out headphone hangers aren’t something I would think of but help simplify things when using the system at an event. The tower size means the system has a small footprint which is very important and of course the carrying handle up on top is huge. I love that they designed the handle to be fully integrated and hidden when not in use as well.
Performance was a concern just like any SFF system but with the Revolt 3 fitting in 240 or 280mm AIO coolers into the system, it will help keep things cool on the CPU side. They also allow for full-sized aftermarket cards which will help keep temperatures down there as well. I think the Revolt 3 fits current monster GPUs better than a lot of full ATX systems which is crazy. I would still offer one warning though, avoid a blower-style GPU. Blowing all of the heat out of the PCI slot is normally perfect for an SFF system like this, but with the tower design, it means blowing all of the heat into the bottom compartment which wouldn’t be ideal.
The rest of the downsides to the Revolt 3 aren’t too bad. It is a little heavy for an SFF system, normally a lot of the SFF cases integrate more aluminum. But avoiding that also has a tradeoff in the pricing which I will talk about in a minute. The special edition with the hard plastic flight case and is in my opinion the best feature that the Revolt 3 offers. But from what I understand this is only exclusive to the launch which is a bit of a bummer as I think a lot of people would take advantage of the case for LAN use. The other issue I ran into was with the included 700-watt SFX-L PSU, the CPU power cable was just a hair short for our Aorus motherboard leading to it being run across the top of our AIO cooler.
The SFF case market is an interesting one. It is a lot like the enthusiast keyboard market where for a long time everyone ignored the small keyboards and things that the enthusiasts wanted focusing on gaming leading to the communities to create their own designs. SFF cases, especially smaller more compact designs have been expensive and community-designed with just a few exceptions from case manufacturers. Recently though companies have noticed the interest and have been starting to bring out better SFF options and the HYTE Revolt 3 is another example of that. iBUYPOWER has been working on their own designs for a while now for their prebuilt systems, especially when it comes to smaller systems like their Revolt line. Starting the new HYTE brand and opening up their design to be sold without buying a full system is them recognizing the same thing. They didn’t take the same route as some of the community-made designs which are all aluminum, they helped keep costs down there, and also by being able to combine the volume that their prebuilt systems offer helps keep the price down as well. The Revolt 3 has an MSRP of $129 if you are buying the case without a power supply and is $249 when you include the 700-watt 80 Plus Gold PSU. The $120 price of the power supply ends up being a great deal if you compare it with buying your own SFX-L power supply and that ignores that they preinstall it in the case and have the wires shortened and setup specifically for the case. If you run your own power supply, you will have to get a modular one to keep the wiring down and most likely the cables will be longer and harder to manage. You might be able to save a little bit of money however if you don’t need the 700 watts and go with a lower wattage option. But I still don’t think it's worth it. The case price of $129 isn’t bad as well, it is well below what the lower production case options will be at. Its most direct competition will be with a case like the NR200 from Cooler Master which is similar in overall size and has the same MSRP (though is on sale for a little less right now). The Revolt 3 however focuses on a little bit of a different audience with the tower design and integrating in things like the handle and headphone hangers. Overall I’m really liking the Revolt 3 and hope to get it out to a few LANs soon.
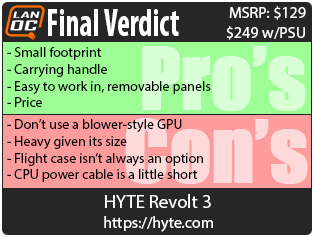


Live Pricing: HERE


