Installation and Performance
For me, half of the performance of a case is how easy or hard it is to work with when you are building a system in it. It is only a one time thing, but it is also one of the biggest areas where cases have improved over the last 10/15 years. A lot of that goes out the window when it comes to true SFF cases. There are lots of larger ITX cases that are easy to build in, but when you start looking at your case size by the number of liters it is like the Era ITX is looked at. The room inside starts getting tighter and tighter. Going into this one I was really curious how all of the modularity would work out as well. One of the big helps, and frankly a big surprise, was how much Fractal helped things right from the start with their instructions. I’ve had some cases come with basically no instructions but on top of normal instructions Fractal stands out here because they went farther by showing how to layout each of the modular configurations. They also have a section of cable management tips where they show you how to run the wires. The only instructions that I have seen similar to this were from the Sentry 2.0 case. Even with simple things like installing the video card they give you tips like removing the front I/O PCB shield to help with getting long cards in.
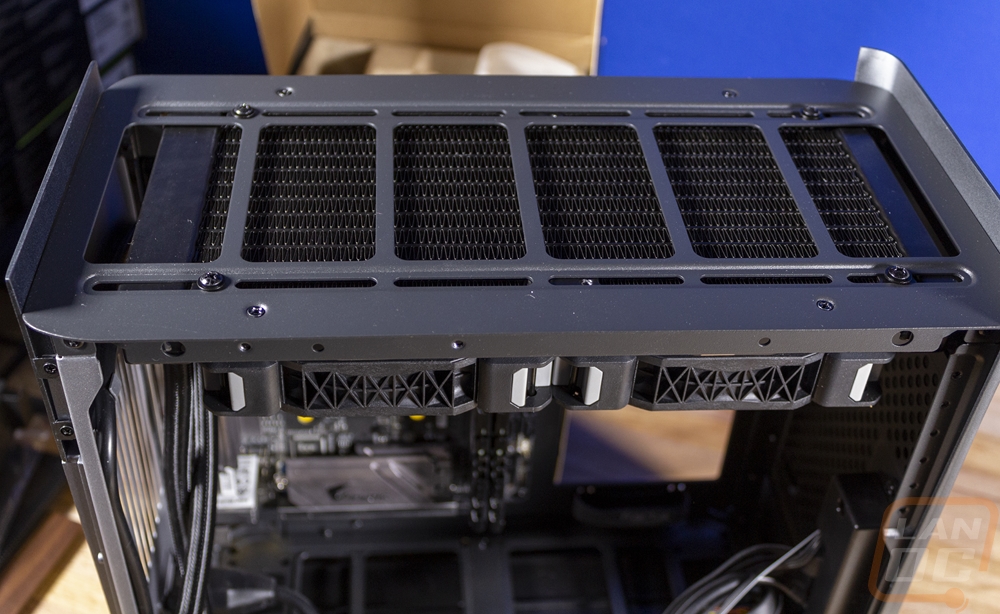
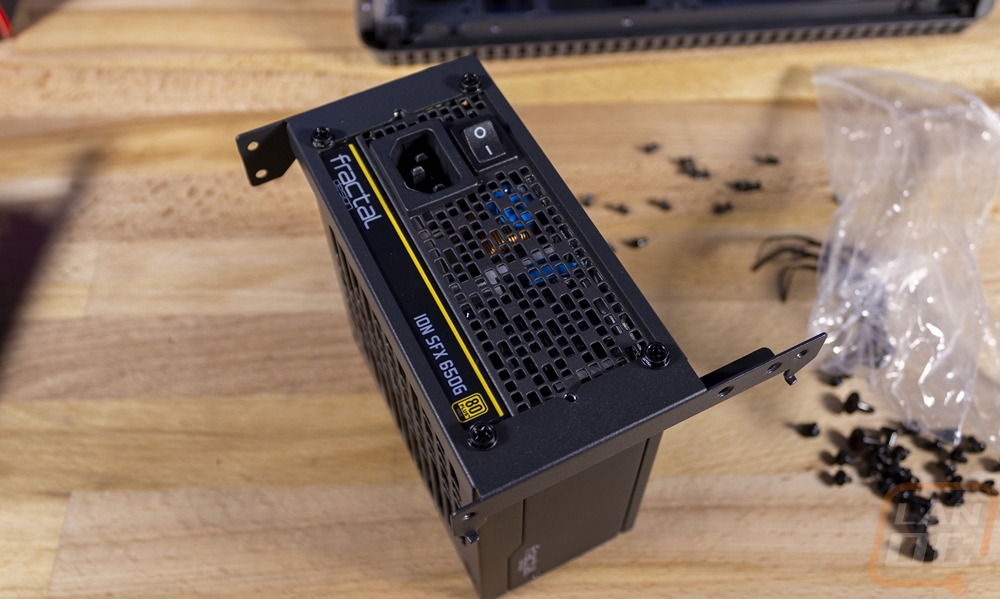
With all of that information, I picked out our components and jumped in. I originally planned on using the Asus ROG Impact but when using the riser card for an M.2 drive the power cable on the back of the Era interfered. So I switched to a Gigabyte X470 board and set out to build in the Era. For a power supply, I had a standard SFX but decided to try out Fractals' own SFX PSU that recently came out, being an SFX-L it did mean I had to go with a shorter video card but I have the EVGA RTX 2060 KO. For CPU power I went with the AMD Ryzen 2600 and Corsairs H100i RGB Platinum for cooling. I could have gone with an air cooler and been happy but with 240mm radiator support in the Era, I wanted to see how well it would work.
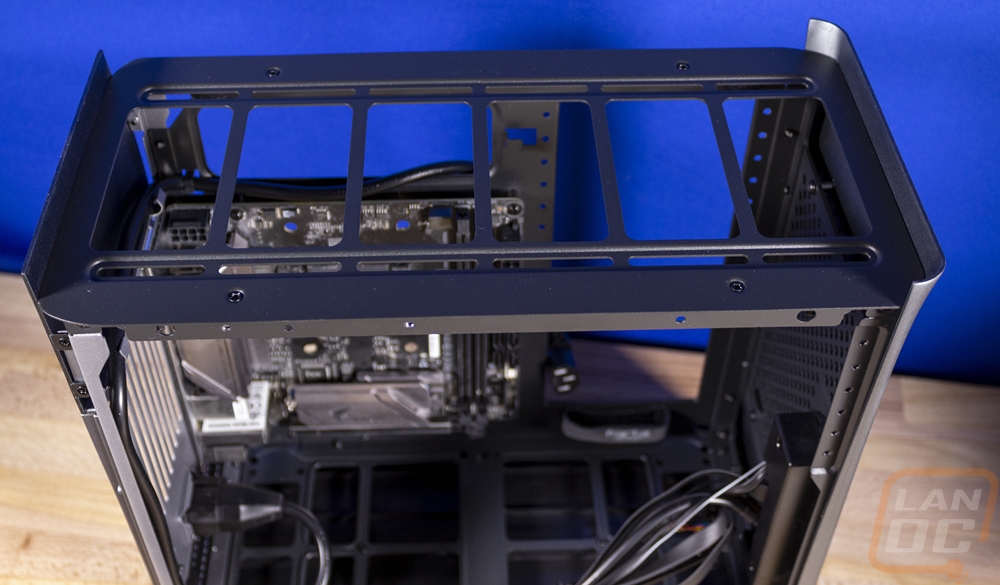
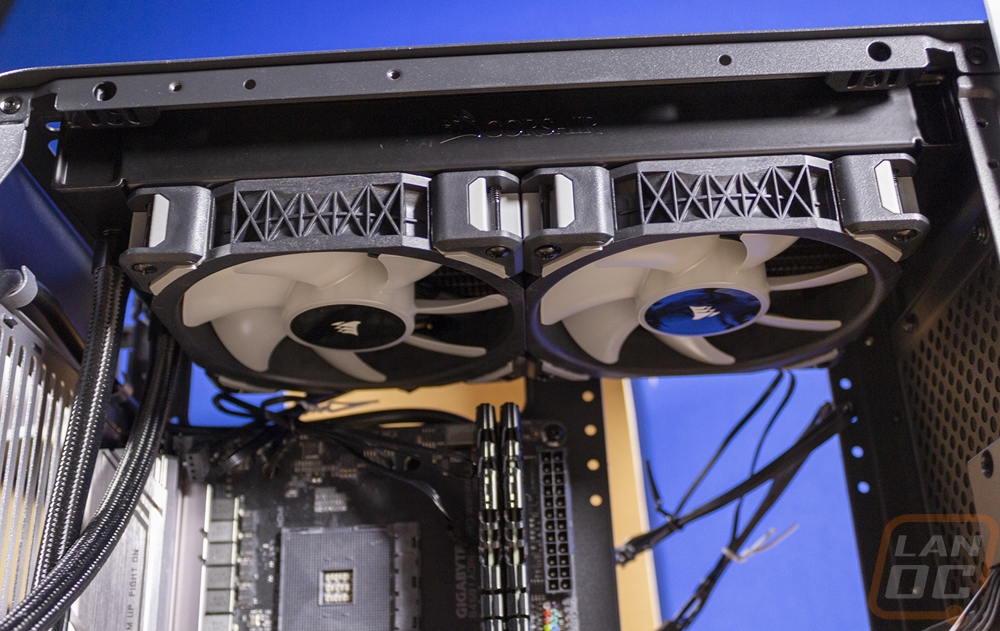
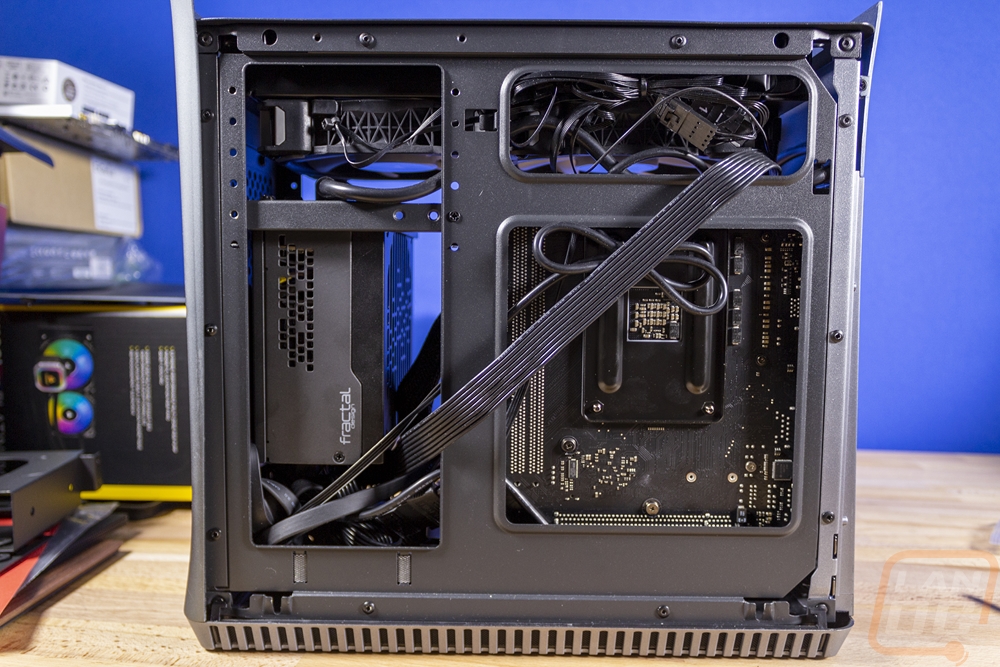
To get things started I installed I pulled all of the brackets out of the Era ITX. Obviously, with both ATX and SFX PSU brackets I wouldn’t need both but it also opened up room for working. Then I installed our WD Blue M.2 drive on the motherboard in the GSkill memory. Then from there, I installed the motherboard, which went smoothly. It was easier after removing the rear fan, because it does stick out, but you can slip in it around it and with just four screws it is an easy install. From there I mounted the Corsair fans to the AIO and put the AMD brackets on then mounted it up top. There is room to slide left and right. I went more to the right to leave room for the cooling tubes to go around the rear fan. From there you can install your CPU if you haven’t already and the pump on to the CPU.
Next, I picked out my PSU bracket and installed it on to the PSU and grabbed all of the PSU cables we would need. It is easier to connect them all with it out of the case. Then you mount the PSU, because of the AIO cooler and to keep the power cable from hitting the fans I had to install the PSU on the bottom setting. This is where a standard SFX PSU helps keep room for a full-length card.
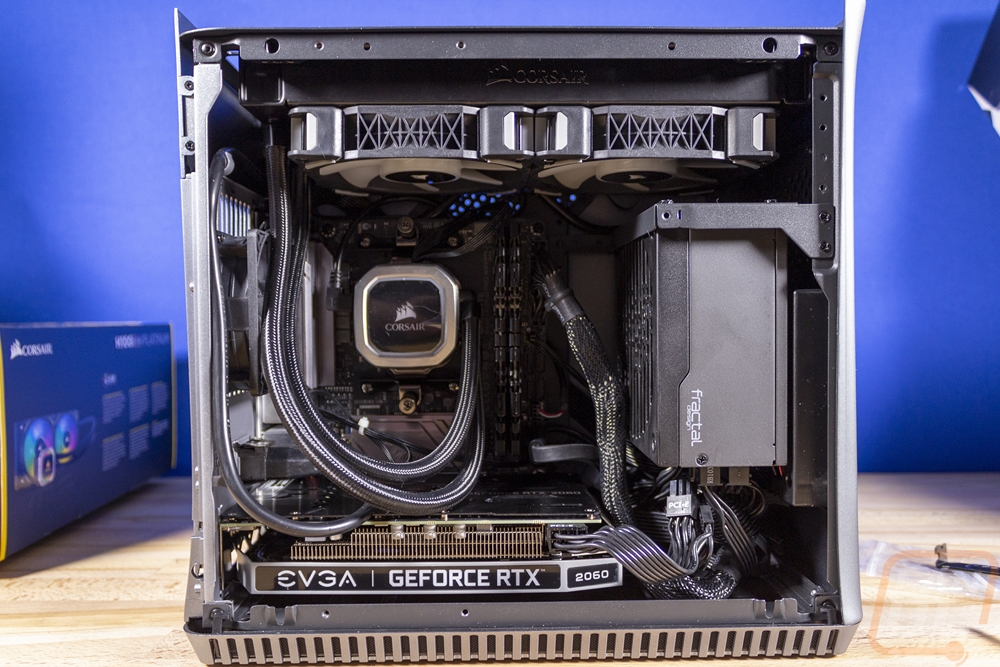
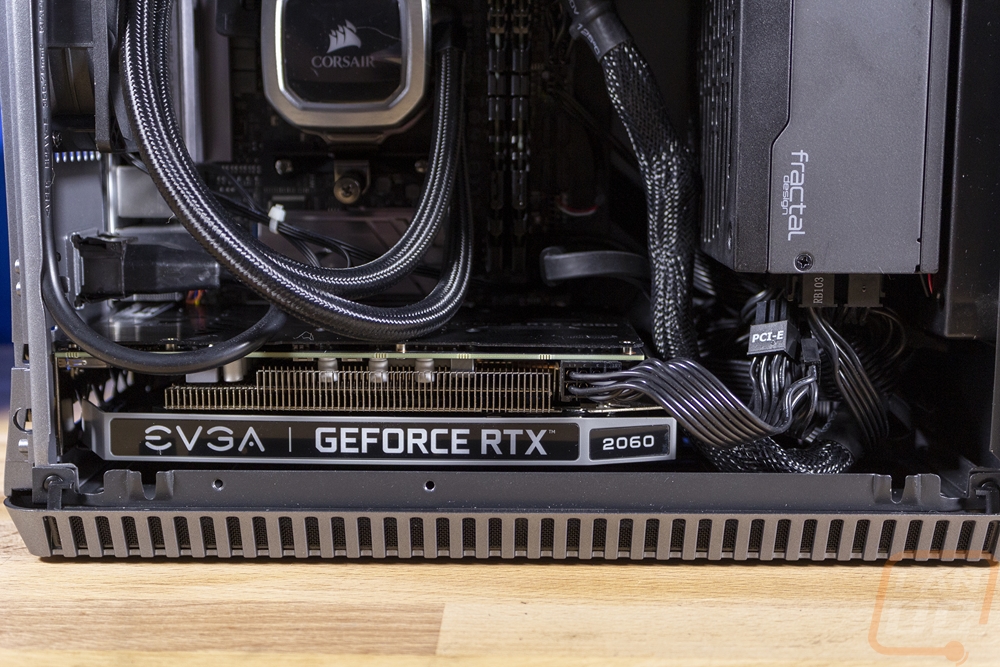
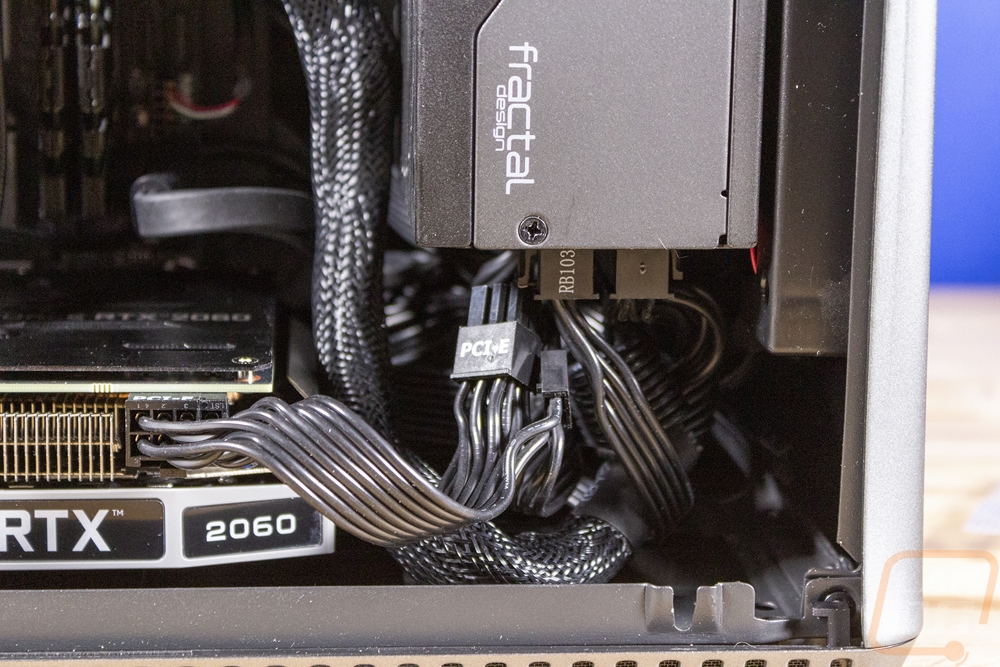
From there you still have to install the GPU and run the cables. It was easier to put the video card in after running wires. This is the hardest part of working in the Era ITX, Fractal does a great job of showing how to run wires but you don’t have much room behind the motherboard tray so plan on having to hide most of your cables up under the PSU. The front I/O cables were easy because they are all flat and flexible and the motherboard standoffs are taller so you can work behind the motherboard in that way as well. I ended up routing our 8 pin CPU across the back and I was worried that the door wouldn’t go back on but it did so there is a little room for flat cables. Installing the video card did cause a small challenge with getting at the PCI bracket screws. One has a small access hole which was high enough that some of my screwdrivers wouldn’t reach and the hole is small enough that my normal torque-controlled powered screwdriver bit fit but rubbed.
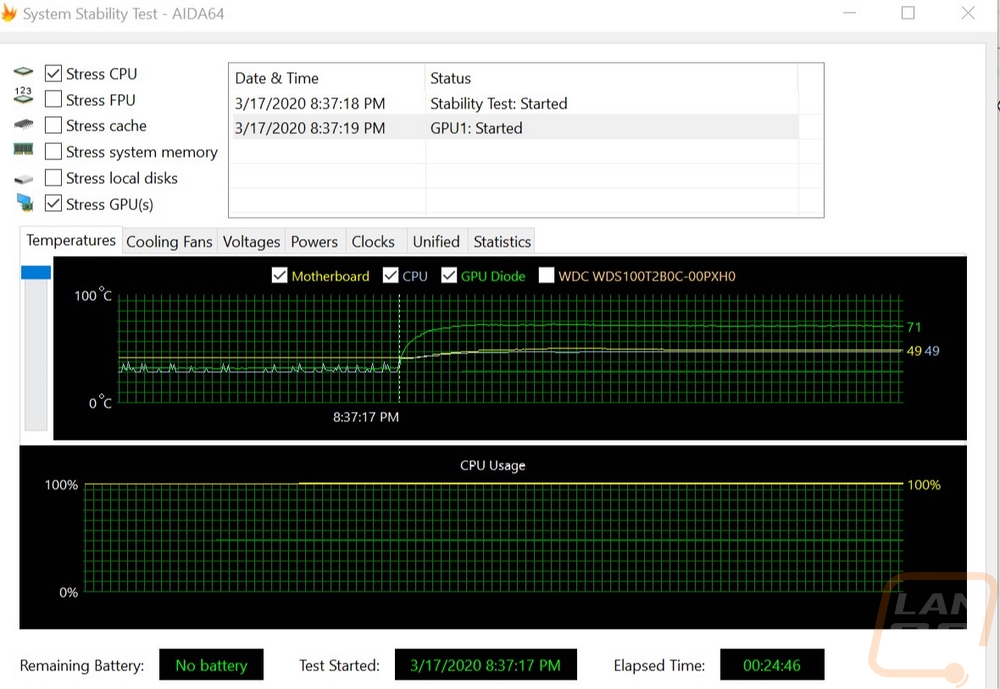
The other half of performance for me is cooling, especially with ITX builds. The Ryzen 2600 and RTX 2060 KO are a mice mid to high build for a system like this but I was curious how warm things would get. As a worst-case, I ran AIDA64 with the CPU load and the GPU at the same time for a half-hour. Having room for that 240mm AIO really helps keep the CPU cool. The GPU did run warmer than it did in my open-air testbench testing from our initial review where it reached 63 degrees under load. Here it stayed at 71 which is warm but still useable. This was while the CPU and motherboard stayed at 49c.
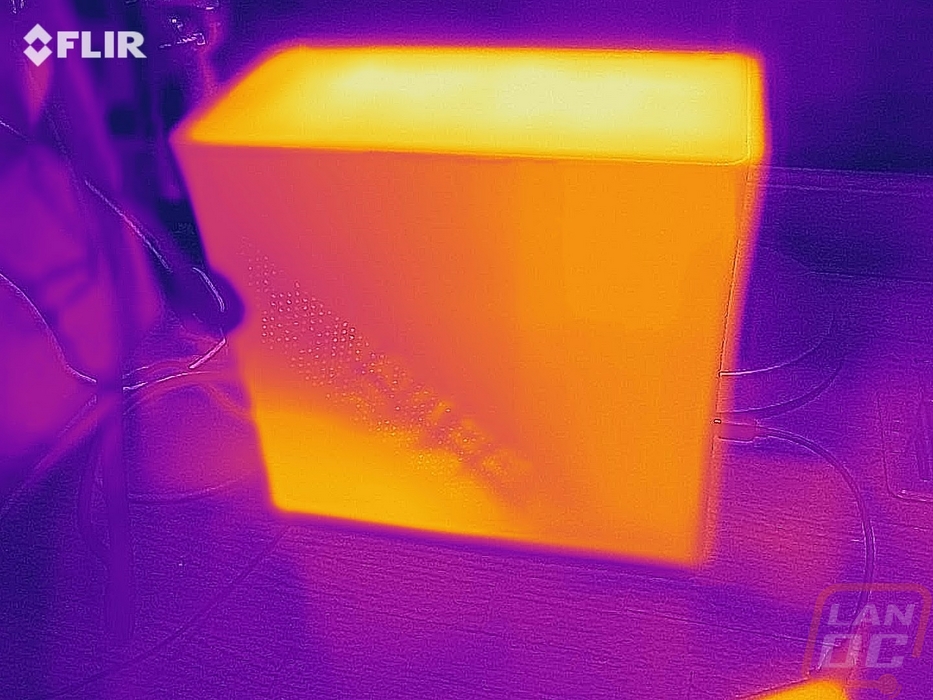
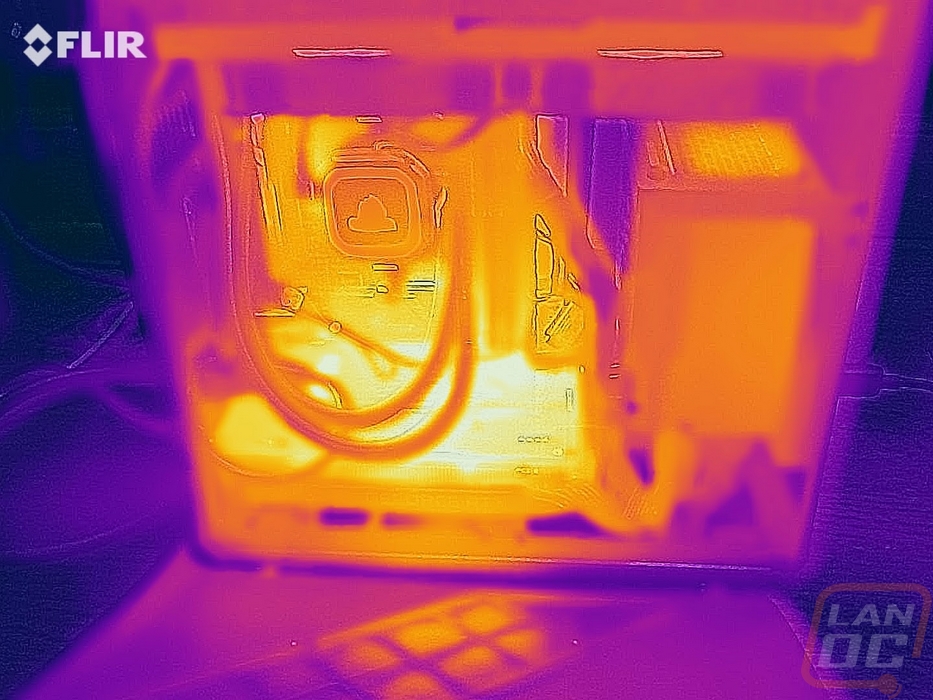
Here are thermal images of the case close and right after I opened the door up. You can see the heat from the AIO venting out of the top of the case but even on the outside, you can also see the video card heat soaking in that bottom left corner. The dual fans on the video card can pull in air from the bottom but the 2060 KO vents out of the top of the card when pushes that heat against the door. The side vent on the door does help some of that but I think if it ran the length of the video card slot it would be more effective.