When it comes to cases, even just from a few years ago things have changed drastically. RGB and Tempered Glass are extremely popular but it feels a little like everyone is moving forward only to keep making everything similar. For a while now though Thermaltake has been making something completely unique in their Core P series of cases. The Core P5 and the Core P3 are both extremely popular, especially in the water cooling crowds because of their open but unique design. So when the Core P1 was announced at CES I immediately reached out to check one out. The P3 and P5 are far too large and heavy for me but the P1, but an ITX case might be a little better. So for a while now I have been toying around with the Core P1 and today I’m going to talk about it.
Product Name: Thermaltake Core P1
Review Sample Provided by: Thermaltake
Written by: Wes
Pictures by: Wes
Amazon Affiliate Link: HERE
|
Specifications |
|
|
P/N |
CA-1H9-00T1WN-00 |
|
Case Type |
Mini Case |
|
Dimension (H x W x D) |
422 x 332 x 380 mm (16.6 x 13.1 x 15 inch) |
|
Net Weight |
9.5 kg / 20.9 lb |
|
Side Panel |
Tempered Glass (5mm thickness) |
|
Color |
Black |
|
Material |
SPCC |
|
Drive Bays |
-Accessible 2 x 2.5" (Outside the chassis) -Hidden 1 x 3.5’’ or 2.5’’ (Inside the chassis) |
|
Expansion Slots |
5 |
|
Motherboards |
6.7” x 6.7” (Mini ITX) |
|
I/O Port |
USB 3.0 x 2 , HD Audio x 1 |
|
PSU |
Standard PS2 PSU (optional) |
|
Fan Support |
Left Side: 2 x 120mm |
|
Radiator Support |
Left Side: 1 x 240mm |
|
Clearance |
CPU cooler height limitation: 170mm VGA length limitation: 380mm (Radiator thickness under 30mm without fan) PSU length limitation: 180mm Radiator Width Limitation: 122mm |
Packaging and Assembly
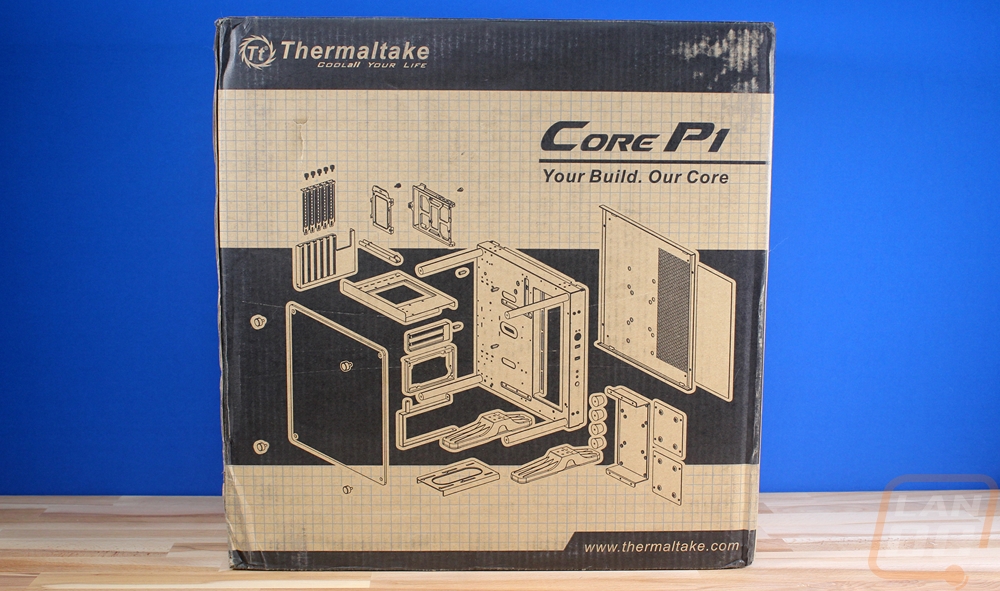
The box for the Core P1 was a little unexpected. I’ve seen the other Core P cases so I knew they shipped flat packed, but I was surprised with the brown cardboard look though it isn’t a big deal or anything. The front of the box has a blown-up drawing of the case that shows all of the components and variations. When the box came in my wife brought it in and we were both really surprised by the total weight of everything, the Core P1 is a Mini-ITX case that comes in at just under 21 pounds and that doesn’t include the extra hardware that is also in the box.
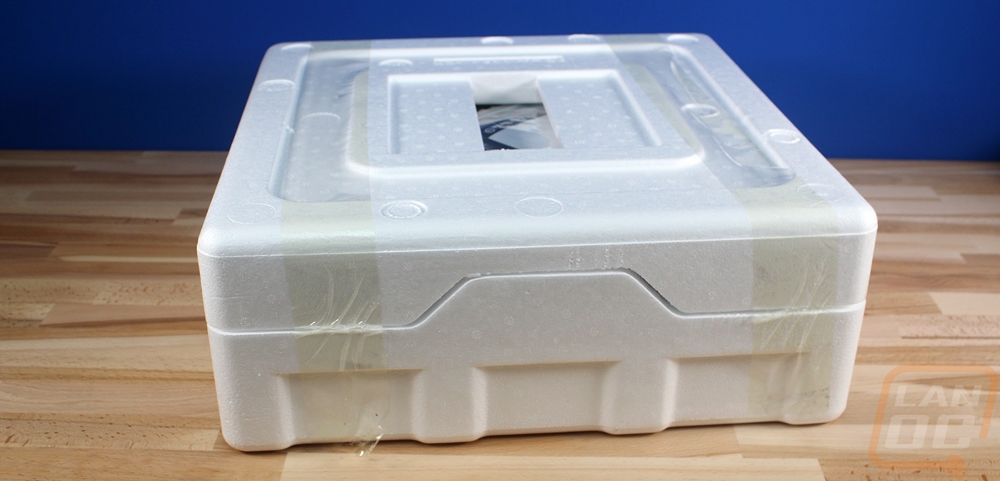
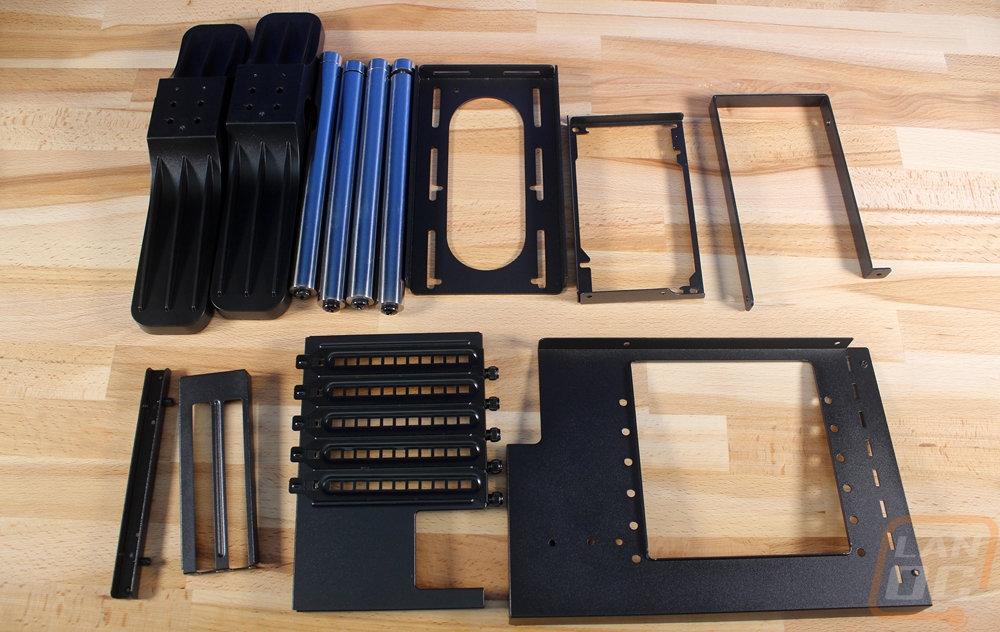
Inside everything is wrapped up in one big foam clamshell with tape holding it all together. When you open it up the main piece of the cases it up on top with foam between it and the tempered glass panel. Up under that, you can see all of the other accessories are all there for things like the power supply mounts, the two different video card mounts, and the feet.
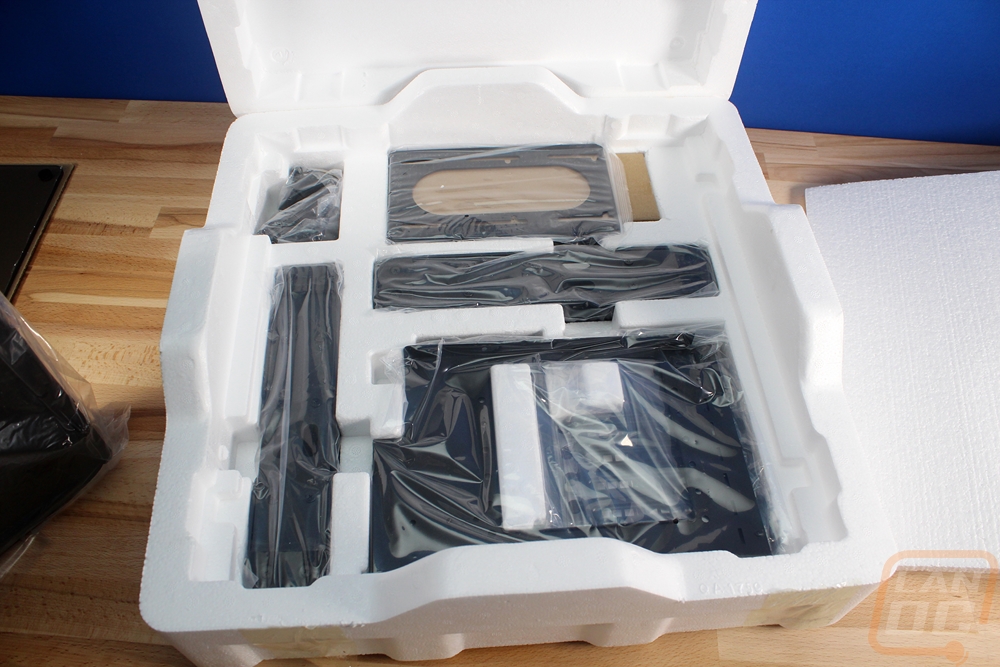
Here are all of the other parts are including the four standoffs that hold the glass that were in their own small box inside of the chassis when I dug into it.
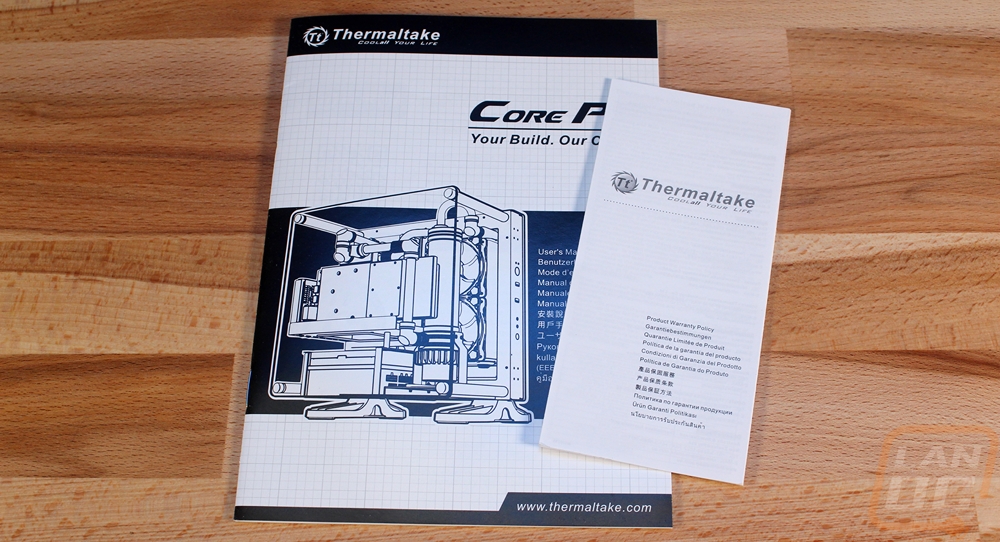
For documentation, you get a small warranty paper and a full user manual.
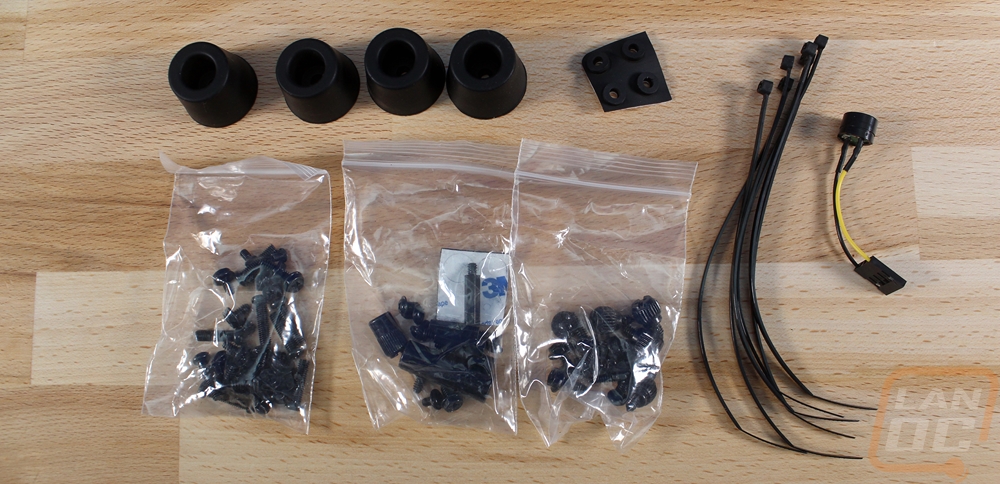
Because you have to build the case before building your PC the Core P1 comes with more screws than the average case. You get three bags of screws, zip ties, and a motherboard speaker. Then there are four large feet and four tiny feet, these are for use when using the Core P1 as a wall mount or if you flip the case on its back the feet hold it up for airflow.
So before I check out the case itself or even considering building anything in it I had to get it put together a little. I saved things like the PSU mounts and the two different PCI bracket options for when I build the computer itself. But I needed to get the feet on the bottom. They bolted on with just four screws each into pre-threaded mounts. Then from there I just had to get the glass on. You mount the four pegs using one large screw from the back each peg. The pegs weigh a ton to help offset the weight of the case. Once you get the pegs on you hold the glass up and screw the end bolts on to the pegs to get it all together.

Photos and Features
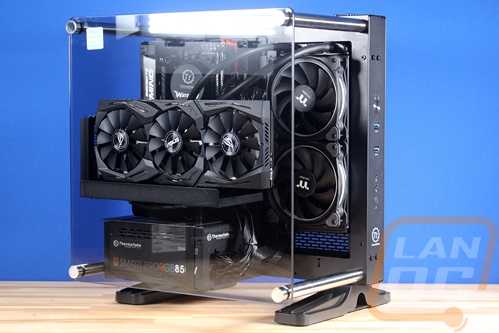
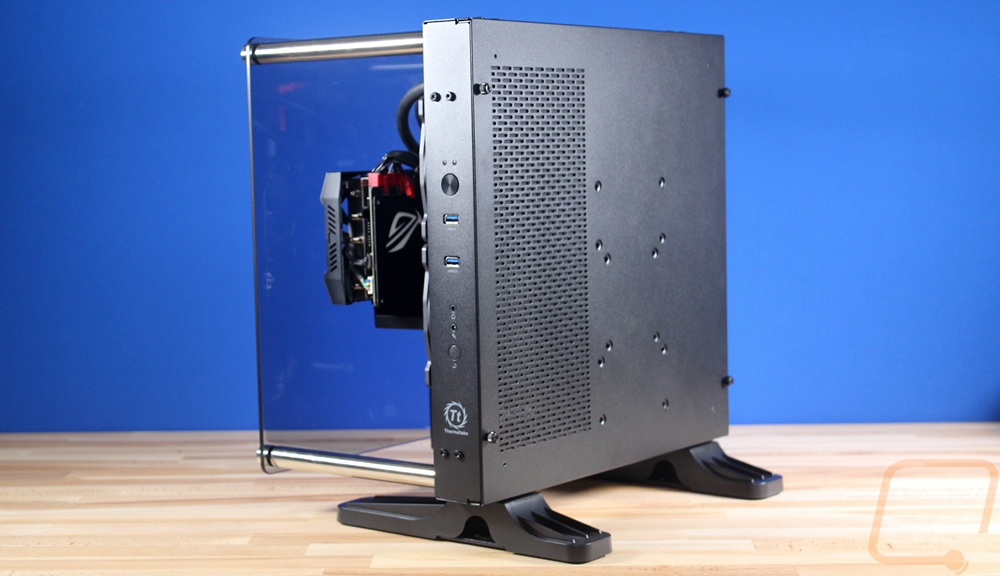
So typically I split up the inside and outside of the case into two different sections but with the Core P1, most of the inside of the case is basically on the outside right out of the hole because of its open design. The basic design is a flat pillar from the front that holds your Mini-ITX motherboard, the Power supply, and cooling. Then there are four chromed pegs that hold a tinted tempered glass panel out away from the case leaving the top, bottom, front, and back all open. The design takes a LOT of cues from the old Thermaltake Level 10 design only with everything being out in the open and with the glass. I should point out that the Core P1 actually comes with the tempered glass where some of the other Core P3 and P5 models only have the glass with specific models and the rest have to pick up the glass later as an upgrade. I don’t think I would like the look of this case half as much without it.


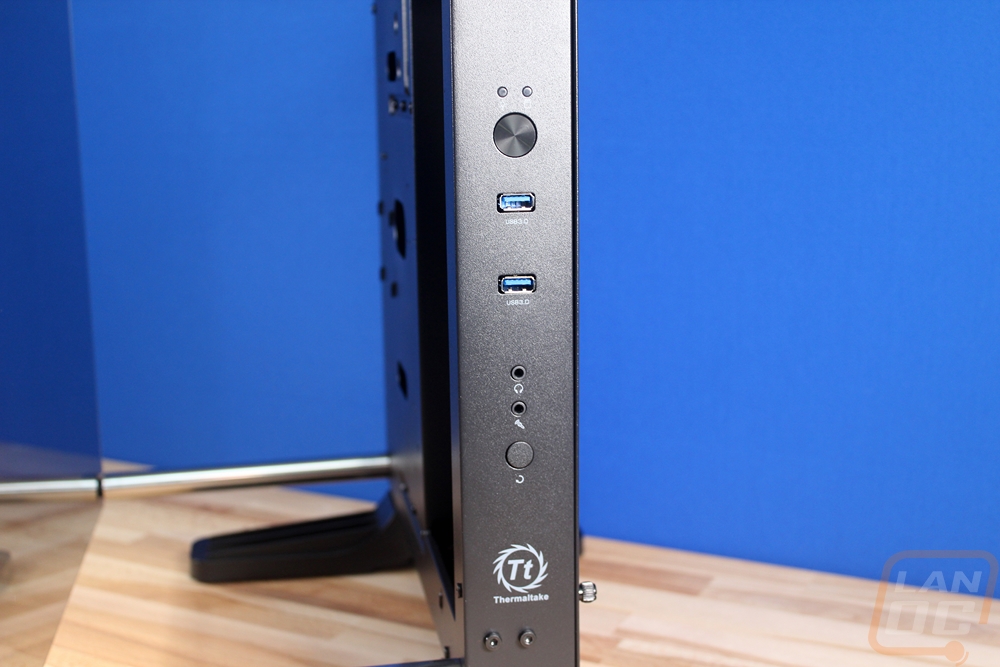
From the front point of view, there isn’t too much to the case. The front panel has a large aluminum button with power and hard drive indicator lights right above it. Then you get two USB 3.0 ports that are VERY spaced out to prevent any clearance issues. Then down towards the bottom are front panel audio connections and a reset button. The main casing is steel with a semi-glossy black finish and on the front is a small Thermaltake logo. Down at the bottom of the case, the feet are plastic and I feel like this is an area where they could improve. The feet have to stick out a lot on the back side of the case to keep balance but it does make the case about 3 inches wider than everything above it and more importantly, the plastic doesn’t really match with the rest of the construction at all.
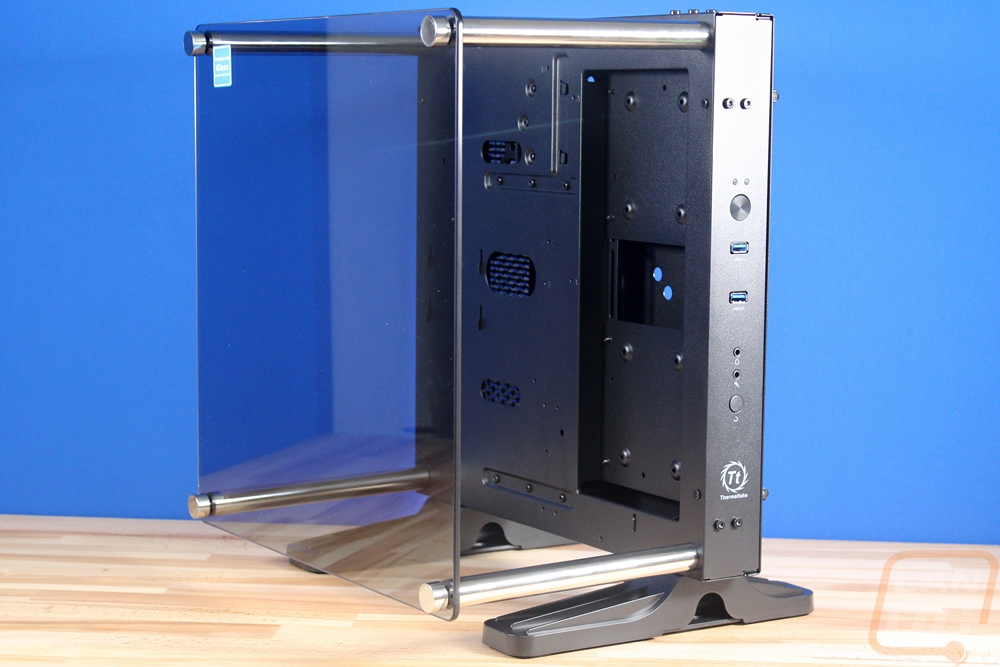
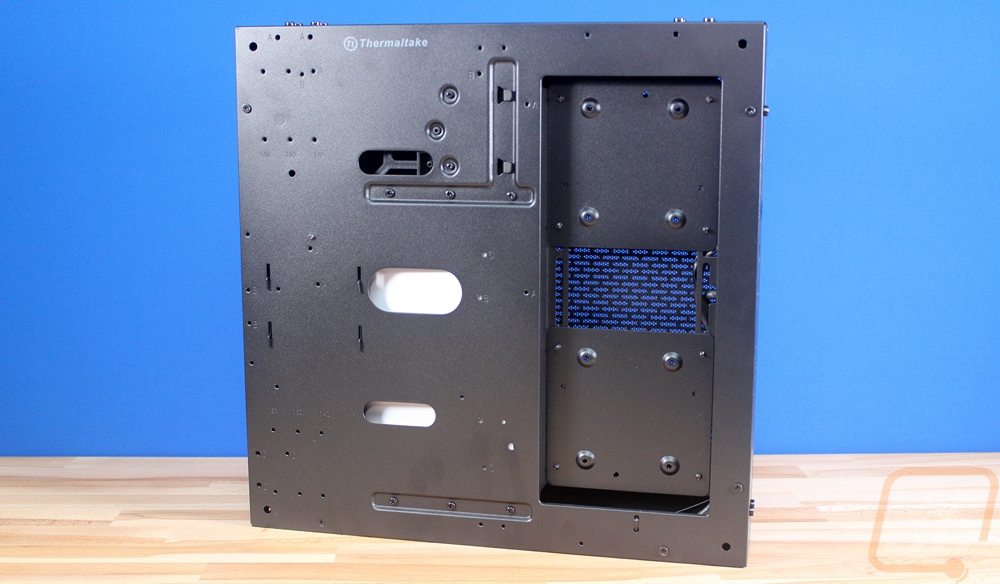
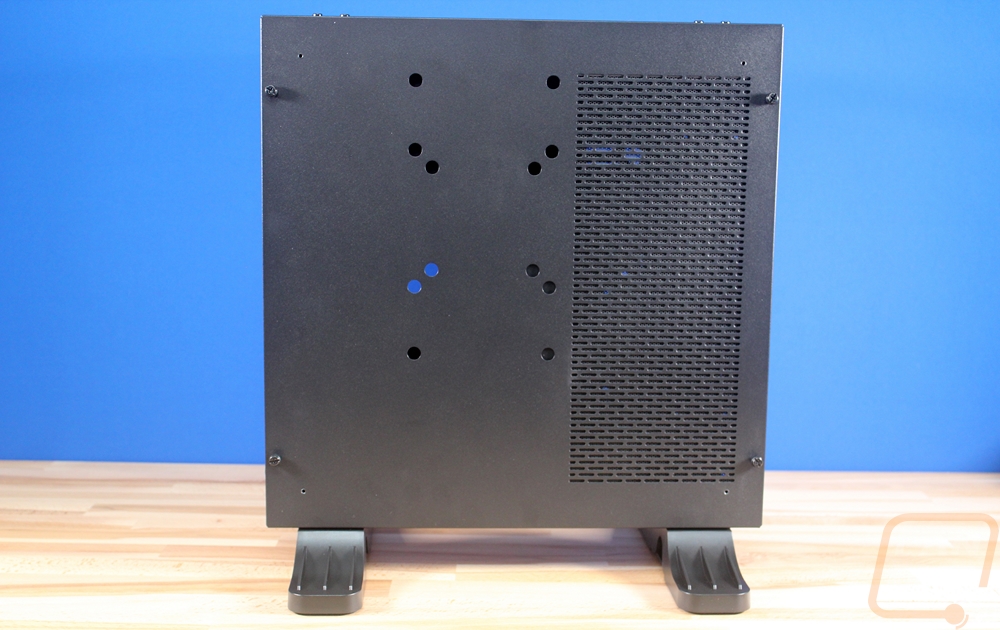
The back of the P1 has a few things going on. On the left side (the back panel is actually installed upside down in this photo) it has a vented area to handle the airflow from the dual 120mm fan/radiator mount on the front of the case. The back panel is all steel just like the rest of the main case and it can be removed with the four thumbscrews that stick out. The 12 other holes near the middle of the case are all there for wall mounting the Core P1. They don’t actually include the rest of the mounts, you have to pick it up in addition to the case.
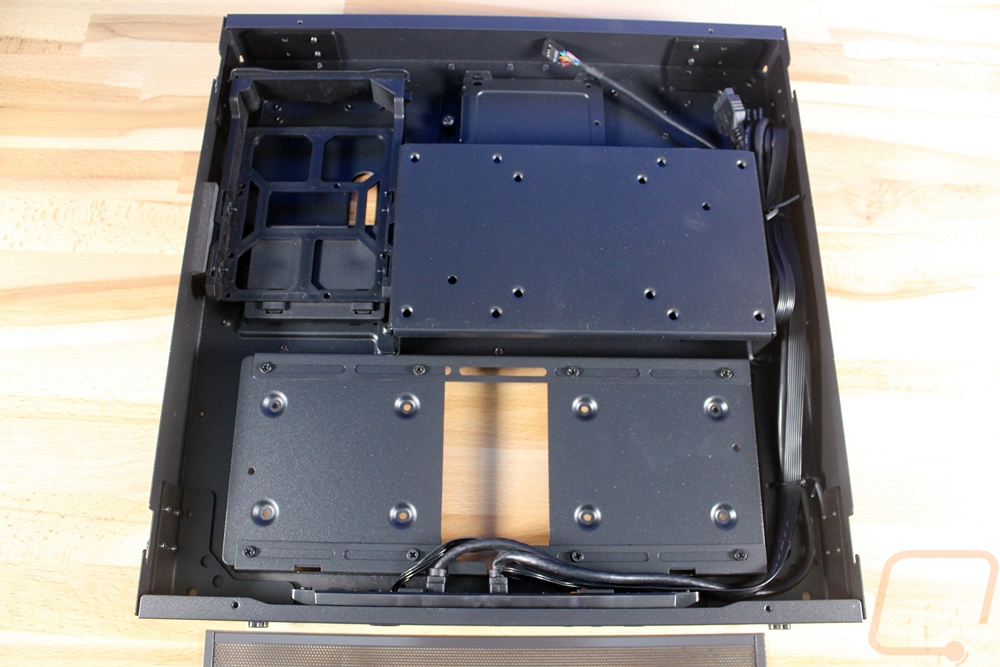
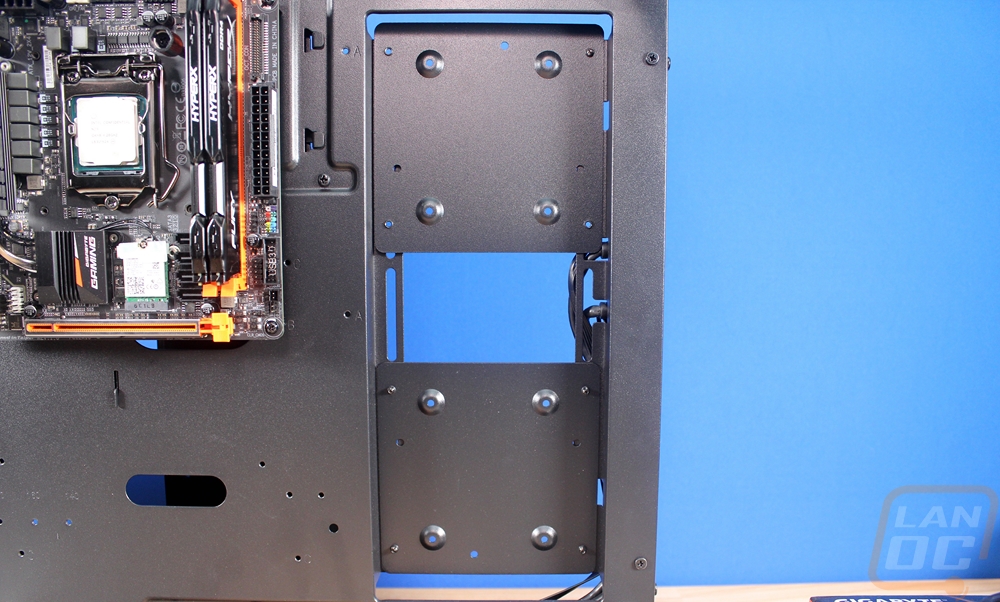
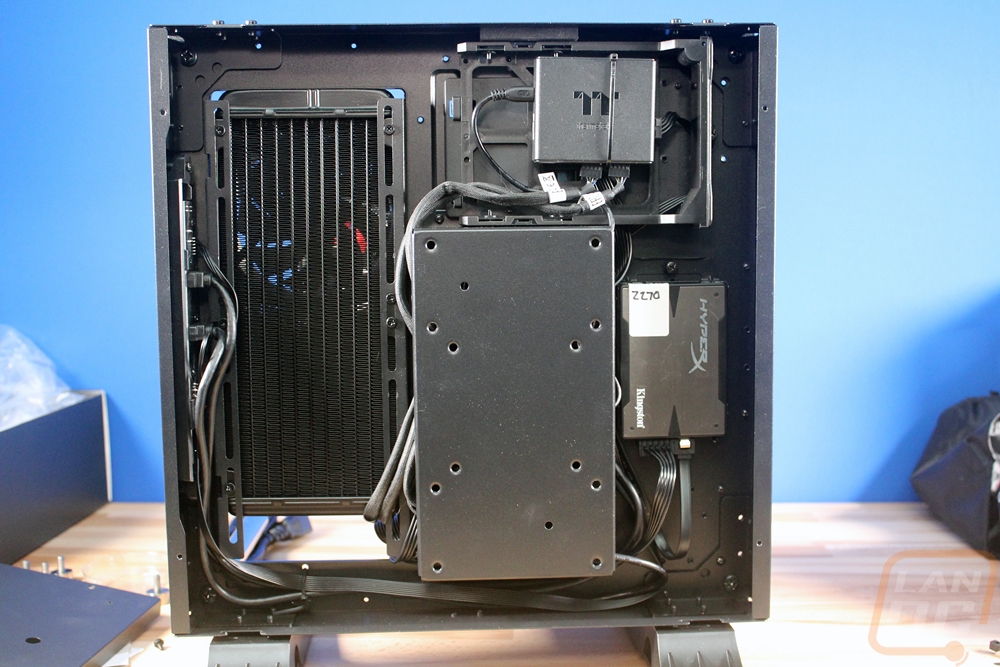
When you pull the back panel off we have a few things going on in the inch and a half thick main case. The large bracket in the middle is the main support for the wall mount, although they don’t include the rest of the mount you do get this main support pre-installed. If you don’t want to use this mount at all I would highly suggest uninstalling it before building in the case or you will have to pull everything apart to get to it. On the left is the dual 120mm mounts but the case actually ships with two adapter plates that can be used to install two SSDs in place of a radiator. If that isn’t your thing or if you want to have a radiator you have a metal 2.5 inch SSD mount over on the right side and a plastic 3.5 inch hard drive tray up on top.
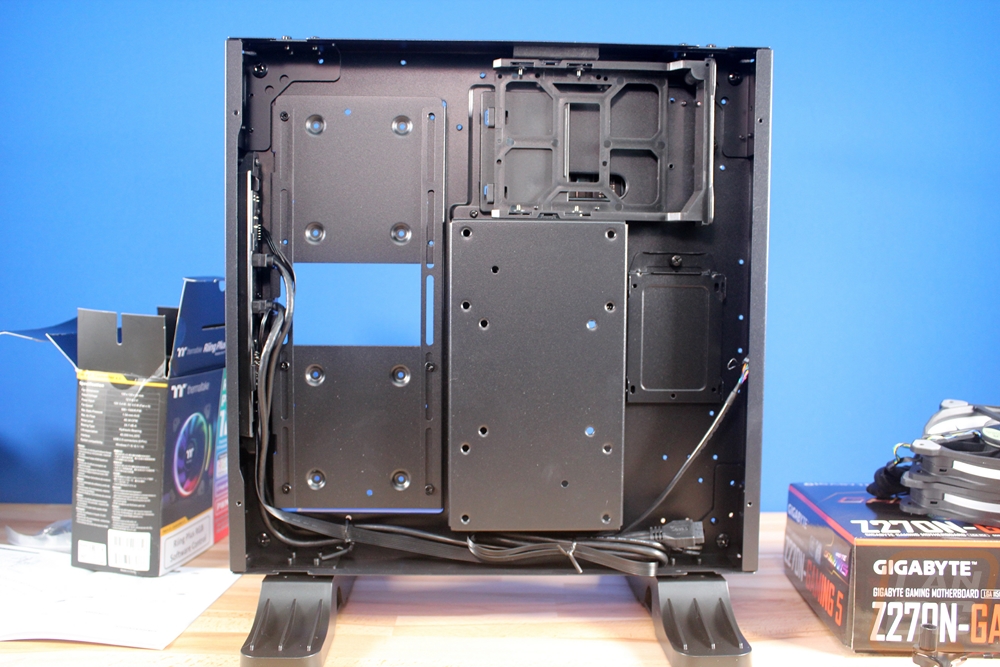
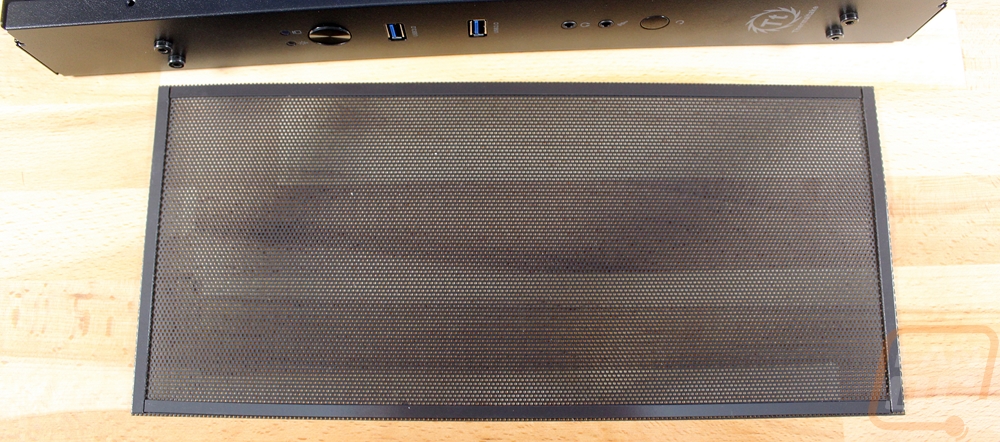
You also get a magnetic fan grill that mounts to the inside of the back panel. This was interesting to me because all of the photos of the Core P1 seem to have the fans blowing from the front of the case to the back so this filter would really only catch dust inside of the case unless I’m not completely understanding where it should go. I love the idea of magnetic fan filters, I just don’t know if they are very usable in this case.
Back around on the front here is another look at the radiator mounting area and the two SSD mounts. It’s interesting to note that the mount is actually sunken into the case a little. In some ways, this is nice as it does leave even more room to be able to fit things like a pump and reservoir, but I am a little worried that some radiators might also not fit in this space as well. I personally haven’t run into this yet but so far I have only used a Thermaltake AOI kit, with custom water cooling in the plans I am hoping it doesn’t become an issue.
Installation
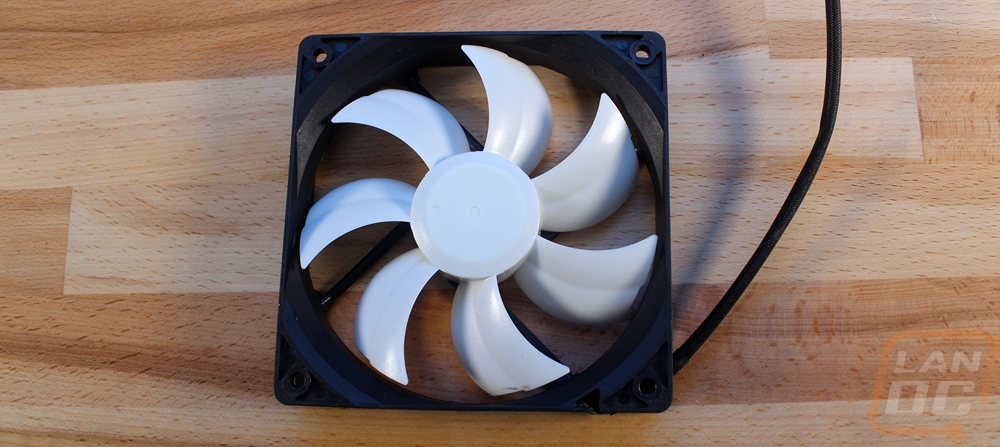
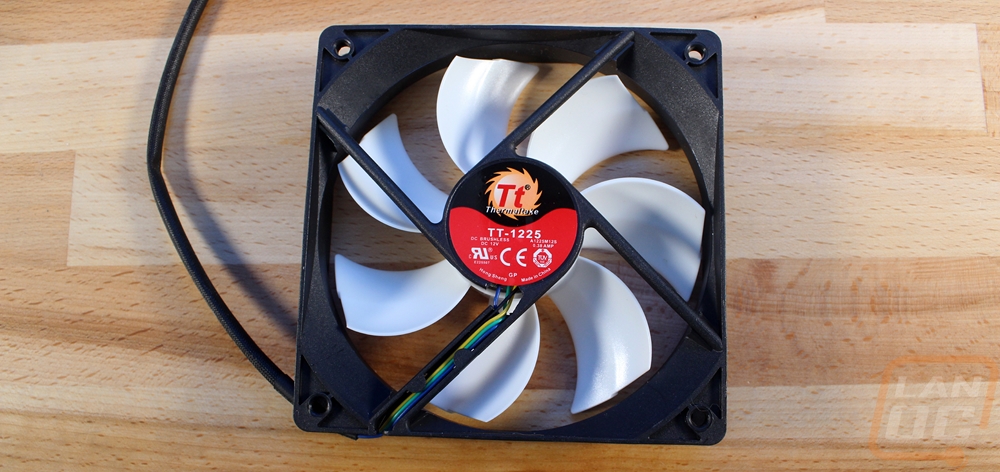
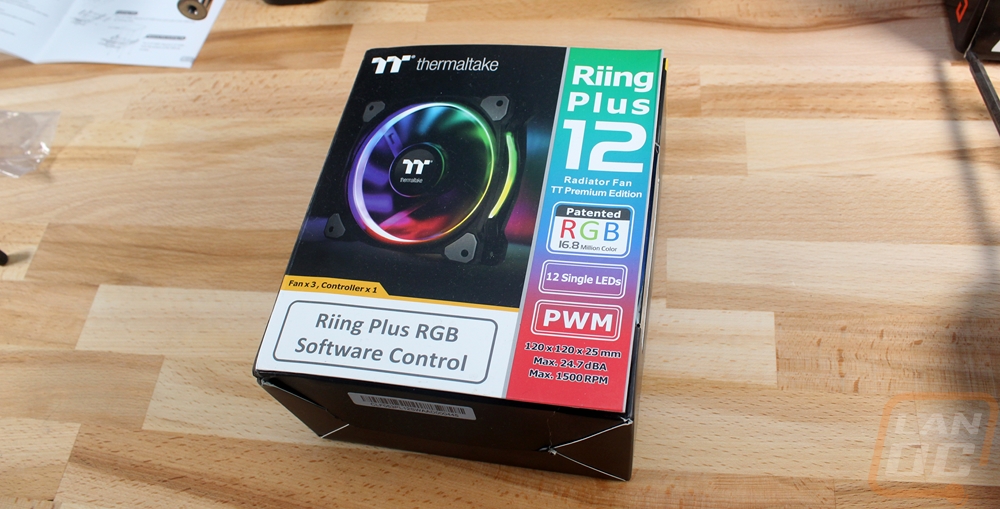
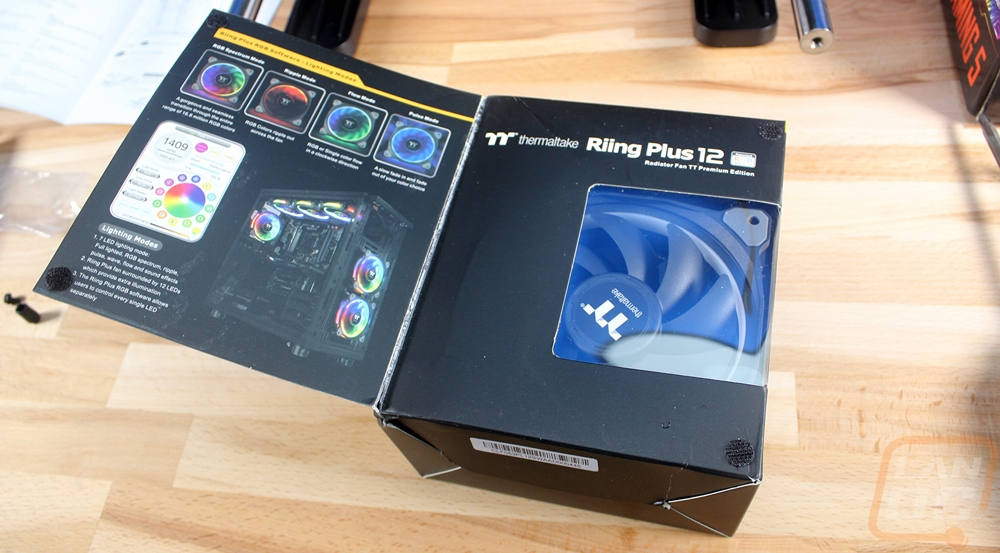
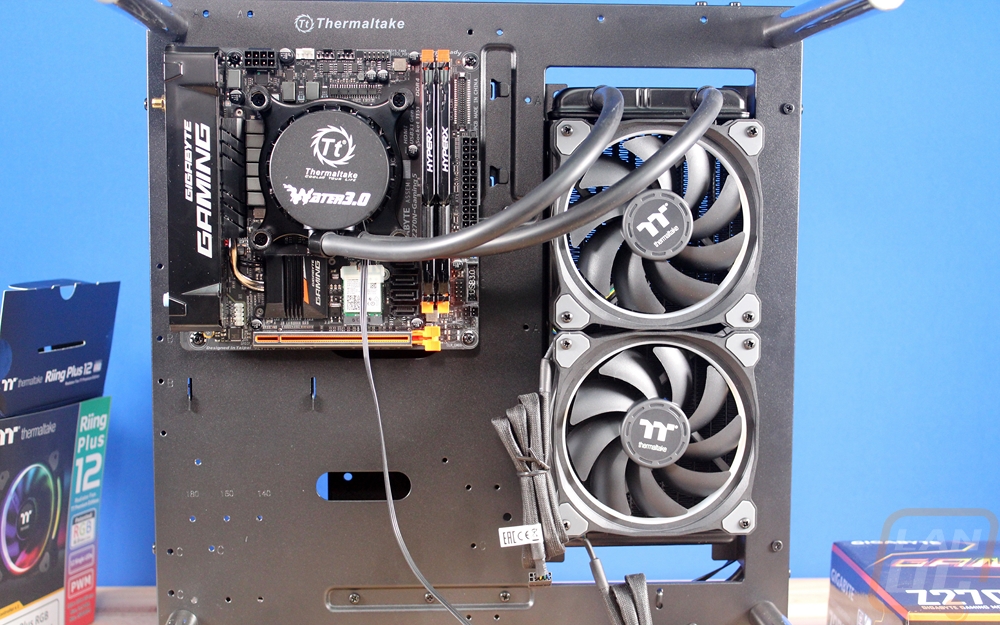
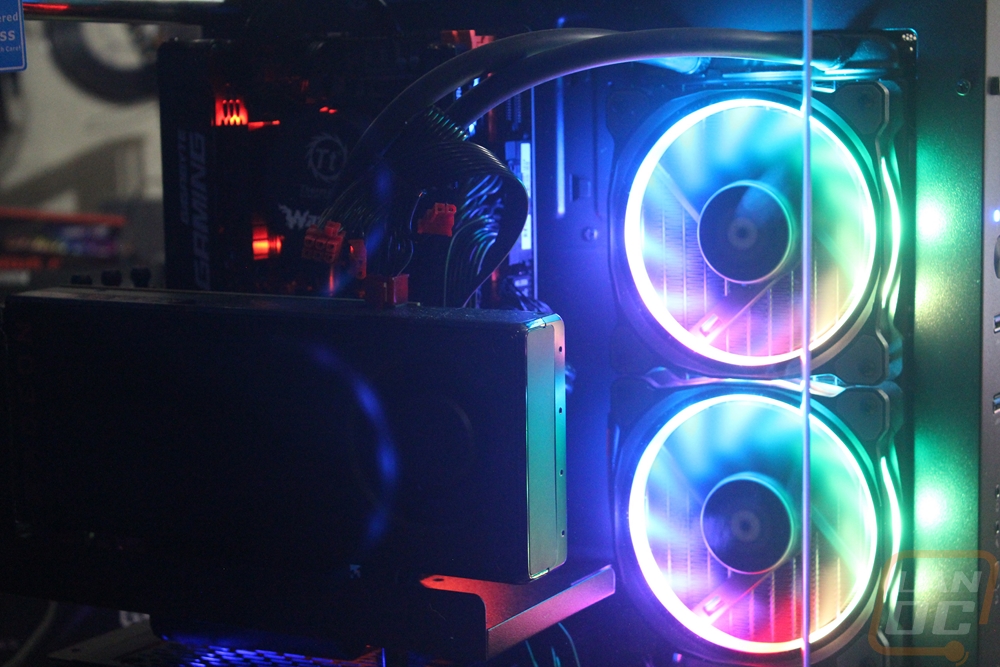
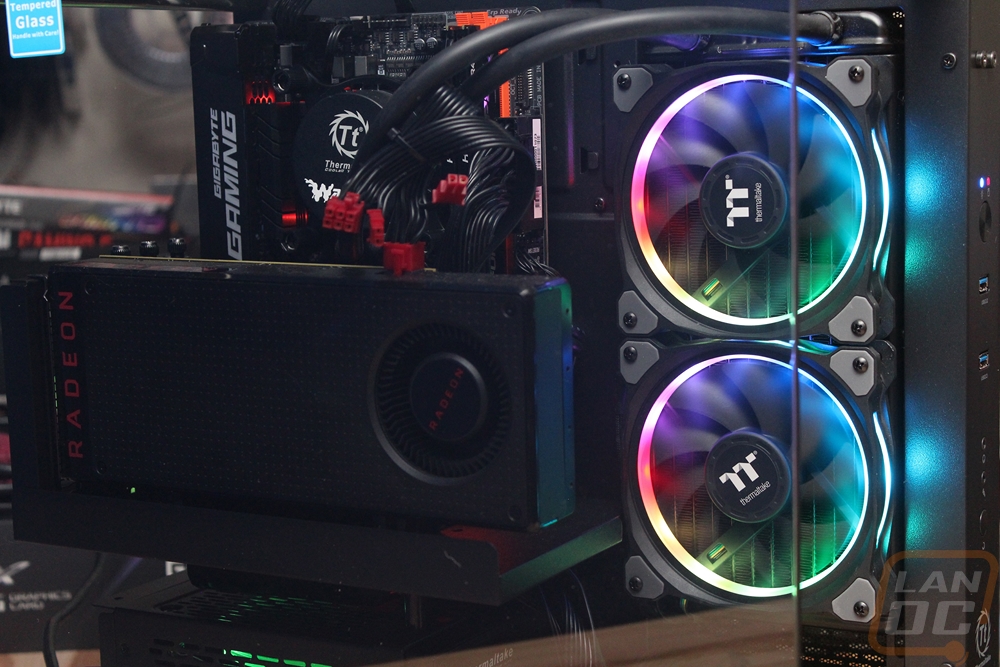
Before testing out the Core P1 I had to get a full PC built inside and luckily Thermaltake also sent along a few other toys to help with that. They sent over a Water 3.0 Extreme S kit for water cooling but the black and white fans weren’t really going to do anyone any favors in this very open case. To help with that they also sent a Ring Plus 12 set of RGB fans. So before I get started let's take a quick look at both.
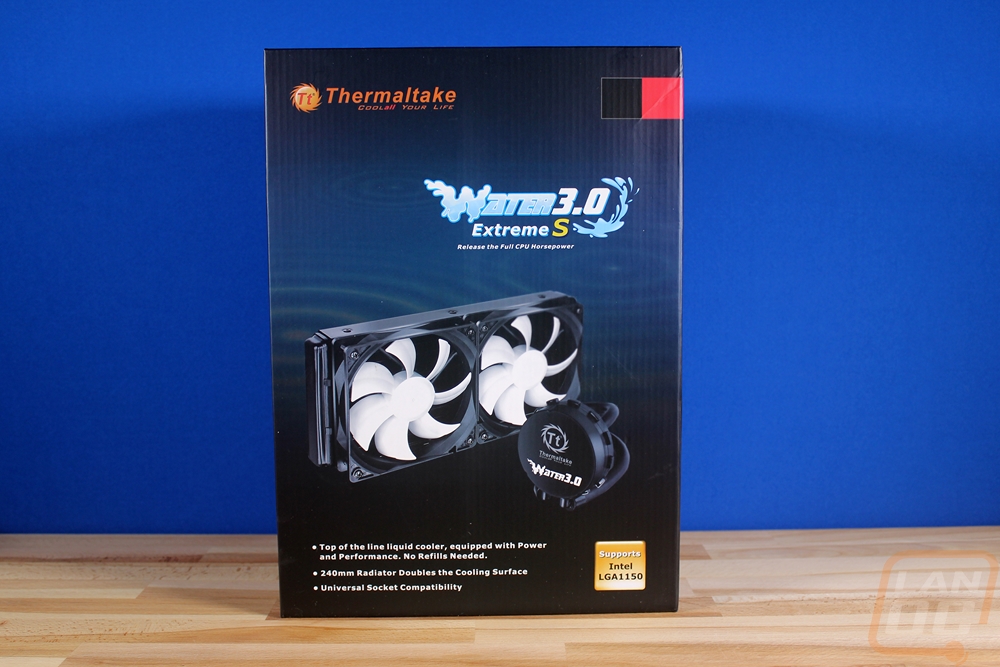
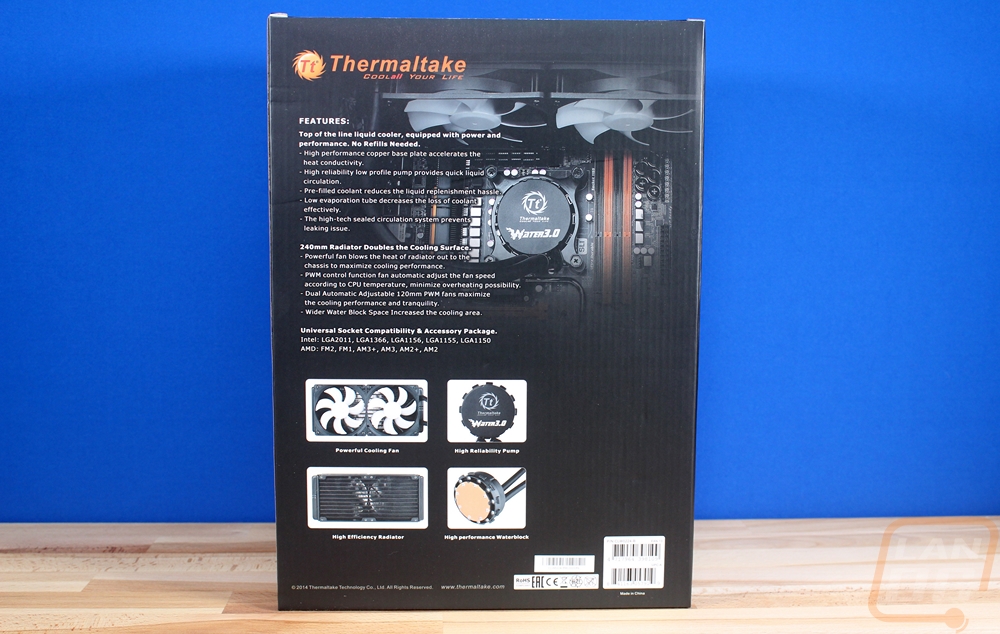
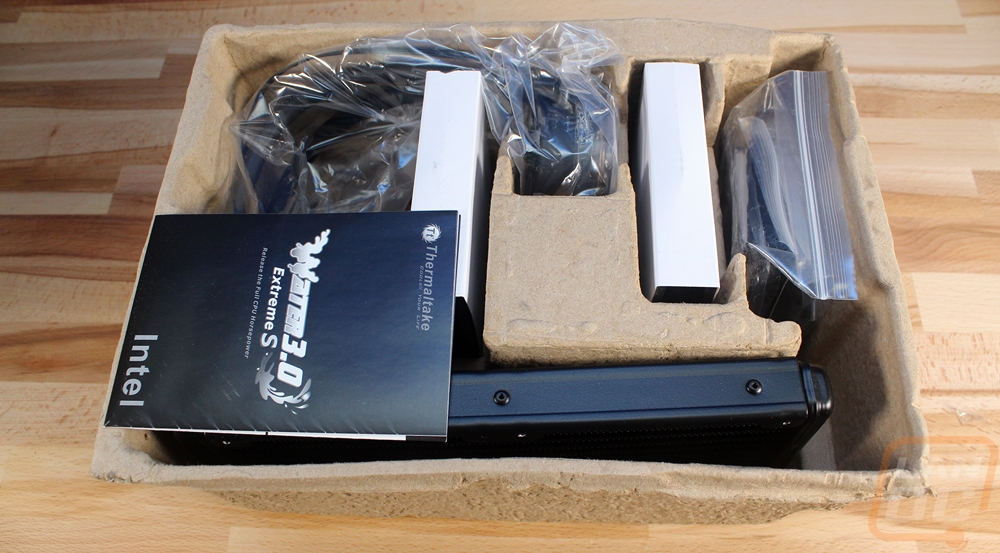
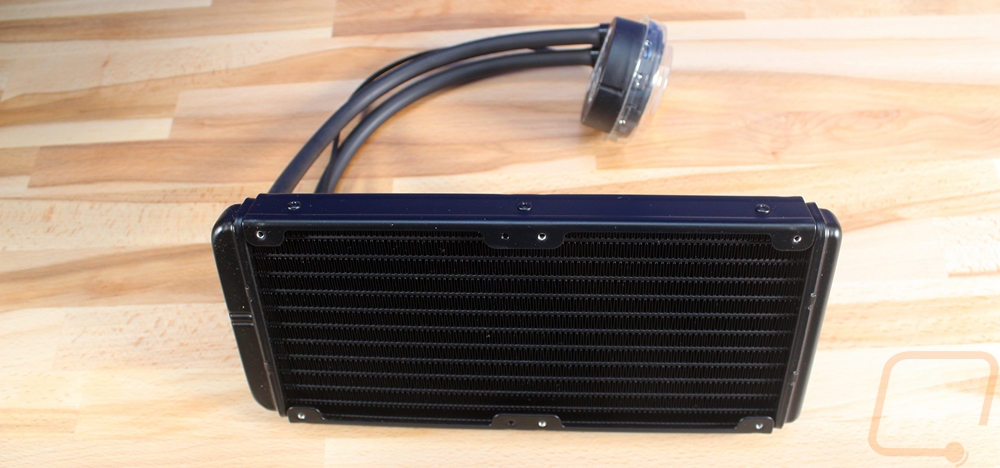
The Water 3.0 Extreme S AIO kit is actually the same kit that I used in our D-Frame build a long time ago before going full custom on it as well. It is reasonably priced and has decent performance, on par with any of your 140mm AOI kits. This is MORE than enough to keep the 7700k in this build cool.
So yeah, those black and white fans would actually look good in a lot of builds but not in this one.
The Ring Plus 12 kit had three 120mm ring fans along with a control box to power everything. The fans don’t actually hook up to any of your motherboard's fan headers, instead, you feed it SATA power then hook it up to USB 2.0 to control the speed and lighting.
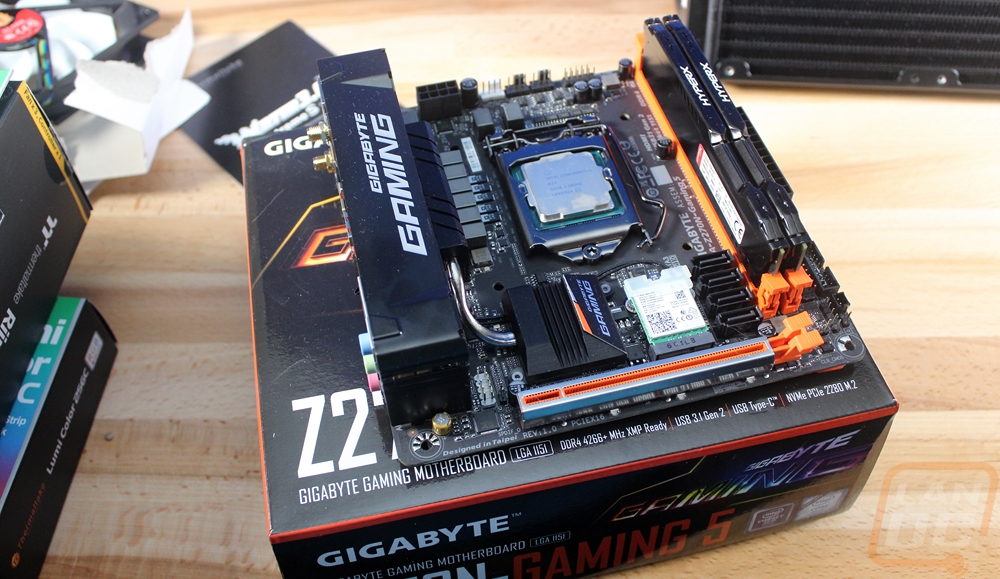
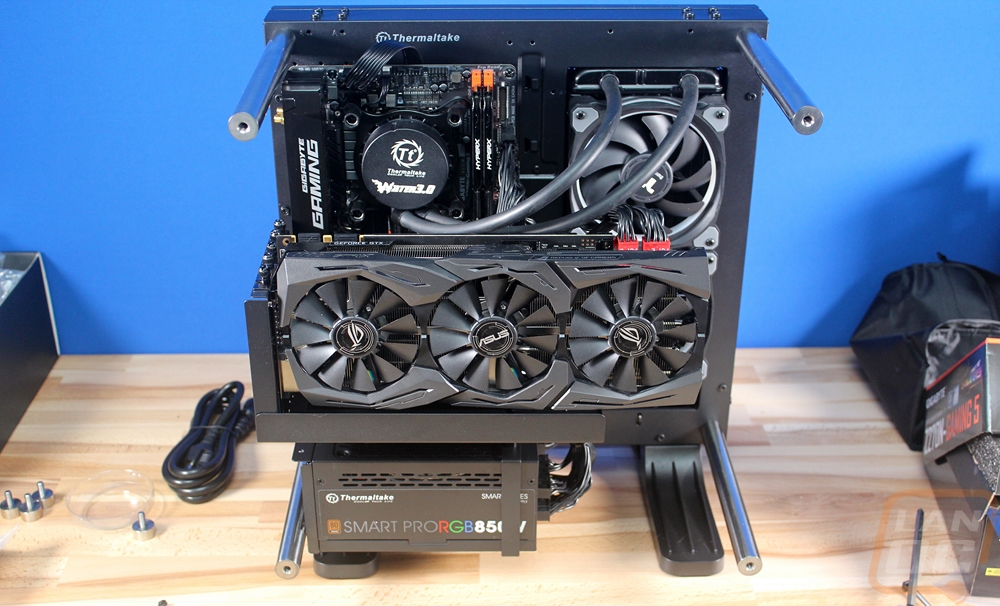
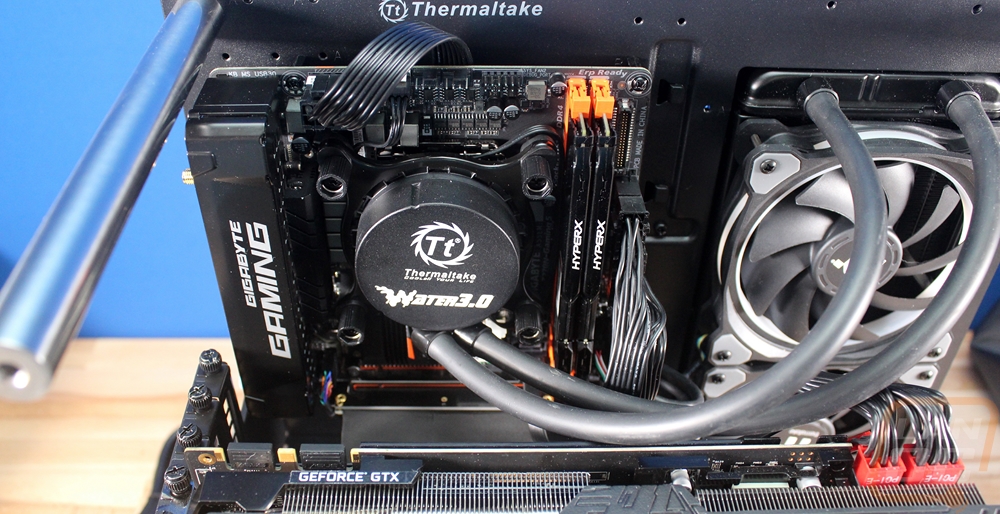
So around the time of starting my testing of the Core P1, I was also reviewing the Gigabyte Z270N Gaming 5 so I figured why not use that to test out the Core P1. I dropped in the 7700K and 16 gigs of HyperX DDR4 as well to round everything out. I have to admit the board looks really good in there! The Core P1 uses extremely tall standoffs for the motherboard but as you will notice there also aren’t any wire management holes around it, the tall standoffs give you room to run the cables up from a large hole in the middle under the board.
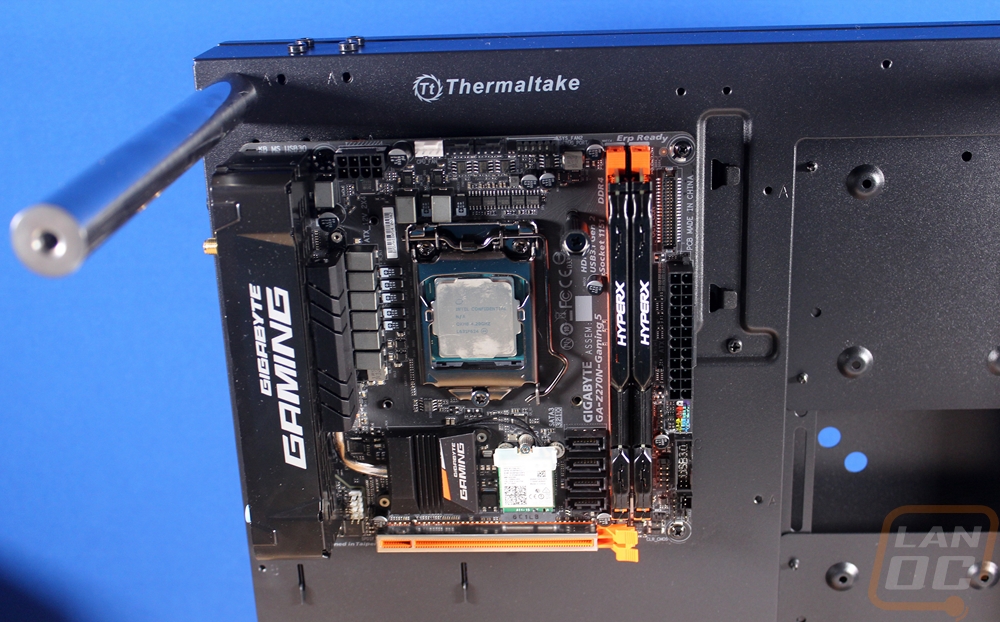
With the motherboard installed I then started in on getting that water cooling kit installed. I installed the two Ring fans on to the radiator first. Then I installed the radiator into the case with eight screws though four would have been more than enough. The screws on the left side in the middle were a little harder to get at because of the wires coming out of the front panel. Then from there, I installed the pump onto the motherboard. The distance from the CPU to the radiator was just right for the AIO kit.
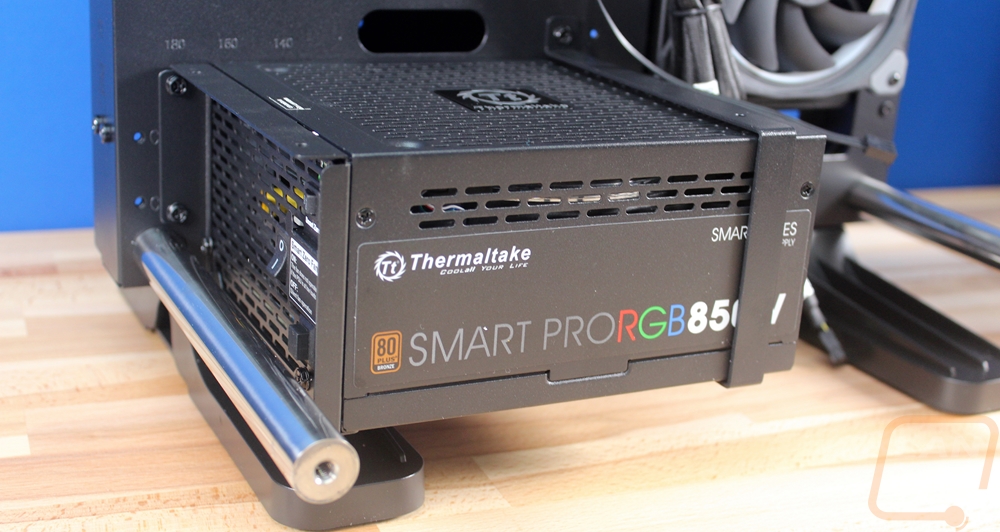
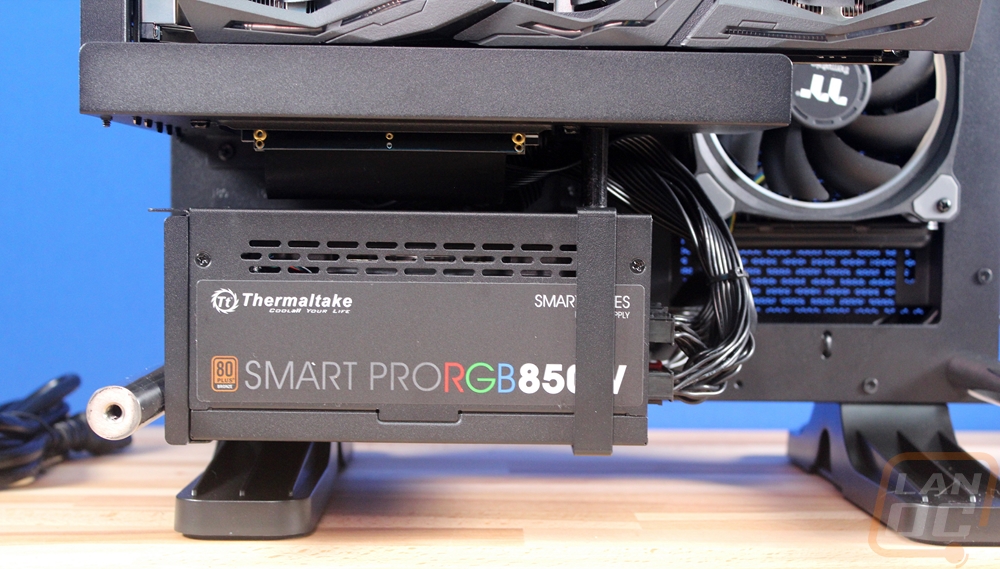
Installing the power supply required two brackets. One mounts to the power supply with your standard four screws then screws to the case. Then the second mount is a bracket that goes around the power supply for support on the back half. The second bracket is open and does leave room for longer power supplies if needed, though I wouldn’t recommend trying to pack a long one in the Core P1 if you plan on also using water cooling.
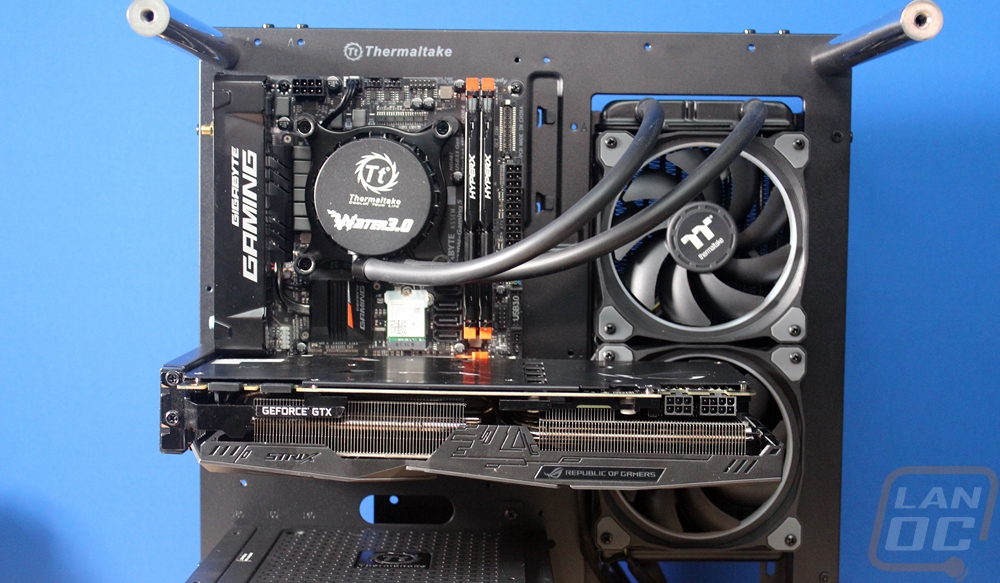
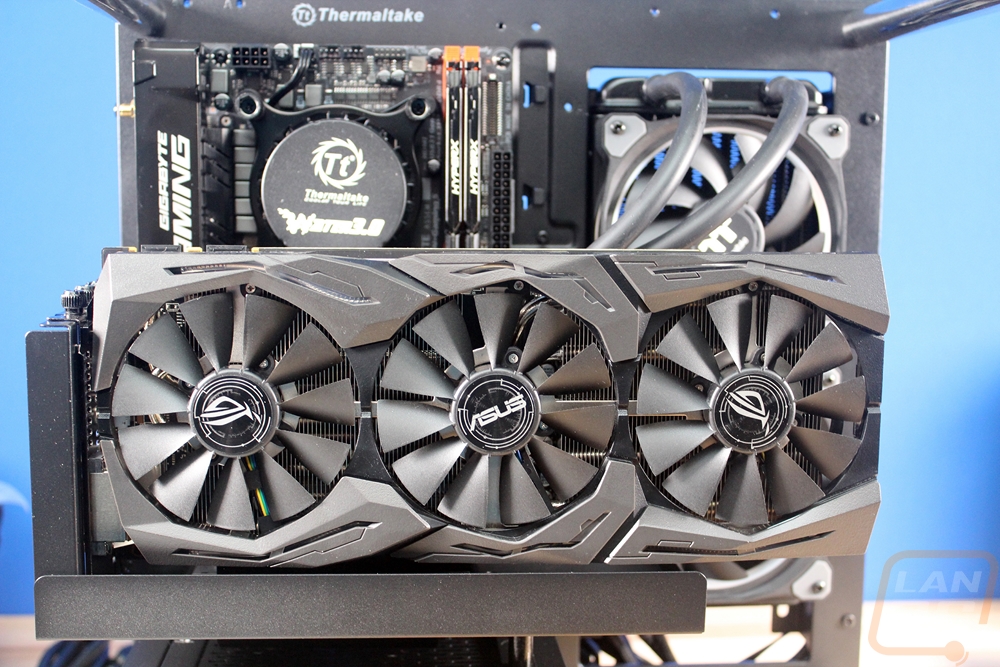
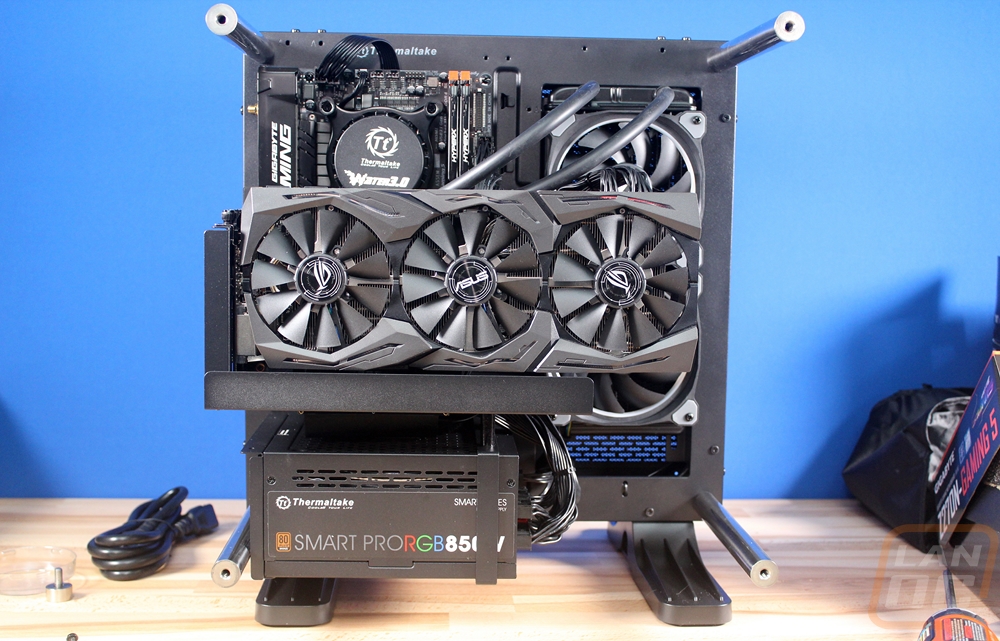
So for your video card or whatever PCIe device, you plan on hooking up you have two mounting options with the Core P1. You can mount it standard like in the two photos below. This mount is a simple double slot bracket that bolts to the case in two places.
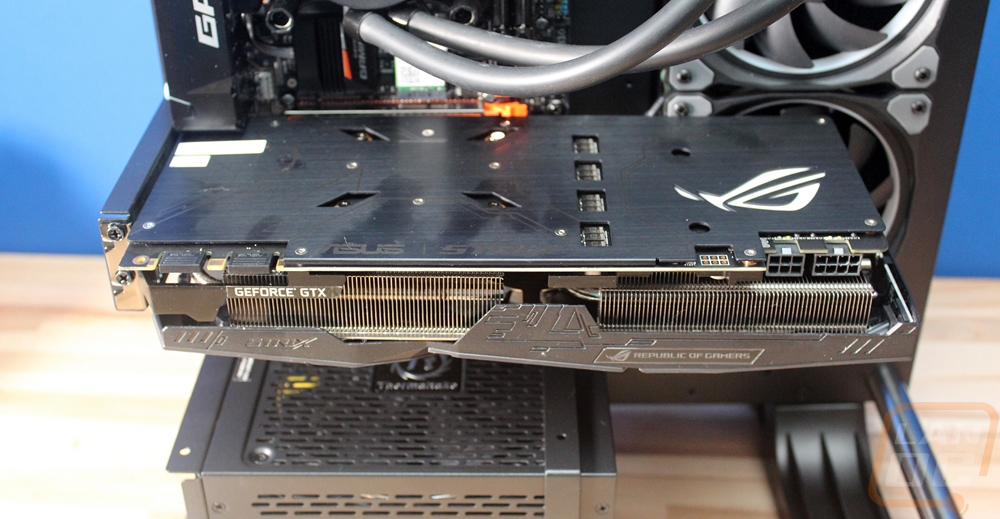
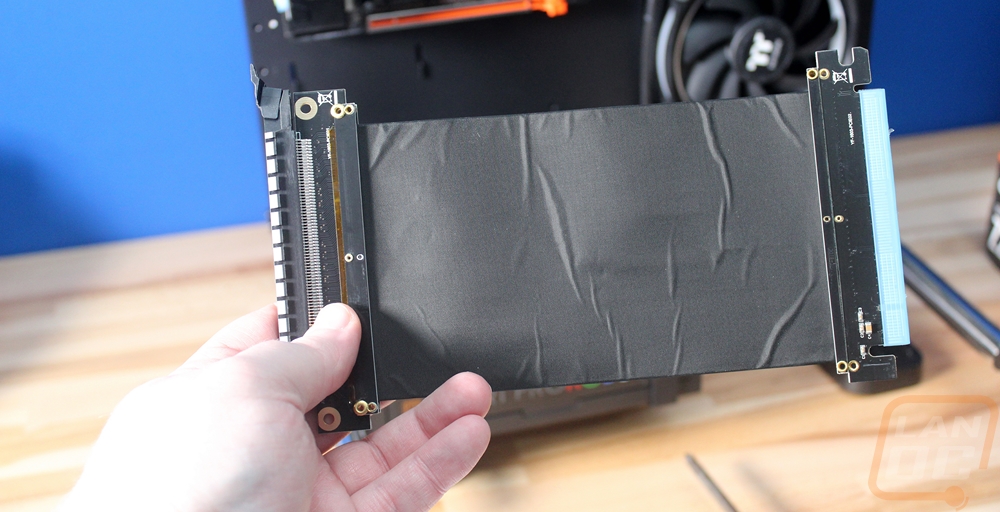
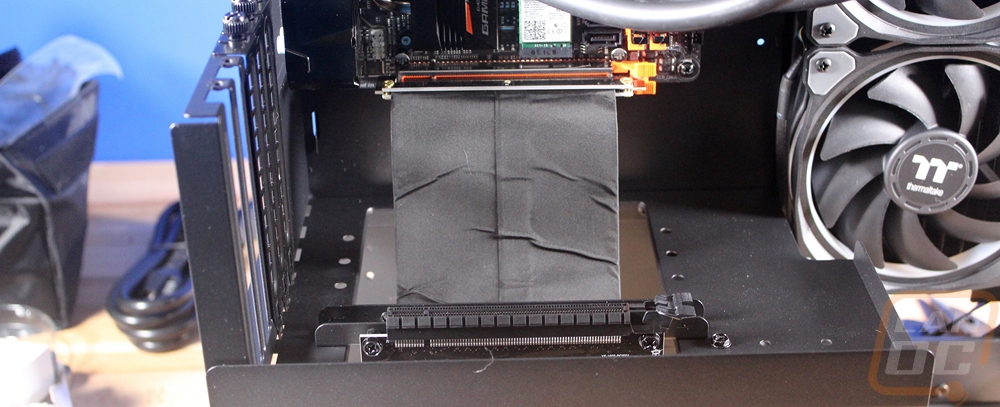
The second mounting option is a little different and is what I bet a lot of people like the most about the Core P1. This mount pulls your video card away from your motherboard and faces up so you can actually see the cool side of the care. To do that they include a PCIe riser cable and then you have to mount two brackets together. In addition to that, you have to pull the power supply back out to mount that bracket to it as well. THEN on top of all of that, you have to install the PCI riser cable on to the bracket as well. You have 5 slots available depending on how you want to position your card. This is important to have with thick cards and potentially for clearance on water cooling components too but I will get to that in a minute.
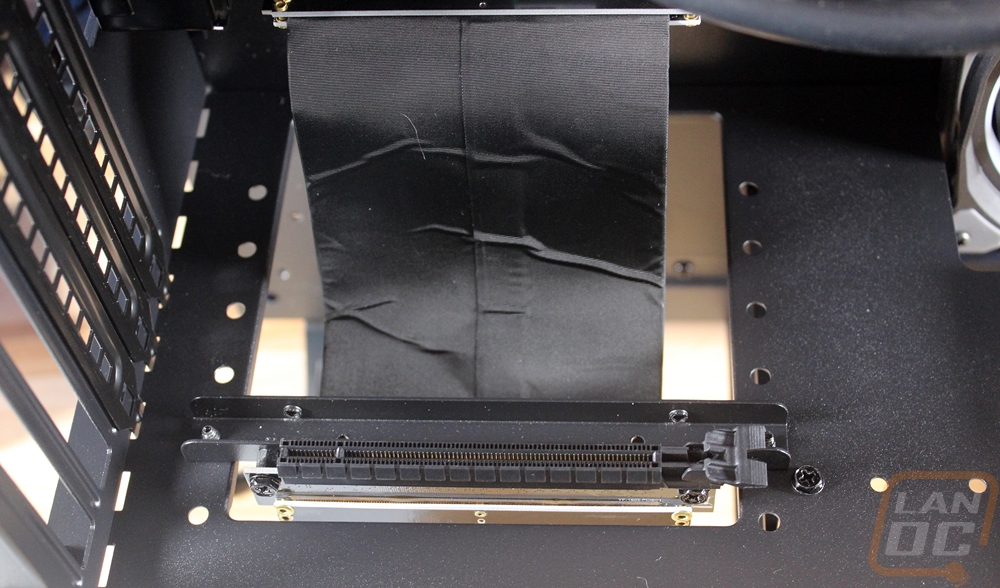
So I didn’t need the bracket at the time because I was using an AIO cooler, but here is a look at the included mounting bracket for custom water cooling. You can mount pumps and reservoirs to this one but note that they have two main slots. This depends on if you install your video card towards the glass or back towards the motherboard.
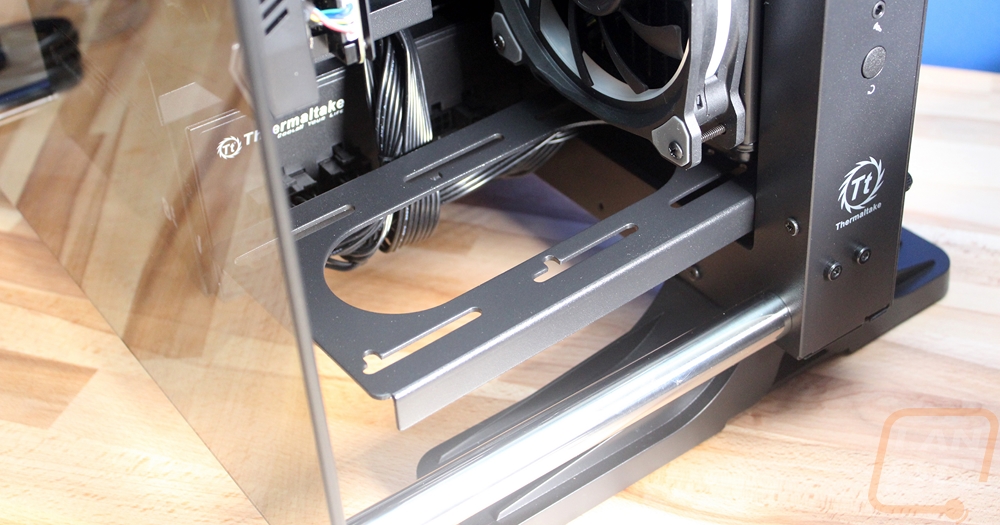
So with the main components installed I then had to get our SSD installed and get everything wired up. Wiring in the Core P1 could have been a disaster with basically no wire management holes but it turned out better than I expected. I routed the 24 pin and the GPU power directly from the power supply to their locations, then for everything else I ran it out the hole under the board using the wall mount bracket to keep everything hidden from view even from the back. Now the Ring fan controller was tricky but at least for now I have it installed in the 3.5-inch hard drive tray. This left the left side of the inside of the case clear for airflow coming from the fans as well.
From the outside, the whole package looks even better. The huge GTX 1080 video card fills out the Core P1 really well, so much so that it blocks a lot of the view of the motherboard and new RGB fans but it was well worth it.
Performance
With everything together, I have been messing around with the Core P1 in a few different situations. Performance testing was a little different than normal here. The case itself doesn’t come with any fans so making sure the fans were quiet wasn’t really a big concern. With the completely open-air design cooling is less of a concern but I was still curious about it. You see with the D-Frame Mini that I also have in use, the radiator fans blow up across the motherboard and video card to at least keep some airflow going. This design has no fans blowing anywhere around. Thankfully though the airflow from the video card and the open air design itself did still do their job and I didn’t run into any thermal issues.
Of course, the open air design itself is going to really depend on your living situation. You wouldn’t want to have something like this with kids who might get into it and even in my own home with three cats them messing around in the case could be a concern. The big issue for me will most likely be cat hair though. With an open top dust and dirt can and will fall in and unlike the D-Frame Mini with the video card orientated in the better-looking orientation, you have more space for dust to collect so plan on cleaning it all out more often than a standard case.
As far as moving it around or using it for LAN events. The case wasn’t too hard to grab or hold with the big pegs that hold the glass on but the overall weight is a little crazy. The case without anything in it is almost 21 pounds, so add in all of the components on top of that and things really start to add up. In addition to that, this is really a case that shines best with custom water cooling and that is going to really add the pounds as well so this wouldn’t be my first choice for a mobile case even with the ITX form factor.
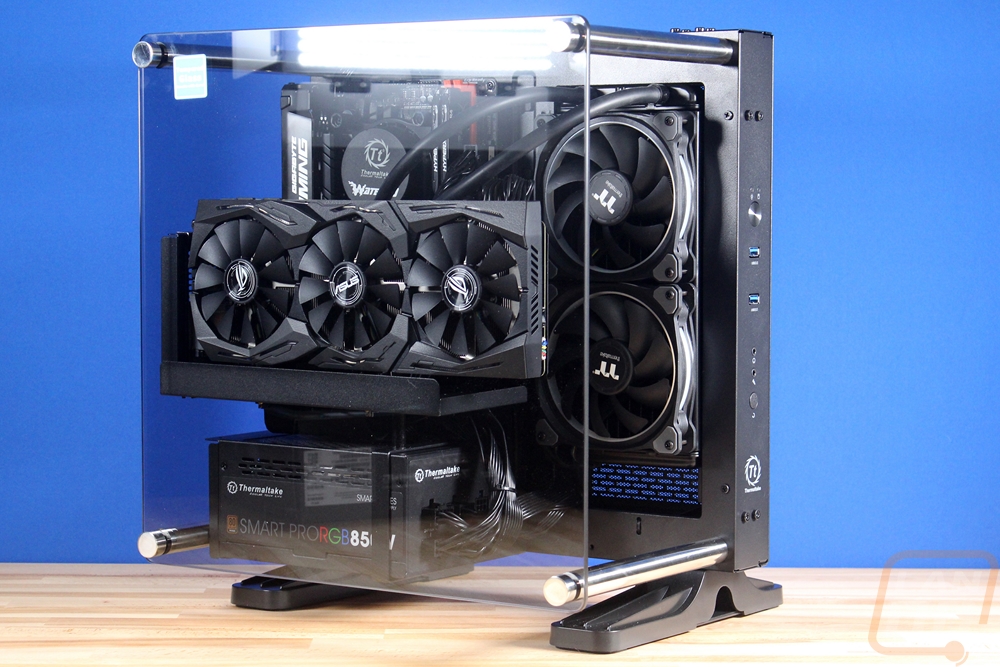
But god damn does it look good when all together. You can’t get away with anything but a fully thought out build in the open design but if you take your time picking components the payoff is really worth it. Even the Ring fans alone really look good.
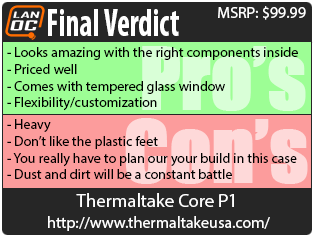
Overall and Final Verdict
So while the Core P3 and P5 are both great cases, I personally think the Core P1 is the best of the whole series. The other cases end up being huge but the Core P1 with its micro-ITX form factor is able to save a little space while keeping a lot of the same features that are great with the others. You get a really unique design that takes a lot from the Level 10 from years ago and combines it with some of today's trends. You get an open design that really allows you to show off your build to the fullest. Of course, this also means that you have to take extra care in planning out your build. Just tossing random components in this one isn’t going to look very good and there is no room to hide bad wiring. Really I think this, like the P3 and P5, is begging for custom water cooling but even just with an AIO with a set of nice fans, it looks good. I’m actually planning a really crazy build in this one in the near future so keep an eye out for the project build in the future.
When the Core P1 first came in I didn’t even know that it having a tempered glass window included was a big deal. It was later when looking at P3’s for a friend that I found out that a lot of the P3’s and P5s don’t come with tempered glass unless you get the glass models, you have to buy it individually and upgrade. So Thermaltake including the glass with the P1 is a nice touch, without it this case wouldn’t be what it is. The customization that you have is also a big selling point for me, even with how you can mount your video card. Beyond that, they included mounting for pumps and reservoirs or you can use the space to mount SSDs right in the front to show them off. I don’t think any two Core P1’s is going to look the same.
Now there are downsides as well. For starters, this is a very heavy case given the ITX form factor. Without anything in or on the case, it weighs 21 pounds, a fully decked out rig is most likely going to be pushing 40-50, especially if you have water cooling. I also wasn’t a fan at all of the big plastic feet, they take up more space than I would like and more importantly they are the only part of the case that doesn’t have a high-quality look or feel. They do their job very well, but I would love to see someone come up with another design. You also have to keep in mind that the open design of this case is going to mean more maintenance. You will need to clean dust and dirt out more often as there is nothing to stop it from getting inside, if you even consider there to be an inside to the case. I didn’t list it in the cons, but I would also keep an eye out on the PCI riser as well, apparently, on the P3 and P5 they were known to be bad but for our sample at least I had no problems.
Even with the downsides in mind, I do love this case and I’m not the only one. Months ago after I had arranged the Core P1 to be coming in and after I planned on using it for a project build to build my wife a new PC she was browsing Facebook and saw a picture of this amazing case that she just had to have. That case was the Core P1, she picked it out blindly after I had already arranged everything. It is a stunning case, especially when you use it to feature something crazy. With all that in mind, the $99.99 price point that you can pick it up for ends up being a little bit of a deal. It isn’t a budget case of course, but with a tinted tempered glass window and the overall construction, it was cheaper than I expected it to be.

Live Pricing: HERE


