Well with all of the video cards being launched recently it was starting to feel like that’s all I do. I recently noticed that I hadn’t spent any time checking out cases in a long time. So I have a whole stack coming in and today I start off with a new case from Cooler Master. Today I’m checking out the Masterbox 5 and a quick look at the feature list shows that Cooler Master has doubled down on the full customization of their Mastercase line of cases and brought similar features into their more budget friendly cases. At just under $70, the Masterbox 5 is at the price people are looking for, so today I’m going to dive in and find out if it’s an easy case to work in, find out if the customization is all its hyped up to be, and see if it’s a quality case that will hold up to years of abuse.
Product Name: Cooler Master Masterbox 5
Review Sample Provided by: Cooler Master
Written by: Wes
Pictures by: Wes
Amazon Link: HERE
| Specifications | |
| Materials | Steel body, Plastic mesh bezel |
| Dimensions (LxWxH) | 500 x 220 x 475mm |
| Motherboard Support | E-ATX, ATX, Micro-ATX, Mini-ITX |
| Expansion Slots | 7 |
| Drive Bays |
Combo 3.5" / 2.5" - 2 SSD - 1 |
| I/O Port | USB 3.0 x 2, Audio in / out |
| Pre-installed Fan(s) |
Front – 1x 120mm Rear - 1x 120mm |
| Fan Support |
Front - 120mm / 140mm x 2 *with optional bracket support up to 3 x 120mm Rear - 1x 120mm |
| Liquid Cooling Support |
Front - 240mm / 280/ radiator, up to 50mm thickness without fan *with optional bracket support up to 360mm radiator Rear - 120mm |
| CPU Cooler Clearance | 167mm / 6.5" |
| PSU Clearance | 180mm / 7.1" |
| GPU Clearance | 410mm / 16.2" (w/o 3.5" HDD cage) |
| Cable Routing space behind motherboard tray | 25mm - 35mm |
Packaging
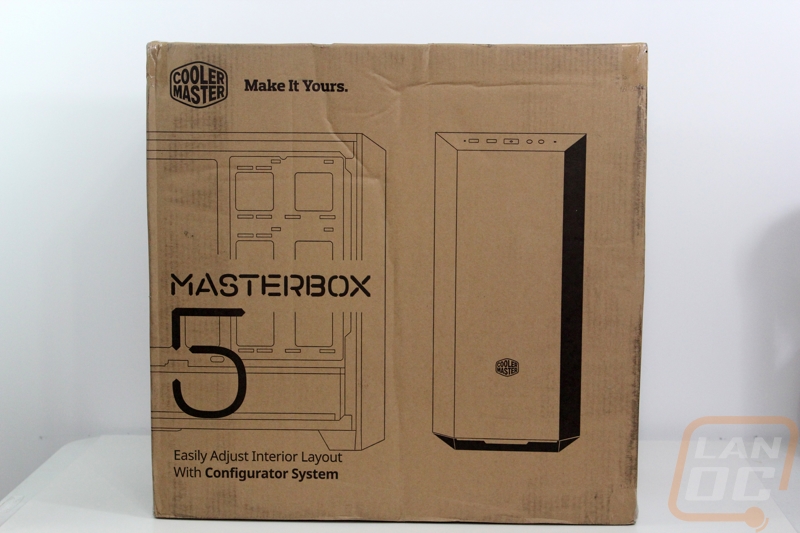
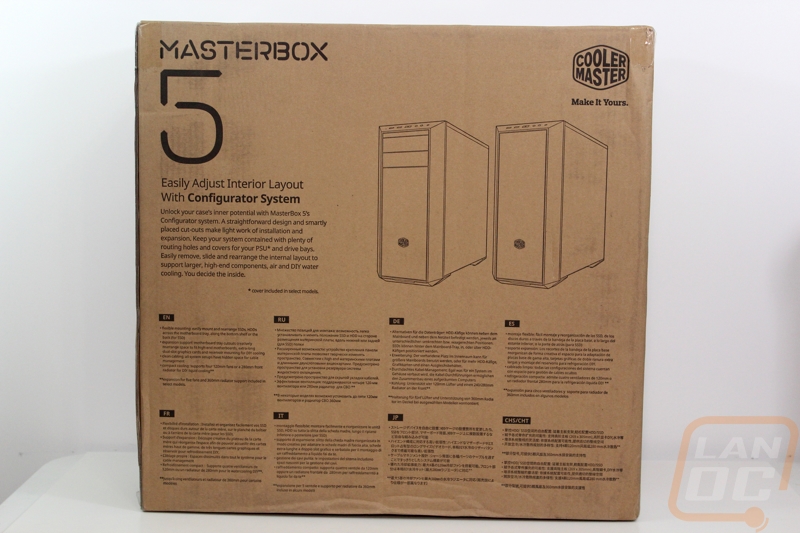
Being a budget friendly case, it’s no surprise that Cooler Master kept things simple on the packaging. Who needs a fancy full-color box when cases in retail are normally displayed out of the box anyhow. So the Masterbox 5 has a standard brown box with a line drawing of the case on the front. They do mention down at the bottom that it has an easily adjusted interior layout with “configurator system” in bold. Around on the back is a smaller line drawing and a short feature list that is copied over into multiple languages.
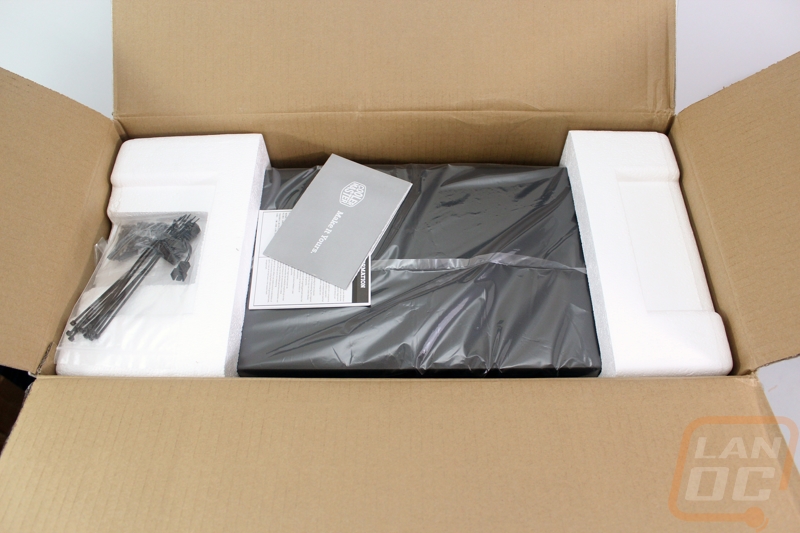
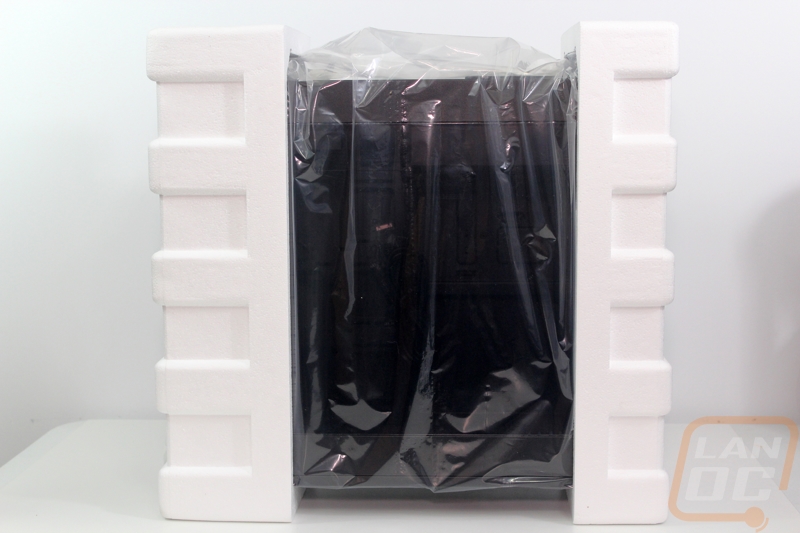
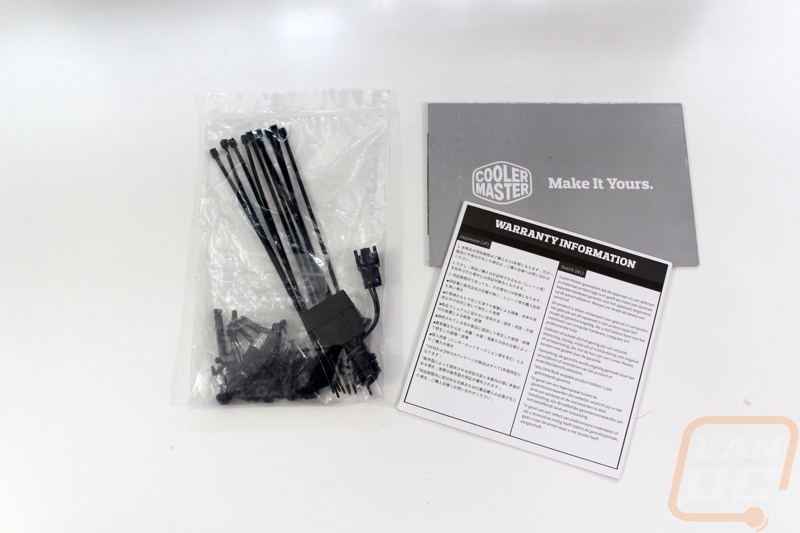
Inside the box, the case is wrapped up in a plastic bag with the standard foam on each end to keep it safe. It did the job for me, the box came in a little banged up but the case is in great shape. Up on top of everything they also included a Make It Yours book and a warranty information page. Alongside that, they also give you a bag filled with screws and standoffs, a Molex fan adapter, and a decent amount of zip ties. All of the screws and standoffs are black, a nice touch that some cases forget to do with their otherwise black cases.
Outside
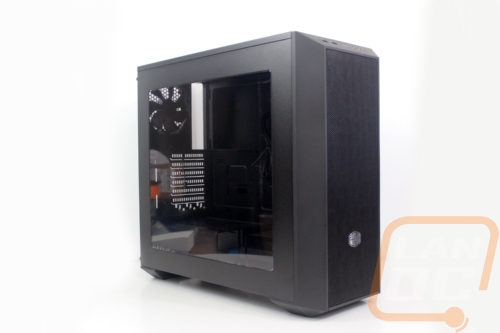
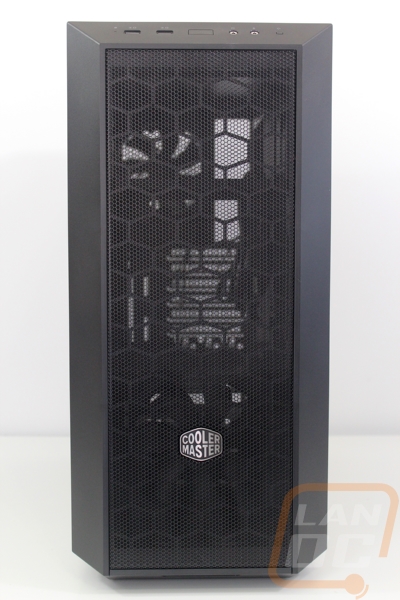
Before we jump inside the Masterbox 5 let’s take a look at the exterior. The overall design takes a lot from the Mastercase 5 only simpler. The Mastercase is Cooler Masters higher end model and its customization wasn’t limited to inside the case like the Masterbox 5. Its design has handles up top and the option to add a filler in between them that gives the case an angled design up top. The Masterbox 5, on the other hand, has a flat top. This is normal for a price point focused case, adding on to the top adds a lot to the cost. That said the Masterbox 5 does have the same angular front design that the Mastercase 5 has. While our sample is black they actually have it available in both black and white and I think both have a simple but good look to them. The angular front makes it more than just a standard steel box but still keeps things simple. It’s the same idea that manufacturers like Fractal have done for a long time, simple, functional, and elegant.
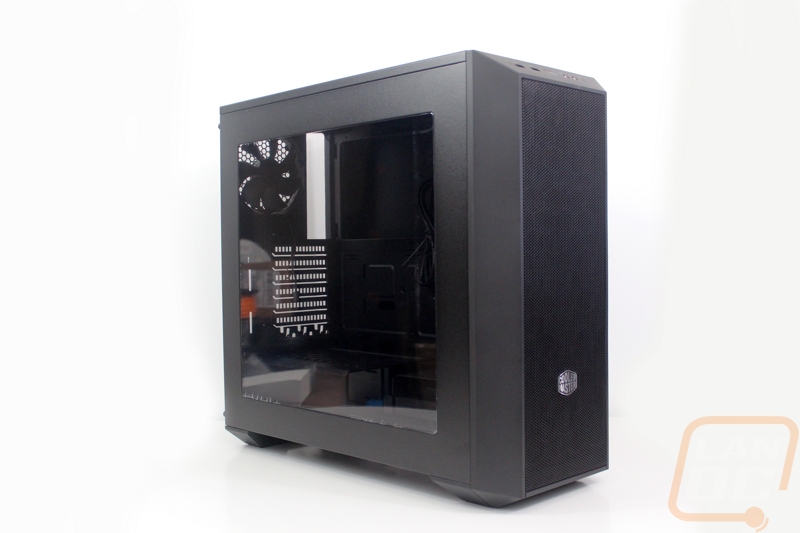
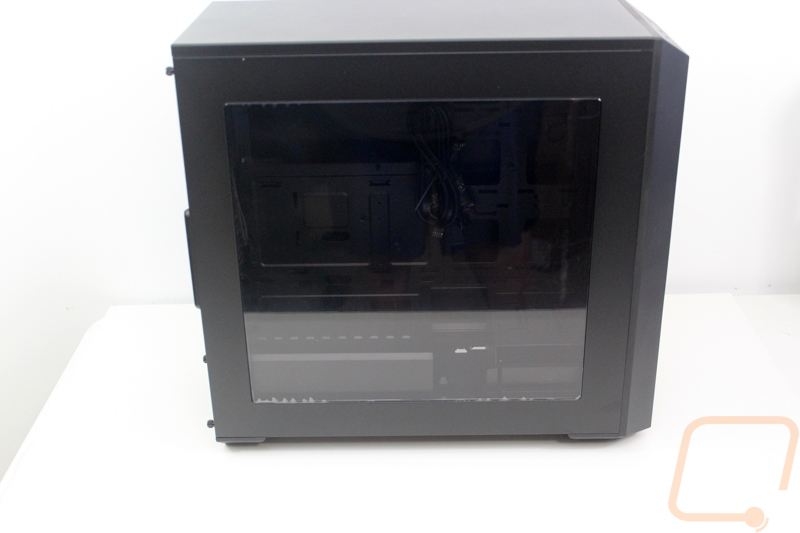
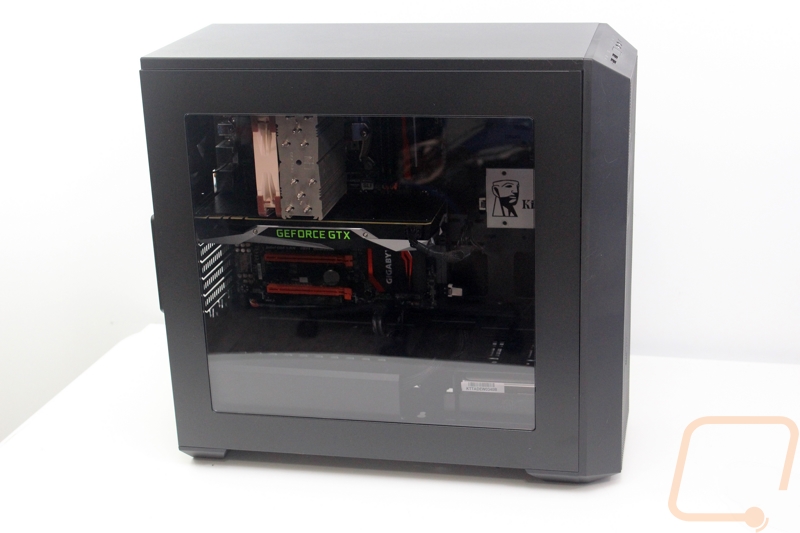
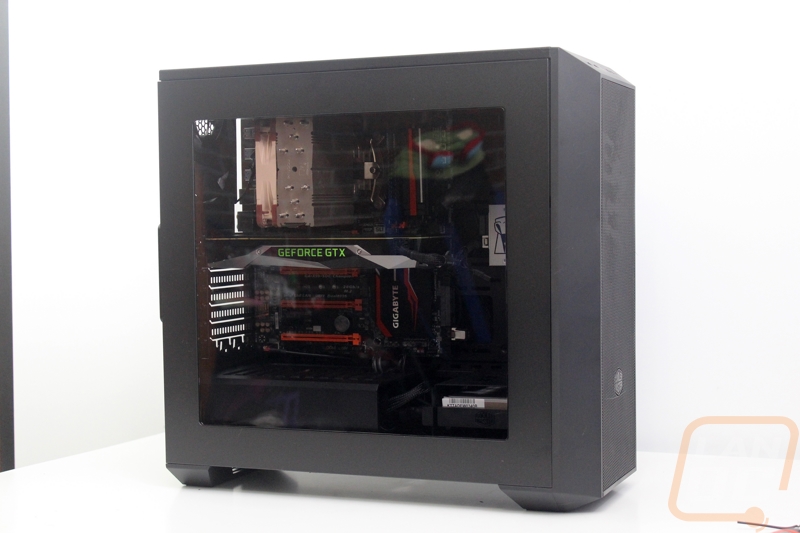
The left side of the Masterbox 5 is mostly filled with the smoked window. It takes up everything but a two-inch ring around the outside edge. The tinted window matches the blacked out case giving it a murdered out look while still giving you a peek inside. I think I would prefer the window to be a little shorter, specifically to cover up the hard drive trays but as you will see in the interior section, with all of the customization there isn’t any way you could make a window that hides everything without it being tiny.
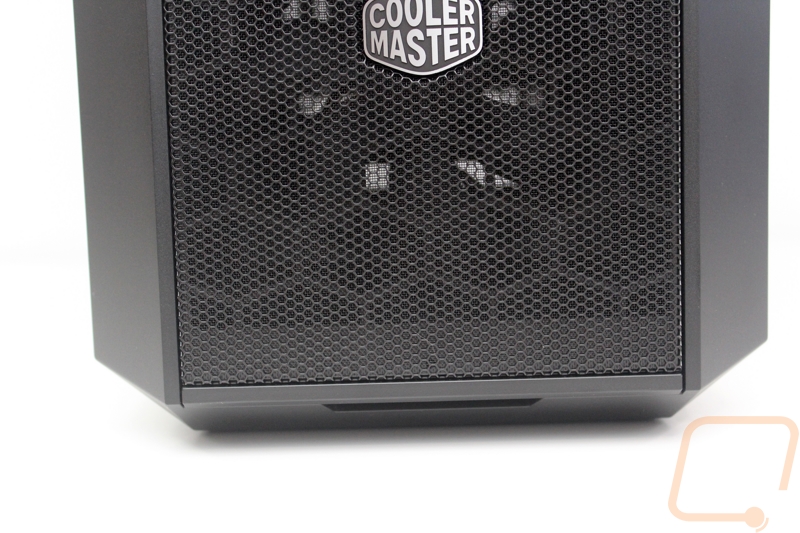
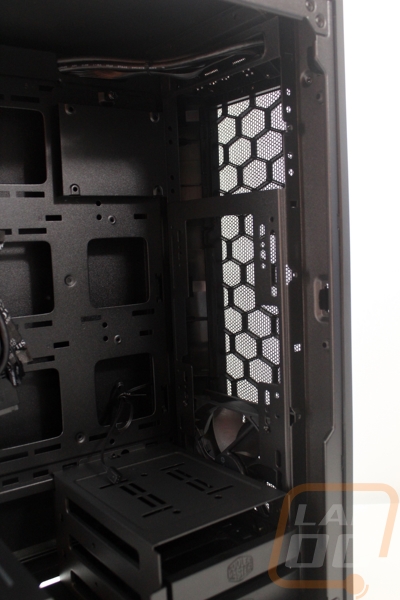
The front of the Masterbox 5 angles in and then has a mesh panel that runs from top to bottom. The mesh has a honeycomb-shaped structure behind it that you can see from most angles. The design is very open leave the option to run fans all the way up the front of the case. The mesh does also have the Cooler Master logo down near the bottom in front of one of the included fans. Down along the bottom, you can pull on the front panel to pop it out to clean and to also gain access to the front of the fans. Cooler Master uses plastic push mounts to attach the fans so you can actually install fans directly from the front.
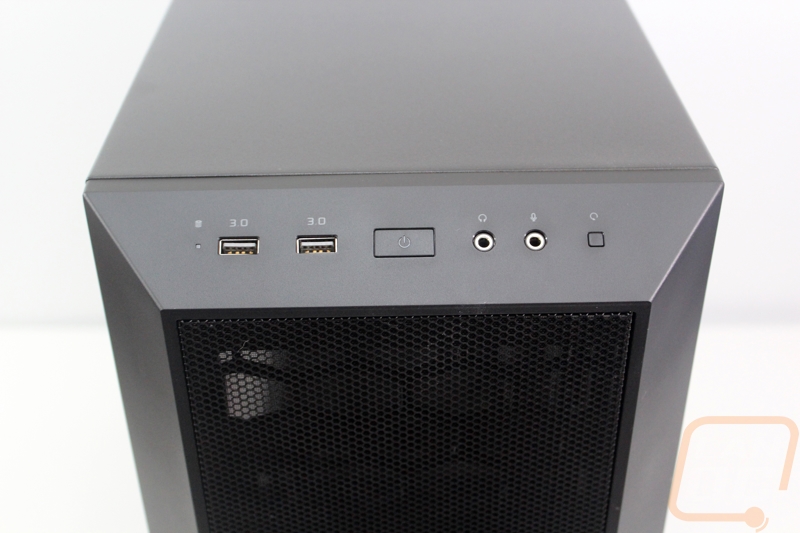
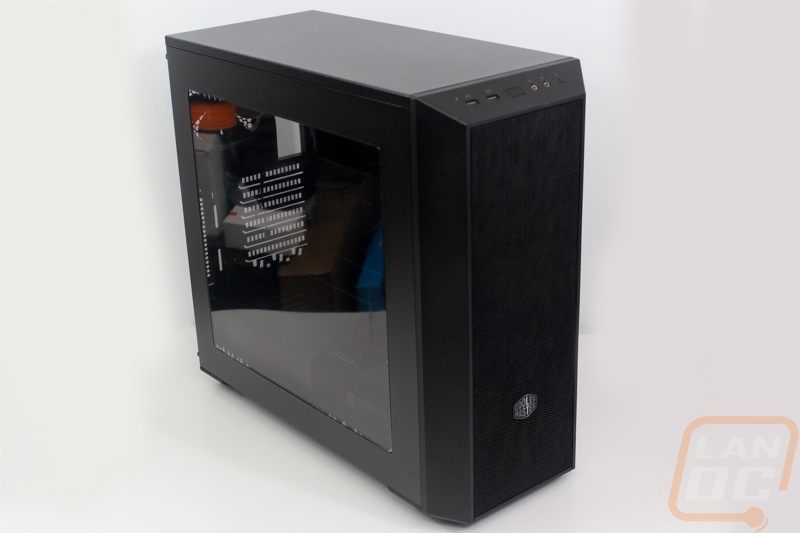
Up on the top edge of the angled front panel is the front I/O. In the center is a rectangle shaped power button. To the right of the power button, you have the headphone and microphone ports, each has a small printed icon above them. Then to the far right is a tiny reset button. On the far left is a pinhole hard drive status LED and between that and the power button are two USB 3.0 connections. Cooler Master went a little different here, the USB connections don’t have the normal blue color to them but they did print 3.0 above them to make sure everyone knows what they are. The two USB ports are also spaced out a little more than normal, enough so that you should be able to plug in two thick flash drives into them if needed. I know this has been an issue for me in the past where you can only use one if you have a thick drive plugged in.
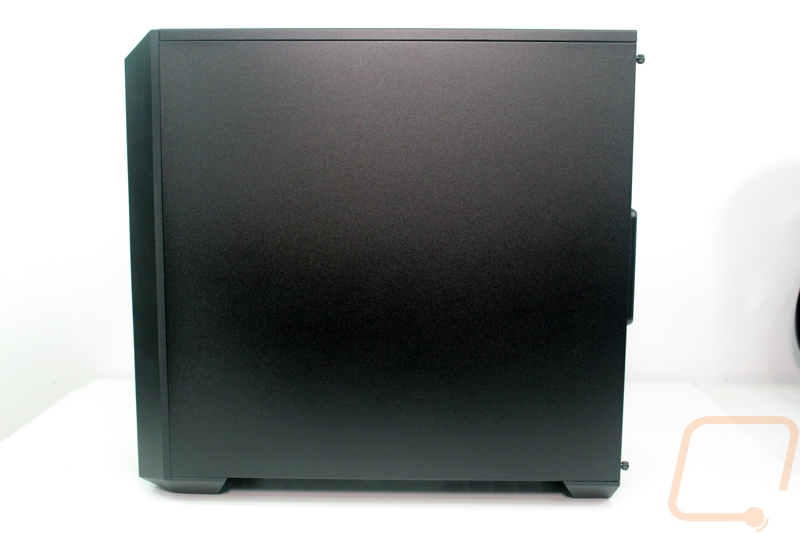
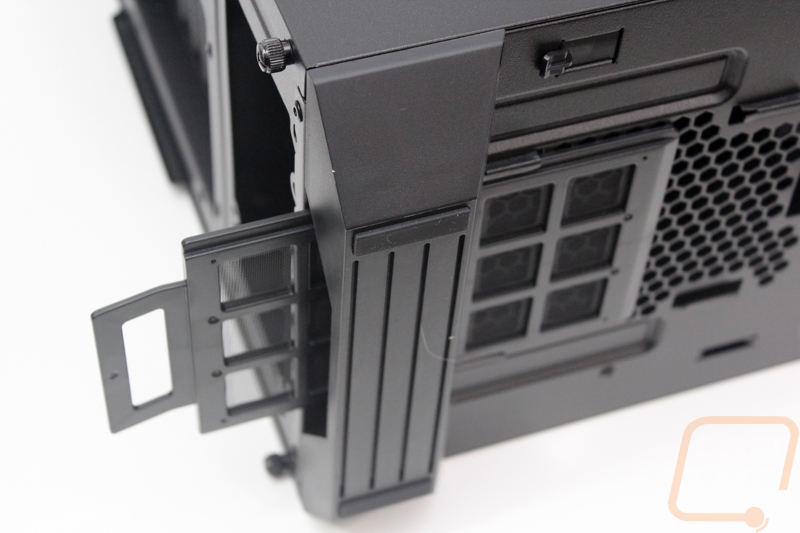
The right side of the Masterbox 5 doesn’t have anything going on beyond the small handle to help pull the panel off and the two thumbscrews that keep it on.
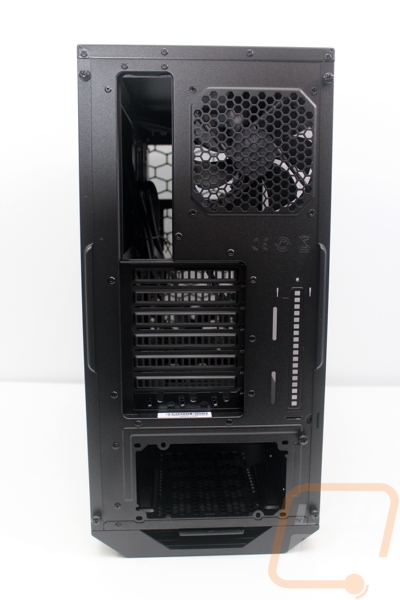
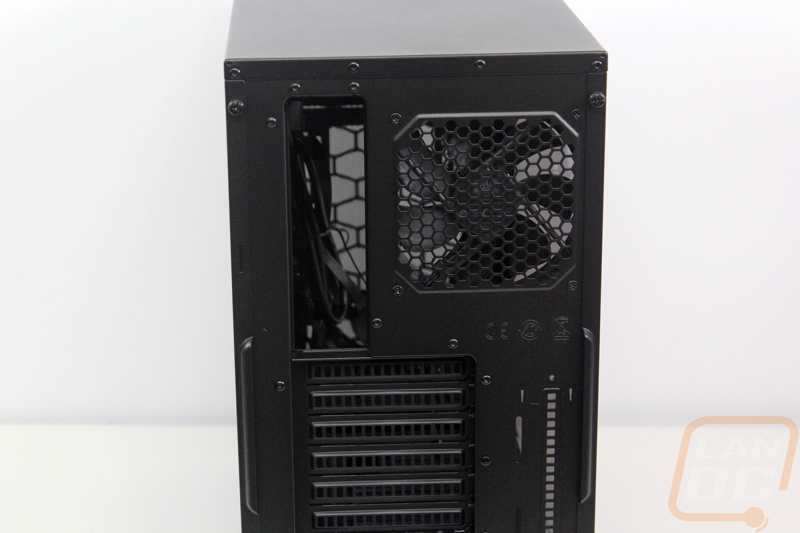
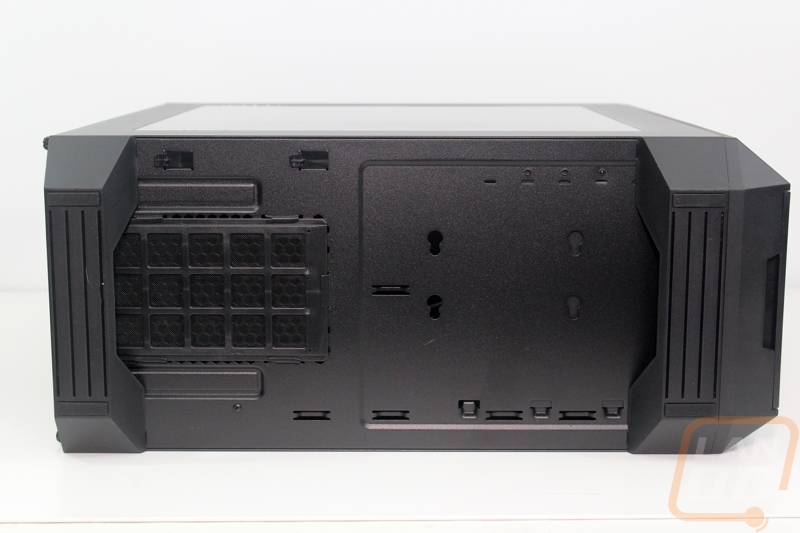
Alright on the back of the Masterbox 5, the first thing that really caught my eye was the extra space over on the left. Specifically, this is the space under the motherboard and it’s much more than normal. Up above the rear, I/O is a 120mm exhaust fan. For PCI slots, the Masterbox 5 has 7 slots with one of them having a Stormguard bracket that you can wrap your peripheral cords around and secure them at LAN events. Down towards the bottom is the ATX power supply mount and tucked in down below it is a pull out fan grill.
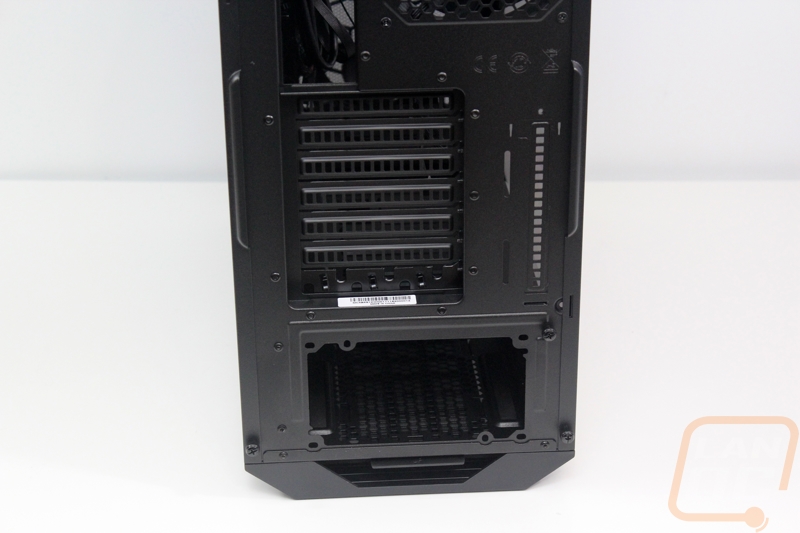
On the bottom, there are two feet, one on the front and one on the rear. The feet have the same angular shape as the front of the case. For grip, each foot has two inch and half wide rubber feet. From this bottom view, we can also get a better look at the pull out bottom fan grill. It covered the entire intake below the power supply to help keep your power supply free from dust.
Inside
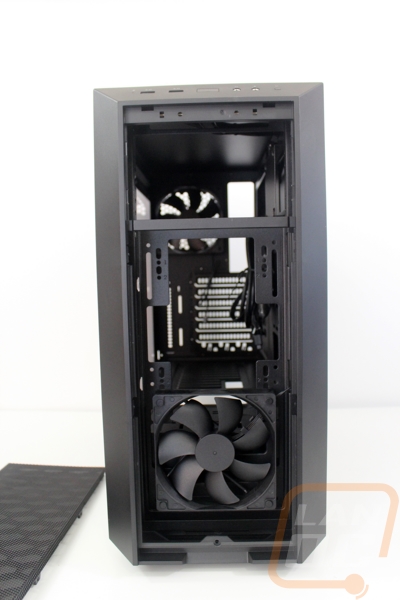
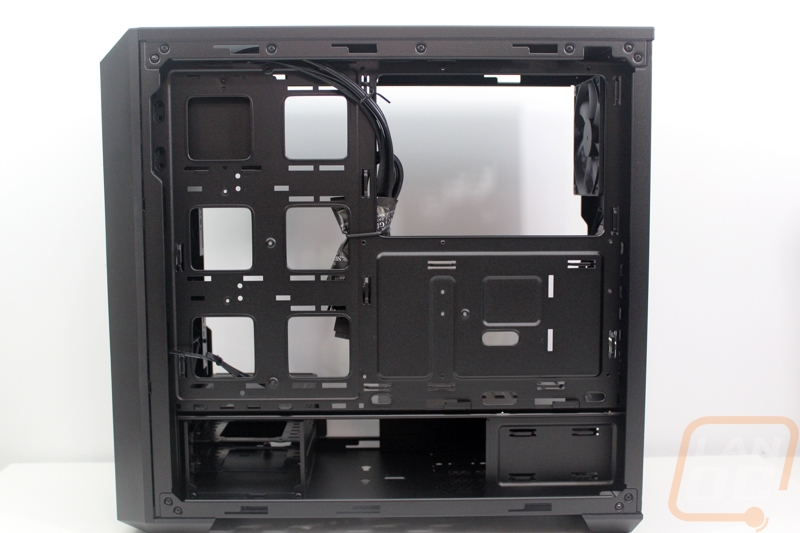
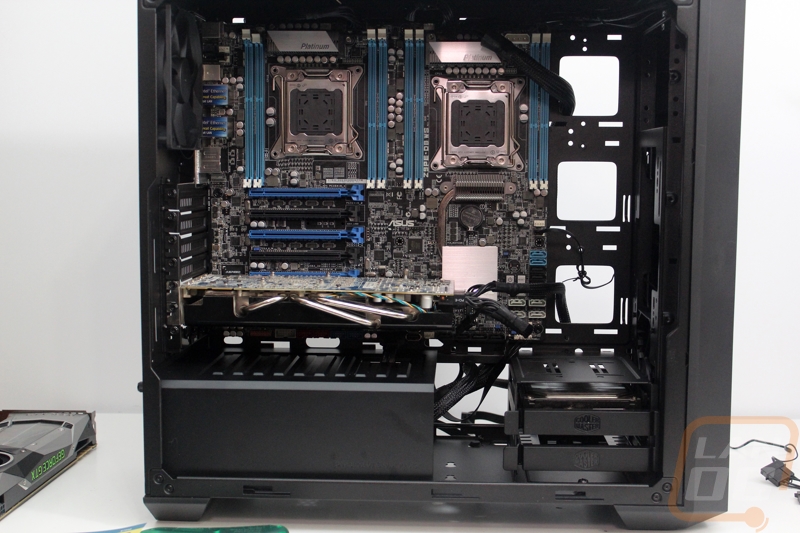
At first glance, the inside of the Masterbox 5 isn’t really all that different from any other case on the market. But a quick look through the product page clues us into what Cooler Master is talking about when they talk about all of the customization. Specifically, the SSD mount, hard drive cage, and radiator mount can all be moved around to fit your build. The entire interior of the Masterbox 5 is powder coated a semi-gloss black that matches the rest of the case, continuing that murdered out look.
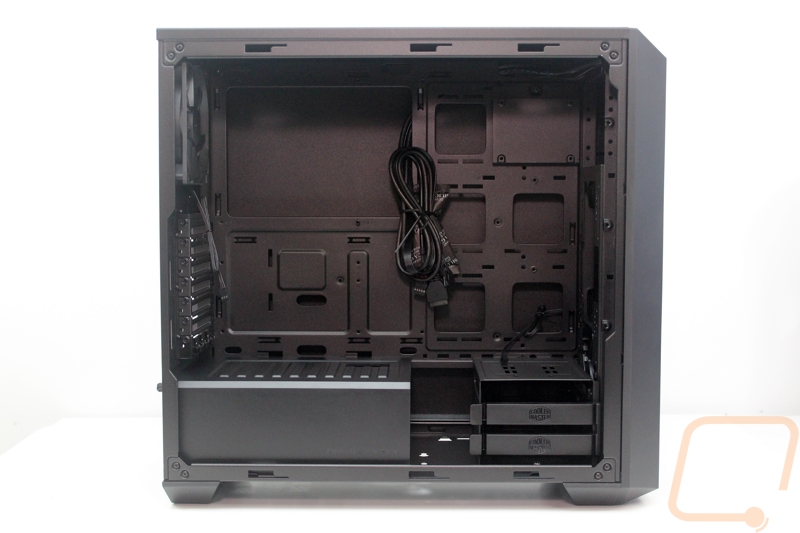
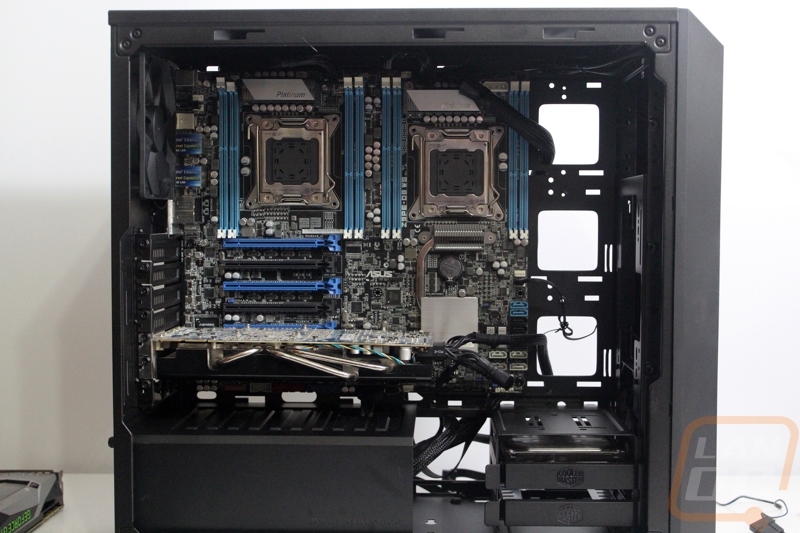
The Masterbox 5 supports from ITX to Extended ATX motherboards and from the looks of it no matter how big or small you are going to have access for wiring with the 6 holes over on the right. There is also the extremely large access hole to get at the back of a CPU to install a cooler. Normally the holes aren’t any larger than an ITX motherboard but Cooler Master didn’t let that limitation stop them when going about three inches wider. The six holes over on the right side don’t have any grommets though like the Mastercase 5 had, so we can expect there to be a little extra work keeping some wiring from being visible.
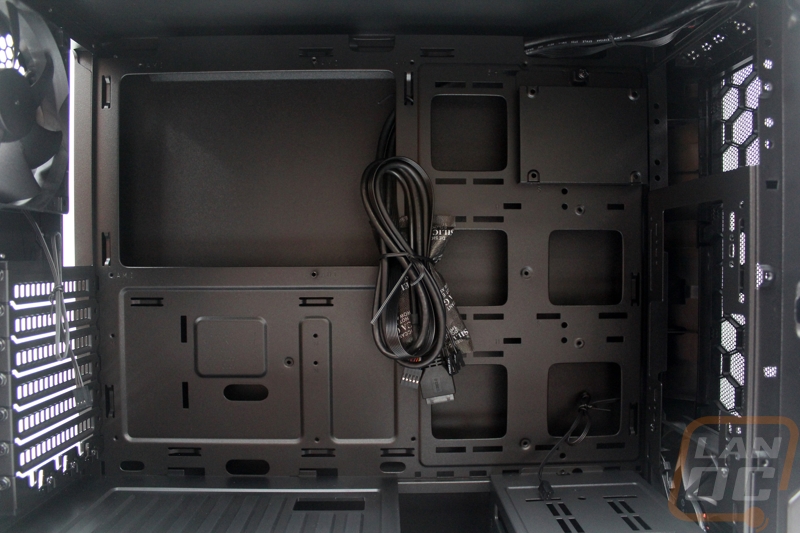

To go with the full e-ATX support they also included 7 PCI slots. Each bracket has wide venting with the exception of the last one. That last one is the stormguard bracket, you wrap your peripherals around it and reinstall it to make it harder for someone to walk off with your keyboard or mouse.
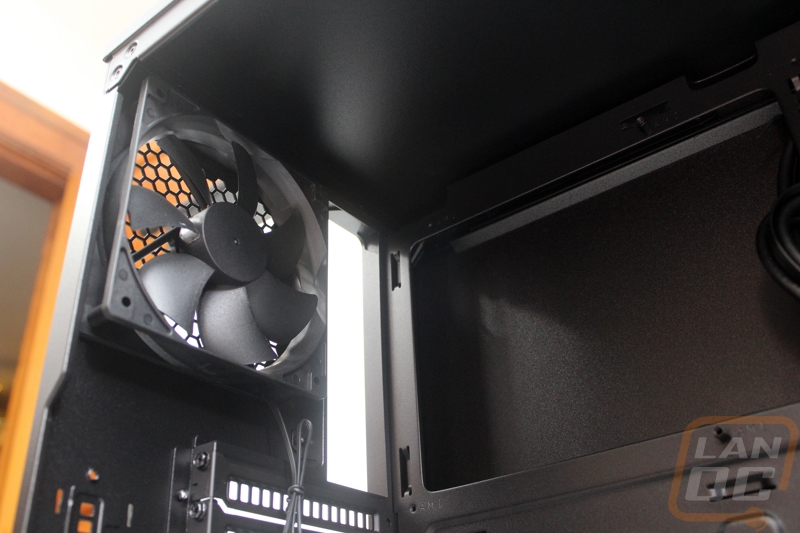
Just above the rear, I/O hole is a basic 120mm exhaust fan. There aren’t any labels visible to show us what fan this is, but I can say for sure it has no lighting and doesn’t have anything special going on. It is however completely blacked out and has a black cord and connector, seeing a pattern here?
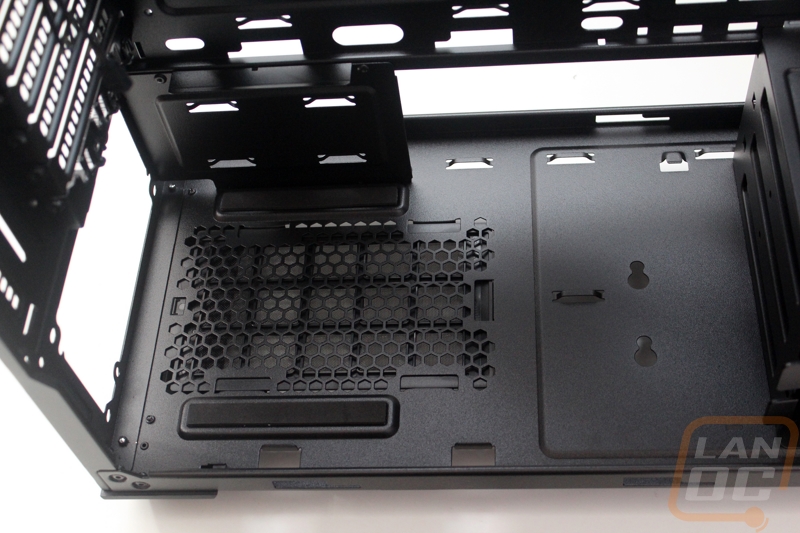
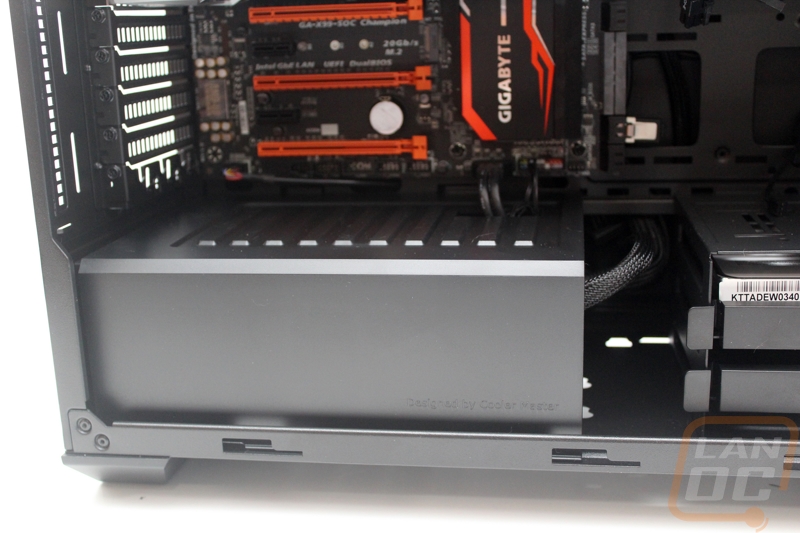
I think one of the best features of the Masterbox is the simple plastic cage that they include to go around your power supply and power supply cables. The box is held in with just one thumb screw and is easy to remove. It has one hole in it to route cables up and out of if needed and it makes having clean wiring much easier. With it removed we can see the two rubber pads that the power supply sits on as well as the bottom vent for the intake fan on your PSU.

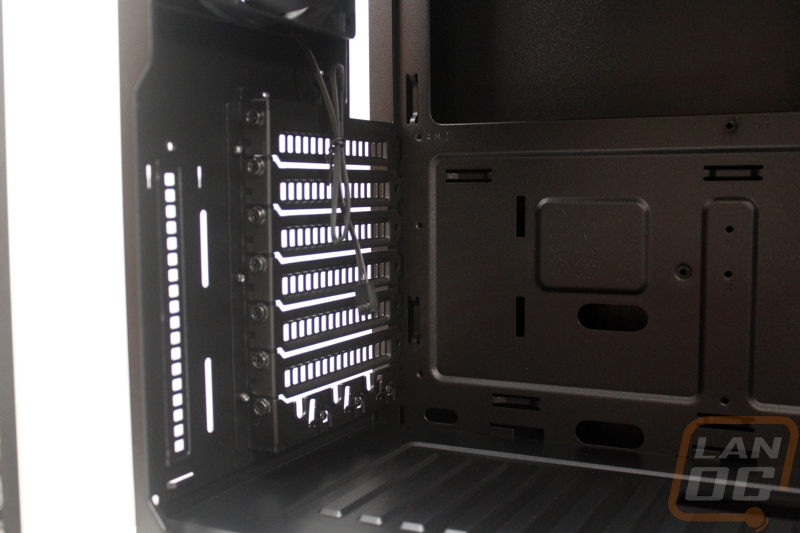
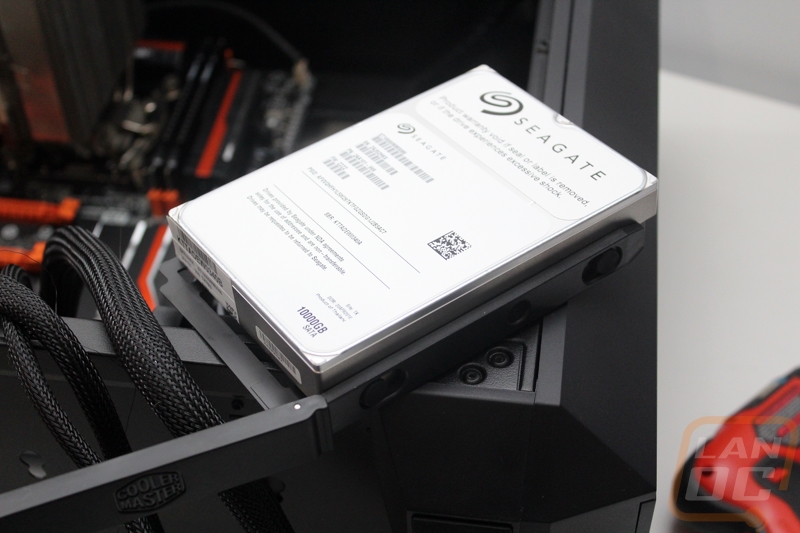
So the Masterbox 5 comes with a relatively small hard drive cage that holds two 3.5 inch drives but it is very unique. The drive cage is mounted in with a thumbscrew and it can be moved around. You can move it to the left two spots with the farthest mount being up against the power supply cover in the photo. The two drives mount into the toolless plastic trays that Cooler Master has been using for years. They use pins mounted on rubber mounts to secure your drives and the reason they haven’t changed the design in such a long time is because it works perfectly.
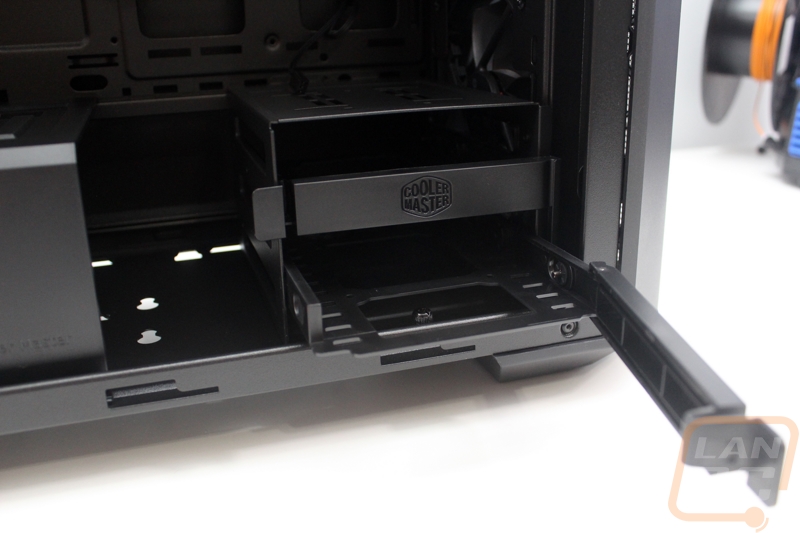
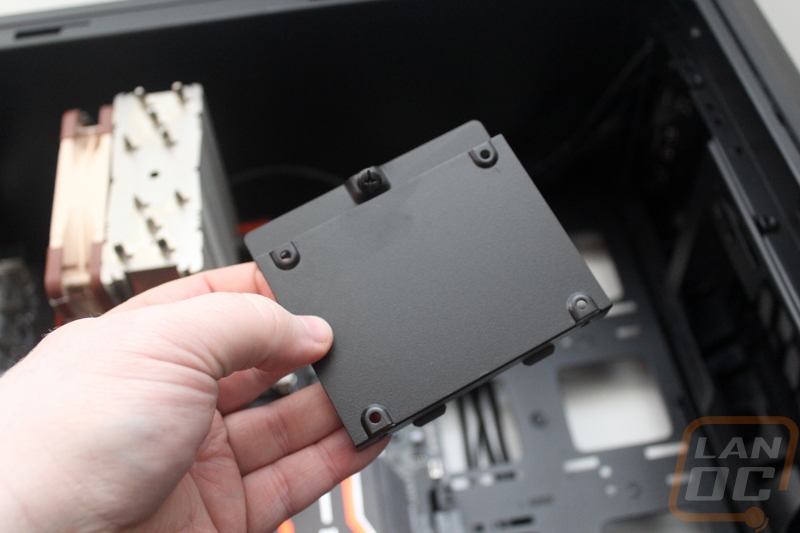
For the SSD mount, it is also flexible in where it can be mounted. The drive cage could only be moved to three positions but the SDD mount can be used in 5. You can mount it in the three visible locations down the front of the case, to the top of the hard drive cage, or you can remove the drive cage and mount it there. I don’t see any additional drive mounts for sale, but I’m hoping Cooler Master sells more in the future because having three or four SSDs installed up the front of the Masterbox 5 would look really good.
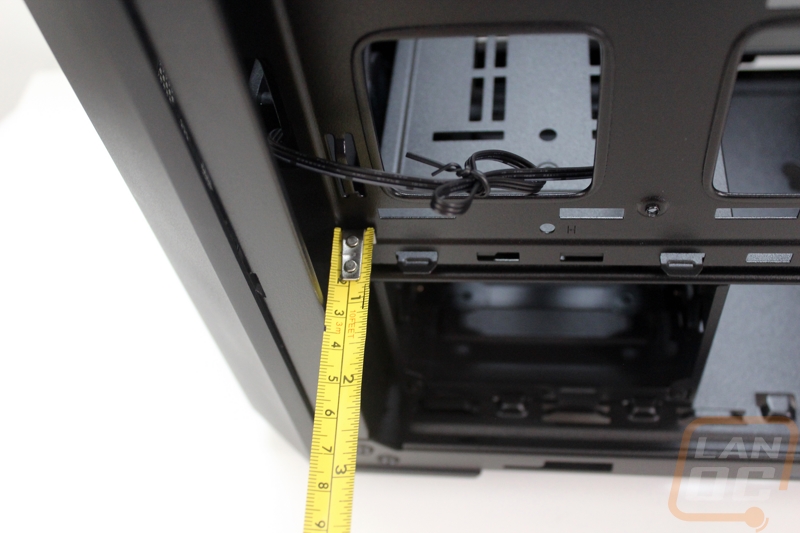
From the back, we can get a much better idea of how much room you actually have for wiring in the Masterbox 5. Both of the 3.5-inch drive bays down at the bottom face towards the back so wiring up hard drives will be simple. There is also a big space between that hard drive cage and the power supply mount for all of the wiring to go up the back of the case. Really though for wiring the most important thing is to actually have room behind the motherboard tray and from looking at the back of the Masterbox 5 I already had a clue that there would be room. With the back panel off I was able to get a closer look and frankly I was blown away at home much room there was. You get a full inch of space so even if you half ass your wiring I will be willing to bet you don’t have to worry too much about trying to keep the wiring tight and up against the back of the motherboard try to get the side panel on.
Installation and Performance
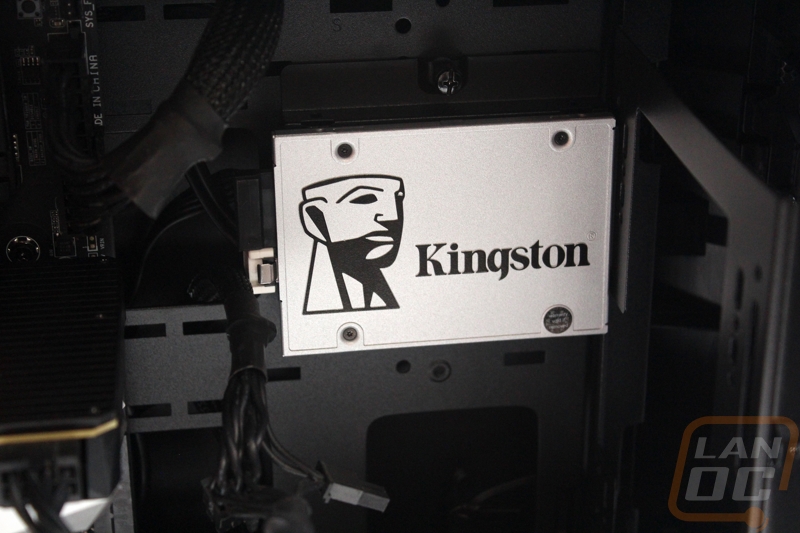
Before I could jump into testing the Masterbox 5, I did have to actually get a PC installed. This also gives me time to get a feel for how easy the case is to work in. So to get started I moved our x99 test bench into the case. To do this I did have to dig through the small bag of screws and pull out all of the standoffs and using the included screwdriver adapter I installed each of the standoffs that I would need. With them installed the motherboard/CPU/ram/heatsink combo dropped right in. The Masterbox 5 supports ITX, MATX, ATX, and EATX motherboards but I also toyed with an EEB board but I will get into that later. With the motherboard installed from there, all I needed to do was get my hard drive and SSD installed along with a video card and PSU. For the SSD I used our new UV400 from Kingston. I installed the drive into the removable mount and while doing this I figured something out. Cooler Master only lists the Masterbox 5 as having the one 2.5 inch mount on top of the two 2.5/3.5 trays in the cage. Well, the SSD mount can actually have two drives installed. You can install one up top like what I did below and you can also mount a drive under the mount at the same time.
Installing our 3.5-inch hard drive was even easier with the plastic toolless trays. I popped it in and slide it into the hard drive cage.
Installing a power supply was simple, four screws and it was done. From there I ran all of our wires out the back of the case and then reinstalled the PSU cover. With the wires in the back I dropped each wire up and through the hole closest to the plug on the motherboard. I didn’t really have to zip tie or clean up the wiring because of the amount of space under the motherboard tray and with the PSU cover.
Last but not least I dropped in our GTX 1080 and hooked up the 8 pin power connection that I had already run. For being a mid-sized tower that 1080 actually looks really small inside doesn’t it? This is because there aren’t useless cages running up the entire front of the Masterbox 5. That Kingston drive looks great sitting in there as well. There is room in the front if you want to install a 240mm or 260mm radiator and have a nice tall pump/res combo.
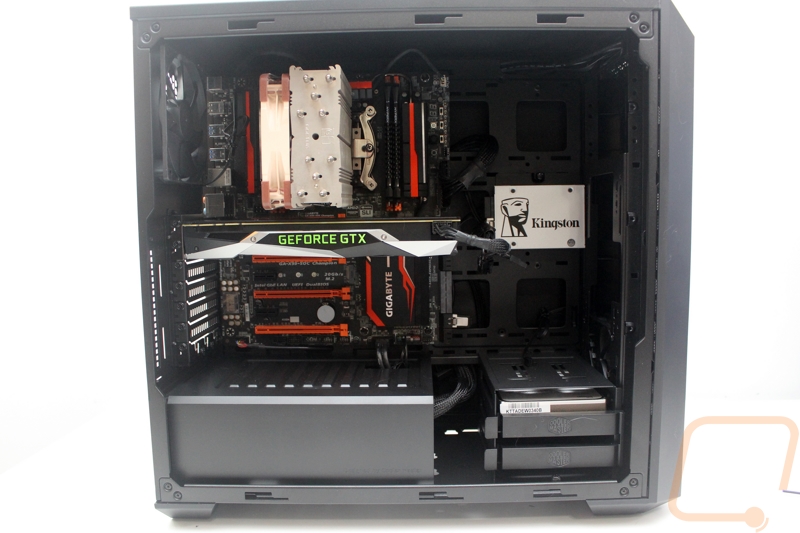
With everything installed and up and running, I closed the case up for testing. I love the way the tinted side window tones down everything inside the case while still giving you a look inside. The large window that I kind of complained about earlier does really help show off the mounted SSD or if you had water cooling there it would show that as well.
After getting the Masterbox 5 up and running I played a few games and kept an eye on temperatures. With the two fans pulling in fresh air over the hard drive and pulling the hot air away from the CPU things ran nice and cool, no different than our open air test bench in fact. The two unmarked fans ran well and didn’t make a lot of noise but I think I still might swap them out later on just so I don’t have to worry about a cheaper fan going out. All in all the Masterbox 5 ended up being a nice case to work in and to use. Its still small enough to take to and from a LAN if needed but large enough to pack a full high-end PC inside with room for a few displayed SSDs or water cooling.
Speaking of installing a high-end PC inside. Once I was done testing the Masterbox 5 I wanted to see if our Asus Z9PE-D8 WS would fit inside. If you don’t know what the case is, it is a large dual socket motherboard. I’ve been looking for a case that wasn’t a complete full tower or a server chassis to fit it in and the extra width of the Masterbox 5 caught my eye. Anyhow the EEB form factor is similar to E-ATX but a few of the mounting points are different because the second CPU socket is over top of the standard ATX mounts. After a little trial and error, I was able to get the motherboard to fit for the most part. I did have to remove a few standoffs and skip a few of the mounting holes that didn’t line up, but I did get the board installed in a way that I was comfortable with. Officially the Masterbox 5 doesn’t support EEB because they don’t have all of the mounting holes, but it is workable. Cooler Master could actually give it full support just by including a few more mounting points for their standoffs, most of the missing locations were over top of structure.
Overall and Final Verdict
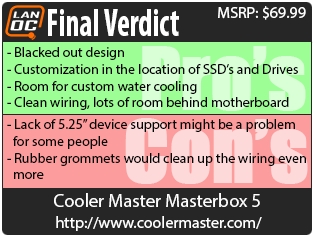
So now that I have spent a little more time with the new Cooler Master Masterbox 5 I can finally put together a full opinion. First off, I think the whole Masterbox name is a little confusing once you remember that Cooler Master also has the Mastercase line. Not only is Mastercase a better name, but having both end with a 5 can cause confusion. I would almost prefer one to be Mastercase and the other line be Budgetcase or something that better reflects the products location in the product lineup.
That said I was extremely impressed with the Masterbox 5 the entire time I worked with it. I love the blacked out design that also includes a tinted side panel window. The ability to customize your SSD and hard drive mounting locations was nice and I hope in the future they have SSD mounts available. I know Cooler Master will also be selling a case with an additional mount for a little more as well. If you don’t end up showing off your SSDs you have room to pack in a full custom water cooling kit into the small case. I was also really impressed with how simple doing clean wiring was in the case. The cover for the power supply hid a lot of my wiring and the inch gap between the motherboard tray and the back of the case helped as well
Really my only complaints are small nitpicks. Rubber grommets in the wiring holes could help clean things up even more, I know they would add to the cost but maybe having the option to pick them up as a customization option would be very cool. Also, the lack of 5.25″ device support is going to be a sticking point for some people. Personally, I’m happy to drop that and gain the room for water cooling and wide motherboards, but I know a few people still aren’t willing to ditch their DVD drives just yet.
The best part about the Masterbox 5 though is that it’s a price point case. At Just under $70 it should fit in most low budget PC budgets. More importantly, it doesn’t feel like they skimped or tried to save money anywhere. The steel casing isn’t thin, they didn’t cut out features, and frankly you normally have to spend more money than this to be able to have clean wiring and room to fit high-end builds but the Masterbox 5 fits the bill.

Live Pricing: HERE


