It’s fairly rare these days that a new company jumps into the case market. We have seen it in recent years from Corsair for example, but for the most part, it is a rare occurrence. Recently XFX announced that they would be joining the case market. On top of their video cards, XFX has sold power supplies, a mouse pad, and even a monitor stand. I’m excited to check out what they put together as their first case.
Product Name: XFX Type01 Bravo
Review Sample Provided by: XFX
Written by: Wes
Pictures by: Wes
|
Specifications |
|
|
Case Material |
SECC 0.7mm / AL 3.0mm / ABS |
|
Case Type |
Mid-Tower |
|
Color |
Black |
|
Motherboard Support |
ATX, Micro-ATX, Mini-ITX |
|
Side Panel Window |
Yes |
|
I/O and Ports - Front Panel |
Audio in/out (HD Audio) : 1 Power button : 1 Reset button : 1 USB 2.0 : 2 USB 3.0 (via 20pin connector) : 2 |
|
External 3.5" Drive Bays |
1 (when using 5.25 adapter) |
|
External 5.25" Drive Bays |
3 |
|
Internal 2.5" Drive Bays |
5 |
|
Internal 3.5" Drive Bays |
3 |
|
Add-on card slot |
8 Slots |
|
Fans |
Bottom : 1pc 120/140mm Front : 200x200x15mm Rear : 1pc 120/140mm Top : 1pc 140/120mm |
|
Package Contents |
2.5 inch Drive Trays : 5 Cable Ties : 5 Drive Screws : 32 Fan Scews : 8 MB Screws : 11 MB Stand Off Sockets : 1 MB Stand Offs : 11 ODD Screws : 12 PSU Screws : 4 |
|
Product Dimension |
20.4 x 9.2 x 22.2 |
|
Weight |
22.9lb |
|
Manufacturer Warranty |
5 Years (Product Registration Required) |
Packaging
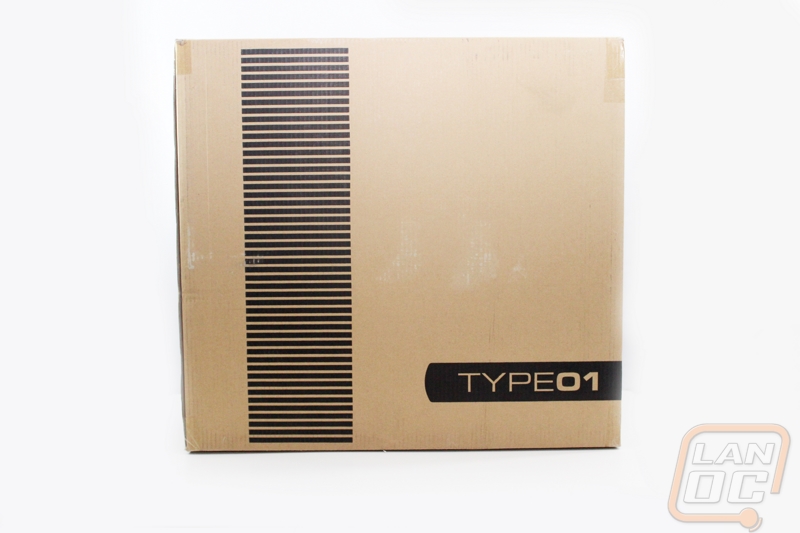
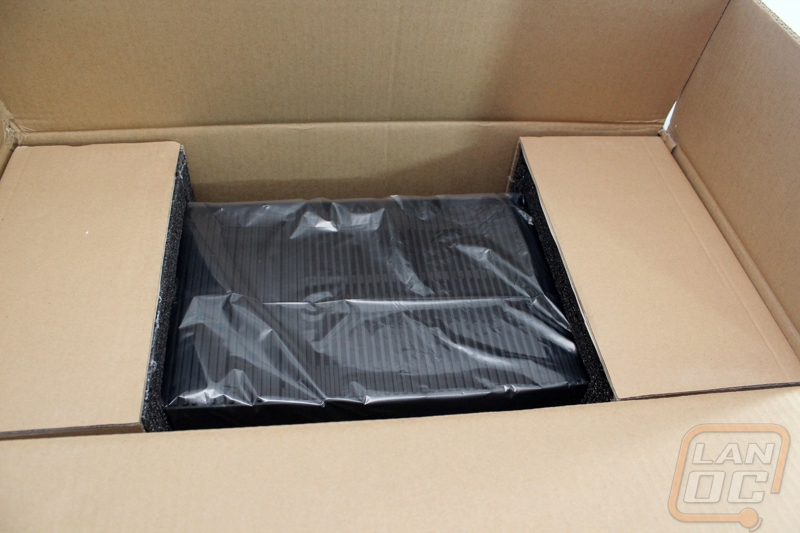
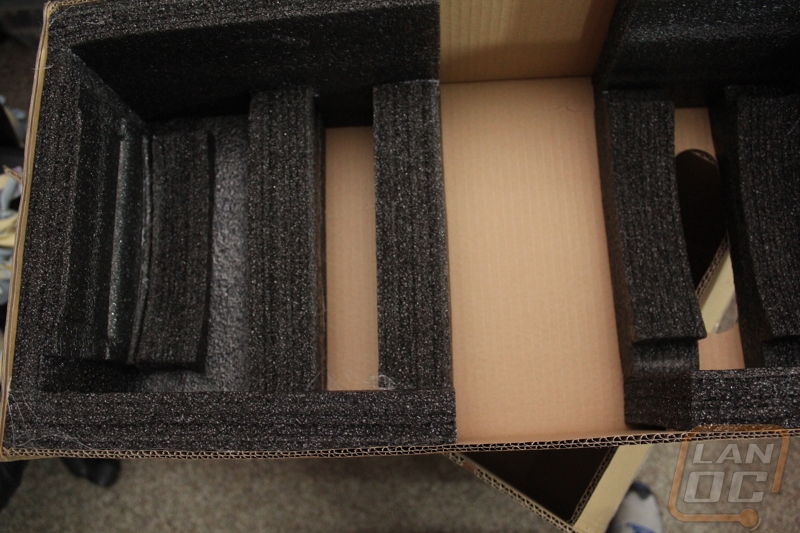
The Type 1 comes boxed up in a fairly standard brown cardboard box with no color artwork on it. XFX did still manage to include a little bit of their styling with the Type01 logo matching the red badges on their previous generation of video cards. The dashes on the side also match the case perfectly as well. Inside however I was impressed with XFX going a different route for protection of the case. Rather than standard Styrofoam, they used plastic foam attached to cardboard. This made pulling the case out extremely easy compared to pulling other cases out of their boxes. The foam is cut to fit the case perfectly as you can see in my third image.
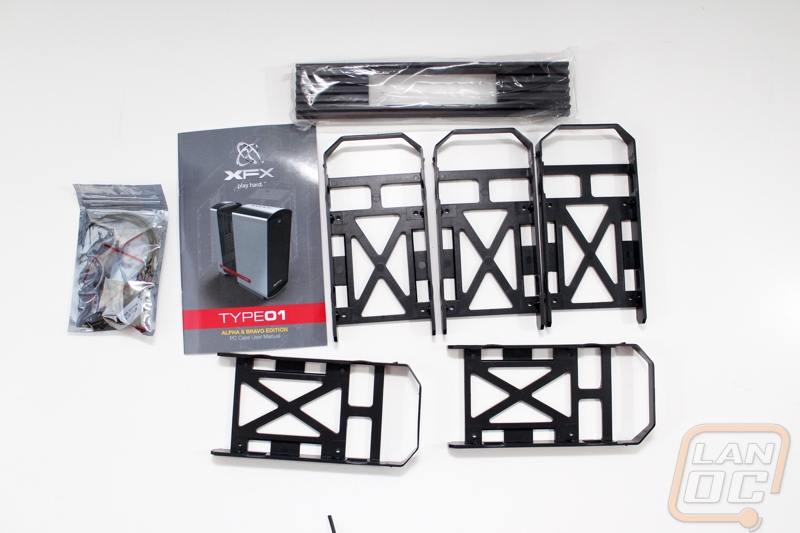
Digging farther in, all the way inside of the case in fact you will find another box with the Type01’s accessories, screws, and documentation. Here you have five SSD mounting trays and the 3 ½ inch bay adapter on the odd chance you might need to install a floppy drive in your PC. The instruction manual is great with a full color cover and all of the information you might need inside. XFX also included a small bag with the motherboard screws as well as an I/O speaker and a few small zip ties to help you tidy up your build when you finish building it.
Outside
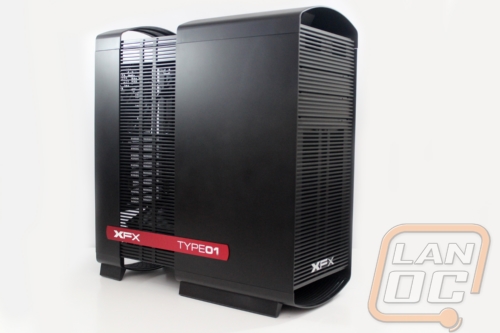
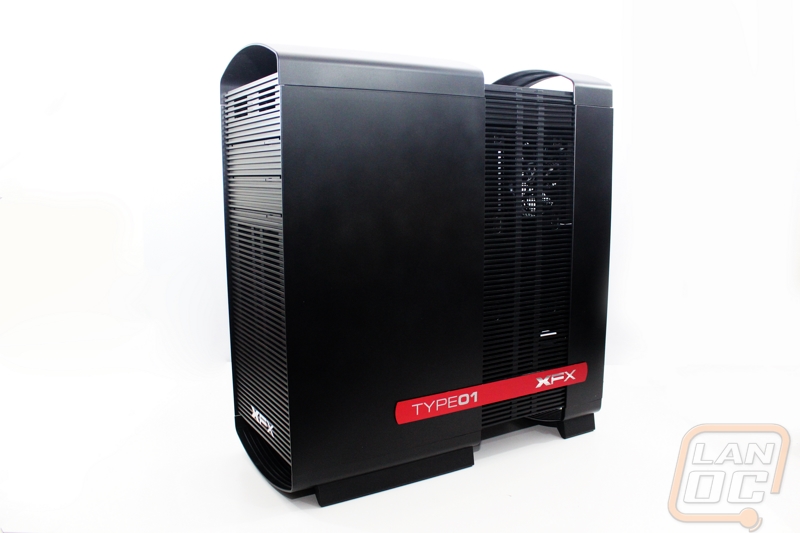
My initial impression of the Type01 was that there couldn’t possibly be more fitting case from XFX and there is nothing else on the market that is anything like this case. The combination of roundness on the top and flat front and side panels isn’t what I typically see. Normally the roundness is on the front or on the top corners. As for the “XFX” look, the side panel badges with the model name on it fit perfectly with last year’s XFX video cards.
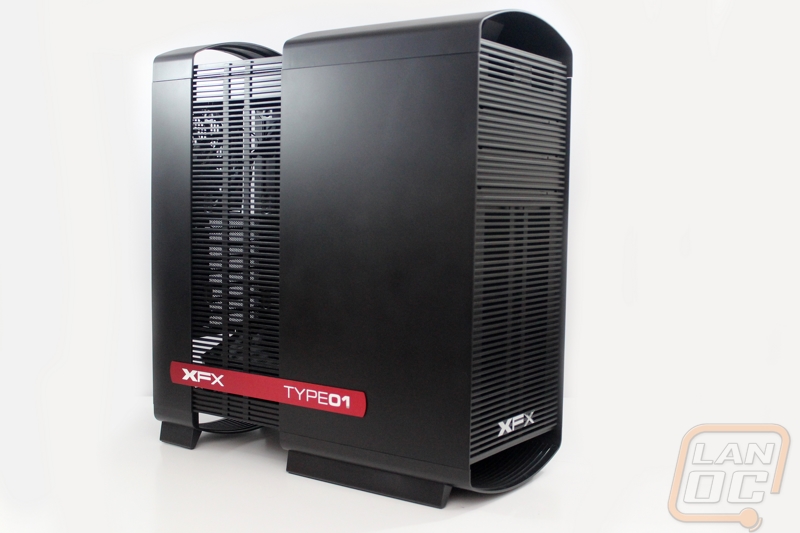
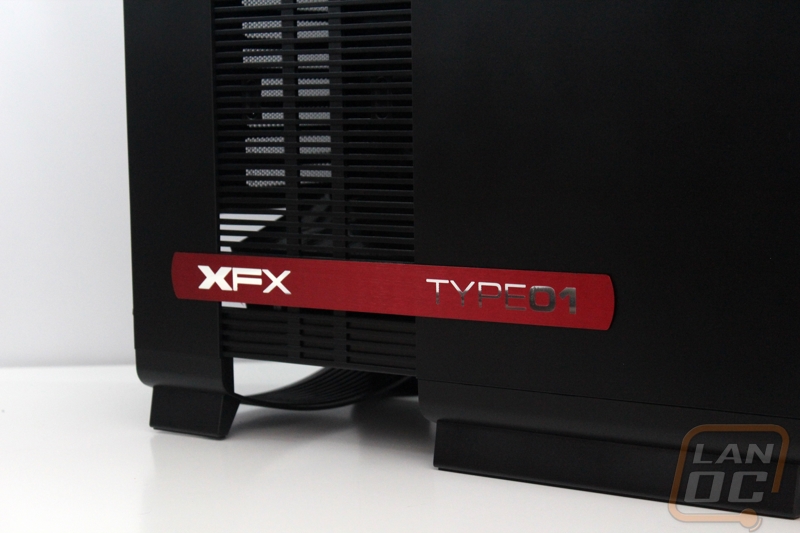
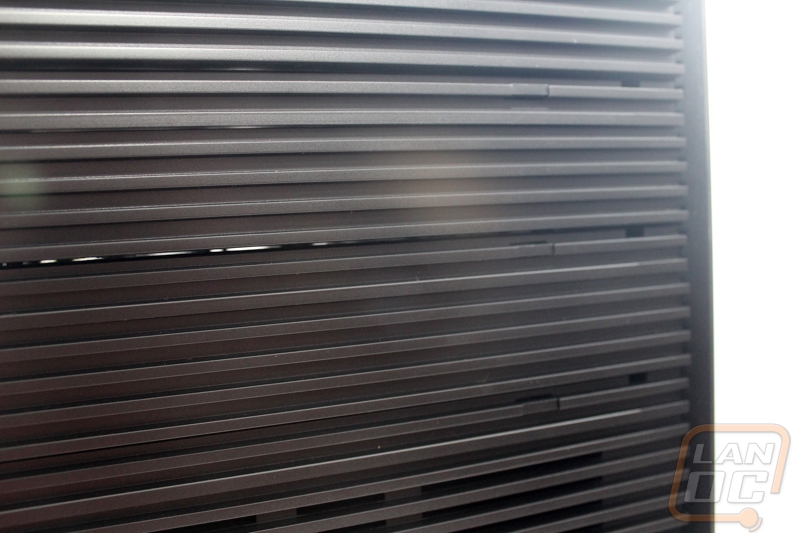
As someone who ran four of the XFX cards for a very long time because of how much I loved the styling with the reddish orange name badge on the side I can say that the badge on the side of the Type01 looks good. My only disappointment with it is the timing of this cases launch. I have a feeling that they pushed to introduce this case long before now but had delays. The orange badge fits perfectly with last year’s XFX cards but XFX dropped that styling for a different look for this year’s cards. If you were building a new PC with this case it’s doubtful that you are going to want to go with last year’s cards, if you can even find them. With that being said, this still looks good though. The rest of the side panel skipped out on a windowed side panel for a more functional vent that runs from the bottom all the way to the top of the case. This side panel vent should help with pulling in fresh air for both the video cards and the CPU should you air cool it.
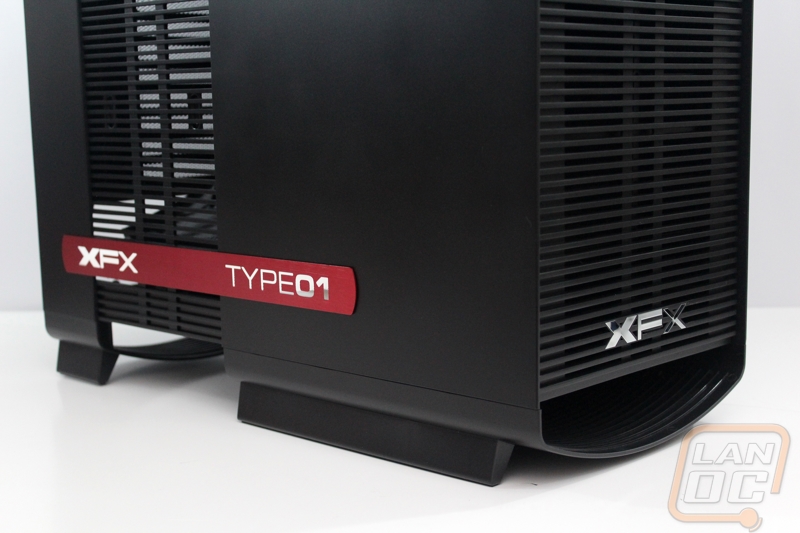
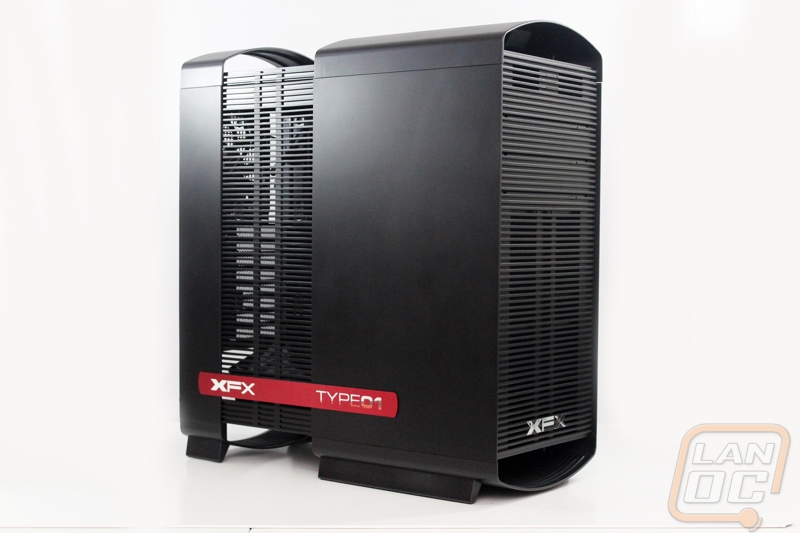
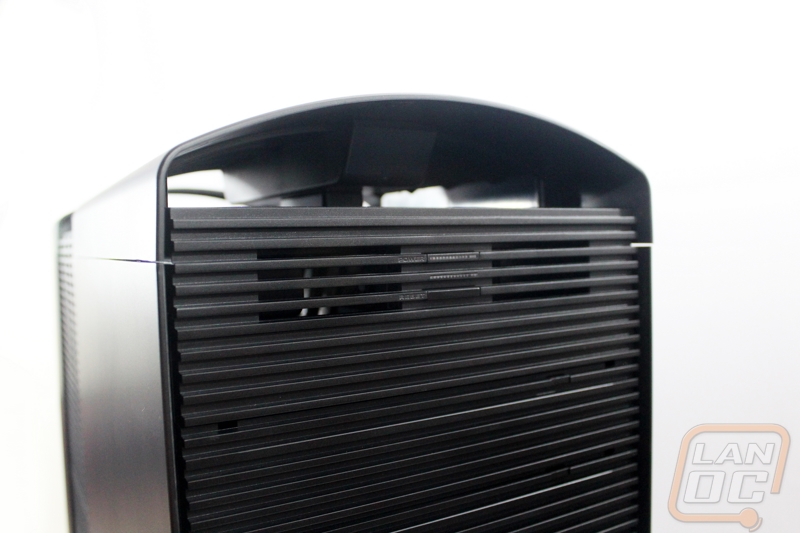
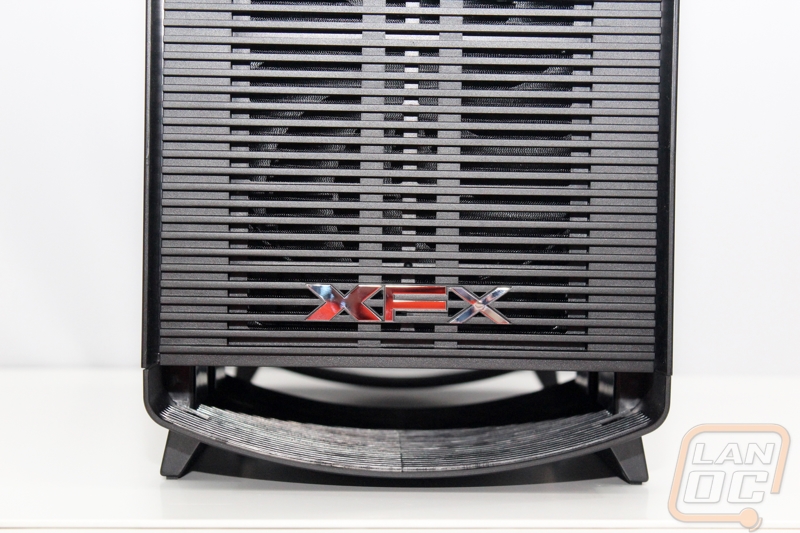
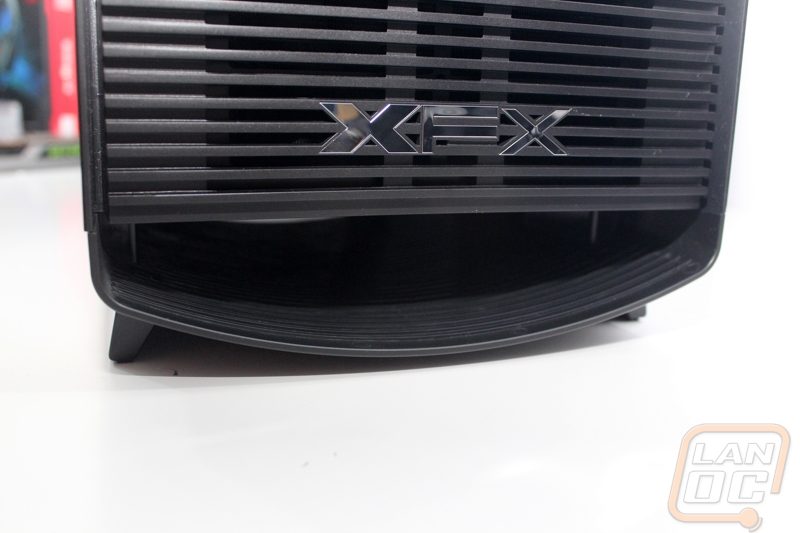
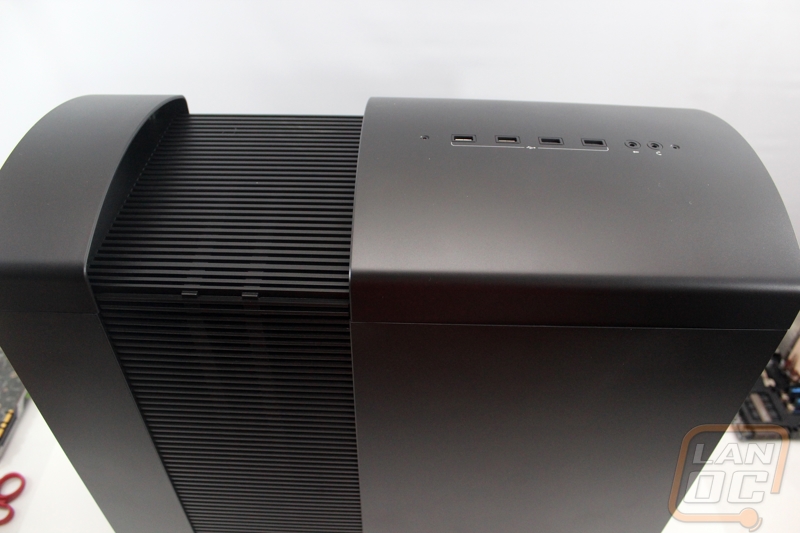
The front panel of the Type01 is designed to match the venting on the side panel. XFX even went as far as matching that same venting over the three 5.25 inch drive bays up top. If you decide to install a disc drive you won’t have to worry about messing up this look because each drive bay is designed with a button pass through and a spring loaded flip out to keep your love for having a DVD drive hidden from all the people (like me) who have stopped installing them. Up at the top of the front panel if you look closely you will see the power and reset buttons blending into that same venting. They even slipped in status LEDs for both as well. Really the only thing that disrupts the clean look of the ventilation is the chrome XFX badge down at the bottom of the case.
Over on the right side of the Type01 things are exactly the same as the left side. I expected them to drop the vents on this side with this being the side with the motherboard tray, but XFX stuck with it and continued the look all the way around all the way down to the reddish orange name badge again. They even made sure to flip the logos to match the other side properly.
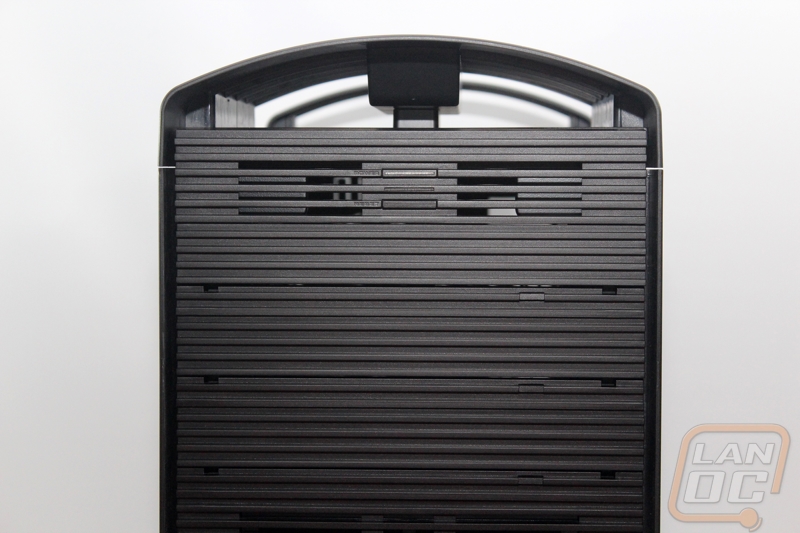
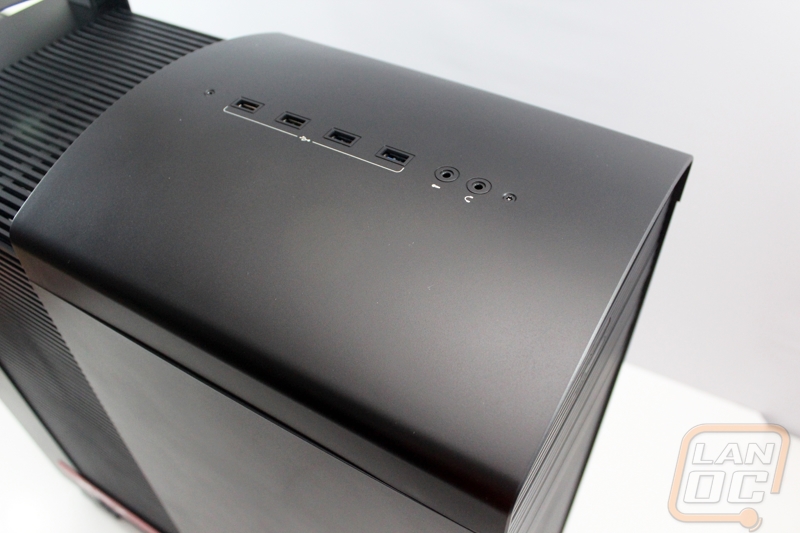
As expected, up top the ventilation continued. XFX even cut out a section of the curved top to give full view to the ventilation. Also up here is the “front” I/O panel. You get four USB 2.0 plugs as well as both microphone and headphone jacks. All of the connections have easy to read logos so you shouldn’t have any mix-ups. I’m not sure if I like the jacks being on the top though, if you use your PC on your desk or put the case under your desk it’s going to be a little hard to get access too.
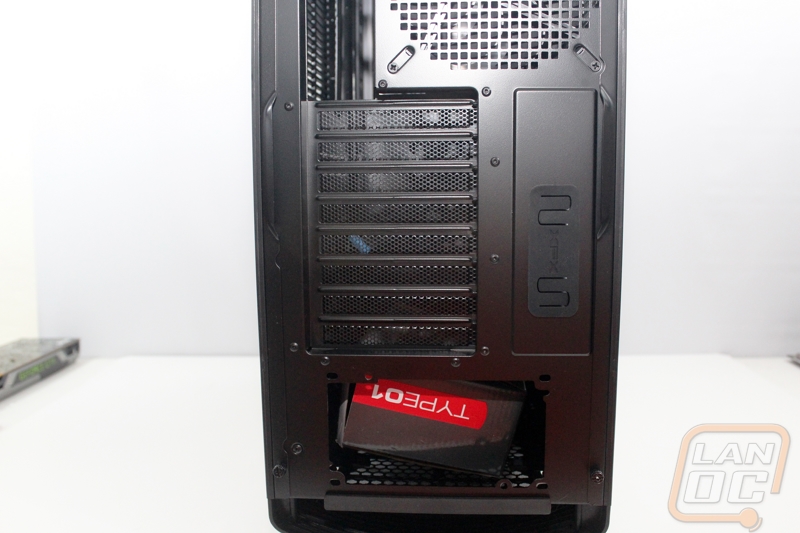
Really the only part of the case that isn’t dominated by the plastic paneling and the horizontal vents on the Type01 is the rear of the case. Back here XFX has chosen to paint the back black to match the rest of the case. We have a 120/140mm fan vent right next to the rear I/O panel. Just above it they did include a rubber grommet for routing your water cooling out the back of the case should you need more cooling capacity. There is a second grommet just above the cases 8 PCI slots, I suspect that this one might come in handy if you ever need to plug in a USB device but keep it inside of the case. All eight of the PCI slot covers are made of a mesh, adding to the cases crazy amounts of ventilation. The power supply is mounted down at the bottom of the case. When you look at the power supply mounting bracket you can see just how wide this case really is. Some cases are just barely wider than the power supply but the Type01 has over an inch and a half on each side of it.
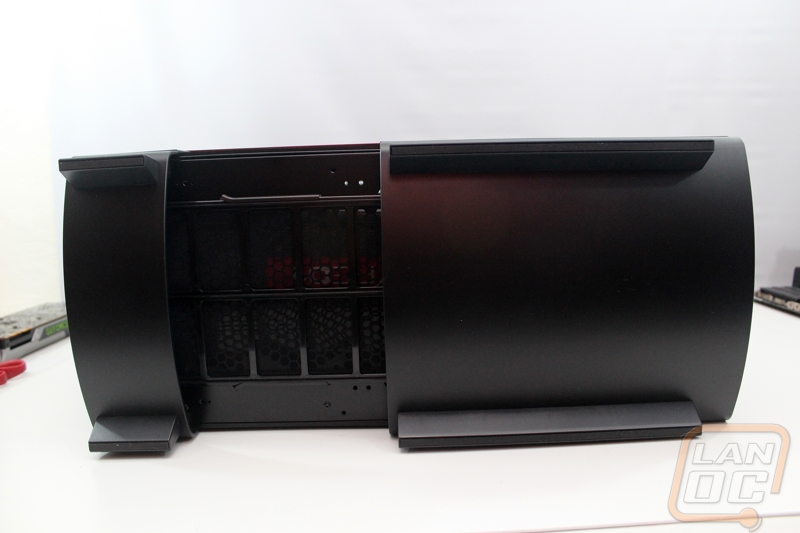
Before checking out the inside of the Type01, no outside section would be complete without a peak as the bottom of the case as well. As expected, XFX did continue the ventilation here as well. To keep the case standing up, they had to add long feet onto each side of the curved bottom panel. Each foot has a long rubber strip attached to the bottom to keep the Type01 from sliding around and causing you issues.
Inside
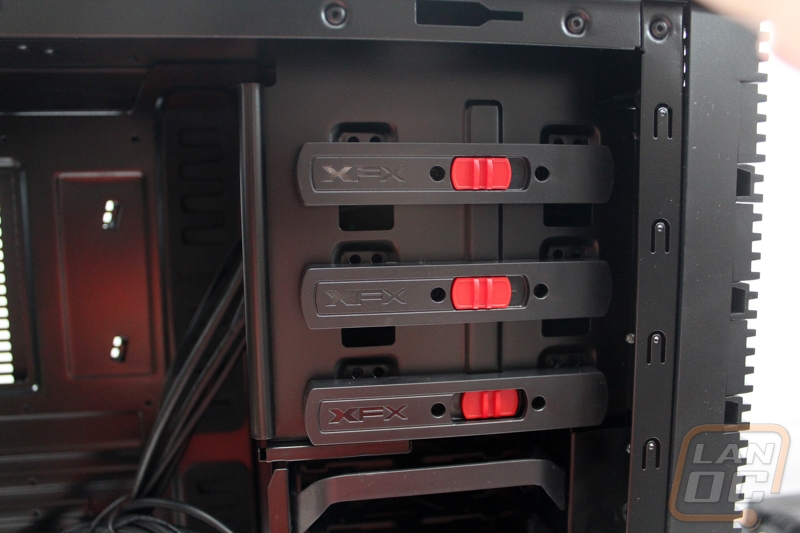
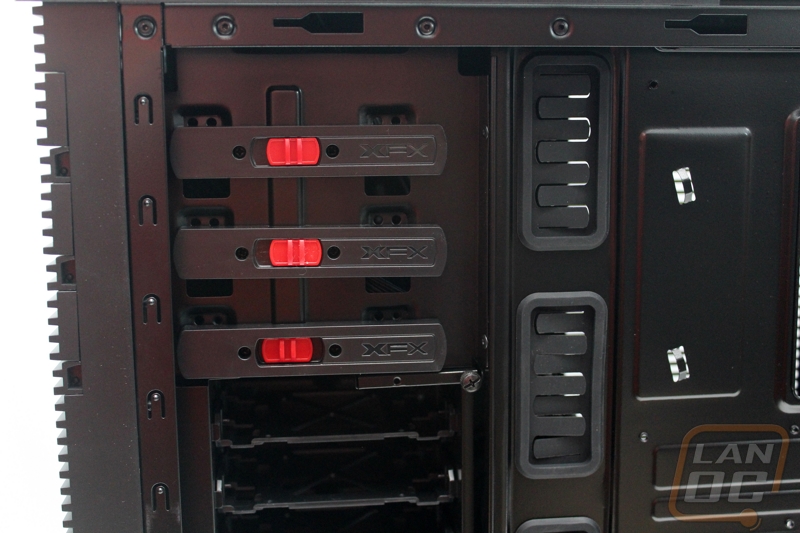
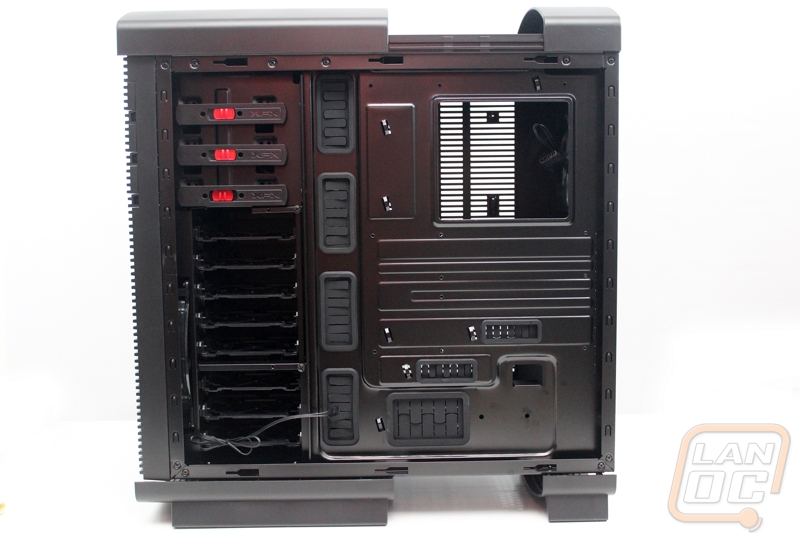
With such a unique styling on the exterior of the Type01, I really wasn’t sure what to expect when I got inside of the case. XFX carried some of their black and red theme into the interior with everything being completely blacked out other than the small red touches on the disc drive locks. The eight slide out hard drive trays really catch your eye as well. The biggest shame really is the lack of a side panel window to let us look in and see the matching interior. Let’s take a look at a few of the Type01’s interior features.
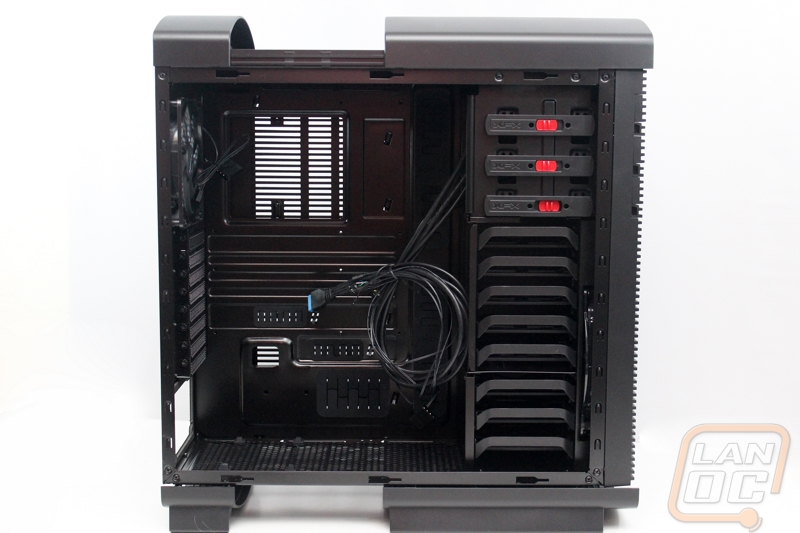
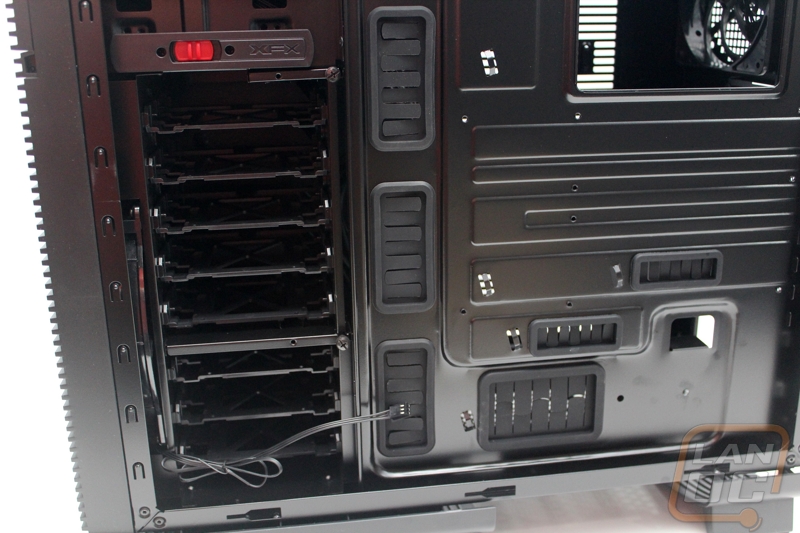
Starting up in the top right corner, we have the red accents that I mentioned. They are attached to the three 5.25 inch drive tooless locks. XFX also slipped in their branding right into the locks as well. The mounts are installed on both sides of the cage unlike most other tooless installations. This should keep your disc drive installed night and tightly while still making it easy to remove when you need too.
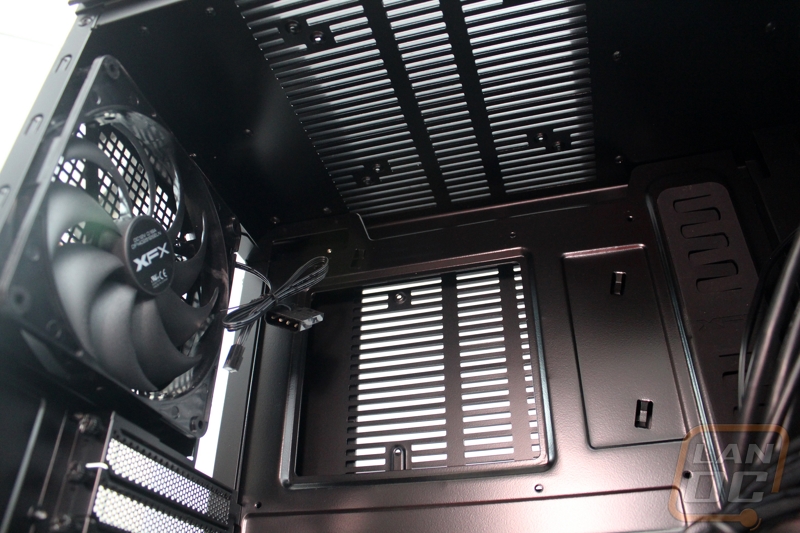
Over on the left side around the motherboard you can see the venting from the exterior is completely functional and has mounting points for a 120 and 140mm fan up top. On the rear of the case, above the rear I/O panel XFX has included a 120mm exhaust fan to help pull the hot air away from your CPU. Also in this photo we can see the large access hole for installing heatsinks after your motherboard is installed. Through that hole you can actually see another fan mount built into the ventilation on the right side panel, a fan installed here would blow over the bottom of the motherboard and give an additional way to keep things cool.
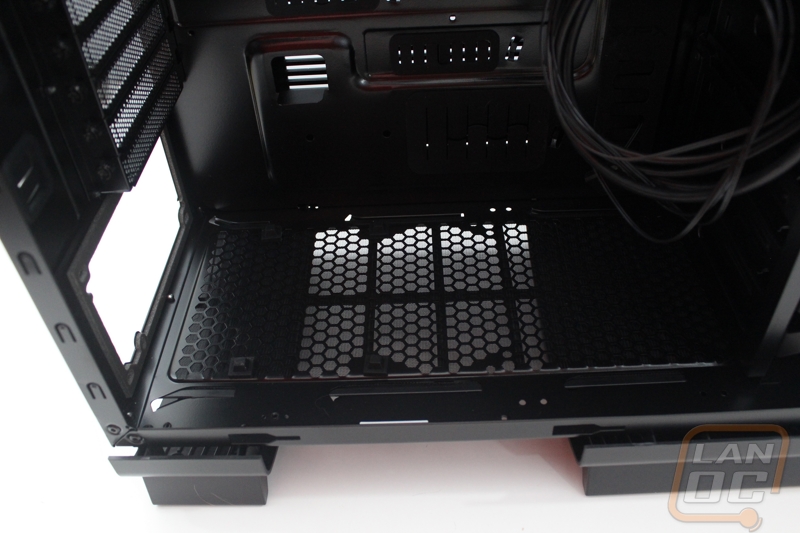
Down below the motherboard you can install nearly any length power supply. To keep things cool XFX did include an air intake on the bottom of the case and to keep your power supply from pulling in dust off of the ground they did include a dust filter. If you look closely they even put a rubber pad around the back panel where the power supply attaches to keep noise and vibration to a minimum in the Type01.
Flipped around it is easier to see all seven of the grommeted wire management holes. XFX used a new style of grommet that I haven’t seen before. It does a great job of completely blocking the view through the hole while giving multiple places to slip a wire through. The eight removable hard drive trays all have plenty of room for connecting the SATA and power cables. There is a little less room behind the actual motherboard tray, but you do still get ¾ of an inch of space to get the job done. To help keep your wiring clean on the back side of the motherboard tray XFX also slipped in multiple tabs for you to be able to zip tie your wiring too. They are up the middle and across the bottom and top of the motherboard, exactly where you will need them.
Installation and Performance
Installing our test components into the XFX Type01 was actually a smoother process than I expected. The tooless hard drive trays and disc drive bays make quick work of the small stuff. Installing our motherboard/cpu/ram/heatsink combo would have been almost as easy but I did have to stop and go in and install all of the motherboard standoffs, I would have preferred at least some of them be pre-installed. Our GTX 780 installed with almost three inches of clearance as well.

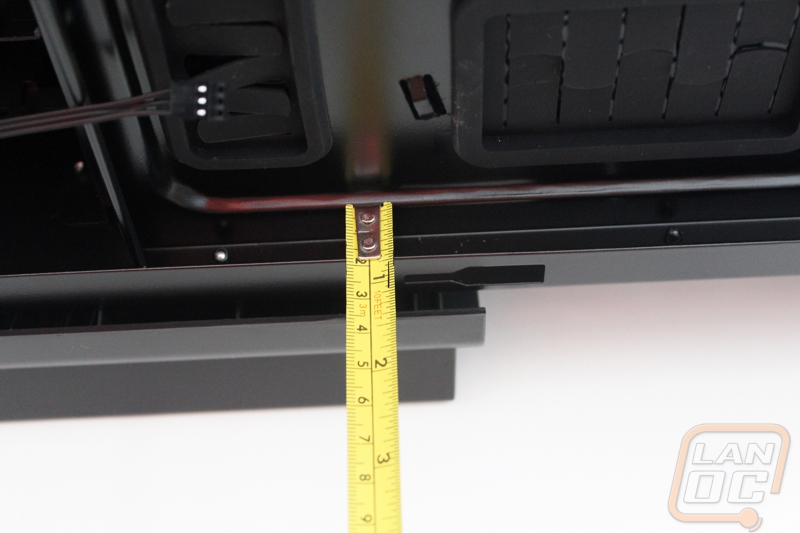
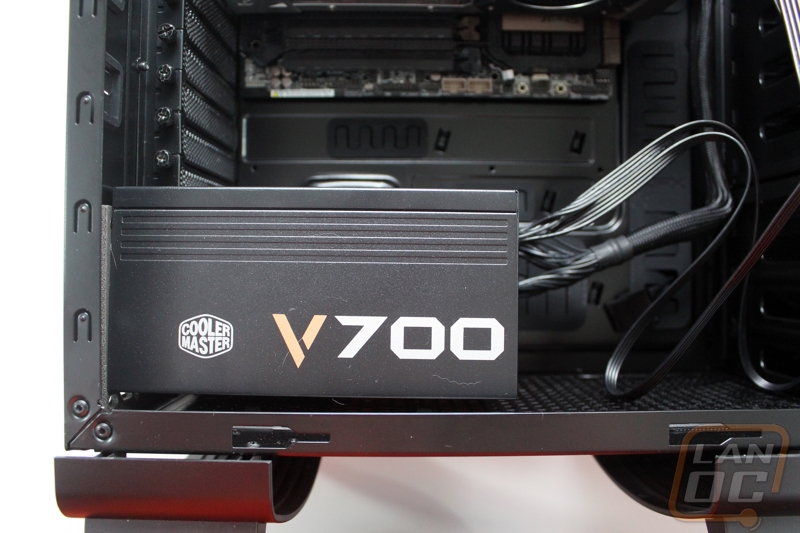
The biggest part of the installation was installing the power supply and wiring everything up cleanly. The power supply was of course the easy part, requiring the standard 4 screws to be installed. Our V700 is a fairly short PSU so when installed I had room to get my hands in and hook up all of the modular power cables. Routing what I could out behind the motherboard tray went smoothly due to the grommeted holes all over the Type01, I do however wish there was a little more room behind the motherboard tray. With ¾ of an inch of space it wasn’t too tight, I would consider it average, but you do have to be careful to not overlap cables or you will run into issues installing the side panel. I loved the small wiring holes directly at the bottom and top of the motherboard that makes hiding the 4/8 pin power cable and front panel audio cables very easy.
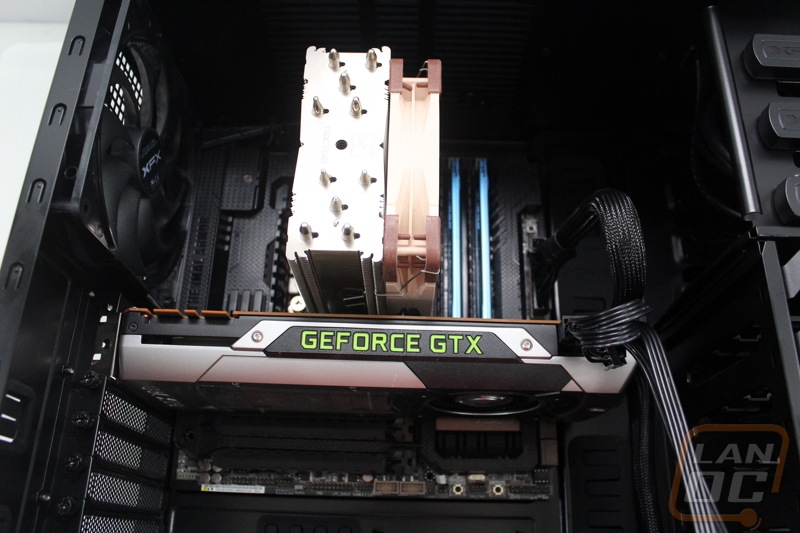
With everything installed, I double-checked to make sure the Nocuta tower heatsink would clear the side panel without any issues. As you can see below, there is still a little less than an inch of clearance.
With everything installed and up and running I really didn’t run into any issues. The noise level of the Tyoe01’s two fans was reasonable but not silent. With so much ventilation in the case this really wasn’t a surprise. I was happy with the cooling performance, running through 3DMark a few times to heat things up didn’t cause a noticeable change in the air temperature inside of the case.
Moving the case around wasn’t too bad, with the use of plastic it isn’t very heavy but it doesn’t fall into the lightweight category as well. What did throw me for a loop was figuring out where to hold the case when picking it up. My first instinct is to pick it up by the arches on the top but if I do that I’ll break the case. This left me fumbling around for a second until I got a good grip on the underside of the case. It’s obviously not as simple to carry as the CM Striker or some of the Mini-ITX cases I have taken a look at, but getting it to and from a LAN shouldn’t break your back.
Overall and Final Verdict
With this being XFX’s first attempt in the case market I don’t think anyone, including me, had any idea of what to expect. My first impression of the Type01 was that XFX really with a unique styling when compared to everything else that is on the market. In the past unique hasn’t always been a good thing, but I really do like the look that XFX put together.
One complaint would be with the amount of plastic they had to use. In my pros and cons, you will notice I mention that they styled the Type01 to match their video cards. If the Type01 would have come out a year earlier, this would have been perfect, but with the redesign of their cards for the R series, it means picking up a card to match your case will have you buying last year’s models. Inside its obvious XFX did their homework on wire management before building their first case, the Type01 is practically made out of grommeted holes. My only other nitpick would be with the top mounted I/O panel, with your USB ports facing up like this there is the potential to collect a little more dust and dirt than normal, so keep an eye on it if you decide to pick up the Type01.
All in all I think XFX did a good job on their first case. I really hope they stick at it and we have a chance to see what they come up with in the future. A case designed to match their current cards with the blacked out design and glowing XFX logo would look kick ass for example!


