Over the last couple years Cougar has started rising in popularity, due mainly to their case fan lineup. Recently the German company has expanded their line of PC Cases to new horizons. There are many options for PC enthusiasts that are looking for a new home for their components. The mid tower is one of the most popular form factors, since you have a nice balance between the size and weight of the case. Today we are going to take a look at the Challenger case from Cougar. The case has a pilot theme, which is urging you to flip the missile switch and unleash havoc on your enemies. Let's see how the Challenger stacks up against it's competition.
Product Name: Cougar Challenger
Product Sample Provided by: Cougar
Written by: Ryan Croussore
Pictures by: Ryan Croussore
Specifications
|
Case Type |
Middle Tower |
|
|
Motherboard Type |
Micro ATX / ATX |
|
|
Dimension |
268(W)x514(H)x523(D) |
|
|
5.25" Drive Bay |
3 Exposed |
|
|
3.5" Drive Bay |
1 Exposed & 7 Hidden |
|
|
2.5" Drive Bay |
3 Hidden ( converted from 3.5' 'drive bays ) |
|
|
External 3.5' ' & 2.5' ' HDD/SSD Hot-swap |
1 |
|
|
Maximum 3.5' ' HDDs Install led Quantity |
9 |
|
|
Maximum 2.5' ' HDDs / SSDs Install led Quantity |
8 |
|
|
I/O Panel |
USB3.0 x 2 ( internal ), Mic x 1, Audio x 1 |
|
|
Cooling System |
|
Max Install led : 7pcs Fans |
|
Front |
120mm Fans x 2 / 140mm Fans x 2 / 200mm Fan x 1 |
|
|
Top |
120mm Fans x 2 / 140mm Fans x 2 / 180mm Fan x 1 / 200mm Fan x 1 |
|
|
Rear |
120mm Fan x 1 |
|
|
Bottom |
120mm Fan x 1 / 140mm Fan x 1 |
|
|
Left Side |
120mm Fan x 1 / 140mm Fan x 1 |
|
|
COUGAR 200mm Red LED Fan (front) |
1 ( pre-install led ) |
|
|
COUGAR 120mm Turbine Fan (rear) |
1 ( pre-install led ) |
|
|
Expansion Slots |
7 |
|
|
Maximum Graphics Cards Length |
410mm |
|
|
Power Supply |
Standard ATX PS2 ( optional ) |
|
Packaging
The Challenger case comes in a standard box with black design and text on the box. On the front you will see a design of the front of the Challenger case. On the front you see the Cougar Germany logo as well as a huge section in the middle of the box letting you know that the Challenger "Midi Tower" is contained within.

On the back of the box you see a diagram of the Challenger case, along with a list of features. It also shows you how you can change the drive cage hardware inside of the case to allow for video cards of different lengths. Along the bottom you will see a link to their website as well as some links to their online social media pages.
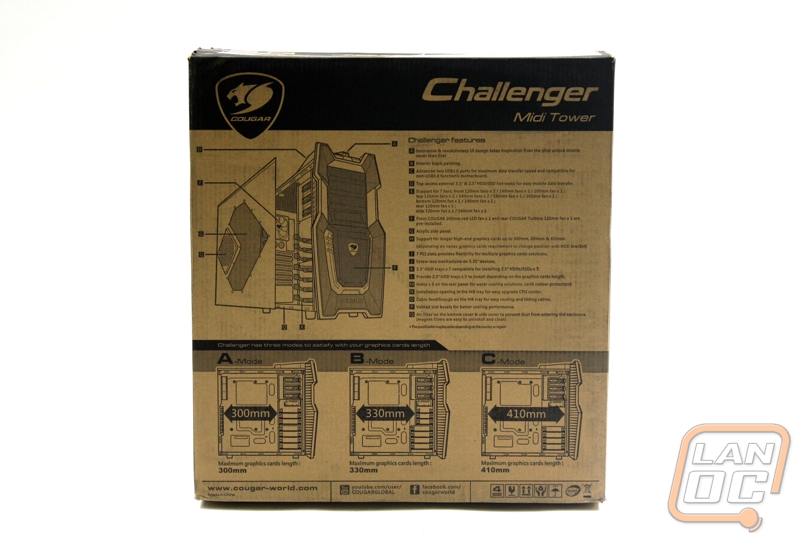
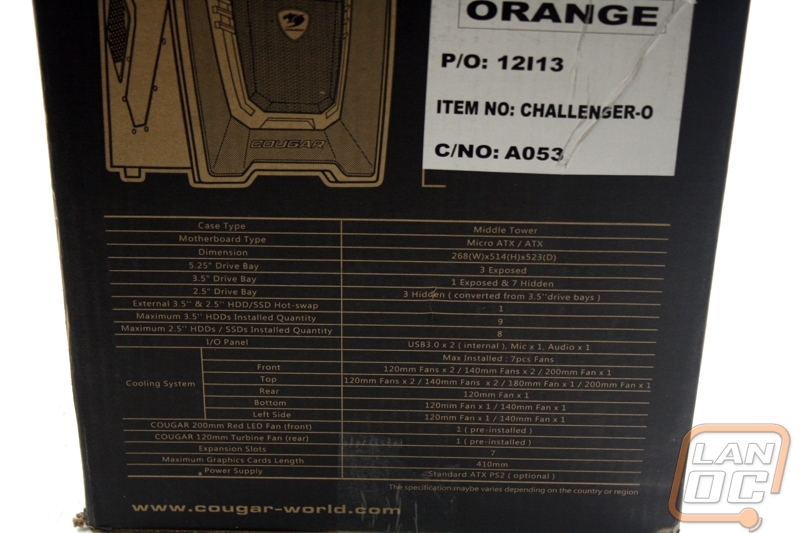
On the left side you will see the product number, color, and a design of the case. Below that there is a listing of all the specifications.
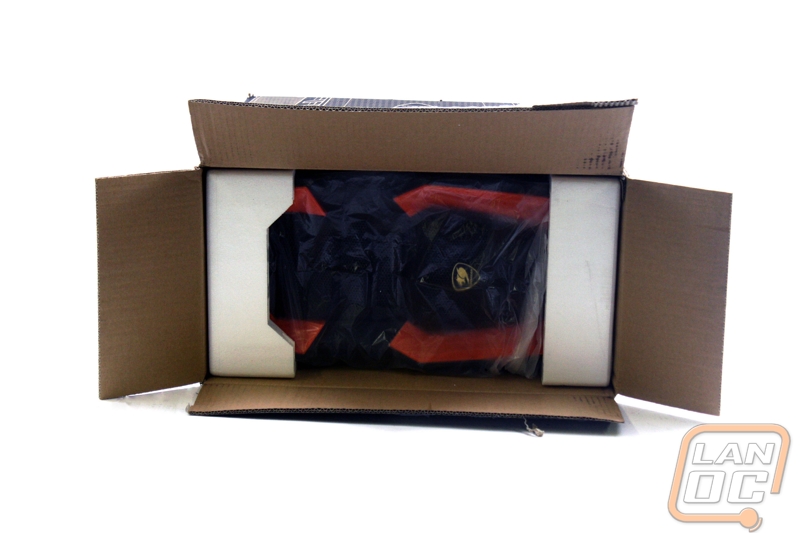
After opening the box you see the Challenger case is packaged with the front of the case towards the top of the box. Two molded Styrofoam pieces help keep everything in place within the box. The case it's contained in a plastic bag just to make sure there are no elements reaching the case before you do.

Outside
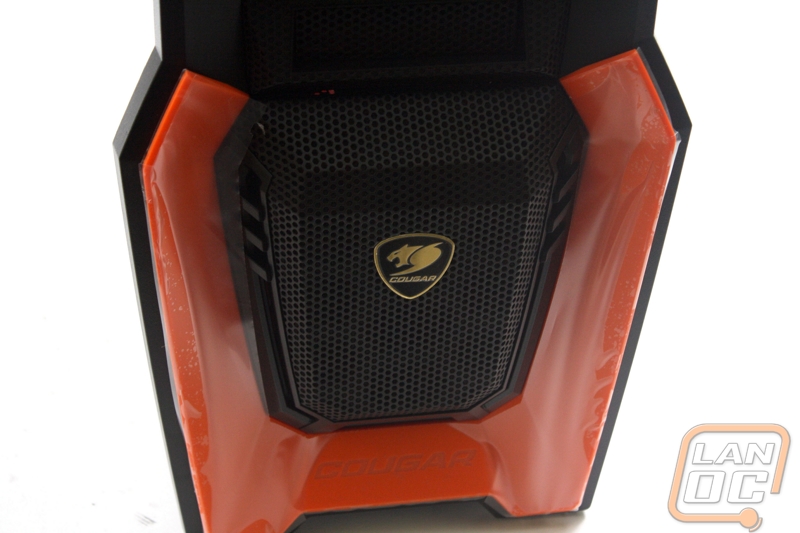
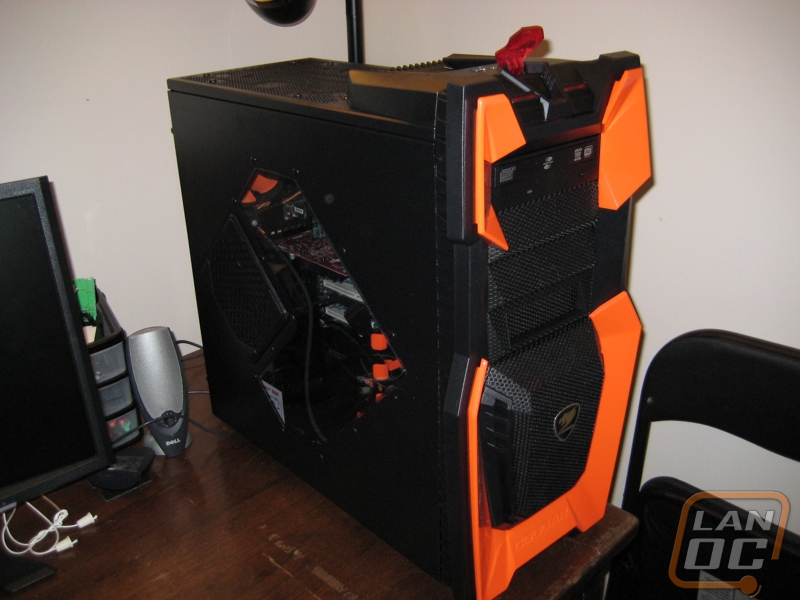
Cougar uses an attractive orange and black theme on this case. Most of the outside is a standard matte black aluminum. Splashed around the case are mesh and grill areas for airflow within the case. The front of the case features an orange trim as well as a golden Cougar logo placed in the middle of the lower front of the case. The orange pieces are a glossy orange and to some this may be too much of a plastic-y looking case. There are three 5.25" bays exposed on the front as well as one 2.5" drive bay.
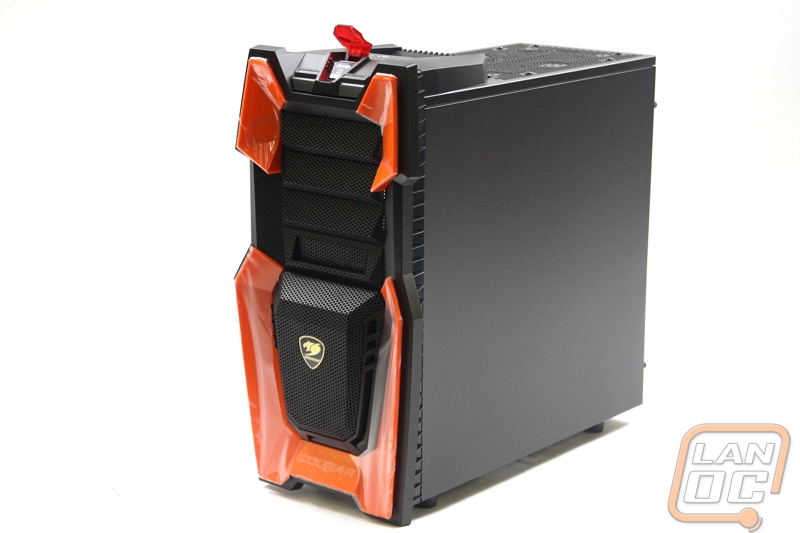
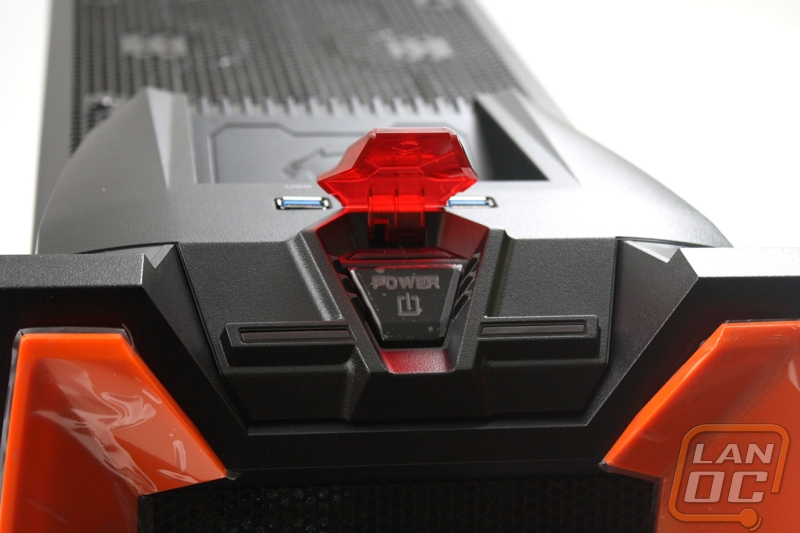
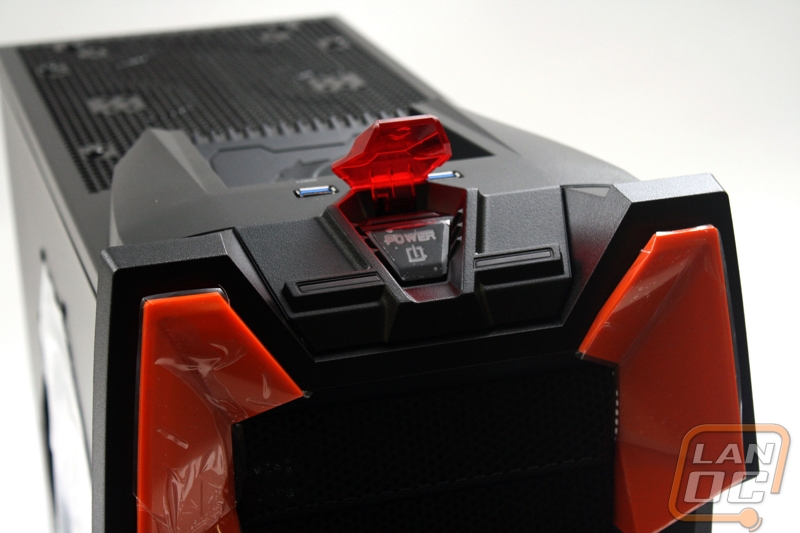
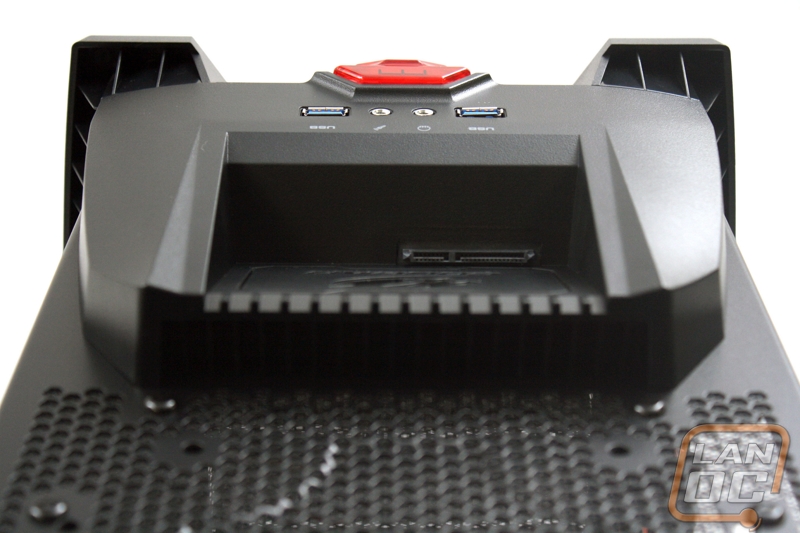
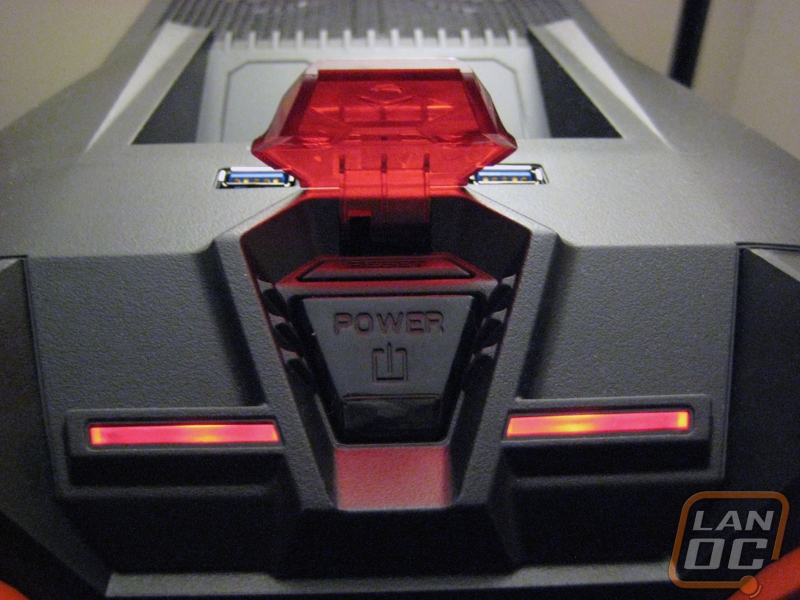
On the top-front is where you will find a few ports as well as the pilot style power switch. There is a pair of USB 3.0 ports as well as a headphone and microphone jack in this area.
On the top of the case there is access to an external SATA hot swap HDD/SDD bay for easy data transfer. I have seen a few different types of bays on cases now for connecting storage drives, but this one is definitely unique as it uses a cutout in the top of the case to act like tray and it can fit a 3.5 or 2.5 inch drive.
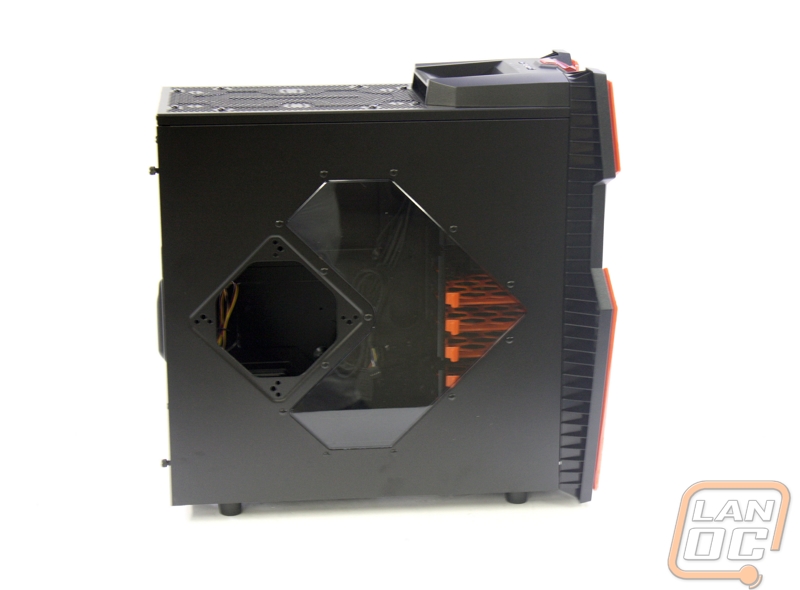
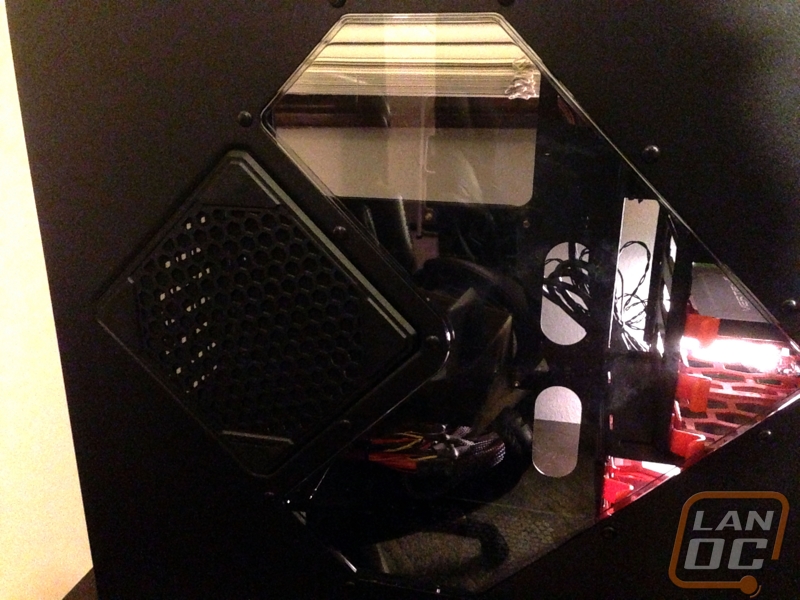
On the left side of the case there is an acrylic panel for a look inside of the case. There is also a spot for the included magnetic fan filter, which is a nice touch. I feel the window could have been bigger or maybe a different shape, at the position of the window it will be hard to see your CPU and some if not all of your graphics card. Most of what you will see in the window is the right side of your motherboard and some of the hard drive brackets.
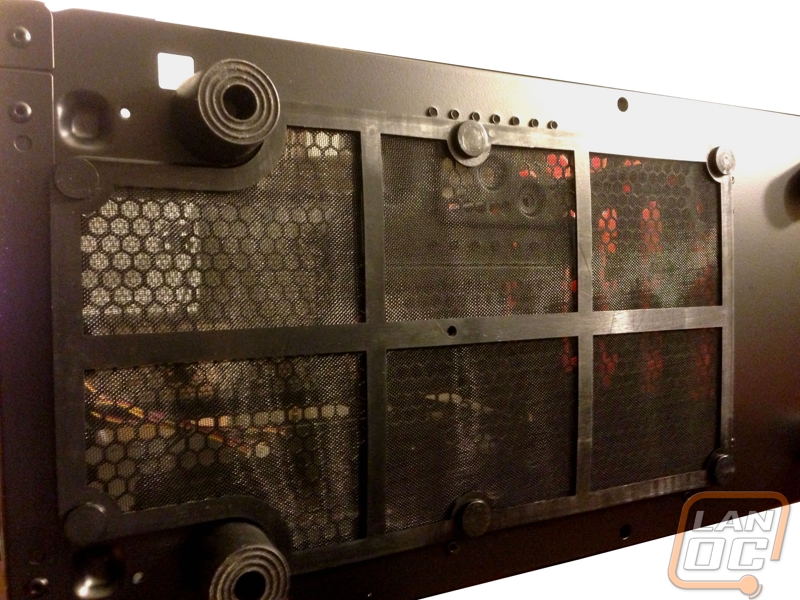
A look at the magnetic fan filter, installed. I will say that the magnets are not that strong, so I would worry that if you were moving the case around you may bump them and have the filter fall off, it is something to keep in mind.
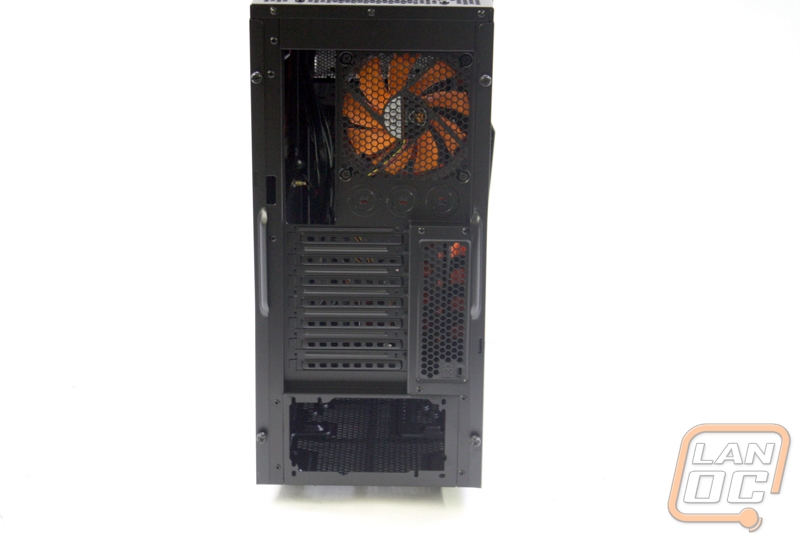
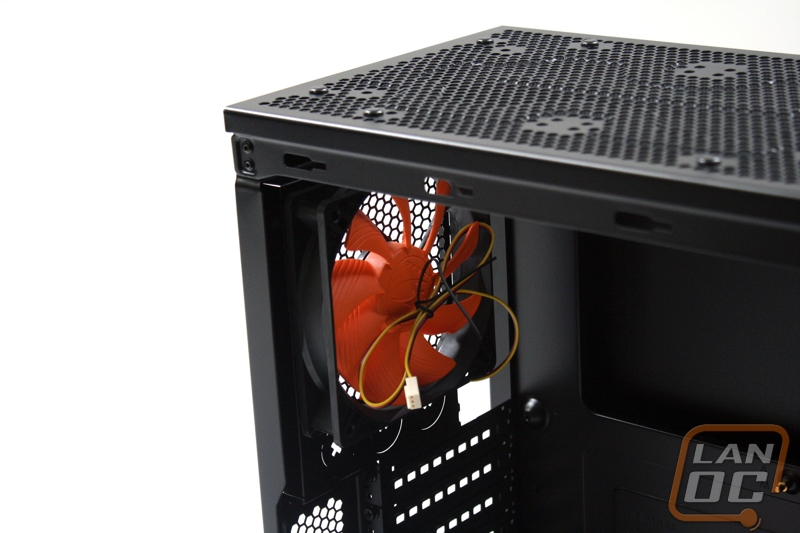
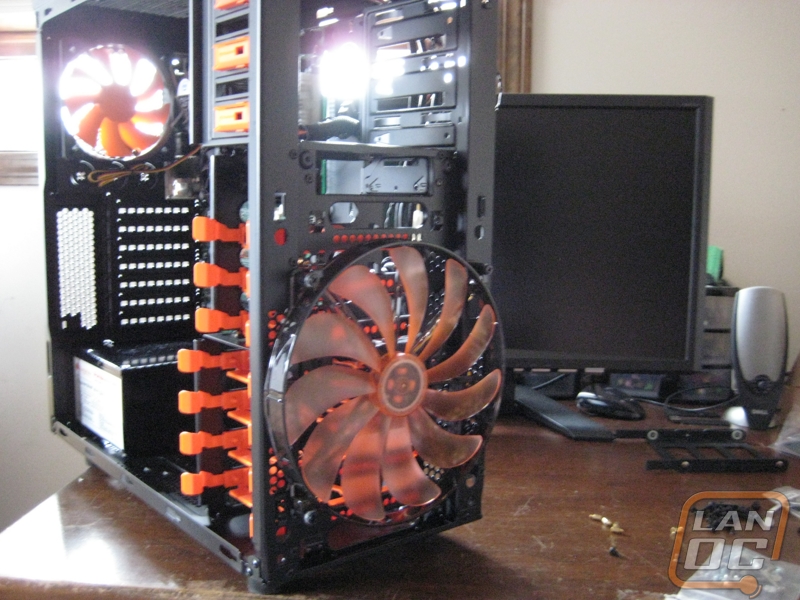
On the back of the case you see the included rear 120mm fan. Directly below that you will see 3 holes for a water cooling solution. There are 7 expansion bay slots on the back of the case, which a good amount for a mid-sized case. The expansion slot covers are vented for extra airflow. You also have a air ventilation area with a security lock slot included. On the back you will find two thumbs screws on each side panel for removal.
Finally on the bottom of the case you will find another magnetic fan filter. This filter covers both the power supply intake on the bottom of the case as well as an area for one 120mm fan or one 140mm fan. The filter is easy to pop on and off, but if I were going to transport the case I would remove them and put them in a safe place then put them back on when I got to my destination. It would have been nice if there was some sort of twist lock or if one side snapped in and the other side was magnetic.
Inside
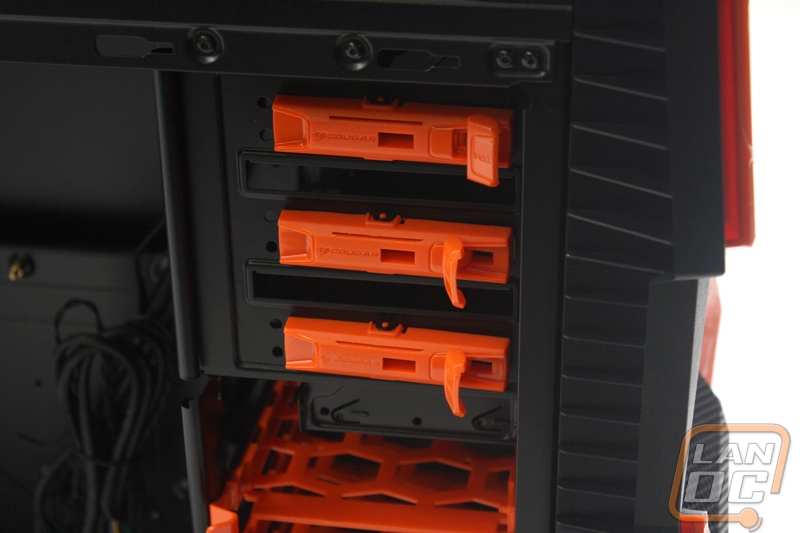
The inside of the case shows a decent amount of room for installing your components. One thing I really like is the tool-less hard drive brackets, and the flexibility for different sized drives. You also have a tool-less system for securing the 5.25 drives which is also very nice. The plastic hard drive brackets and locks for the 5.25 drives match the orange theme on the front of the case. There are several holes for cable management also there is a large cutout to make it easy to upgrade/replace your CPU.
Here is a closer look at the 5.25 drive locks. They have a unique design that fits in with the pilot switch style cover for the power button.
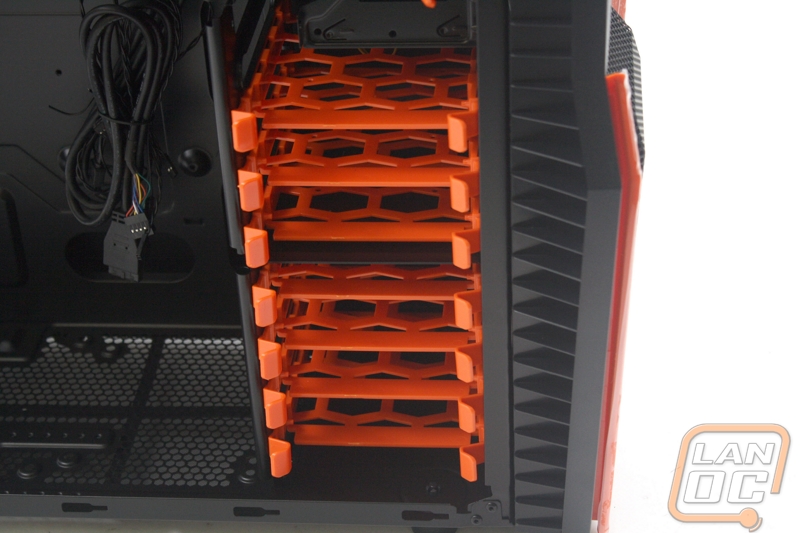
You can install up to seven 3.5" hard drives. This is the standard setup for the drive cages, which allows for the most 3.5" hard drives however in this configuration your video card may not fit if you have an extra-long card. You can fit up to a 300mm length card in this configuration. If you have 2.5 inch hard drives that you would like to use, you simply remove two screws from the left side of the bracket, then reinstall the bracket on at the 2.5" position. It's very easy to switch the configuration. Once in that configuration you can install up to a 330mm length video card. If needed you could totally remove the entire bracket which would allow up to a 400mm length graphics card.
On the rear of the case you can see the included 120mm fan. The orange Cougar brand fan matches with the orange and black theme of the Challenger.
Installation/Performance
Being unfamiliar with Cougar cases I was unsure of how the installation would go. Pleasantly, there are a number of nice features that make installation in the case a really easy experience. To start off, this being a mid-tower case, I still felt that I had plenty of room for working inside of the case and getting everything adjust to my liking. The case is lightweight which makes it easy to work with and transport. However when I am dealing with lighter materials I always have to wonder if that might mean less durability in the long run.
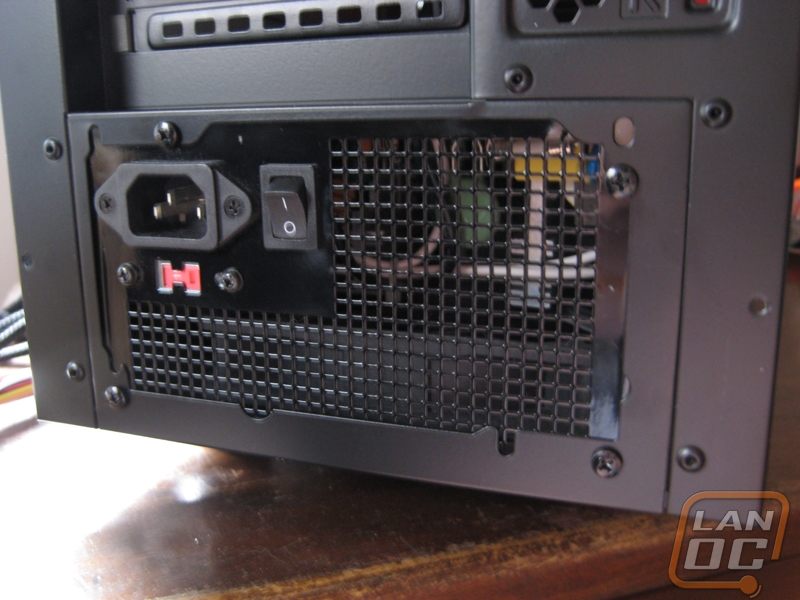
I started with installing the power supply. Everything went as expected when installing my trusty power supply unit.
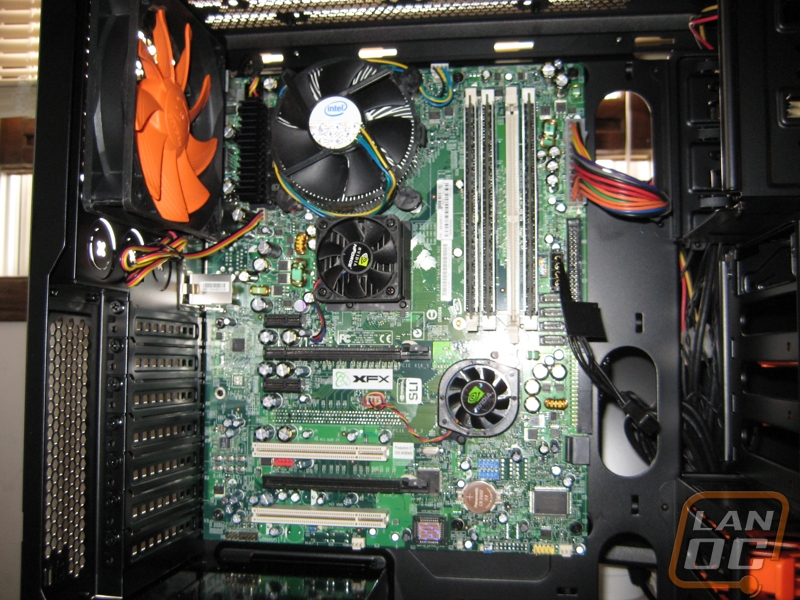
Next I began installing the motherboard which already had my CPU and ram installed. One very nice feature that they included are the raised motherboard mounting points. With these you do not need to install brass standoffs into this case. There is an inverted standoff like piece in the middle of the motherboard tray that you use to be your middle point and keep things in line when installing the main board.
The case has some large cut outs for running your cable management wires through. There is also a large cutout on the motherboard tray for upgrading or access to your CPU. They also left a small area in the upper left hand corner of the case for you to run your ATX 8 pin (or 4 pin) cable up there. I had no problem running any of my cables through the case to connect with the motherboard and components.
Next up are the drives. All of the hard drive caddy's are tool-less in design. So you just line up the bracket to the holes on the side of your drives and clip it on, then it slides easily into the case. This can't be any easier and is one has been one of my favorite solutions for installing drives into the case. The 5.25 bays are also tool-less as well. There is a small lever on the right hand side that you can pull for removing the drive once installed and it pops the drive forward for removal. To install the drive just slide the drive in and it locks in place. You can put a screw or two on the other side to make sure the drive is fully secure. I chose to put a thumb screw on that side for quick installation in the future.
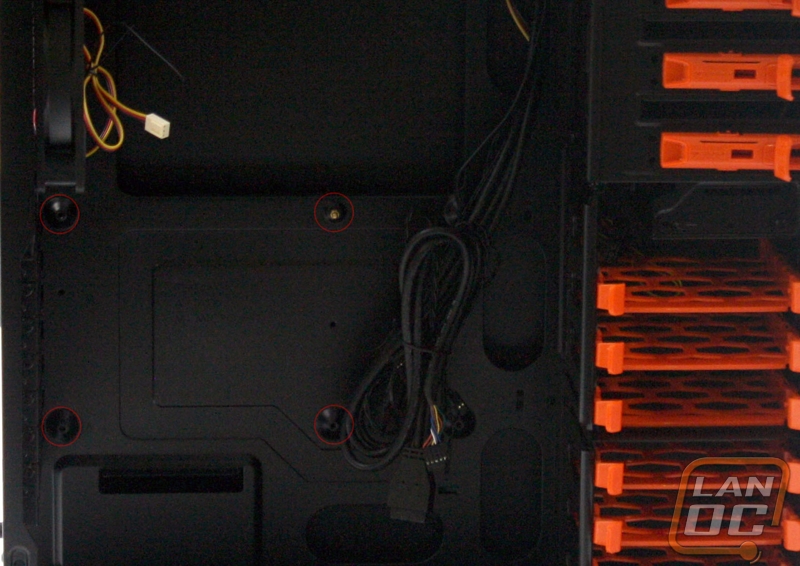
On the back of the case you have about 1.5 inches to fit your cables in. The right panel is just a standard flat side panel. I wish they would have chosen to do the exploded view type side panel like we are seeing on some other cases now days. The only issue I had with installing the cables is there are only a couple loops provided for tying things down to case, so you have to get a little thrifty to make the cables lay nice and flat but it wasn't hard to accomplish the task.
After I got all the components installed and everything connected, it was time to go for a test run. I flipped up the pilot switch and hit the switch contained beneath to unleash the fury! The system fired right up and I could now see red lights showing that I had power to the system. There is also a light above the power switch that will flash red whenever this is hard drive activity. All of the fans installed on the system are whisper quiet and the front 200m fan even shows a red LED glowing inside of the case. It's not a super bright LED but more of a subtle red tone illuminating the front.
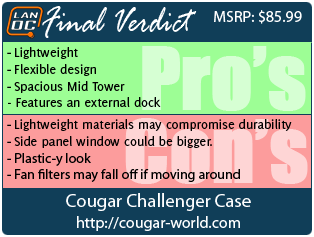
Overall/Final Verdict
For a mid-sized case coming from a company that I am not that familiar with, I will say that I really enjoyed setting up a system in the Challenger. It features a unique design and plenty of versatility packed into to the case. The installation was very easy and you can tell that the engineers had ease of installation in mind when designing this case. There is enough expansion of the cooling that you can do to keep even the hottest of components cool, including the ability for water cooling. Also adding in the external SATA drive connector at the top of the case was a very nice touch. Everything from the magnetic fan filters to the tool less hard drive brackets are very nice features to have in a case at this price point. I also felt that there was still a lot of room for working inside the case without things getting in my way. The adjustable hard drive bracket is a great idea for those who have very long graphics cards. I believe is an attractive package for someone looking for a mid-tower case. Whether or not you like the theme and look, this case is bound to turn heads by anyone passing it by. I will deem this case with the recommended LanOC title.