Inside
Digging into the Define R4 the first thing that I noticed was that each of the side panels weighed more than I have ever seen a side panel weigh before. A quick glance showed why though, Fractal has covered both side panels with a thick sound deadening material to keep the noise inside of the case. Along with that you can see what ModuVent is all about with its extra sound dampening material.
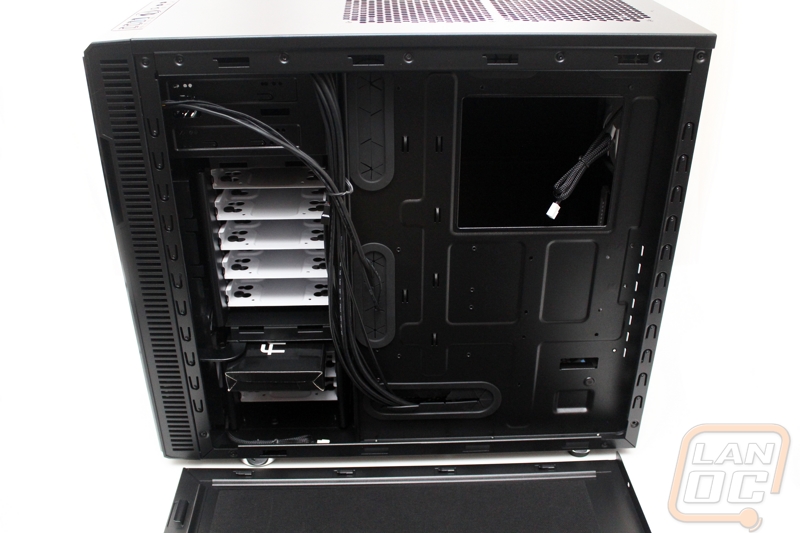
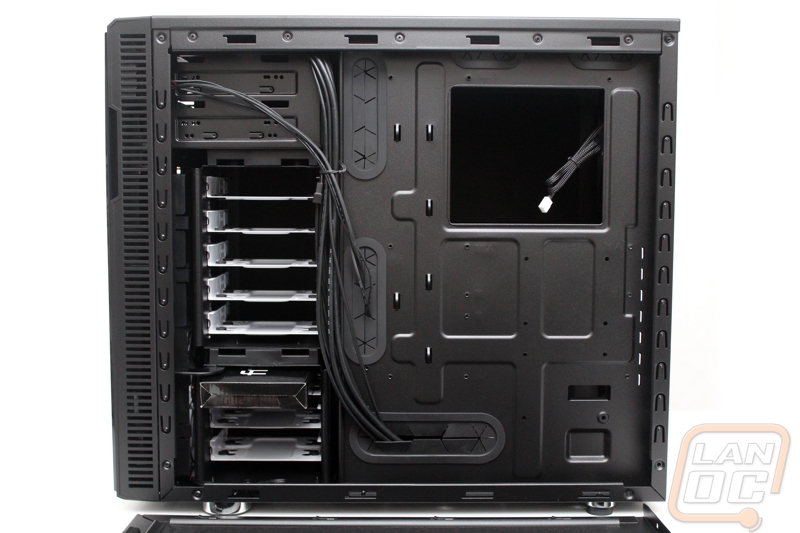
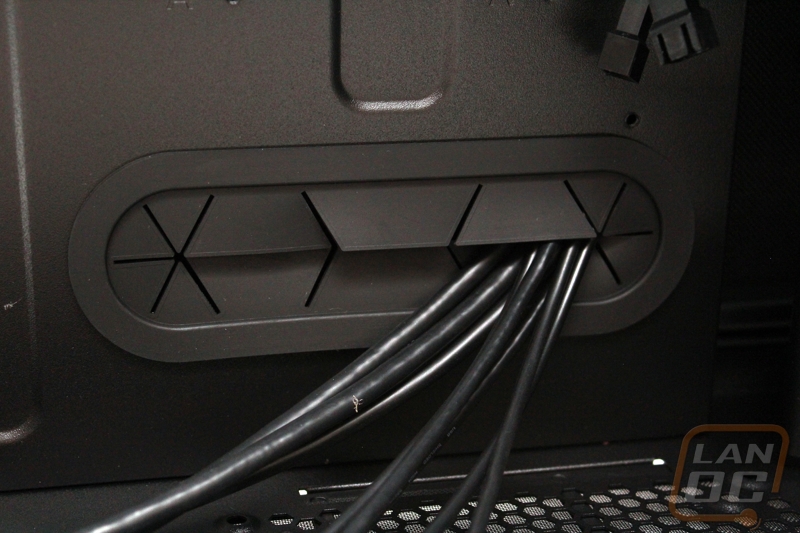
Starting around back we are able to get a good idea of the Define R4’s wire management ability. First we can see 5 different holes to feed wires through and each has a grommet for a clean look and wire protection. On top of that there are zip tie tabs going all the way up the middle of the motherboard tray for proper wire management. At just under an inch there is the room needed, but I wouldn’t mind seeing a little more. 24 pin power cables are thick and will take up most of that space.
Around on the business side of things, stepping back and taking it all in, the all black look paired with the white accents catches your eye. Its really a shame to cover it all up with a windowless side panel, but this is what you sometimes have to give up to keep noise down. Its also really impressive when you see all eight of the cases hard drive trays, you could really pack the Define R4 full of hard drives.
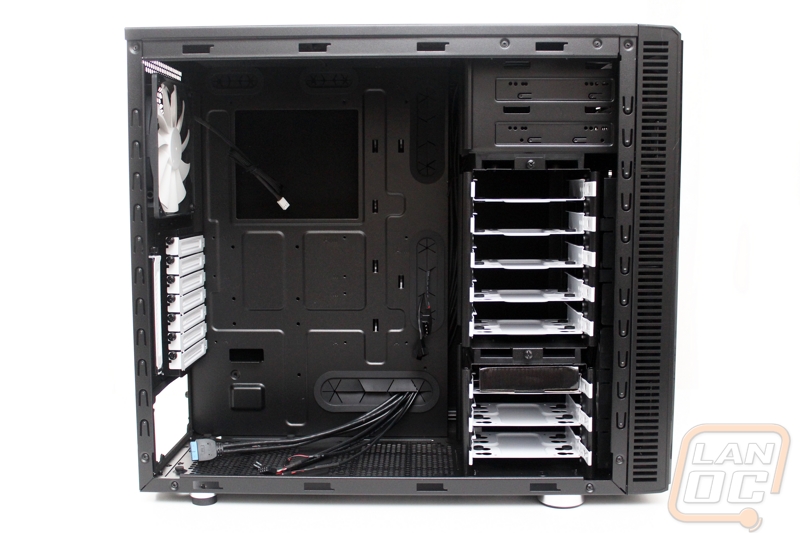
Up in the top left corner we can see the two grommeted holes up above the motherboard for your 8 pin power connection and extra fan wiring. Its a small touch but I also love that the fan doesn’t have a sticker on it here, I would remove the sticker for a clean look anyhow, its great to see that they recognize that. Also for those who need to swap out their heatsink you have good access with a large hole in the motherboard tray as well.
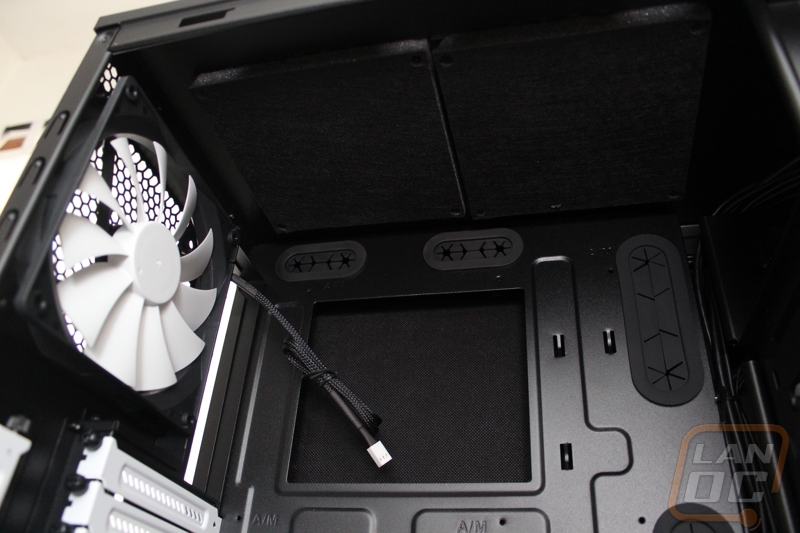
A little lower down we have a better look at the white PCI slot covers that we were admiring from the outside. I’m kind of surprised they went with vented on these considering the efforts to keep noise down, but of course you do need some airflow to keep things cool.

Down at the bottom you have a large grommeted hole for you to feed most of your power supply cables through. I also wanted to point out that all of the cabling in the Define R4 is black to match the rest of the case. Its a small touch, but it all adds up to a clean build when you get it all together.
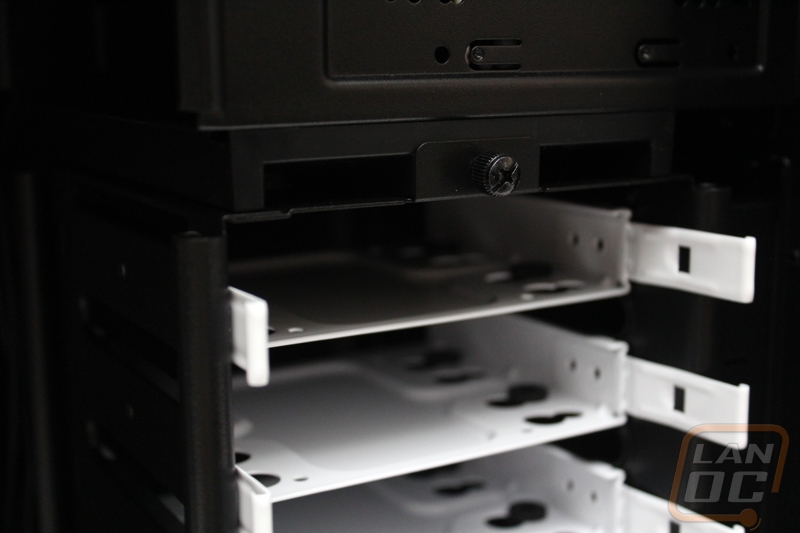
Over on the right side you have the eight hard drive trays that I mentioned before. Each tray supports both 3.5 inch and 2.5 inch drives. The difference between the two installations is in the rubber mounts. The 2.5 inch drive mounts don’t have any rubber. This isn’t a big deal with SSd’s, but if you do end up running a 2.5 inch hard drive it may end up being louder than a 3.5 inch drive in this case.
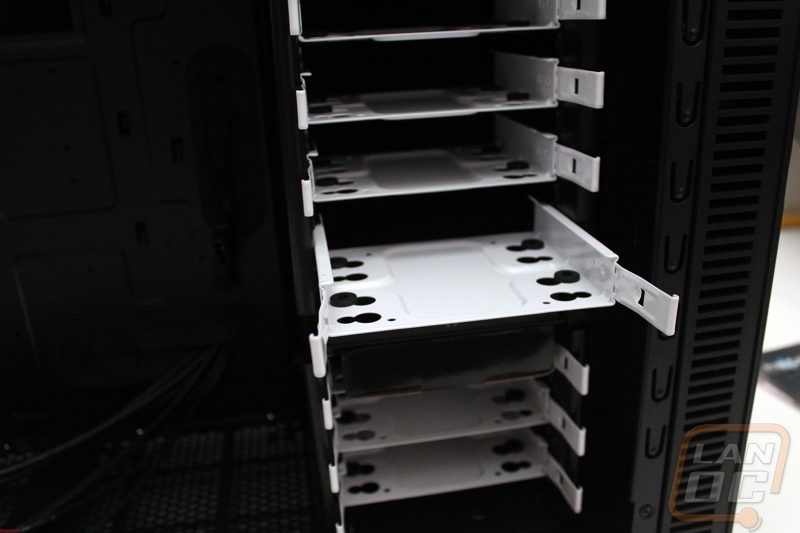
The main hard drive cage is actually removable if you need more space for your video cards. All you have to do is remove the two thumbscrews and pull it all out.