 At our last LAN we gave away a couple Cooler Master Storm Trooper cases and I was extremely impressed with them. Of course right now white is all the rage, so it wasn’t a surprise that Cooler Master introduced a white version as well. This time they called it the Stryker, I’m sure that a white and black Storm branded Trooper made a few lawyers a little uncomfortable, so the name change when going white wasn’t a shock. No matter the name, I was excited to dig in and put the Stryker to the test.
Product Name: Cooler Master Storm Stryker
Review Sample Provided by: Cooler Master
Written by: Wes
Pictures by: Wes
Specifications
|
Model |
SGC-5000W-KWN1 |
|
Color |
Black and White |
|
Material |
Appearance: Synthetic, Mesh front bezel; Case body: Steel |
|
Dimension |
250.0 x 605.6 x 578.5 mm / 9.8 x 23.8 x 22.8 inch |
|
Weight |
13.7 kg / 30.2 lb |
|
M/B Type |
Micro-ATX, ATX, XL-ATX |
|
5.25" Drive Bay |
9 |
|
3.5" Drive Bay |
8 (converted from 5.25" bays by 5.25"/3.5" Combo Cages) |
|
2.5" Drive Bay |
13 (converted from 5.25" bays by 5.25"/3.5" Combo Cages) |
|
I/O Panel |
USB 3.0 x 2 (internal), USB 2.0 x 2, Audio In and Out (supports HD Audio) |
|
Expansion Slots |
9+1 |
|
Cooling System |
Front: 120mm LED fan x 2, 1200 RPM, 17 dBA Top: 200mm fan x 1, 1000 RPM, 23 dBA (converted to 120/140mm fan x 2) Rear: 140mm fan x 1, 1200 RPM, 19 dBA (converted to 120mm fan x 1) Bottom: 120mm fan x 2 (optional) |
|
Power Supply |
ATX PS2 / EPS 12V |
|
Maximum Compatibility |
VGA card length: 322.0 mm / 12.7 inch CPU cooler height: 186.0 mm / 7.3 inch |
|
Warranty |
2 years |
|
UPC Code |
884102017179 |
Packaging
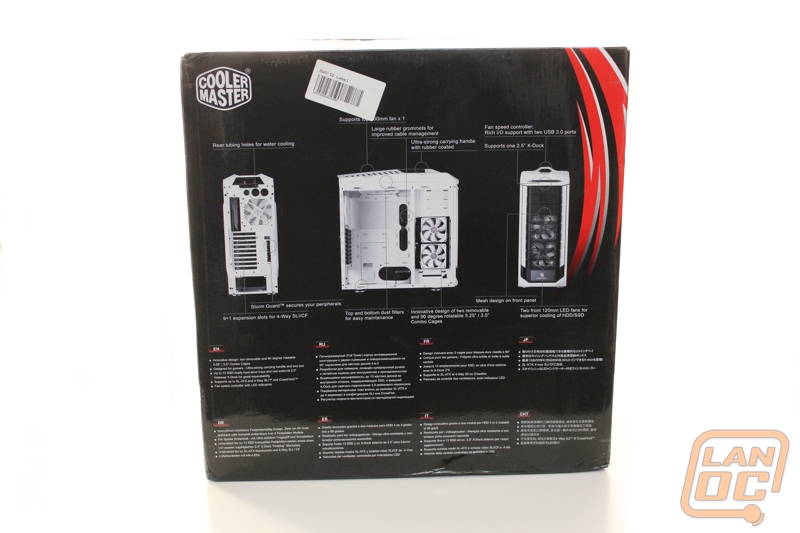
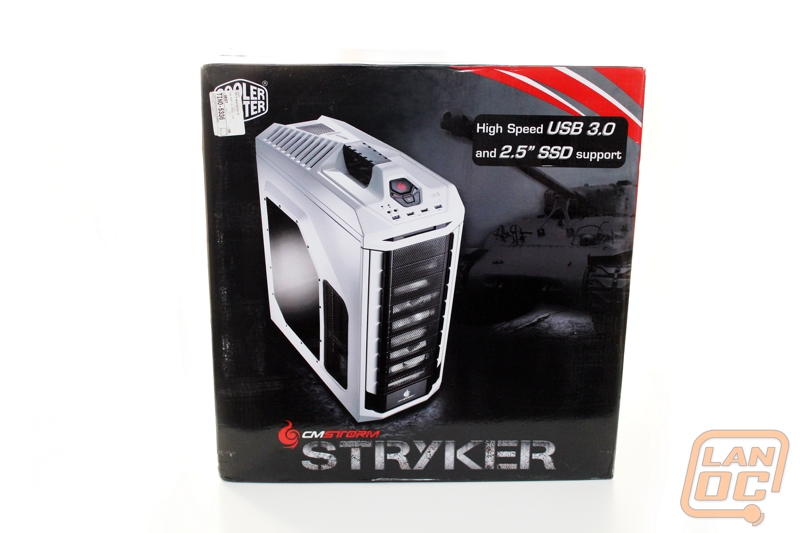
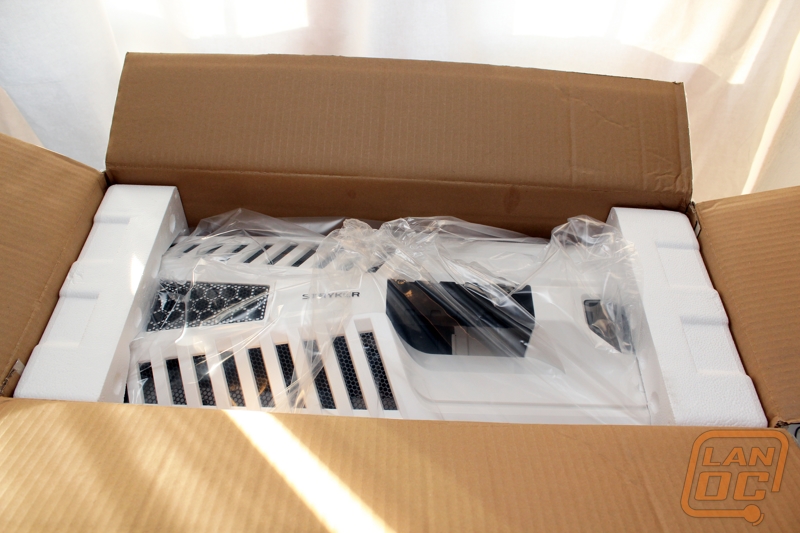
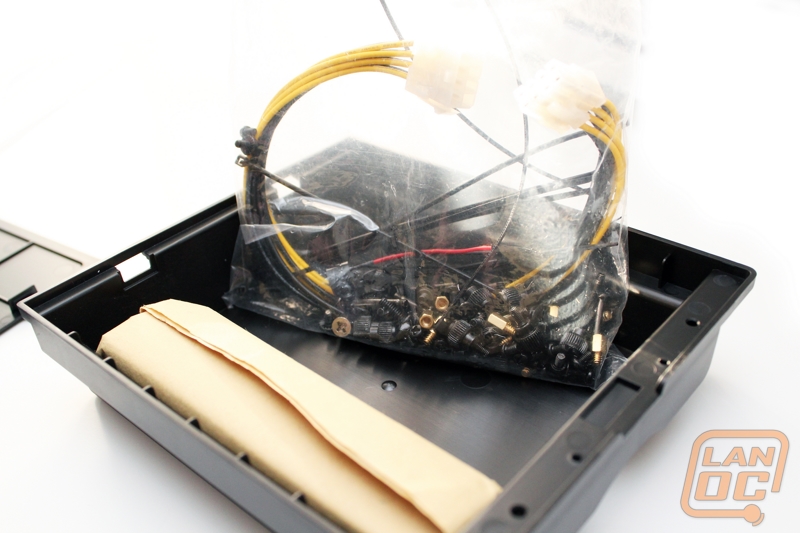
The Stryker’s box has the typical Cooler Master Storm styling. In the background of the front there is a tank hiding in the black background. The white case stands out against the dark background on the front of the box and the red and white streaks on the top right corner catch your attention. Around back there are three photos of the case opened up showing off all of its features. Inside the box, the case is wrapped up in a plastic bag with foam on each side to keep it protected. They were nice enough to make sure that the handle on the top of the case faces up though, so removing the case from the box was extremely easy.
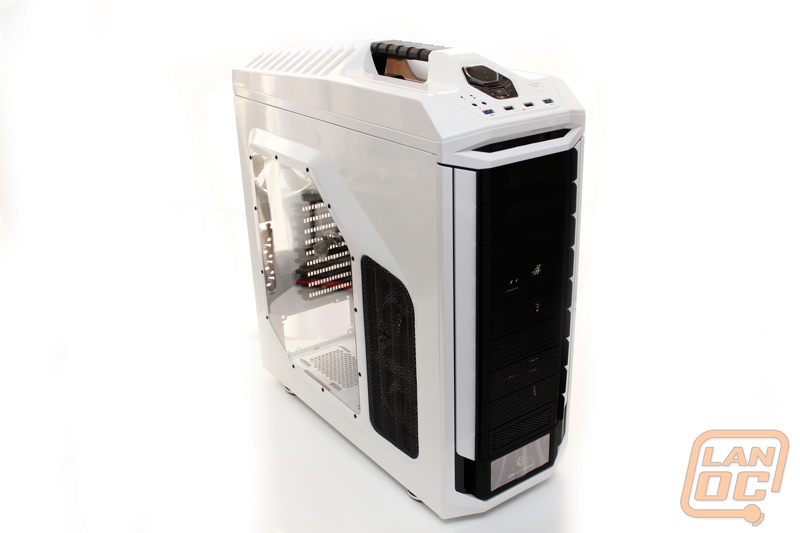
Outside
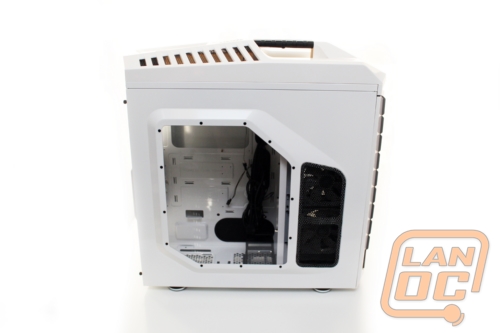
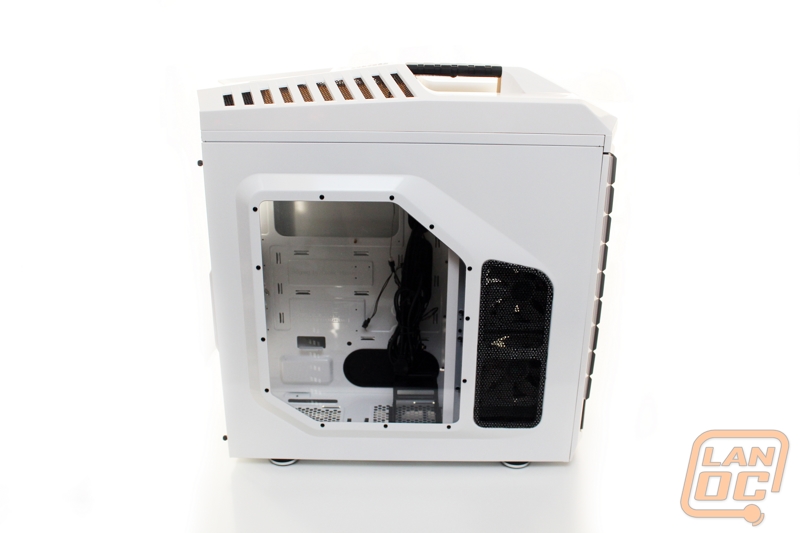
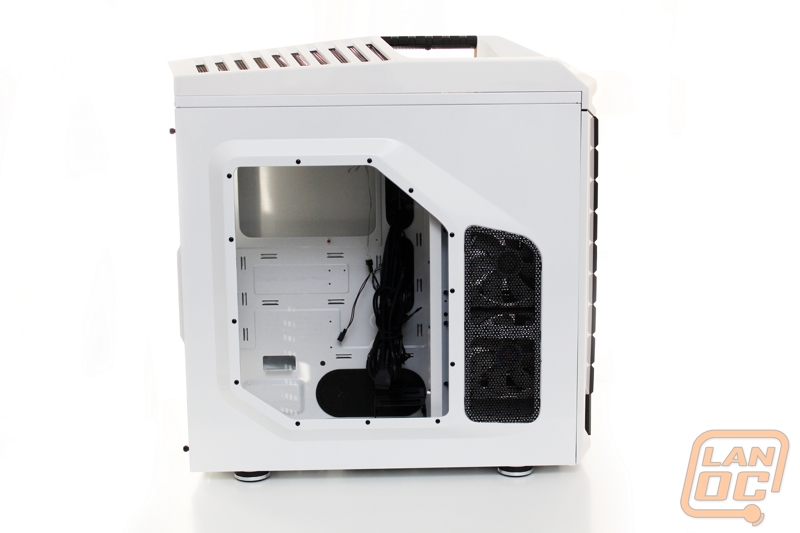
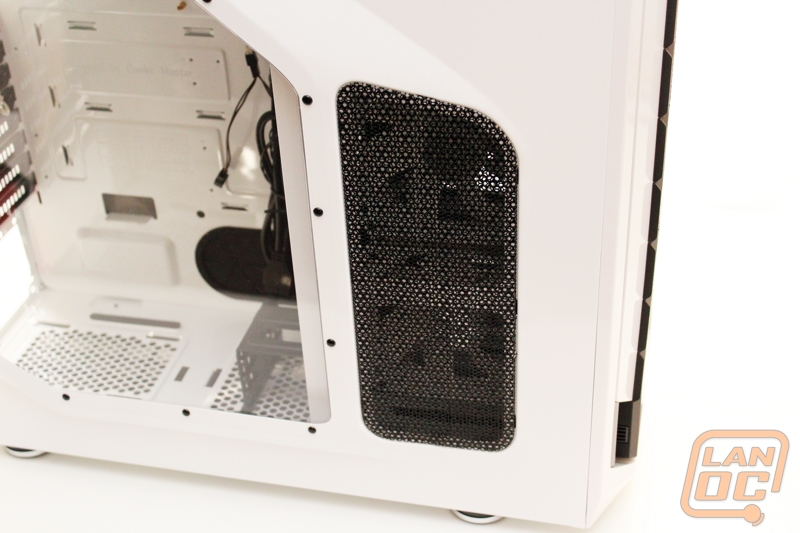
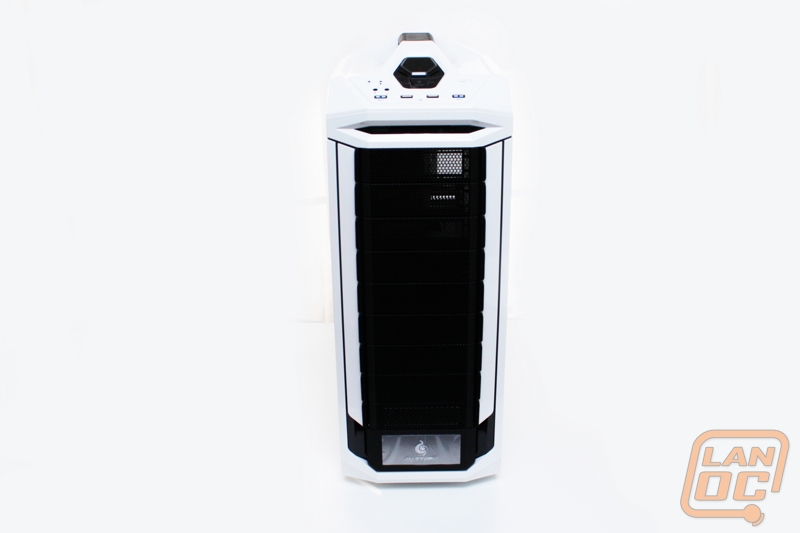
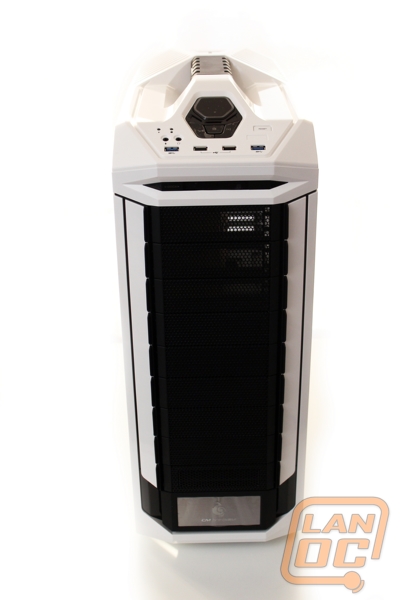
When you take a look at the Stryker, there are two things that stand out right away. First, its bright white color and glossy finish, and a close second for those who have seen the Trooper is the side panel window. The Trooper came with a mesh side panel; the Stryker has a much more stylish window/mesh combo. The layout runs almost to the top of the motherboard and down to the power supply, so you will have to be careful on wire management to keep everything looking good. The mesh side panel stands out because the mesh is black on the white finish. Both the mesh and window are on the area of the side panel that protrudes slightly, not nearly as much as the older Storm Sniper though.
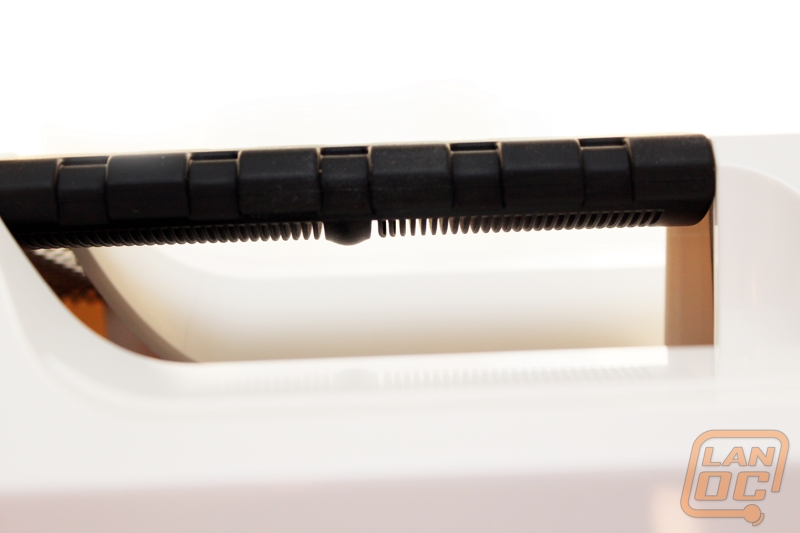
One of the cases other prominent features is the large rubber coated handle on the top. Most of you know by now, I love cases with handles on top. This is partially due to me being lazy, and also because I enjoy going to a LAN party or two. Being able to carry your case in one hand makes a world of difference, especially if you have to open any doors on your way in. I built a LAN box specifically to make that trip easier, but some people would prefer to have a full sized case; this is the solution to that. The back half of the top is vented with black mesh. The rubber handle has a nice slotted rubber finish on the bottom that absorbs the weight of the case a little and makes carrying the Stryker packed full of equipment comfortable.
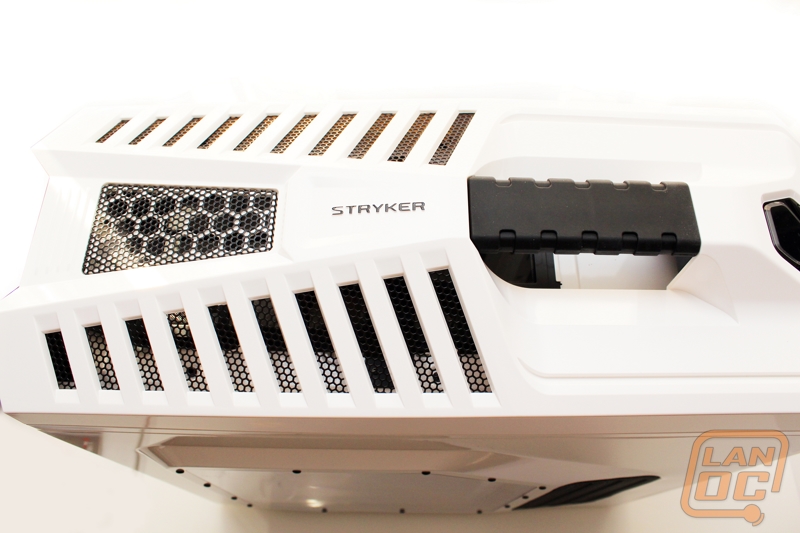
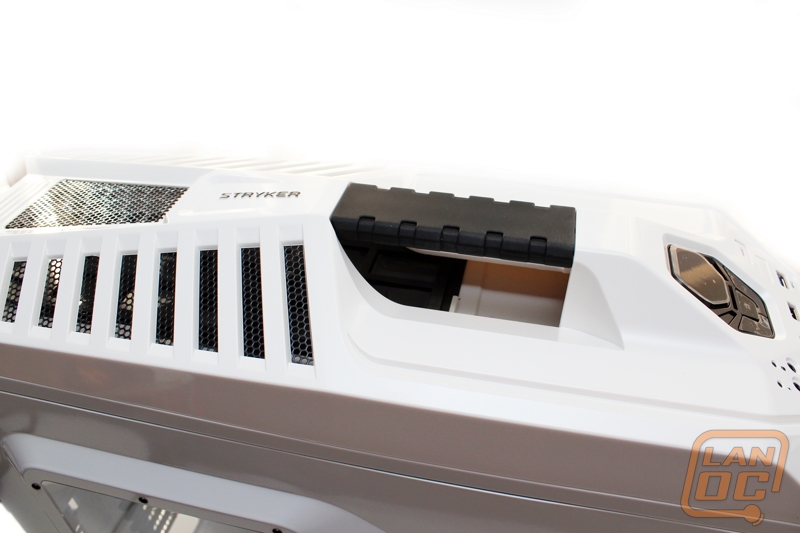
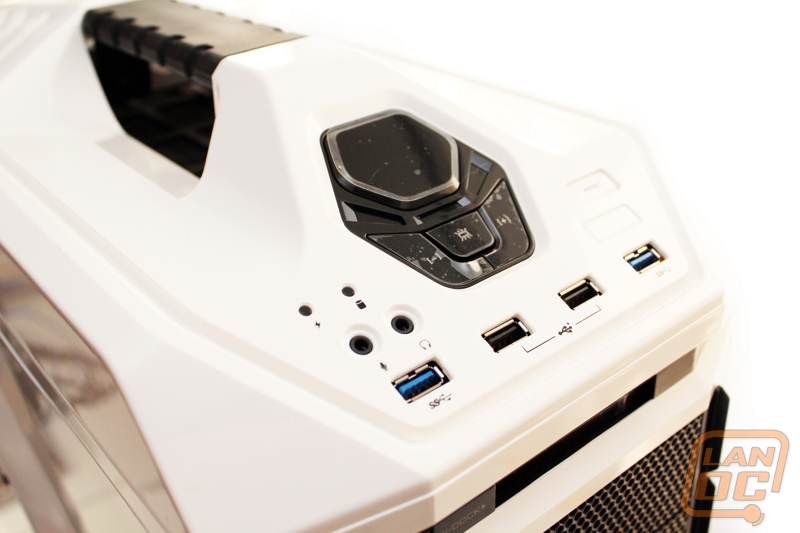
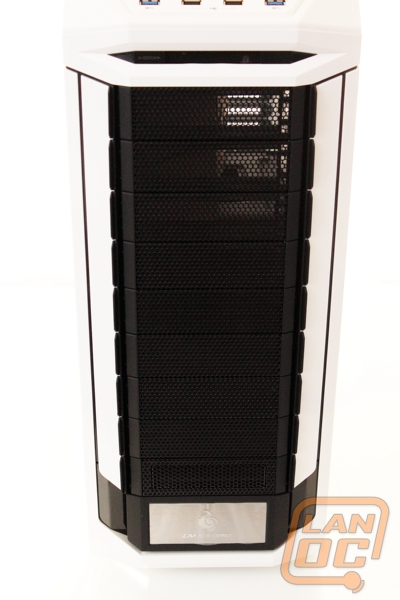
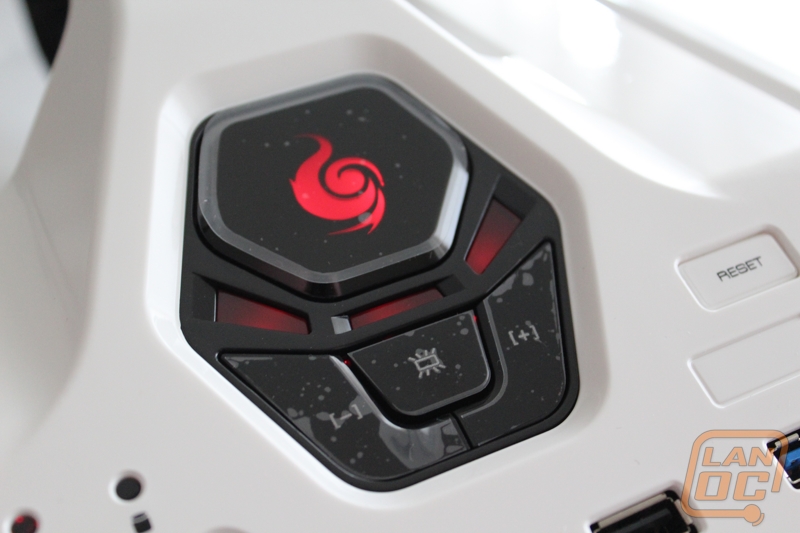
The front of the top panel is where Cooler Master put the Front I/O panel. You have the standard headphone and microphone ports as well as two USB 2.0 and two USB 3.0 ports. There are two LED indicators for power and hard drive activity as well just above the headphone port. The cases reset button is a little hidden, it is on the right side and blends in with its white color. Then directly in the center there is a large power button that lights up with the Cooler Master Storm logo when you power up. Below that you have a single button that turns the lighting on and off and two buttons that turn the fan speed up and down.
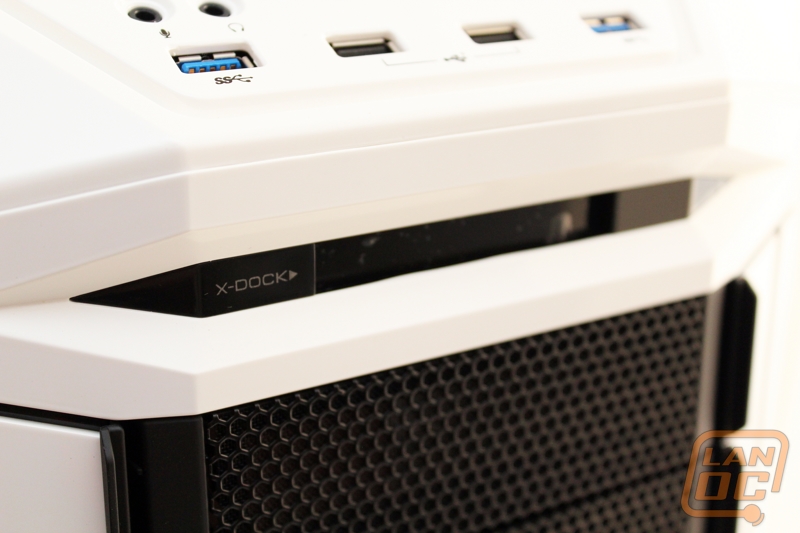
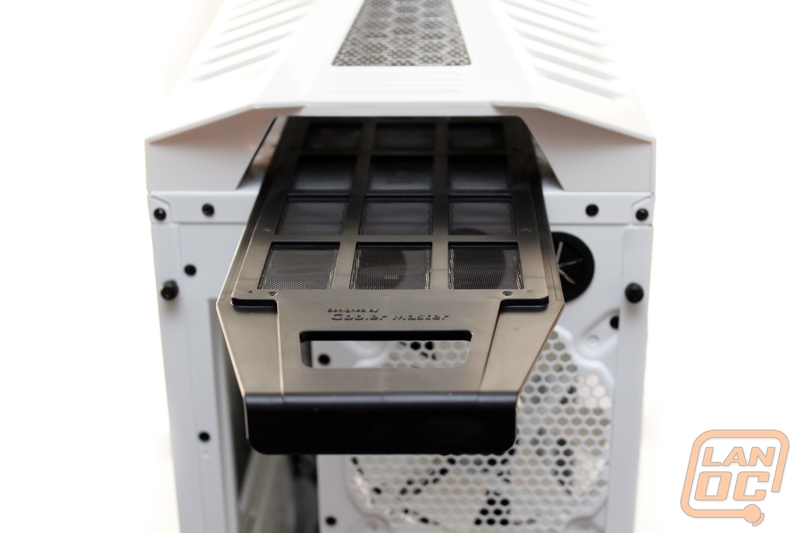
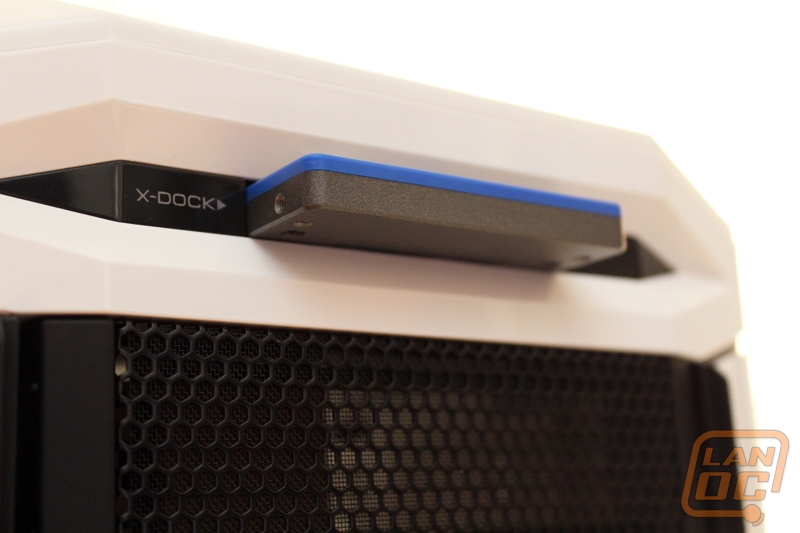
Below the front I/O panel we also have the X-Dock, a 2.5 inch hard drive hot swap. I love that the X-Dock isn’t to in your face but is right up top where it would be easiest to reach.
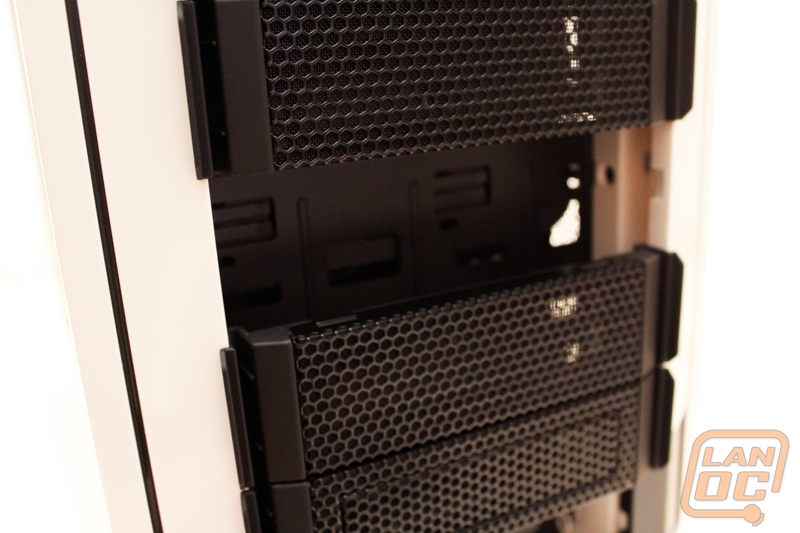
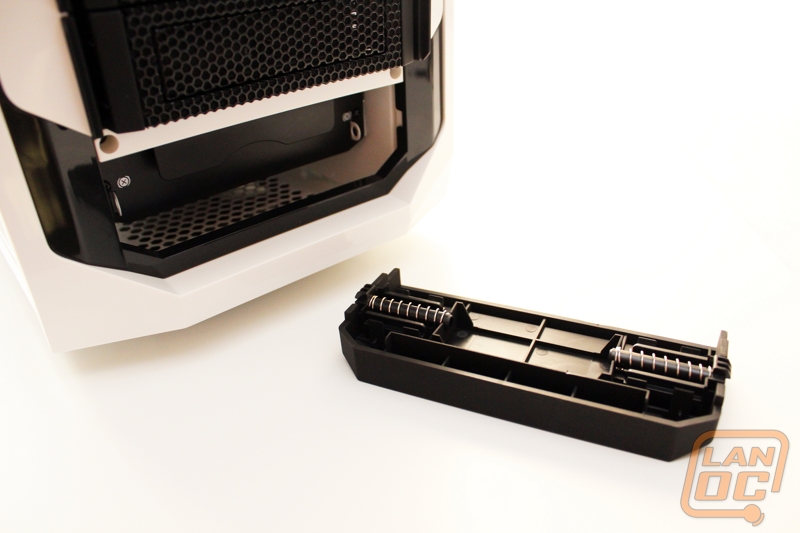
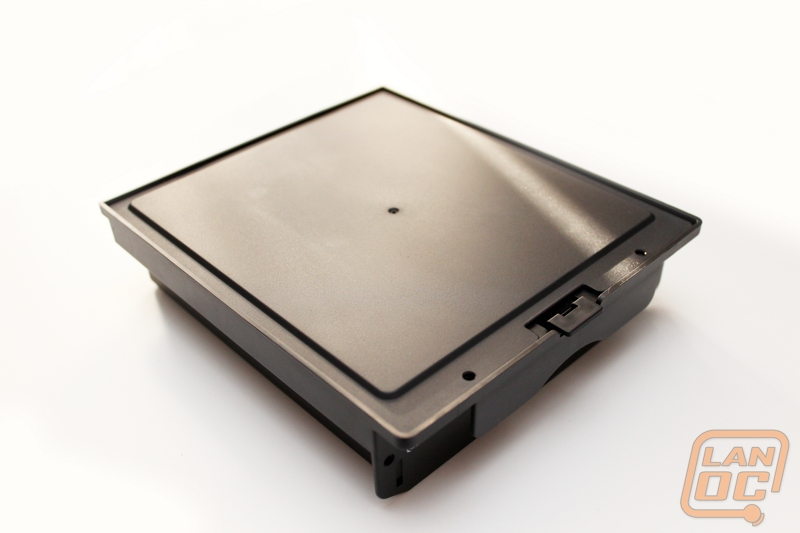
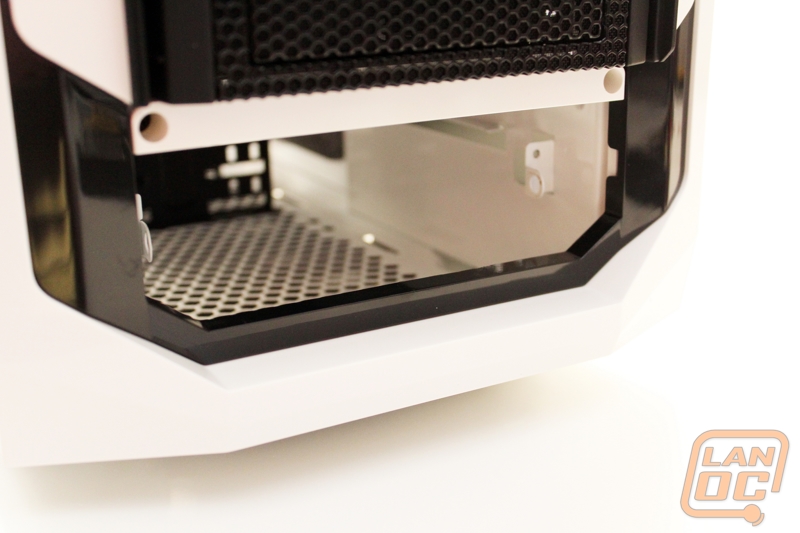
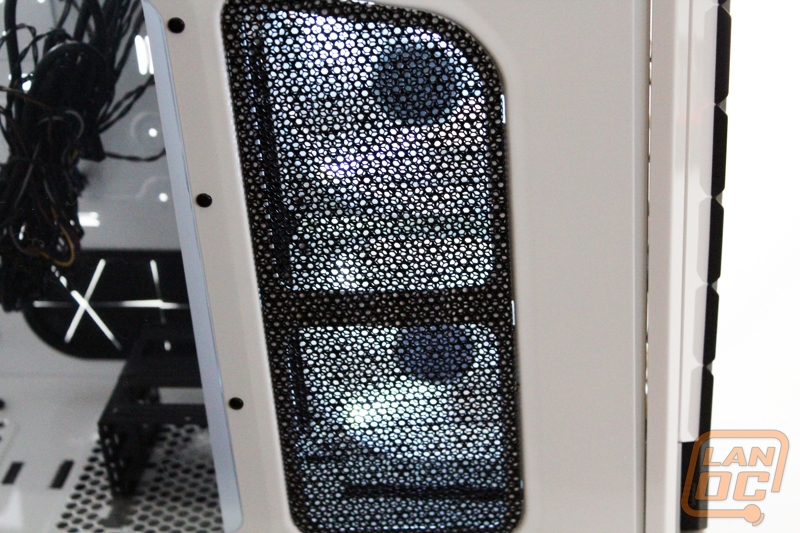
The black and white theme isn’t more obvious than when you look at the front of the Stryker. There is black mesh from top to bottom with just the white framing it on the top, bottom, and sides. Each of those mesh drive bays is removable just by squeezing the sides in slightly and popping them out. All the way down at the bottom there is a solid panel with the CM storm logo on it, this panel is also removable with a pull out drawer behind it. We will talk a little more about that one in the inside section.
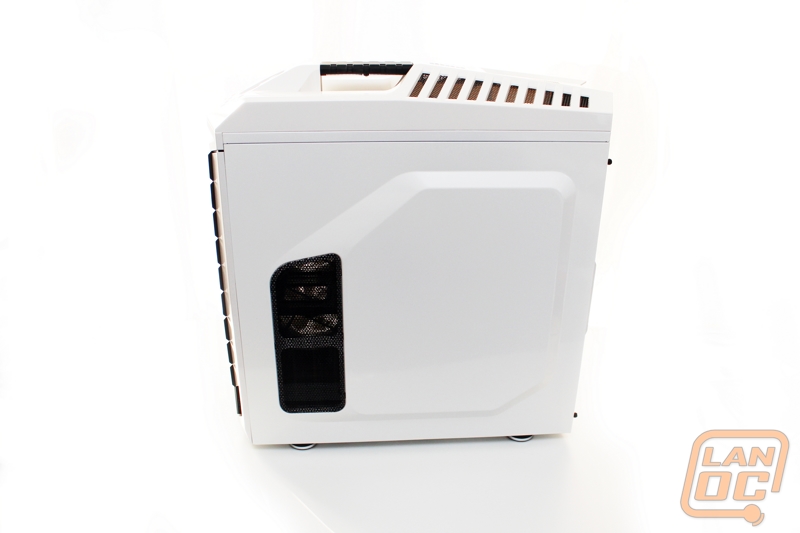
The right side of the Stryker is very similar to the left side. There is the same raised area and black mesh, but without the window.
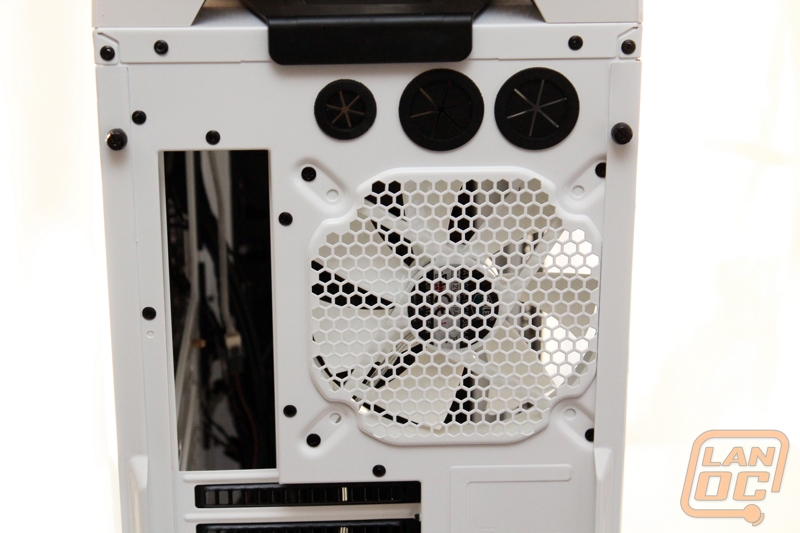
The gloss white finish on the back of the Stryker is interesting and rarely seen. Even with a lot of the white cases, the interior and back panels are flat black. Here the theme continues around the back including the all-white fan peeking through above the rear I/O panel hole. Up top you have access to a fan filter for the top panel and then just below it three grommeted holes. Two are large water cooling holes for anyone who might need to mount their radiator on the outside of the case and the third hole is smaller and close to the rear I/O panel for those who don’t have a motherboard that supports internal USB 3.0. While we are looking at the rear of the case, I should mention that the side panels aren’t attached in any special way. They went with standard black thumbscrews, no door handles or special latches.
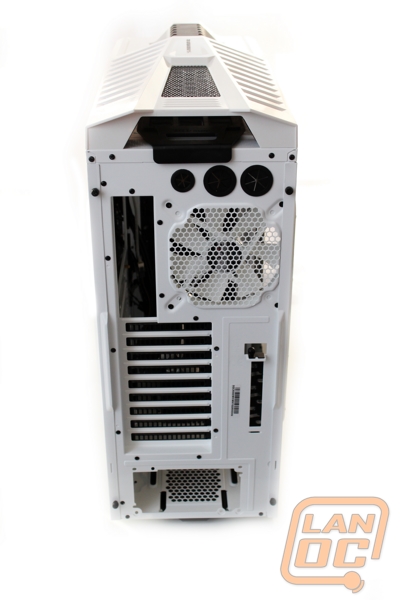
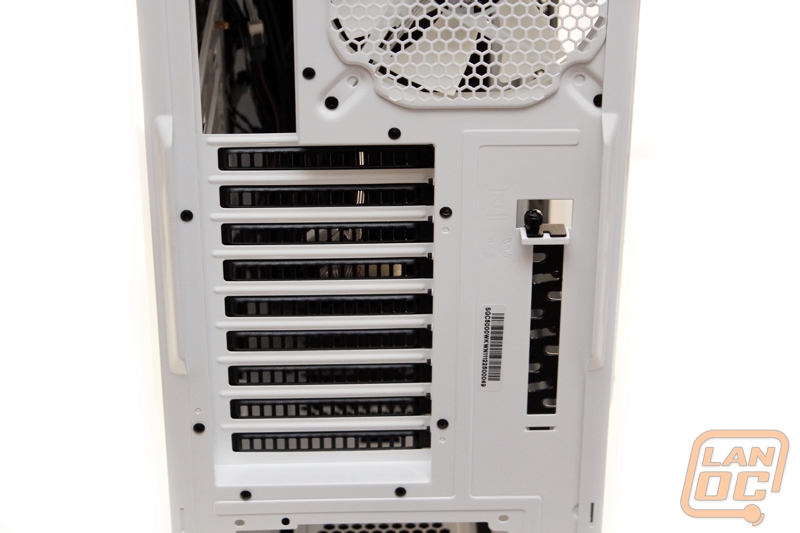
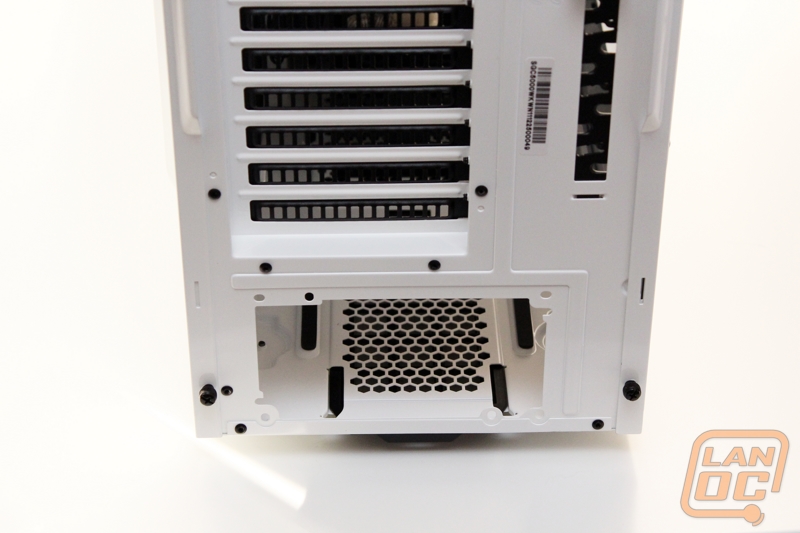
There are a whopping 9 PCI slots as well as the 10th slot mounted up above the others with the peripheral lock that Cooler Master normally includes on their Storm line of cases. Each PCI slot cover is extremely vented for the highest airflow; they are also all black so they stand out against the white finish of the case, much like the side panel mesh.
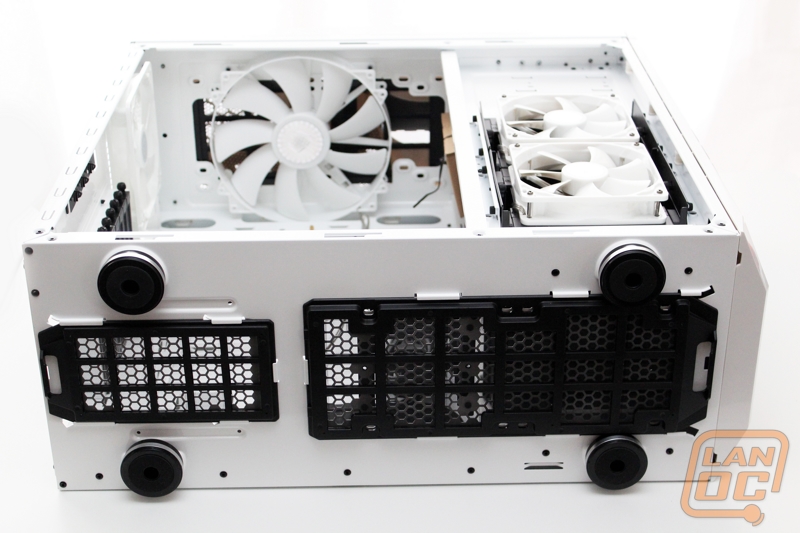
The bottom of the case has two removable fan filters, one on the front and one on the back. One slides out from the back and the other the front to be washed. This should keep the dust inside of the Stryker to a minimum. For feel the Stryker has four larger aluminum feet with rubber bases, they have a good look and most importantly, the larger rubber area should keep the case firmly in place.
Inside
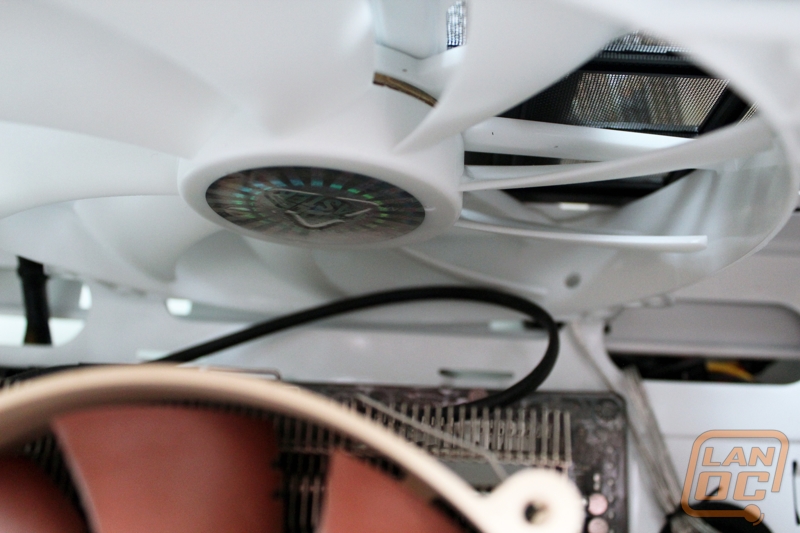
The Storm series from Cooler Master is beginning to identify with a large, top exhaust fan and the Stryker shares the tradition. The 200mm, 1000RPM fan is entirely white, like the majority of those shipped with the Stryker. Two 120mm or 140mm fans could also be substituted here for those seeking higher RPM.
Paired with the top exhaust, the rear exhaust is also a pure white, 140mm 1200RPM fan, with the option of equipping a 120mm in its place.
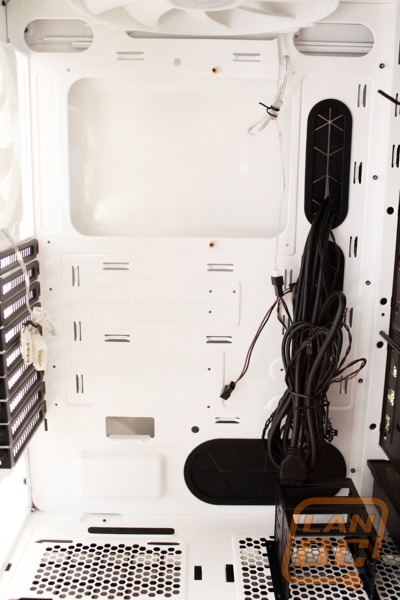
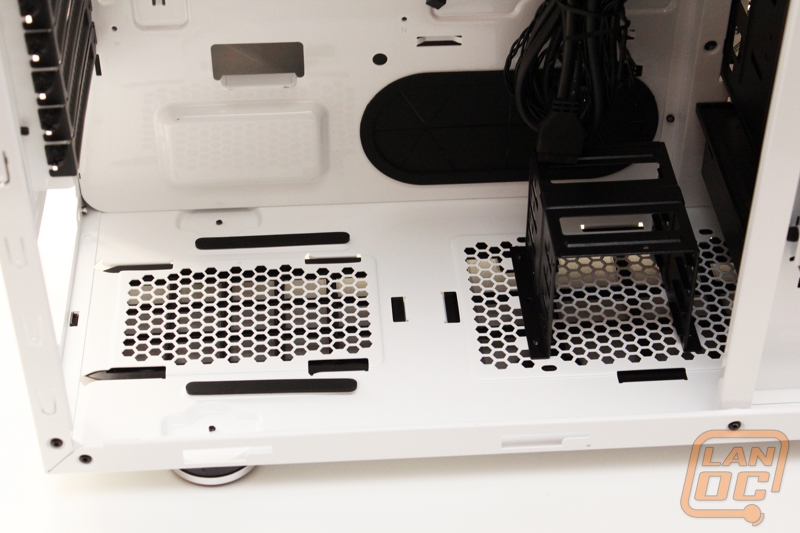
The PCI placeholders contribute to what little black exists on the interior, functioning with thumbscrews for a tool-less design. The power supply bay finishes out the remainder of the rear, and continues on to the floor of the Stryker with raised rubber runs for the unit to rest on, and give some extra elevation. This should help a little in vibration reduction since it will keep the PSU from being metal-on-metal.
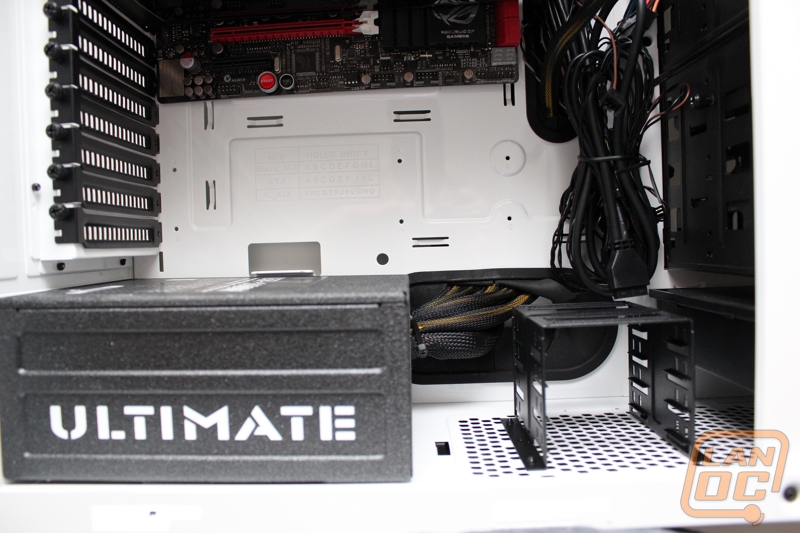
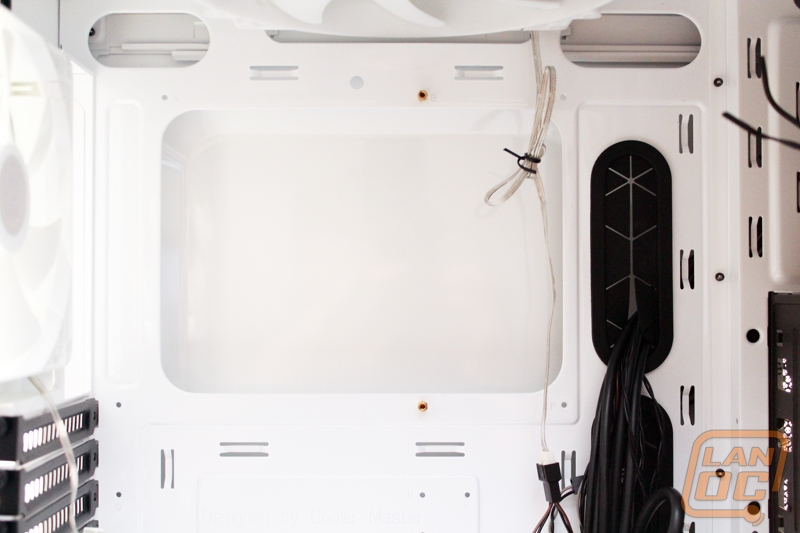
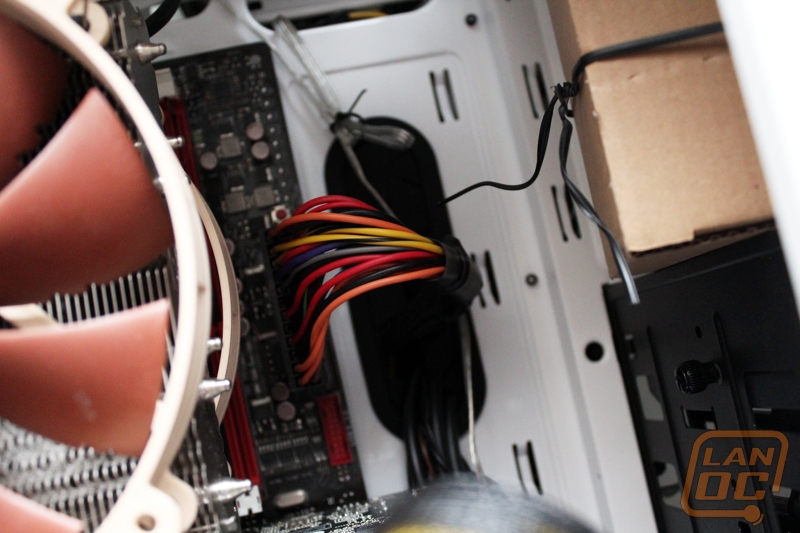
Adjacent to the PSU bay you’ll find one of many black rubber grommets, to help with cable management. The grommet for the power supply cabling is actually significantly larger than the others, since the thickest bundles will route through here.
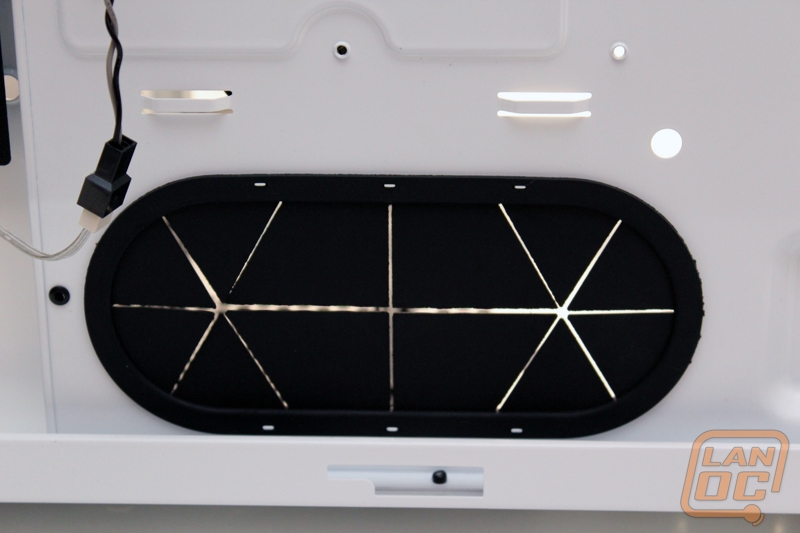
Two mesh designs mirror one another for airflow under the chassis, one for the PSU and the other under a fixture designed to mount 2.5” hard drives, which works specifically well for solid-states, since there isn’t as much airflow as the traditional bays.
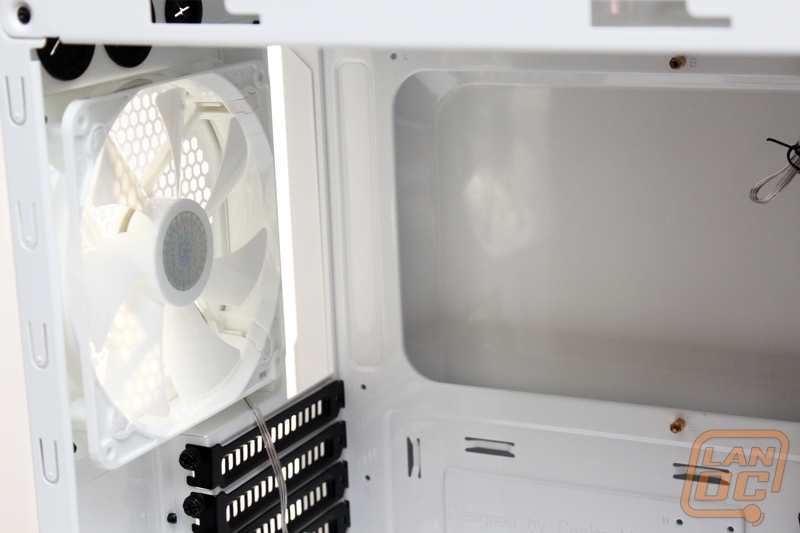
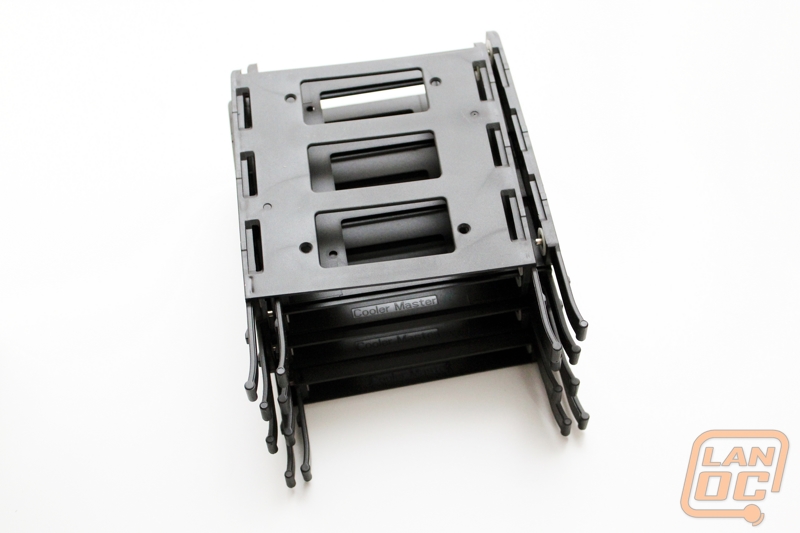
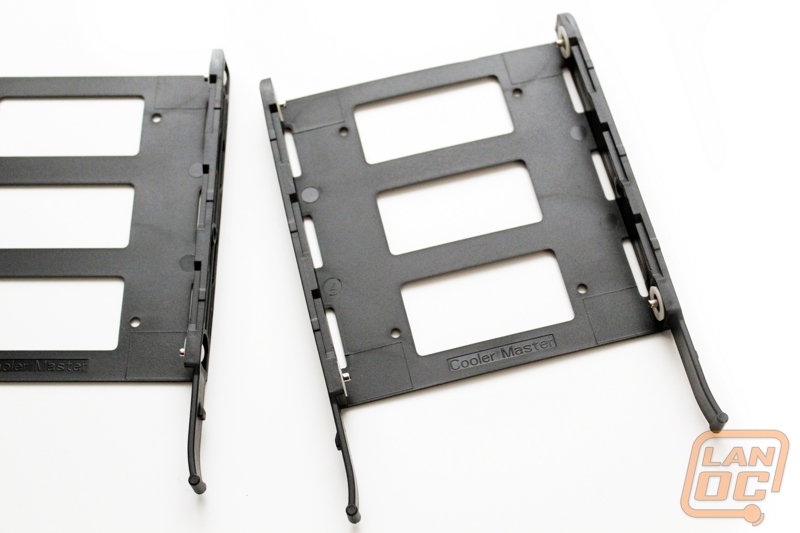
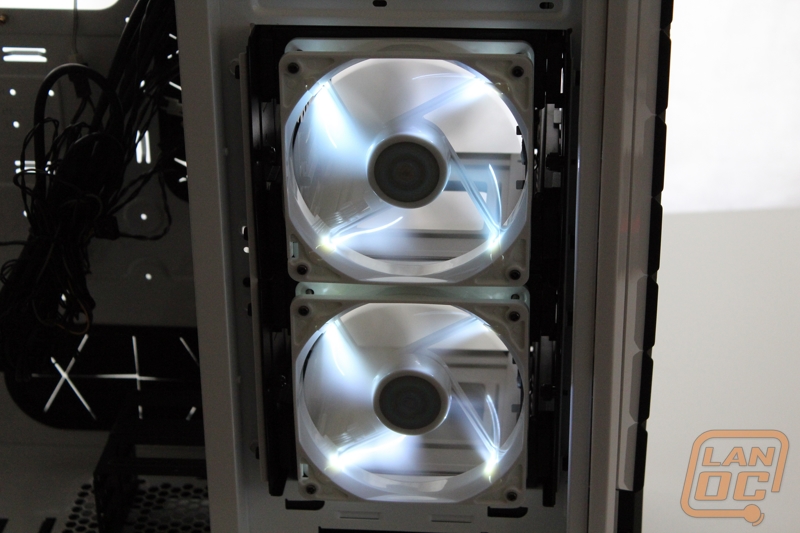
The hard drive bays are equipped with two straight-white 120mm fans also featuring a white LED to shine through the mesh on the front or main side panel. One of the unique features of the Stryker is the hard drive cages, particularly the effect they have on cooling. By default the chassis will ship with fans turned 90 degrees, to intake and exhaust from the sides instead of the traditional draw in from the front. As mentioned, this also adds a nice lighting effect for the side of the case. This setup creates a personal circulation for internal drives, separate from the flow of the rest of the case. While this benefits the drives substantially, it does cut down on the amount of external air that is brought in for the rest of the tower.
Cooler Master has designed the cages so you can rotate them back toward the front in traditional manner, and since the two cages are independent you could even combine the two styles. However, this will also rotate the SATA headers of the hard drives from facing the rear side panel (best for cable management) to being exposed in the main compartment of the Stryker, completely visible from the windowed panel. Still, if you have an empty cage, it may be a good idea to convert it into a front in-take as well.
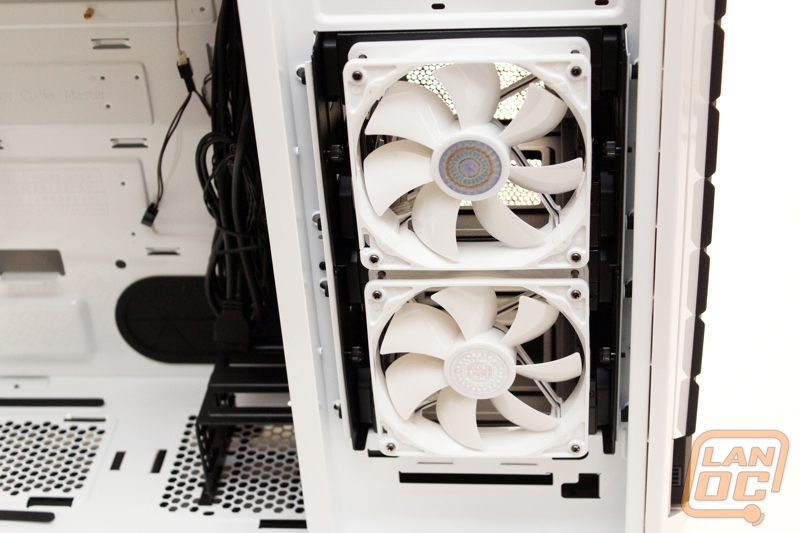
Both 1200mm fans are attached to its own four-bay hard drive cage, which can be pulled out while the fan is attached. The hard drives can be mounted tool-less using rail systems included as accessories.

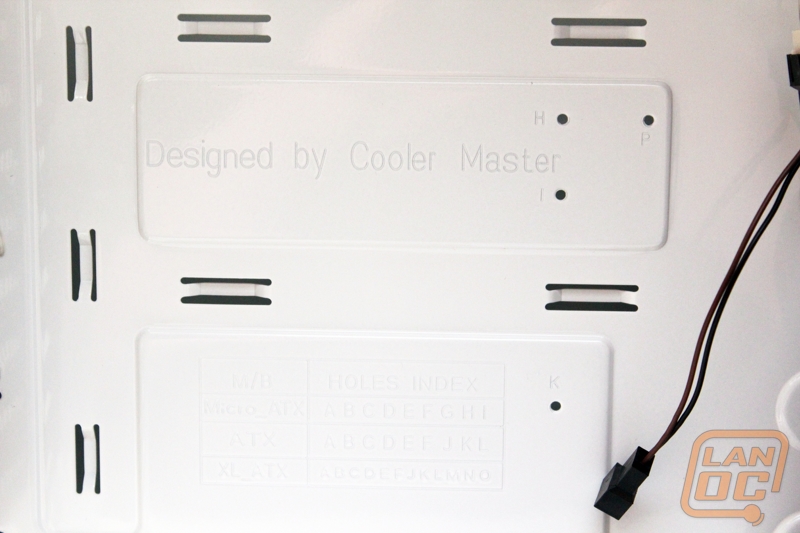
With several grommets and installed fans already routed nicely, cable management in the Stryker shouldn’t be too large a chore. It is becoming more common to leave extra space behind the motherboard tray for cabling, as Cooler Master has done here, scoring around 1.25”.

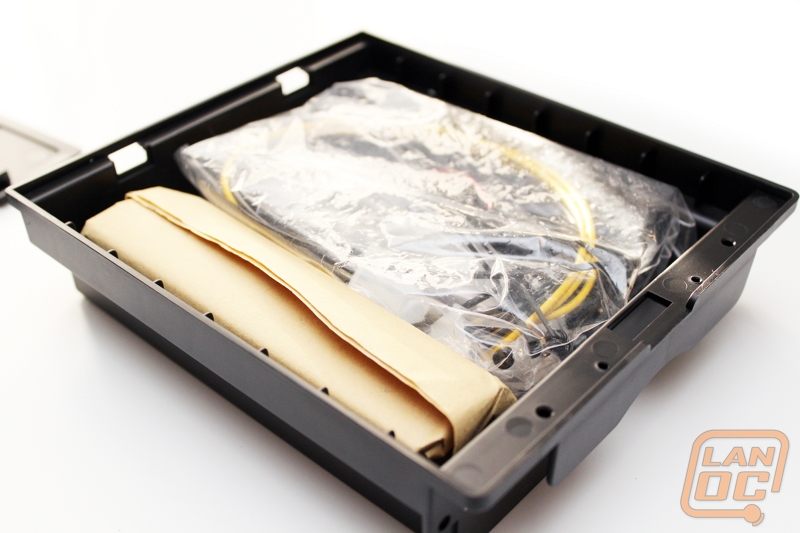
Probably my favorite feature is what Cooler Master calls the ‘internal tool box’, which is where you’ll initially find the included accessories package. Accessible from the front via thumbscrews, this draw finishes the bottom corner of the Stryker with a drawer to store items in. This is a great feature especially for LAN parties.
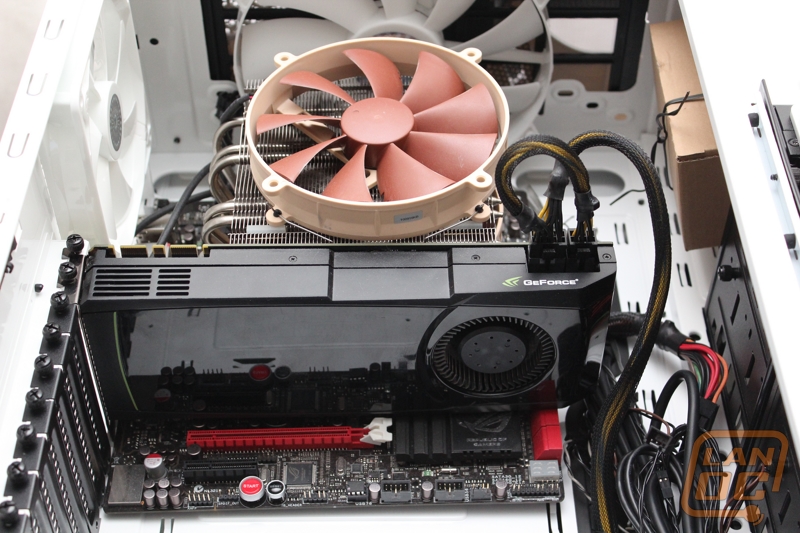
Since the Stryker is a full tower, you would expect support for high-end enthusiast hardware, which Cooler Master has lived up to. Extended components, such as power supplies and video cards, should have no problem fitting in, though with such a nice black and white theme, you may want to put some though into matching colors.
Installation/Performance
Installing and setting up our Micro ATX test components couldn’t have been easier considering the Stryker’s size. We had plenty of room to work with. Even packing our old 1100 watt power supply in was simple and it is slightly larger than what you will see from other power supplies. I did notice that the 2.5 inch drive bays near the power supply area might make things tight if you were working with an extra-long modular power supply, but most won’t have to worry about this at all. Clearance for large video cards is there as well, you have a total of 12.7 inch’s to work with. To put that in perspective, the GTX 680 is 10 inches, and the GTX 690 and HD 7970 are both 11 inches long. I did run into a slight issue where the wires from my CPU fans kept pushing up into the top fan of the case, tucking them away or a zip tie would take care of this issue though and it won’t be an issue for people using a tower style cooler.
Putting SSD’s is easy but installing your 3.5 inch hard drives will require pulling out the hard drive cage first. It’s not hard, but it is another step to take. It’s worth it to have that direct air flow over the hard drives though. Not to mention being able to swap the drive bays to face th side or the front of the case to change your airflow needs. Personally I would face one bay to the side and pack it full of drives and face the second bay to the front for additional airflow for the case. This would prevent any heat from the hard drives from warming up the case as well.
With everything hooked up, I was curious what the case would sound like with the four fans (two fronts, one rear, and one top). All four of the fans were quiet and pushed plenty of air as well. The LED fans used on the hard drive cages looked great lit up as well. I was especially impressed with the Stryker’s control panel up top with everything powered up. It made turning the lighting on and off easy and having a fan controller built into the case is also nice. When you speed up or slow down the fans the case beeps to confirm that you pressed the button as well. With the fans turned up the Stryker has all the cooling performance you will need. That is of course if you turn at least one of the hard drive cages to blow into the case, the way they ship they don’t add to the cooling performance of the case.
As a whole package, I was extremely happy with how easy our loaded up case was to carry around. Generally cases of this size are always a pain to carry around, but a well-placed and well-padded handle made a big difference. What I also liked was the 2.5 inch hot swap. With SSD prices dropping a lot of people are moving up to larger SSD’s, the hot swap is a perfect use for your smaller 30 or 60 gig SSD, you can basically use it as an extremely fast flash drive.
Overall and FV
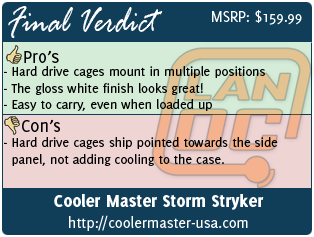
Of all of the cases we have seen from Cooler Master this year, I have been the most impressed with the Stryker. Beyond needed additional space for water cooling, I just can’t imagine what else you might need in a case. Cooler Master put together a gorgeous case packed with features. The 2.5 inch drive hot swap and the built in accessory storage tray for example are small things that you don’t think you will need or use until you have them. You have all of the key features like room for lots of hard drives, plenty of SSD mounts, more than enough room for long video cards, and even USB 3.0 ports on the front I/O. The only complaint I could come up with for the case really was that they ship the case with the hard drive fans facing the side. For those that don’t know they can be moved around, they may miss out on additional cooling (yeah I know it’s a trivial thing to complain about).
I was especially impressed with how easy the handle made carrying this large case around. I love small cases with handles generally; it’s rare to see a full size case with a functional handle. Between that and the built in storage drawer, I can highly recommend this case for LAN party use. Paired up with a carrying bag for your monitor and other goodies, you could carry everything into a LAN in one trip, and maybe even with a hand free if you use a shoulder strap for your carrying bag.