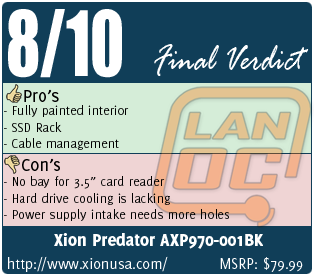
 It's unbelievable how many different cases there are out there. They come in a multitude of shapes, colors, styles, and from countless manufacturers. With that kind of pool to choose from, how does one decide which one to get? There are, of course, a few popular ones that get all the attention, but who wants their computer to look the same as half-a-dozen other computers at the LAN party. You want something unique, something that is a little different than everyone else's. Well, the guys over at Xion have been making cases since 2002, with that in mind. Their latest, the Predator, might just be that little something different you're looking for.
Product Name: Xion Predator AXP970-001BK
Review Sample Provided by: Xion
Review and Pictures by: Chris
Specifications
|
Series :
|
XION Predator Gaming Series
|
|
CASE TYPE
|
ATX Mid Tower Steel Chassis
|
|
Color : |
Black Color
|
|
MATERIAL
|
Black Interior Steel
|
|
With Power Supply : |
Not Included
|
|
Motherboard Compatibility : |
ATX, Micro-ATX, Baby AT
|
|
Expansion |
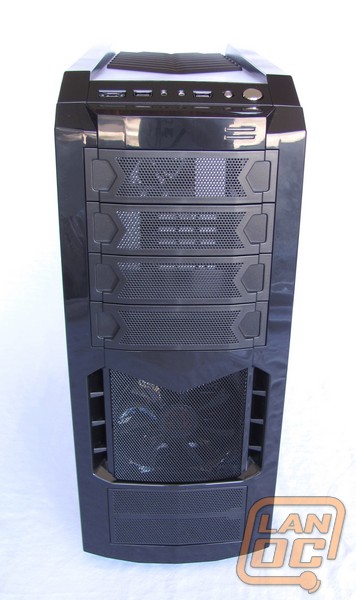
External 5.25" Drive Bays : 4 |
|
Expansion Slots : |
7
|
|
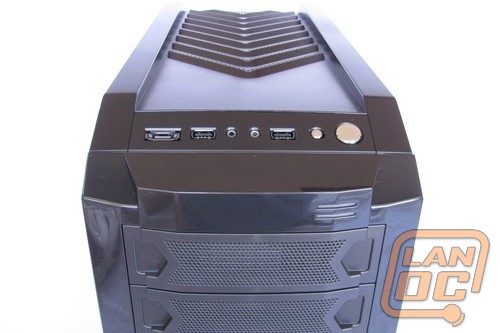
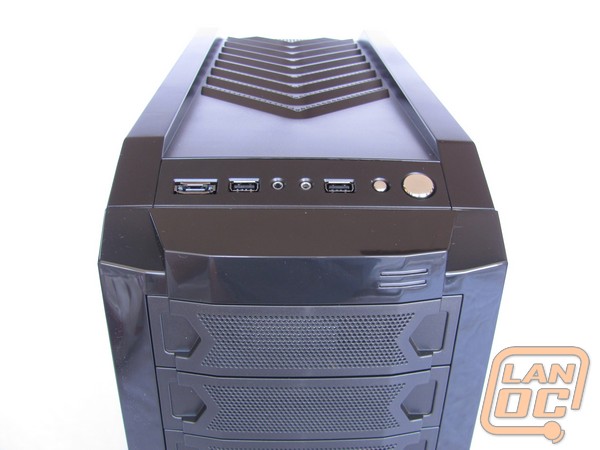
Front Ports : |
eSATA, USB 2.0 x2, 7.1 channels Audio x 2
|
|
Cooling system |
Front, 1 X 120 mm Blue LED Fan (included) |
|
Dimension (D x W x H)
|
8”x 17” x 18.” ( W x H X D )
|
|
Weight
|
16 Lbs ( 7.28kg )
|
Packaging
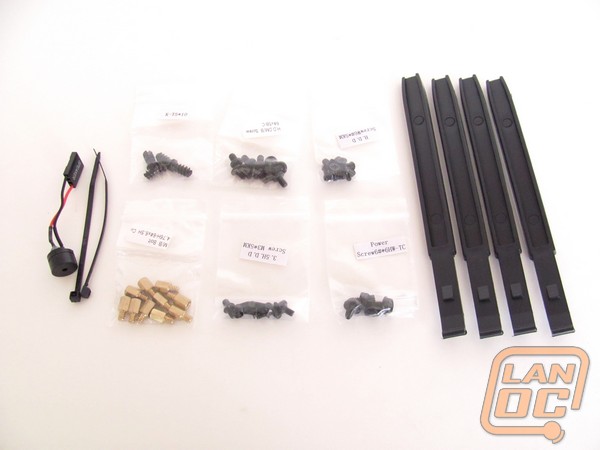
I can't really show you what the packaging looks like today. I think UPS must have torn it up so bad that they threw it away and put it in another box. I supposed I'm lucky that the case got to me at all. This means all I have left for this section is to show you the hardware that came with it, assuming I got all of it. I'm not sure that I did either. When installing all the cards (video, network), I didn't have enough to finish the job. I had to get some screws from my own stash.
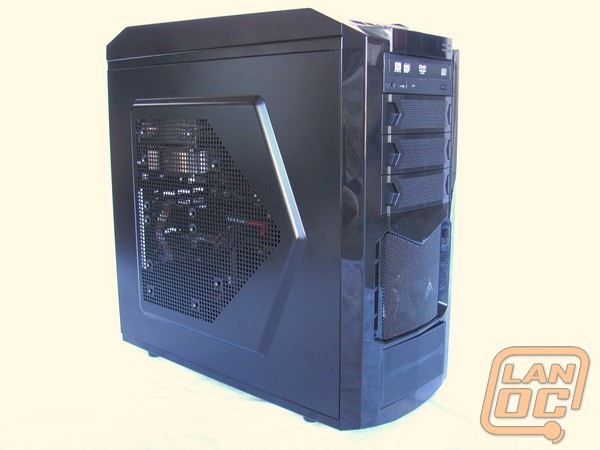
Outside
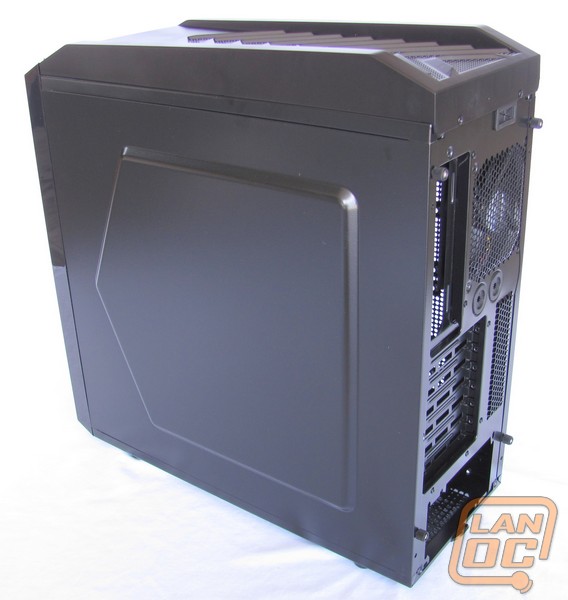
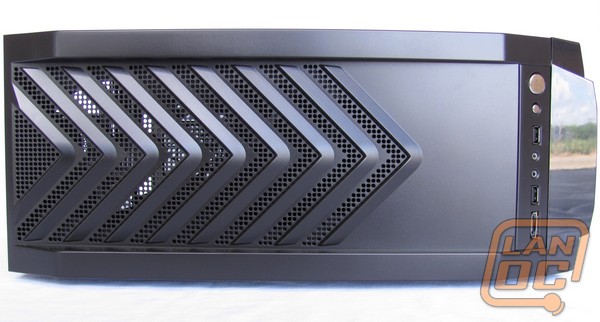
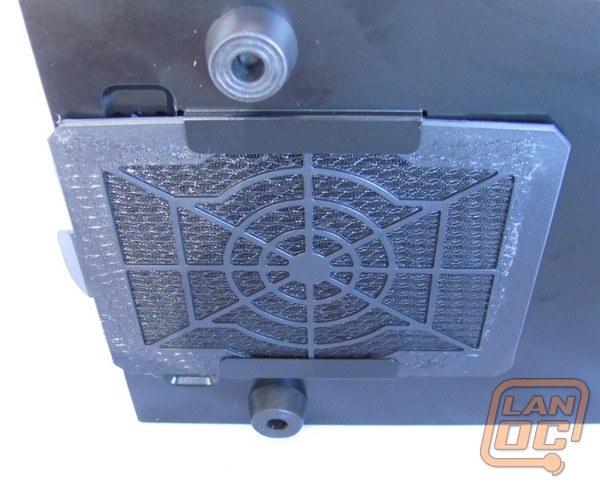
I appreciate it when they give you the option of either putting one big fan or two smaller fans on the side of the case. If you go with one of those tall, tower style heatsinks to cool your CPU, there's isn't room for a fan directly above it. With what Xion has done here, you're still able to put a 120mm fan in the lower position. This still works out nice because it's blowing air right on the graphics card. If you're going with stock or can find a lower profile heatsink, putting a lighted 200mm fan there would look really nice. Just be aware that the fan on the front is blue. That way you can buy one that will match.
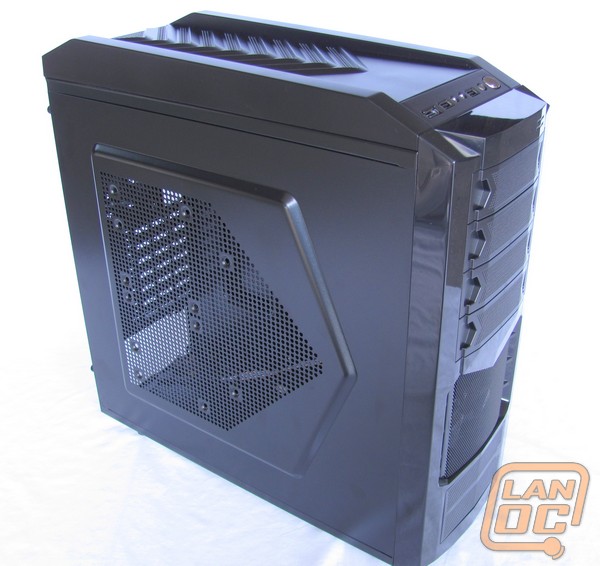
One thing that almost slipped by me at first is the fact that there's no bay for a 3½" media card reader, in the Predator. Sure, no one uses floppy drives anymore, but it sure is nice to be able to pull the memory card from your camera and pop it into your computer. If you planned on using a card reader that you already had, I guess you're out of luck. Your only other option it to get one that fits in a 5¼" bay. If you're buying all new parts you'll want to keep that in mind, so you don't buy the wrong one.
··· ·
·
·
·
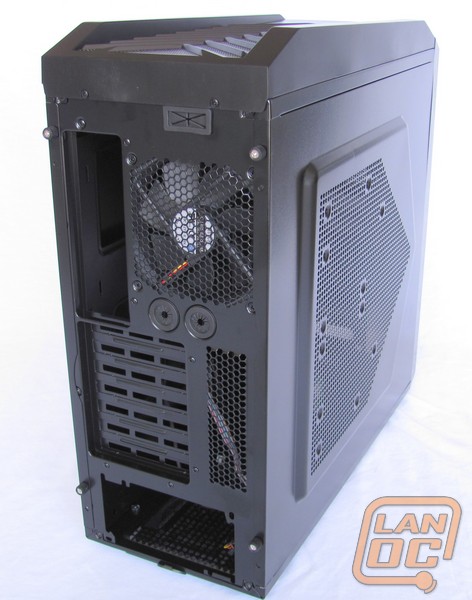
Not only does the top look pretty neat, it should allow for a decent amount of air flow through too. I usually prefer larger holes, they let more air through with less resistance, but this is much better than some of the mesh screens I've seen on other cases I've seen.
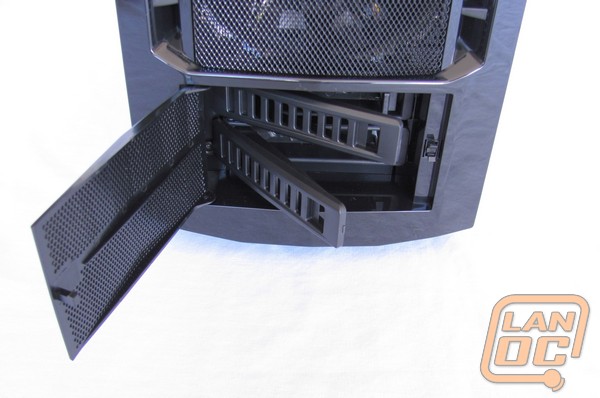
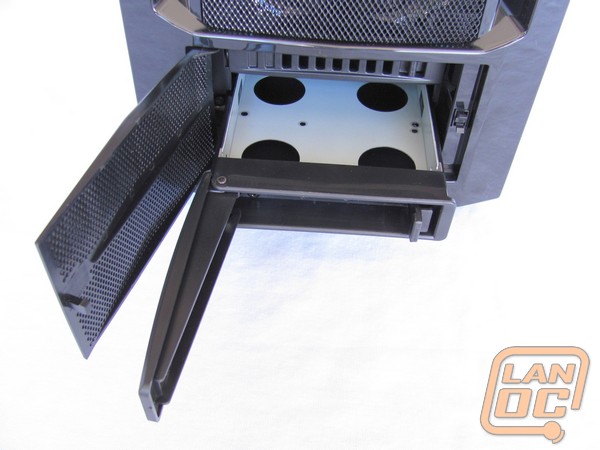
On the bottom-front there is a door that swings open to reveal two removable hot-swap hard drive trays. There's nothing better than being able to jam a drive in your computer while it's still running. What makes it great is if you're tech support for all your friends and family, and one of them brings you their messed up computer. You pull the drive from their computer, drop it in a tray, and slide it in. Now you're able to copy off their important files before you reinstall Windows, without having to open up your own case. What usually happens to me is that everyone else's drives are IDE, so I end up opening my case anyways. I can never win.
Inside
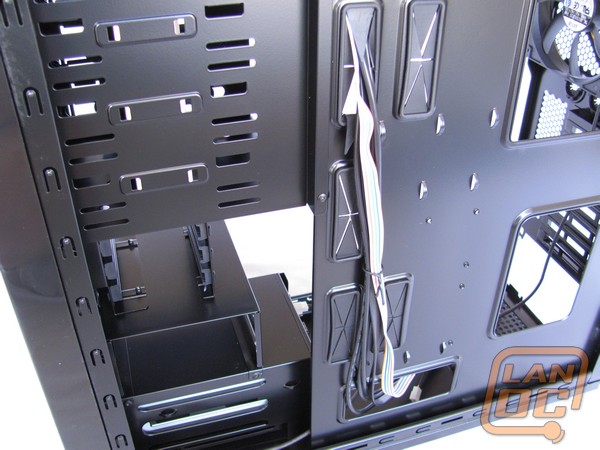
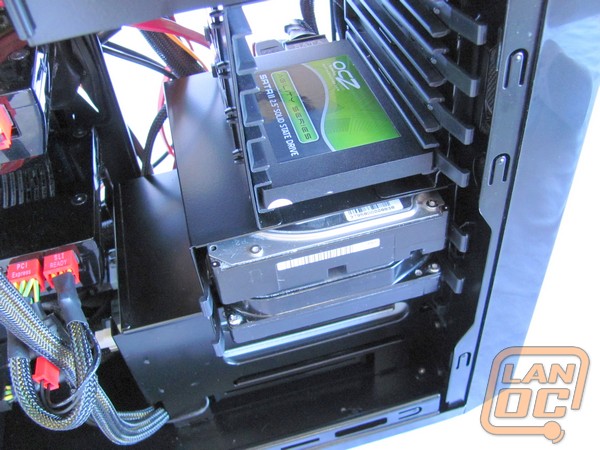
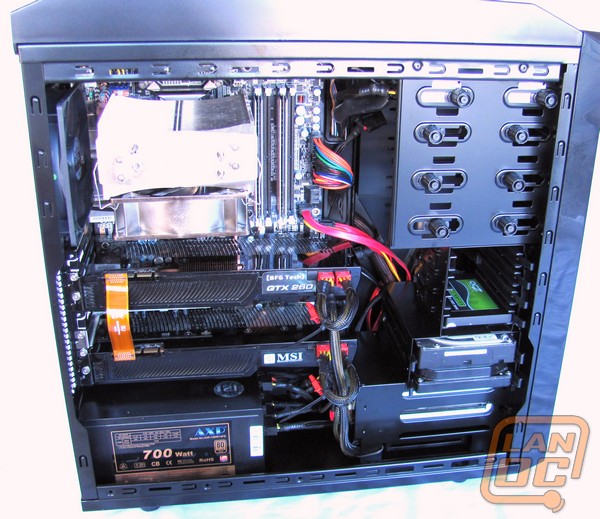
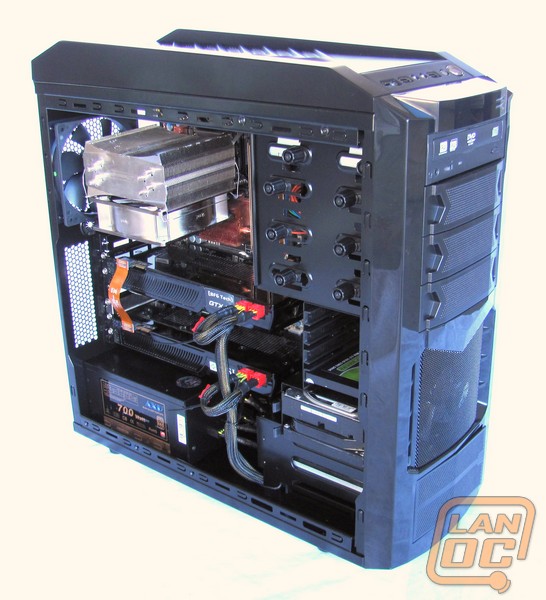
Once you look inside, you'll notice several nice features. First and always at the top of my list is the painted interior. A case looks so much better like this. Next is the inclusion of all the holes with grommets on them, on the motherboard panel. This should make it easier to hide all those unsightly wires from view. Then there's the nicely sized CPU cut-out. Most people think they're never going to need that feature. I bet they're real happy to have it once the need arises. Lastly we have something I haven't come across before, a rack for mounting 3½" hard drives. With the price of SSDs coming down, this will be a feature that everyone will be needing soon, if not right now. There's room for 4 of those bad boys in there.
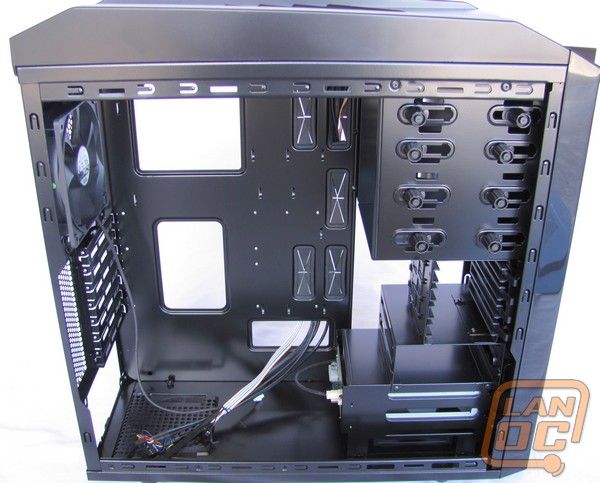
With all the attention that is payed to wire routing, I would have thought there'd be a little larger gap between the side panel and the motherboard panel. The wires start to pile up when you route them all in the same area. Thankfully there's a bulge in the side panel. I'm sure it is meant to compensate for this.
Installation
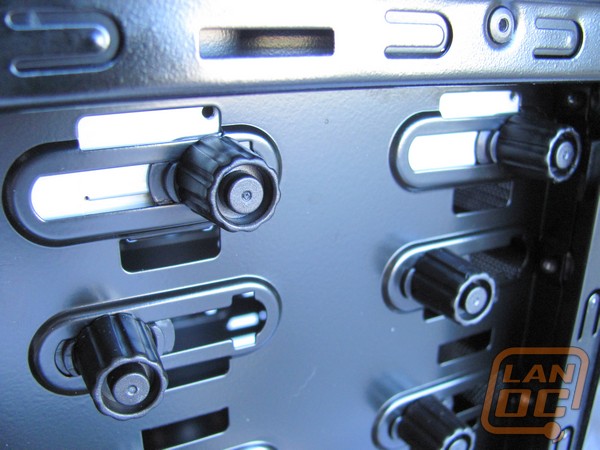
Every company seems to have their own take on tool-less installation. Xion decided to forgo the weird clips and gizmos and went with what works. This is essentially just the screws that you'd normally use, but permanently attached to the case. All you have to do is slide the drive in, line up the screws with the holes, and turn. It may not be as cool looking as that other stuff, but it secures better than anything else. There's not going to be any wiggling drives here.
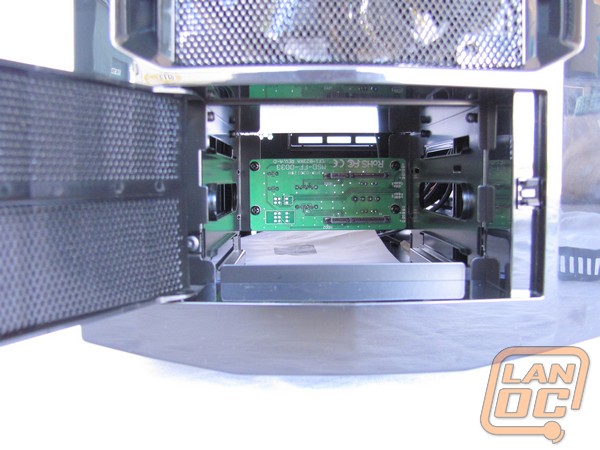
Installing an SSD was so easy. Just slide it in until the clip snaps and you're done. The only thing left to do is plug it in. With this much room for them, you'll be able to really pimp your rig. Ignore the fact that some poeple call RAID 0 "death wish mode" and give it a shot. It will load apps so fast that you won't even notice that iTunes started up and crashed, all in the blink of an eye. The with the way this is set up, this reduces the number of standard 3½" hard drives that are in-line with the front intake fan, down to two. It's just as important to keep the hard drives cool as it is any other part in your computer. If you look closely, the gap between the hard drives is really small too. With the way the whole rack is designed, I'm not even sure how much, if any, of the air from that front fan makes it across the drives and into the case. I've seen cases with sideways mounted drives before. Most had enough holes to still allow a decent amount of air to move across the drives, but this one takes the cake in restricting it. While I'm on the subject, the hot-swap drives in the bottom get zero air flow. I can imagine how much heat would build up in there if you actually put two drives in and left the computer on for a long time. In my opinion, you should save those bays for temporary use only, if you care at all about how hot your drives get.
By removing two screws, the top panel easily comes off. Here you're given space to mount two 120mm fans. Their website also indicates that you can also add a double radiator, should you decide to water cool. I know someone who could have really used that recently. He had to mod his case so he could fit a double radiator in there. Modding is his thing, but it doesn't have to be yours. All you have to do is turn a couple more screws and you're set.
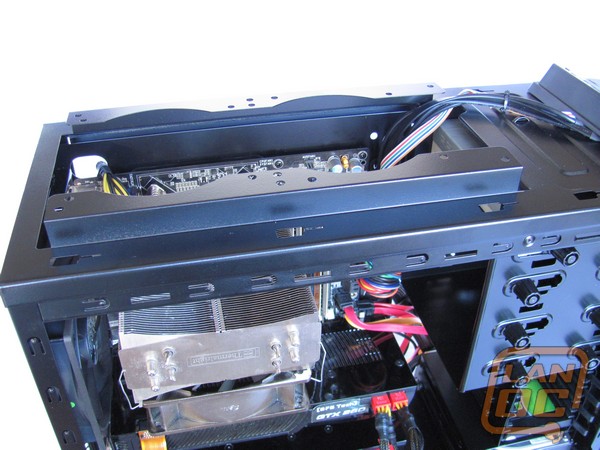
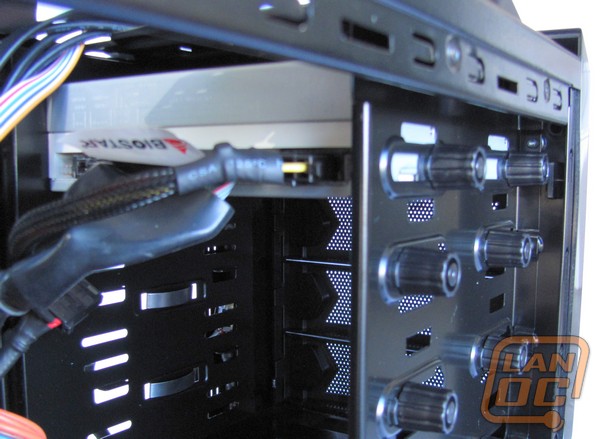
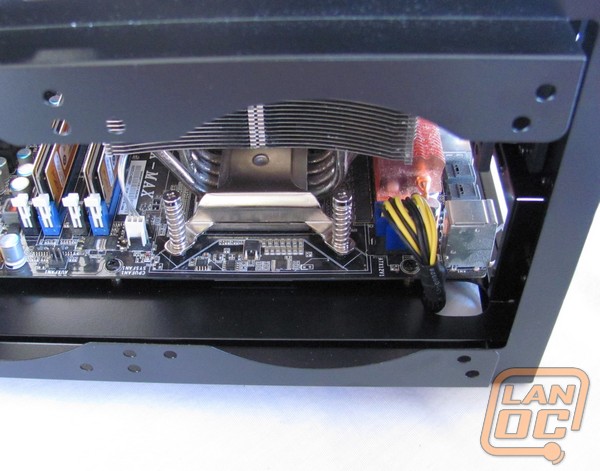
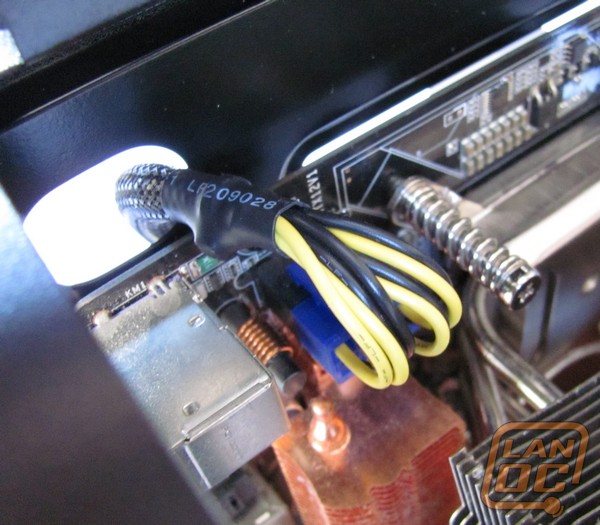
Another nice thing about being able to remove the top is that you've now got easy access to the inside of you PC. Normally I'd have to really squeeze my hand in there to get the heatsink screws started. Having all this room made it a breeze. Another pain that this made easier was connecting the extra motherboard power connector. Not only could I easily get to it, but Xion placed a hole in the motherboard panel to allow you to route the wire around back, out of site.
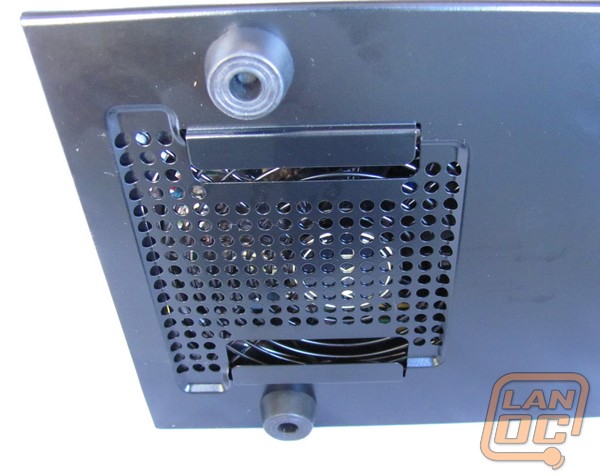
On the underside of the Predator they've included a washable fan filter. This should help keep your power supply cleaner than it would be otherwise. What bothers me is how they skimped on the number of holes. A good portion of the power supply's intake is being blocked. Couple that with the resistance that the filter creates and I'm left wondering how much hotter it's going to run because of it. Since I'm using one of Xion's own power supplies here, it makes you wonder why they didn't notice this themselves. If it were me, I think I'd take a dremel and cut the whole section out, leaving only the filter holders.
The Predator also features one of my pet peeves, and I really wish these companies would stop it. The rear expansion card cut-outs have to be removed by twisting them back and forth until they break off. Unless you're really thinking ahead, it's hard to know which slot your graphics card is going to occupy before you get the motherboard in the case. When I was trying to twist the first one off, it caught on one of the resistors on the motherboard. I about crapped my pants. For a second, I thought it had broken the motherboard. I was releaved when my computer started up, afterwards. Just a warning to you case manufacturers, I'm sending a bill whoever kills my computer because of this !@#$.
Performance
There was plenty of room to fit all my gear in this case. There's even room for bigger cards than the GTX260's I have here. Once I added a couple fans on the top and one on the side, the case as a whole had pretty good air flow. I could feel quite a bit of hot air coming out the top and back of the computer. I'm not too impressed with the cooling of the hard drives, though. The drives in the two top bays weren't hot to the touch, after several hours of use, but the room my computers are in is air conditioned. If you're running without such a nicety, I'm not sure the drives would fair as well.
Overall
Ease of install was the theme with this case. Usually I go on and on talking about how hard it was to do this or that. So in this case, my lack of words about the install is a good thing. Xion has also taken notice that people are using more and more SSDs and included four slots to put them in. Even if you only have one, this case is ideal. You'll be able to drop another one in later, for some RAID action, without a problem. The painted interior rounds everything off by giving it a more finished look. The ability to easily add a couple fans on the top and side is always a welcome feature and helps to keep your CPU and graphics card relatively cool. Too bad a little more attention wasn't paid to keeping the hard drives the same. The Predator was about to become home to my daughter's computer if it weren't for that. She really liked the looks of it. I ended up talked her out of it though. I considered this to be a slight downgrade from her current case. Which is too bad. The Predator has the makings to be excellent, but falls just a hair short. When there's so many options to choose from, a hair is all the reason you need to go with something else.