Performance
While the most important part of the performance for me is sound quality, for a device like the X3 which uses its software for a few features. Before jumping into normal performance testing I wanted to check out what the software has to offer. The X3 uses a program called Sound Blaster Command and it isn’t product-specific. This is the same software that works with the AE-7, AE-5, and G6 as well. I like the integration with other products more than the exclusive software that our X7 uses, even though I can’t imagine you will be using more than one Sound Blaster audio product on the same PC at the same time.
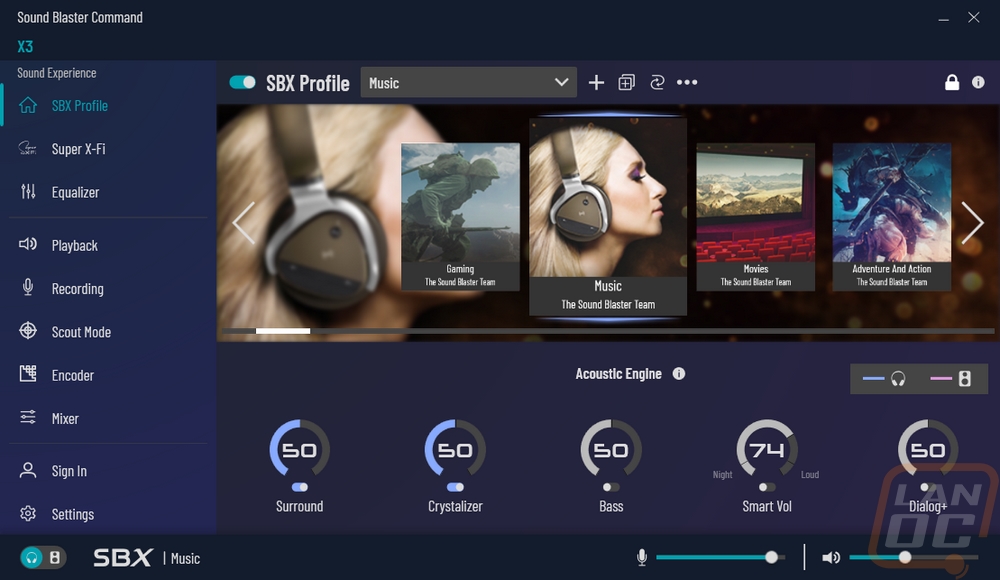
The first page you land on has the model up in the top left corner under the Sound Blaster Command name with a full menu of pages on the left and then down at the bottom there is a quick switch to switch between your headphones and speakers and volume controls for the input and output over on the bottom right. This is also where you can turn on SBX profiles which there is a drop-down list of different options. There are also options to turn on things like crystallizer, surround audio, bass, smart volume, and dialog+. Most of these are available on our X7 as well and are different ways to enhance different audio aspects.
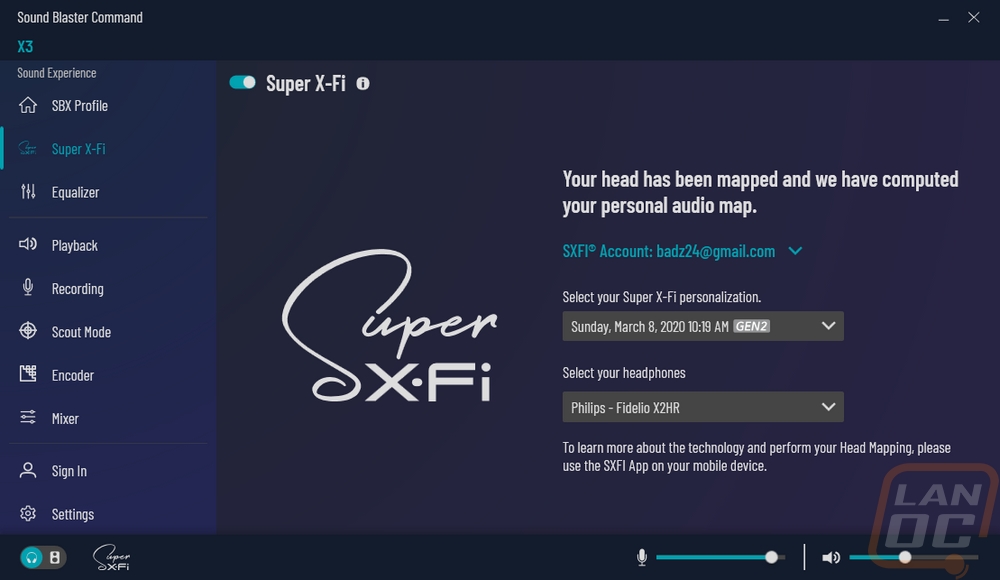
So the Super X-Fi page looks like nothing is going on. But that is because some of the functionality of this feature requires you to use the Super X-Fi app. You HAVE to log in to your account to download your profile. I took a look at this first back when I tested the Creative Outlier Gold In-Ears. The reason the app is required is that in order for the software to work it has to have pictures of your ears and your face to figure out the size of your head and your ear shape to map things out. They also have to have your headphones listed and for me, I had to go with the X2HR’s because the new X3’s weren’t added yet, but the X2 has a similar design.
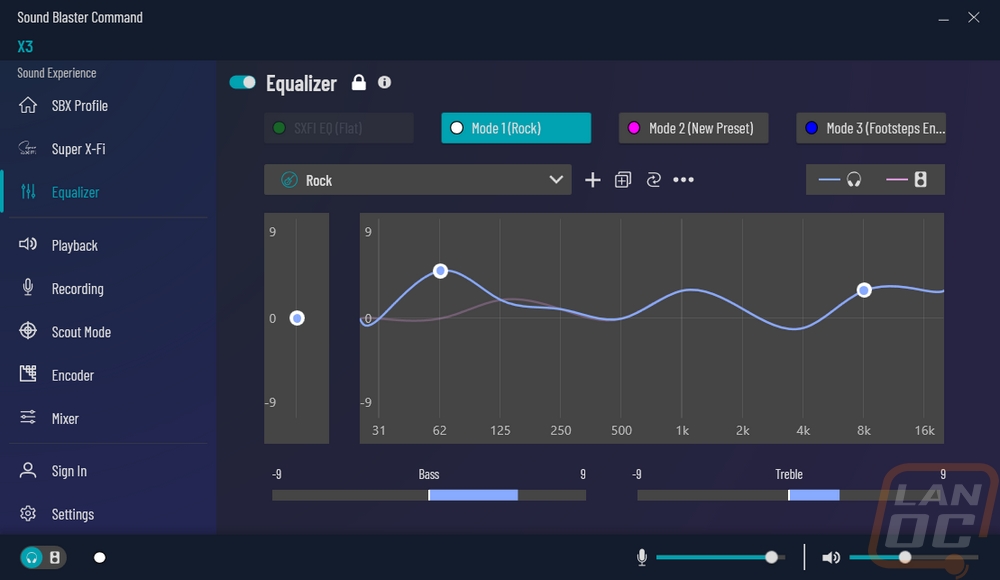
The equalizer page, like the Super X-Fi and the SBX profiles, has an on and off switch right at the top. Below that you can see the three modes and the flat profile that you can switch between. From there you can select a mode and pick from the dropdown menu. You can also make your own EQ profiles. What is interesting here to me is that there is a pink and a blue line, each mode/profile can have a different EQ for your headphones and for the speaker output so you can make each perfect. There are 10 frequencies that you can adjust. They even let you use a pen and draw the profile out and it sets it closest to your drawing for quick setup. The bass and treble options down below just adjust the two dots on the lines which are the standard bass and treble locations.
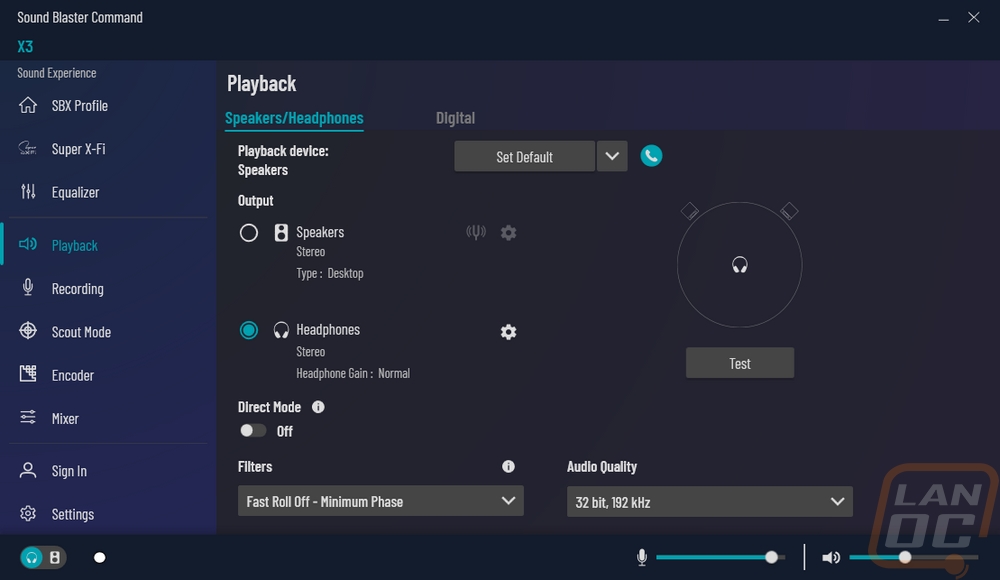
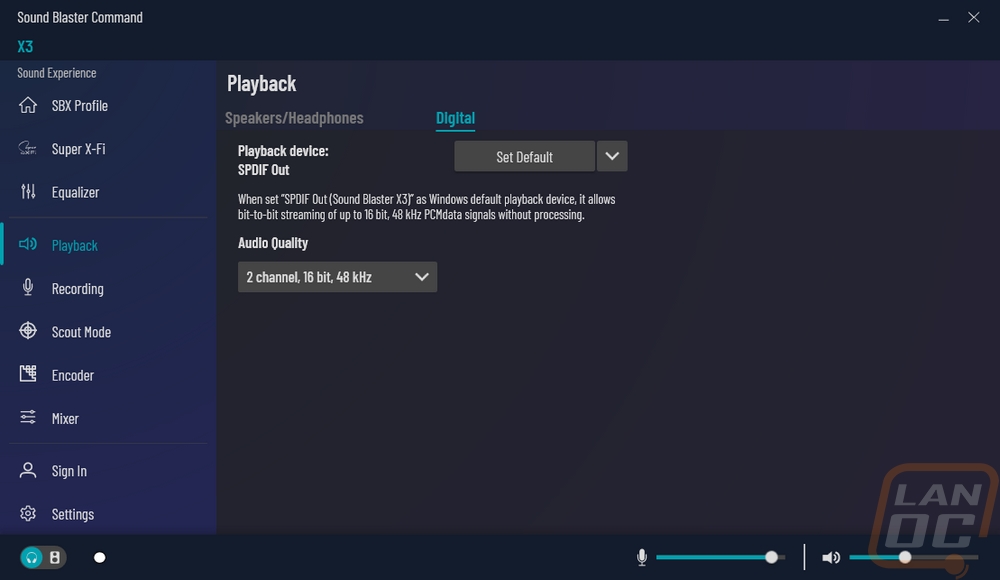
The playback tab splits up your speakers and headphones apart from the digital output that would go to a receiver. You can set a direct mode that forces pure audio, set the DAC audio quality, and set a few basic filters as well. The digital page also has audio quality options as well which goes up to 24 bit 196 kHz or Dolby digital live where the headphones are the main focus with 32 bit at 192 kHz being its highest setting. This changes the format setting from the windows advanced settings to save you from having to dig to it. You can also set the device as default with a click here for everything or just communications, also saving you from the windows settings.
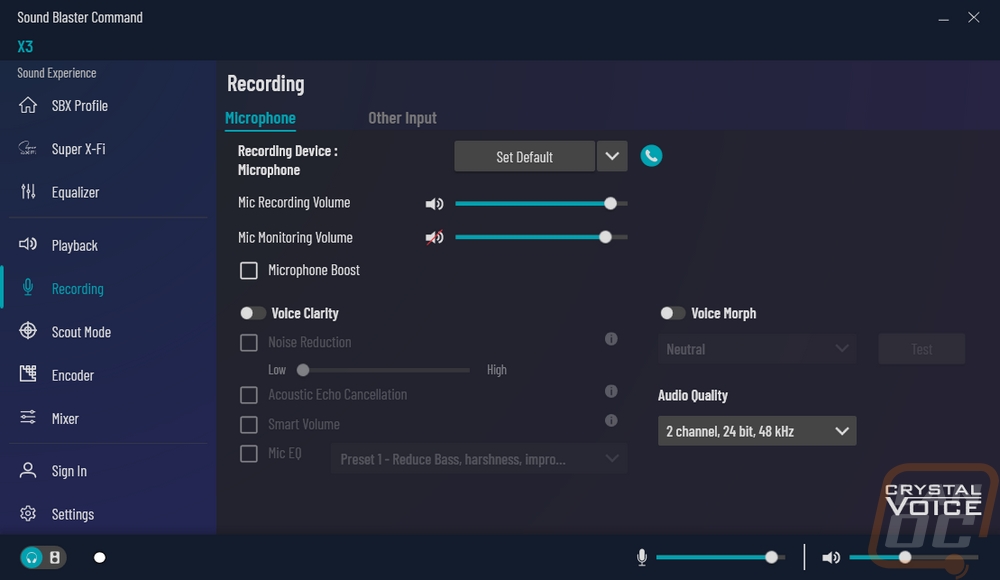
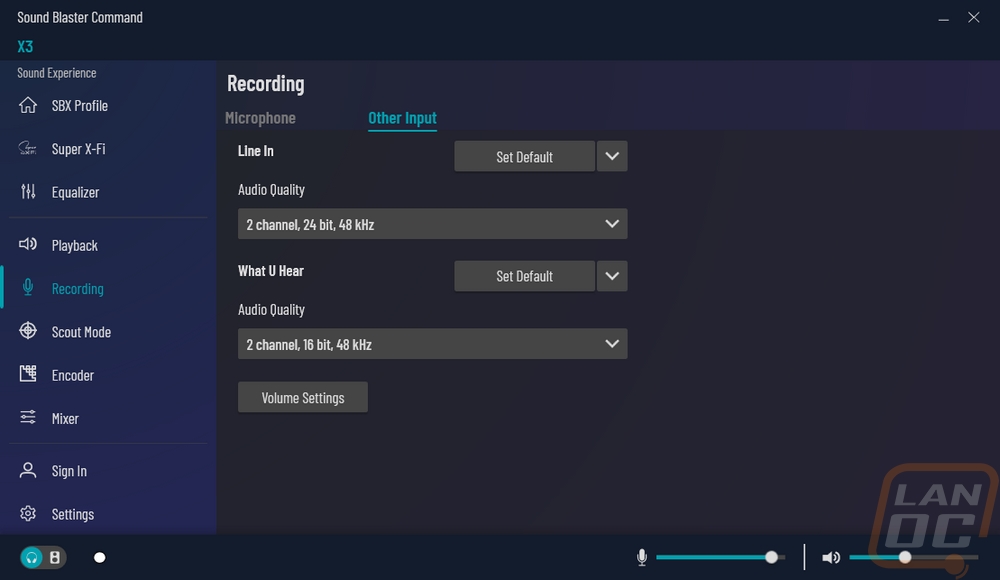
The recording page is similar but for the microphone side of things. Here you can force this to be your windows default and also set the audio quality used. The microphone boost from windows is here as well. Then you can get into volume settings and you have a few options to change your voice sound with the voice clarity options as well as the voice morph which has options like a chipmunk, male, female, elf, etc. The back input also has a page where you can set the quality, open up volume settings, and force it to be your windows default.
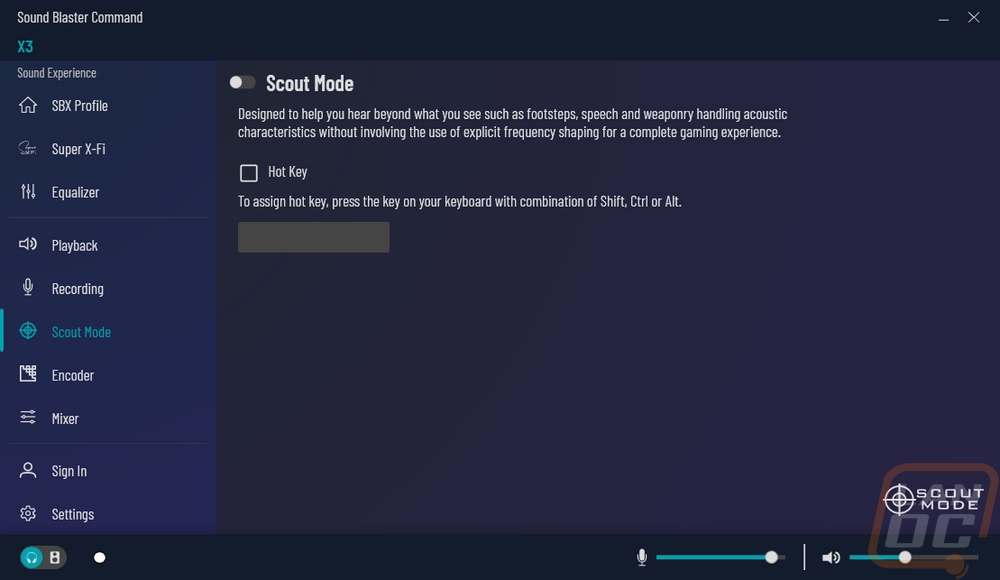
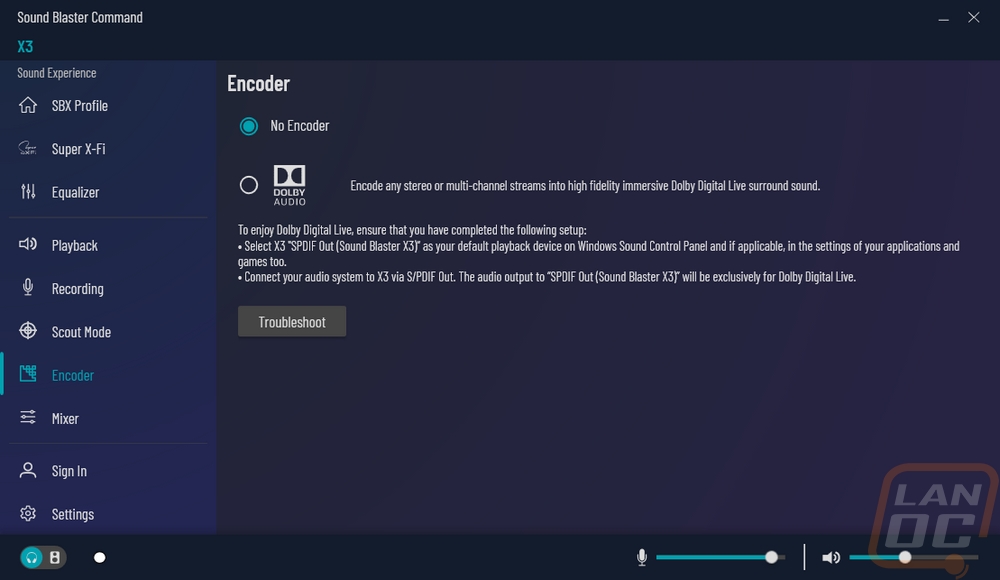
Scout mode is a single option but they give it its own page. They can make some important in game sounds like footsteps and the noise when weapons are handled can be enhanced. This when turned n lets you set a hotkey to turn it on and off. The encoder page is also another single page option lets you turn Dolby Digital Live surround sound on or off.
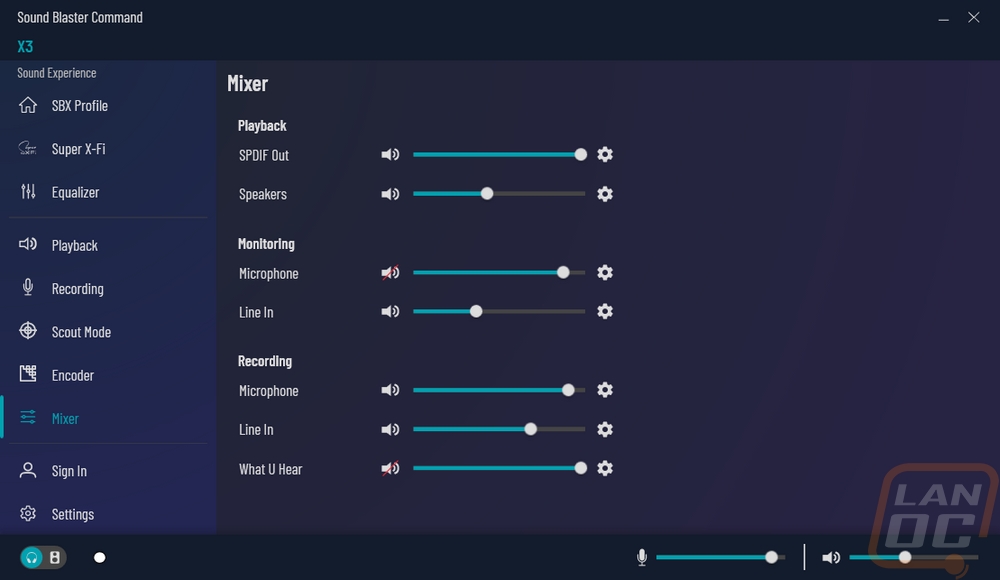
The last page is the mixer. All of these can be found on other pages, but they have put all of the volume settings all on one page. You can mute by clicking on the audio icon on the left. The gear on the right also lets you set the left and right balance on most of the volume sliders and for your speakers, you have the full 8 options for the 7.1 audio as well.
For performance testing, I paired the X3 up with the Philips Fidelio X3 headphones that I recently reviewed. I had been using them with the X7, so a high-quality DAC wasn’t an issue from the beginning. But I was curious what the X3 might add and was hoping it would at least keep up with X7 in audio performance. Testing included a lot of testing in music, some TV shows, and movie viewing, and gaming as well.
Specification wise the X3 does improve on things from the X7. Going from a 24-bit controller at 192 kHz to the 32-bit at 192 kHz. The headphone amp still supports 32–600Ω Impedance headphones as well and enough power with 1.2V RMS @ 32Ω and going up to 2.9V RMS @ 600Ω. What does that translate to actual performance? Well out of the box, things sound really good. The gap between the X7 and the X3 isn’t much, but the gap between them and most other options, especially onboard audio which is where I see a lot of people would be using an X3, to replace their built-in option.
Diving into the software, I was really curious if some of the options would be able to improve on the overall experience. The base performance is great, especially when paired with great headphones. But what did Super X-Fi add? Well, the short version is that it gives a multi-speaker experience out of the two speakers in your headphones and it does that without a doubt. Turning it on and closing your eyes on some songs and it feels like you are right there in the room with them playing in front of you. Of course, there are some songs that this effect goes wrong and doesn’t work as well. Overall though the experience is surprising, this is a LOT better than your standard surround sound effect. The best way I can describe it is that it moves the audio to in front of you where the basic sound is just at your ears. It also opens up the sound stage, similar to how an open-air headphone does compared to a closed earcup.
The equalizer profiles in the software were important when tuning different audio types. Specifically, I used this to add a little more bass when listening to rap and rock and roll but I could flip back to a flat profile which is what I prefer with most everything else. The SBX profiles were a similar option. Turning the bass up on here worked well. But I mostly just used these when I wanted to really to jam out and needed more volume, the smart volume does a great job of turning things up when you set it to loud.
