Photos and Features
I touched on it a little in the section about 3d printers but if you didn’t catch that SeeMeCNC has been making in the 3d printer market now for five years and most of that time their printers have been deltas. The Eris isn’t any different. Well it is very different, but it’s still a delta! That said no one has ever tried to make a significantly smaller Delta design. Most have been based on the Rostock design with different variations. Now in the Cartesian printer market there is a wide variety of small format printers. SeeMeCNC has been working on the Eris design for a long time, I mean they were showing off photos that looked to be late in the development process back in December of 2014. So you can imagine just how happy they are to finally bring the Eris to market.
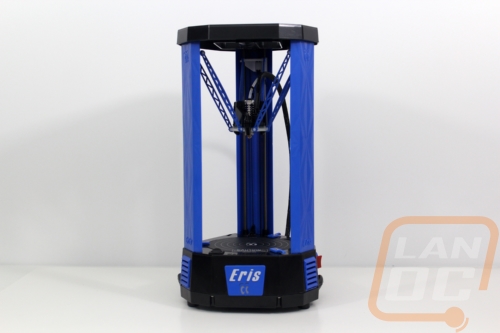
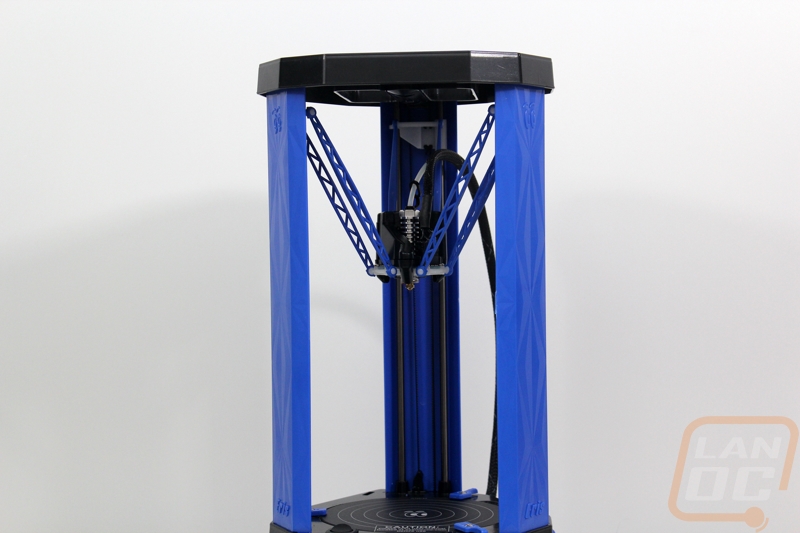
The Eris shares a lot with those 2014 photos but of course you can see that things have been tweaked and worked on at well. The overall design is black and blue and unlike SeeMeCNC’s other printers a good portion of the printer Is injection molded plastic. I have to be specific there because there are 3d printers that come with plastic parts that have been printed. There obviously isn’t anything wrong with that, but going as far as to injection mold everything does improve the overall build quality and fit and finish. The design is a little different because everything is housed in the base where the Rostock Max has a top mounted extruder and end stop switches for each post.
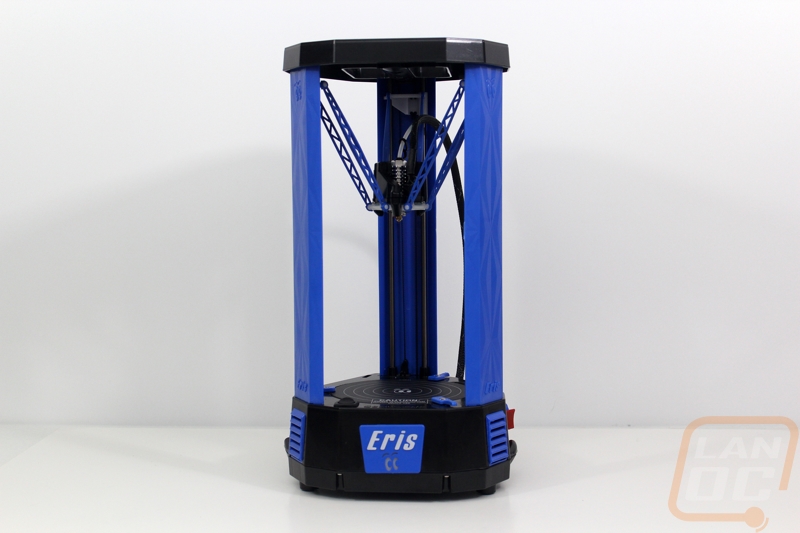
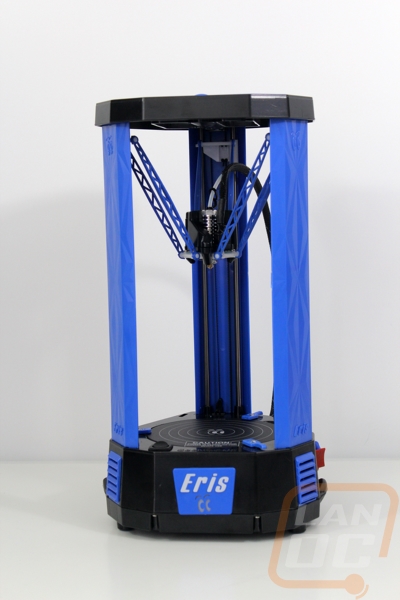
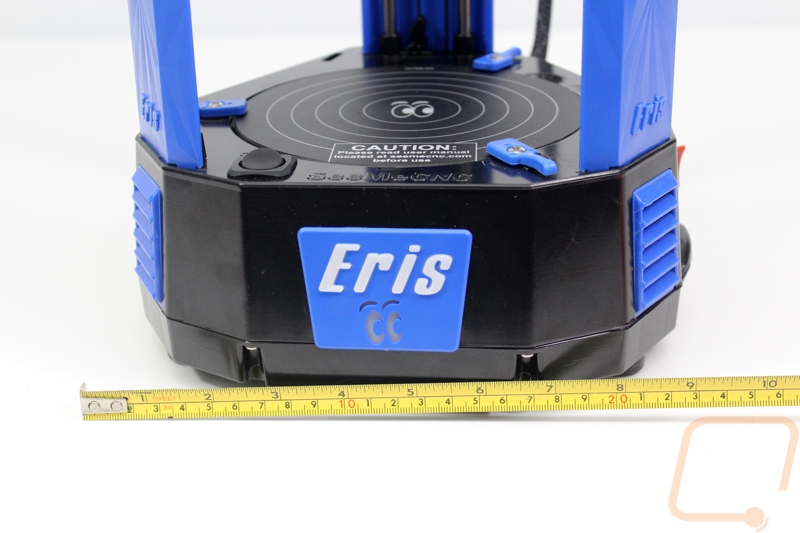
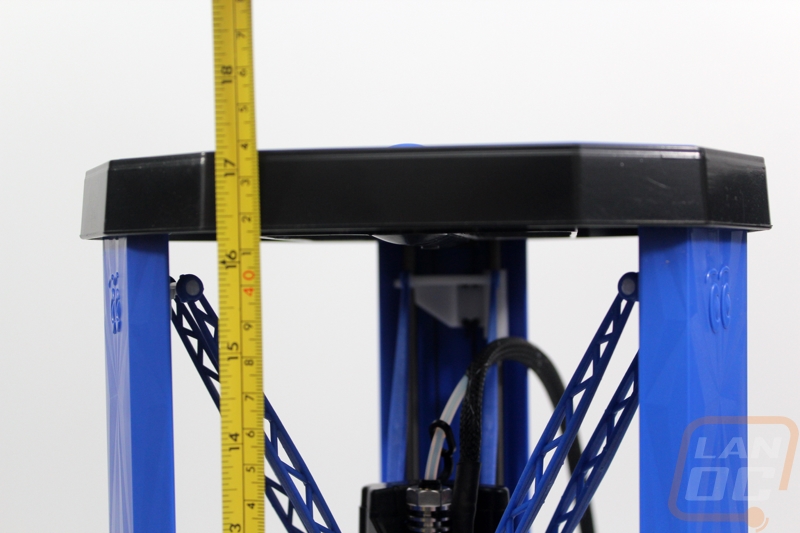
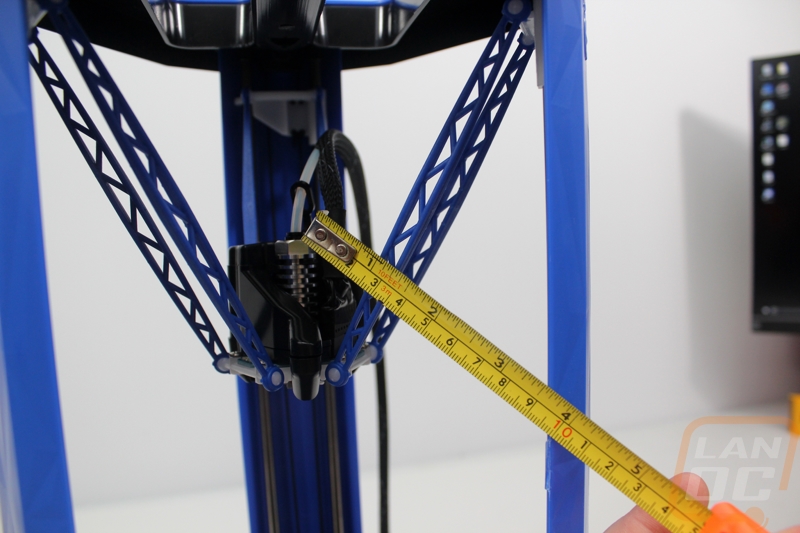
The Eris is 17 inches tall and about 9 inches wide at its widest point. The overall footprint is more like a triangle than a circle. This is because it has to fit its three poles as well as the circular build plate.
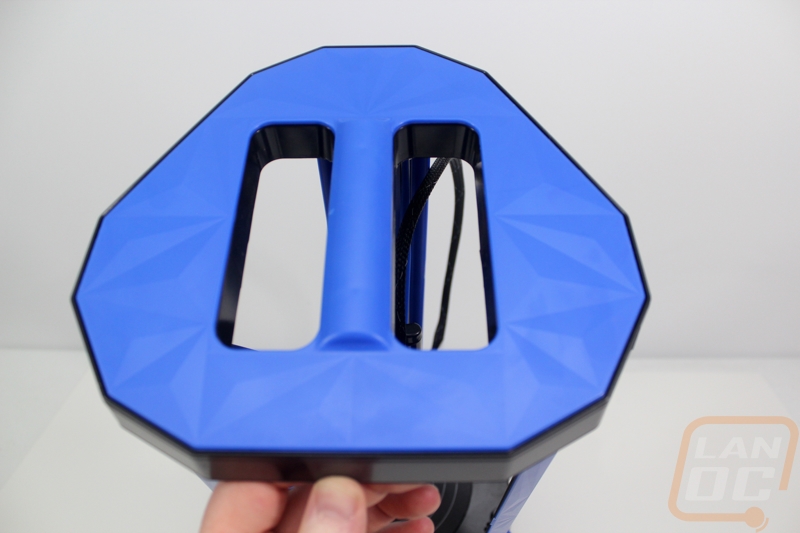
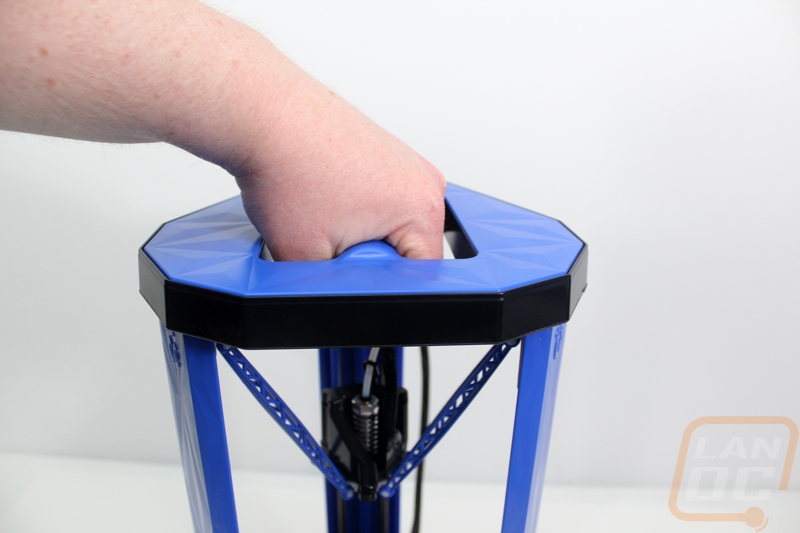
Given the Eris’s already small footprint and small size I was really excited that it has a built in handle. The top panel has an angular finish but the handle is round and sticks up higher than the rest of the top panel to give it enough bulk to make it easy to grip. It fit my large hands just as well as it did my wife’s tiny hands. So you might be asking whats the point of a handle on a 3d printer. Well it really depends on how you plan on using it. At minimum having a handle helped to make it quick and easy to get out of the box. It also makes moving it around your office or house simple, not to mention if you ever move. But it really comes into its own for people and companies who sometimes use 3d printers at events. I know I’ve been to a few events and have seen a big printer setup printing small trinkets to get your attention and have to stop by and talk to them. A quick google search for portable 3d printer will bring you back a lot of results for large printers with handles on both sides, printers that require setup, and a few vulnerable open designs that would quickly get banged around being moved to much. The Eris’s design isn’t completely enclosed but the casing does protect it well.
So SeeMeCNC’s Rostock based printers all have a smart control panel down on the front with a controller knob and an LCD screen. The Eris isn’t just designed to be portable, it was also designed to be an affordable delta and to do that they did drop the controller. When talking with them it does sound like they are looking at the possibility of adding another model down the road with a smart controller and a heated bed. That said for now the Eris is locked to your computer or laptop. In place of the smart controller they designed a nice blue insert that has a transparent white Eris logo and the SeeMeCNC eyes. This has blue backlighting to light up the transparent parts when the Eris is powered on as well.

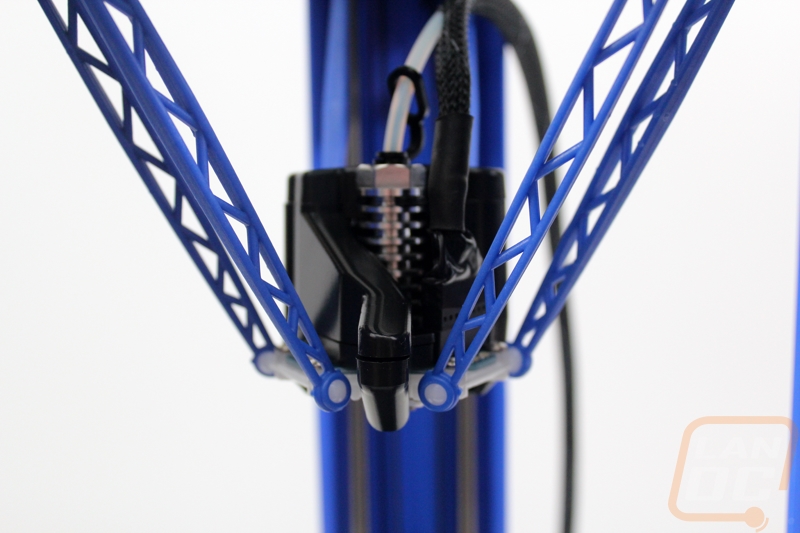
So they went with injection molded arms to hold the hot end up. Specifically, there are six arms. Frankly when you first see them they are very underwhelming, there is a reason people like to go with carbon arms on their deltas, and that is because any flexibility in the arms will quickly translate right into poor quality prints. The arms on their wider side are well under a half inch thick but I was very surprised at just how strong they are. SeeMeCNC went with a stronger plastic here, one with fibers. So while I know the first impression is that you are going to want to replace these, don’t judge a book by its cover and wait and feel them in person.
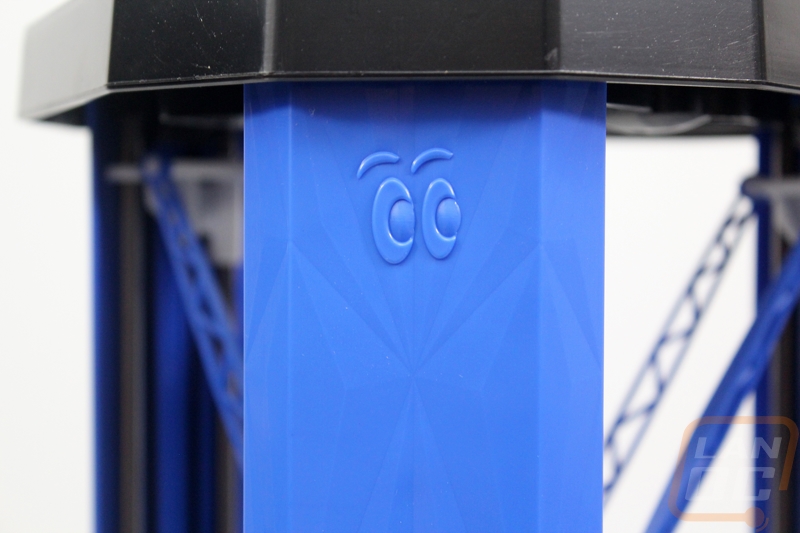
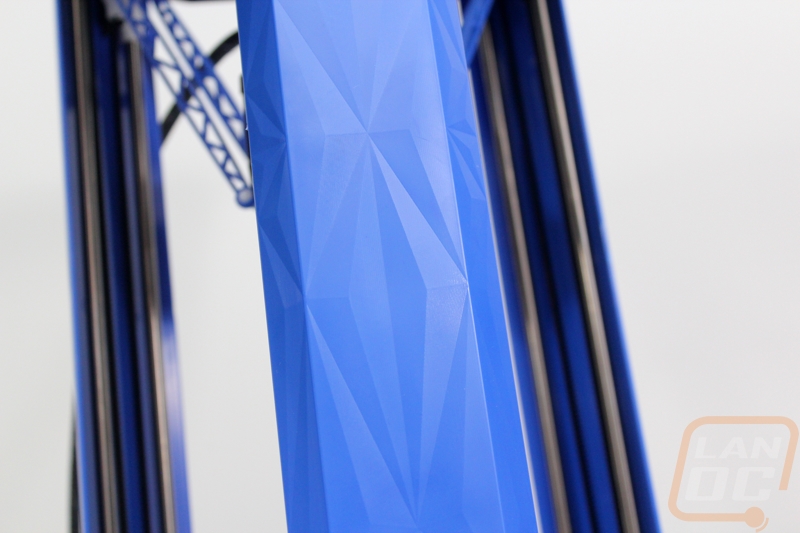
So the plastic casing for he main three posts has the same angular design on it that we found on the top. You can hardly even feel the difference in angles when rubbing your hand across them and they were even a little difficult to capture in photographs. That said I love the touch of styling. Also up on the top the SeeMeCNC eyes are molded in as well.
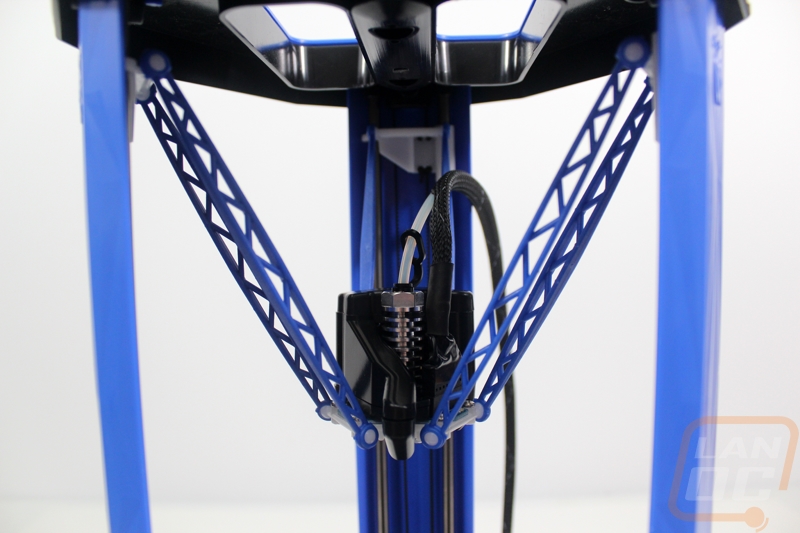
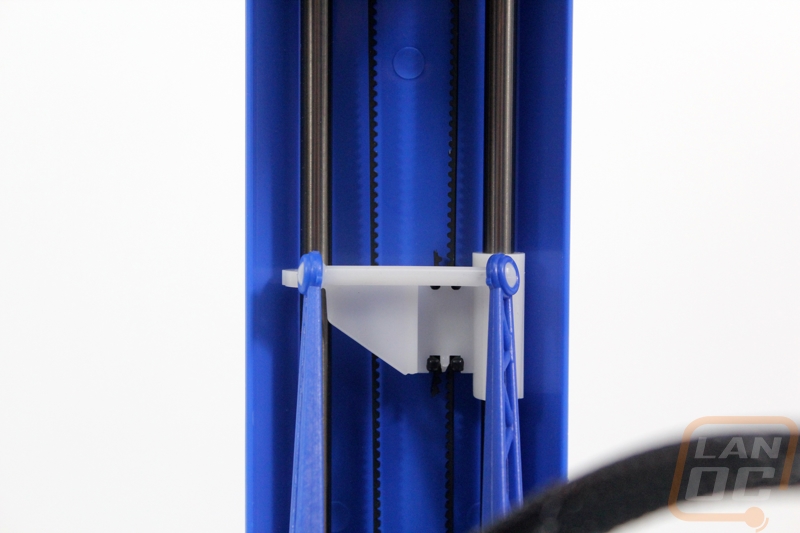
So with the three posts that form the main structure of the printer. Behind the fancy panels I spoke about above. Each post actually consists of two metal rods. These rods give the printer most of its structure and they also double as the tracks for each arm. The small arms attach to a white assembly that attaches to both rods and also has a small clip attached to it and the belt that runs from the bottom where the stepper motors are up to the top of the printer. The belt helps guide the arms up and down and the assembly that attaches to the rods is self-lubricating and fits tightly to make sure you get a good print. The two arms snap on to ball joint, this should make replacement easy should that ever become an issue.
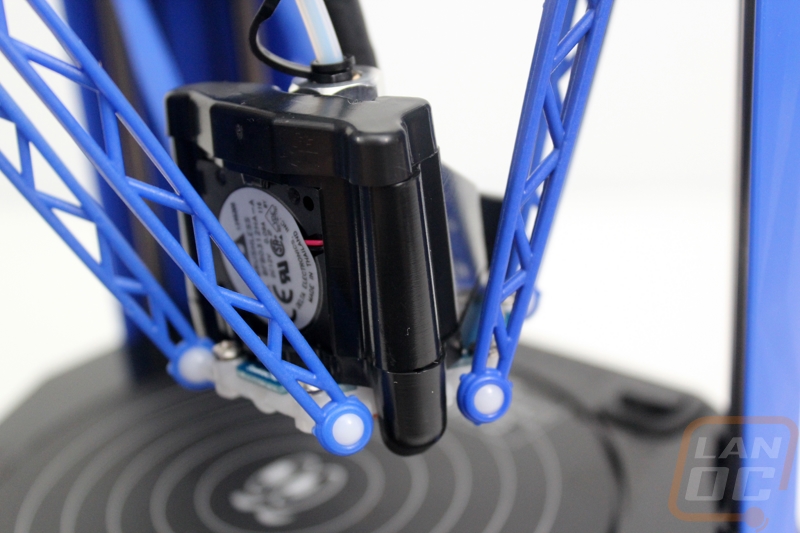
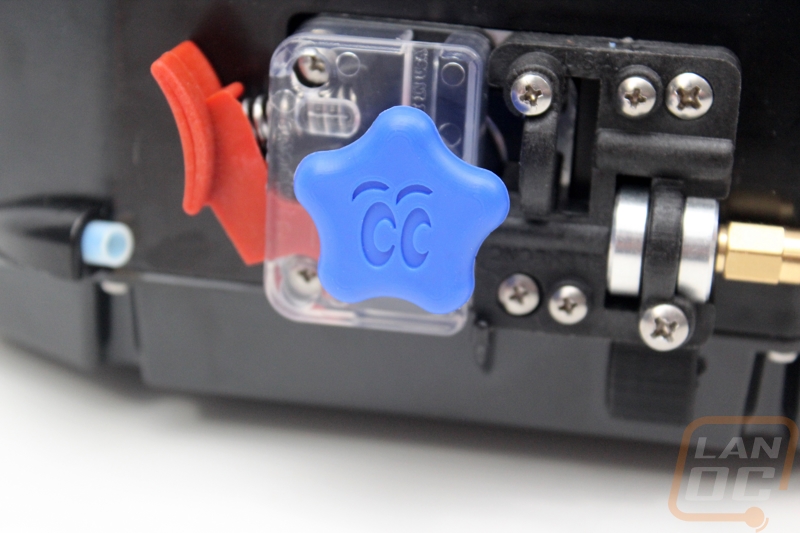
For the hotend on the Eris SeeMeCNC really stepped up their game. For starters the main part of the hotend is all metal. This means from the nozzle, the heat break, up into the heatsink it’s all metal. Its everything else that really sets the HE280 apart though. For starters right at the heat break is a triangle shaped PCB. The Eris is designed to auto calibrate and SeeMeCNC did this is a unique way. On the PCB they integrated a cell phone style accelerometer. In the past auto calibration has been done with moving parts on the hot end or switches down on the print surface. This accelerometer allows the hot end to bump the surface and know exactly where it is at. The PCB also has status indicators on it to show when the hot end is heating up, when you are turned on, and when the fans are running. All of the power and controls run through the unplugable connection up on top and then on the underside the resister and even an LED light to light up your print area are all connected to the PCB. If you look close you can also see that they left a pair of connections for anyone looking to add another fan as well.


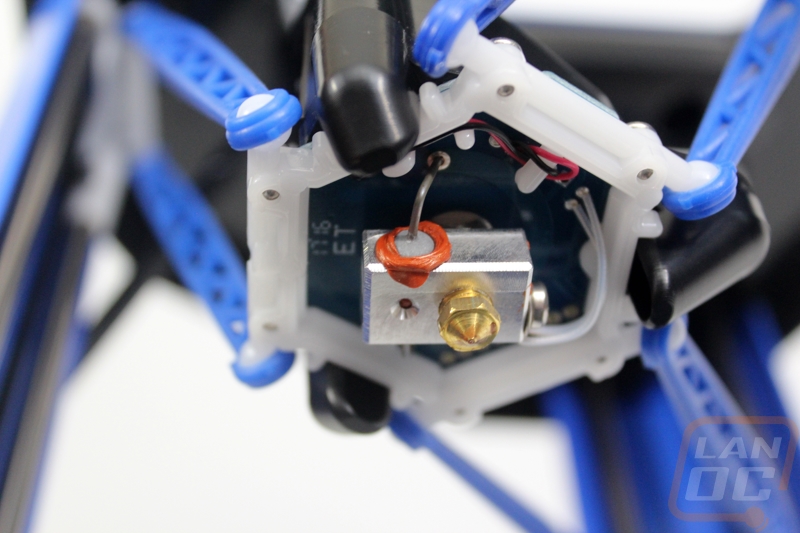
Up on top around the hot end they designed a fan shroud that is able to both cool the heatsink and also output on all three sides of the hot end to blow air on your part as you print. On the back is a 30mm fan to push air into the shroud. Up on top the cap can actually rotate out of the way if you don’t want air blowing on your print, it will blow everything out the top. The Eris is designed mainly for PLA use but its clear they have kept in mind other materials like ABS with this design.
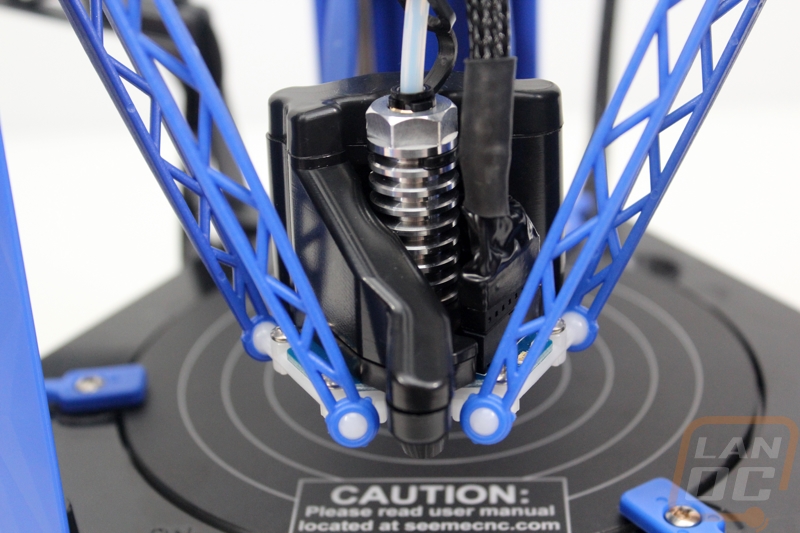
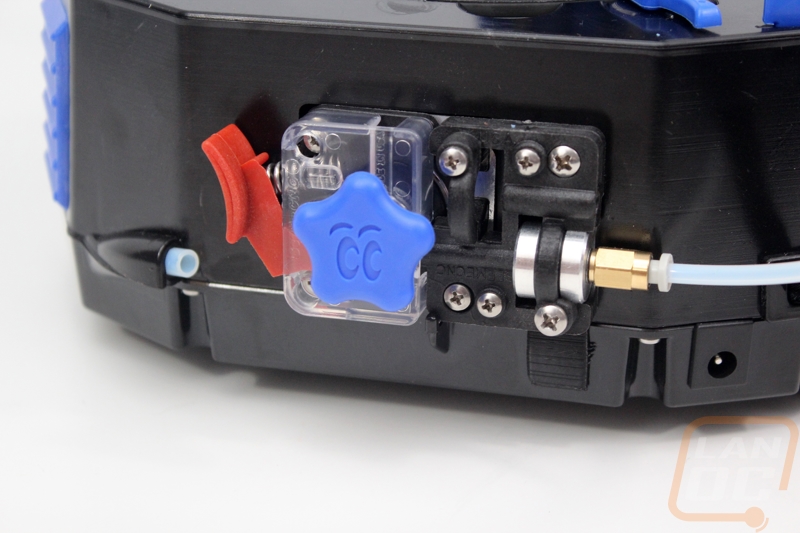
So in order to get your filament to the hot end you are going to need an extruder. For the Eris the extruder is down on the side of the printer. SeeMeCNC went with their standard EZStruder kit. This design runs a stepper motor inside of the base and then on the outside the EZStruder has the gear with a bearing above it to push the filament into the gear. The bearing is attached to the red quick release button, this way you can push the button and run filament up quickly, making color swaps easy. The Eris uses PTFE (Teflon) tubing on both sides of the EZStruder. They have a tube that goes from the opposite side of the printer where the spool hands that comes out just before the EZStruder and then PTFE that runs from the extruder output up through braided sleeving alongside of the power cable for the hot end. The PTFE tubing then runs down into the heatsink all the way past the heat break. On the EZStruder they also designed a new knob for when you need to manually spin it. The new knob matches the blue them and has the SeeMeCNC eyes on it and looks great.
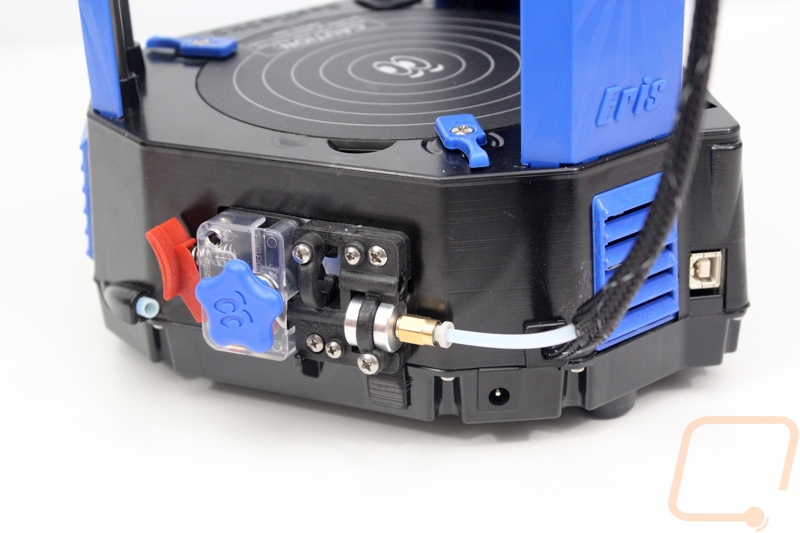
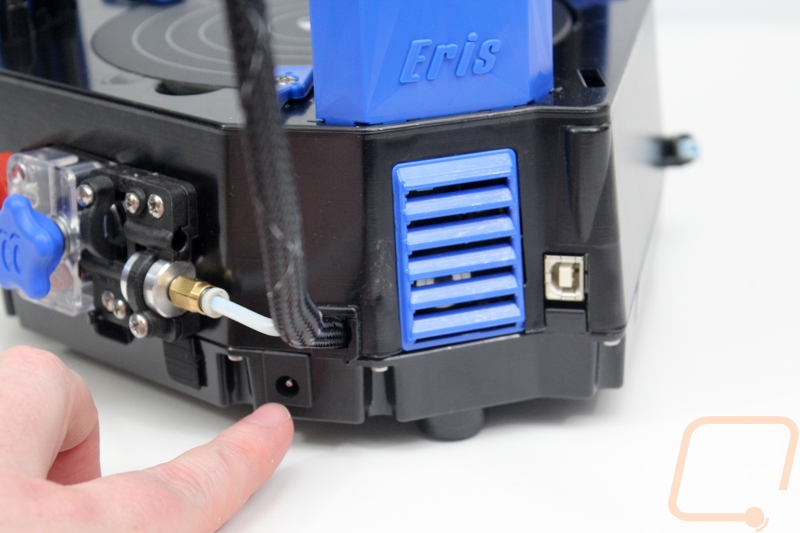
For external connections the Eris actually only has two and they are both back in the back corner. You have a small power plug for the laptop style power adapter and then a USB connection.

The filament spool holder comes detached but latches on over on the left side. If you look closely you can see the PTFE tubing that I mentioned earlier as well where the filament feeds into to go over to the extruder.

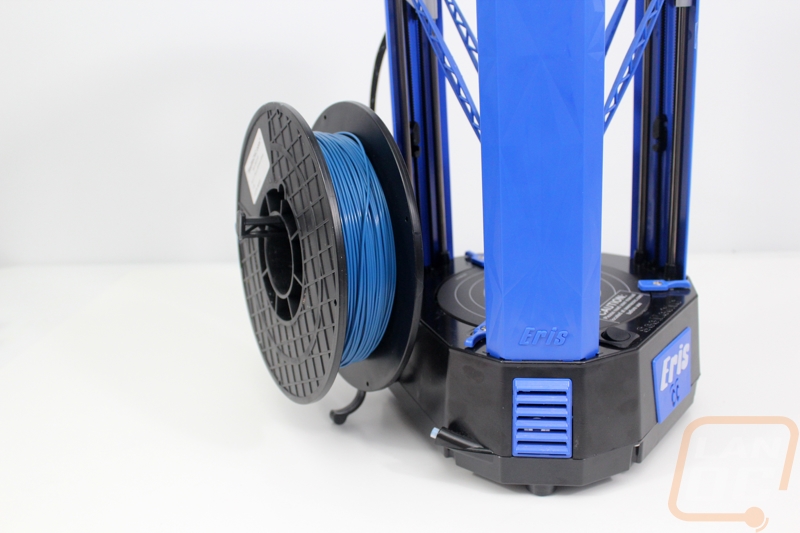
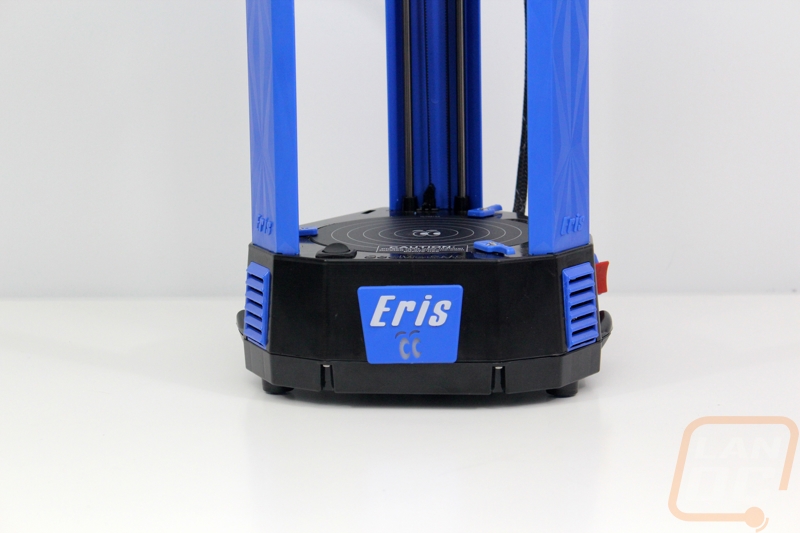
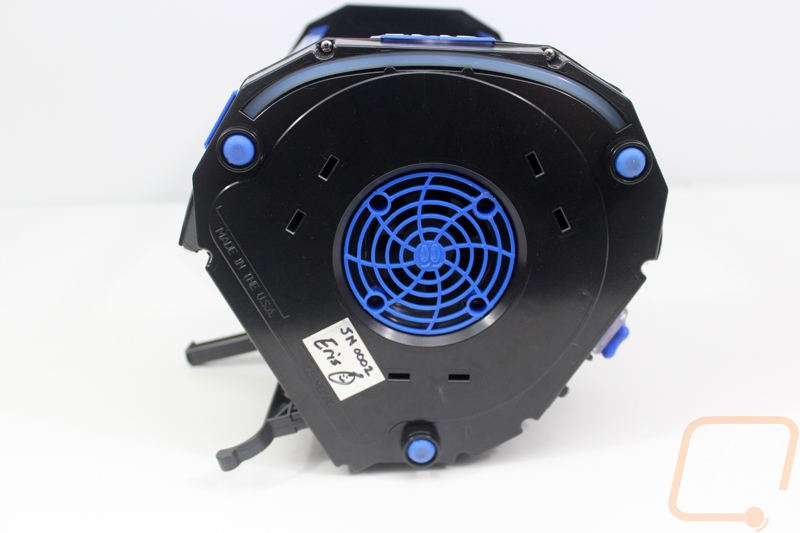
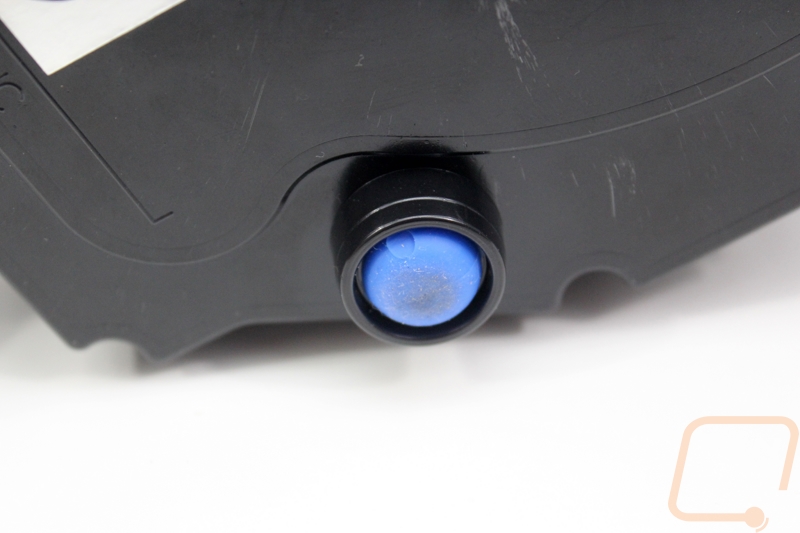
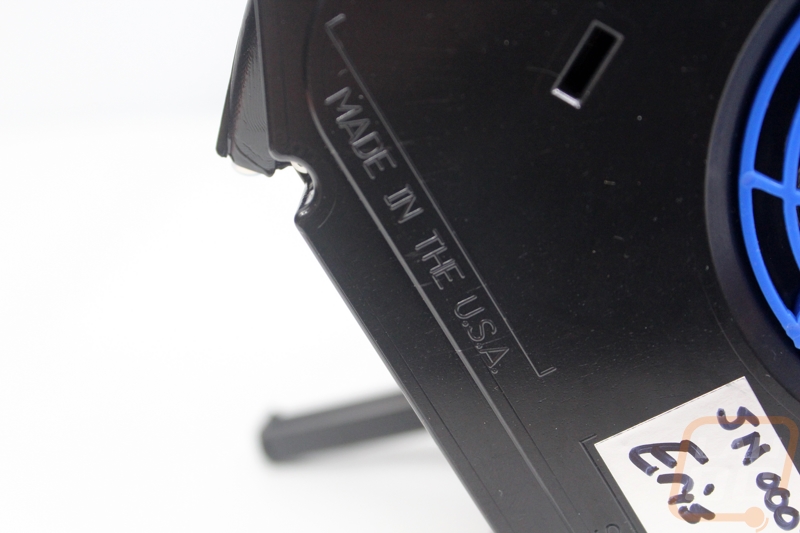
Next we have the base of the Eris. This view is going to be a little different than a full production model because no one else is going to have a Part Daddy hand drawn serial number plate. The bottom of the Eris is held on with 7 screws. Inside is where we will find the Mini-RAMBo controller and four stepper motors, three for the arms up top and one for the extruder. The base also has a small fan in the middle to help pull out a little of the heat that everything being in one small space is bound to have happen. SeeMeCNC are proud to show off that the Eris is made in the USA with that molded in. Then for feet the printer has three bright blue feet, one in each corner to keep things stable.
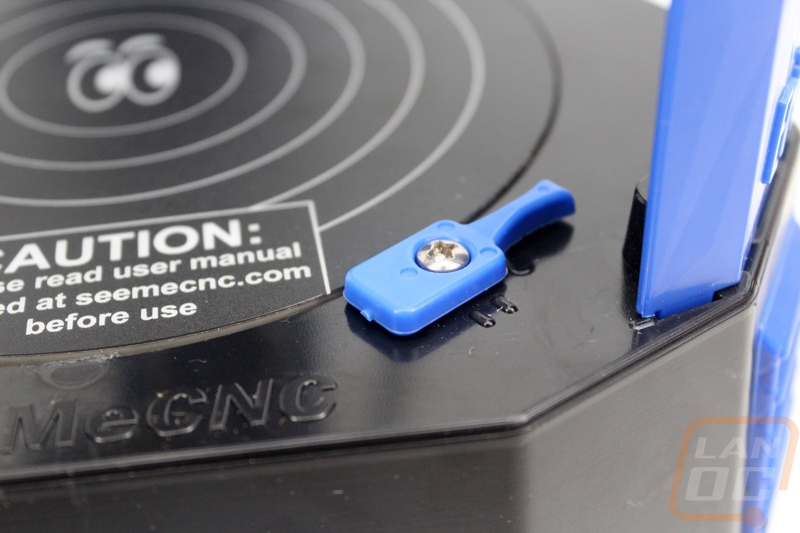
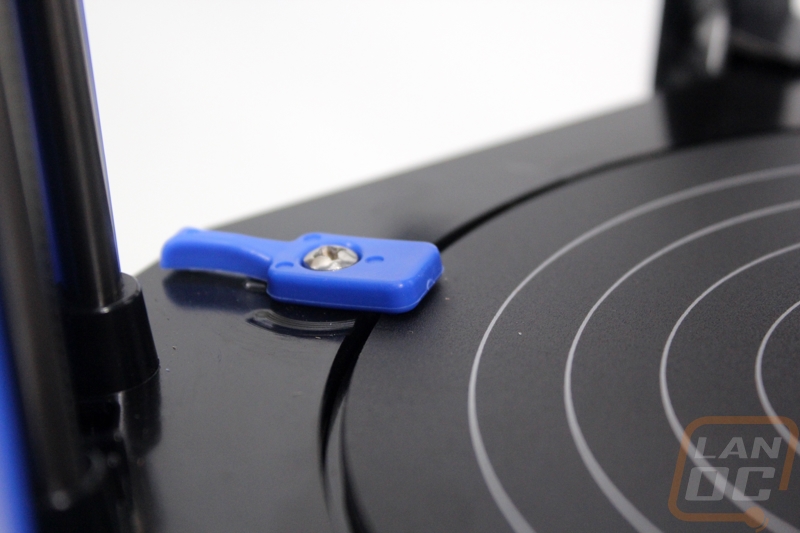
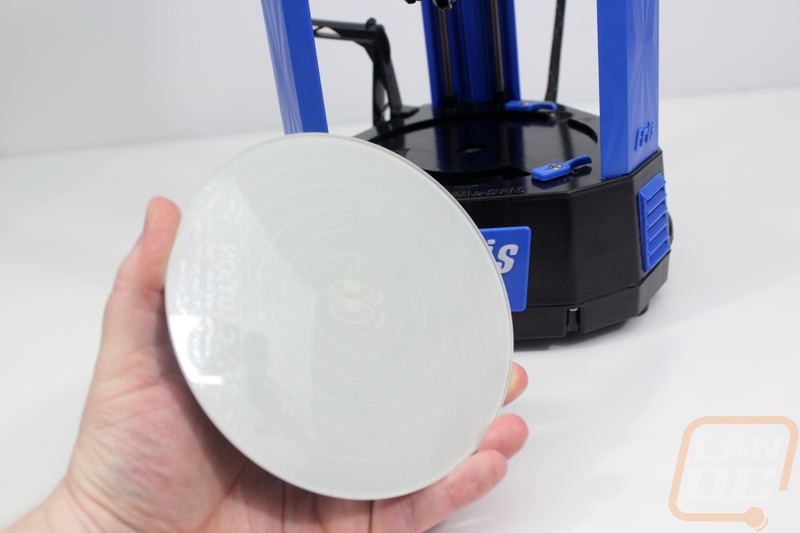
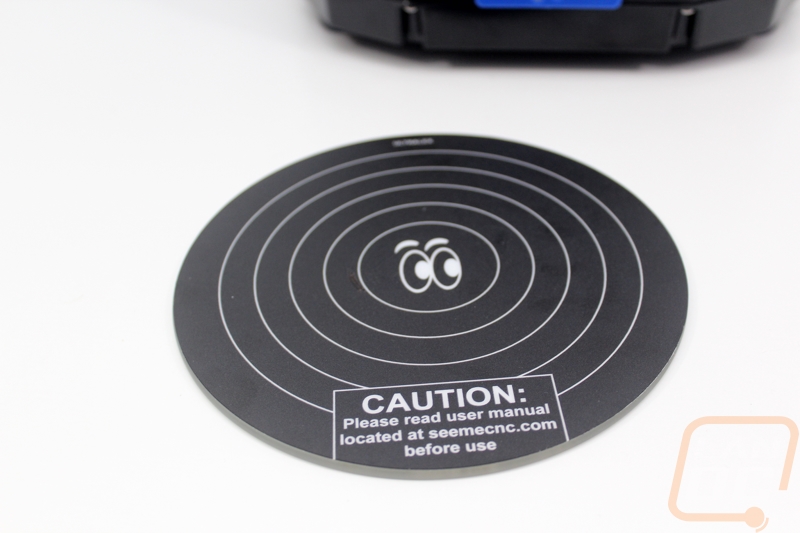
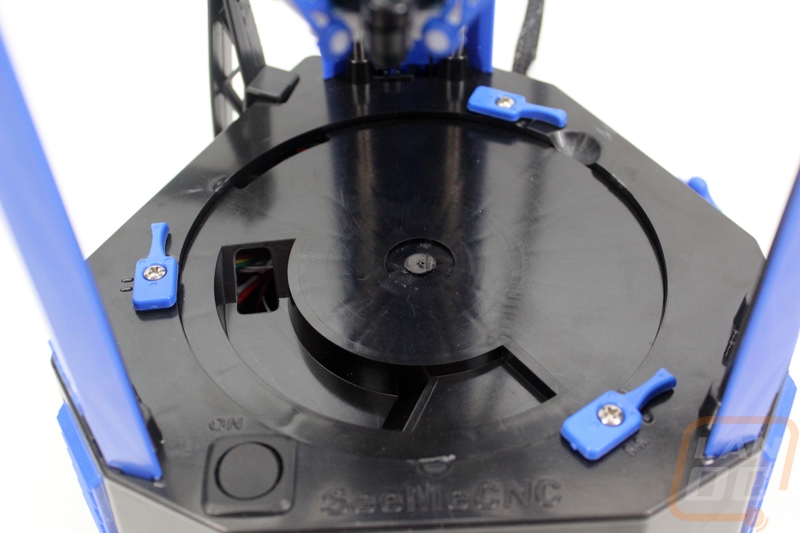
With the printer flipped back on its feet the last area we have to look at is the build plate itself. As expected being a delta printer the Eris has a round build plate. The plate is made of borosilicate glass and is 146mm wide and 3mm’s thick. It is covered in a laminate textured surface with the SeeMeCNC eyes in the middle as well as a warning label down at the front edge. The build plate can be quickly removed and is held in place with three plastic clips that spin out of the way. This is a nice improvement over the normal build plate mounting designs of the Rostock Max and a lot of other printers that just use metal binder clips. The build plate is mounted into the surface so when you unclip it you have to stick your finger in the small area on the right side that they give you to lift up on it. With the back side still being glass you can always flip over to it if you prefer that as a build surface.
Under the build plate we do see something a little unique. SeeMeCNC once again was thinking ahead when they included a gap under the build plate as well as a small hole into the base. This is so you can add a heated bed in the future. In fact, the Mini-RAMBo controller is plug and play for this.
")
