Board Layout and Pictures
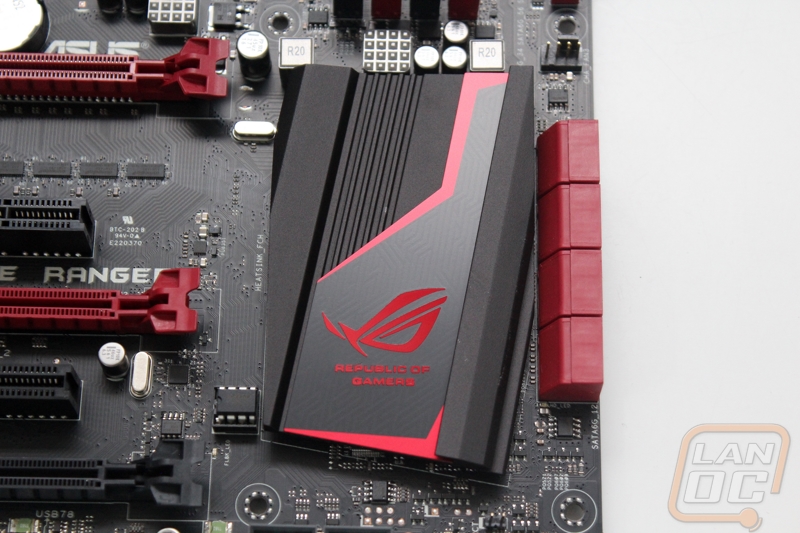
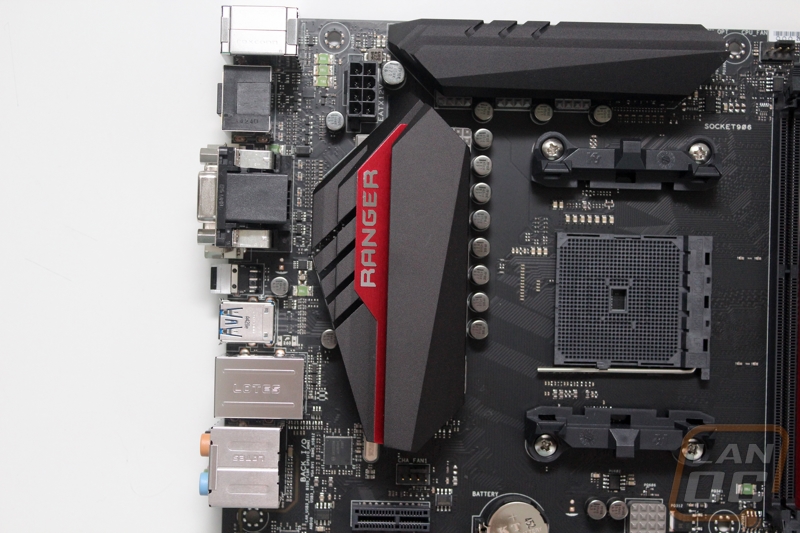
With the Crossblade Ranger only recently being introduced, it has a much more modern ROG design. We still get the black and red theme like all Republic of Gamers boards but the heatsink design is cleaner and more angular than the AM3+ board I took a look at last week. Around the CPU socket is suspiciously clean though, I don’t think I’ve ever seen a board with that big of an open space, it should leave a lot of room for your heatsink though.
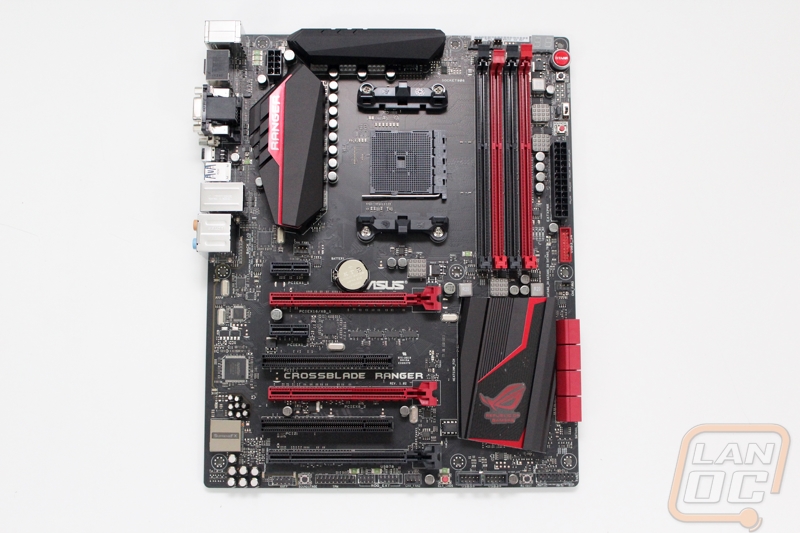
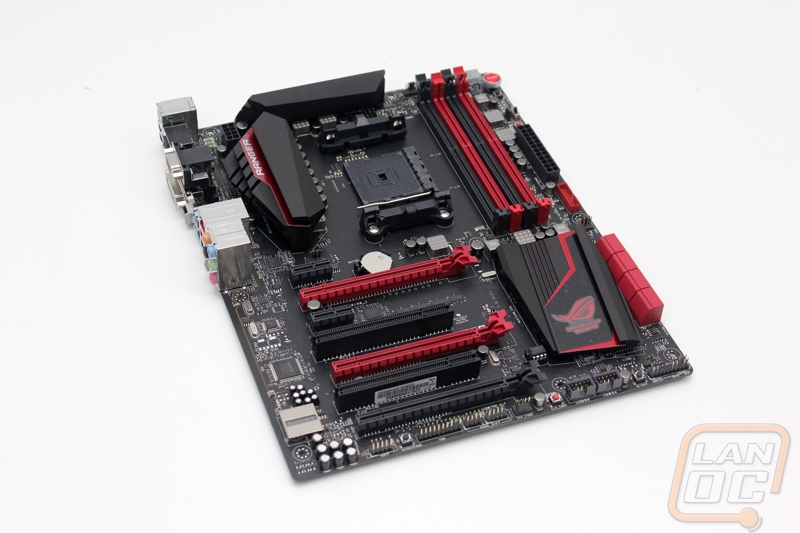
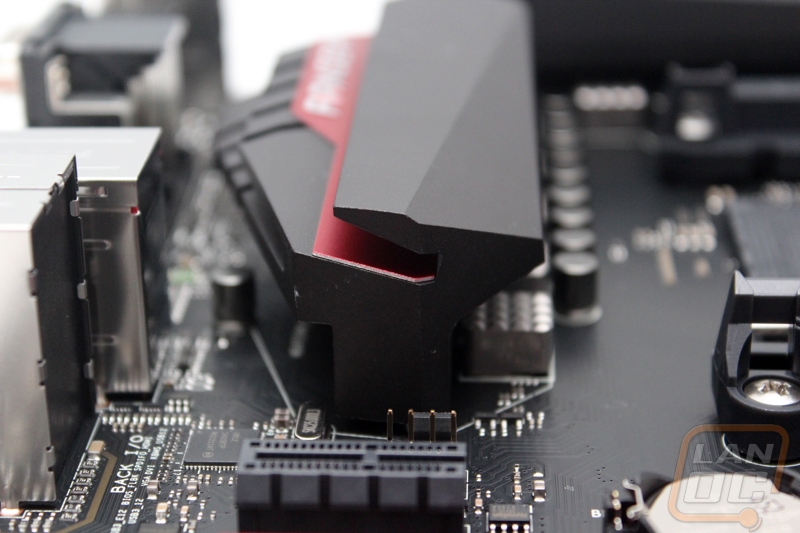
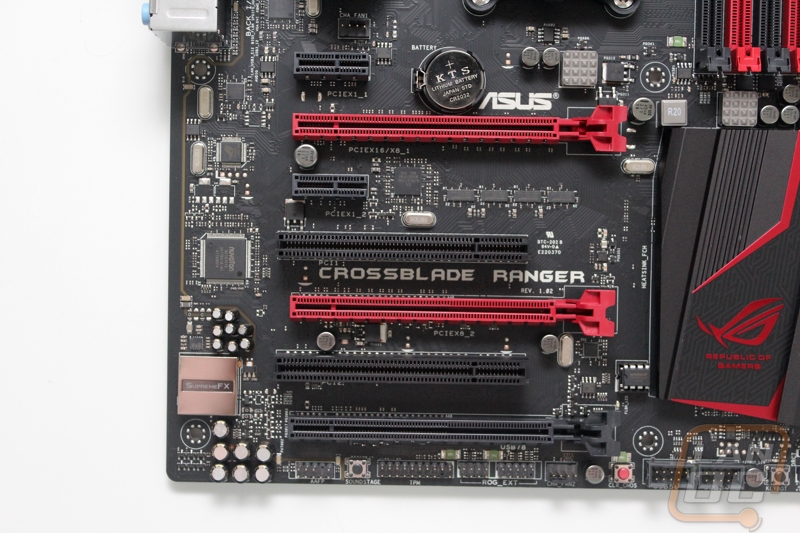
I mentioned that the Crossblade Ranger has a much more modern design on the cooling than the AM3+ board from last week. The design reminds me a lot of the old stealth fighters with its angles and matt black finish. Around the CPU to help keep the boards NexFET Power Block MOSFETs a d alloy chokes cool we have two heatsinks. The larger of the two is on the left side and goes all the way over to the back of the rear I/O panel, the other is smaller and up top. Both look extremely simple until you see them from a side profile, this way they still have a clean look while having more than enough surface area to keep things cool. Speaking of cool, I really like the red trim slipped into the larger heatsink with the Ranger logo on it. The chipset heatsink is much shorter to make sure there is clearance for your video cards. It is also anodized black and then Asus added on a dual layer plate made of black and red to add in a little ROG branding on the board.
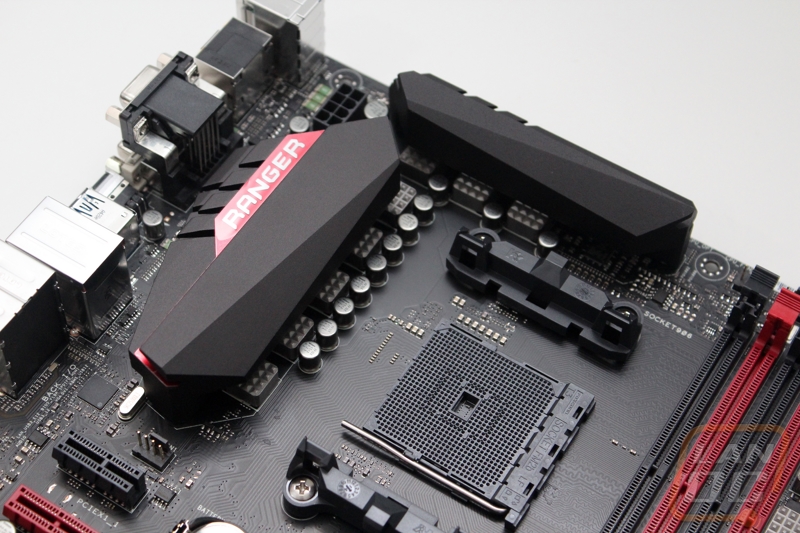
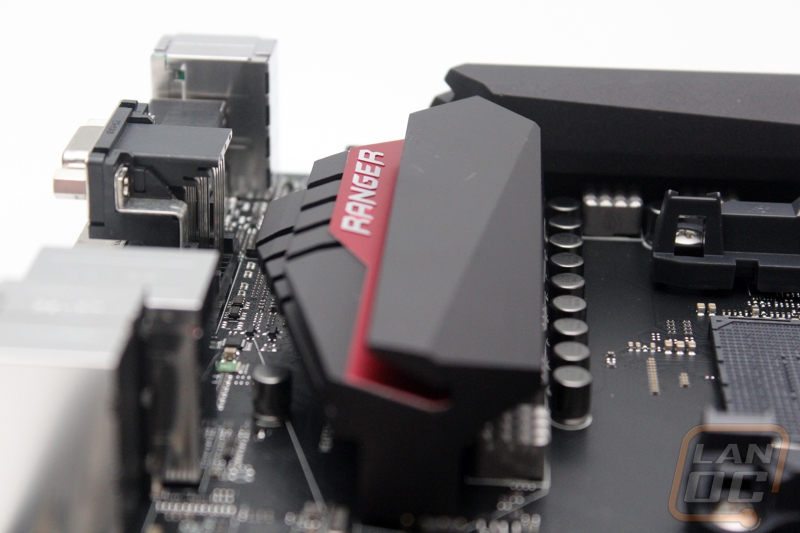
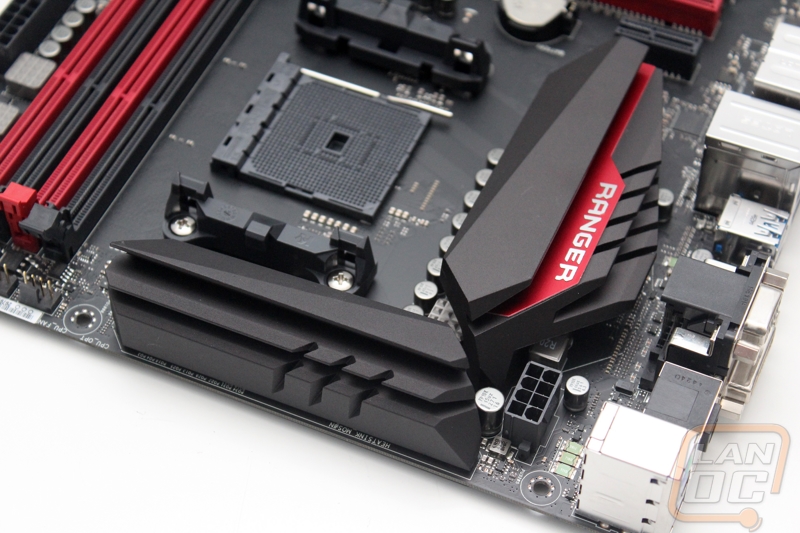
Starting up in the top left corner we don’t really have to much going on. Like I mentioned before the CPU socket area and largely lacking of anything to talk about and the heatsinks both take up a lot of room as well. That means there isn’t anything going on behind the rear I/O panel but down at the bottom tip of the heatsink we do have our first four pin PWM fan header. Up above the left heatsink is the eight pin CPU power connection as well.
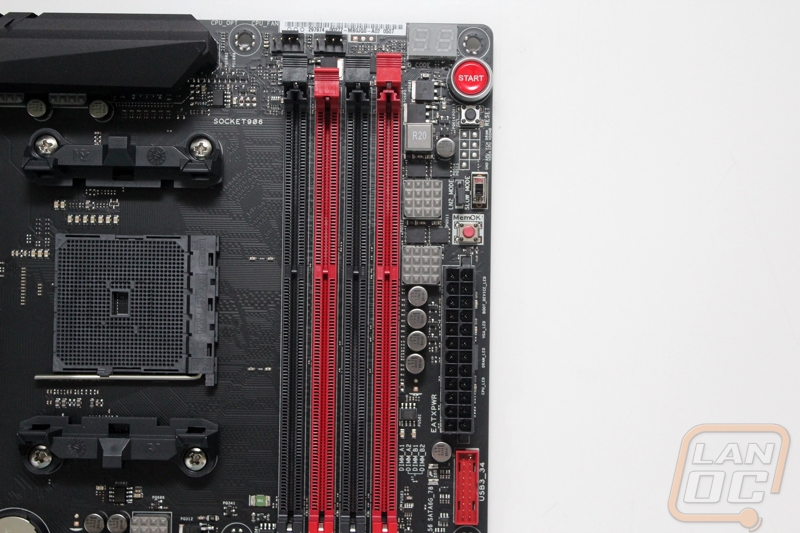
On the top right side we have a lot more going on though. First we have four DDR3 DIMM slots in black and red to match the board. Up above them we have two four pin PWM fan headers for the CPU cooler putting us up to three so far. Next to them is an LED diagnostic readout to help track down issues. Next is a large red power button and then a small reset button as well. After that you have seven small solder points where we can test all of the voltages on the Crossblade Ranger when overclocking. To go with that below it we have a jumper for LN2 more and a switch to turn slow mode on and off to help when overclocking and you can’t get past the boot. Next is a small red button for the MemOK test, pressing this will automatically drop your memory clock speeds down until the PC will boot to help when your memory defaults too high. After that is the 24-pin motherboard power connection. Lastly Asus slipped in a red USB 3.0 header for your front panel USB 3.0 connections.
Moving on down the right side we have another four pin PWM fan header and then the eight SATA 3 ports, all at a right angle. The front panel connections are down in the bottom right corner for the easiest possible access and then next to it is another small button, this time the keybot button. I saw this same button on the Impact motherboard, keybot is Asus’s new feature that can automatically give your keyboard macro keys and other functions including overclocking your motherboard, all without having to have a gaming specific keyboard. Next we have two USB 2.0 headers and then a small red clear CMOS button. Next is our last four pin PWM fan header giving the Crossblade Ranger a total of five.
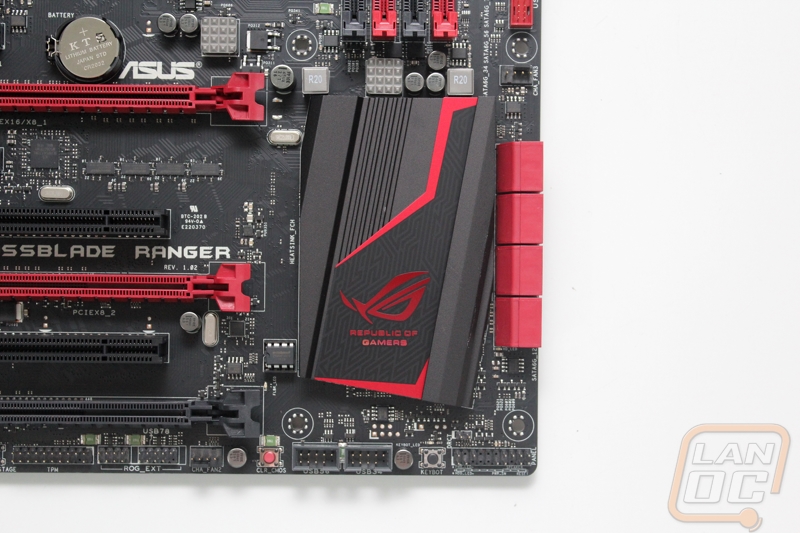
Continuing right to left along the bottom, next we have the ROG Extention header, you can use this plug to plug in Asus’s OC Panel. Next is the TPM plug, the Trusted Platform Module header can be used with many devices including Asus’s bitlocker. Next is the Sound Stage button that lets you flip through different amp sound stage options. Beside that we have the front panel audio header. From the front panel audio head and on over we have the SupremeFX audio card. Asus was careful to give the on board audio its own PCB, you can see the split/gap that is filled with transparent resin from the header all the way around the audio PCB.
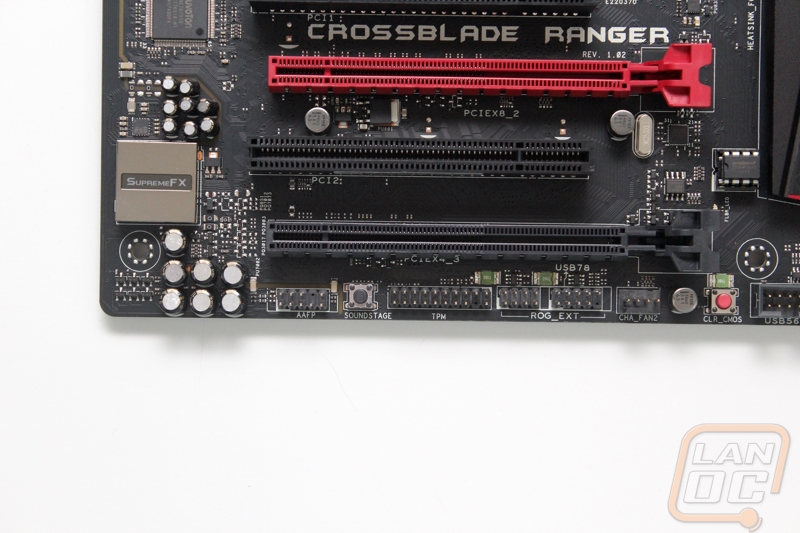
For PCI connections the Crossblade Ranger gets a mix of old and new. We have two PCIe x1 slots and also two legacy PCI slots. I haven’t seen to many of those recently! For PCIe x16 slots you get three but the bottom slot (in black) only runs at x4 all of the time. The other two will run at x16 if you are only using one slot and x8 on both if you go with an SLI or Crossfire solution.
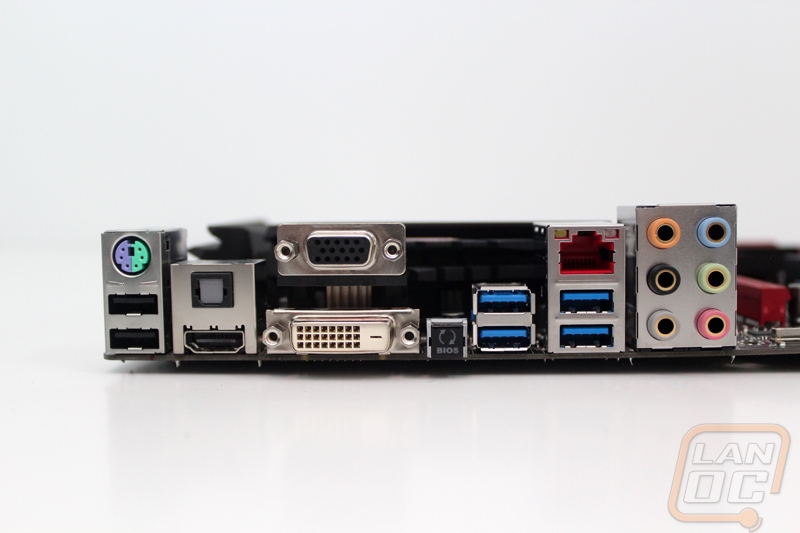
Unlike our last AMD ROG board the Crossblade Ranger being an FM2+ board does have to include a few video connections. So for that Asus included an HDMI, DVI, and even a VGA connection. For audio things are standard with a six port audio panel as well as the S/PDIF connection just above the HDMI port. For USB you get four USB 3.0 ports as well as two USB 2.0 ports. The two USB 2.0 ports are also paired with a legacy PS/2 connection to get your mouse and keyboard hooked up without any problems pre-OS. For network the Crossblade Ranger has an Intel I211-AT Gigabit NIC, it’s nice to see Asus sticking with the Intel NICs, even on an AMD board. Last but not least, next to the USB 3.0 ports they also slipped in a small Clear CMOS button should you need to do that without having to dig into your PC.
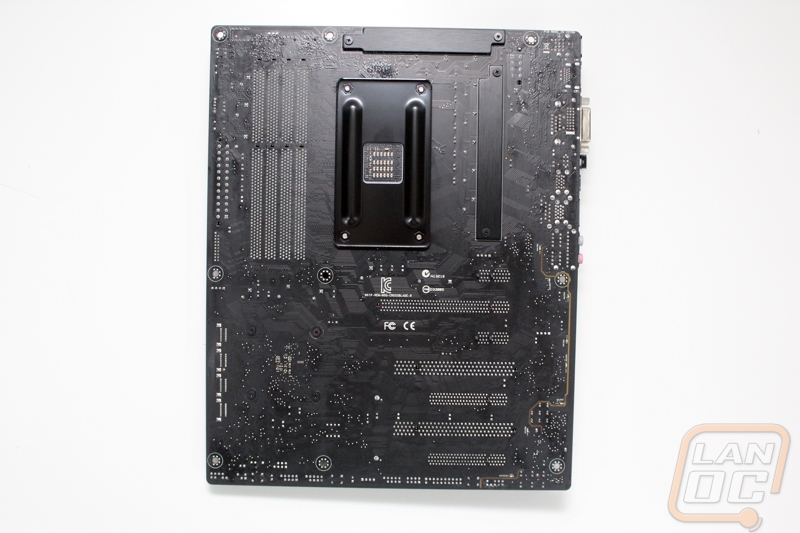
Around on the back of the Crossblade Ranger we can see the flat black PCB. Addiitonally we can also see that the two heatsinks around the CPU socket require backplates to keep them secure along with the CPU backplate as well.