We can’t very well look at the i7-5960X from Intel and not do a motherboard review along with it right? As the first of what I expect to be a list of X99 motherboards I will be covering, I wanted to use the X99 Deluxe first because Asus boards are always reliable and the software is perfect for keeping an eye on things when benchmarking the CPU. Asus went with a simpler name than on previous generations with the X99 Deluxe and they also went a little ham and changed up a lot with the new design. Let’s see what all changed, beyond the new white styling.
Product Name: Asus X99 Deluxe
Review Sample Provided by: Asus
Written by: Wes
Pictures by: Wes
|
Specifications |
|
|
CPU Support |
New Intel Core i7 Processores on LGA 2011-v3 Socket |
|
Chipset |
Intel X99 Express Chipset |
|
Memory |
8xDIMM, max 64GB, DDR4 up to 3000MHz |
|
DIP Version |
5-Way Optimization by Dual Intelligent Processors 5 |
|
CPU Power |
DIGI+ VRM 8-phase design |
|
DRAM Power |
DIGI+ DRAM 4-phase design |
|
PCIe x16 Slots |
5 |
|
PCIe x4/x1 Slots |
1 PCIe x4 |
|
Multi-GPU |
3-Way/Quad GPU SLI &CFX bandwitch up to 16/16/8 |
|
Gbit LAN |
Dual Intel LANs |
|
Wireless Connection |
3T3R Wi-Fi a/b/g/n/ac 2.4 and 5GHz – Bluetooth 4.0 |
|
Audio |
Realtek 1150 8-Cn HD (High quality 112dB SNR stereo playback output), DTS Connect/DTS UltraPC2 |
|
Storage |
12 SATA 3 (4 shared with SATAe) |
|
USB |
14 USB 3.0 (4 front panel); 6 USB 2.0 |
Packaging and Accessories
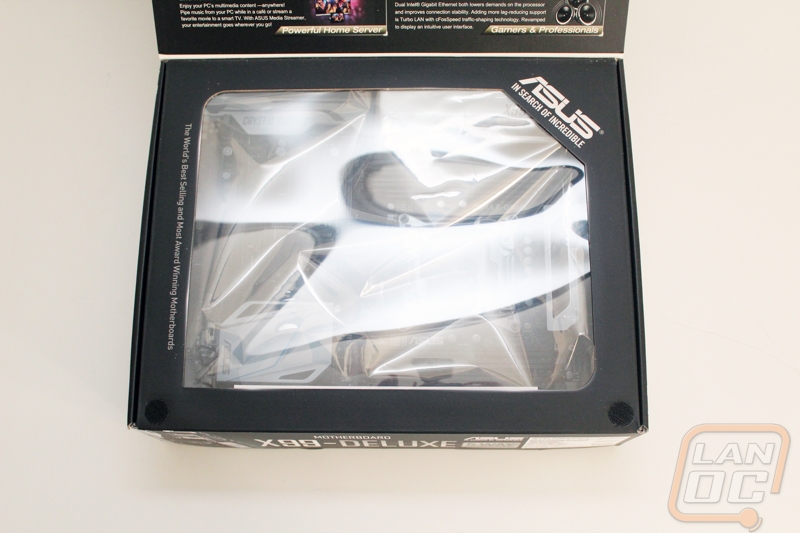
Right away when I saw the packaging for the X99 Deluxe I was happy to see that Asus changed things up and didn’t go with their standard packaging. The swapped the branding on the front to white to match the motherboard and the rest of the front is completely covered in a photo of the actual motherboard that is inside. Not only does this make it much easier to see what you are getting, I really feel like Asus is putting everything out there with nothing to hide. I really hope they continue this into future models. I don’t want to buy a box and get home to find out that the board inside is boring and unexciting when the packaging told a different story.
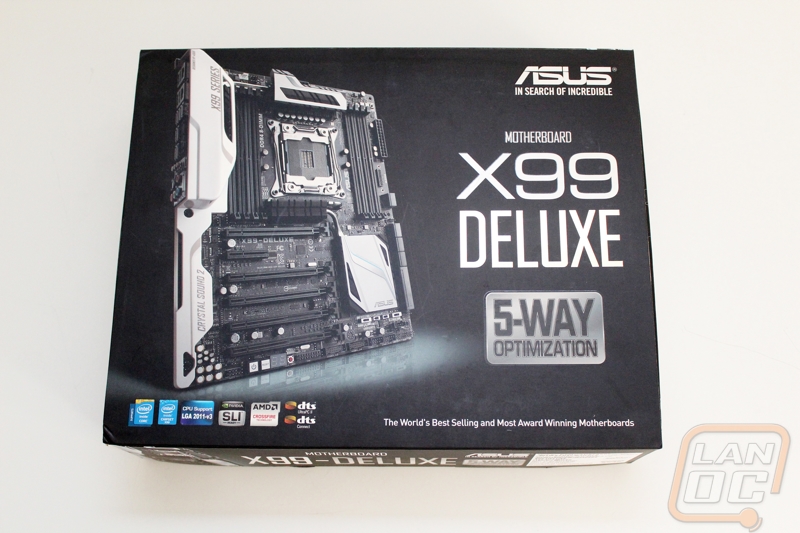
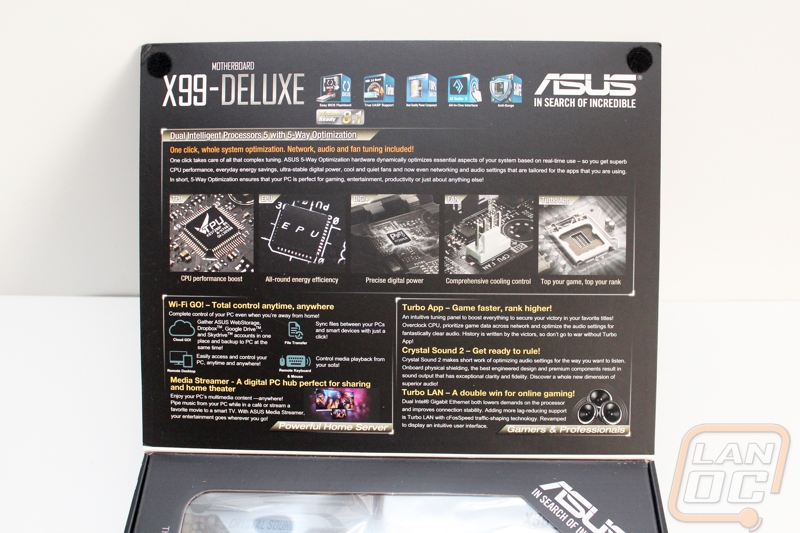
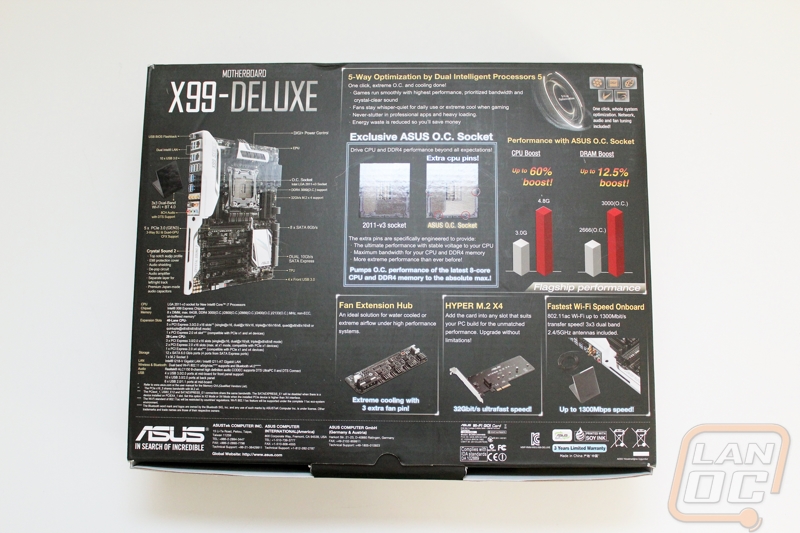
The front opens up to a window giving you another view of the board inside. Inside the flap they dig into what sets Asus motherboards apart, features like their Dual Intelligent Processors 5 with 5-Way Optimization, Wi-Fi GO!, and other features. Each has photos along with short write-ups explaining everything. There is more information on the back of the box. I really like that there is a photo of the board with lines pointing out different features. They also include a specification listing on the back to make sure you have all of the information you need to make an informed choice.
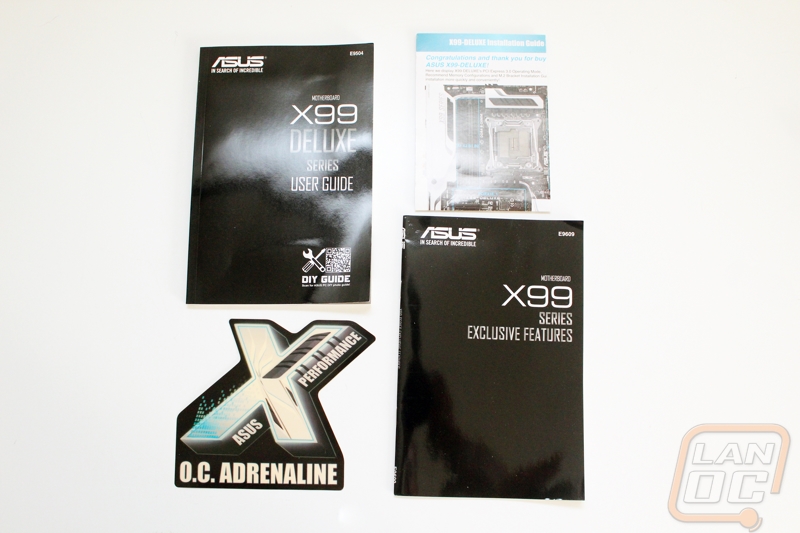
One of the things I love about the enthusiast chipsets is when you pick up a motherboard you get more than just the I/O panel and the motherboard. The focus on people who really care about their computers generally means extra features, toys, and sometimes a little swag. With the X99 Deluxe Asus packed in a crazy amount of accessories! For documentation, you get a full user guide and a second book that covers the exclusive features. Asus always tries to teach you about what they pack into their boards, you have to do this when you pack so much into your boards. You also get an installation guide poster and a sticker.
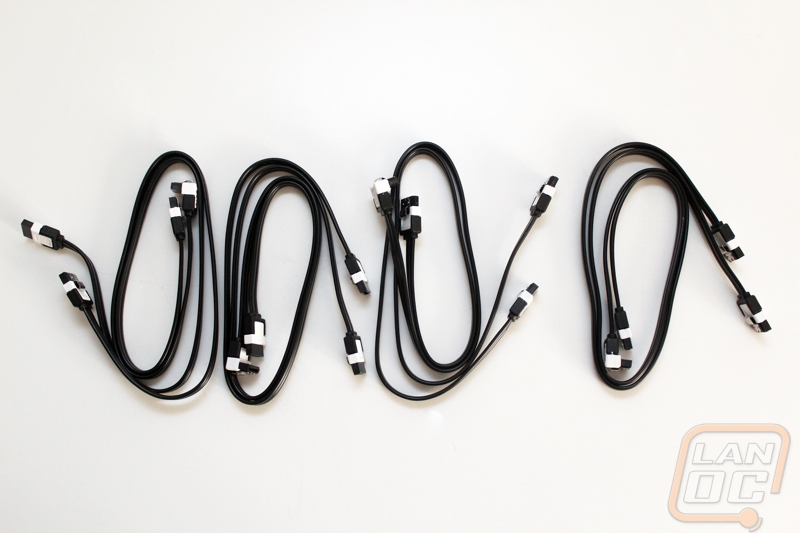
Considering the number of SATA connections on the X99 Deluxe, this collection of SATA cables that it came with wasn’t a shock. You get eight cables total with half of them having a right angled connection on one end.
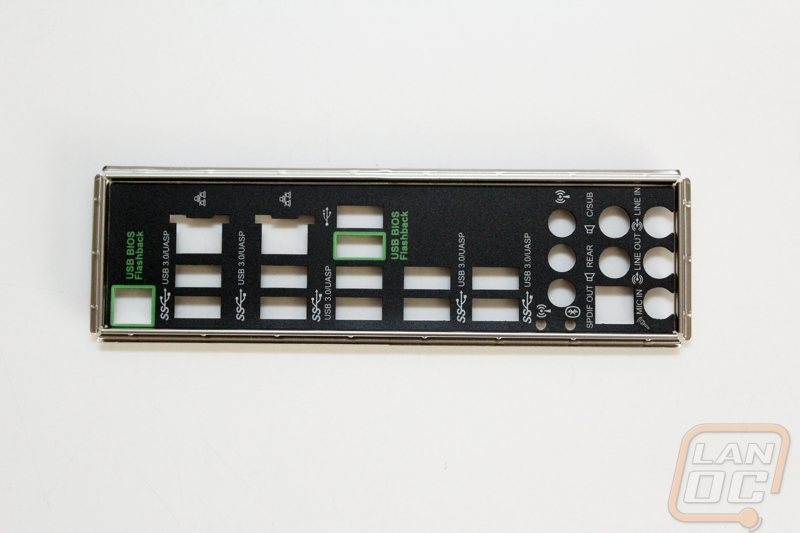
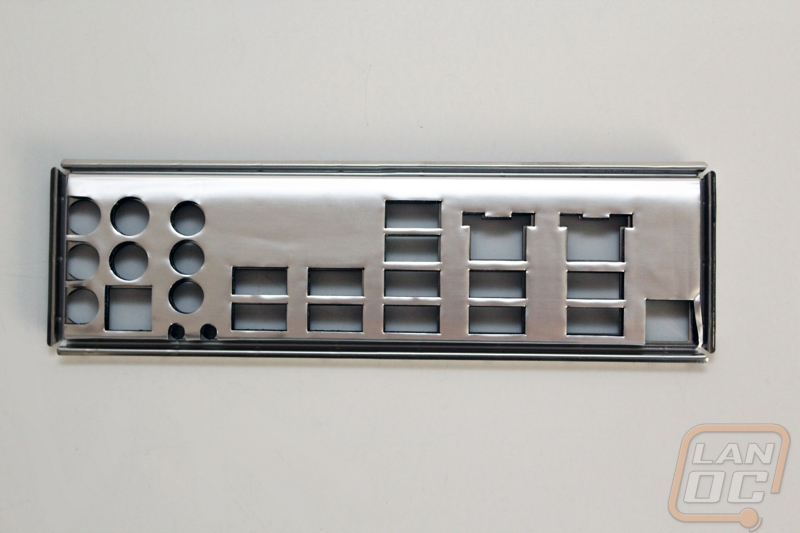
The rear I/O panel is clocked out but has a few color coded connections on the rear as well as labels on each connection to help you figure things out if you need the help. On the back Asus went with a foam design over those annoying metal springs that catch on everything.
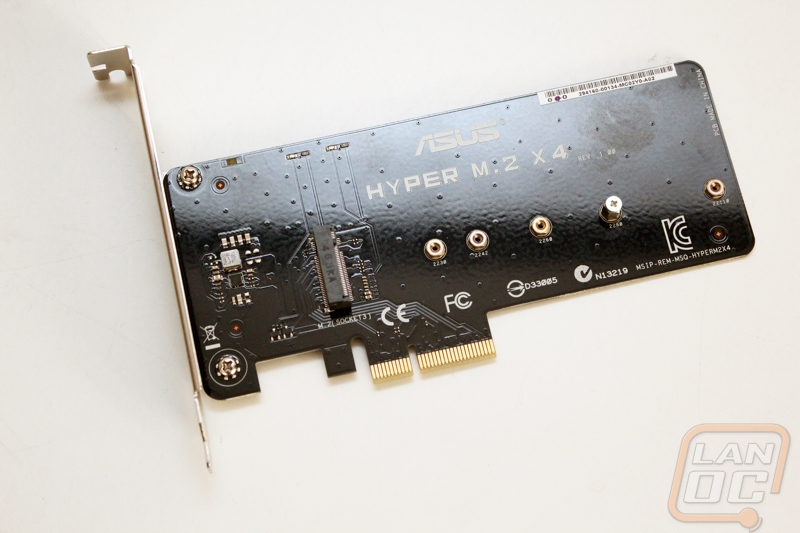
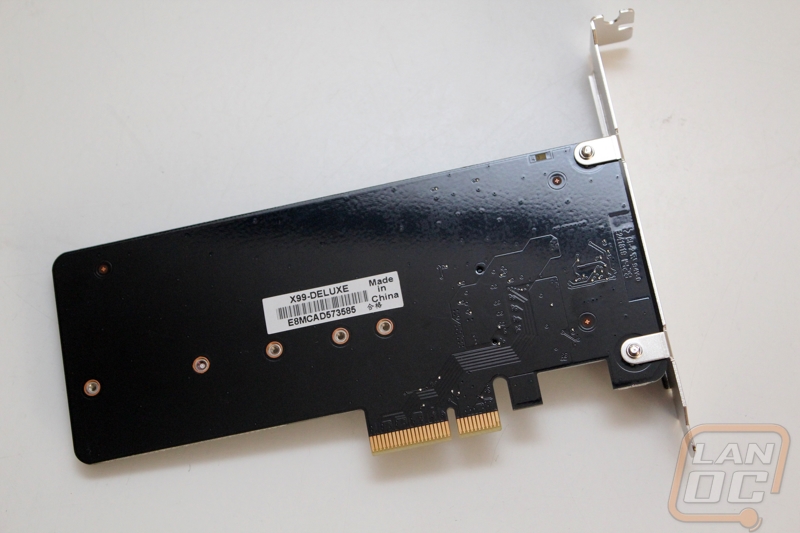
Asus even bundled an M.2 PCIe adapter. This gives you a second M.2 slot to go along with the vertical one built into the board. The PCB is all blacked out so it will blend right in should you need to use it.
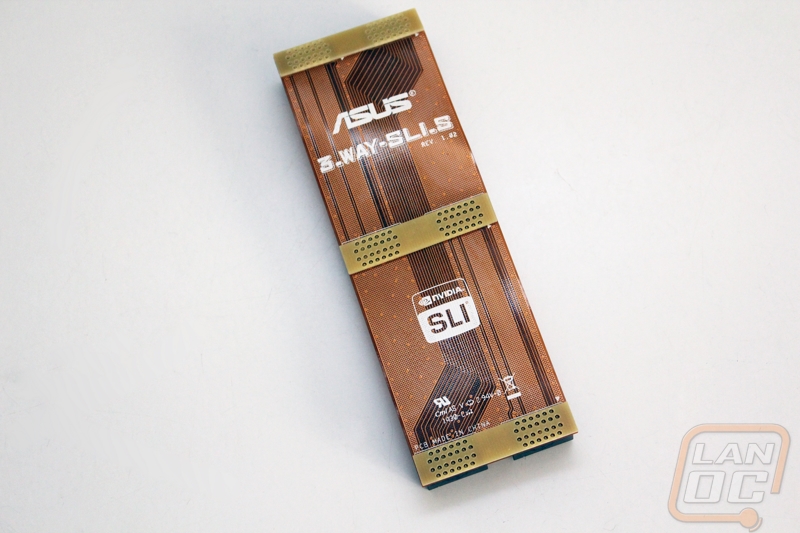
I was a little bummed to see that the 3 way SLI bridge is that funky bronze color. With it being double wide black or white would blend it much better and go with any build.
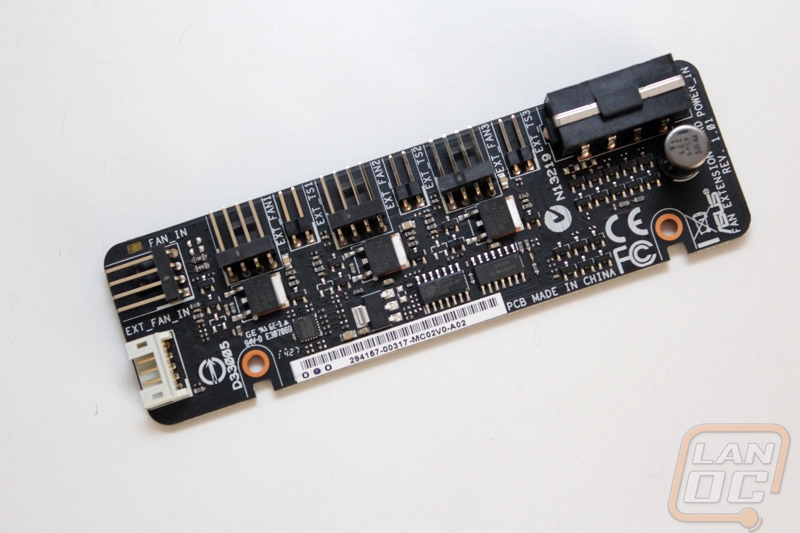
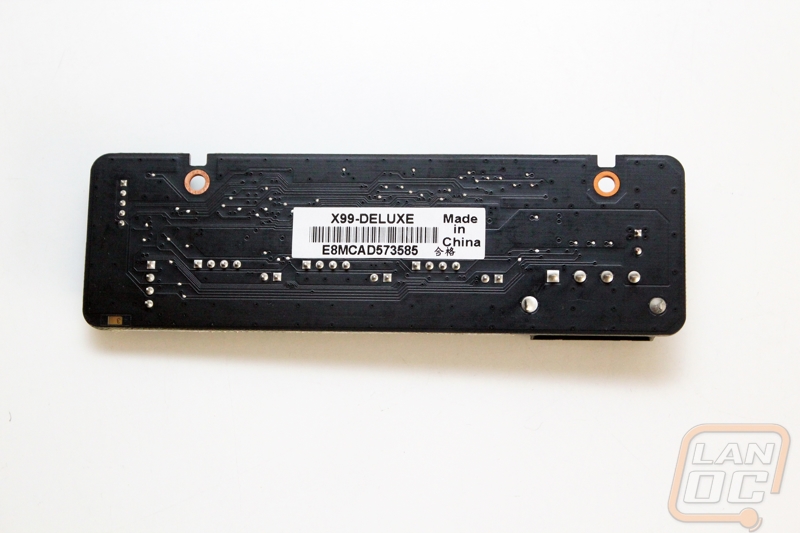
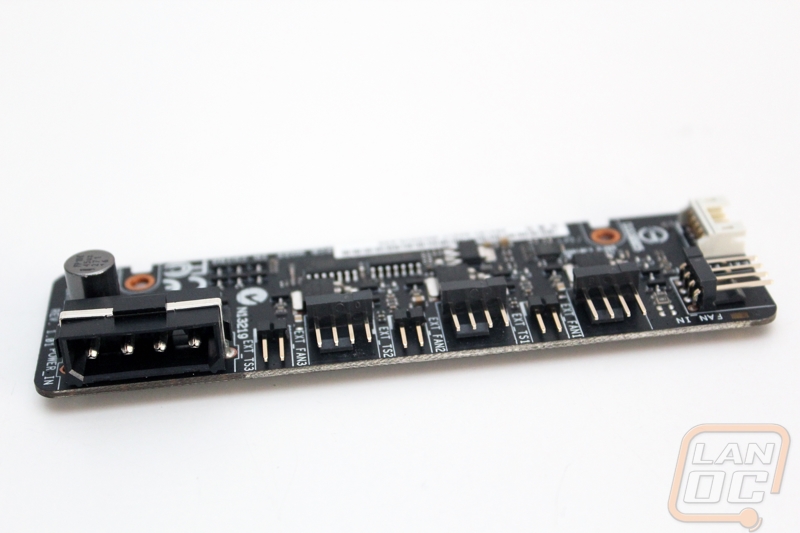
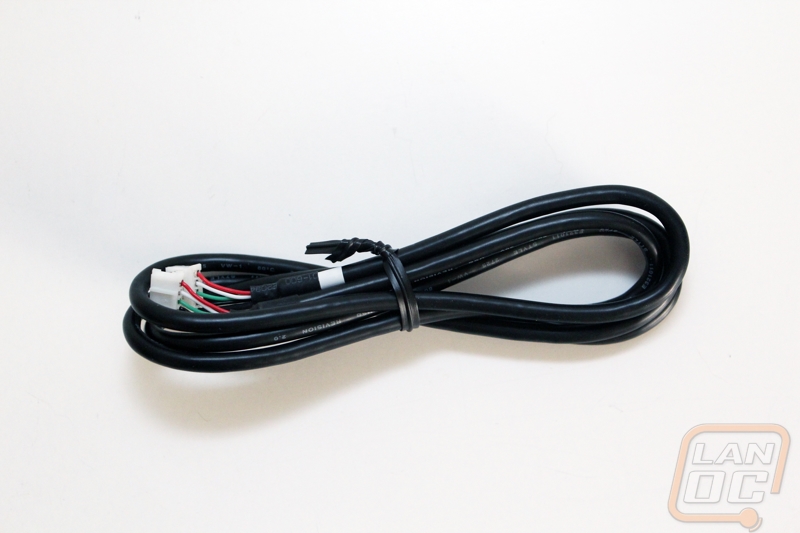
Asus motherboards typically have more than enough fan headers for just about any build other than my fridge build with 17 fans. If you don’t have enough with the X99 Deluxe, they went ahead and included a PCB with four more four pin PWM fan headers. To hook it up you have to run a Molex over to it as well as hook up the cable included to the white plug on the left side of the PCB. There are also three plugs for thermal sensors, Asus even included the sensors as you will see in a minute. The best part is that all of these fan headers are still controllable via Asus’s software, this alone makes this a much better option than getting an aftermarket fan controller.
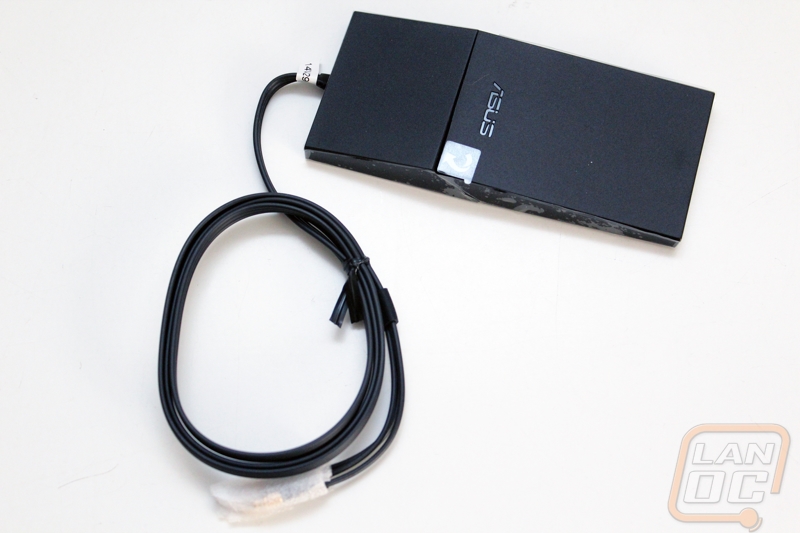
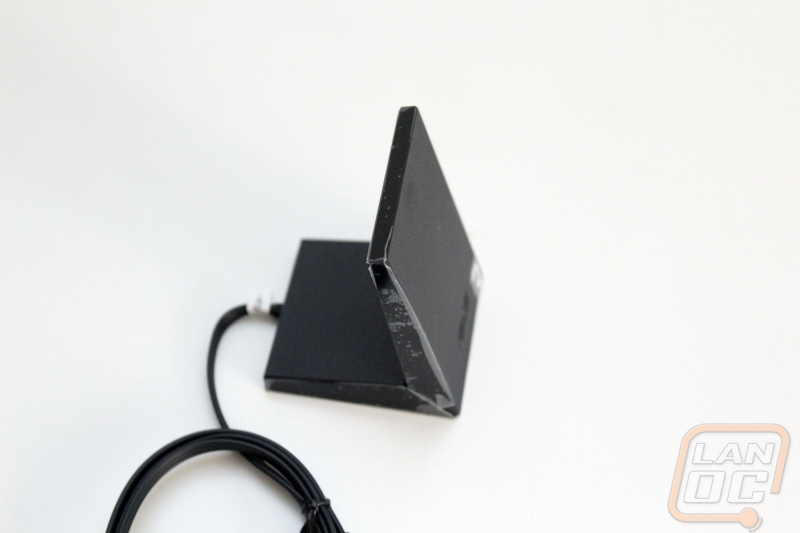
In order to take advantage of the three transmitters built into the X99 Deluxe’s AC Wireless adapter you have to use the included wireless antenna. Other than the third connection it looks a lot like the other antenna’s that Asus has included in the recent past. I love the design though; it has a magnet built in to keep it from moving around if you put it on your PC. The design actually twists allowing it to sit on your desk as well.
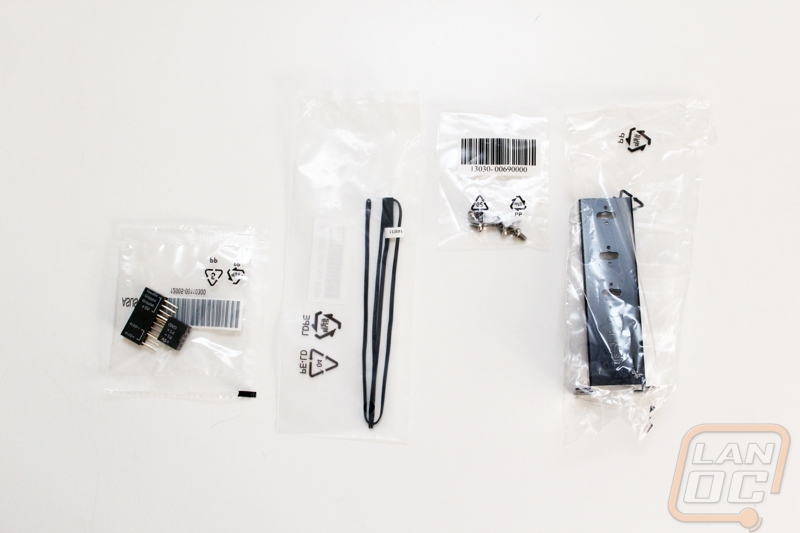
The rest of the accessories are a little random. Over on the right is the mount for the vertical M.2 slot that is built into the board. You will need to use the mount to support the M.2 SSD. If this doesn’t fit in your case you will have to use the PCIe card that was included as well. The black cables are thermal sensors that plug into the fan extender and over on the left we have the front panel connection helpers to make hooking up your front panel plugs easier.
Board Layout and Pictures
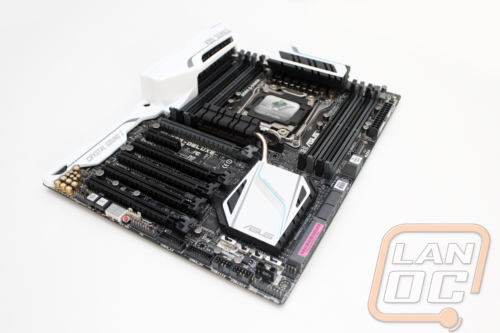
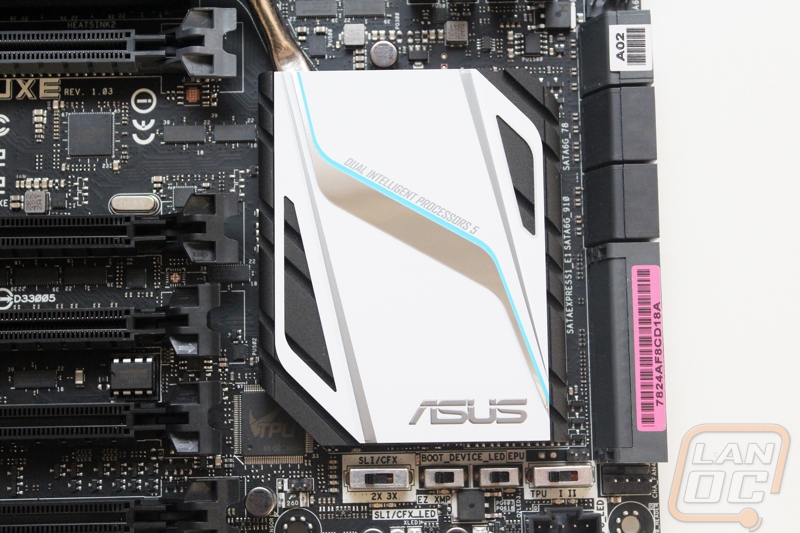
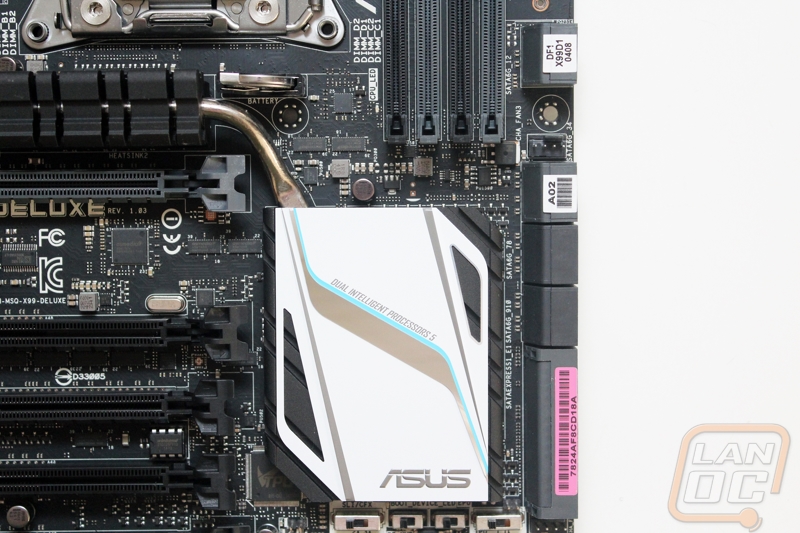
The most obvious thing that stood out when I first got the X99 Deluxe into my hands was its new white color scheme. It’s crazy that with all of the different color schemes out there no one has gone with white. It should look great it nearly any case, especially with white cases being so big over the last few years. Once I got past the new color, the cover that runs over the rear I/O all the way down to the bottom of the board caught my eye. This basically covers up everything that you might not care to see while adding even more white to the mix. The only thing I was disappointed with on the cover is that it is plastic. Obviously, they wouldn’t be able to do such a curvy design in metal, but my initial thought was that they went with a metal cover to help isolate the audio even more from any potential interference. Even so, the X99-Deluxe looks amazing!
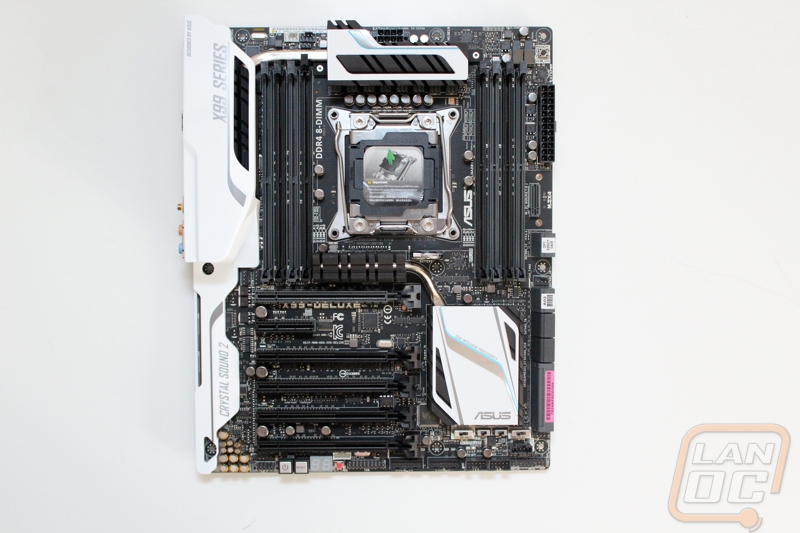
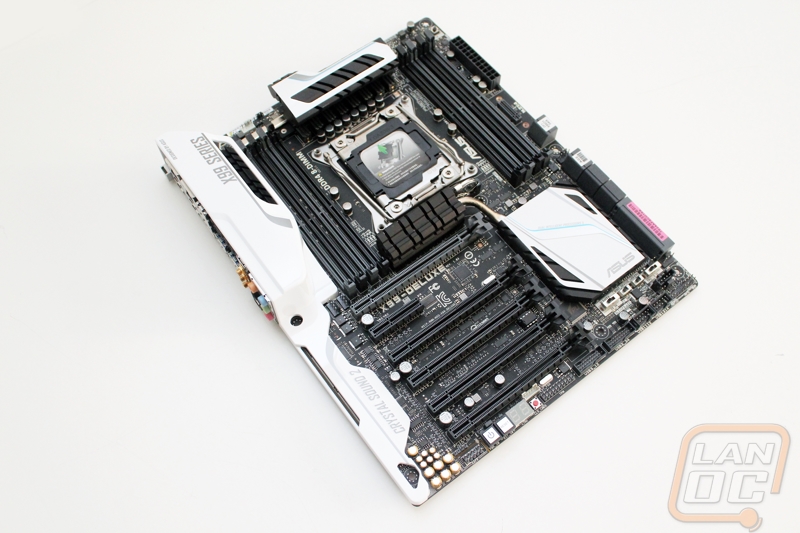
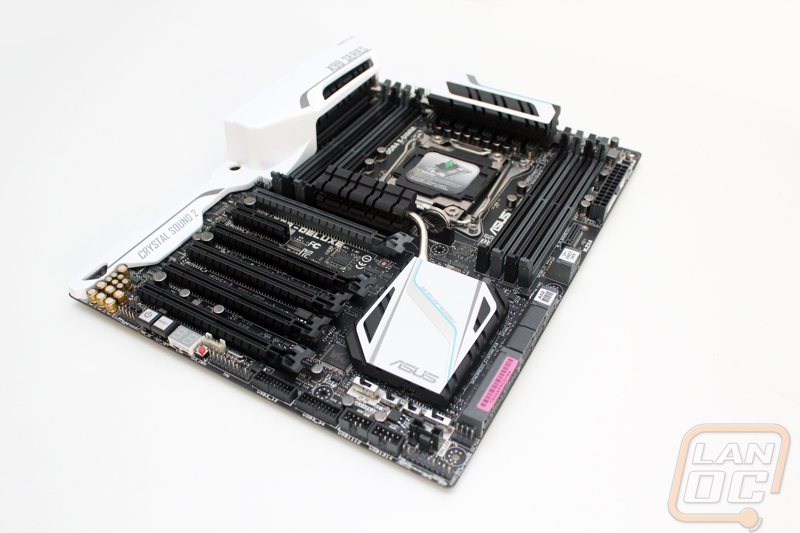
Not only did they change to while on the heatsinks, but the overall design is completely different from the X79 Deluxe. The new design has a little more style with the flat areas on the top for the white trim. The heatsinks are actually a lot like the black ROG heatsinks that Asus has been doing for the last few years. We have a heatsink above the CPU socket, one under the socket, the chipset cooler down next to the PCIe slots, and the last up under the I/O cover of all places. Each of the heatsinks are connected together with heatpipes to help spread the heat around.

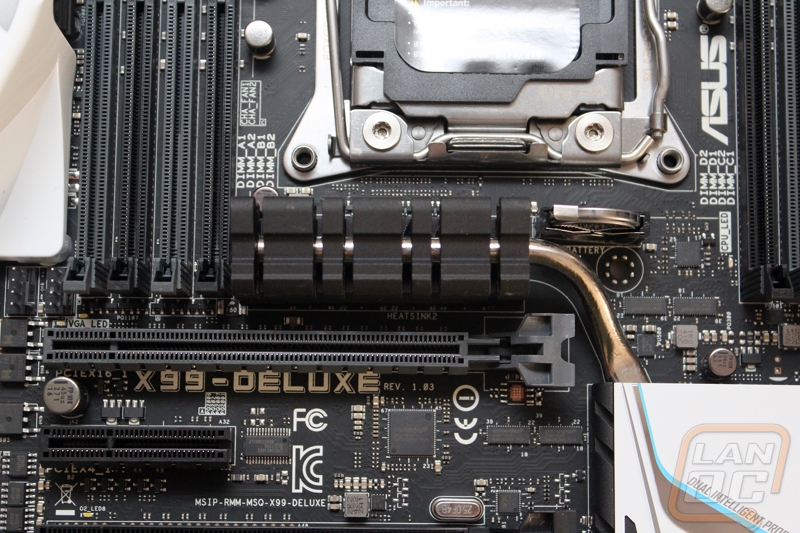
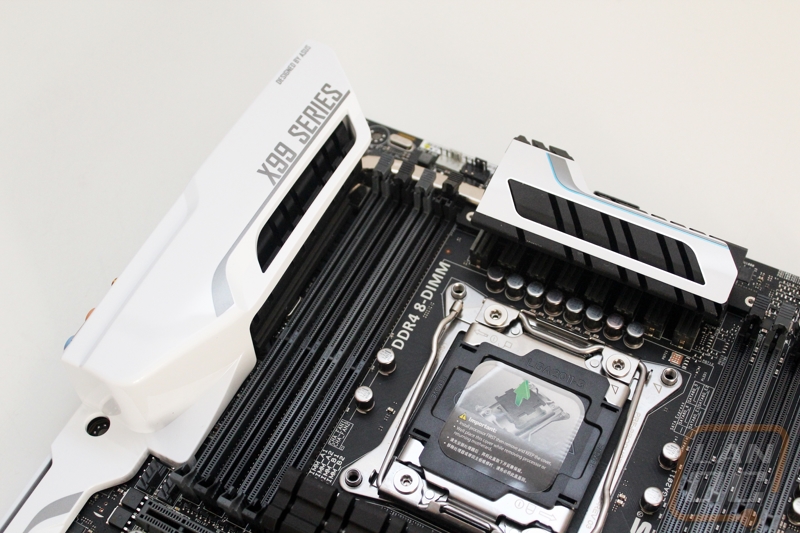
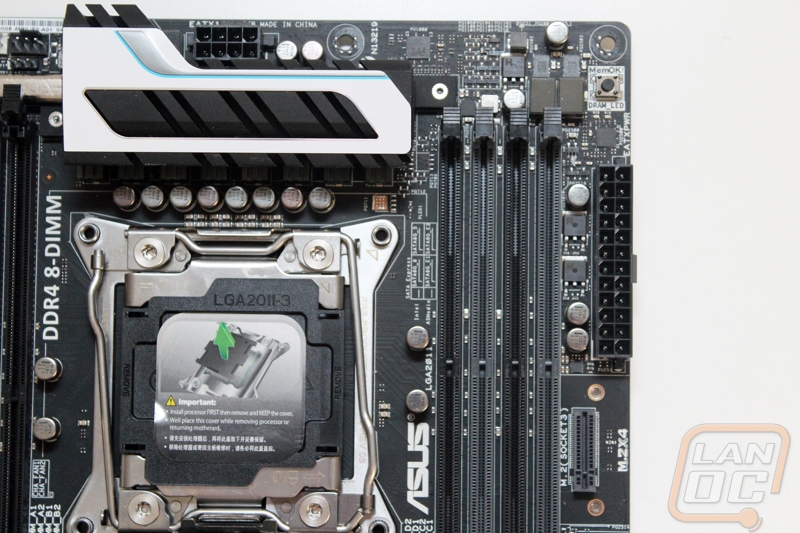
Starting up in the top left corner we have two four pin PWM fan headers for the CPU fan. Just under them are four of the new DDR4 DIMMS. The new ram slots have tabs on one side only to make things easier. Tucked up under the left DIMMS are two more four pin PWM fan headers for case fans. Just above the top heatsink is the eight pin CPU power connection.
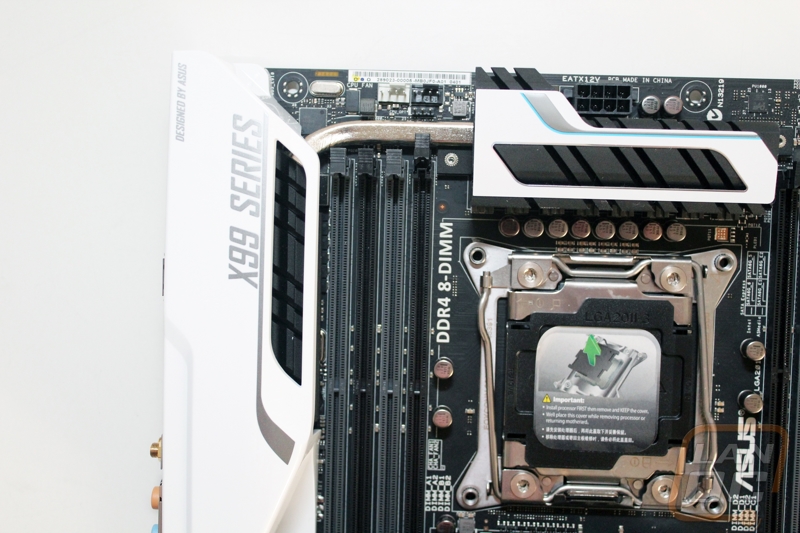
In the top right we have the other four DDR4 DIMM slots. Next to the slots is the standard 24 pin motherboard power connection. The weird vertical M.2 connector is just below the 24 pin, in order for this to work you have to use the included vertical mount as well. Up in the top corner is also the MemOK button. This has an led that will light up when you are having memory errors. Holding the button will restart the PC and turn the memory clock speeds down until it boots correctly. This is a great feature that will prevent someone from having booting problems with high end memory.
Moving down along the right side of the board next to the chipset cooler we have all of the various SATA connections. You get 8 SATA 3 connections as well as two SATA Express plugs. SATA Express is a little new, but if you are buying X99 you are most likely not looking to upgrade for a few years. Having them now will help extend the useable life of the board. In between the SATA ports you also get another four pin PWM fan header making it a total of 5 so far.

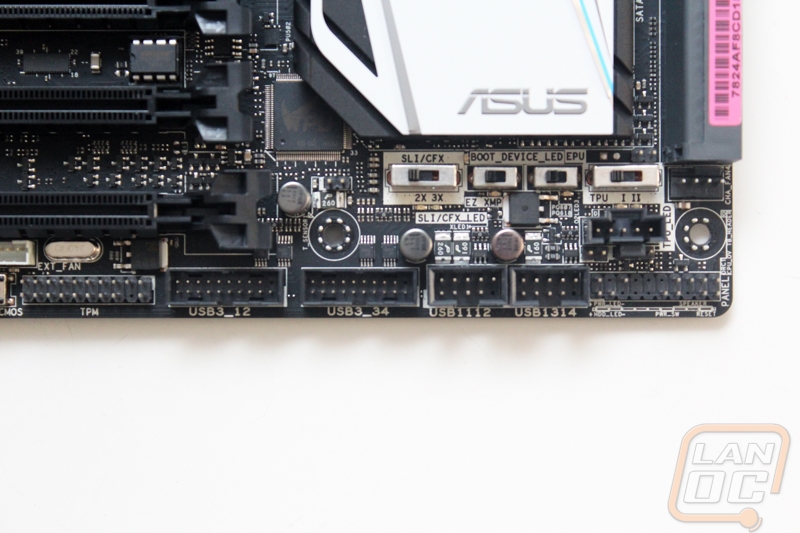
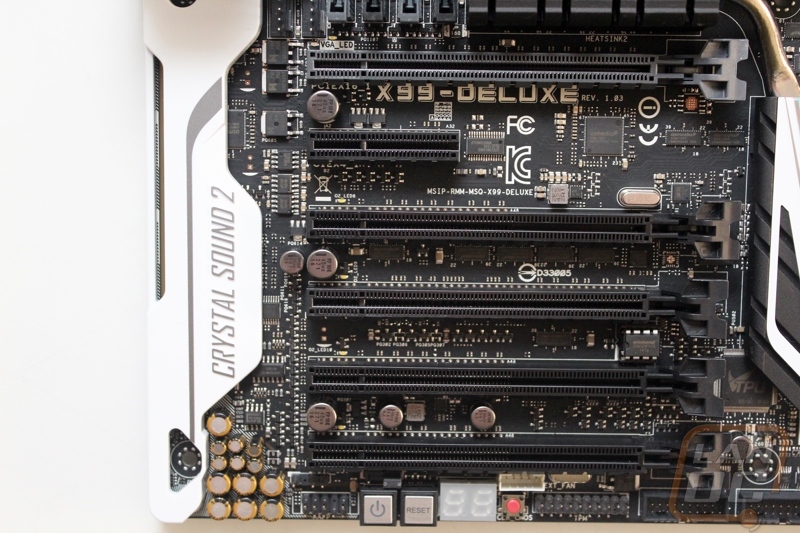
Boy oh boy, the bottom has a lot going on. Just below the chipset cooler you have four different switches. One adjusts TPU settings and the one to its left is for the EPU. There is one that turns on easy XMP meaning it turns your memory XMP settings on automatically, saving you from one adjustment in the bios on boot. The last is the SLI/Crossfire LED. This was a small feature Asus added this time around to help people when installing multiple GPUs. Simply put, it turns on LED lights next to the PCIe slots than you should hook up your video cards. There are options for single, 2 and 3 way. This was in response to a lot of people getting on their forums asking what the best slots to run their cards in are. I love the idea of it. The only thing that might be hard is getting people to know it is there. The people who aren’t sure where to plug in their video cards may also be the same people who wouldn’t look to closely at small switches on their motherboard.
Down along the bottom edge we have all of the connections. In the right corner you have the front panel connections as well as our sixth four pin fan header. Next re two USB 2.0 headers and two USB 3.0 headers. I love that I’m starting to see more boards have two internal USB 3.0 headers, I hope to see more cases have four total connections. Lastly on the left is the TPM connection aka the trusted platform module header.
There is a little less going on in the bottom left corner. Here we have all of the gold caps for the Realtek 1150 8-Cn audio card. Next to them is the front panel audio connection. From there you have power and reset buttons for when toying with the X99 Deluxe on a test bench or with the door off. Then you have an LED diagnostic readout and a clear CMOS button. The white plug just above the cmos button is actually for the included four PWM fan extender that Asus bundled with the board. We have a total of 6 four pin fan headers on the board and 10 if you use the extender.
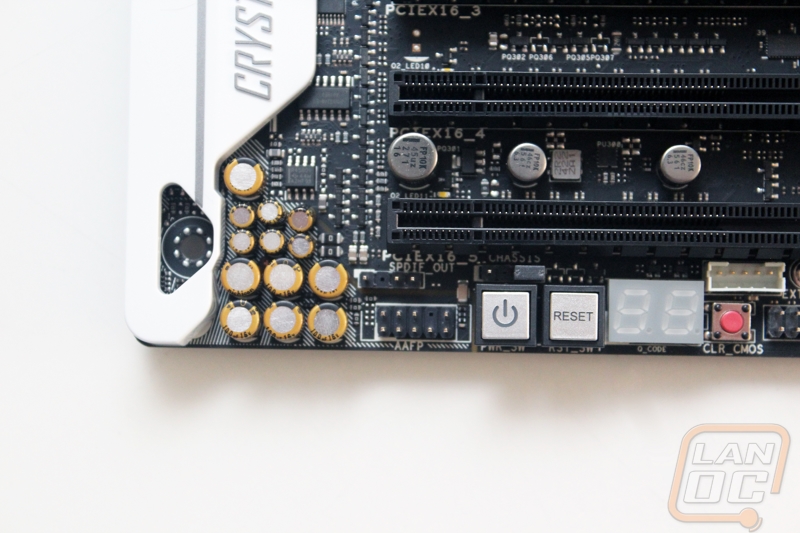
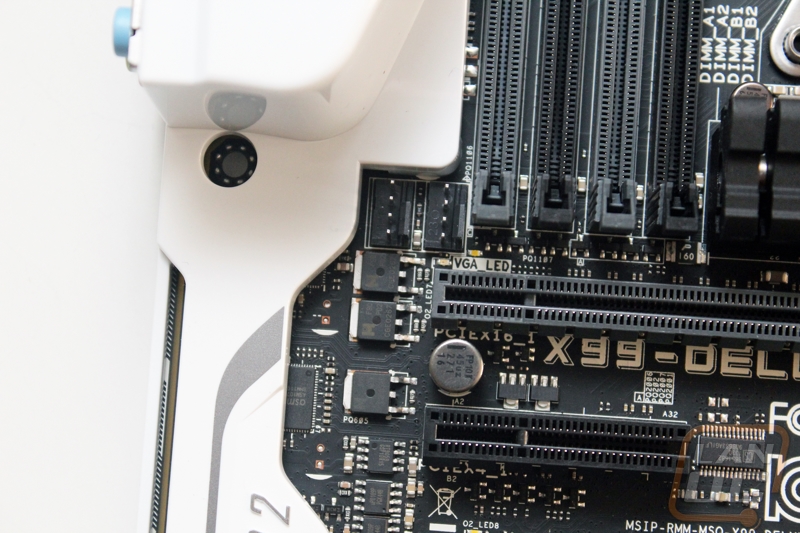
For PCI slots you get one PCIe x4 and five different PCIe x16 slots. While the 5960X does have 40 PCI lanes, that isn’t enough to support all five at a bandwidth of x16 so in the end you can run two in x16 and one in x8 for triple video card setups.
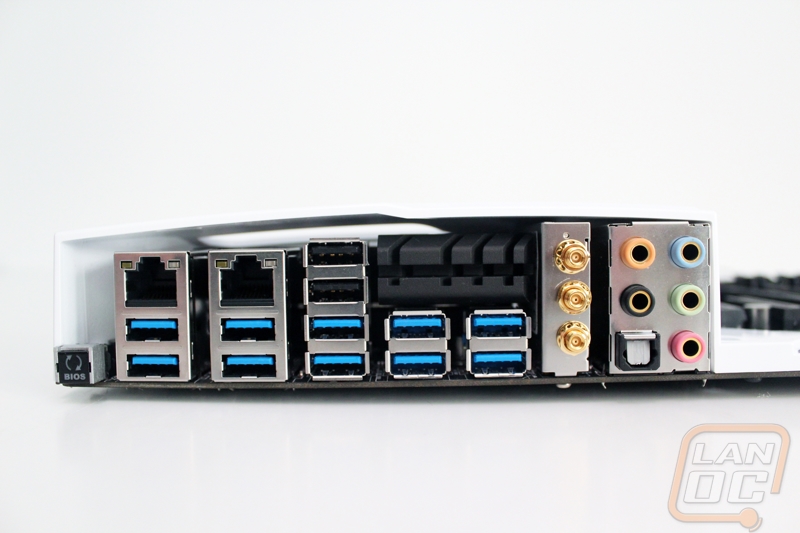
If you have been looking for more USB 3.0 connections Asus has heard you loud and clear. The X99 Deluxe has an impressive 10 USB 3.0 connections along the back, all running on the Intel controller. There are still two USB 2.0 connections as well for you to be able to run your mouse and keyboard on before drivers are installed. All the way over on the left you have a BIOS reset button to keep you from having to dig around looking for the jumper at the worse possible moment. You get two Ethernet connections as well. Both are Intel but they use two different model Intel controllers. Over on the right side you have the three antenna connections for the 3T3R wireless AC NIC and a fairly standard audio configuration with five plugs and an optical connection.
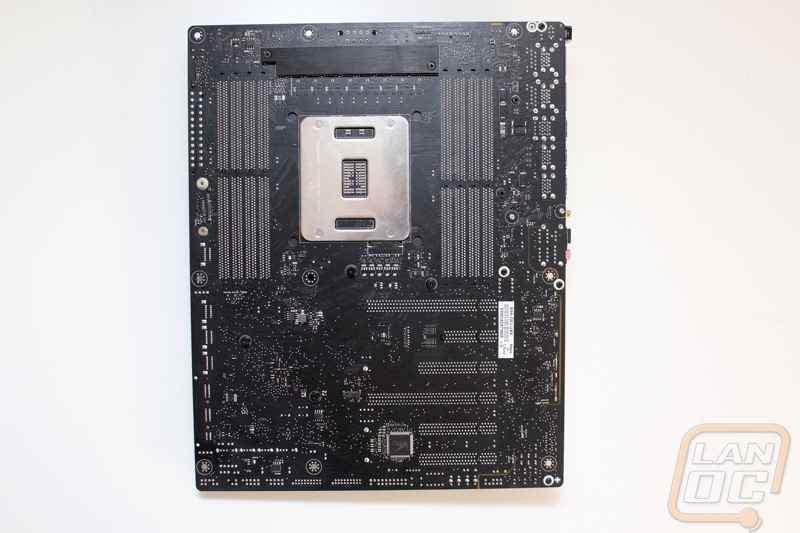
With the X99 Deluxe flipped around we have a better look at the flat black PCB. From here we can also see just how busy this board is, Asus didn’t leave one area untouched.
UEFI and Software
Asus has always innovated with their software, typically we can look at what they are doing this generation and see what to expect from the competition next year. This is why as a whole I have preferred to use their motherboards in our test benches and systems when possible. For the X99 Deluxe they didn’t make any huge changes but as always it was easy to use and packed full of features.
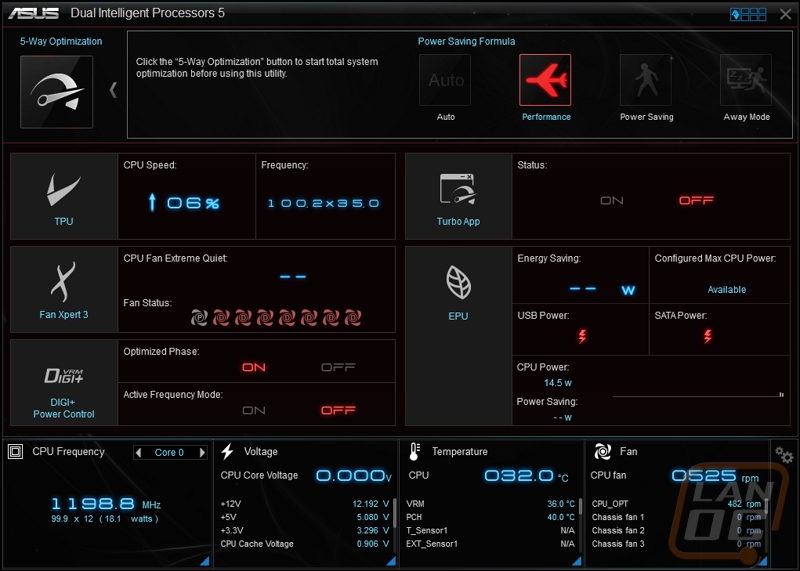
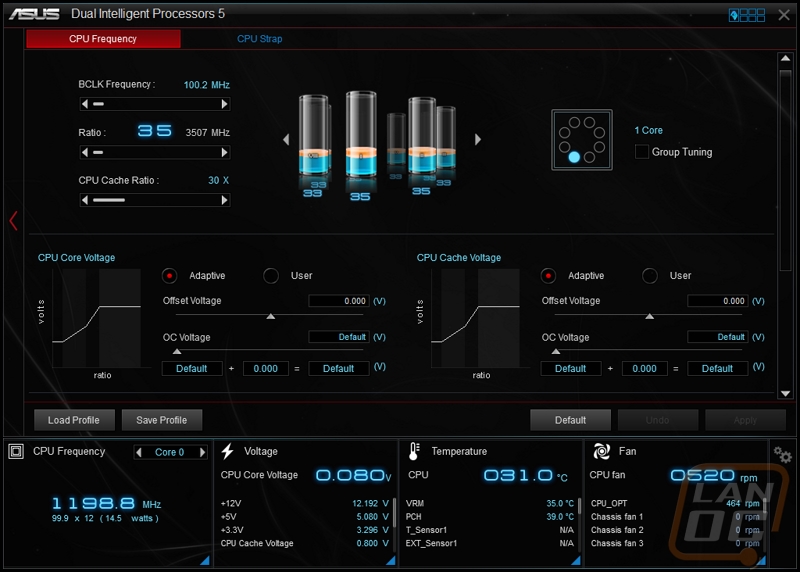
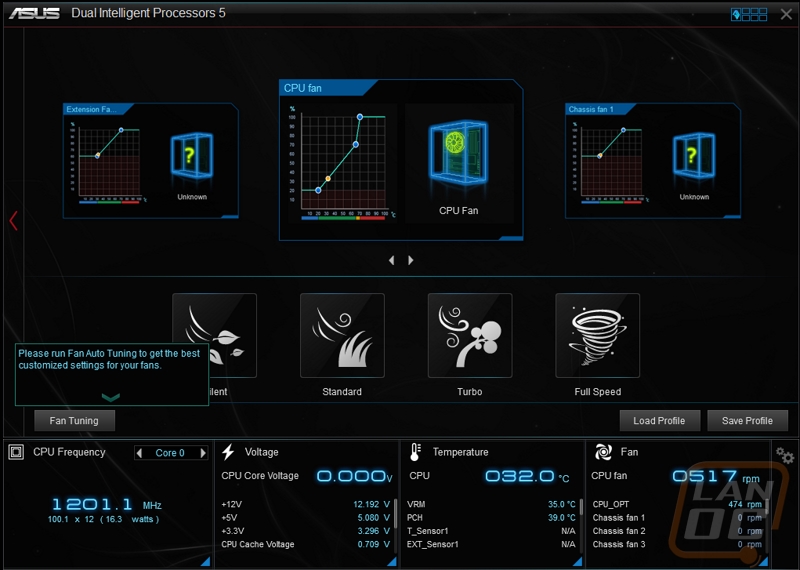
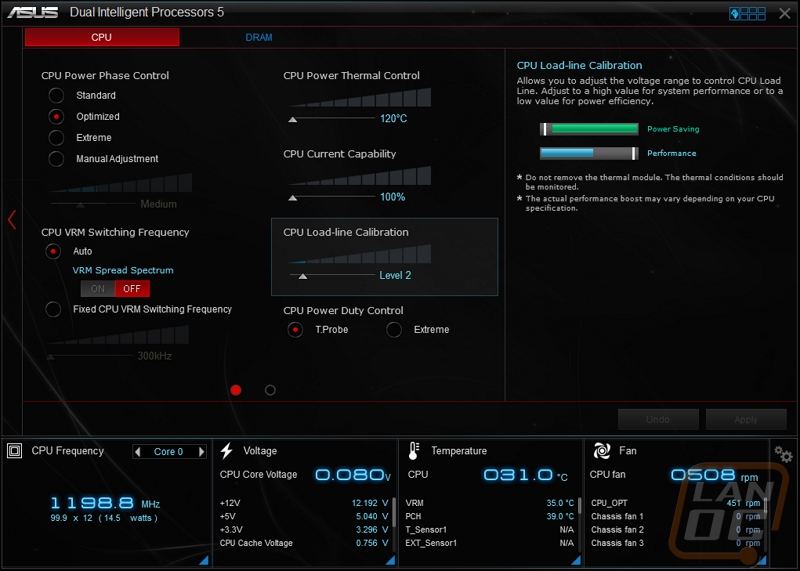
When you boot up your computer with their AISuite 3 installed you will only get a small box on the right side of your monitor. Here you can open up small temperature and voltage monitoring widgets. If you dig into it farther you can open up the full program to get access to all of the tuning options. The four main pages split up cooling, overclocking, and control of their DIGI+ power tuning. You have options to do everything automatically or dive in with basically the same functionality as the UEFI. In our overclocking section I put the auto overclocking to the test and talk about a few changes they made in there.
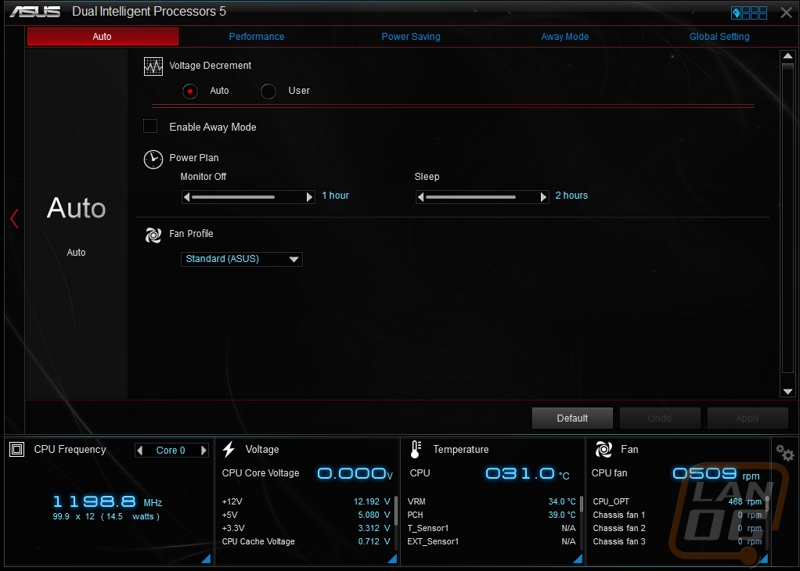
If you click up in the top right corner you can open up another page that gives you a whole list of other tuning options that aren’t overclocking related. Here you can get quick UEFI updates, get to your Wi-Fi options for turning things like Wi-Fi GO! On, USB 3.0 Boost, and even USB Charging options.
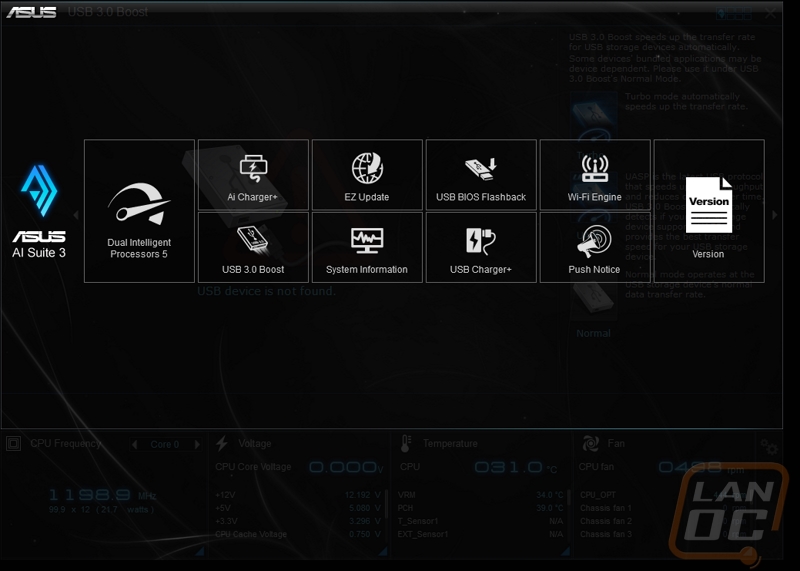
The Turbo App option is great. If you have ever used the Turbo Network options the setup is very similar. Here you can select programs or games that you have open and give them more priority over other programs you are running at the same time. For example if you stream you could set your game to have priority over OBS, this way if you run out of CPU resources it won’t slow your game down.
Like I said before Asus didn’t really make any big UEFI change for X99 but this is because what they have does what it needs to do very well. Their UEFI is easy to navigate both by mouse and keyboard without having any weird quirks. Although some of the manufactures are catching up in overall features in the UEFI, most are still clunky and hard to navigate. Its crazy that something that seems so simple could make such a big difference, but it does.
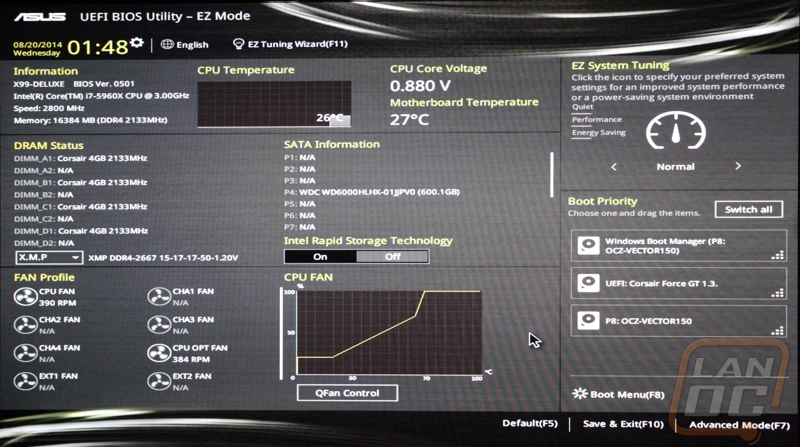
When you load into the UEFI you are dropped into EZ Mode. Here you can make basic changes that most people would be looking to do like turning on XMP and changing your boot priority. You cn see temperatures and fan speeds and you have quick links to open up fan tuning and their EZ system tuning. From there you can go to the advanced page to dig into the options we are used to seeing in the BIOS. I love that they have made it easy enough to make the basic changes without giving access to options that could really break things.
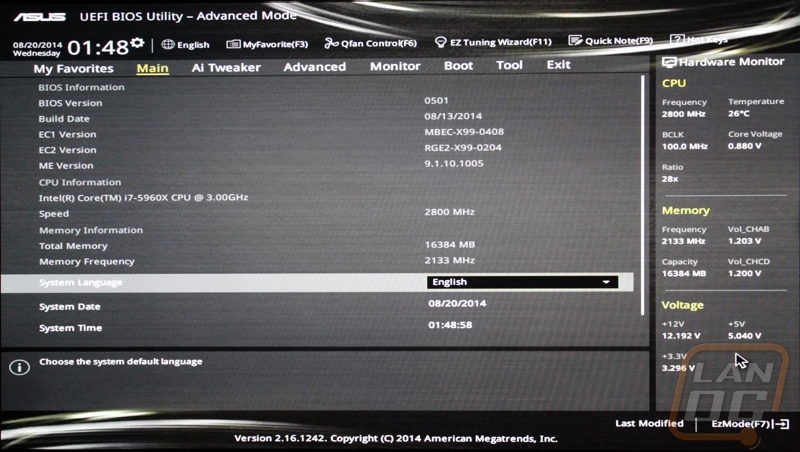
The advanced mode is a little closer to what you would normally expect for a BIOS. Sure you still have the use of a mouse and the hardware monitor on the right showing up to date numbers.
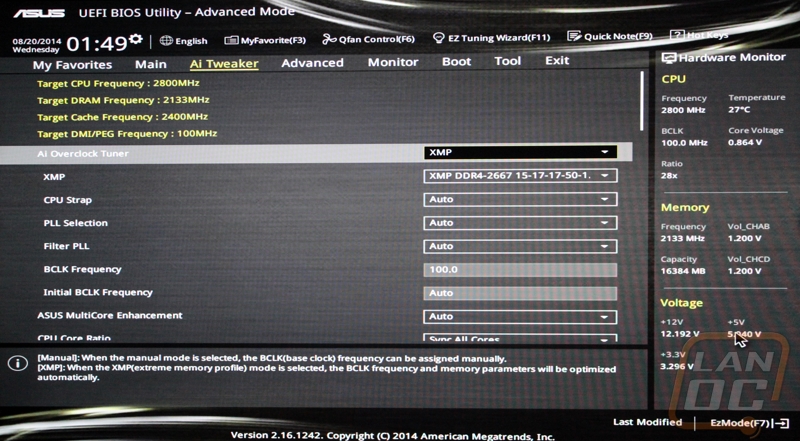
The Ai Treaker page is where you will do all of your overclocking. Here you can toy with power, CPU, and memory settings.
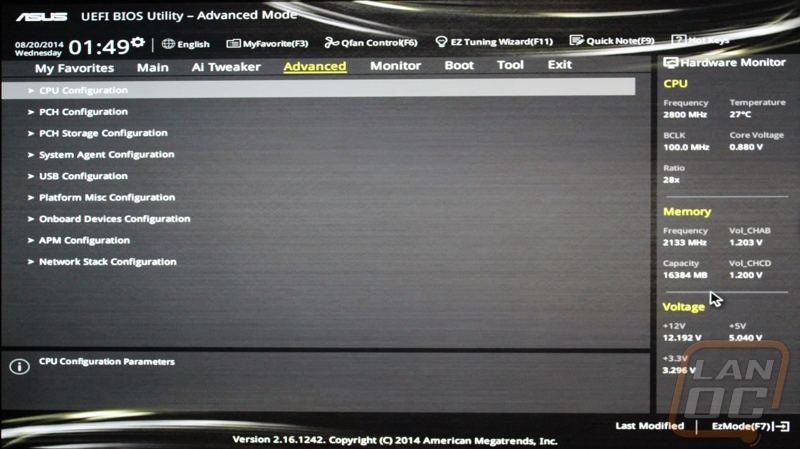
The Advanced tab is where you can turn chipset and CPU options on and off. A good example would be turning legacy USB on or off.
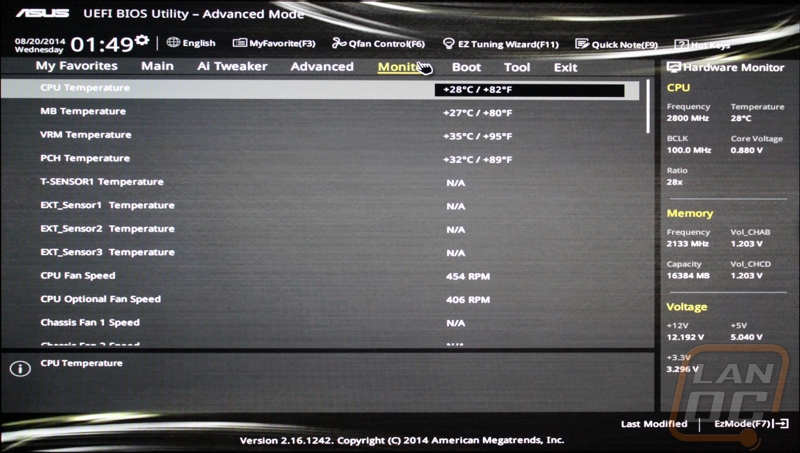
The Monitor tab is just that, a page that shows every temperature sensor, fan speed, and voltage in their current state.
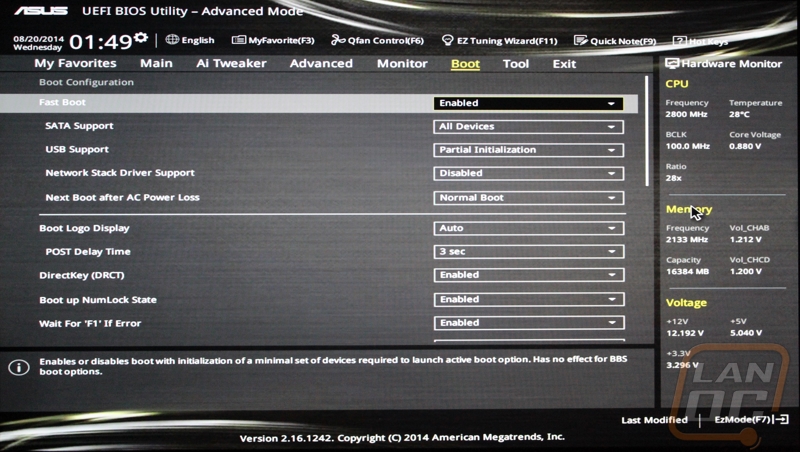
The boot tab lets you set your boot priority just like the EZ Mode but here we have a LOT more options. You can turn on Windows 8 quick boot options for example and set how you want your PC to handle boot and power loss.
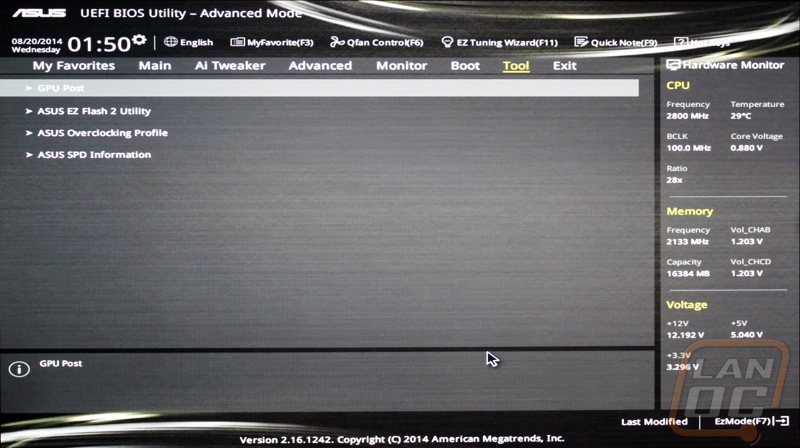
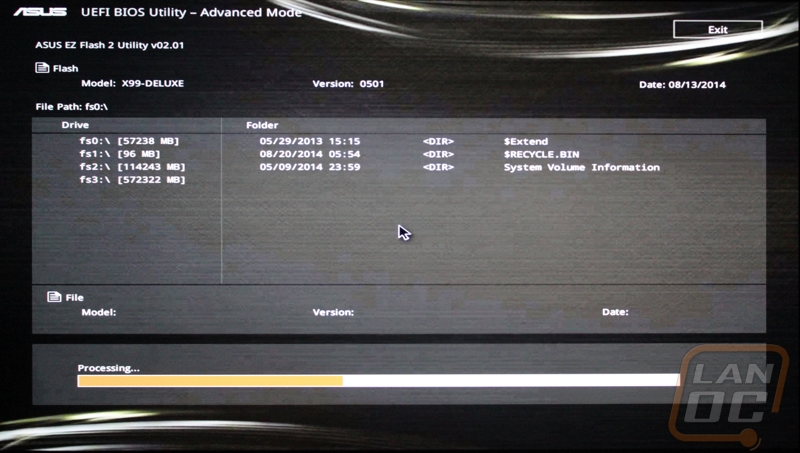
The Tools tab is the last tab. This page gives you access to a few very helpful tools that don’t really fall under any other section. You can setup your overclocking profiles on one. EZ Flash 2 Utility is what you use to update your UEFI with a new file. Even using the windows software will actually reboot you and take you into this tool.
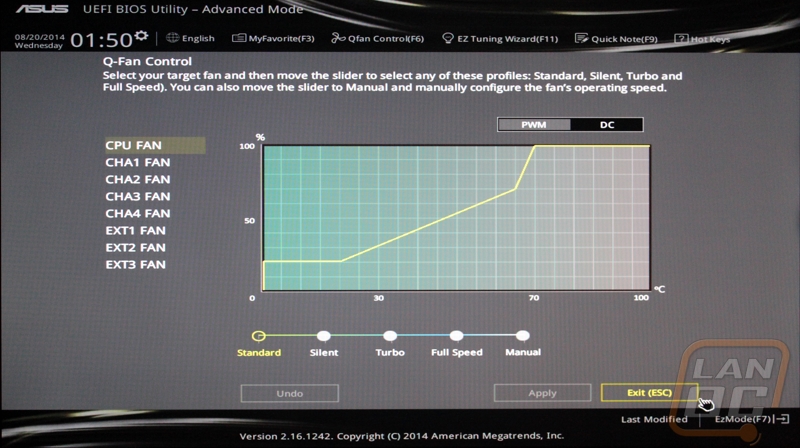
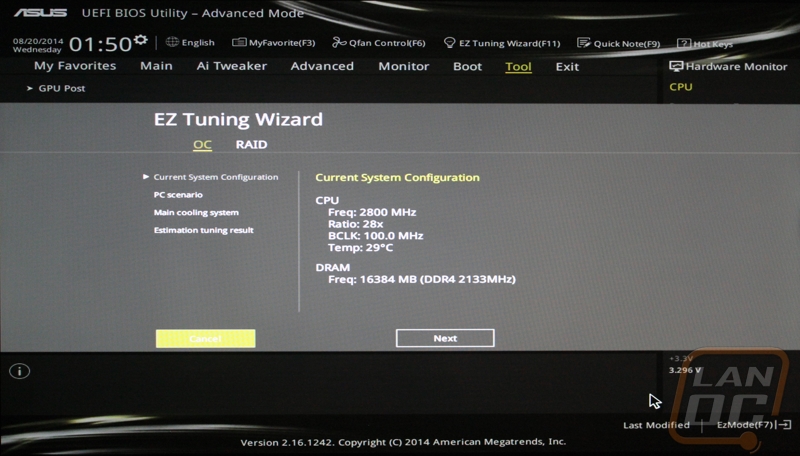
Up at the top of the page there are links for Q-Fan Control and the EZ Tuning Wizard on every page of the UEFI. The Q-Fan Control page lets you set the fan speed profile for each of your fan headers. This lets you tune things to towards cooler temps by louder fan noise or the other way around. The EZ Tuning option is actually very similar to the software overclocking that I will cover in the overclocking section, stay tuned.
Test Rig and Procedures
|
Intel LGA1150 Test System |
||
|
CPU |
Intel i7-5960X CPU |
Live Pricing |
|
Cooling |
Noctua NH-U12S for cooling Noctua NT-H1 Thermal Paste |
|
|
Memory |
Corsair Vengeance LPX 2666MHz DDR4 4x4GB |
|
|
Storage |
OCZ Vector 150 120GB SSD Western Digital Velociraptor 600GB HDD (for steam) |
|
|
Video Card |
Nvidia GTX 780 |
|
|
Power Supply |
Thermaltake Grand 850W PSU |
|
|
Case |
Dimastech Test Bench |
|
|
OS |
Windows 7 Pro 64-bit |
|
|
Motherboard Testing |
|
|
Passmark Performance Test 8.0 |
Overall PCMark score |
|
PCMark 8 |
We use the Home Accelerated benchmark and track the overall score |
|
3DMark |
We run the 2013 Fire Strike test on the performance setting |
|
In Game Tests |
|
|
Bioshock Infinite |
Using the Adrenaline Action Benchmark Tool, we run Bioshock Infinite on the “Xtreme” quality setting. |
|
Tomb Raider |
Using the Adrenaline Action Benchmark Tool, we run Tomb Raider on the “Xtreme” quality setting. |
|
Hitman: Absolution |
Using the Adrenaline Action Benchmark Tool, we run Hitman: Absolution on the “Xtreme” quality setting. |
|
Sleeping Dogs |
Using the Adrenaline Action Benchmark Tool, we run Sleeping Dogs on the “Xtreme” quality setting. |
|
Subsystem Testing |
|
|
RightMark Audio Analyzer |
We use this to test the on board audio on all motherboard that come in, this gives us an idea of their audio performance beyond subjective testing. When testing we always have our audio set to 24 bit. |
|
Crystal Disk Mark |
We use this benchmark for USB 3.0 and SATA speed tests. Testing is done with Crystal Disc Mark with a Corsair Force GT 60 Gb. USB 3.0 testing is hooked up through a Thermaltake BlackX with USB 3.0 support |
|
Passmark |
Passmark Advanced network test |
Performance
Well first things first, with this being the first X99 motherboard I am testing I don’t really have much to compare to. Lucky for us, for the most part overall performance benchmarks on a motherboard are more a formality than anything else. What we are looking for are numbers that don’t perform up to the average, in other words we are keeping an eye for any weird bugs that you might run into while using the board day to day. It’s hard to compare the numbers to any other boards because they are really based on the memory, CPU, and video card more than anything else (a little on the SSD as well in some tests). Even so I still ran the X99 Deluxe through our standard benchmarks to see where it lands. Nothing stood out as an issue on the benchmarks below, but if you happen to be building a rig using this board, the i7-5960X, and a GTX 780, you can expect some kick ass results as shown below.
|
3DMark |
|||
|
Motherboard |
Overall Score |
Graphics Score |
Physics Score |
|
Asus X99 Deluxe |
8959 |
9738 |
16185 |
|
PCMark 8 Home Accelerated Score |
|||
|
Asus X99 Deluxe |
4183 |
||
|
Passmark Overall Score |
|||
|
Asus X99 Deluxe |
4975.9 |
||
|
Bioshock Infinite Average FPS |
|||
|
Asus X99 Deluxe |
100.48 |
||
|
Tomb Raider Average FPS |
|||
|
Asus X99 Deluxe |
56.7 |
||
|
Hitman: Absolution Average FPS |
|||
|
Asus X99 Deluxe |
46.6 |
||
|
Sleeping Dogs Average FPS |
|||
|
Asus X99 Deluxe |
61.5 |
||
USB 3.0 and SATA 3
With Intel adding even more SATA3 and USB 3.0 ports on the new chipset there aren’t going to be very many motherboards that have big slowdowns on them anymore unless they add even more ports using aftermarket controllers. Even so I still put the Asus X99 Deluxe through our tests. Asus is the only company currently that offers anything like their USB 3.0 Turbo Boost. Most of the time I would think that this would just be a feature that does very little but adds a marketing point for the box. For the last few years Asus has had this feature and every single time I test it I am impressed. I mean look at the performance difference between their normal USB 3.0 read speed over the turbo speed. They manage this by using UASP Mode. The original specifications for USB 3.0 still handle the data in a similar way that they did with USB 2.0, one command at a time. UASP allows multiple simultaneous commands at once to make the file transfers more efficient. It’s still not as fast as SATA, but it is still a big improvement over normal USB 3.0.
|
SATA3 |
Read Speed |
|
Asus X99 Deluxe |
448.3 |
|
USB 3.0 |
Read Speed |
|
Asus X99 Deluxe |
245.1 |
|
Asus X99 Deluxe w/turbo |
405.3 |
Audio
Everyone’s expectations when it comes to onboard audio are a little different. For some you just want basic audio that will put sound out of your 10-dollar speakers. Others spend a LOT of money to have their PC’s compete with a concert for performance. For me my expectations fall somewhere in the middle. I have what I would consider a fairly high-end set of PC speakers but they are still PC speakers, not anything studio quality. I listen to my music on my speakers when working, watch tv on them at night but then use my headset for gaming. When going into testing the X99 Deluxe I run through a few of the normal tasks that I would do and compare it to previous experiences. I was happy with the sound quality of the Realtek sound card. I wouldn’t consider it a replacement for a sound card if you have high expectations, but it performed worlds above what I would consider basic audio. Feature wise this has similar features to Asus’s gaming motherboards short of the isolated PCB and the headphone amplifier. Considering this board is just as likely to be used in a high-end work PC as it would be for gaming I won’t fault them for not including those features.
Network
Network performance is one of those things that we tend to not even think about. Oddly enough this is one of only a few parts of a motherboard that we can test and show differences between motherboards. This is because some manufactures use different controllers. Asus prefers Intel and I would tend to side with them. Intel is more reliable and stable, especially in high usage situations. This is why we have a very expensive Intel NIC in our LAN router. With that said I did run into an issue with the X99 Deluxe in testing. I had the same issue with their Z97 as well actually. My performance numbers were noticeably lower than any other motherboards tested. After digging into the issue for nearly a full day I did come to a few conclusions. First things first, I only ran into the lower speeds when using the Trendnet TEG-S24Dg. No other motherboard ran into this issue oddly enough. But I was able to get proper tests by swapping switches.
For most people you will never run into this issue, but I do want to note it because these are fairly popular switches and we even use them at our events. The numbers were still more than enough to get your file transfers done (around 700). That said the numbers below are the true performance numbers when testing on any other switch including our other Trendnet switch. I went ahead and included the numbers when using the turbo setting as well. Turbo prioritizes your network traffic.
|
Motherboard |
Average Network Speed |
|
Asus X99 Deluxe |
887.0 |
|
Asus X99 Deluxe w/turbo |
907.6 |
Overclock
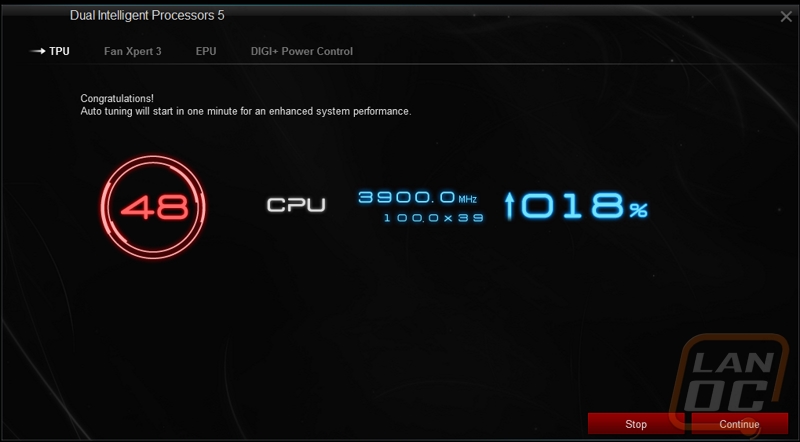
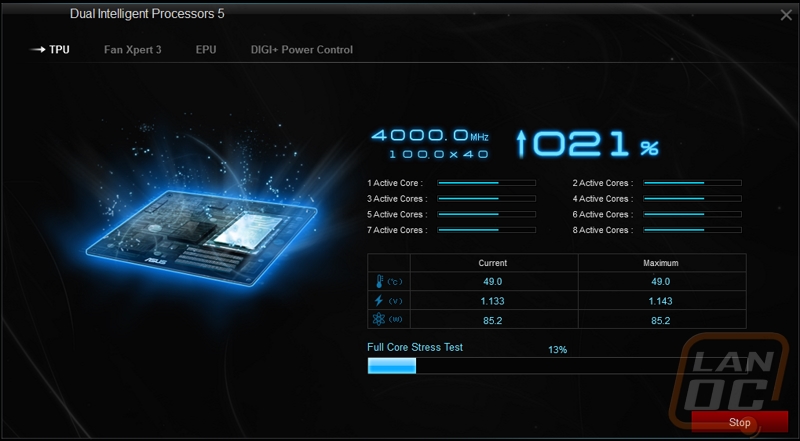
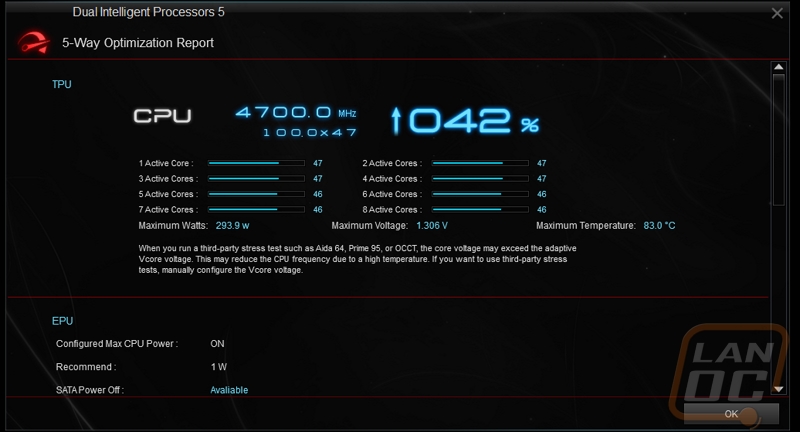
What is great about overclocking on the X99 Deluxe, you can get a great starting stable overclock just by using their 5 Way Optimization. For someone who overclocks often this is a great way to get a solid starting point to work on going even higher and anyone who doesn’t know how to overclock can overclock in short amount of time with no work. This time around they made a few improvements to the software though. Running through without getting into the advanced options didn’t change, but in advanced they added options to add a memory test when resting, an AVX Test, and even the ability to set the test duration. All of these features allow you to make the test that Asus runs after each overclock even more strict. If you plan on doing a lot of encoding on important projects for example you can tune it to test for an extended period of time. You also get options to change the starting overclock, or to set a temperature limit that you want to tune around!

I spoke about it in our i7-5960X review. I ran our CPU through the overclock. As you can see below, as Asus is bumping up to multiplier they show you what they are turning up and then as they test to make sure the overclock is stable you can see the temperatures, load, voltage, and how far into the stress test you are. In the end our CPU came out with an extremely impressive 4.7. I was actually able to edge a tiny bit more out of it myself, but for an auto tune without the Bclk tune turned on it did extremely well. As you can see from the temps, I think we could have done even better with more cooling. Sadly our water cooling on the test bench was acting up, so this was done on air. Here in the next few weeks I might have to put together a custom loop and turn things up even more.
Overall and Final Verdict
When it comes to motherboards I generally know I can count on Asus boards being packed full of features no matter the price point. When you get up into high end enthusiast chipsets things can sometimes get a little silly. Just going through the packaging section for a minute and checking out all of the accessories the X99 Deluxe comes with shows you how much value Asus really tried to add with this board. You get 3T3R wireless with Bluetooth, a second M.2 slot via a PCI card, enough SATA cables to tie someone up, and a really cool PWM fan header expander. This is on top of everything that they packed into the motherboard. Just to give you an idea of how packed the PCB is, they had to actually mount the M.2 header in a vertical position because laying it down would take up to much space!
The white theme also made me very happy, it’s just a shame they don’t have a white dual CPU board that I could put in my Fridge build. White is more natural than the gold on their other boards while still being something fresh and eye catching. Really the only issue I had with the board was the issue with our Trendnet switch that caused slowdowns when doing network testing.
The software, as always, was top notch. They didn’t improve on much from Z97 but the changes in how they handle auto overclocking were welcomed! The only other downside to the board really is the overall cost. At just under $400 this isn’t going to be a board for everyone. Its not even that it’s a bad deal, because they packed it full of features. The problem is if you spend $400 on your motherboard, $583 or even $389 for a CPU, and around $400 on ram you already have hit your bank account really hard. That is before picking up the SLI or Crossfire video cards that are going to go perfectly with this setup and everything else. BUT if you have the room in your budget the Asus X99 Deluxe is a great board to keep in mind.