UEFI and Software
Asus has always innovated with their software, typically we can look at what they are doing this generation and see what to expect from the competition next year. This is why as a whole I have preferred to use their motherboards in our test benches and systems when possible. For the X99 Deluxe they didn’t make any huge changes but as always it was easy to use and packed full of features.
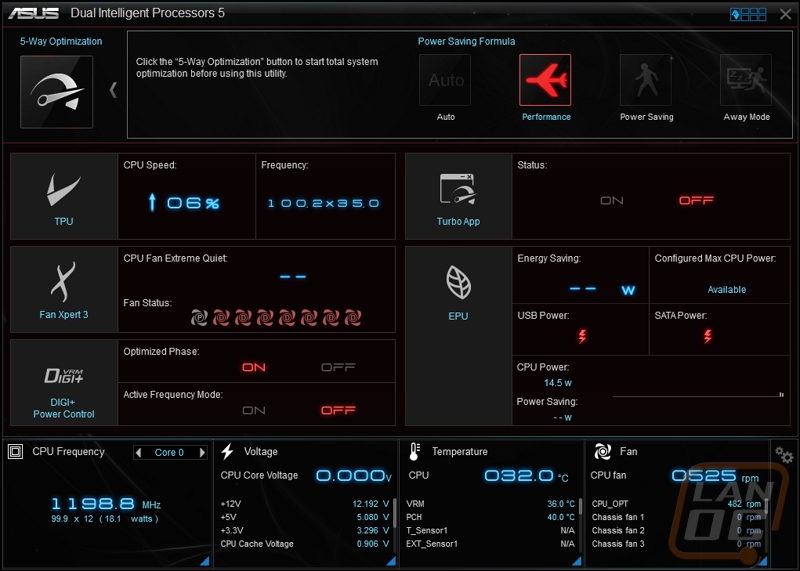
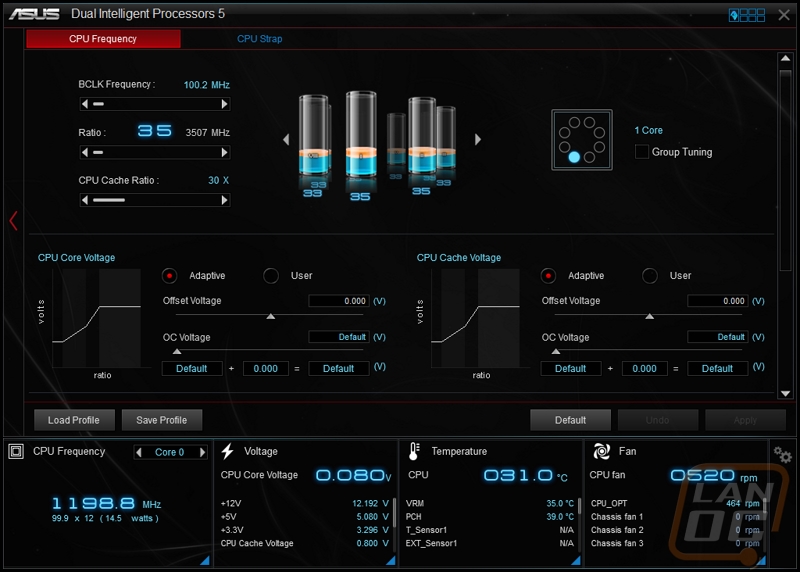
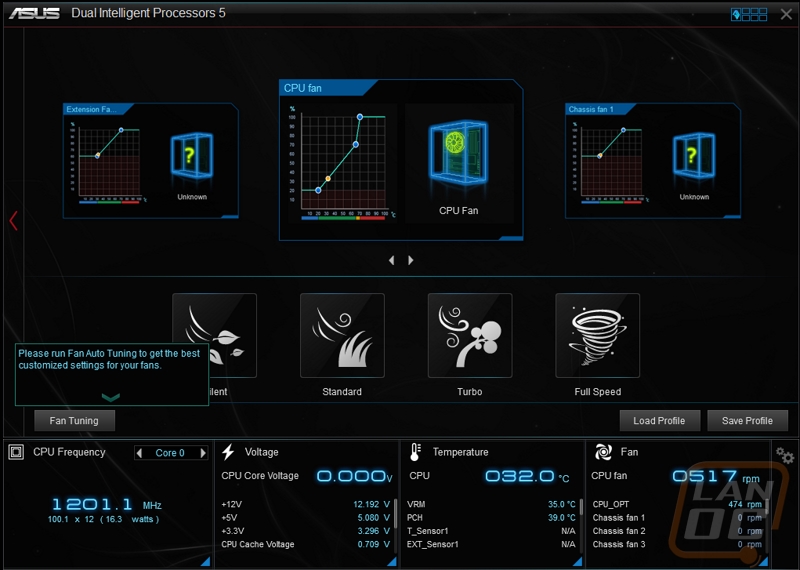
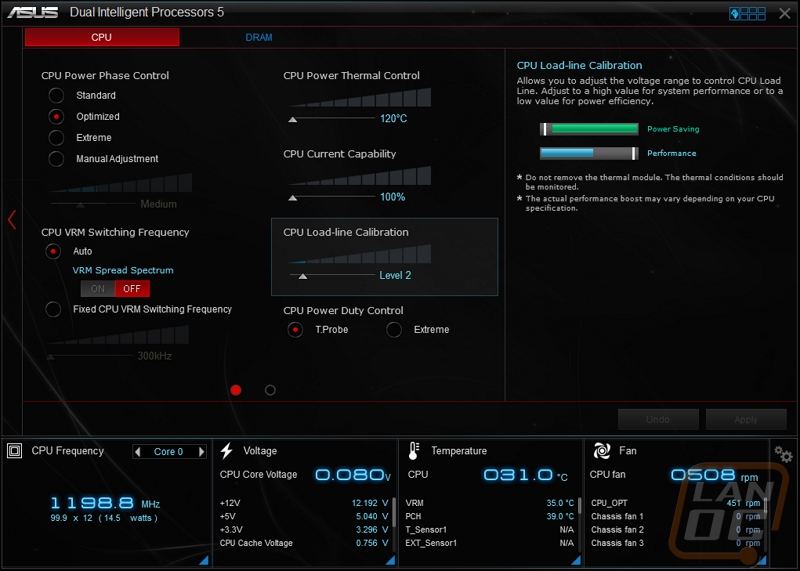
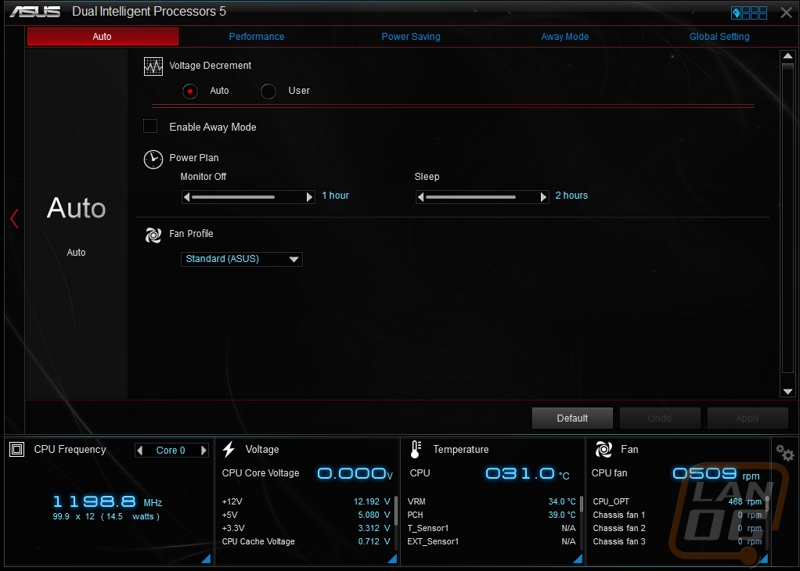
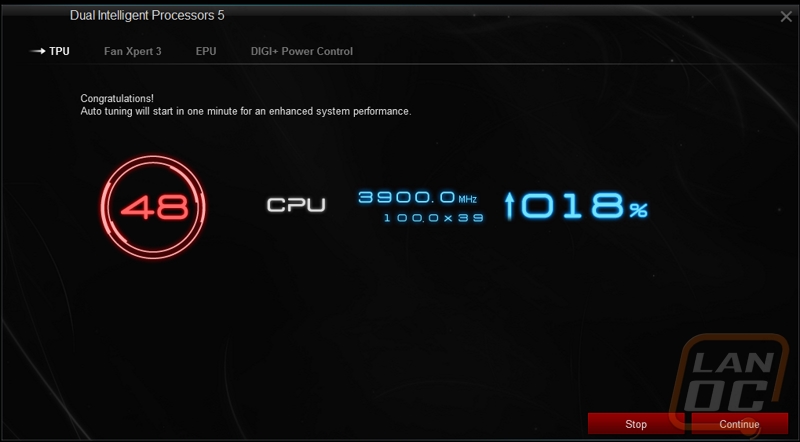
When you boot up your computer with their AISuite 3 installed you will only get a small box on the right side of your monitor. Here you can open up small temperature and voltage monitoring widgets. If you dig into it farther you can open up the full program to get access to all of the tuning options. The four main pages split up cooling, overclocking, and control of their DIGI+ power tuning. You have options to do everything automatically or dive in with basically the same functionality as the UEFI. In our overclocking section I put the auto overclocking to the test and talk about a few changes they made in there.
If you click up in the top right corner you can open up another page that gives you a whole list of other tuning options that aren’t overclocking related. Here you can get quick UEFI updates, get to your Wi-Fi options for turning things like Wi-Fi GO! On, USB 3.0 Boost, and even USB Charging options.
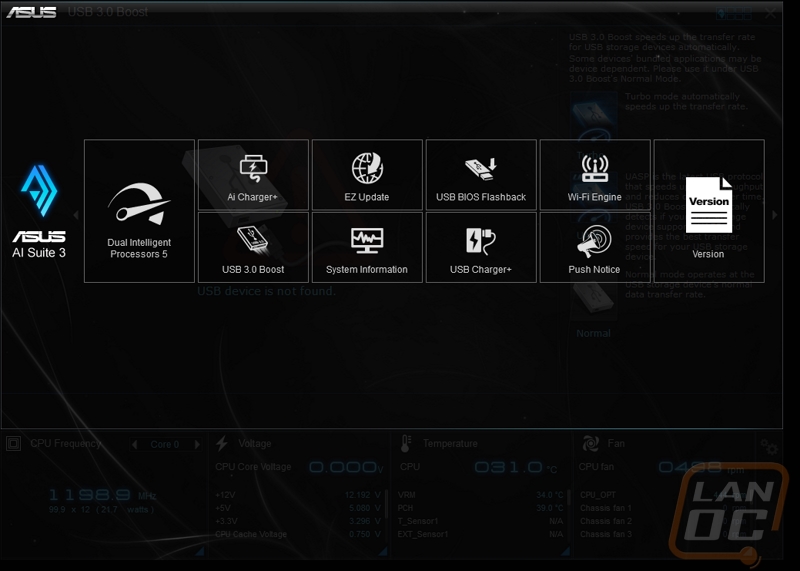
The Turbo App option is great. If you have ever used the Turbo Network options the setup is very similar. Here you can select programs or games that you have open and give them more priority over other programs you are running at the same time. For example if you stream you could set your game to have priority over OBS, this way if you run out of CPU resources it won’t slow your game down.
Like I said before Asus didn’t really make any big UEFI change for X99 but this is because what they have does what it needs to do very well. Their UEFI is easy to navigate both by mouse and keyboard without having any weird quirks. Although some of the manufactures are catching up in overall features in the UEFI, most are still clunky and hard to navigate. Its crazy that something that seems so simple could make such a big difference, but it does.
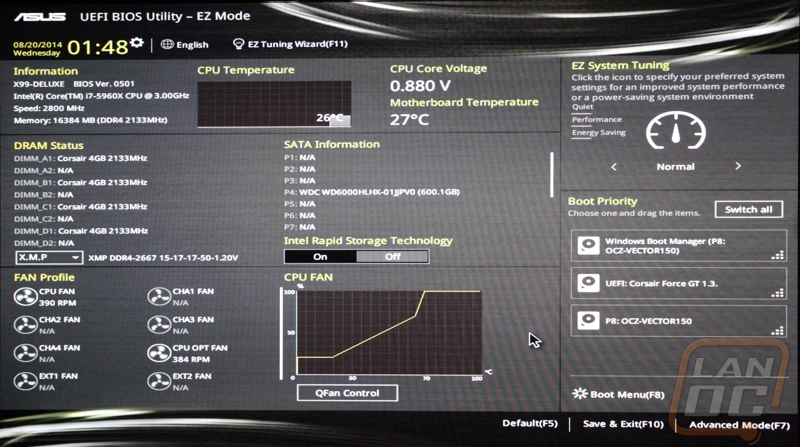
When you load into the UEFI you are dropped into EZ Mode. Here you can make basic changes that most people would be looking to do like turning on XMP and changing your boot priority. You cn see temperatures and fan speeds and you have quick links to open up fan tuning and their EZ system tuning. From there you can go to the advanced page to dig into the options we are used to seeing in the BIOS. I love that they have made it easy enough to make the basic changes without giving access to options that could really break things.
The advanced mode is a little closer to what you would normally expect for a BIOS. Sure you still have the use of a mouse and the hardware monitor on the right showing up to date numbers.
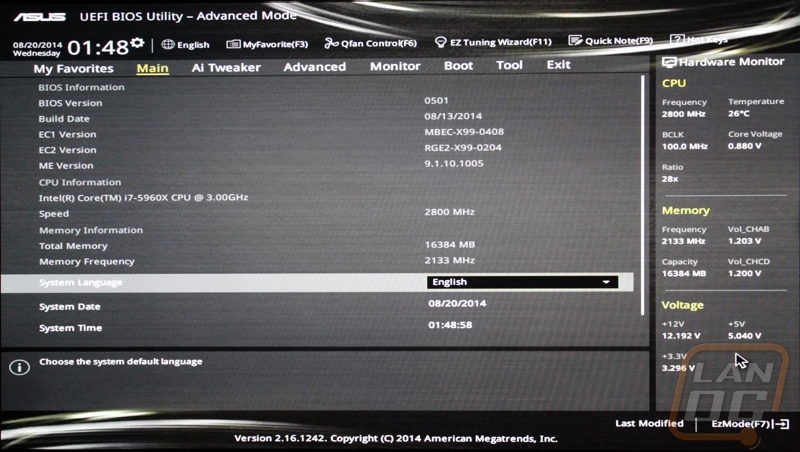
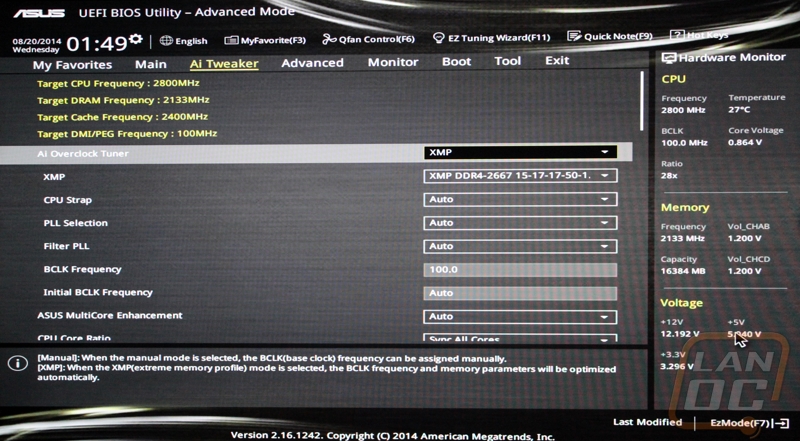
The Ai Treaker page is where you will do all of your overclocking. Here you can toy with power, CPU, and memory settings.
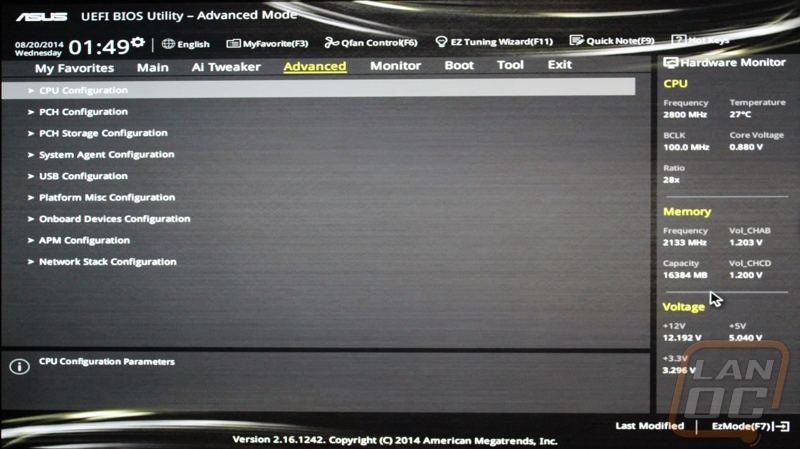
The Advanced tab is where you can turn chipset and CPU options on and off. A good example would be turning legacy USB on or off.
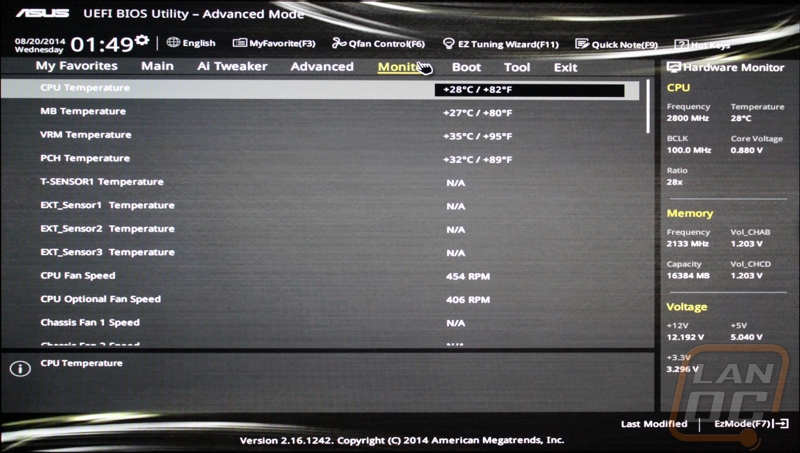
The Monitor tab is just that, a page that shows every temperature sensor, fan speed, and voltage in their current state.
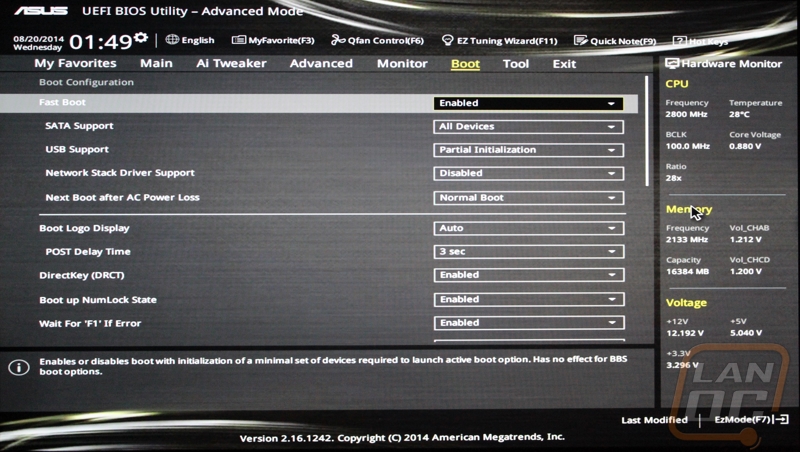
The boot tab lets you set your boot priority just like the EZ Mode but here we have a LOT more options. You can turn on Windows 8 quick boot options for example and set how you want your PC to handle boot and power loss.
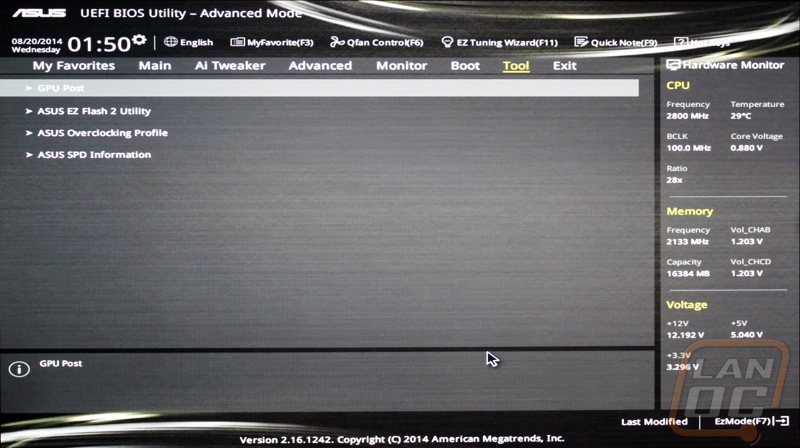
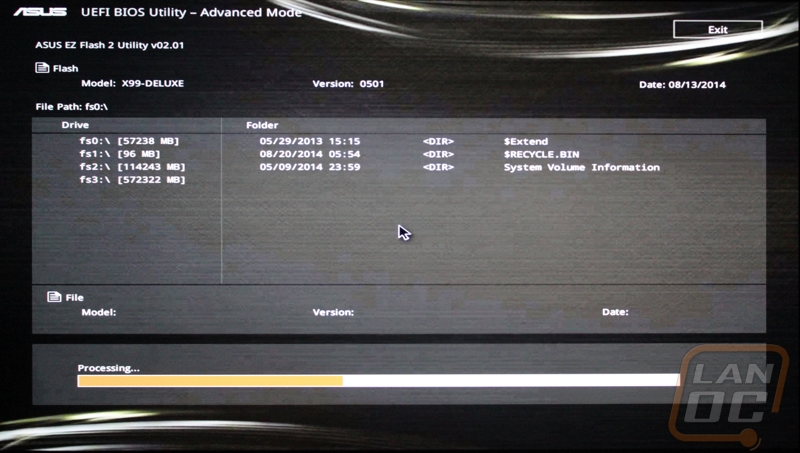
The Tools tab is the last tab. This page gives you access to a few very helpful tools that don’t really fall under any other section. You can setup your overclocking profiles on one. EZ Flash 2 Utility is what you use to update your UEFI with a new file. Even using the windows software will actually reboot you and take you into this tool.
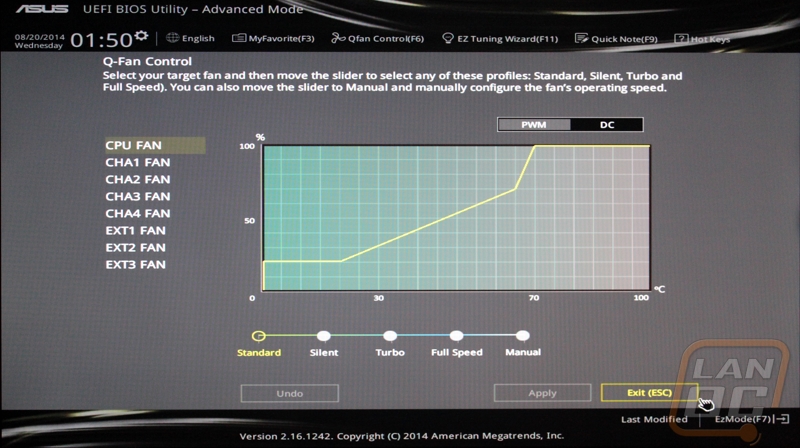
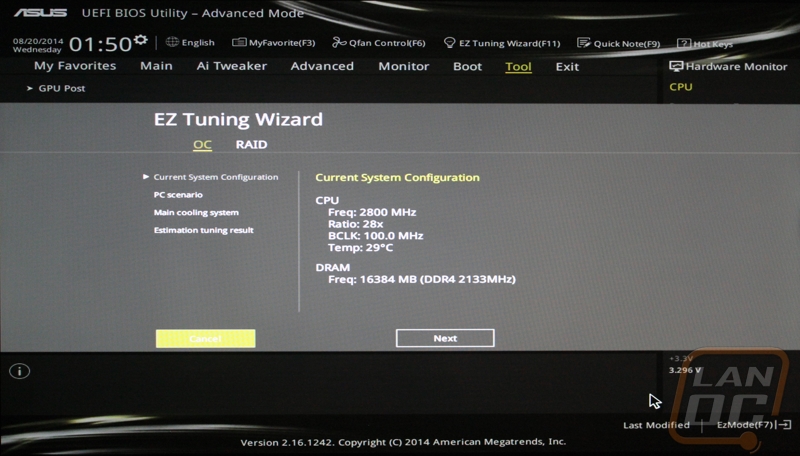
Up at the top of the page there are links for Q-Fan Control and the EZ Tuning Wizard on every page of the UEFI. The Q-Fan Control page lets you set the fan speed profile for each of your fan headers. This lets you tune things to towards cooler temps by louder fan noise or the other way around. The EZ Tuning option is actually very similar to the software overclocking that I will cover in the overclocking section, stay tuned.