Board Layout and Pictures
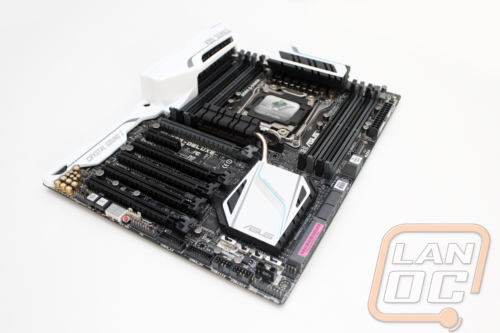
The most obvious thing that stood out when I first got the X99 Deluxe into my hands was its new white color scheme. It’s crazy that with all of the different color schemes out there no one has gone with white. It should look great it nearly any case, especially with white cases being so big over the last few years. Once I got past the new color, the cover that runs over the rear I/O all the way down to the bottom of the board caught my eye. This basically covers up everything that you might not care to see while adding even more white to the mix. The only thing I was disappointed with on the cover is that it is plastic. Obviously, they wouldn’t be able to do such a curvy design in metal, but my initial thought was that they went with a metal cover to help isolate the audio even more from any potential interference. Even so, the X99-Deluxe looks amazing!
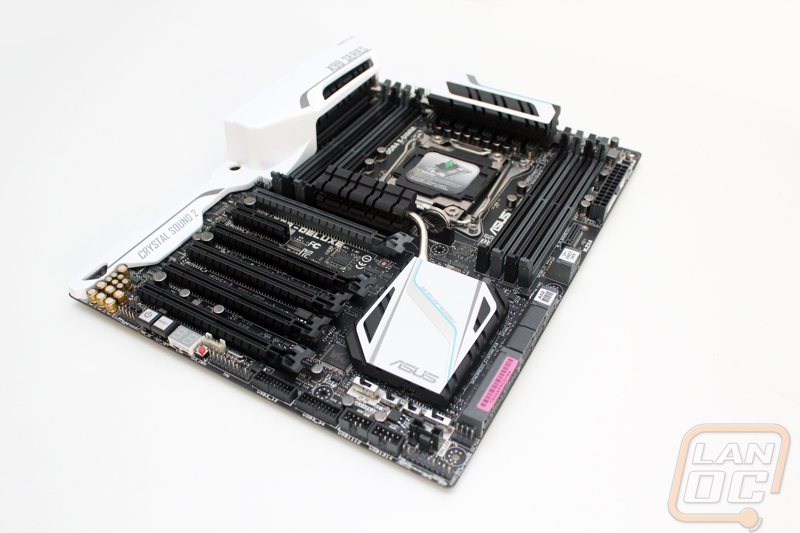
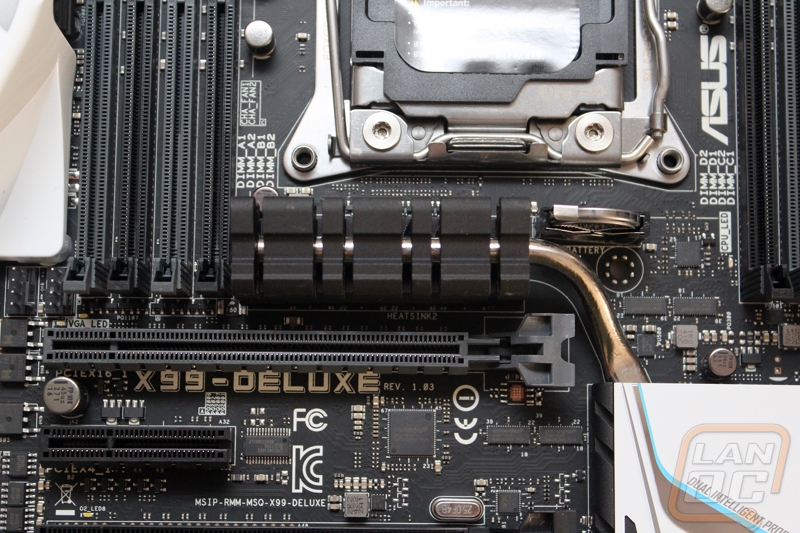
Not only did they change to while on the heatsinks, but the overall design is completely different from the X79 Deluxe. The new design has a little more style with the flat areas on the top for the white trim. The heatsinks are actually a lot like the black ROG heatsinks that Asus has been doing for the last few years. We have a heatsink above the CPU socket, one under the socket, the chipset cooler down next to the PCIe slots, and the last up under the I/O cover of all places. Each of the heatsinks are connected together with heatpipes to help spread the heat around.

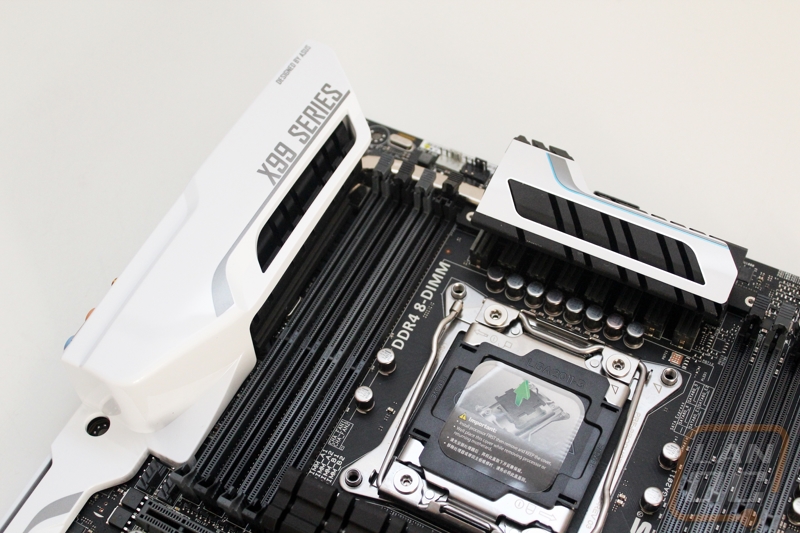
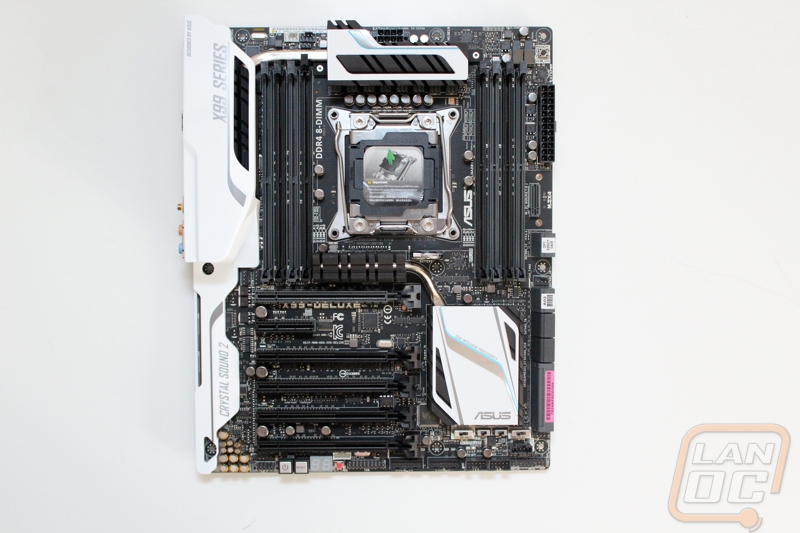
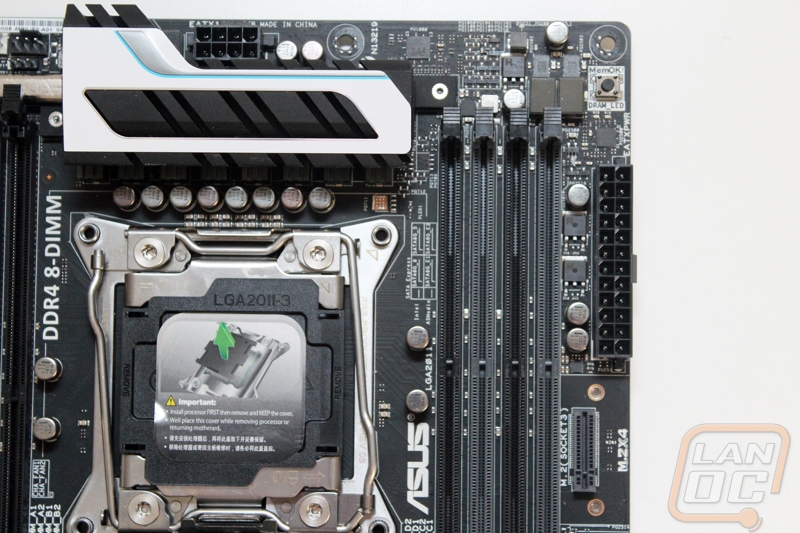
Starting up in the top left corner we have two four pin PWM fan headers for the CPU fan. Just under them are four of the new DDR4 DIMMS. The new ram slots have tabs on one side only to make things easier. Tucked up under the left DIMMS are two more four pin PWM fan headers for case fans. Just above the top heatsink is the eight pin CPU power connection.
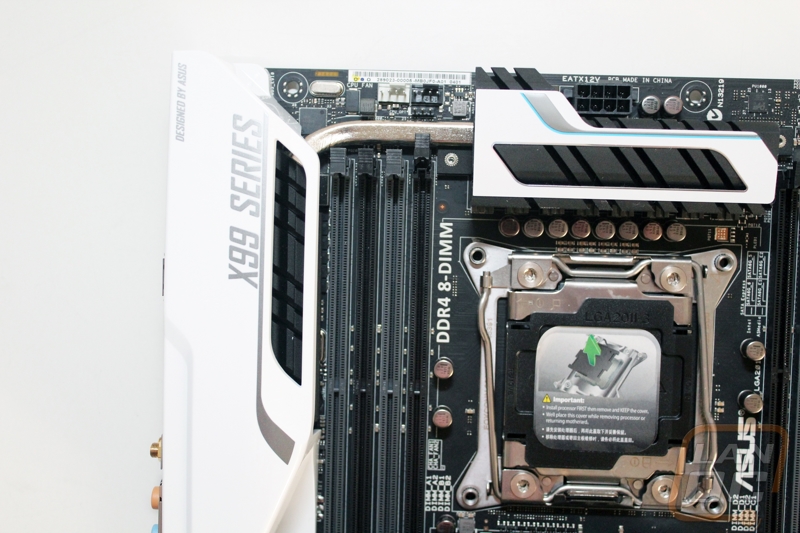
In the top right we have the other four DDR4 DIMM slots. Next to the slots is the standard 24 pin motherboard power connection. The weird vertical M.2 connector is just below the 24 pin, in order for this to work you have to use the included vertical mount as well. Up in the top corner is also the MemOK button. This has an led that will light up when you are having memory errors. Holding the button will restart the PC and turn the memory clock speeds down until it boots correctly. This is a great feature that will prevent someone from having booting problems with high end memory.
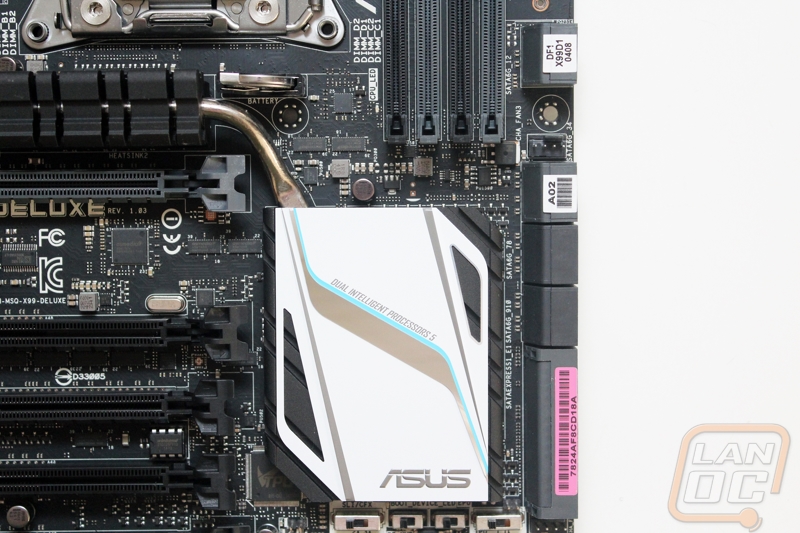
Moving down along the right side of the board next to the chipset cooler we have all of the various SATA connections. You get 8 SATA 3 connections as well as two SATA Express plugs. SATA Express is a little new, but if you are buying X99 you are most likely not looking to upgrade for a few years. Having them now will help extend the useable life of the board. In between the SATA ports you also get another four pin PWM fan header making it a total of 5 so far.

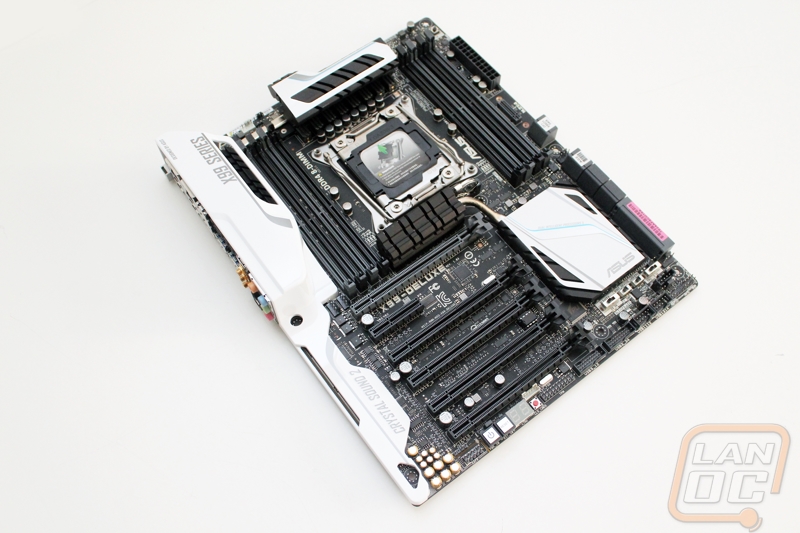
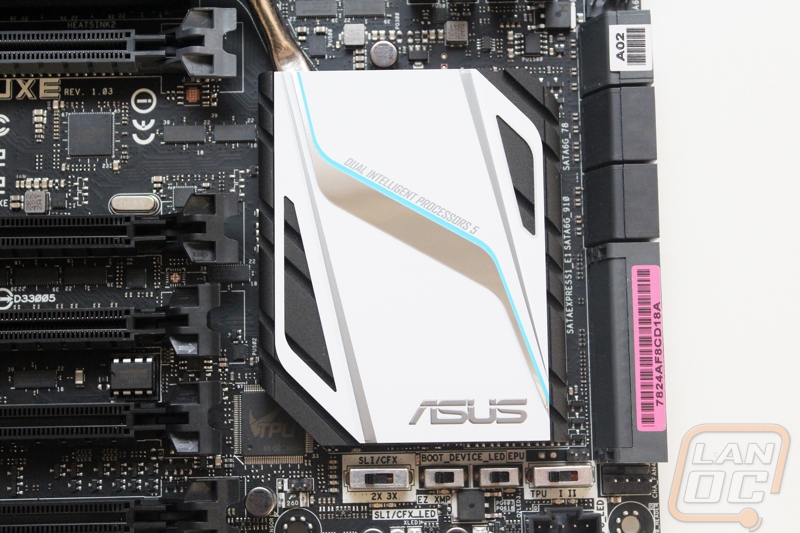
Boy oh boy, the bottom has a lot going on. Just below the chipset cooler you have four different switches. One adjusts TPU settings and the one to its left is for the EPU. There is one that turns on easy XMP meaning it turns your memory XMP settings on automatically, saving you from one adjustment in the bios on boot. The last is the SLI/Crossfire LED. This was a small feature Asus added this time around to help people when installing multiple GPUs. Simply put, it turns on LED lights next to the PCIe slots than you should hook up your video cards. There are options for single, 2 and 3 way. This was in response to a lot of people getting on their forums asking what the best slots to run their cards in are. I love the idea of it. The only thing that might be hard is getting people to know it is there. The people who aren’t sure where to plug in their video cards may also be the same people who wouldn’t look to closely at small switches on their motherboard.
Down along the bottom edge we have all of the connections. In the right corner you have the front panel connections as well as our sixth four pin fan header. Next re two USB 2.0 headers and two USB 3.0 headers. I love that I’m starting to see more boards have two internal USB 3.0 headers, I hope to see more cases have four total connections. Lastly on the left is the TPM connection aka the trusted platform module header.
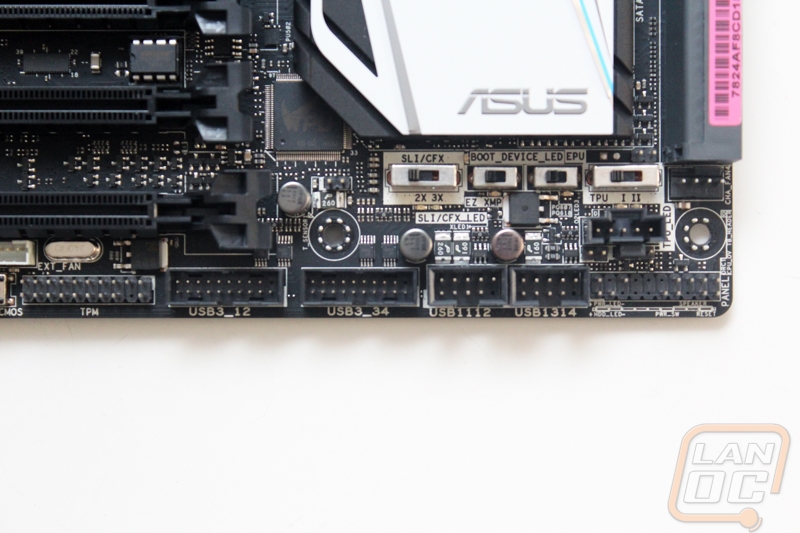
There is a little less going on in the bottom left corner. Here we have all of the gold caps for the Realtek 1150 8-Cn audio card. Next to them is the front panel audio connection. From there you have power and reset buttons for when toying with the X99 Deluxe on a test bench or with the door off. Then you have an LED diagnostic readout and a clear CMOS button. The white plug just above the cmos button is actually for the included four PWM fan extender that Asus bundled with the board. We have a total of 6 four pin fan headers on the board and 10 if you use the extender.
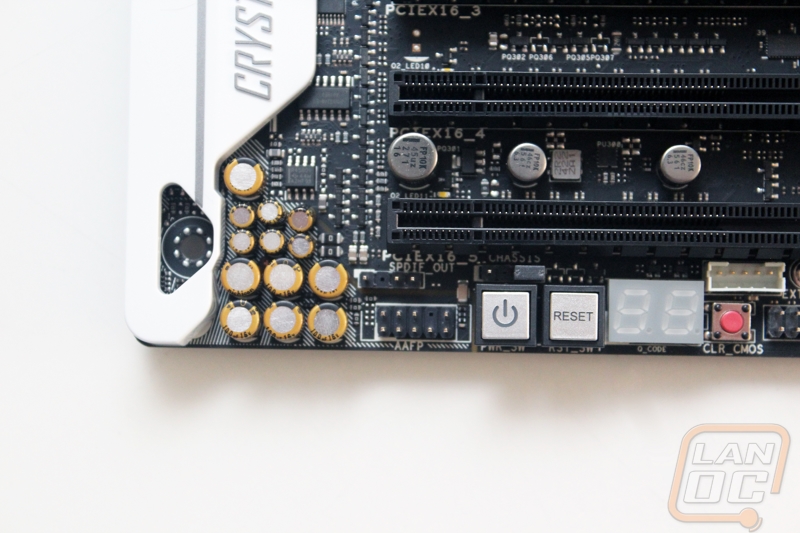
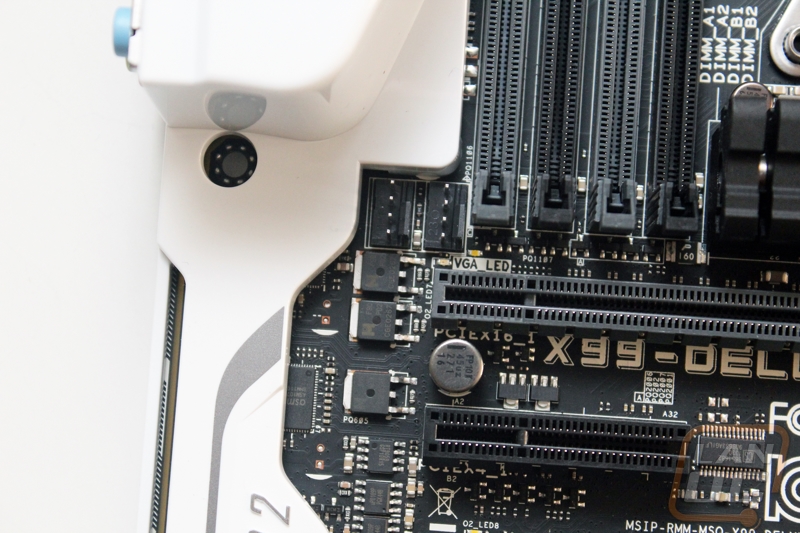
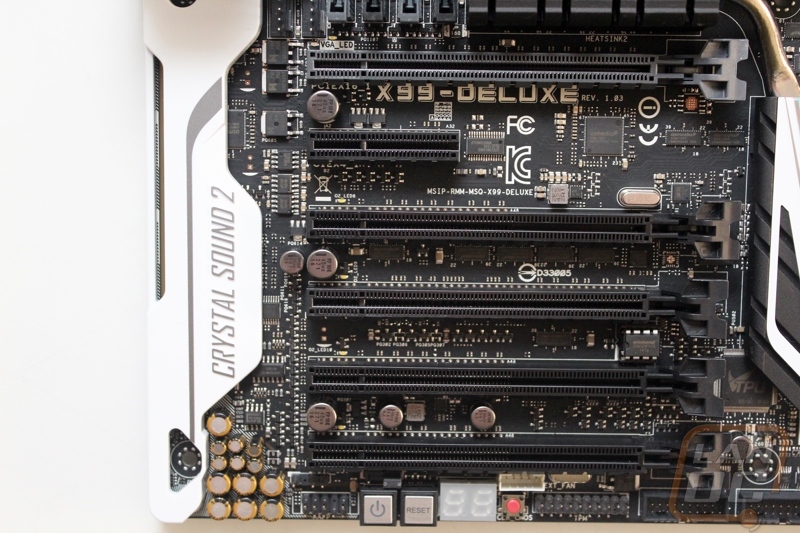
For PCI slots you get one PCIe x4 and five different PCIe x16 slots. While the 5960X does have 40 PCI lanes, that isn’t enough to support all five at a bandwidth of x16 so in the end you can run two in x16 and one in x8 for triple video card setups.
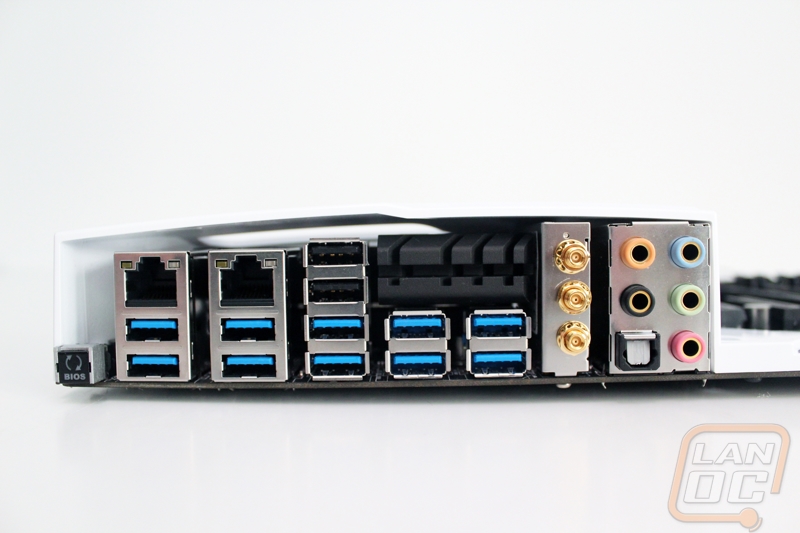
If you have been looking for more USB 3.0 connections Asus has heard you loud and clear. The X99 Deluxe has an impressive 10 USB 3.0 connections along the back, all running on the Intel controller. There are still two USB 2.0 connections as well for you to be able to run your mouse and keyboard on before drivers are installed. All the way over on the left you have a BIOS reset button to keep you from having to dig around looking for the jumper at the worse possible moment. You get two Ethernet connections as well. Both are Intel but they use two different model Intel controllers. Over on the right side you have the three antenna connections for the 3T3R wireless AC NIC and a fairly standard audio configuration with five plugs and an optical connection.
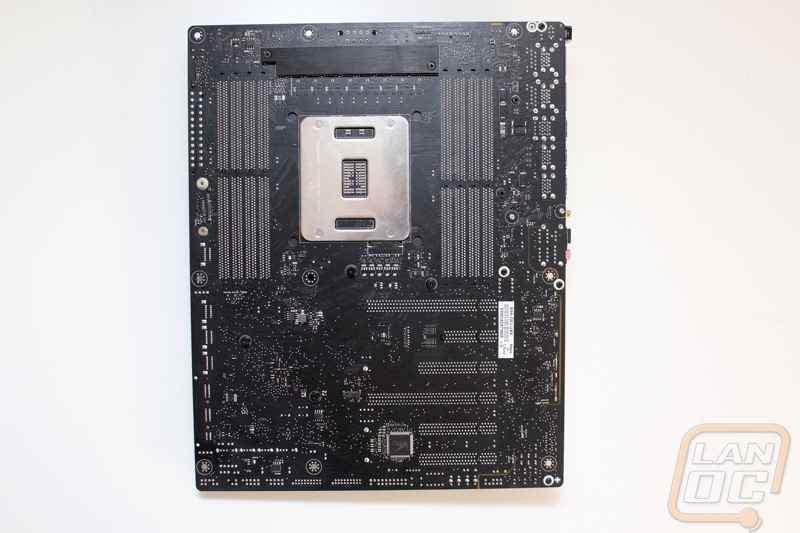
With the X99 Deluxe flipped around we have a better look at the flat black PCB. From here we can also see just how busy this board is, Asus didn’t leave one area untouched.