Photos and Features
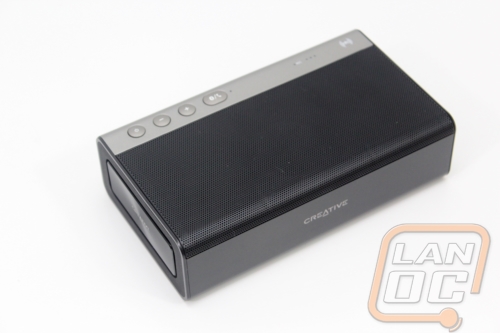
If you have seen the original Sound Blaster Roar the Roar 2 maintains the same shape and a lot of the same features. If this is your first time, like me, the Roar 2 has a similar shape to two old VHS tapes stacked together. This makes it easy enough to carry around but it isn’t exactly portable enough to just put in your pocket. Even if you have large pockets. All of the speakers on the Roar 2 face out the one direction making it easy to direct the sound in the direction you need or lay it flat on its back for music all around.
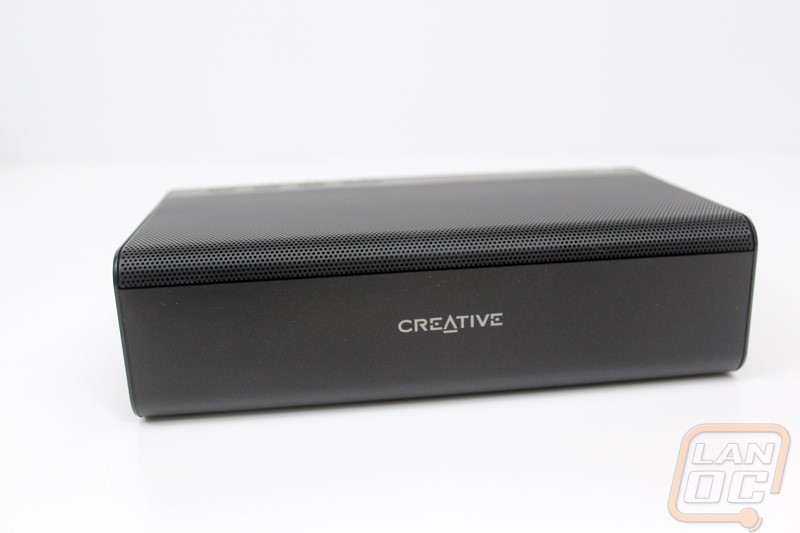
The front edge of the Roar 2 has nothing going on other than the Creative logo across it. This is the side that you can put the additional rubber feet on to angle the Roar 2 in one direction.
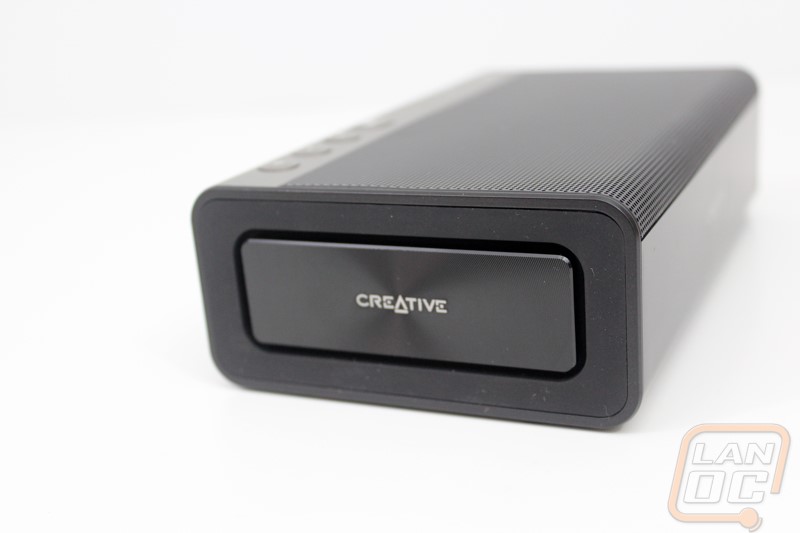
On both ends of the Roar 2 Creative replaced the mesh ends of the original Roar with panels. They call these panels passive radiators and what they do is move with the airflow of the 2.5 inch mid and bass driver up top to increase the Roar 2’s bass output. You can also see them move when in use as well, just like a bass driver.
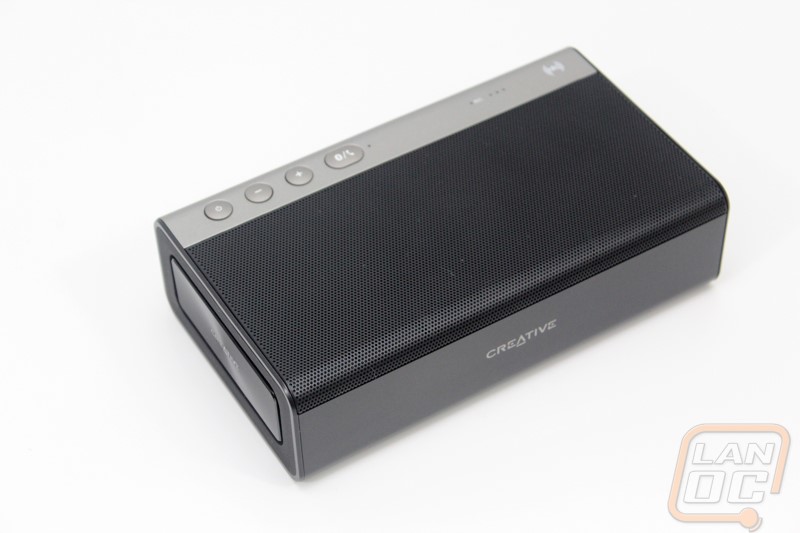
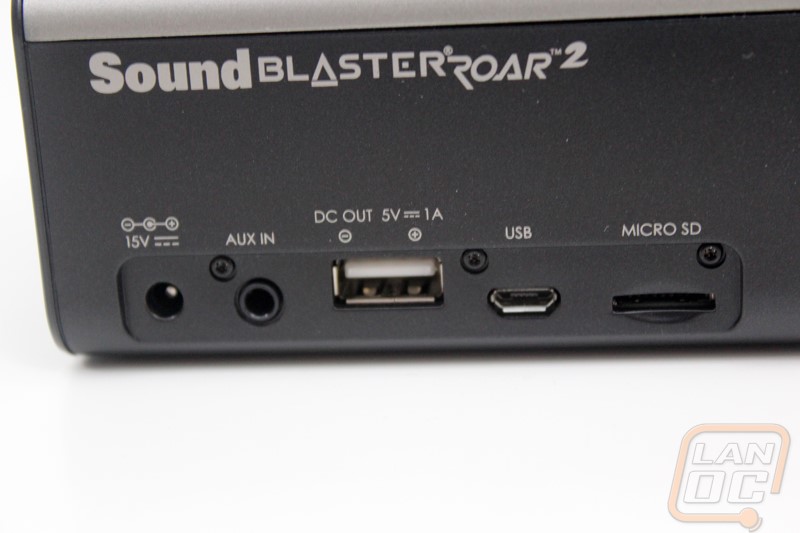
All of the controls and connection options for the Roar 2 are all packed into the one end of the speaker with the exception of a few of the buttons that wrap up around onto the top. There is a lot going on here so let’s try to break it all down. For connections everything is down in the bottom left corner. You get a power connection to recharge the built in battery in the Roar 2. Next to that is an auxiliary in port that you can hook up nearly anything to if needed. After that is a USB port that you can actually plug your phone or tablet into to use the built in battery to recharge or maintain the charge on your device when playing music on the go using the built in 6000mAh battery. Next is the micro USB port, you can use this to recharge the Roar 2 or you can even hook it up as an audio device this way. It will even connect to a PS4 using the Micro USB port to enhance your gaming experience. The last connection is a Micro SD card slot, you can load up your music and play your music without having any other devices hooked up to the Roar 2.
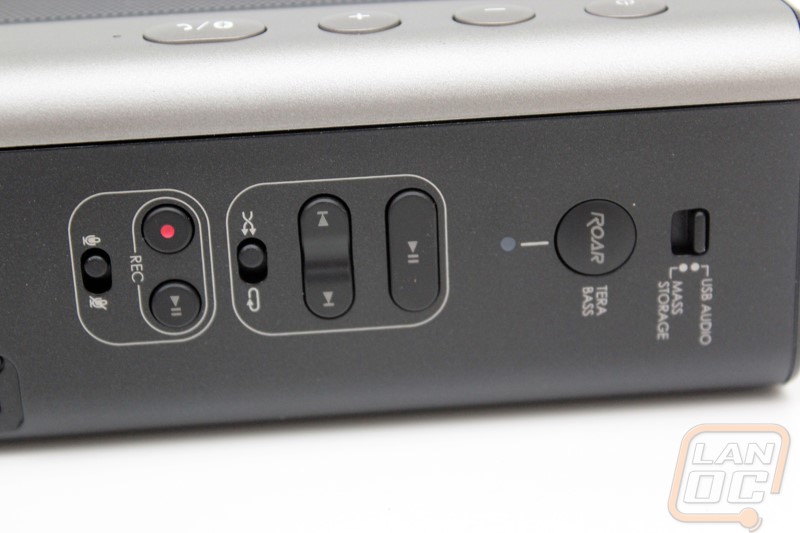
Over on the right half of the back panel we have all of the controls. For starter the switch at the end is how we flip between USB audio or using the built in Micro SD card. Next to that is the Roar button, this bumps up the bass performance. Next you have playback controls to flip through songs, play/pause, and to have random songs or to play them in order. Next are the recording controls. Along with being a speaker the Roar 2 actually has a built in microphone for use as a speakerphone and you have the option when you have an SD card in to record notes or even record a speakerphone call if you want.

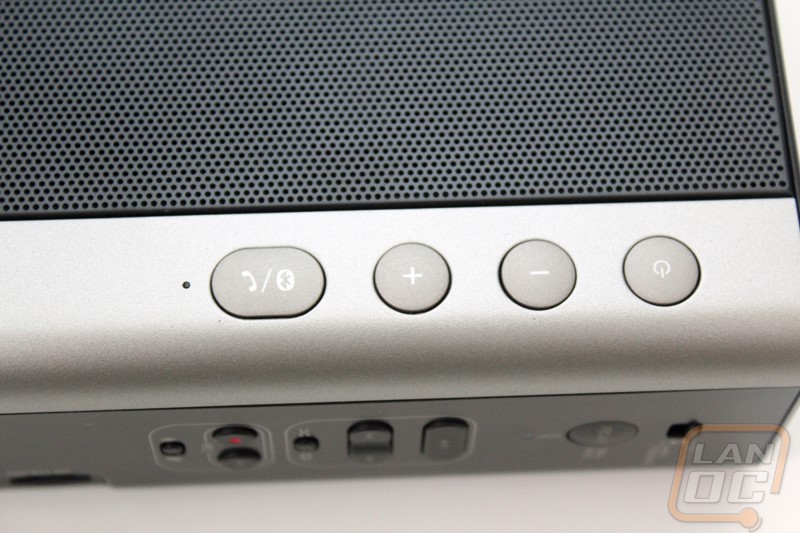
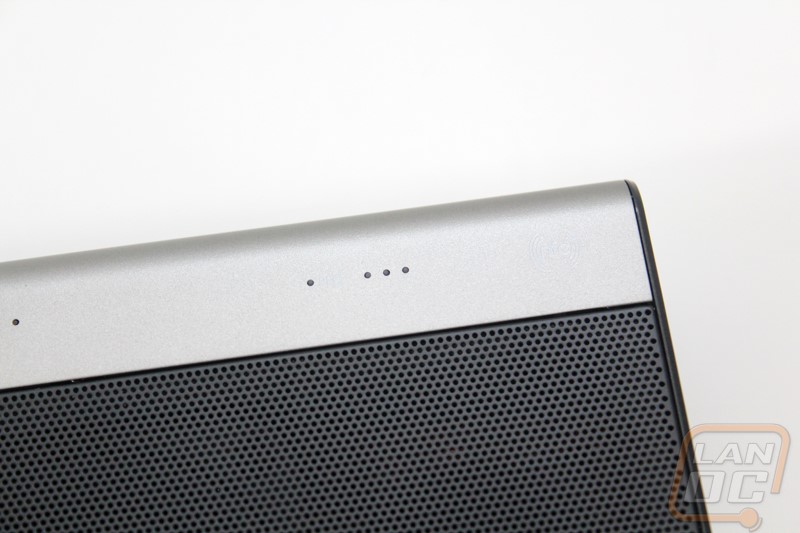
Up on the top edge of the Roar 2 next to the side panel controls we have the rest of the Roar 2’s controls. Here we have a power button, volume controls, and the speakerphone/bluetooth setup button. The controls are large and easy to use due to their size. To turn the Roar 2 on and off you press and hold the power button, the two middle buttons handle volume and the end button will answer your phone on speakerphone if you get a call or if you press and hold it you can put the Roar 2 into a Bluetooth searching mode to connect it to your devices. Also long the edge are a few pinhole LEDs that will let you know how the Roar 2 is doing on battery life. Next to the pinholes the Roar 2 also has a small NFC logo, this is because on the top they have built in NFC to let you touch your phone and automatically connect it as a speaker to make setup even quicker.
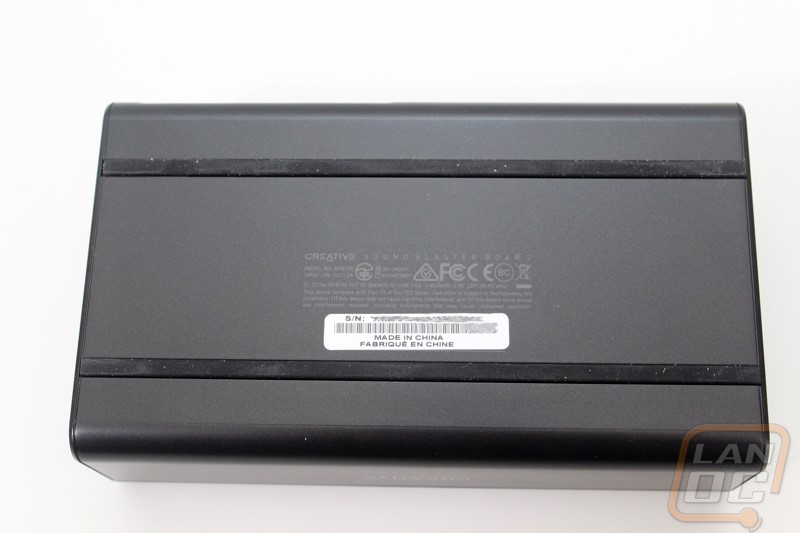
The bottom of the Roar 2 doesn’t have to much going on. Here you have all of the standard required stuff printed on the bottom and then a sticker with the serial number should you need to RMA it. Then from one end to the other there are two rubber strips to keep the speaker from getting scratched up and to keep it from sliding when you have it out.
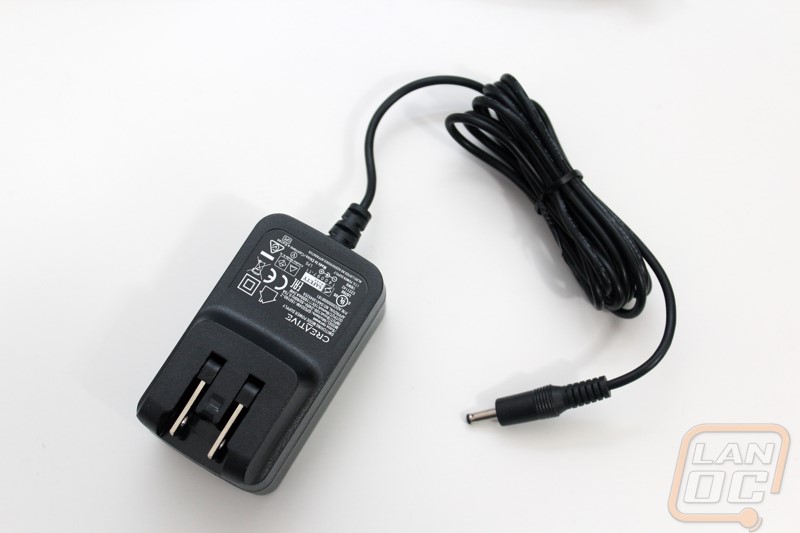
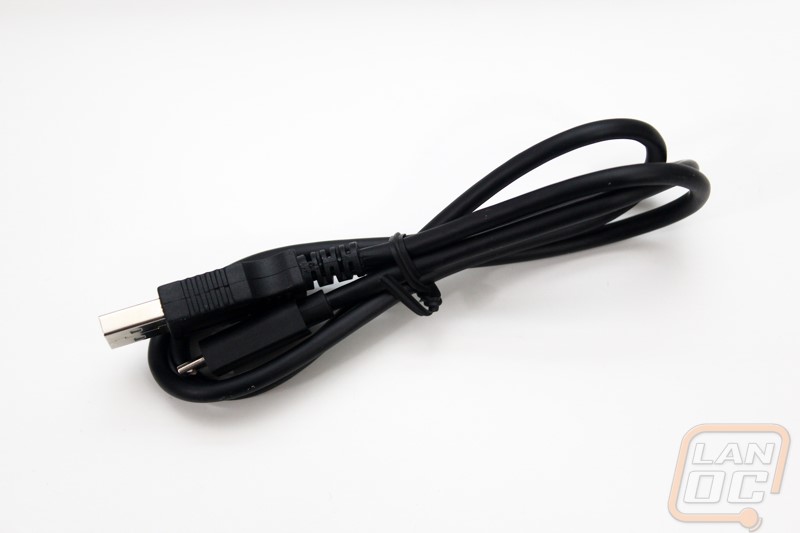
For accessories, the Roar comes with its power cord to get it recharged in between uses or during extended use as well as a thick USB to Micro USB cord for hooking up some devices.
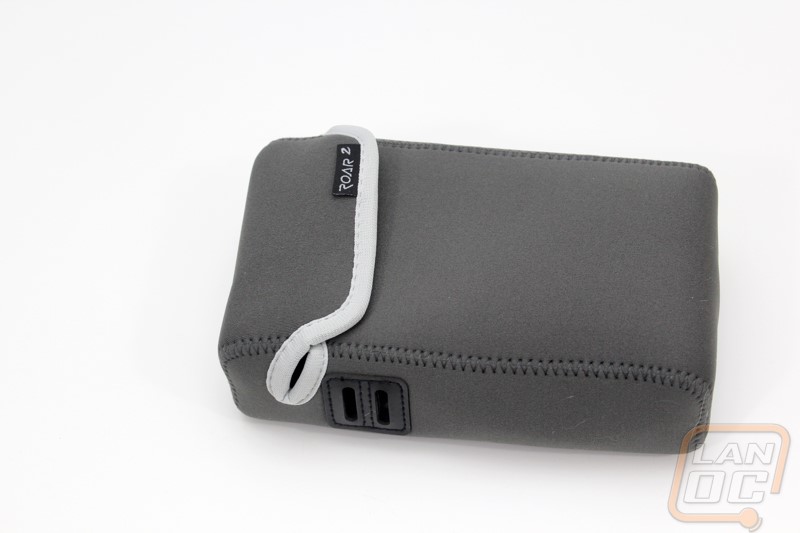
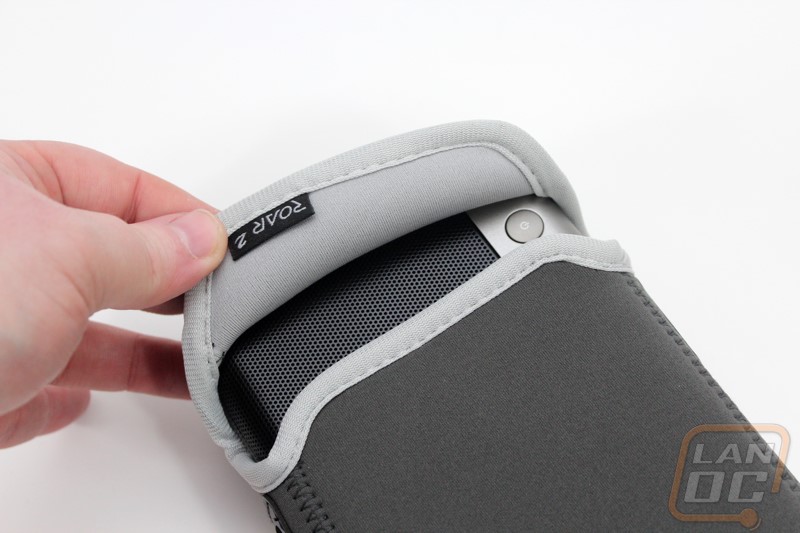
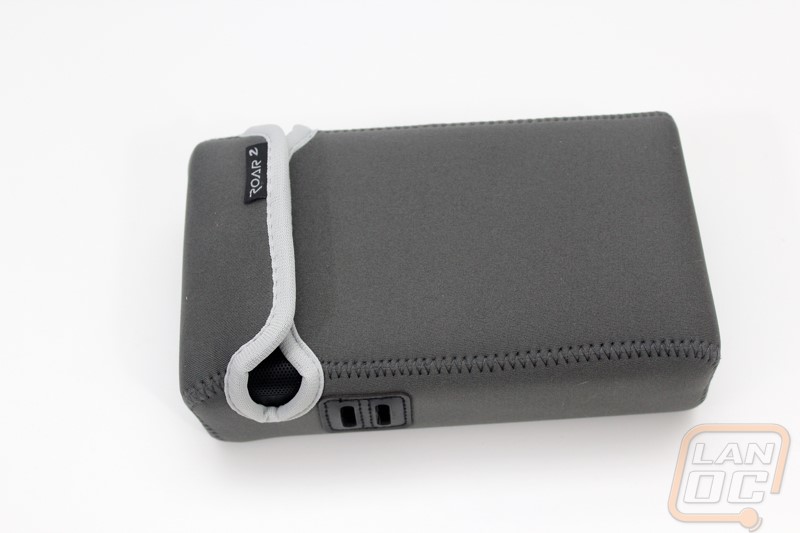
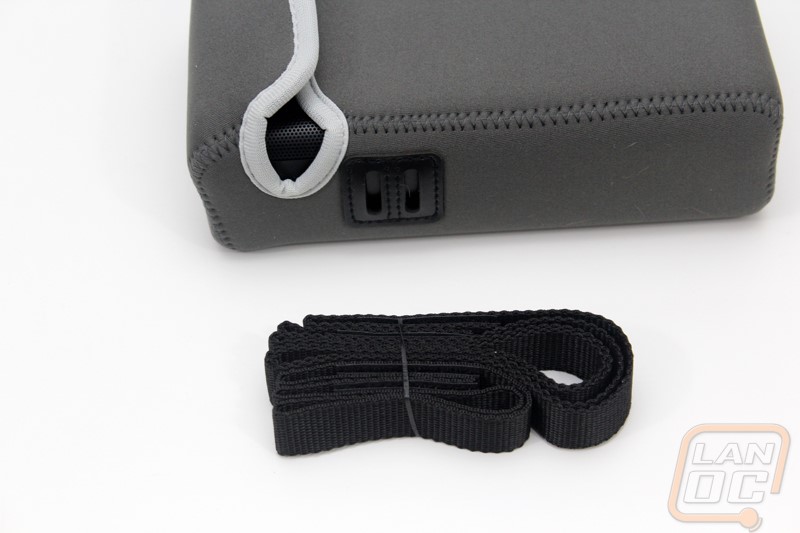
Like I said earlier they went ahead and sent a carrying case with the Roar 2. This doesn’t come with it by default but is available from Creative Labs or if you look on Amazon there are a few other aftermarket options as well. The official case is made out of a padded neoprene. The design is very simple, the top of the case flips open and you can slide the speaker in. It is a very snug fit. You can flip it inside out to get a light grey or the dark grey. Then they include two different straps. One is a long shoulder strap and the other is a short strap for carrying it.